- Animals, Chickens, Compost, Gardening adventures, Hugelkultur, Other Insects, Permaculture and Edible Forest Gardening Adventures, Seeds, Soil, Vegetables, Water Saving, Worms
Using Smuck, or Using Food Waste
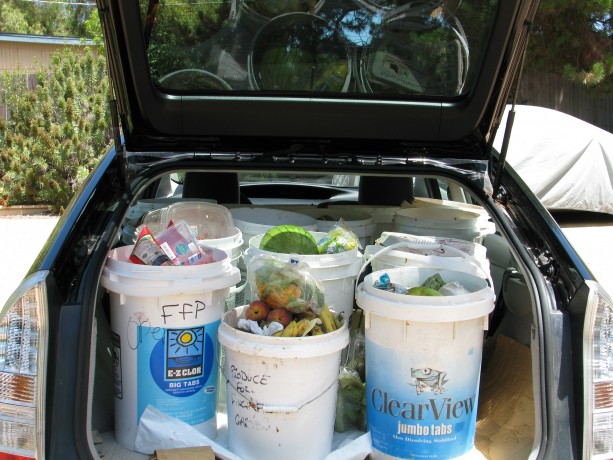
One afternoon’s haul of smuck. Just when I was mourning the fact that our household didn’t create enough food waste to generate lots of compost, I received an email from a former visitor to Finch Frolic Garden. She volunteers at the Fallbrook Food Pantry, where they distribute balanced food supplements to over 800 families a week who earn less than the US poverty limit. They receive raw, outdated fruit and vegetables from grocery stores and other sources, sort through it and have to discard what isn’t safe to hand out. The volunteer knew that I composted and wondered if I’d like to pick up the residue so that they wouldn’t have to throw it out. She and the director had been taking it home, but it was too much for them. Four times a week I’ve been picking up buckets of smuck, or what I call the rotting fruit and vegetables, and often its too much for me as well.
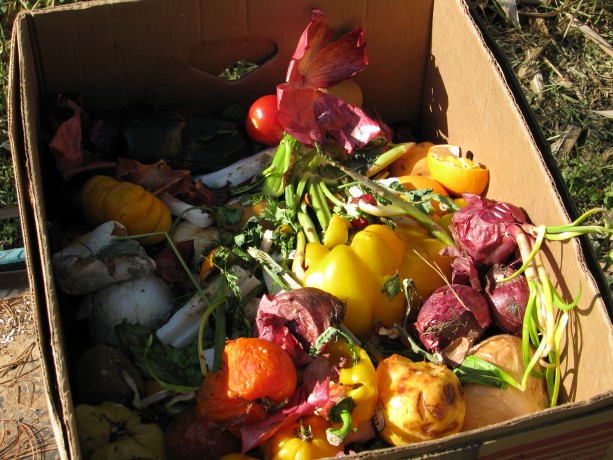
Boxes of mixed smuck were difficult to pick up and very, very juicy. Buckets are better. There has been a grace period where my daughter and I nearly broke our backs picking up cardboard boxes sodden with fruit juice that stained our clothes and our car, and spent lots of time cutting produce out of plastic bags and containers, but the Food Pantry staff have been wonderful about usually opening the packages and using only old pool buckets.
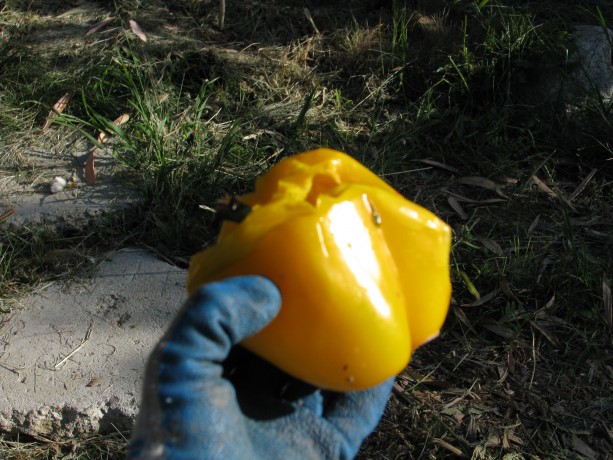
One drawback is that very little of the smuck is organic. We are constantly amazed at how fruit and vegetables remain hard on the outside while rot on the inside. These peppers were hybridized to be solid enough to ship without bruising, at the expense of flavor and nutrition. My back, my clothes and my car thank them. Fortunately others have been picking some smuck up. The man in my life happily takes lots of it to feed to his compost worms. We’re a great match.
My daughter and I empty the buckets into the chicken coop.
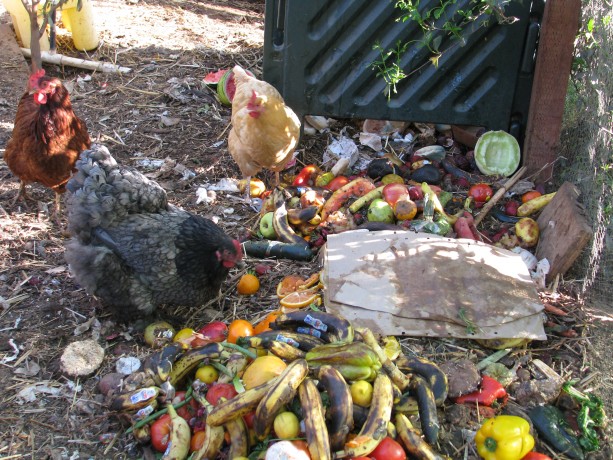
Charlotte, Bodicea and Esther/Myrtle with a new batch of smuck, heavy on the bananas. The girls love it. I make sure they eat lay crumble and calcium as well to keep laying, but with the smuck they’ve reduced their intake of crumble and hence have lowered my expense.
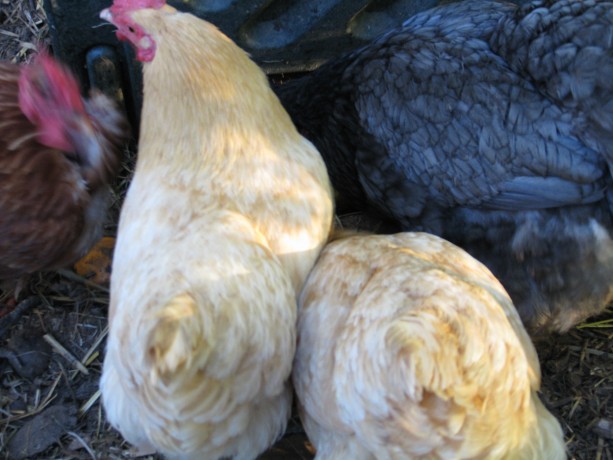
The girls going after the smuck. I pitchfork straw and weeds over the top and within a few days most of it except some citrus and a coconut or two is pretty much gone. There is a fly problem, but with the flies there have come more flycatchers and lizards, and the hens eat the insect larvae that emerges in the compost.
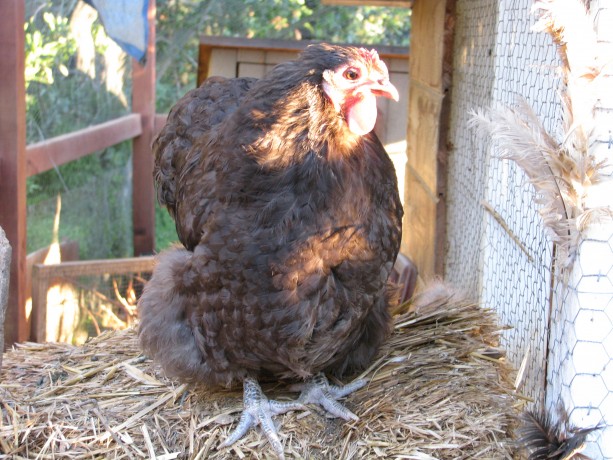
This is Agatha, named after a favorite mystery writer. She’s here just because she’s so lovely. The picking up of smuck, hauling it down the hill and into the coop, de-packaging, cleaning buckets and fighting flies and ants, three – to -four times a week has been a time-consuming and very, very icky job, but the thought of all that free waste going into the dumpster keeps me at it. This is bacteria-heavy compost material, which is excellent for growing non-woody herbaceous plants such as our own vegetables and herbs.
I’ve also layered the smuck with cardboard, paper waste from the house (tissues, paper towels, cotton balls, Q-tips, junk mail, shredded paper, etc.) under the bananas.
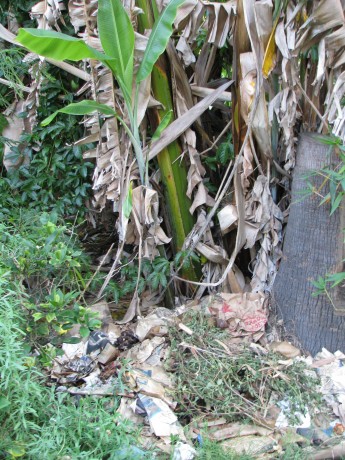
A pile of fruit, veggies and cardboard, partially covered with clippings, at the food of our big banana. A citrus to the side likes it, too. Bananas love lots of food in the form of moist compost around their roots; in fact, they are commonly planted in banana circles with understory plants and the center of the circle is a place for waste products to deteriorate. In our dry San Diego climate we don’t have that kind of tropical moisture to help it rot, but the compost does become a sheet mulch and really helps create soil.
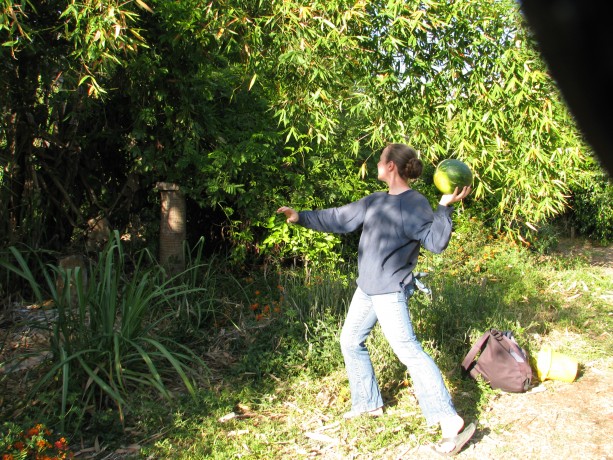
Miranda adds a melon to the banana circle smuck. One inch of compost reduces watering needs by ten percent, so a pile of wet smuck layered with carbon items such as dry cuttings and cardboard is excellent. I throw cuttings and pine needles over the top to keep down the rotty fruit smell, which doesn’t last long anyway.
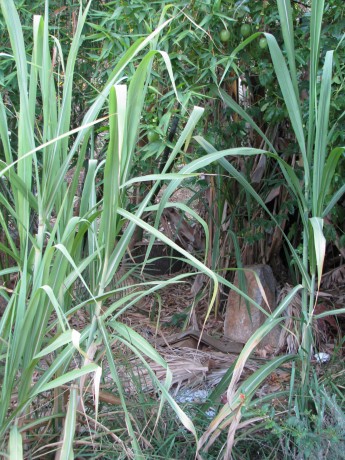
Sugar cane and passionfruit enjoy the smuck layers under the banana – kind of a banana semi-circle. When creating new impromptu trellises for melons and squash in unimproved soil, Miranda and I dug trenches, threw in wet wood and dumped buckets of smuck right on top then covered the trench with dirt. We planted seeds in handfuls of good compost and away they went. We also used some of the mostly composted soil from the Fowl Fortress directly into the kitchen garden .

We augmented the kitchen garden soil with nearly-composted smuck dirt. Due to the wide variety of fruit and vegetables in the smuck buckets we’ve had some interesting volunteer plants. Tiny tear-shaped tomatoes that had been sold in plastic containers for natural snacks, a sweet potato, other tomatoes, and melons. At least we thought they were melons.
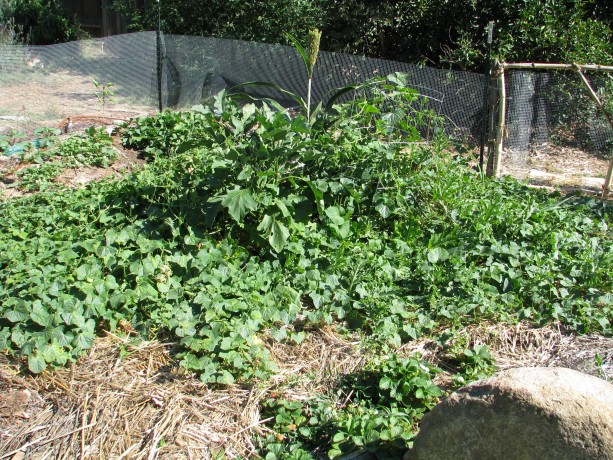
Melon vines taking over the kitchen garden… but not the melons we expected! Miranda was wondering about pulling them out of the kitchen garden because they were taking over without apparently producing a flower. A couple of days ago she investigated further and found a real surprise. We have about thirty kiwanos growing under the foliage!
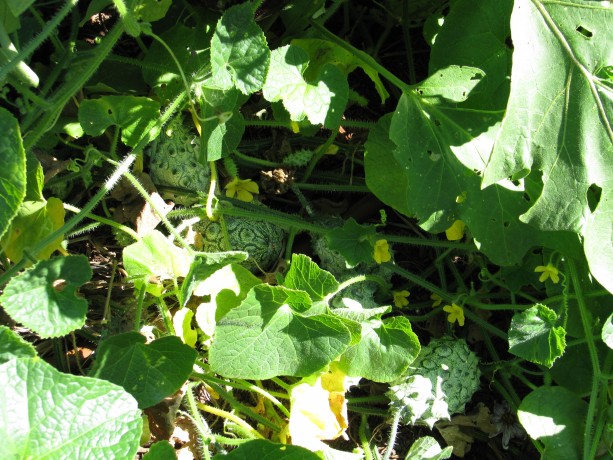
Kiwanos with lots of blooms lurking beneath the foliage. I’ve never eaten a kiwano. Wikipedia says: Cucumis metuliferus, horned melon or kiwano, also African horned cucumber or melon, jelly melon, hedged gourd, melano, in the southeastern United States, blowfish fruit, is an annual vine in the cucumber and melon family, Cucurbitaceae. I’ve seen them in the smuck buckets, and it just figures that of all the green melons and orange melons that we’ve thrown in there, something like these would grow! None have ripened to the light orange color as yet, which is good because it gives us time to figure out what to do with them.
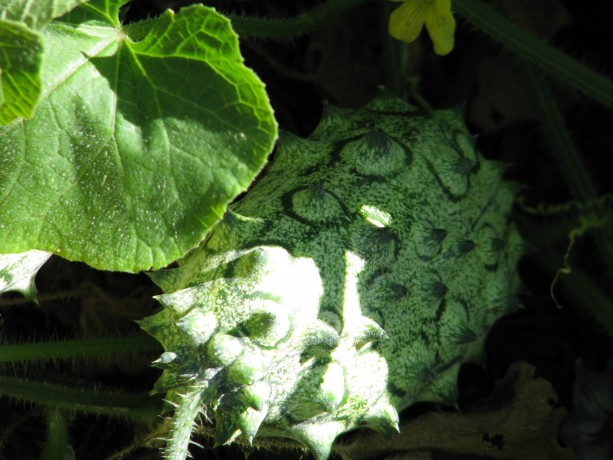
When they turn orange they’ll really look like blowfish fruit! - Animals, Bees, Birding, Building and Landscaping, Chickens, Cob, Compost, Composting toilet, Fungus and Mushrooms, Gardening adventures, Giving, Health, Heirloom Plants, Hiking, Houses, Hugelkultur, Humor, Living structures, Natives, Natural cleaners, Other Insects, Permaculture and Edible Forest Gardening Adventures, Pets, Photos, Predators, Quail, Rain Catching, Recycling and Repurposing, Reptiles and Amphibians, Seeds, Soil, Vegetables, Water Saving, Worms
Special Tours for Aug. and Sept., 2014
Come take a tour of a food forest! Normally tours of Finch Frolic Garden are held by appointment for groups of 5 – 15 people, Thursdays – Mondays. Cost is $10 per person and the tour lasts about two hours. By popular demand, for those who don’t have a group of five or more, we will be hosting Open Tour days for the first 15 people to sign up in August and September. They will be Sunday, August 10 and 24, Sept. 7 and 21, and Thursdays August 7 and 28, and Sept. 11 and 25. Tours begin promptly at 10 am. The tours last about two hours and are classes on basic permaculture while we tour the food forest. I ask $10 per person. Please reserve and receive directions through dianeckennedy@prodigy.net. Children under 10 are free; please, no pets. Photos but no video are allowed. Thank you for coming to visit! Diane and Miranda
- Breads, Breakfast, Cake, Condiments, Dessert, Frosting, Permaculture and Edible Forest Gardening Adventures, Recipes, Sauces, Vegan, Vegetables, Vegetarian
Making Ethical Butter

Vegan butter! I’ve labeled myself an ‘ethical vegetarian’ for nearly two decades. I stopped eating animals when I became horrified at the dichotomy of having glue traps under the house to catch wild rats and mice (and any poor, poor animal that happened upon it, such as lizards. Glue traps are horrendously cruel. I hadn’t put them there.) and a cage with an exercise wheel and specialty food for ‘pet’ mice in the bathroom. Justice is a man-made effort, and by not eating animals I was no longer approving of mass torture by buying into it. Although I no longer ate animals, I have still indulged in animal products, namely dairy products. Slowly it has sunk in how badly animals are treated for those, too. As someone who loves cooking, it has been difficult for me to wean away from dairy products. Butter is especially difficult. Unlike hens who have been bred to continuously lay without needing the services of a rooster, dairy cows must be lactating to produce milk. Cows are usually artificially inseminated, then after giving birth their calves are replaced by milking machines. The calves are most often slaughtered for veal. This process is repeated until the cow is used up from the constant pregnancies and lactating, and then she is slaughtered. This horrible practice is disguised by advertisements showing happy cows grazing in fields. That is a fantasy. ‘Grass fed’ and ‘pasture raised’ are sly terms that give you an image that is nowhere near to the truth. Please read Michael Pollen’s Omnivore’s Dilemma to understand where your food comes from and why.
To find an acceptable butter substitute has been an expensive and frustrating endeavor. For awhile I used a dairy substitute from Trader Joe’s, who I swear keeps tabs on what I buy the most and then discontinues it. All other butter substitutes either taste horrible, can only be used for spreading, or more commonly contain palm oil. The sudden fad for palm oil has created extreme clearance for the growing of palm in the areas which are habitat for the orangutan; indeed, if we don’t curtail our consumption of palm oil quickly the orangutan will go extinct within our lifetimes.
I finally found a recipe for a butter substitute that works pretty well for both spreading and baking. It is made mostly of refined coconut oil. At this point coconut oil is sustainably produced – please make sure that you support companies that do so. Refined organic coconut oil has no flavor or scent; unrefined has a mild coconut flavor and a toasted coconut scent. If you are using a batch of this butter for baking where coconut flavor is desired, then use the unrefined.
This recipe is by no means my own. I found it and a detailed description of the science behind it at VeganBaking.net . There are several options listed and a lot of cooking science behind the butter.
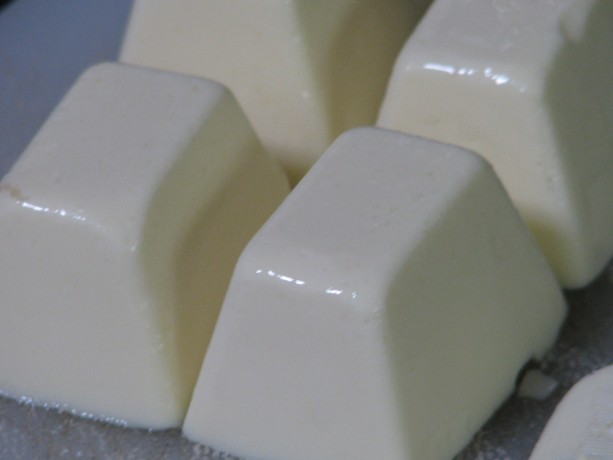
The mouth-feel is amazingly creamy and satisfying. I used the basic recipe, Regular Vegan Butter, Coconut Oil Base. The recipe calls for curdling the soy milk, which will drive the butter flavor. I tried the full teaspoon of cider vinegar, then half cider vinegar and half coconut vinegar, then just half a teaspoon of coconut vinegar, and finally no vinegar, and thus no curdling, at all. I found for my taste that the vinegar flavor carried through and was much too dominant. Even at just half a teaspoon it was so noticeable to me that I didn’t like it on toast. It was good, however, when my daughter used it on sourdough and topped it with fresh avocado. The slight vinegar flavor enhanced the avocado deliciously.
The batch I made without vinegar seemed perfect. The mouth-feel of this butter with or without the vinegar is creamy and all that a high-fat butter should be. It looks, cuts and spreads like butter. The flavor is creamy and very mild, almost like a slightly salted sweet butter. This was a winner for me. For the soy milk I used Trader Joe’s Organic Plain, which does have some sweetener in it. I’ll try with an unsweetened plain organic soy milk another time.
I keep my butter on the counter. I know that organic butter holds its shape better in the heat than processed butter, but both stay stable unless the temperature is in the 80’s. Coconut oil melts at 76F, and in my summertime Southern Californian kitchen, this vegan butter must be kept in the refrigerator. The butter is hard when needed, so the next batch I will take the author’s advice and swap out a tablespoon of coconut oil with regular oil to make it more spreadable.
I wanted to test the butter in cooking and baking. I melted it in a pan and cooked eggs and other breakfast items in it successfully. I used it on toast and on mashed potatoes with great success. The experiment with shortbread cookies went wrong, however, but I don’t think that that was the butter’s fault. These were lemon rosemary shortbread cookies, and contrary to my baking sense I followed the author’s (another blog) directions and didn’t sift the powdered sugar before adding it. There were lumps, therefore, in the batter and I mixed it extra to try and beat them out, which I believe was responsible for making the cookies tough. They were flavorful, but not crumbly. Oh well, I’ll just have to try again! The cookies rolled out, cut, and baked well, retaining their shape and performing as well as with cow’s butter.
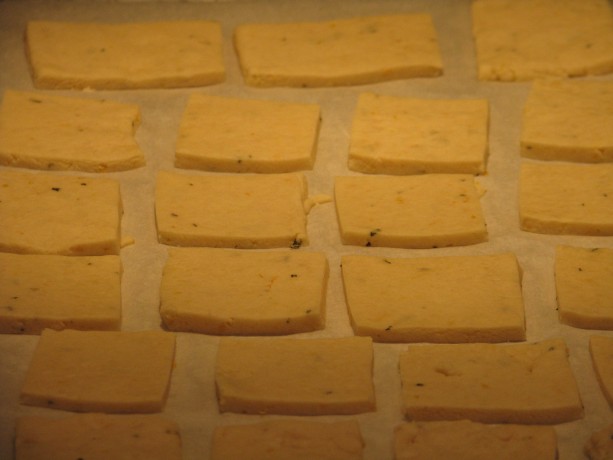
Shortbread didn’t spread using this butter, which was great. I don’t have a finished photo of the lemon-rosemary cookies because, well, they were eaten. As with all substitutions, there is always a difference and vegetarians and vegans have to embrace it. Of course fake bacon and ground ‘meat’ is not quite the same: the great part is that it is far more healthy for your body (lower fat, few preservatives if any, often organic, and not the pesticide-drenched and drugged animals that people eat) and doesn’t perpetuate the extreme cruelty to animals about which humans have become nonchalant. Yes, other animals aren’t kind when feeding off of other animals (those which aren’t vegetarians). Yet we as humans have the option the others don’t, to make eating choices.
Here is the basic revised recipe; please see the original blogpost on VeganBaking.net and give the options a try. I found xanthan gum from Bob’s Red Mill at my local grocery store, and liquid lecithin and coconut vinegar online through Amazon.com.
You can double or triple the recipe with no problem! Enjoy.
Recipe update: I’ve since made some changes to the recipe, exchanging some vegetable oil for some coconut oil for more spreadability, and adding a little more salt for a more satisfying (to me) taste when spread on toast. I’ve been using this butter for a month now, and have noted that: when melting in a hot pan it will brown faster than regular butter, so keep the temperature down, that it will melt and separate at room temperature (its summer now, so the kitchen is usually in the 70’s – in the winter it will be different) so I keep it in the refrigerator. I found butter stick molds that have the teaspoon markings along the side, so I’ve made 8x the original recipe and poured it into the butter molds, then wrapped each unmolded stick in wax paper and frozen them.
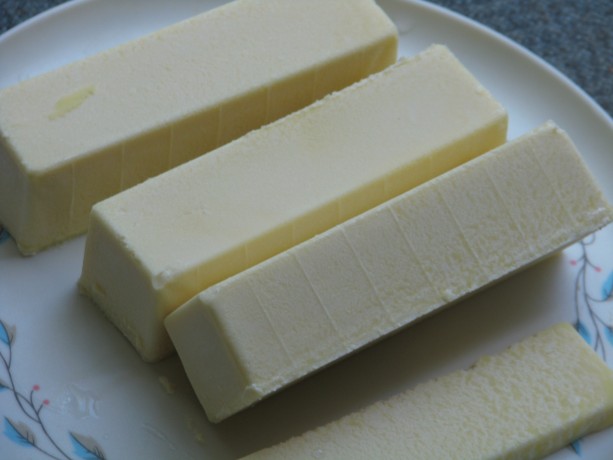
Vegan butter sticks with teaspoon markings along the side for ease in baking. I’ve also poured it back into the cleaned coconut oil jars and frozen them, keeping one in the refrigerator for unmeasured use. I’ve used it along with a non-dairy creamer in the Chocolate Ganache recipe and it is very chocolaty, but not as rich as the original. Part of that is due to the creamer; heavier creamer will produce creamier results, but in no way was it disappointing. It was very tasty, but not as heavy. When refrigerated it didn’t solidify as much as the other, so more chocolate might need to be added depending upon the type of creamer used but it was still spreadable and yummy.
Another Recipe Update:
I’ve been making the butter with unsweetened organic rice milk and it turns out well. At first it tasted too light to be satisfying, but when I had dairy butter at a restaurant it tasted greasy and heavy – my taste buds wanted the vegan butter! I found out that even when the kitchen is colder than the melting point of the coconut oil, it isn’t a good idea to leave the butter refrigerated because unlike dairy butter it will grow mold. The rice milk butter with the increased vegetable oil makes it perfectly usable from the refrigerator. I make sticks and freeze them in a freezer bag for baking and pour the rest into glass jars with screw-on caps for spreading. The jars are kept in the freezer until needed, then switched to the refrigerator. I’ve made biscuits, cookies, cakes, scones and breads with this butter, and with proper handling they all come out just fine. We offered both dairy and vegan butter to our holiday guests and they didn’t detect much of a difference. Since vegan butter is so much lower in calories, and coconut oil is so good for you, I don’t have to hesitate to use it. It is actually part of my weight maintenance program!
Ethical ButterAuthor: Mattie, at VeganBaking.netRecipe type: CondimentCuisine: VeganPrep time:Cook time:Total time:A wonderful vegan butter with no palm oil, but lots of options. My version is without curdling the soy milk. Please see the original excellent post for more explanations and options.Ingredients- ¼ cup + 2 teaspoons organic plain soy milk
- ¼ + ⅛ teaspoon salt (I increased the total salt to ½ t. for spreading butter)
- ½ cup + 2 Tablespoons + 1 teaspoon (130 grams) refined coconut oil, melted to room temp. (For more spreadability, I used ½ cup coconut oil and changed the 2T and 1 t to vegetable oil, along with the following 1 T for a total of 2 Tablespoons and 1 teaspoon vegetable oil.)
- 1 Tablespoon vegetable oil or light olive oil
- 1 teaspoon liquid soy lecithin or liquid sunflower lecithin or 2 ¼ teaspoons soy lecithin granules
- ¼ teaspoon xanthan gum or ½ + ⅛ teaspoon psyllium husk powder (I used xanthan gum)
Instructions- Combine soy milk and salt in a food processor or blender.
- Melt the coconut oil until it is just room temperature and barely melted.
- Add the coconut oil and the rest of the ingredients to the soy milk.
- Blend or process for about 2 minutes on low.
- Pour into ice cube trays, or into butter molds or trays.
- Freeze until firm, about an hour.
- Serve.
- Keep wrapped in refrigerator for a month, or frozen for a year.
- Makes one cup.
- Gardening adventures, Heirloom Plants, Permaculture and Edible Forest Gardening Adventures, Seeds, Vegan, Vegetables, Vegetarian
Watermelon Radish
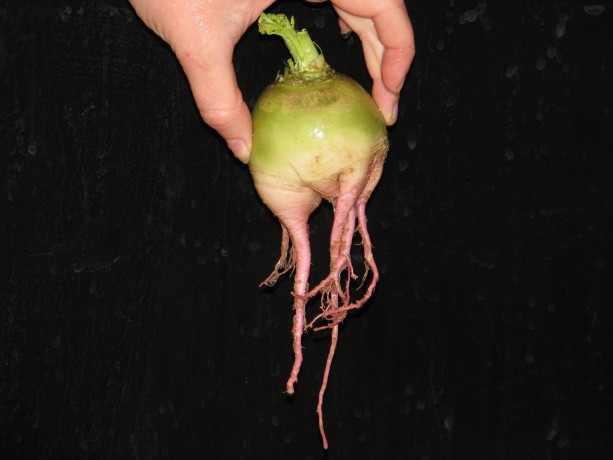
It looks a little like an alien species! We’ve planted a lot of new varieties this year. Still there are seed packages left unopened! So much fun, though. One veggie that we bought from Baker Creek Heirloom Seeds is a beautiful radish called Chinese Red Meat Radish, or Watermelon Radish.
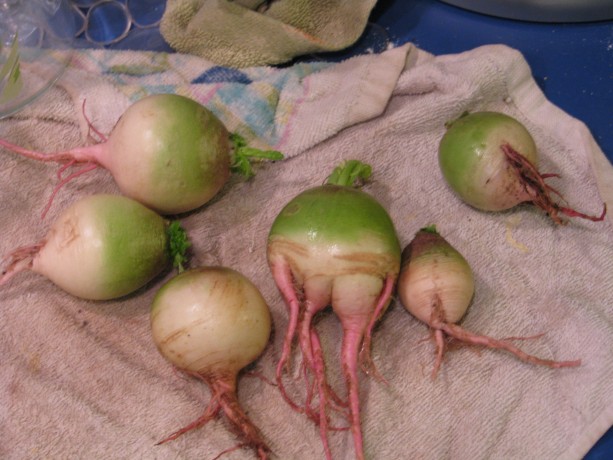
The green/white/pink outer color on the swollen roots is a little disconcerting. I’m not a huge fan of radishes. They grow quickly, help identify rows of slower-growing seeds, and are great for kids to plant. Still neither me nor my tummy really likes the strong radish flavor.

Slicing into them is a little creepy. The Watermelon Radish, however, are large, crisp and sweet on the inside. My daughter cut them into small triangles and stir-fried them. They had a little of the bitter radish flavor, but if you expect that you will be delighted at the taste and color.
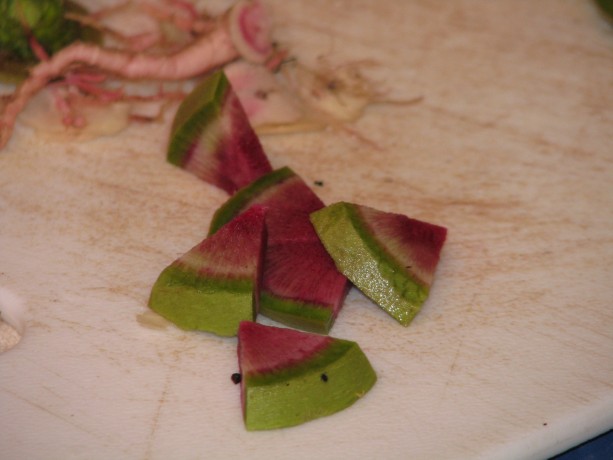
These brilliant little wedges don’t hold much heat and are great raw, in stir-fries, or lightly cooked on their own. Younger ones have more of a starburst of red in the center. Older ones grow brilliantly red, set against the green outer skin, as dramatic as a dragonfruit.
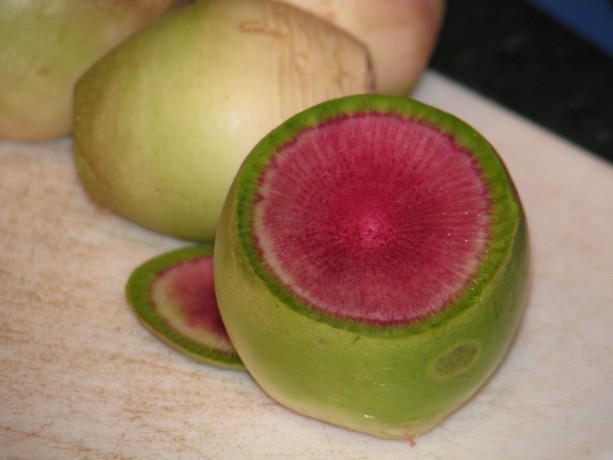
The brilliant center color is fantastic. Radishes are cool-weather plants; these I planted late but were shaded by vigorous volunteer currant tomatoes that are taking over the bed!
When planting annuals, plant your favorites but don’t forget to play. There are so many varieties of veggies, herbs and flowers available now, especially heirloom and organic (non-GMO!). Why not try some and share the seed with friends?
- Animals, Bees, Birding, Books, Building and Landscaping, Chickens, Cob, Compost, Composting toilet, Fungus and Mushrooms, Gardening adventures, Heirloom Plants, Hugelkultur, Humor, Living structures, Natives, Natural cleaners, Other Insects, Permaculture and Edible Forest Gardening Adventures, Ponds, Predators, Quail, Rain Catching, Recycling and Repurposing, Reptiles and Amphibians, Seeds, Soil, Water Saving, Worms
Permaculture Lectures At Finch Frolic Garden, June 2014
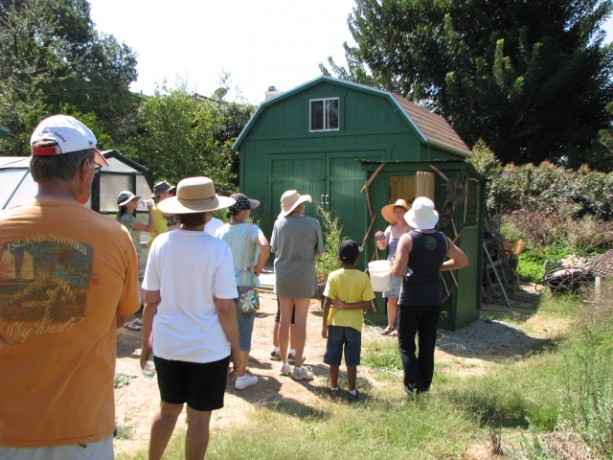
Tour Finch Frolic Garden! Permaculture Lectures in the Garden!
Learn how to work with nature and save money too
Finch Frolic Garden and Hatch Aquatics will present four fantastic, information-filled lectures in June. Join us at beautiful Finch Frolic Garden in Fallbrook, 4 pm to 6 pm, for refreshments and talks on…
Saturday, June 7: Introduction to Permaculture and Finch Frolic Tour: We’ll take you through the main precepts of permaculture and how it can be applied not only to your garden, but to yourself and your community. Then we’ll tour Finch Frolic Garden and show rain catchments, swales, plant guilds, polyculture, living buildings and so much more.
Saturday, June 14: Your Workers in the Soil and Earthworks: Learn the best methods for storing water in the soil and how to replace all your chemicals with actively aerated compost tea and compost.
Saturday, June 21: Aquaculture: You can have a natural pond – even in a tub! How natural ponds work, which plants clean water and which are good to eat. Even if you don’t want a pond, you’ll learn exciting information about bioremediation and riparian habitat.
Saturday, June 28: Wildlife in your Garden: What are all those bugs and critters and what they are doing in your yard? We’ll discuss how to live with wildlife and the best ways to attract beneficial species.
Your hosts and lecturers will be
Jacob Hatch Owner of Hatch Aquatics. With years of installing and maintaining natural ponds and waterways, and a Permaculture Design Course graduate, Jacob has installed earthworks with some of the biggest names in permaculture.
Miranda Kennedy OSU graduate of Wildlife Conservation and wildlife consultant, Miranda photographs and identifies flora and fauna and maps their roles in backyard ecosystems.
Diane Kennedy Owner of Finch Frolic Garden, lecturer, consultant, Permaculture Design Course graduate, former SDC Senior Park Ranger, Diane educates homeowners on how to save money and the environment while building their dream gardens.
Each class limit is 50 attendees, so please make pre-paid reservations soon before they fill up. Fee for set of four lectures and tour is $45 per person. Single session fee is $20 per person. Contact Diane Kennedy at dianeckennedy@prodigy.net for reservations and directions.
You will not want to miss this fascinating and useful information!
-
Fruit Flies – How To Be Rid of them Naturally

A jar, plastic and ACV. Works like a charm. It is fruit season and citrus and stonefruit are becoming ripe in the garden. When the fruit comes to the kitchen, and particularly when the peels and pits go into my open compost bucket, fruit flies appear as if by magic. It is amazing how quickly they show up and how quickly they reproduce. Fruit flies are busy laying eggs in any spot on any fruit or juice vegetable such as tomato. Gross. Here is a quick and inexpensive method of trapping and -unfortunately- killing the little things. I don’t like to kill anything, but I don’t know of a way to get around this, even when I drape towels over the fruit.
Take a small canning jar or baby food jar – something like that. Use the rim of the lid of a canning jar, or just a strong rubberband. You’ll also need a small piece of plastic to cover top of the jar; you can reuse some cellophane or part of an old plastic bag.
Fill the jar only about halfway with apple cider vinegar – not white distilled vinegar. Place the plastic over the top and secure with the lid rim or a rubber band.

A fruit fly finding a way in. Take a toothpick and prick tiny holes in the plastic. Set the jar near where the fruit flies accumulate and forget about it. Be sure to remove other lures such as old kitchen scraps or fruit, or cover it with dishtowels. That’s that. The flies swarm to the jar and eventually disappear into it and can’t get out.
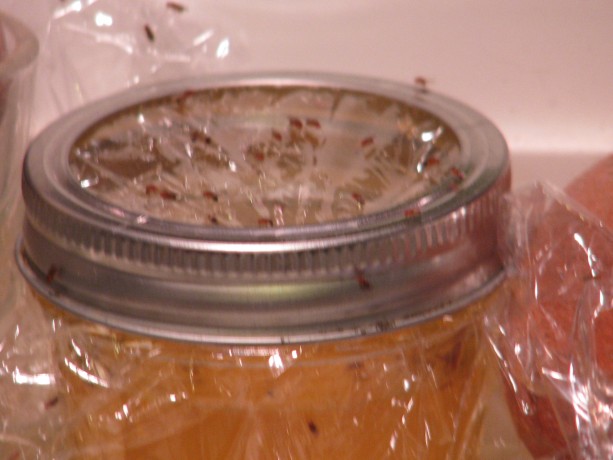
A kind of blurry photo of lots and lots of fruit flies queuing up to get inside. - Arts and Crafts, Gardening adventures, Heirloom Plants, Living structures, Permaculture and Edible Forest Gardening Adventures, Seeds, Soil, Vegetables
Curly Willow Trellis
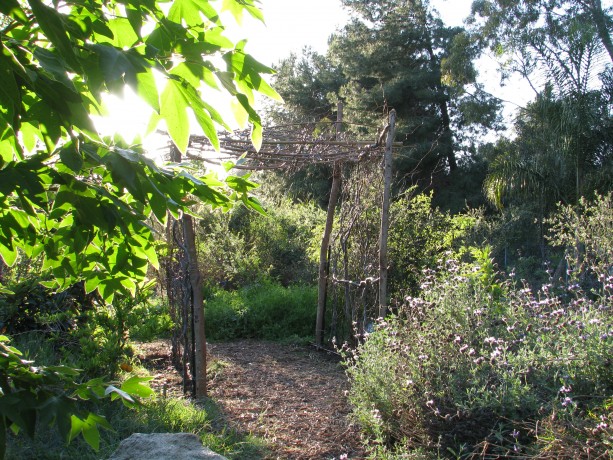
A walk-through squash trellis. The vines will give it stability, and hang through. Thanks to generous friends, free seed opportunities and wonderful seed catalogs, we have many, many squash varieties to choose from this year. We also want to grow vertically where we can to save space so my daughter and I are creating trellises. No builder, I, but we’re hoping these will last for years to come.
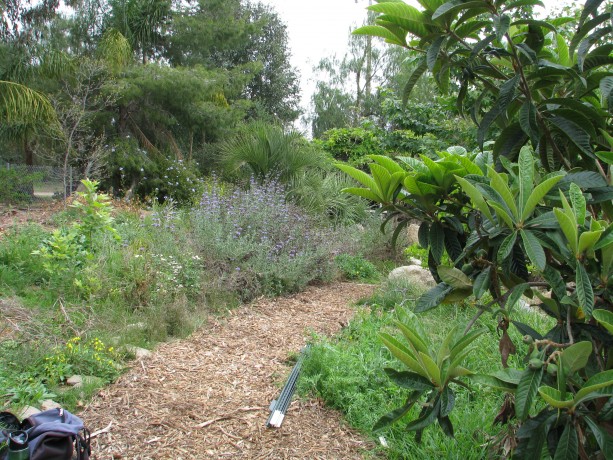
This part of the trail was perfect for vertical growing space. This area of the upper trail isn’t lovely when not covered by vines. It is also quite warm when people are touring and it could use some shade and interesting focal point. Miranda had cut down a large curly willow tree a few months back (it was taking too much water from an avocado). We used a couple pieces of the trunk to inoculate with mushroom spores, and the rest was fair game for a trellis.
Curly willow (Salix matsudana ‘Tortuosa’) has wonderfully shaped branches that twist and curl naturally. You’ll see it often in bouquets, where it usually roots while in water. This willow enjoys more sun and a little less water than native willows do. Willows all produce salicin, the pain-killing ingredient that has now been synthetized as aspirin. Willows also produce a rooting hormone which can be used to encourage sprouting and rooting of other plants. Cut up a willow branch, soak it in water for a couple of days (if water is chlorinated, leave it sit for a day before adding willow) and use to water seedlings.
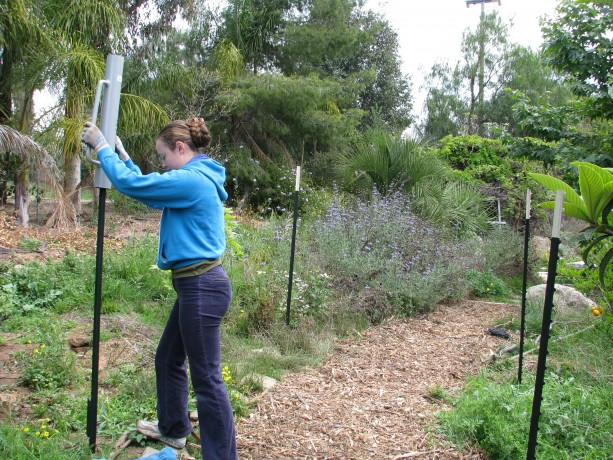
Miranda makes this look so easy! After we’d put these in, a friend recommended sliding the post pounder over the post before standing it up… for we short people who have trouble lifting the really heavy thing over our heads! Wanting to avoid cutting wood and nailing things together, we sunk four T-posts into the corners. The trellis is six feet across and eight feet wide; any wider and we would have put a center post on each side as well.
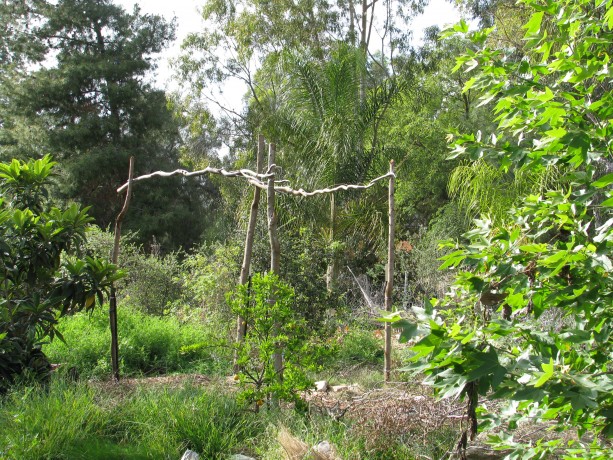
We wired on curly willow trunks in the corners, and wired long branches across the tops and the middle. We wired on the side posts and cross posts, cutting long branches from the willow. This willow was long dead; fresh willow could be sunk into the ground and it would root to make a living trellis, like the Withy Hide. We didn’t want that here, though.

We laid long whips from a Brazilian pepper tree across, then wove curly willow through for the top. We stood smaller branches upright along the sides and wired them on, keeping in mind spaces where the squash vines will want to find something on which to grab. Over the top we laid long slim branches from a Brazilian pepper that is growing wild in the streambed and really needs to come out. By pruning it and using the branches, we’re making use of the problem. In permaculture, the problem is the solution! I wanted to make an arched top and tried to nail the slim branches in a bended form, but this was difficult and didn’t work for me. I didn’t want to spend days finishing this… too much else to do! So we laid the branches over the top, wiring some on, and then wove curly willow branches long-wise through them. This weaving helps hold the branches in place, will give the vines support, and brings together the look.
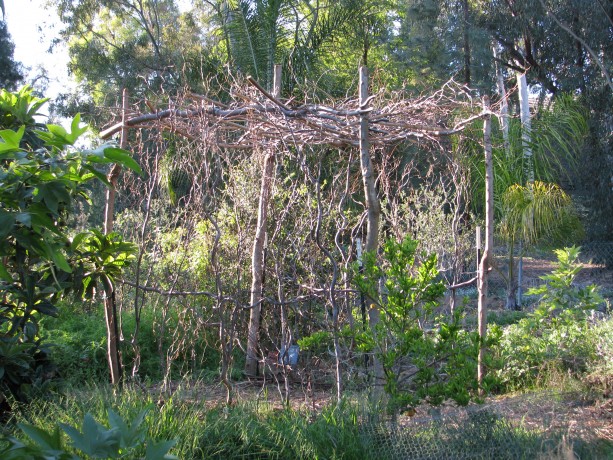
We planted four kinds of squash along the poles. And it was done. It should stand up to wind. We may need to add some vertical support depending upon the weight of the squash vines. We planted four varieties of squash that have small (2-3 lb.) veg. We planted four seeds of each, two on either side. We also planted some herbs, flowers and alliums, and some perennial beans, the Golden Runner Bean.
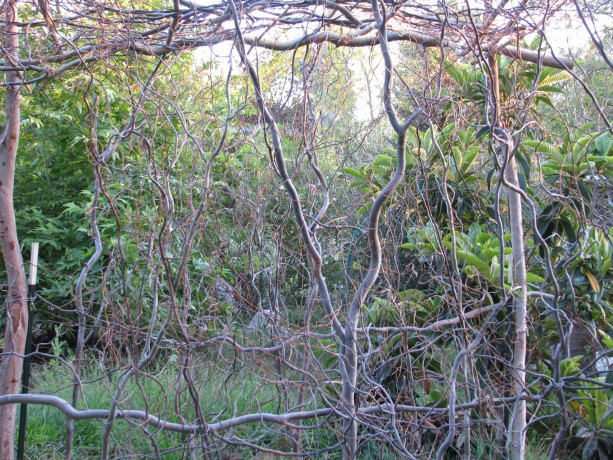
Architecturally interesting when not covered by squash as well. If nothing else, it is lovely and interesting to look at; better in person than in the photos. We can’t wait for the squash to start vining! Now, onto the next trellis.
- Animals, Bees, Birding, Chickens, Cob, Compost, Composting toilet, Fungus and Mushrooms, Gardening adventures, Health, Heirloom Plants, Hiking, Humor, Living structures, Natives, Natural cleaners, Other Insects, Permaculture and Edible Forest Gardening Adventures, Pets, Photos, Ponds, Predators, Quail, Rain Catching, Reptiles and Amphibians, Seeds, Soil, Water Saving, Worms
Finch Frolic Facebook!
Thanks to my daughter Miranda, our permaculture food forest habitat Finch Frolic Garden has a Facebook page. Miranda steadily feeds information onto the site, mostly about the creatures she’s discovering that have recently been attracted to our property. Lizards, chickens, web spinners and much more. If you are a Facebook aficionado, consider giving us a visit and ‘liking’ our page. Thanks!
-
Sauteed Fennel
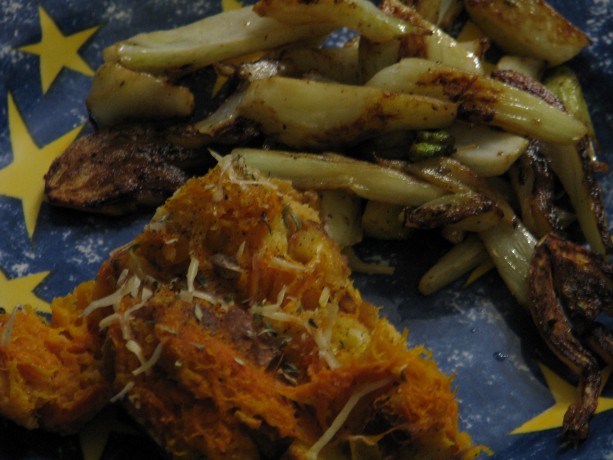
Sautéed fennel alongside squash bread pudding. The bread pudding recipe I have to work on, but not the fennel! It was so easy and so fantastic! Fennel is a sweet-tasting bulb with a satisfying crunch. This recipe is quick and easy, and absolutely delicious. I don’t have a good photo of it because, frankly, we ate it before I could make the light better.
Fennel apparently doesn’t have any companion plants according to every source I’ve checked. I grew a couple of bulbs in a polyculture bed without any problem, but to be on the safe side give it a spot by itself. Allow some to go to flower and you’ll attract lots of pollinators, and also have a host plant for swallowtail and other butterflies.
This recipe serves two as a side dish; feel free to up the number of bulbs. Enjoy!
Sauteed FennelAuthor: Diane C. KennedyRecipe type: Side dishCuisine: AmericanPrep time:Cook time:Total time:Serves: 2A simple, quick and utterly delicious vegetable side dish.Ingredients- One fennel bulb
- ⅛th cup olive oil
- Salt and pepper to taste
- Squeeze of lemon or lime
Instructions- Cut the top and bottom from the fennel bulb, then slice the fennel into small strips, about ¼ inch thick or so.
- Heat oil in a large frying pan and adjust heat to medium.
- Add fennel and cook, stirring occasionally to evenly brown, about ten minutes or until fennel is tender. Fennel should be slightly carmelized.
- Add salt and pepper to taste.
- Serve with a squeeze of lemon or lime, if desired.
- Animals, Bees, Birding, Compost, Fruit, Fungus and Mushrooms, Gardening adventures, Herbs, Hugelkultur, Natives, Other Insects, Permaculture and Edible Forest Gardening Adventures, Ponds, Predators, Rain Catching, Reptiles and Amphibians, Seeds, Soil, Vegetables, Water Saving, Worms
The Mulberry Guild
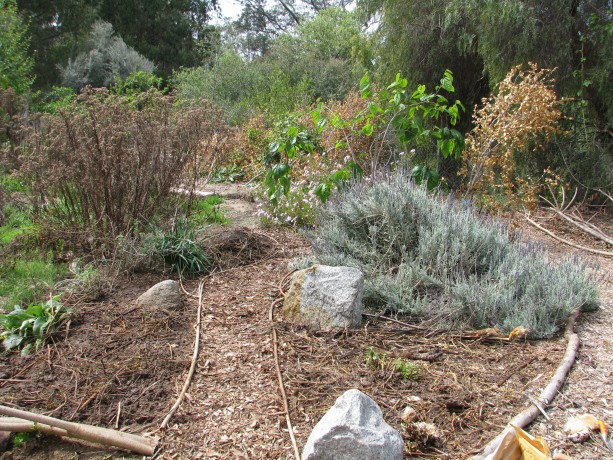
The renovated and planted mulberry guild. One of our larger guilds has a Pakistani mulberry tree that I’d planted last spring, and around it had grown tomatoes, melons, eggplant, herbs, Swiss chard, artichokes and garlic chives.
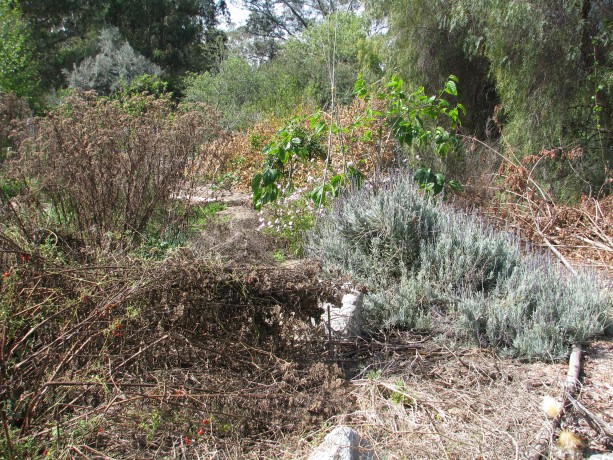
Mulberry guild with last year’s plant matter and unreachable beds. This guild was too large; any vegetable bed should be able to be reached from a pathway without having to step into the bed. Stepping on your garden soil crushes fungus and microbes, and compacts (deoxygenates) the soil. So of course when I told my daughter last week that we had to plant that guild that day, what I ended up meaning was, we were going to do a lot of digging in the heat and maybe plant the next day. Most of my projects are like this.
Lavender, valerian, lemon balm, horehound, comfrey and clumping garlic chives were still thriving in the bed. Marsh fleabane, a native, had seeded itself all around the bed and had not only protected veggies from last summer’s extreme heat, but provided trellises for the current tomatoes.
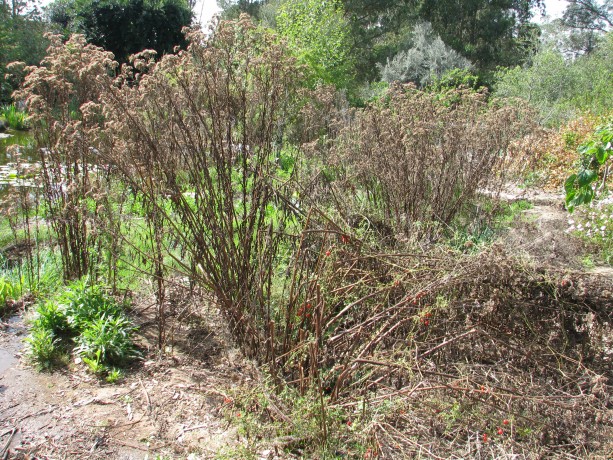
Fleabane stalks from last year, with new growth coming from the roots. Marsh fleabane is an incredible lure for hundreds of our tiny native pollinators and other beneficial insects. Lots of lacewing eggs were on it, too. The plants were coming up from the base, so we cut and dropped these dead plants to mulch the guild.
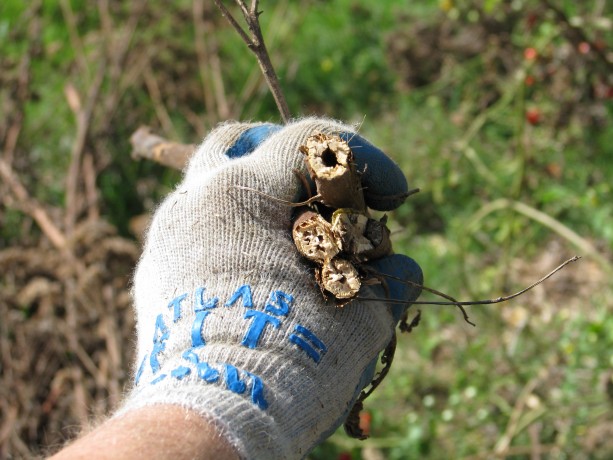
The stalks of fleabane are hollow… perfect homes for small bees! The stems were hollow and just the right size to house beneficial bees such as mason bees. This plant is certainly a boon for our first line of defense, our native insects.
We also chopped and dropped the tomato vines. Tomatoes like growing in the same place every year. With excellent soil biology – something we are still working on achieving with compost and compost teas – you don’t have to rotate any crops.

Slashed and dropped tomato and fleabane. We had also discovered in the last flood that extra water through this heavy clay area would flow down the pathway to the pond, often channeled there via gopher tunnels.
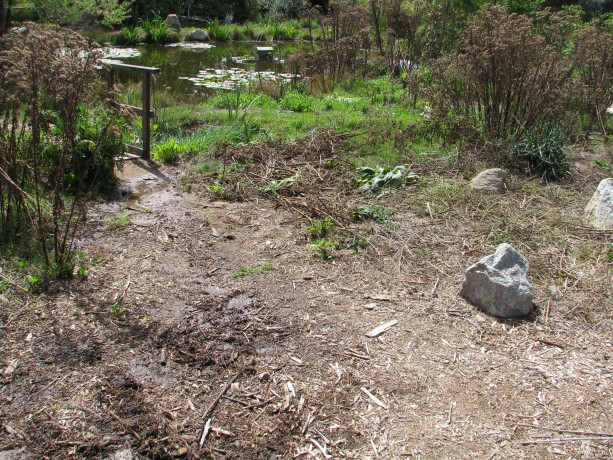
The pathway is a water channel during heavy rains. It needs fixing. We decided to harvest that water and add water harvesting pathways to the garden at the same time. We dug a swale across the pathway, perpendicular to the flow of water, and continued the swale into the garden to a small hugel bed.

Swale dug on contour through the pathway and across the guild. Hugelkultur means soil on wood, and is an excellent way to store water in the ground, add nutrients, be rid of extra woody material and sequester carbon in the soil. We wanted the bottom of the swale to be level so that water caught on the pathway would slowly travel into the bed and passively be absorbed into the surrounding soil. We used our wonderful bunyip (water level).
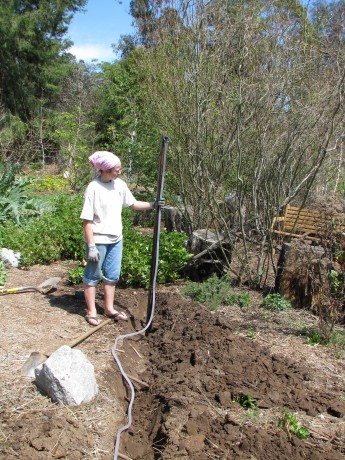
Using a bunyip to make the bottom of the swale level. Water running into the path will now be channeled through the guild. Because of the heavy clay involved we decided to fill the swale with woody material, making it a long hugel bed. Water will enter the swale in the pathway, and will still channel water but will also percolate down to prevent overflow. We needed to capture a lot of water, but didn’t want a deep swale across our pathway. By making it a hugel bed with a slight concave surface it will capture water and percolate down quickly, running along the even bottom of the swale into the garden bed, without there being a trippable hole for visitors to have to navigate. So we filled the swale with stuff. Large wood is best for hugels because they hold more water and take more time to decompose, but we have little of that here. We had some very old firewood that had been sitting on soil. The life underneath wood is wonderful; isn’t this proof of how compost works?
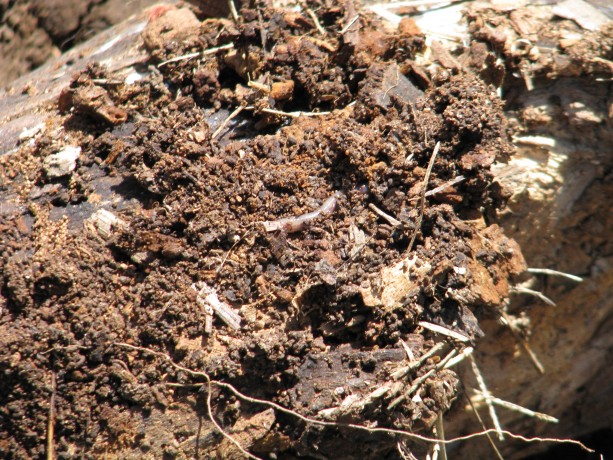
The activity under an old log shows so many visible decomposers, and there are thousands that we don’t see. We laid the wood into the trench.
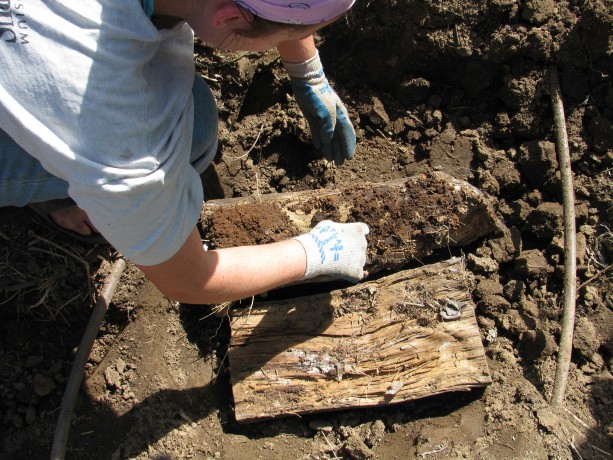
Placing old logs in the swale. If you don’t have old logs, what do you use? Everything else!

This giant palm has been a home to raccoons and orioles, and a perch for countless other birds. The last big wind storm distributed the fronds everywhere. We are wealthy in palm fronds.
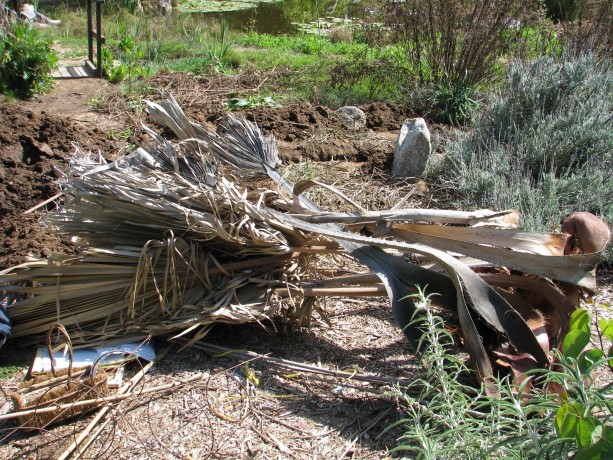
Three quick cuts (to fit the bed) made these thorny fronds perfect hugelbed components. We layered all sorts of cuttings with the clay soil, and watered it in, making sure the water flowed across the level swale.
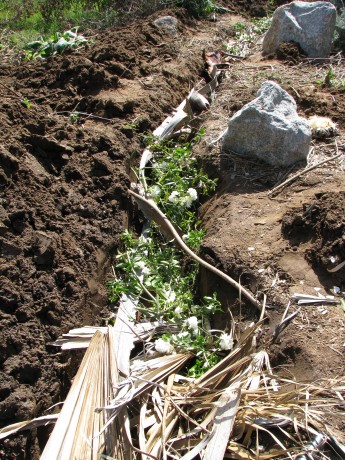
We filled the swale with fronds, rose and sage trimmings, some old firewood and sticks, and clay. As we worked, we felt as if we were being watched.
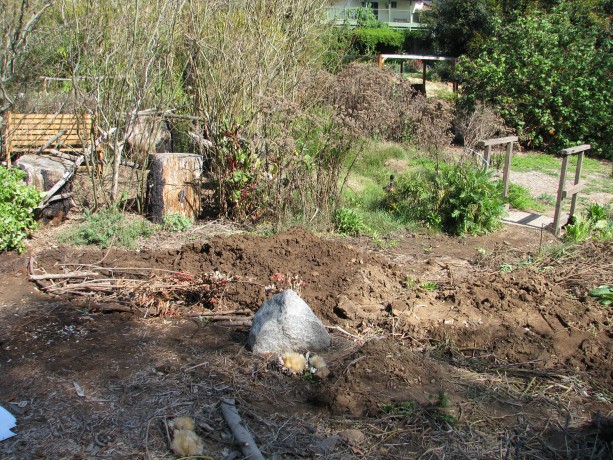
Can you spot the duck in this photo? Mr. and Mrs. Mallard were out for a graze, boldly checking out our progress. He is guarding her as she hikes around the property, leading him on a merry chase every afternoon. You can see Mr. Mallard to the left of the little bridge.
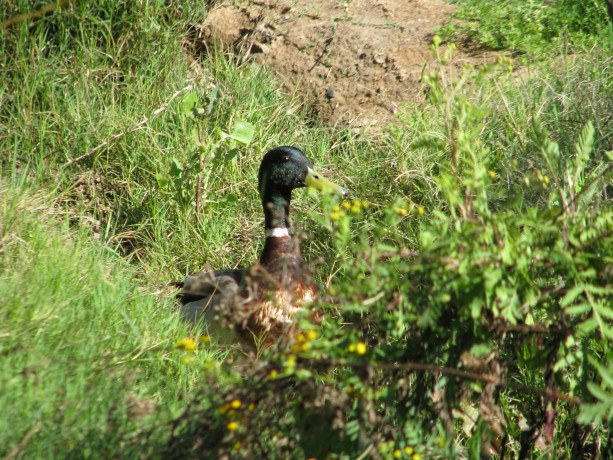
This male mallard and his mate, who is ‘ducked’ down in front of him, enjoyed grazing on weeds and watching we silly humans work so hard. After filling the swale, we covered the new trail that now transects the guild with cardboard to repress weeds.
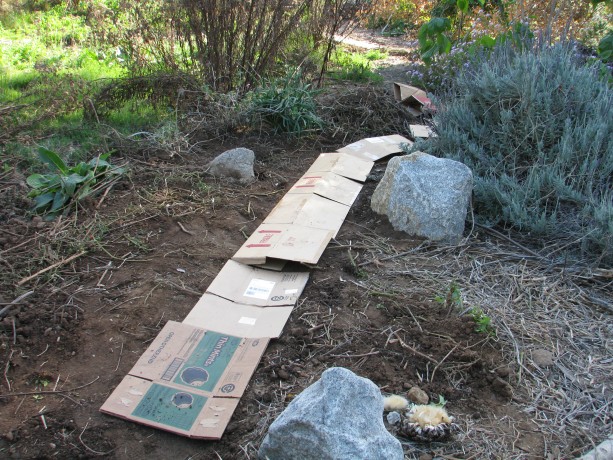
Cardboard laid over the hugelswale. Then we covered that with wood chips and delineated the pathway with sticks; visitors never seem to see the pathways and are always stepping into the guilds. Grrr!

The cardboard was covered with wood chips and the pathway delineated with sticks. Where the trail curves to the left is a small raised hugelbed to help hold back water. At this point the day – and we – were done, but a couple of days later we planted. Polyculture is the best answer to pest problems and more nutritional food. We chose different mixes of seeds for each of the quadrants, based on situation, neighbor plants, companion planting and shade. We kept in mind the ‘recipe’ for plant guilds, choosing a nitrogen-fixer, a deep tap-rooted plant, a shade plant, an insect attractor, and a trellis plant. So, for one quarter we mixed together seeds of carrot, radish, corn, a bush squash, leaf parsley and a wildflower. Another had eggplant, a short-vined melon (we’ll be building trellises for most of our larger vining plants), basil, Swiss chard, garlic, poppies, and fava beans. In the raised hugelbed I planted peas, carrots, and flower seeds.
In the back quadrant next to the mulberry I wanted to trellis tomatoes.
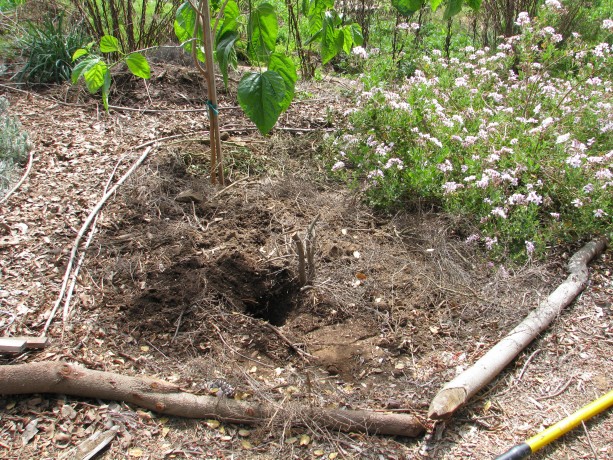
This quadrant by the mulberry needed a trellis for tomatoes. I’d coppiced some young volunteer oaks, using the trunks for mushroom inoculation, and kept the tops because they branched out and I thought maybe they’d come in handy. Sure enough, we decided to try one for a tomato trellis. Tomatoes love to vine up other plants. Some of ours made it about ten feet in the air, which made them hard to pick but gave us a lesson in vines and were amusing to regard. So we dug a hole and stuck in one of these cuttings, then hammered in stakes on either side and tied the whole thing up.
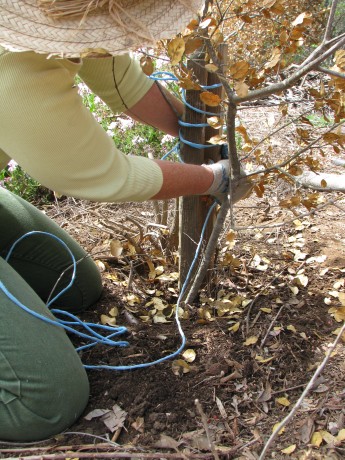
Tying the trunk to two stakes with twine taken from straw bales. Love the blue color! The result looks like a dead tree. However, the leaves will drop, providing good mulch, the tiny current tomatoes which we seeded around the trunk will enjoy the support of all the small twigs and branches, and will cascade down from the arched side.
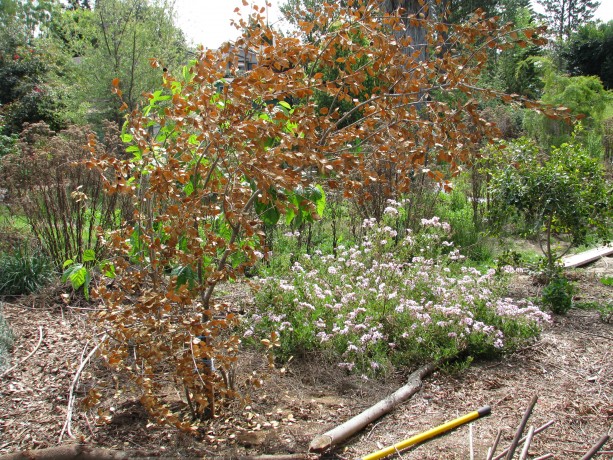
The ‘dead tree’ look won’t last long as the tomatoes climb over it and dangle close to the path for easy harvesting. We seeded the area with another kind of carrots (carrots love tomatoes!) and basil, and planted Tall Telephone beans around the mulberry trunk to use and protect it with vines. We watered it all in with well water, and can’t wait to see what pops up! We have so many new varieties from Baker Creek Heirloom Seeds and other sources that we’re planting this year! Today we move onto the next bed.
