- Compost, Gardening adventures, Permaculture and Edible Forest Gardening Adventures, Soil, Vegan, Vegetables, Vegetarian
Fava Beans
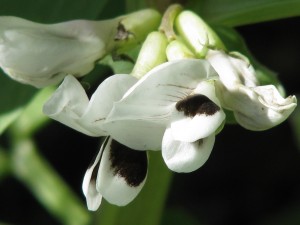
Fava flowers Have you ever eaten Italian, Greek or Middle Eastern food and found some enormous beans in it? Most likely those were fava beans. Commonly called broad beans or horse beans, these ancient beans are native to Africa and Asia, but can be found in cuisines worldwide.
There are a lot of reasons to grow them, even if you don’t eat the beans. First of all, they are nitrogen fixers, being a legume. However they don’t tendril like green beans do. The plant is a tall stalk (different varieties grow different heights) that sets beautiful flowers down the trunk. From these flowers grow some very weird-looking veggies. The pods look like clusters of swollen green fingers, I kid you not. The stalk can grow unsupported, but may topple over once the heavy pods are set.

Another reason to grow them is that they are hardy and can tolerate cold, and soils that are heavy in clay and salts (which pretty much describes my yard). Often broad beans are grown as a cover crop, then cut and allowed to decompose on the soil surface while the roots release the nitrogen under the soil.
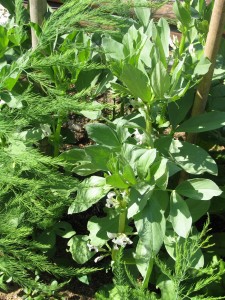
Then there is the reason that these very industrious plants produce an interesting protein-rich bean that enjoys notoriety worldwide (hence, easy to find different recipes for them!). The young leaves and flowers are edible as well.
To harvest favas, pull the swollen (but not too lumpy or they’ll be tough) pods from the stalks. Here comes the drawback: you have to shell the beans and it is a chore. Turn on a movie, pull up a bag of fava beans and an empty compost bucket, and go to. You may want to use a sharp knife to run down the seam, but I just used my fingernails. I watched the 1980’s TV show Cheers, which I never saw because I haven’t had television in about 17 years. Three episodes and I finished a big bag of favas!

When you’ve shelled the beans, you must blanch them for 3 minutes, then drop them in an ice bath. Rub the beans to remove a waxy coating. Then you can sautee them, mash them with potatoes, use them in fritters and soups, try an exotic Middle Eastern recipe with them. Fry them until they are crisp and serve salted as a snack. If you want to freeze them, then give the beans the blanch and ice water treatment, dry them and freeze them on a cookie sheet. Put them into a freezer bag. When you want to use them, then thaw, remove waxy shells and use. Some people don’t remove the coating, but its better if you do.
Fava beans have a nutty, slightly bitter and earthy flavor that becomes quite addictive. Two warnings, though. Some people, particularly those of Mediterranean decent, may be allergic. Also if you are taking anti-depressants, the beans are rich in tyramine and should be avoided by those taking monoamine oxidase (MAO) inhibitors – a type of medication used to treat severe depression.

Add fava beans to your garden and landscape. Just tuck the seed into the ground and stand back. Mine weren’t nibbled by rabbits or bothered by anything; however last year I grew six plants in a raised bed, and something opened all the pods and ate the beans. This year I have them planted all over the property to help build the soil, and the harvest appears to be all mine. I’m glad that Cheers ran so many seasons!

- Animals, Bees, Birding, Chickens, Compost, Gardening adventures, Health, Other Insects, Permaculture and Edible Forest Gardening Adventures, Photos, Ponds, Quail, Rain Catching, Reptiles and Amphibians, Soil
I Went to a Garden Party….

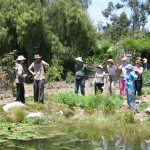
AAUW Garden Tour Saturday was the AAUW Garden Tour. What a glorious day. I expected about a hundred visitors, and made 120 handouts. Sometime in the early afternoon I guess they ran out, and I didn’t know about it for awhile. I made 25 more for the last two hours, and have five left. One of the docents said that some had been turned back in during the morning. Every couple probably took just one… wow, that’s a lot of people.
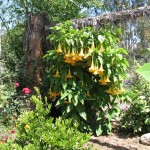
I’d been talking to the garden all week, asking the blooming plants to hold that thought for a few more days, and encouraging the nonblooming ones to get a move on. The plants did what I asked! There were so many flowers out Saturday, it was amazing. Heirloom roses, Gideon’s Trumpet, ranunculus, herbs, wildflowers, and waterlilies. The garden, apparently, also was also all for proof in advertising, as in standing behind the NWF Habitat sign on the front gate. So many kinds of butterflies and dragonflies were out for the first time this year that people remarked on it. In the afternoon, there were sightings of a king snake all over the property; I think it had to have been three kingsnakes. One was moved from the refreshment area, but he came back, and then as I was standing by the pond talking to some ladies one came past us. Another was sighted up in the driveway. Roger sighted a gopher snake. No one shrieked or complained; either these were hardy people, or the idea that this was a habitat yard made them keep calm. It also backed up my claims of letting snakes deal with gophers and rodents! One man spotted a baby bunny under the Withy Hide bench. By one o’clock, it was funny. It was as if a button had been pressed to turn the garden on, and all the features were working! What a glorious day.
Jacob (Aquascape Associates) and Roger (landscape architect) and I answered questions for most of the day; the last four visitors left at four. So many people asked questions about permaculture, soil, beekeeping, cob ovens and rain catchment that I know that I couldn’t answer everyone’s questions. Of course there were some who like a tidy, orderly garden, and that is fine. If everyone came away with some idea how to work with nature rather against it, to use chemicals less, to grow organic food, to repurpose, to compost their kitchen waste and weeds, then what a lot of small ripples of good will come of it.
Thank you to my dear friends who helped prepare the garden so that it looked stunning. And thank you to the snakes, butterflies, bees, dragonflies, birds, bunnies and who-knows-what-else that came out to perform for the visitors! And thank you to everyone who visited! No casualities; all good.
Here are some photos, although my camera doesn’t do the colors justice:
AAUW Garden Tour Welcome! Look at photos of how it was. Main entrance walkway Walkway into the Nest One of the many trails A palm sitting stump between guilds by the driveway A green melon under variegated lemon, with native grasses. Quail hut, with privacy boards up. Status and wildflowers across the stone walkway Cool spot under the upper pepper tree Roger and visitors by the Withy Hide Some of the first visitors of many Pickerel blooming in the little pond Gideon’s Trumpet keeping blooms and aroma until the tour Jacob teaching about natural ponds Baby bunny under the Withy Hide bench Roger answering questions View from the Bee Garden gate Cool spot under the pepper tree - Animals, Gardening adventures, Heirloom Plants, Permaculture and Edible Forest Gardening Adventures, Ponds, Reptiles and Amphibians, Soil, Vegetables
Earth Day at Finch Frolic
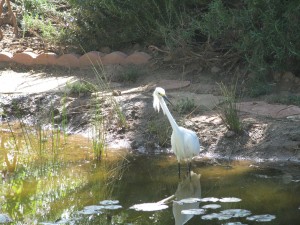
Snowy egret hunting. "Get the bullfrogs!" In celebration of Earth Day, I worked in the garden. You can stop laughing now. Yes, I know that I work in the garden nearly every day, and then spend time not volunteering or exercising, recovering from working in the garden. It was an overcast day, which beach-bound teenagers probably cursed, but I found perfect for working outside.

Roses in bloom everywhere. I had a visitor wishing me a Happy Earth Day.
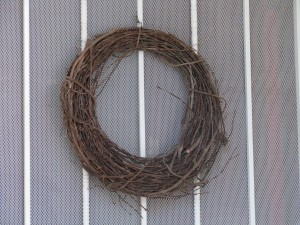
Do you notice anything about this wreath? This is an alligator lizard.
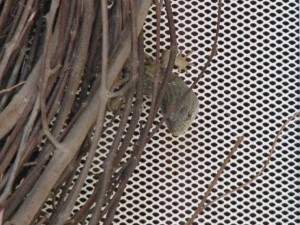
"Hello!" Hopefully he enjoyed the ride as I opened and closed the door several times to photograph him.
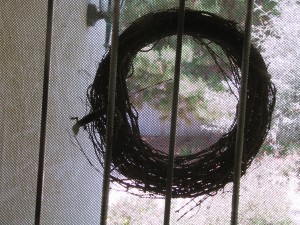
Alligator lizard from inside. Among other things today, I sifted compost. I had moved my compost bin, and this good compost was still on the ground from where it had been.
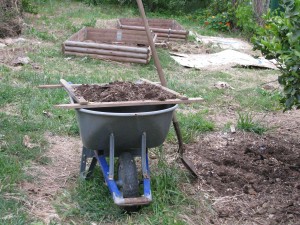
Sifting compost through a screen. I put it into a new raised (and wire-lined) bed.
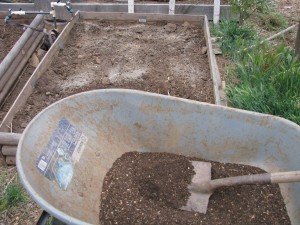
Adding sifted compost to the bed, which has been dusted with organic non-animal based fertilizer. Then I planted two rows of rice in it. Yes, rice. It is an heirloom variety from Baker Creek Organic Heirloom Seeds (http://rareseeds.com/rice-blue-bonnet.html), and it doesn’t need to stand in water to grow. Just something new and fun to try out.
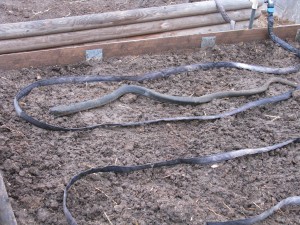
The rubber snake guards a freshly planted bed of rice. I’m also growing red seeded asparagus beans, the seeds of which were given to me by the woman who made the quail house. She also introduced me to Baker Creek, and for that I’m sincerely indebted. (http://rareseeds.com/red-seeded-asparagus-bean.html .)
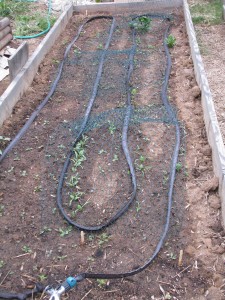
Spinach, carrots, edamame, sesame, Kentucky pole beans, endive and tomatoes are finally coming up. The other veggie beds are finally sprouting, now that the evenings have warmed up.
Collards and carrots, transplanted from another bed and doing well. 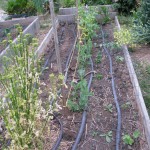
An incredible parsley setting seed, peas, parsnips, spinach, rhubarb, carrots and beans. 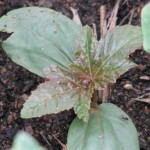
Castor bean seeds were in the mushroom compost, and I'm pulling them quickly. Here are a few views from other areas of the garden. Three weeds until the AAUW Garden Tour. Yikes!
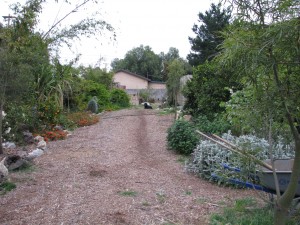
General Mischief waiting near the quail house for dinner. The hose connects to the 700 gallons of cootie water (compost tea) and is irrigating native plants. 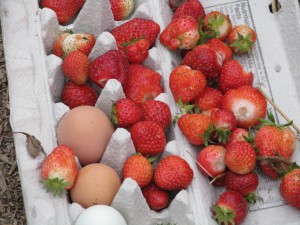
A happy harvest. Strawberries and eggs. I'm freezing the berries for later to make jam. 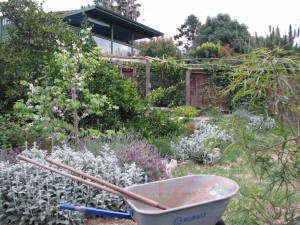
Lamb's Ear, whitebud, passionfruit and Bermuda grass 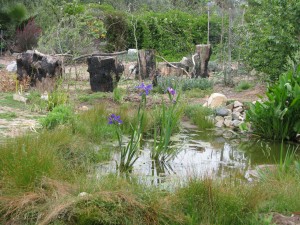
Stunning blue iris in the pond. 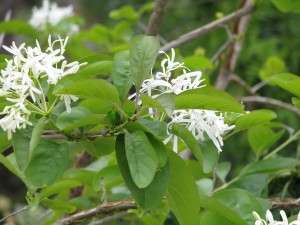
Fringe tree in bloom. 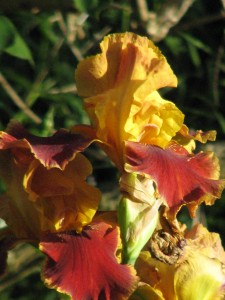
Iris -
Harry Mud Has a New Look
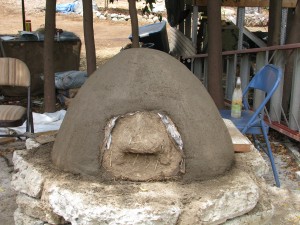
Harry Mud with his bald pate This morning a Meetup was held at my property (Finch Frolic) for the San Diego Permaculture group (http://www.meetup.com/SanDiegoPermaculture/ ). The agenda was to tour the garden and build the second layer – the insulation layer – on Harry Mud, the cob (earthen) oven begun at a similar Meetup last July. There are three installments posted on my blog; you can search for cob oven, or read about the third installment here: http://www.vegetariat.com/2011/07/cob-oven-3/ ) (sorry, I can’t seem to get the hyperlink to work).
During all this time Harry has patiently sat under his tarp awaiting a second layer. Today was his day.
One of the reasons I wanted to work on Harry is that my garden will be on the Association of University Women’s garden tour on May 12th (OMG! Only four weeks away!!!). I’m hoping to inspire a lot of people to research permaculture for their own properties, and to show off earthen building. Harry will be a star.
With 29 people signed up to come today and projected rainshowers, I scrambled a bit to make sure there would be cobbing opportunities for all. However about 15 people toured, the weather although windy was dry and beautiful, and all goals were accomplished. Hopefully everyone came away with what they wanted to hear about, and not so much dog poo on their shoes.
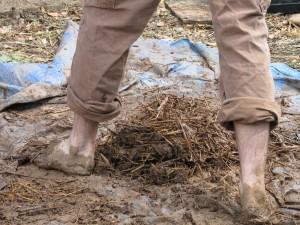
A dirt and straw pedicure. Although I enjoy speaking with groups of people, the drawback is that I don’t have the chance to speak with individuals and find out their stories or learn from them. Everyone has wells of experience and tidbits of knowledge (or buckets full!), and you never know how your life can change with just a passing comment or chance encounter.
Anyway, many of us had mud manicures and pedicures, the group dwindled, and Harry became even more handsome, if that is even possible. Three intrepid souls stayed for Harry’ First Fire, and we lunched and chatted about all kinds of interesting topics, such as communication between plants. It was a good day. Now that I’ve soaked the mud off of myself in a hot bath with epsom salts, I’ll show you what went on.

Sifted soil in wheelbarrow being resifted through smaller mesh. To create the insulation layer, we sifted dirt through two progressively smaller screens.
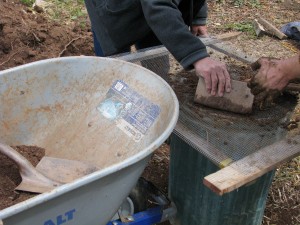
Screening dirt. That was mixed with water and a lot of straw, which took a lot of time but was fun.

Fancy cob footwork. Cob is a community event. That cob mixture was formed in a four-inch layer around Harry.

Harry looks as if he's going bald, but he's actually getting a straw afro! Just in case all 29 people showed up, I had prepared an extra cob project. I thought a work table next to the oven would be a good idea, so stacked two old tires, topped by a tire with the wheel still in there. These had been part of the fill on my property when I moved in 13 years ago. Two intrepid permaculturalists then filled the inside with rubble (small bits of urbanite left over from walls) and sand left over from Harry Mud. A piece of wood was propped in the center to hold the top in place. At some point the entire thing will be cobbed.

Filling stacked tires with cement rubble and sand for future cob table. Harry’s First Fire was set. Handsome, isn’t he?
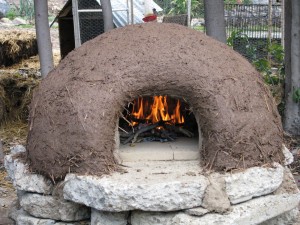
Harry Mud, all fired up! He is a little thicker towards the bottom (I know how he feels!) because the mixture slumps a little, but he’s thick enough all over to insulate well. Harry will eventually receive a slip coating on the outside, which will help protect the insulation layer and be decorative. The urbanite base will be covered as well. I’d like a shade structure over the area, built out of the shed leftovers of which I have plenty. Harry will have to be protected from rain by a tarp as usual.
Thank you everyone who helped out!
- Gardening adventures, Humor, Permaculture and Edible Forest Gardening Adventures, Rain Catching, Soil
Seven Hundred Gallons of Cooties

That's a lot of tea. One of the amazing and useful things I learned in my Permaculture Design Course was how to brew microbes in a bucket. Yes, I know, most women like champagne and jewelry. I like compost and worms. Whatever. Microbes are the microscopic creatures that make dirt into soil. By brewing a microbial tea you can so supersaturate the water with microbes that giving your plants just a small drink of it will greatly improve their health. That is because microbes eat plant litter and other decaying things and make available (and by ‘make available’ I mean ‘poop out’.) (Sorry.) more of the nutrients such as minerals that can be locked in the soil. Adding microbes to poor soil is a good thing.

Fish tank water, paint strainer and aerator: tools for microbial brewing. To make a microbial brew, you put good compost in a mesh bag such as a paint strainer or layers of cheesecloth. Obtaining compost from various sources gives you a good mix of microbes because not all the same microbes live in all soils. Suspend this bag in a five-gallon bucket of water, add a little organic molasses for the microbes to eat (like sugar to yeast), and if you want other soil additives such as rock sulphate, blood or bone meal, etc. I used water from my fish tank. Then you oxygenate the water with a fish tank aerator. After thirteen hours the microbes will have reproduced to a maximum capacity and the brewing is finished. You should use the brew within a few hours.

I'm not sure what made it foam, but it looked more like a brew. So, I did this a couple of times last Fall. Meanwhile, Jacob, who still maintains the Aquascape projects and volunteers some time here, managed to have donated to me a 700-gallon tank. It had been used for organic fertilizer.

The tank. The target: under the balcony. Jacob brought it over in his pick-up, and with the building of an impromptu scaffold he, my daughter and I (but mostly him) rolled it into place by my garage without damaging the propane tank or each other. Then he re-routed a rain gutter from my paltry 50-gallon rain barrel into the 700-gallon tank.

Trying not to crush the propane tank. The tank filled after a few rains, and I used most of the water recently between rains. Then the last two rains filled it to the top. Jacob, who is into aquatic microbes with which to balance natural ponds, microbes being referred to as ‘cooties’, suggested turning the entire tank into a cootie-brewing container. That way I’d not just be watering the plants, I’d be giving them a microbial smoothie. A cootie cocktail.

The tank, full of rainwater from the gutter, becoming a microbe farm. Always up for doing the improbable, I filled a paint strainer with some fine samples of soil from several long-established areas of my yard, and suspended it inside the tank. In went an entire bottle of molasses, which is a drop in the bucket, so to speak. Then in went my little fish tank aerator, quivering in fear at the impossible task of aerating 700-gallons of water. I took a water sample and then plugged the thing in. That was a few days ago. I have no idea how well the microbes are brewing, since the aerator is barely stirring the water. The water has turned brownish, which I take to be a good sign. The warmer temperature is perfect for the little guys; springtime for microbes. I think I may have a microscope left over from my older brothers – circa 1950-something – in the garage somewhere, with which I can compare water samples to see if anything is happening. I figure, even if it isn’t, there is no harm done, and even if some microbes have flourished the water has improved.

The aerator down inside the now-brownish cootie water. There are many quips I can make about this whole project. For instance, here are several million pets I don’t have to take to the vets. Or, I really love to cook, and since I enjoy making soup this project is a natural. However I just think the whole idea of making 700 gallons of microbial tea is so funny that no matter how the project ends up, I think the laugh is worth it. If I can’t do something bizarre, it isn’t worth doing!

Microbes are amazing, aren’t they?
And so are tadpoles, which are thriving not unlike microbes, but in my pond. (A belated happy April Fools.)
-
Soil: Weeding by Sheet Mulching
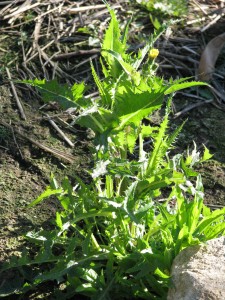
Sow thistle For this next part of how to build soil by weeding, I’ll discuss one of the easiest and laziest ways. If you want nothing to grow in an area, and don’t care about how it looks or length of time, then sheet mulching may be for you. I’ve used cardboard and newspapers around my vegetable beds with great success. To fully knock out tough weeds such as Bermuda grass, you should put down a good inch of newspaper or cardboard (or a combination). If you are using newspaper, leave the sections intact or else the wind will blow it everywhere, or cover it with a piece of cardboard. Water it in and let it rot.
If you have old plywood lying around, drag it over to your weed patch and pop it on top. Walk over it all you want, just watch out for old nails.

Sheet mulching with plywood... at work! Another method is to water your weeds, then cover them with thick black plastic held down with rocks. On hot days the weeds will cook under the plastic. I’ve used this before successfully, but now I would only use it if I had the plastic already. I’m trying hard to not contribute to the creation of more plastic.

The area after the plywood was removed. Then there is sheet mulching where you actually build your soil over the top of weeds. The new catch-phrase for this is lasagna gardening. Start with a layer of corrugated cardboard or three layers of newspapers (or a combination!) right on top of your weeds and where you want to plant (this isn’t for clearing pathways). Water this in really well. Then gather together compost items such as coffee grounds, weeds (without seeds), grass clippings, shredded paper, seaweed or algae… whatever you can compost. Sort your compost into browns and greens. Browns are mostly dead stuff such as leaves, shredded paper, pine needles and dried plant clippings. Greens are fresh things like dinner scraps, green cut grass… anything with some life still left in it. Manure is perfect for your ‘greens’ pile. Chasing down landscapers as they rake leaves and bag up grass from their lawnmowers is a good way to collect ingredients. Now start layering. The best ratio would be two parts brown to one part green, but don’t stress over it. The green stuff will heat up and cook the browns. Depending on how much stuff you can layer, your bed should be about two feet high, and however long that you want it. Water it regularly. Within weeks your lasagna will have sunk down into fantastic garden soil. If you want to plant right away, then add several inches of compost to the top. Otherwise, let it sit a season and you’ll be able to plant right into it. The newspaper or cardboard at the bottom will help suppress weeds and keep it moist. Remember that the deeper your loam, the more rainwater it will hold and the less you’ll need to water.
What all of these methods of weeding does, is to decompose the weeds right where they are. The minerals that they hold in their leaves are distributed into the soil, and as their roots decompose they leave tunnels for worms and other soil creatures to move around in. You are keeping the soil moist and dark, which are wonderful conditions for our soil friends to flourish. I’ve left plywood down on pathways during the entire growing season, and when lifting a piece have discovered treasures such as newts and salamanders underneath, that I wouldn’t have seen otherwis. They are great bug eaters for the garden. Sheet mulch also can harbor slugs and ants, but they are easily dealt with, especially if you have chickens!
Sheet mulching is very easy, it combats even tough weeds, it builds soil, and it repurposes things you might normally put into the trash. So save all those boxes from Christmas, the contents of your paper shredder, what newspapers you didn’t use to light the fireplace, your garden waste, your kitchen waste, and whatever your neighbors want to get rid of (tell them you’re making lasagna with it!) and begin layering. You are helping your garden, helping your soil creatures, building loam, opening underground stores of minerals for usage by plants, making your fruit and vegetables rich with nutrition, lightening your impact on the dump, creating a beautiful garden, and all without backbreaking work and certainly no chemicals! Just say, “NO!” to Monsanto!
-
The Little Guys in the Soil
I know, I know, I’ve been very delinquent. However I have been working hard, reading a lot and studying. I’m taking a Permaculture Design Course in San Diego on most weekends, and the information has been dazzling. Even though I know a little or a lot of what is being presented, what amazes me is how related the information is and how it all works together. For instance…
Gardeners know that the best pH for soil is somewhere around 6.5. Higher or lower than that and the soil has too much acid or alkaline. Here in San Diego we have alkaline soil. Rainwater is excellent because it has a neutral pH. What is so important about that neutral pH? Well, I’m going to tell you. There are all kinds of nutrient in the soil in the form of trace minerals, such as iron, magnesium, copper, etc. However these nutrients are bound up in the soil because of the pH… some are bound by a high pH, some by a low pH. For instance, we have adequate iron in our soil, but because of the alkalinity, plants can’t access it and become iron deficient. If you have neutral pH, then plants are able to feed themselves nutritiously. To free up the iron, you should add mature compost and water as much as you can with collected rainwater.
Okay, so you knew all that. So did I. Here comes what I think is the interesting thing.
We know that the soil is teeming with little beings such as bacteria, fungi and nematodes. Some are good, some are bad. Such is life. Picture if you will the soil in a forest, which has a lot of large materials such as logs and sticks being broken down by various fungus. The soil in a vegetable garden, however, is loamy with small particulate matter. Well, in a forest situation, with an acid soil, there is high fungus activity and lower bacteria count in the soil. The soil isn’t usually turned over or bothered in any way. In a vegetable garden, a slightly more alkaline soil is perfect because it has less fungus and more bacteria. The soil is turned over frequently. Weeds such as grasses prefer a pH range that is slightly more alkaline. By changing the pH with the addition of different kinds of mulch, you can moderate the microbes in the soil, tipping the balance between fungi and bacteria, and edging out the grasses. Cool, huh?
Fungus is extremely important where longer-lived trees are planted, because fungus travels underground, linking with the spreading roots of the trees and actually causing communication between them! Fungus, it has been said, is nature’s Internet. Mushrooms are called nature’s teeth, too, but that is an image that perhaps you just don’t want in your head. Bacteria help soil that is often disturbed by helping leguminous plants fix nitrogen (yes, yes, I know, back to the darn legumes again), and help free up nutrients for the roots, usually by dying. That’s not a happy thought but, again, that’s the way it goes. If you till the soil, you kill off the bacteria and nematodes and fungus and all the other little critters. There is a rise in fertility, but only briefly because that rise is the nutrition released by the decomposing bodies of all your soil critters! Then there is just dead soil. Then farmers pour on the salt-based fertilizers (NPK), which is just salting the land and making sure nothing can live in it. The crops grow, but since there aren’t any friendly critters freeing up nutrients, the resulting nutritional value of the produce is poor. Only by mulching, composting, and cover-cropping can the soil come alive again, which nourishes the plants, which nourish us.
There is so much life in just a pinch of soil; so much going on that we still can only guess at. To build up your soil with mulch, compost and organic practices is to give life to gajillions of life forms (yes, that many!) which all work to make your plants healthy, your food more nutritious, and gain back some of the topsoil that has disappeared through man’s blundering.
I hope this was as interesting for you as it is for me!

