- Animals, Bees, Birding, Chickens, Compost, Fungus and Mushrooms, Gardening adventures, Heirloom Plants, Hugelkultur, Microbes and Fungi, Natives, Other Insects, Perennial vegetables, Pets, Predators, Rain Catching, Recycling and Repurposing, Reptiles and Amphibians, Seeds, Soil, Vegetables, Water Saving, Worms
Pathways Can Help Your Garden!
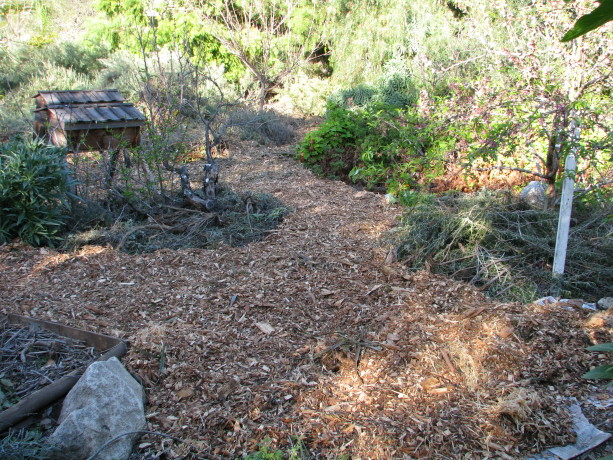
A finished section. Footpaths and/or vehicle access paths are absolutely necessary for any yard. Unfortunately, weeds love growing in them. Worse, the pressure from footfalls, wheelbarrows and vehicles compress and compact the soil, pressing the soil grains together so tightly that oxygen – and therefore life – can’t exist often up to several inches or more deep. Any life, that is, except for the grasses and other weeds that nature sends in to help repair the soil. Bare ground will be greatly compacted by rainfall, which will then erode paths as it runs, unable to soak through that spaceless ground. Once wet bare pathways are often unwalkable until they dry out, and have to be resmoothed. In our hot, dry areas, bare earth or graveled pathways reflect heat and light back up. That reflected heat and light dries out the underside of plant leaves, where species such as Live Oaks have over the millennium developed leaves that curl to expose less surface to the hot sun and to gather moisture underneath. Reflected heat and light dries out the air as well, and any hope of slight humidity to help water plants through months of dry heat is gone. If you have open-pollinated vegetables that rely on breeze for pollination, all that open pathway actually decreases your germination because pollen – such as from corn – will dry out in arid conditions. Humidity that you can keep in your garden will keep pollen more viable longer.

A wealth of freshly chipped wood – two dump-trucks full! The challenge: to spread it all in a week before our first tour. Yikes! What to do? Covering pathways with gravel is a common solution. I hate gravel. It heats up and becomes a thermal mass in the summer, further cooking your soil and air. It doesn’t suppress weeds and weed-whipping becomes an exercise in avoiding shrapnel. You can never get it out of the ground once you apply it, and chunks of gravel don’t do soil much good for planting. If you trip and fall on gravel it does terrible things to your knees – I had a piece lodged in my kneecap after a stumble some years ago (sorry for that cringe-worthy item).
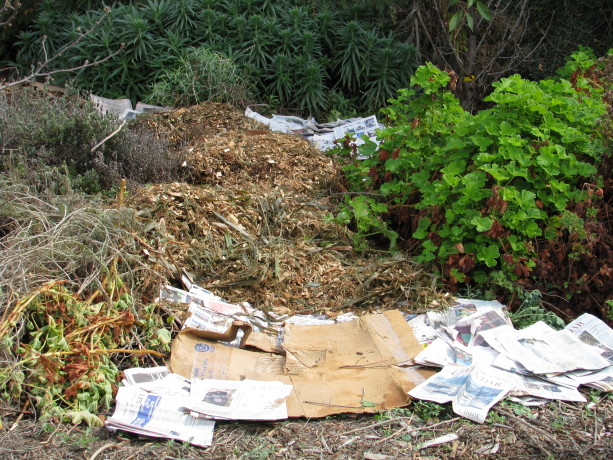
A 1/2 inch of cardboard or newspaper with mulch on top. Covering the soil is better, but not best. Bark will help rain bounce and then percolate, is dark so it won’t reflect light and heat as gravel does, and it decomposes. It is also expensive to buy, and because it decomposes you have to re-buy it every couple of years. Decomposing bark may be adding elements to your soil that you don’t want depending upon the source.
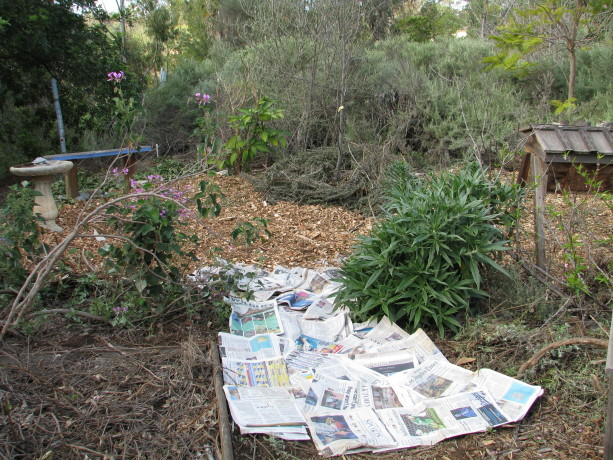
More progress as the afternoon wears on. I have experienced all the options above. The best method of countering all these issues that I have found also repurposes and recycles. Sheet mulch. Yep. You’ve heard it from me before and it proves itself every year. There is more to it, though.
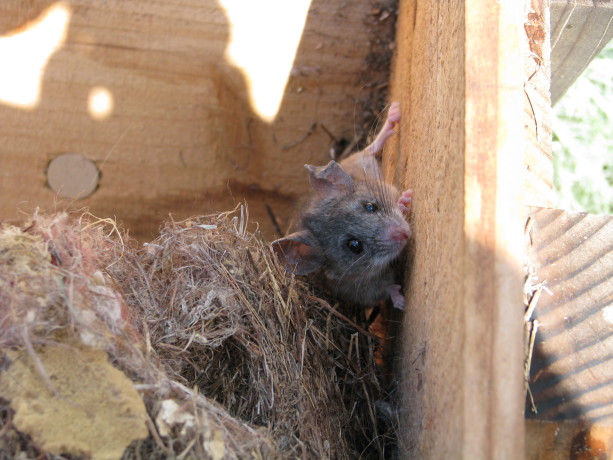
I disturbed a couple of nesting mice in one of the unused Kenya bee hives. First of all, please, please, please never use plastic. You can read about white pollution and the layers of plastic merging with topsoil in China and cringe. Plastic will not last. It will always be around in pieces. You will be poisoning your soil.
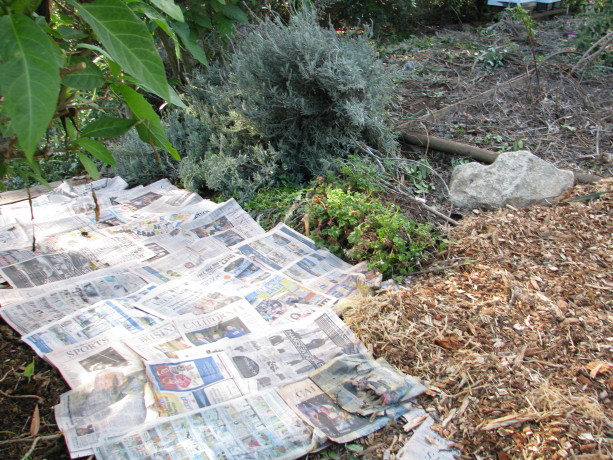
At the most basic, you can cover your pathways with 1/2″ of cardboard and newspaper, and top it with wood chips. I obtain my wood chips from arborists who save paying a dump fee by dumping it in my yard. If you’d rather have a more uniform look then purchase your bark. Either way the cardboard and newspaper will make the chips last years longer. More importantly the cardboard and newspaper form a protective, absorbent layer that protects the soil from compaction. Have you looked under a log or sheet of abandoned plywood in awhile? All the white tendrils of fungus, insects, worms, lizards and roots are thriving there along with billions of soil microbes all because they have that protective layer that keeps moisture in and compaction out. That microclimate is what you are forming with cardboard and mulch pathways. Since microbes free up the nutrients in the soil from which plants feed, you are creating more food sources for your plants. Tree and plant roots don’t end at the dripline, they reach out towards whatever source of water and nutrition they can find. If you are top-watering rather than deep-watering, then roots are abundant closer to the topsoil. By sheet mulching pathways you are extending food sources for your plants and trees, which now can stretch underneath the paths, link together with other roots through fungal networks, and become stronger and healthier. You also are creating habitat which is a food source for the entire food chain. Cooler, humid areas are better for bees and insects that pollinate, and the predators that feed upon them such as lizards, toads, frogs and birds. Just by sheet-mulching your pathways you are improving your environment as a whole. How can you NOT want to do this?

Sheet mulching around trees is much the same, except you add a little manure or compost tea if you have it. Sheet mulched pathways hold moisture and create some humidity which allows for better pollination and helps keep your plants from scorching in arid areas. If you live in a wet area or very humid area, use thicker layers of cardboard and mulch, which will help absorb moisture from the air and deliver it to the ground. Decomposition is quicker in wet areas, so using several inches of cardboard with mulch will last much longer and will again keep down compaction. Compaction in rainy areas is just as bad as in arid areas because of the erosion and flooding it causes.

More progress as the afternoon wears on. To catch rainwater and allow it to percolate into the soil rather than erode away topsoil, you dig rain catchment basins or swales. Swales are ditches with level bottoms, and can be a foot long (fishscale swales) or the length of your property. Swales should be positioned perpendicular to the flow of water. You can create swales across pathways, fill them with mulch, top them with cardboard or old plywood, and mulch on top to match the rest of the pathway. Water will be caught in the swales and won’t wash out paths on hillsides.
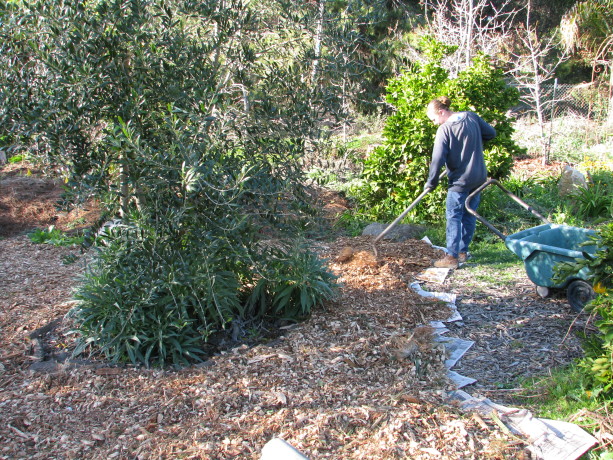
MIranda working on a large pathway near our large hugelbed. Going a step farther, you can ‘hugel swale’. Hugelkultur is layering woody material with dirt. This introduces organic material, oxygen and nutrient pathways into the soil and holds moisture into the dry season. You can dig deeply in your pathways, layer old wood (sticks, branches, logs, whatever you have) with the dirt, up to soil level, then sheet mulch. Your pathways are now waterharvesting alleys that you can walk on, and which will really feed your plants. And you just repurposed old woody cuttings.
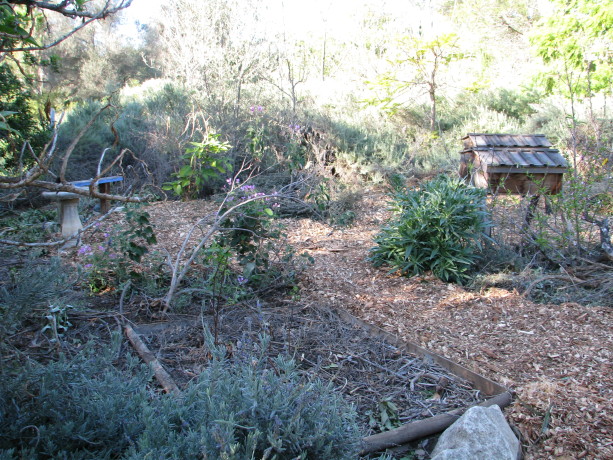
This mulch will greatly help the Asian pears and cherries which struggle with the dry heat of the summer. The ground will be kept moist and reduce evaporation, holding in humidity. We’ll be planting more heavily in this area, too. In very dry areas plants and trees do better in sunken beds, especially those that require a long chill time. Cold settles in holes. Moisture runs downhill, therefore dew will accumulate at the bottom of holes. You can either plant in holes and have your pathways higher, or if you have an established garden (such as I do) you can build up your pathways so that they become slightly higher than your trees and planting areas. We are working on that at Finch Frolic Garden, here in drought-stricken San Diego county.
So before I launch into yet another long lecture, the idea for pathways is simple: sheet mulch with cardboard and wood chips. If you live in a wet area, use several inches of both. If you live in a dry area, use no more than 1/2 inch of cardboard (or else it will absorb moisture from the soil) topped by at least an inch of mulch (no limit there!). If you want make super pathways, bury woody material before you sheet mulch. If you live in a dry area, raise your pathways above your planting beds. If you live in a wet area, lower your pathways so water can drain away from your plants (unless they love wet feet). Never use plastic, and please rethink gravel.
Then sit back and enjoy your yard and all the food and nutrients and abundance you have set the stage for, all using recycled materials that will last for years. Congratulations!
-
Compost Your Gophers
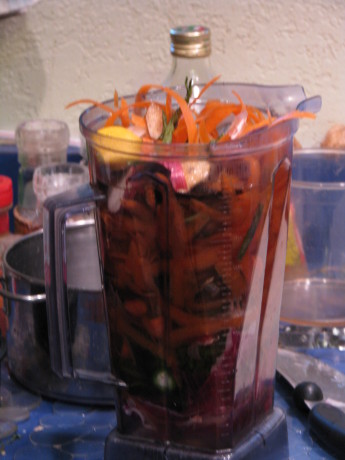
Kitchen scraps blended with a lot of water make excellent liquid compost. I’m a firm advocate of blender composting . Throw your kitchen scraps into your blender (don’t add in items that your blender can’t handle, but throw them in after its blended) with a lot of water and drizzle it around your plants. If its chunky, kick some dirt over it. This feeds your microbes very quickly because the organic matter is bite-sized, and thus feeds your plants. No chemicals necessary.
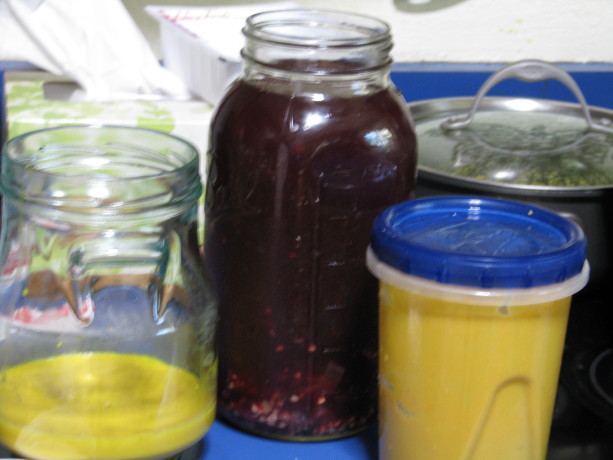
Spoiled soup, pickle juice mixed with old juice… pour it on down the holes! After making pickled jalapenos, salsa, or other spicy foods I thought that the resulting compost smoothie would be very powerful. Indeed it is. So I pour it down gopher holes that are in my garden areas. No one wants jalapeno/onion/garlic water in their livingroom. I’m fertilizing the garden at the same time as discouraging the gophers.
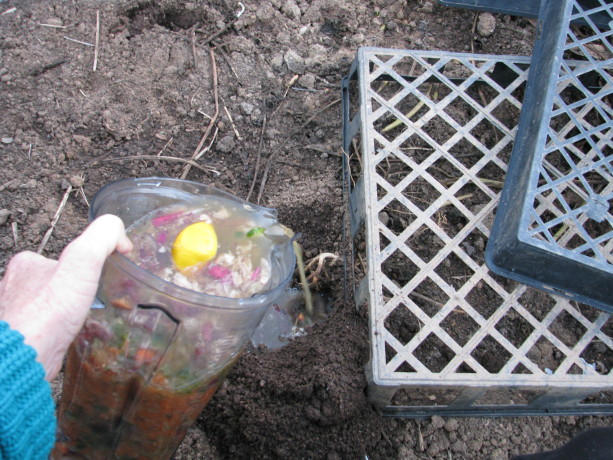
Pouring a noxious brew down a gopher hole. Some solids are just fine, too, as you will be covering it up. Worms just love this. I’ve gone a step farther and made a merry mixup of foods past their prime along with vegetable scraps. Old juice, stinky rice milk, moldy leftovers, the juice from a bottle of pickles, the last of the salsa… whatever you need to throw out, add to your blender liquid and pour it down the holes. It won’t stop the gopher from tunneling in another direction, but it will wreck existing tunnels for them, and feed your worms and microbes. And after watching plants disappear into the ground, pouring evil brews down the hole is very, very satisfying.
- Building and Landscaping, Compost, Fungus and Mushrooms, Gardening adventures, Hugelkultur, Microbes and Fungi, Permaculture and Edible Forest Gardening Adventures, Ponds, Rain Catching, Soil, Water Saving
Taming the Rain

Rain compacts bare soil, and in this case making clay soil slick. No percolation is happening here! World-wide we have a fresh water shortage, and the seas are rising. Erosion is cutting into our fields and washing our precious topsoil into waterways, causing them to silt up and die. In some areas of the US, unprecedented flooding from rain is occurring, while out West drought is drying up wells. The reasons for these happenings have to do with our farming techniques to begin with. How to fix the problems all boils down to some very simple methods that everyone can do – that everyone needs to do. It all comes down to making level-bottomed swales, and rain-catchment basins, to make the water penetrate the soil rather than roll over it. Rain compacts soil more than a tractor does – when it falls on bare ground. We have been trained to rake up leaves and burn them or send them to the dump. Leaves, dead vines and other organic matter cushions the rain and keeps the soil from being compacted. That organic matter also feeds the soil microorganisms that make soil hold manage rainwater. With the lack of organic matter, and the use of herbicides to kill off all vegetation, and the proliferation of huge swaths of lawn that is treated routinely with chemicals and therefore make the ground hard, rain rolls across the landscape taking topsoil with it.
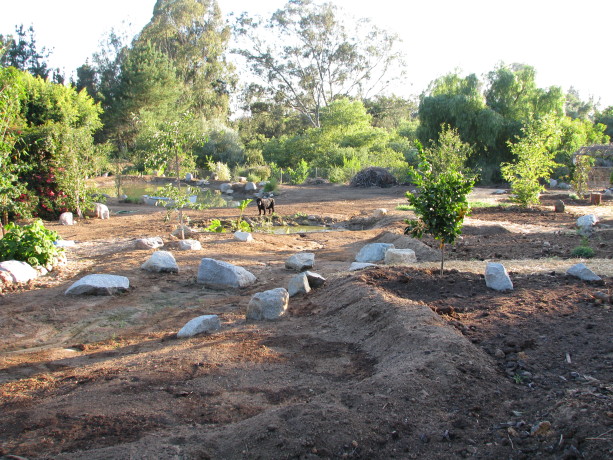
Raised mounds on the downside of swales keep rainwater by plant roots. Many neighborhoods have large culverts through their properties – mine included – where runoff from properties above is purposely channeled through and away from homes. All that precious water is wasted. The same happens in areas where rain is abundant. Rainwater is directed away from properties and into storm drains that fill and overflow, or it puddles in low spots because it has nowhere to go.
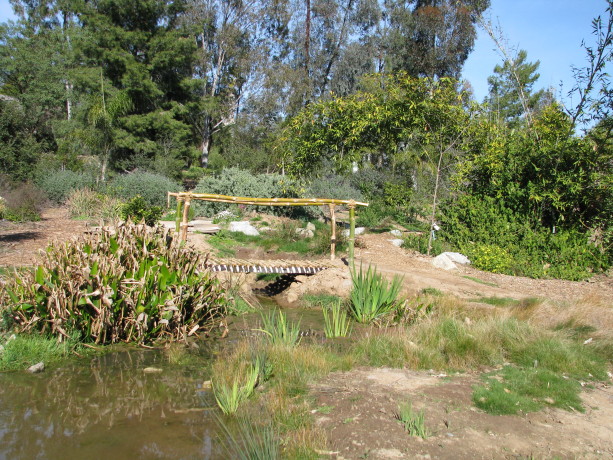
A rainwater and silt basin at the end of a series of rain catchment basins, has turned into a permanent pond. By creating regular level-bottomed swales perpendicular to the flow of water, beginning as high up the landscape as possible, rain will be caught before its momentum running downhill becomes destructive. The water in the swales percolate into the landscape, reestablishing water tables and re-energizing wells and streambeds. Swales should be level at the bottom, dug on contour if large, and have a dedicated overflow into another swale, rain catchment basin or dam. Small property? Dig a small fishscale-shaped swale with a trowel above each of your small trees and plants, perpendicular to the flow of water. Filling these small swales with coarse mulch such as woodchips will keep them moist and weed-free.

With 97% of California wetlands gone, animals have no place to drink. Help them! If your property is the recipient of water from uphill, then talk to all your neighbors above you and convince them to dig swales as well (neighborhood swale-digging party??). The amount of water raging down the hill will become insignificant, and everyone’s trees and plants will flourish due to the water being caught in the soil. The plume of water slowly moving through the landscape encourages tree and plant roots to grow deeper. The roots break through hardpan, produce sugars and proteins and carbohydrates to attract microbes, and create good soil for you.
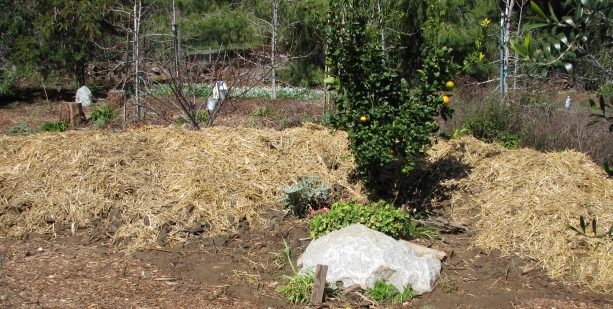
A hugelkultur bed is made from layering wood with dirt and organic materials. It will absorb rainwater and release it slowly as the ground around it dries, while improving the soil. So dig swales and rain catchment basins to passify and hold rainwater. Leave your leaves to prevent compaction and to feed your soil microbes. Enjoy having healthier plants, soil and waterways while helping to put the brakes on global warming.
- Compost, Gardening adventures, Perennial vegetables, Permaculture and Edible Forest Gardening Adventures, Recipes, Seeds, Soil, Vegetables, Vegetarian
Perennial Vegetables: Jerusalem Artichokes
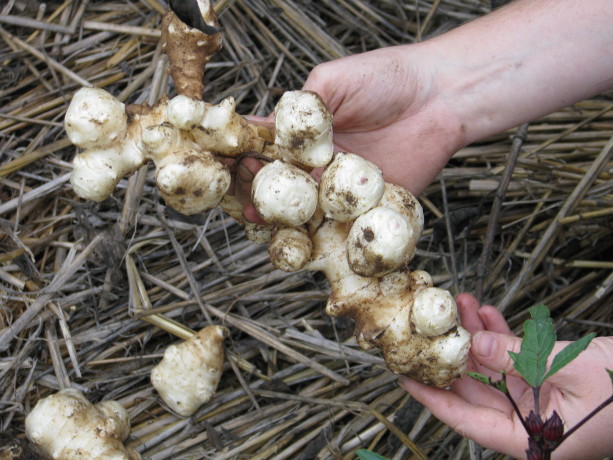
A knobby root of deliciousness. Jerusalem artichokes aren’t artichokes nor are they from Jerusalem. They are also called sunchokes, which sounds something like an unfortunate cosmic event to me. We grew them this year and I have only great things to say about them.
I ordered organic tubers from Peaceful Valley in California. By the way, all of the strawberries and rhubarb that I had ordered from them were inexpensive and yet of prime quality. The tubers grew into tall, sunflower-like plants that graced an area of the new kitchen garden that didn’t have the best soil in it.

JAs have beautiful sunflower-like flowers that pollinators love. They flowered most of the summer and just this month – October – began to die off. The plants had some difficulty with lace bugs, but with good soil fertility and some actively aerated compost tea foliar spray they rallied exceptionally.
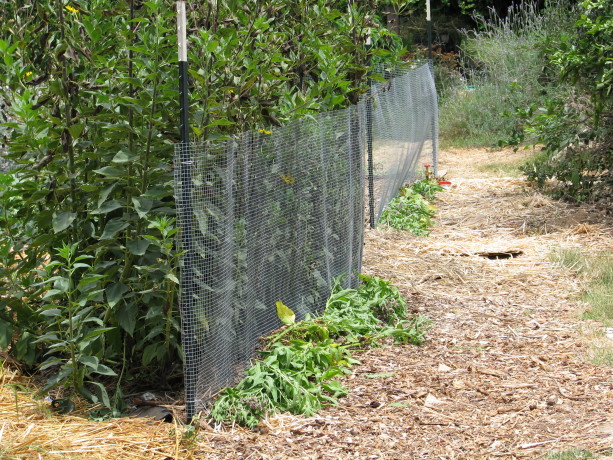
The Jerusalem artichokes made a nice living wall. Today, for our Halloween lunch, we thought some creepy-looking tubers would be appropriate. They share a basket with Black Beauty zucchinis (caught them small!) and our first sweet potato of the year, Spanish Red Improved, which we also steamed and ate – heaven!
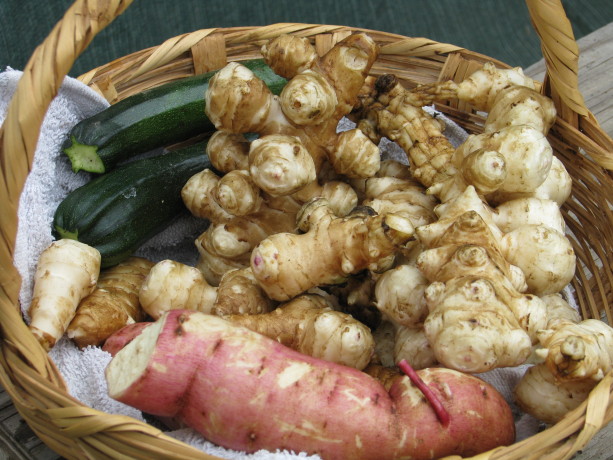
Our Halloween harvest. The ‘chokes are supposed to sweeten up after a frost, but here in San Diego county that might take awhile.
The chokes grow tubers all around the base of the plant, and also spread them underground. They are very easy to harvest; the plant wants the tubers to make new plants so they break off easily.
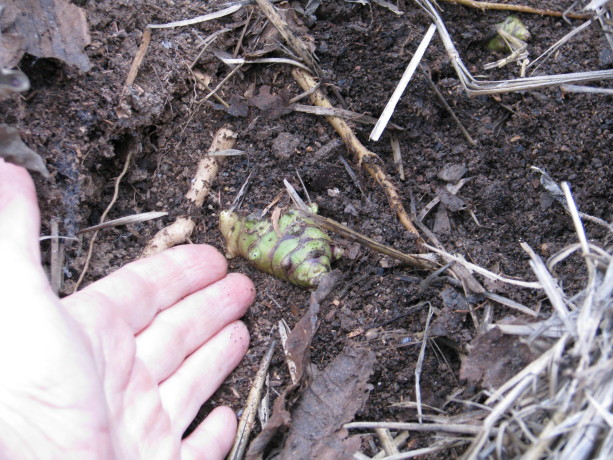
Cover green tubers back up so that they can continue growing. Although they are knotty, they wash off easily and the skin is thin and mostly easily removed with a vegetable peeler. I didn’t scrape all of it off and it wasn’t bitter or unpleasant at all. I roasted them after just washing them with a vegetable brush and the skins were a little firm and the insides very soft. There wasn’t any unpleasant taste.
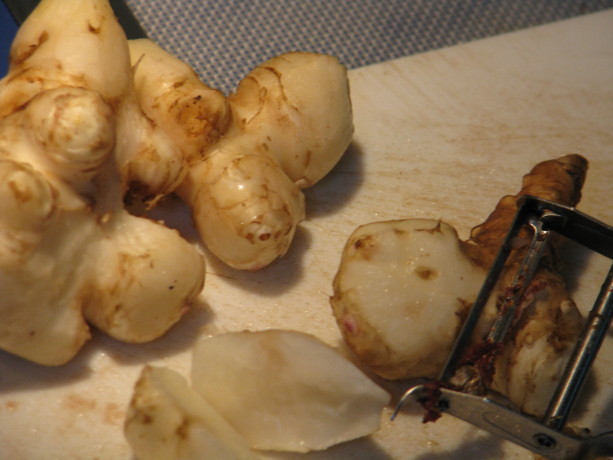
Peeling them is kind of easy, but the skin doesn’t taste bad. Raw they are crisp. Steamed, the JAs become very soft and – by gosh! – taste very similar to soft, buttery artichoke heart! Wonderful! My daughter and I ate them down with a little vegan butter . So wonderfully good. They can be easily mashed as well. We also roasted them along with other vegetables.
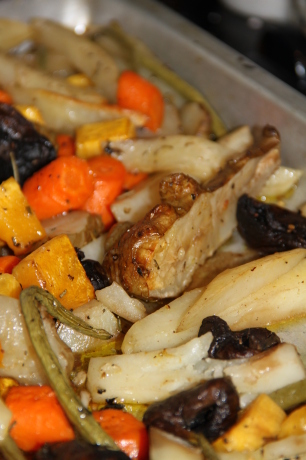
Jerusalem artichokes, carrots, beans, mushrooms, potatoes and squash are roasted with garlic, rosemary and olive oil. Yum. I mix all the veggies in olive oil with dried rosemary, minced fresh garlic and pepper, spread out on a tray and roast at 425F for about an hour, depending upon the size and thickness of the veggies. Roasting keeps them more solid yet tender, and sharpens their flavor a little. Absolutely fantastic.
I’m saving small tubers to plant ALL OVER THE YARD! What a great perennial vegetable – perennial in that you leave some tubers in the ground and they keep coming up every year. They are attractive, give shade to smaller plants, are great for attracting pollinators, create good mulch when the tops have died down, and have wonderful tubers. The tubers may be eaten raw as well; they are crisp and mild.
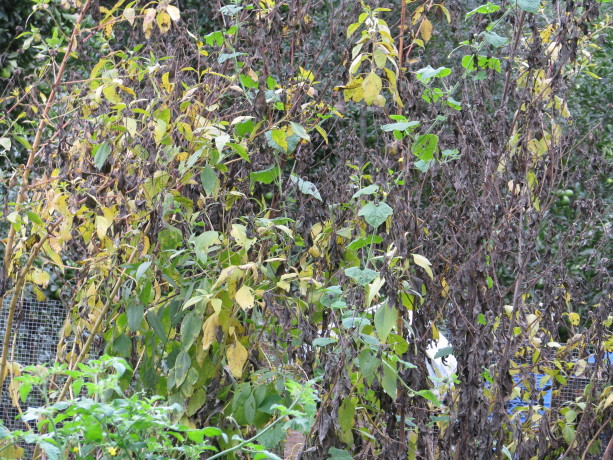
The foliage dies off in the Fall. I’ll cut the stalks at the ground level and lay them down on top of the bed to feed the soil. If you have a corner for some tall flowers, definitely try growing some organic Jerusalem artichokes. Yum.
- Animals, Bees, Birding, Building and Landscaping, Chickens, Compost, Fungus and Mushrooms, Gardening adventures, Hugelkultur, Microbes and Fungi, Natives, Natural cleaners, Other Insects, Permaculture and Edible Forest Gardening Adventures, Pets, Ponds, Predators, Quail, Rain Catching, Reptiles and Amphibians, Water Saving, Worms
Saving the Bees

The ponds at Finch Frolic Garden are cleaned by fish and plants, with no chemicals, algaecide, artificial aeration or filtration. Well-balanced water allows wildlife to thrive. I should have more accurately called this post, Saving All the Insects, or even Saving the Wildlife, because the answer to saving one is the answer to saving them all. We’ve been inundated for years – my whole lifetime, in fact, – with pleas to save our environment, stop whale slaughter, stop polluting, etc. I remember winning a poster contest in fifth grade on the subject of curtailing littering. Since Rachel Carson’s books woke people up to the hazards of DDT and how chemicals have many deadly side effects there has been a grassroots effort to stop the pollution. Since Al Gore’s An Inconvenient Truth came out the push for environmentally friendly lights, cars, LEED-certified buildings and many more positive anti-climate-change actions have grown furiously. Too bad no one listened to him decades before. A drop in the economy and the radical change in weather patterns have people exploring organics, making their own clothes and foods, changing their shopping habits and thinking about what they are bringing into their homes. However, this week the World Wildlife Fund released the staggering results of a study that states that between the years 1970 and 2010, 52% of the world’s animal populations are gone. Over half. Gone. On our watch. In my lifetime. I am stunned with shame. So what about the next 40 years? Over 97% of California wetlands are already gone. There are only 3% left in Los Angeles. The Colorado River hasn’t met the ocean for decades, except briefly last year due to major earthworks. We are pumping all that water overland, open to the sun for evaporation, to treatment plants that fill it with chlorine and other chemicals, then sell it to us to spray over lawns and flush down the toilet or let run down the drain while the water heats up. It is madness. All the wildlife that depended upon the Colorado River along that stretch are gone. All the insects, the frogs, lizards, birds, mammals, etc. that need a clean drink of water no longer have access to it. The only water they can drink is usually chlorinated domestic water in ponds and bird baths. Too often this water is treated with algaecide, which claims it doesn’t hurt frogs but it does kill what the frogs feed upon. We are killing our animals with poisoned domestic water.
![dry_colorado_new[1]](http://www.vegetariat.com/wp-content/uploads/2014/10/dry_colorado_new1-613x321.jpg)
One of the largest reasons we have extinctions in North America is mismanagement of rainwater in drylands (other than polluting the waters. Poaching, over-fishing, destruction of habitat and climate change are the main reasons). We have cleared and flattened the ground, and channel rainwater off into the ocean. Look around at your streets and houses. Are they harvesting water or channeling it? Any property that is slanted is channeling water away. Any property that is level – like the bottom of swales – is harvesting water. So many properties are inundated with annual rains because there is no water harvesting above them. When you harvest water, it runs into rain catchment basins and swales instead of roaring down the hillside taking all the topsoil with it. Water becomes passive and percolates down deeply into the soil. That deep saturation draws tree roots down into the ground. The roots break up hardpan, make oxygen and nutrient channels into the dirt and produce exudates (sugars, carbohydrates and starches) through their roots to attract and feed the billions of microbes that turn your dirt into rain-holding soil. That underground plume of rainwater then slowly passes through your soil, re-enervating subterranean waterways, refilling your wells and bringing long-dry streambeds back to life. We must harvest rainwater to save our animals and plants, and consequently ourselves. We must reestablish sources of clean, unpolluted chemical-free water for animals to eat and from which to drink.
Healthy pond water is off-color due to tannins, and is filled with tiny creatures. Some such as daphnia are visible, but just like soil microbes, many aquatic creatures are microscopic. Fish and frogs feast from this level of the food chain, and these creatures make the water balanced. They eat mosquito eggs. They clean up algae. They are as vitally important as soil microbes. Oh, and 83% of the frogs are gone.
I spoke with Quentin Alexander from HiveSavers today; he performs humane bee rescue around the San Diego area and has been trying to re-queen Africanized hives with calmer European queens which will breed nicer behavior back into the bees rather than having to kill the entire hive. He has had no luck in the past two years with European queens, even those bred in California. With very little wetlands left, and those often sprayed with DEET by Vector Control, or polluted with chemical fertilizers and oils washed out of front yards, streets and driveways, these insects must resort to drinking from swimming pools and bird baths. Again, these contain highly chlorinated water. Animals are being forced to drink poison, or not drink at all.
We MUST stop using chemicals on our properties, and we MUST harvest rainwater. We MUST stop spraying well water into the air but irrigate with it in dripper form under mulch so that it is cycled back into the ground rather than evaporated. One inch of rain on one acre in one hour is 27,154 gallons of water! It is so easy to harvest rainwater – dig level-bottomed swales! Dig small ones with a trowel. Fire up the tractor and turn road ways into swales, or cross-cut vertical paths with swales that have dedicated overflows. Dig rain catchment basins to catch a flow of water. Catch water as high up on your property as you can. If you have level soil, fantastic! You have it so easy!
Make gentle swales, rain gardens, rain catchment areas and sunken gardens to catch and percolate the water. Bury old wood perpendicular to water flow – its called hugelkultur.
Please watch this six-minute video by Geoff Lawton of the Permaculture Design Institute of Australia. You need to type in your name and email, but they don’t sell your information nor do they bug you with lots of emails. Here is the link. The title is Finding An Oasis in the American Desert, and it is about the Roosevelt swales dug during the dust bowl in the desert. If nothing that I say, nor anyone else says can convince you, then please watch this and see the effectiveness of rain harvesting. We MUST do this, and now before the rains come is the time. Catch all the water that falls on your property in the soil, and try to catch the water that runs into it. If there are flood waters channeled through your property, see if you can talk to the people who own land above you about harvesting water up there. It will reduce the flooding, save topsoil and benefit everyone’s property. Work towards keeping rainwater in your soil, reducing your domestic water, and making what streambeds are left come back to life. Keep our old trees from dying by watering deeply through rain catchment. If you have a pond or swimming pool and treat it with harsh chemicals and algaecides, seek out a natural pond professional. In the San Diego – Los Angeles region there is Bob Lloyd of PuraVida Aquatics, or Jacob Hatch of Hatch Aquatics. Jacob builds natural ponds and maintains large natural waterways. Bob maintains chemical-free backyard and display ponds that are full of wildlife. He can convert your pool into a clean swimming pond where the water is filtered by plants and thus is lovely year-round, provides abundant habitat and doesn’t need chemical treatments. No chlorine to burn your skin and eyes. How great is that? He can also create a constructed wetland that cleans your greywater with plants.
There are so many simple and inexpensive ways to harvest rainwater rather than allow it to flow into the salty ocean without penetrating the soil. Please, please, please do them, and if you already have THANK YOU and gently encourage your neighbors to do the same. We must stop the habitat destruction and start to rebuild what is gone.
- Animals, Health, Hugelkultur, Microbes and Fungi, Other Insects, Permaculture and Edible Forest Gardening Adventures, Ponds, Soil, Water Saving, Worms
Microbiology For The Layman
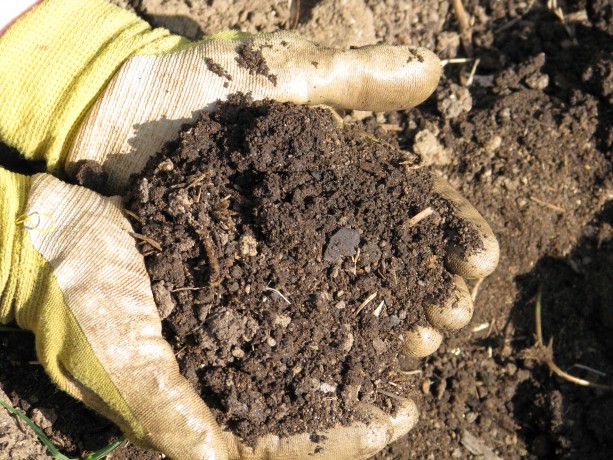 A Permaculturalist’s Explanation of How Life Works
Want to understand the microbial life in compost, in ponds and in our bodies? This lecture by microbiologist Dr. Robert Lloyd will provide you with a basic understanding of how microbes work and what they do. Fascinating and comprehensible for the layman, this talk is essential for those who want to understand more about how life works, in or out of the garden and pond.
This lecture will take place on Saturday, October 11,
4 PM – 6 PM, at beautiful Finch Frolic Garden in Fallbrook. Light homemade refreshments will be served. The fee for the lecture is $20. Please RSVP to dianeckennedy@prodigy.net. The fee can be sent to Finch Frolic Garden, 390 Vista del Indio, Fallbrook, CA 92028 (also the location of the talk).
Dr. Robert Lloyd is owner of PuraVida Aquatic.He has maintained chemical-free ponds and aquariums for 20 years. He also can convert chlorinated swimming pools to chemical-free, naturally balanced, swimmable and healthy ecosystems. (www.puravidaaquatic.com)
Please bring soil, water, or any sample you would like to examine under a microscope!
- Animals, Bees, Birding, Building and Landscaping, Chickens, Cob, Compost, Composting toilet, Fungus and Mushrooms, Gardening adventures, Giving, Health, Heirloom Plants, Hiking, Houses, Hugelkultur, Humor, Living structures, Natives, Natural cleaners, Other Insects, Permaculture and Edible Forest Gardening Adventures, Pets, Photos, Predators, Quail, Rain Catching, Recycling and Repurposing, Reptiles and Amphibians, Seeds, Soil, Vegetables, Water Saving, Worms
Special Tours for Aug. and Sept., 2014
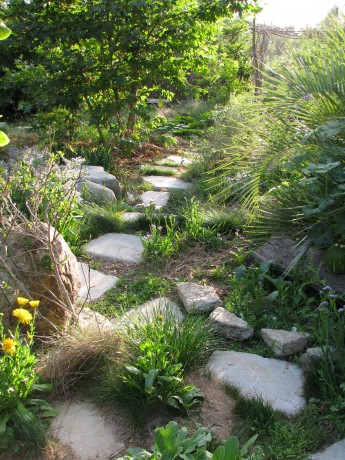
Come take a tour of a food forest! Normally tours of Finch Frolic Garden are held by appointment for groups of 5 – 15 people, Thursdays – Mondays. Cost is $10 per person and the tour lasts about two hours. By popular demand, for those who don’t have a group of five or more, we will be hosting Open Tour days for the first 15 people to sign up in August and September. They will be Sunday, August 10 and 24, Sept. 7 and 21, and Thursdays August 7 and 28, and Sept. 11 and 25. Tours begin promptly at 10 am. The tours last about two hours and are classes on basic permaculture while we tour the food forest. I ask $10 per person. Please reserve and receive directions through dianeckennedy@prodigy.net. Children under 10 are free; please, no pets. Photos but no video are allowed. Thank you for coming to visit! Diane and Miranda
- Animals, Bees, Birding, Books, Building and Landscaping, Chickens, Cob, Compost, Composting toilet, Fungus and Mushrooms, Gardening adventures, Heirloom Plants, Hugelkultur, Humor, Living structures, Natives, Natural cleaners, Other Insects, Permaculture and Edible Forest Gardening Adventures, Ponds, Predators, Quail, Rain Catching, Recycling and Repurposing, Reptiles and Amphibians, Seeds, Soil, Water Saving, Worms
Permaculture Lectures At Finch Frolic Garden, June 2014
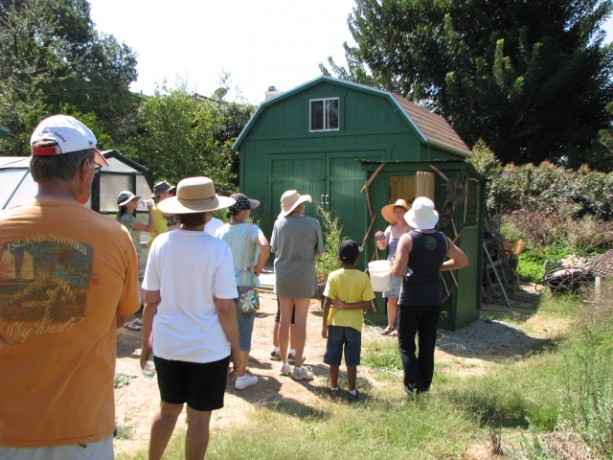
Tour Finch Frolic Garden! Permaculture Lectures in the Garden!
Learn how to work with nature and save money too
Finch Frolic Garden and Hatch Aquatics will present four fantastic, information-filled lectures in June. Join us at beautiful Finch Frolic Garden in Fallbrook, 4 pm to 6 pm, for refreshments and talks on…
Saturday, June 7: Introduction to Permaculture and Finch Frolic Tour: We’ll take you through the main precepts of permaculture and how it can be applied not only to your garden, but to yourself and your community. Then we’ll tour Finch Frolic Garden and show rain catchments, swales, plant guilds, polyculture, living buildings and so much more.
Saturday, June 14: Your Workers in the Soil and Earthworks: Learn the best methods for storing water in the soil and how to replace all your chemicals with actively aerated compost tea and compost.
Saturday, June 21: Aquaculture: You can have a natural pond – even in a tub! How natural ponds work, which plants clean water and which are good to eat. Even if you don’t want a pond, you’ll learn exciting information about bioremediation and riparian habitat.
Saturday, June 28: Wildlife in your Garden: What are all those bugs and critters and what they are doing in your yard? We’ll discuss how to live with wildlife and the best ways to attract beneficial species.
Your hosts and lecturers will be
Jacob Hatch Owner of Hatch Aquatics. With years of installing and maintaining natural ponds and waterways, and a Permaculture Design Course graduate, Jacob has installed earthworks with some of the biggest names in permaculture.
Miranda Kennedy OSU graduate of Wildlife Conservation and wildlife consultant, Miranda photographs and identifies flora and fauna and maps their roles in backyard ecosystems.
Diane Kennedy Owner of Finch Frolic Garden, lecturer, consultant, Permaculture Design Course graduate, former SDC Senior Park Ranger, Diane educates homeowners on how to save money and the environment while building their dream gardens.
Each class limit is 50 attendees, so please make pre-paid reservations soon before they fill up. Fee for set of four lectures and tour is $45 per person. Single session fee is $20 per person. Contact Diane Kennedy at dianeckennedy@prodigy.net for reservations and directions.
You will not want to miss this fascinating and useful information!
- Building and Landscaping, Compost, Fungus and Mushrooms, Gardening adventures, Heirloom Plants, Hugelkultur, Natives, Permaculture and Edible Forest Gardening Adventures, Rain Catching, Seeds, Soil, Water Saving
The Albedo Effect: How Bare Earth Causes Wild Weather
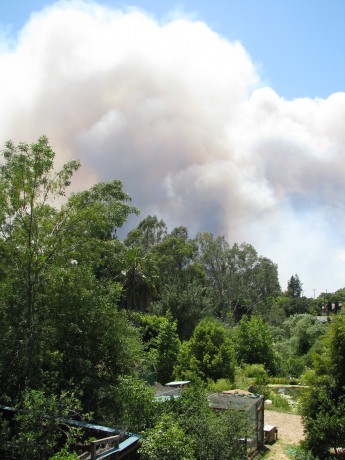
This week’s 100F+ temperatures and high Santa Ana winds have fueled three fires close to us. It is May, not October. Albedo is a reflection coefficient. In layman’s terms it is the effect that happens when sunlight is reflected off of white areas. There is the high albedo of bare earth, snow and ice, and clouds, and the low albedo of water and vegetation. There is less reflection from dark areas such as off of water and green areas, and darker areas, just like dark clothing, absorbs more heat rather than reflects it like white clothing does. There are arguments that we should cut down all the trees to increase white space to stop global warming. NO! The plant life that occupies the green spaces transpire water and excess heat into the air, causing cloud cover. Clouds, of course, insulate the earth from the sun and their albedo effect is cooling to the earth, not to mention that clouds amass moisture and – bingo – you get rain. It is the loss of green areas and the desertification of large masses of Africa, and the in-progress desertification of the already drier areas of the world (such as California) that makes the albedo effect one that is helping warm our climate. Great tracks of land now reflect light into cloudless skies; water sources dry up and plants die so transpiration disappears. The loss of air-borne water (evapotranspiration) allows areas around the desert area to also dry out. The rapid change of climate due to desertification, loss of topsoil and the resulting erosion and the melting of our ice caps (creating larger oceans and thus larger thermal masses to reflect heat) causes severe weather patterns – weather patterns that balance out huge dry desert areas with destructive rain and wind storms in other areas. Drying areas ignite… here in San Diego North County there are five fires burning as I sit, and heavy smoke and ash rain down on everything between them. My house is not threatened at this time, but we may be evacuated. So many people are evacuated right now and the highways are packed. There is another fire near San Diego, and two between here and Los Angeles. It is May – usually we have these temperatures, wild winds from the desert called Santa Ana winds, and fire threat in October. Our lack of rain doesn’t bode well for California.
My point is that to help balance nature out again, we need to hurriedly lessen the amount of reflected light in areas where we were traditionally covered by plants. We need to plant. We need to plant native plants. We need to re-green our landscapes, in each backyard and vacant lot, as quickly as we can. Allow the plants to keep moisture in the soil, to slow flooding, to transpire moisture into our atmosphere so that rain comes back to the desert areas. We need to hold what rain that falls in our soil by burying wood (hugelkultur), by creating level swales and mulching, mulching, mulching. Yet on trash day I see bags and bags of leaves set on the street ready to go to the dump. We need to stop erosion areas by using whatever means we can to keep the topsoil back. We need native trees with long roots that will hold the soil, build topsoil and transpirate.
Of course you probably can’t afford lots of plants, so plant natives that will quickly grow large. Between the slower-growing oaks, plant sages, mallows, ceanothus, quail bush and other bushes that cover 10 -15 feet of dry earth. Under them will be moisture, protected soil with mulch from their leaves, and habitat for lizards, frogs, small birds and hundreds of insects. These bushes will help shade young oaks, sycamores, and other trees and keep their trunks from scorching.
Throw down seeds of California fescue (Festuca californica var. parishii) to hold soil and cover the dry, reflective areas. This native grass is tough and doesn’t cause trouble like non-native grasses. You can seed it with California poppies, lupine and other native flowers. Aggressively weed out non-native species.
Since I was little, in the 60’s, I heard the mantra ‘plant a tree’. Obviously we haven’t been doing that. I think it should be changed to ‘plant a tree and don’t cut down any more because the earth can’t afford it’!
Please plant! And all my hope goes to you and yours who are threatened or have had losses from our severe weather.
- Animals, Compost, Fungus and Mushrooms, Gardening adventures, Permaculture and Edible Forest Gardening Adventures, Soil, Water Saving
Actively Aerated Compost Tea

Aerator, molasses, a paint strainer full of compost and a bucket of water. There are many teas for the garden. Manure tea is made by steeping… you guessed it… well-aged manure in water for several days. Well-aged is the key. Many years ago I gathered horse manure, made a tea and righteously spread it – and all the Bermuda grass seed that was in it – all over my vegetable garden. I’m still battling the grass. With fresh manure you are also brewing some nasty bacteria with which you really shouldn’t be dealing. Allowing well aged or composted manure to brew for a couple of days will produce a nice nutrient tea for your plants. There are better brews for your effort.
Plain compost tea is when you take samples of good soil and allow them to steep in water for several days and use that. This brew has some microbes and basic nutrients in it and is better than plain water for enhancing your soil and as a foliar spray.
However there is a super brew called actively aerated compost tea. It is very simple and inexpensive to make and it works wonders. There are many recipes for it, depending upon how analytical you want to become. Studying your soil under a microscope and following the advice of Dr. Elaine Ingham will give you the premium tea for your particular soil. Dr. Ingham and Dr. Carole Ann Rollins have many books out on the subject of microorganismsin the soil which are all fascinating and well worth the read; if you ever have the chance to hear Dr. Ingham speak, take it!
I don’t tinker with my tea at this time because I just don’t have the time for it. You may not, either. So this is the basic aerated compost tea recipe that will revitalize your soil:
You will need a 5-gallon bucket, a paint strainer or cheesecloth or an old sock, a fish tank aerator or air bubbler, and one or all of these: organic unsulphered molasses, organic flours, organic corn meal, kelp. I have had excellent luck with TeaLab’s Bubblesnake Compost Tea Brewer. I don’t get anything for the plug, I just found that the kit really works and is easy to buy. I purchased through AmazonSmile.
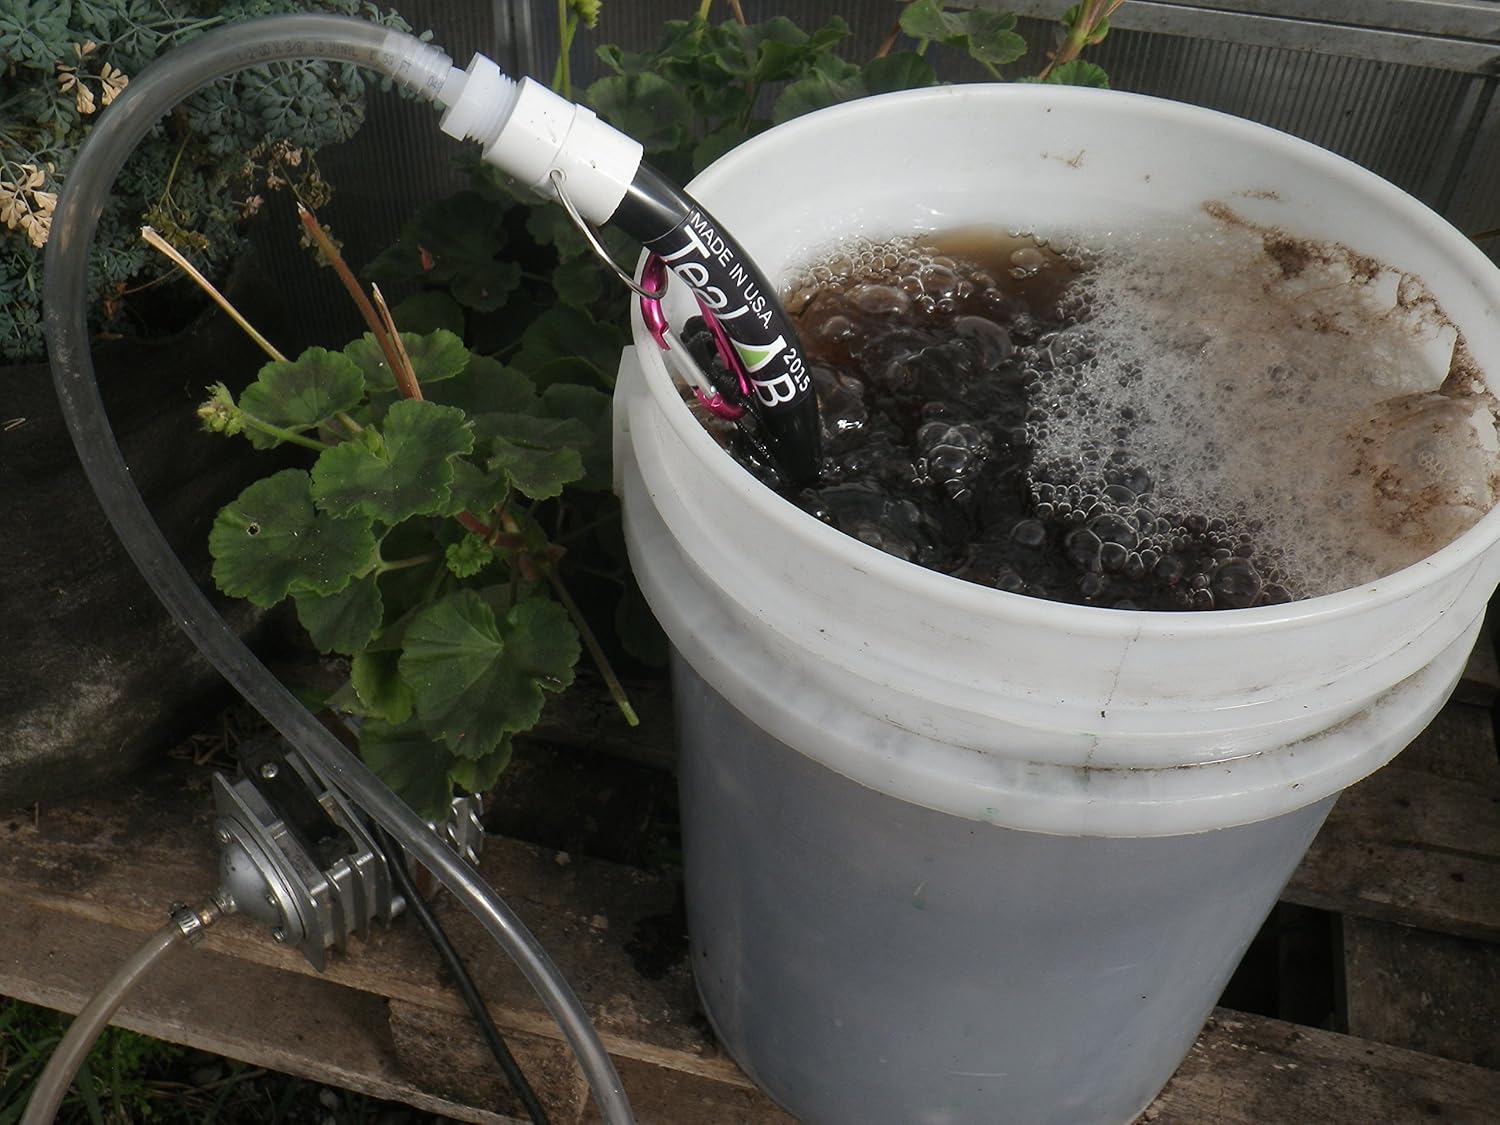
Fill the bucket with either rainwater or tapwater that has stood for at least a day for the chlorine to have evaporated.
Take the paint strainer or sock and fill it with samples of good soil from around your property. If you don’t have any good soil, then add the best you have and then take good soil from areas as close to your property as possible. If you will be using the tea on bushes and trees, then be sure to take soil from under the same. Woody plants like highly fungal soil. If you will be using the tea for annuals and veggies, then go heavy on fine, well-composted soil that is bacteria-rich. Do the best you can; you can’t go wrong unless you take soil that has been sprayed with chemicals, use treated wood chips, or anaerobic soil (you’ll smell it if you do).
Tie the top of the cloth and put it into the bucket. You may tie twine or something around it so that you can haul it out of the bucket if you’d like. This is important on larger containers, but not so much with the small bucket.
Place the aerator or bubbler in the bucket, making sure the air intake hose is clear, and plug it in.
Add about a half tablespoon of molasses. It is important that the molasses is unsulphered and organic for the same reasons that the water shouldn’t have chlorine in it or the soil any chemicals: those things will hurt the microbes that you will be growing. For growth of other microbes, add about a teaspoon of any or all of the following: organic cornmeal, organic wheat flour, liquid kelp, and if you have it tucked away in your shed, bonemeal and bloodmeal (otherwise don’t buy it specially!). So the more different foods you add, the less of each that you use. Two tablespoons of food is about all you want; don’t have a big glob of it floating in your bucket.
Allow the aerator to do its thing for about 13 hours. When its done it should look and smell like sweet tea. Use it within a couple of hours or the creatures will use up all the oxygen and it will go bad. There is much discussion about how long you brew it, etc., just as there are hundreds of stew recipes. This is the recipe taught me in my PDC and one I’ve heard elsewhere. If your tea smells bad, any hint of ammonia or ‘off’ smells, don’t apply it to your plants. You’ll be hurting them. Be sure you have good compost, fresh water and proper aeration, and don’t let it sit too long.
What you are making is not just tea, it is soil inoculant. The micororganisms in the compost will feed on the molasses and oxygen, reproducing until at about 13 hours their numbers will peak and begin dying off a little. The tea should be used within a couple of hours.
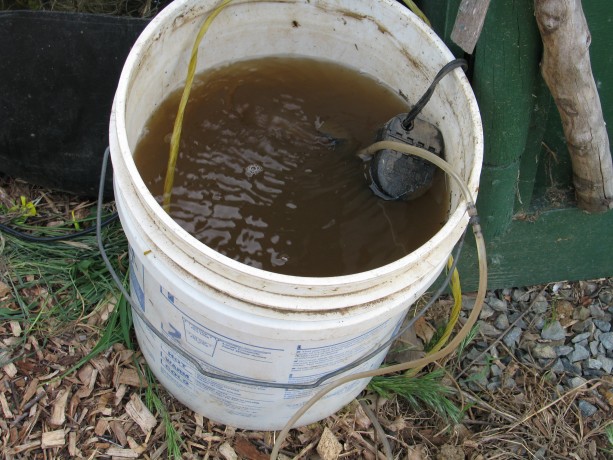
Brew the tea for 13 hours then gently apply as a soil drench or foliar spray. What this tea is doing when applied, is establishing or boosting the fungus, bacteria, amoebas, nematodes, and other soil inhabitants in your dirt, all of which are native to your particular area. If you have decent soil already, then you can use this tea 1:10 parts dechlorinated water. If you have rotten dirt, use it straight along with a topping of compost. Compost, whether it be cooked composed compost, straight leaf matter, shredded wood, logs, damp cardboard or natural fabrics, all provide shelter and hold moisture in so that your microbes have habitat. Compost, of course, is the best source of food, moisture and shelter for them.
Apply the tea with a watering can, or a sprayer that has a large opening for the nozzle if you are using the tea as a foliar spray. A squeeze-trigger bottle used for misting has too narrow an opening and will kill a lot of the little guys you have just grown.
Using the tea as a foliar spray will treat disease, fungus and nutrient deficiencies, and help protect plants against insect attack. Instead of spraying sulfur or Bordeaux solution on your trees as is preached by modern gardening books, use compost tea on the leaves and around the drip line. When applied to leaves, the plant’s exudates hold the beneficial microorganisms to the stomata or breathing holes protecting them from disease and many harmful insects. You can’t overdose with compost tea.
All the additives that are recommended to ‘improve’ your soil are bandages not solutions. Think of the billions of soft-bodied creatures living in your soil, waiting for organic matter to eat. Then think of the lime, the rock dusts, the gypsum, the sulfur, the NPK concentrated chemical fertilizers (even derived from organic sources), poured onto these creatures. It burns them, suffocates them and kills them. Your plants show some positive results to begin with because they’ve just received a dose of nutrients, both from what you applied and from the dead bodies of all those murdered microbes. However the problem still is there. The only long-term solution to locked-up nutrients in the soil, hard pan, heavy clay, sand, compaction, burned, or poisoned soil, is good microbe-filled compost. Remember that microbes turn soil into a neutral pH, and allow more collection of neutral pH rainwater. Nutrients in the soil all become available at a neutral pH; there is no such thing as an iron-deficient soil. The nutrients are just locked away from the roots because of the lack of microbes and the pH.
There are compost tea brewers of all sizes, and lots of discussion about how well they work and whether they actually kill off a lot of microbes. See Dr. Elaine Ingham’s work for discussion on different brewers. For large scale operations there are large tanks with aggressive aerators, and the tea is sprayed from the tanks from a truck bed directly on the fields. If you can’t compost your entire property, then spraying compost tea is the next best thing.
If you’d like to be more involved with the biology of your tea, see Qualitative Assessment of Microorganisms by Dr. Elaine Ingham and Dr. Carole Ann Rollins. This book has photos of different soil components as they appear under a microscope, identifying and explaining them. By studying your soil’s balance through a microscope and then tweaking your tea to compensate you’ll be making the most powerful soil inoculant you can.
