-
Recipes

Recipes over time Something my mother and myself, and to some extent my mother’s mother, had in common, is the obsessive clipping of recipes. I began as a teenager, tearing recipes from the Sunday edition, storing them in a folder. The folder changed to multiple folders, then to a two-drawer filing cabinet, topped with a stuffed basket of wonderful edible possibilities glowing from scraps of magazine pages waiting to be sorted and filed.
Upon my mother’s death, I ended up with bags and bags of recipe clippings, some of which had been my grandmother’s. I couldn’t throw them away without looking through them. First of all, there might be something hidden amongst the papers that had some personal relevance. Secondly, it is like a journey back through decades, through my mother’s married life. The innocent times, post World War, when science and convenience foods would save us all from heavy labor and devastating illnesses through better nutrition and medicines. Recipes featuring the new packaged gelatins, junket tablets, buttery cream sauces and gravies. Thirdly, the love of cooking was perhaps the only strong link between my mother and myself. With forty-two years between us in age, too much history had happened in between to make us easy with each other. My generation selfishly and unquestioningly enjoyed the product of the efforts of her generation to make the world safer, healthier and more free. She had made dresses out of her aunt’s curtains as a child; I had everything I needed, therefore acted as spoiled as I was. Yet I sat on the kitchen counter feeding vegetables through the meat grinder for holiday stuffing, learned how to tell when baked goods were done by the smell, beat up bread dough and caressed pastry. Food wasn’t just good to eat, it was how my mother fully expressed her love for her family. The hard work planning, shopping, coordinating, preparing and serving nutrionally balanced meals. I learned that from her in my own way. I raised my children vegetarian, preparing all the meals, reading labels and shopping around for the best foods, trying to keep likes and dislikes in mind, never using a microwave or food processor, but making each slice personal.

Old recipe collections Going through the bags has taken me several years. It has been hard work. Being sentimental and having always been labeled as too sensitive, I am overwhelmed in the task. I think of my mother cutting, writing, making original recipes. One for peach crisp from a yellowed scrap of a New Jersey newspaper of 1959 was clipped two years before I was born. When she had four happy children still at home, in the house she and my father built amongst the trees in Point Pleasant, which I barely remember. Four hungry mouths to feed, plus my father who loved to eat, and relatives who would drop in for a game of cards. Mom would bake cakes, make sandwiches, happily feed the crowd. She wrote a cooking column called Beth’s Secrets to help support the large family. Mom entered the Pillsbury Bakeoff and won third prize, which included a trip to San Francisco for the judging. She decided that no matter what, the family would have to move to California; she was done shoveling snow.
Then there are the recipes dated when I was in high school, in college when there was just the two of them and only three of us kids left but all grown and flown. These are the ones that hurt the most, just as the ones I clip now do, too. When in our lifetime would we ever make these? Who for? Yet she still clipped up until the end. She had mountains of magazines that she hadn’t read, and as I bundled them up to recycle she insisted I leave the cooking ones because she would still go through them. I have the same bug. I have to look, I have to clip. Then when I want a recipe, I can’t find it, or I’m in a hurry and look in one of the hundred cookbooks I inherited from her, or more commonly now, Google it.
As I finish finally the last batch of her clippings, I find I’ve gleaned a small pile from it, recipes that I may just use sometime if… if I have grandchildren, if I have more mouths to feed. For recipes are hope for the future, a happy future when people can meet over a good meal and peace can reign if not on Earth, then just for a few hours over the dinner table.
My own bag of recipes is waiting for me to sort, although I’ve been much more discriminating since living alone most of the time. I really don’t want to put my children through the same emotional wringer of sorting through bags and files, but then, maybe they would just toss them. They are of the Internet age after all. I have reached to throw the clippings and files all in the recycler but something has stopped me. Perhaps that link with my past, perhaps the love of cooking, or maybe I know in my heart that if I keep them, I haven’t given up
hope for a happy future, highlighted with family and friends around a dinner table.
-
Jook
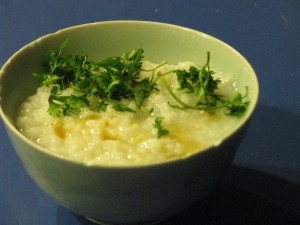
Jook with sesame oil and chopped cilantro Jook, Juk, Chinese rice soup, rice porridge, congee… these are many names for basically the same food, rice cooked with a lot of water. There are equally as many ways to fix this wonderful comfort food. Jook can be made with plain water and white or brown rice, then served with toppings such as cilantro, sesame oil, chopped peanuts, bits of cooked tofu, soy sauce, chopped hardboiled egg, preserved or cooked vegetables, chives… as little or as much as you’d like. Jook can be prepared with or without salt; I prepare mine without, then grind a little on the top when serving for that little burst of flavor. Jook can be served with cinnamon and sugar for dessert; this is especially nice for those who love rice pudding but don’t want to eat or can’t eat dairy. Commonly eaten as a savory breakfast dish, Jook is also a perfect food for when you are ill. Not only is it comforting and filling, but it is easy to eat for a sore throat, easy on a troubled stomach, nutritious, and if you are a victim of Montezuma’s Revenge (if you know what I mean), rice is very good for helping you to stop going. Ah-hem. Jook is a very good baby food for those little mouths that are just getting into semi-solids.
You can find hundreds of different versions of Jook on the Internet. Many make it with part broth, part water. Some throw in fresh ginger, some cook bones in it for added calcium. Cooking it plain allows you to top each bowl up the way you want, which is what I do. Leftover Jook can be mixed with water to loosen it up, or eaten in its more solid form. You can’t get a much easier comfort food to make that is so versatile. It is particularly good for celiacs (those who cannot eat gluten). With cooler weather upon us, make one dinner a Jook day!
JookAuthor: Diane C. KennedyRecipe type: MainPrep time:Cook time:Total time:Serves: 6-8Jook, rice porridge, rice soup or congee, is a wonderful versitile comfort food.Ingredients- 1 cup washed white rice (short or long grained depending on your taste)
- 8 cups water (if you like it thick)
- or
- 10 cups water (if you like it medium)
- or
- 12 cups water (if you like it very thin and soupy)
- optional: 1-2 tsp. salt)
- optional: substitute broth for equal parts of the water)
- optional: add a thumb-sized knob of fresh ginger)
- Topping suggestions:
- sesame oil, peanuts, fresh cilantro, chopped hardboiled egg, cooked tofu, seaweed, soy sauce, freshly ground salt and pepper, butter, cooked vegetables, pickled vegetables... leftovers. Also make it sweet with sugar, honey, cinnamon, nutmeg, dried fruit, chocolate chips!
Instructions- Put washed rice and the desired amount of water in a dutch oven
- Heat until boiling
- Turn down heat to a simmer and cook uncovered 2½ - 3 hours, depending on how thick or thin you want it.
- Serve hot in small soup bowls with choices of toppings.
-
Freezing Apples
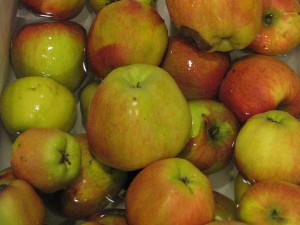 Growing your own food is marvelous. Having it all come ripe at the same time is not. My apple tree is producing well this year, and the apples need to be stored in some way. Since I don’t have a cold cellar, I need to can or freeze them. My plan was to can apple slices in either a light water and sugar mixture, or make Pie-In-A-Jar pie filling. However, two days of 101 degree heat took the wind out of my sails, and used up the time I had allotted for canning. The apples, however, are still there. So I froze them instead, which is probably the better solution because it doesn’t add any sweetener ahead of time.
Another good time saver if you are keeping apples for pies, is to make the apple pie filling, pour it into a pie pan and freeze it. After freezing, slip it out and into a freezer bag. When it comes time to bake, make the crust (which you actually can do ahead of time and freeze separately as well) and slip in the frozen pie filling. Add baking time.
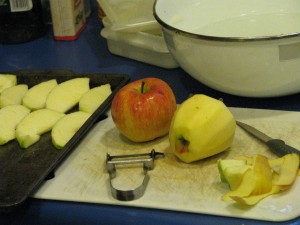
The best apple peeler I’ve ever had was purchased at the Del Mar Fair many years ago and given to me as a gift. It is easy to hold (I have arthritis) and I can zip through peel like nobody’s business. I know that design (in photo) is sold elsewhere, so don’t wait for the Fair.
Freezing ApplesAuthor: Diane KennedyRecipe type: Side dish or dessertPrep time:Total time:Freezing ripe apples allows you to have easy, ready-to-use apple slices whenever you want.Ingredients- Apples
- A bowl full of cold water
- A lime or lemon, or a teaspoon of apple cider vinegar
- cookie sheets that fit into your freezer
- Freezer bags
Instructions- Add the juice of a lime or small lemon, or the vinegar, to the bowl of water.
- Wash the apples.
- Peel several apples and drop them into the water to keep from browning.
- When bowl is full, slice apples into wedges that would be appropriate for pie, and drop the slices into the water.
- Place dipped slices onto a cookie sheet so that they don't overlap.
- Freeze cookie sheet with apples (about 20 - 30 minutes).
- Remove apples from sheet, place in marked freezer bag, flatten and squeeze out extra air, and place flat in freezer so that the bags can be stacked.
- Keeps for about a year.
-
Heavenly Steamed Eggplant
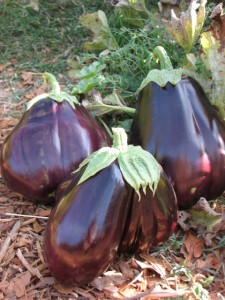
Black Beauty eggplant I love eggplant, but always thought it had to be salted, pressed and fried or baked. Cookbooks always talk about bitter juices that need to be leeched out. The recipe for Coucharas (see recipe list) calls for steaming eggplant until it is very soft so that the pulp can be mashed and combined with other ingredients.
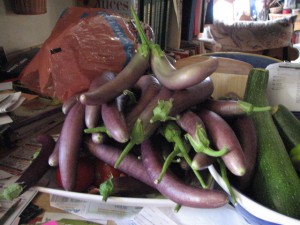
Japanese or Chinese (long) eggplants have few seeds Now with an abundance of eggplant, both Black Beauty and Japanese, in my garden, I looked for some simple eggplant recipes. Maybe everyone else in the world knows how incredible lightly steamed eggplant is, but I just found out!

Choose glossy, firm eggplants I took a Black Beauty (globe) eggplant that I’d harvested the week before and was beginning to go soft, cut off the stem end and quartered it lengthwise. I steamed the slices for 8 minutes (no more than 10!).
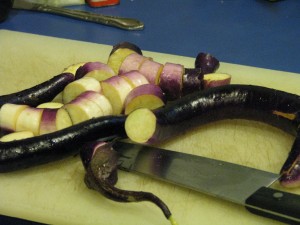
Slice long eggplants into bite-sized chunks The texture was silky and smooth, not at all bitter and incredibly light. Over the top of the quarters I spooned a very easy sauce. The eggplant, which is notoriously spongy, soaked up the sauce. Slicing the eggplant, skin and all, was a dream and eating it was sublime.
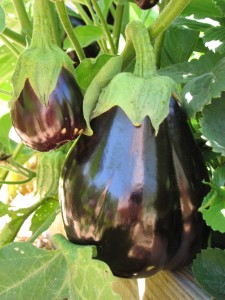
Eggplant is in the same family as tomatoes and potatoes It was so good in fact that I did the same with Japanese eggplant the next night, but instead of quartering them, I cut them into bite-sized chunks, then after steaming poured the sauce over them in a bowl and stirred them around to absorb the sauce. I served both with very thin noodles. Photos of cooked eggplant are rarely delicious-looking, so you’ll have to let your imagination guide you.
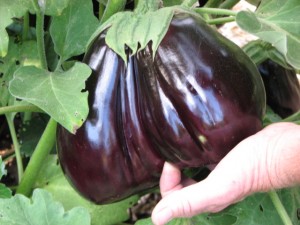
An enormous double eggplant! There are many sauce mixtures on the Internet, but here is mine:
Heavenly Steamed EggplantAuthor: Diane KennedyRecipe type: Main DishPrep time:Cook time:Total time:Serves: 2-4Quick, light, tasty, low-calorie and wonderfully different, this eggplant recipe is a gem.Ingredients- One large Black Beauty eggplant or 3 Japanese eggplants
- 2 Tablespoons Rice Wine Vinegar (or other mild vinegar)
- ⅛th cup Bragg's Amino Acids, Tamari Sauce or low-salt soy sauce
- ¼ teaspoon sesame oil
- 2 Tablespoons olive oil
- ½ teaspoon grated fresh ginger
- If you like garlic, dice or grate a small clove and add it in. You can also include chili paste to taste.
- Fresh cilantro (optional)
- Toasted sesame seeds (optonal)
Instructions- Cut stem end(s) off the eggplant
- If using one large eggplant, cut it into quarters long-wise from end-to-end. If using long eggplant, cut into ¾" - 1" bite-sized chunks. Do not peel.
- Steam eggplant for 8-10 minutes until a knife easily slides into the skin; do not overcook!
- Meanwhile, mix all sauce ingredients except cilantro or sesame seeds, if using.
- Plate the eggplant quarters and drizzle the sauce over the top slowly so it absorbs, or put chunks in bowl and mix with sauce, then plate. Offer extra sauce separately.
- Sprinkle with fresh, chopped cilantro and/or toasted sesame seeds.
- Very good with noodles or rice.
- Heirloom Plants, Permaculture and Edible Forest Gardening Adventures, Ponds, Recipes, Vegetables, Vegetarian
Cucharas

- Cucharas served with hot rice and homemade dill pickle.
Cucharas is one of my favorite eggplant dishes. With several huge Black Beauty eggplants ready to eat, it is time to make these treats. There are several steps, but none of them difficult. The eggplant doesn’t need to be salted or oiled, and the result is tasty hot or as leftovers. It doesn’t taste particularly eggplanty, so for those who don’t think they like eggplant, they may want to try this recipe.
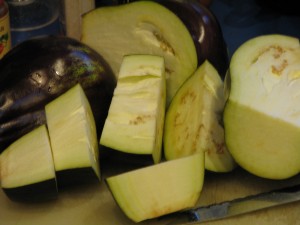
- Halve, then quarter the eggplant.
The word ‘cuchara’ in Spanish means spoon or scoop. The eggplant ‘flesh’ is cooked then gently stripped away from the skins, which are reserved. The insides are then mashed with yummy ingredients and then plopped back on the skins, then baked. The process is very forgiving, so if the skins tear, it is okay. It all sticks together with filling in the end.
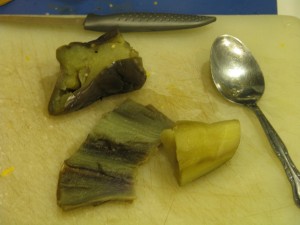
- Scoop out the ‘flesh’ from the cooled skin, and save the skins.
If you are using larger eggplants, then when filling the skin, just cut them in half. The cucharas should be either small enough to be picked up and eaten out of hand, or eaten with a fork.

- Cucharas make great finger – food as an appetizer.
The original recipe is from Sundays at Moosewood Cookbook.
CucharasAuthor: Diane C Kennedy (From Sundays at Moosewood Cookbook)Recipe type: Main dish or appetizerPrep time:Cook time:Total time:Serves: 16 coucharasIngredients- 2 medium eggplants with smooth skin
- 3 garlic cloves, minced
- 3 eggs beaten
- 2½ cups grated cheddar cheese
- ½ cup grated Romano cheese
- ¼ cup matzo meal or bread crumbs
- 2 Tablespoons olive oil
- salt and freshly ground pepper to taste
- freshly grated nutmeg
Instructions- Stem the eggplants and cut each in half lengthwise.
- Cut each half crosswise into four pieces.
- In a covered suacepan, simmer the eggplant chunks in water to cover for 15 minutes until pulp is tender.
- Drain the eggplant in a colander and set them aside to cool.
- Whjen you can comfortably handle the eggplant, use a teaspoon to separate the pulp from the skins, taking care not to tear the rectangles of skin.
- Reserve the skins. Should any tear apart, save them anyway because you can overlap two torn pieced to form a single iece and the filling will hold them together.
- In a bowl, vigorously mash the eggplant pulp with the garlic, or use a food processor or blender.
- Mix in the remaining ingredients, except for ½ cup cheddar cheese and nutmeg, and combine thoroughly. Add more matzo meal if the mixture seems too thin.
- Place a skin, shiny side down, in the palm of your hand.
- Mound it with the eggplant mixture about an inch thick.
- Place it on a well-oiled baking sheet. Continue until all the skins and mixture are used.
- Sprinkle a little of the reserved cheddar and a bit of nutmeg onto each couchara.
- Bake 350 degrees F for 20 minutes or until golden brown on top.
- The preparation can be done ahead of time and the coucharas baked just before serving.
-
Dill Pickles

Try to keep uniform sizes in each jar Last year I planted regular cucumbers, and my daughter and I decided to try our hand at making pickles. We tried several recipes, and the results were okay but not fantastic. The pickles were kind of… flabby.

Sterilize jars and lids while simmering brine This year I planted pickling cucumbers, and they came in last month with the idea to outstrip even the zucchini plant. Trying to find the cucumbers which were cleverly hidden and camouflaged, before they grew too long, became a game. When we had enough, we made pickles. I wanted a recipe that didn’t have too much garlic, and used cider vinegar, which is healthier than white distilled (grain) vinegar. Most recipes called for white wine vinegar, but that was very hard to find and only sold in small expensive bottles. Red wine vinegar, however, I could find in a gallon, but it would have discolored the pickles to an unappetizing greyish red, and just wouldn’t have had the right flavor. Cider vinegar was inexpensive, easy to find and has the ‘mother’ in it, which is that strandy thing that is suspended in the bottle. That is live yeasty stuff that makes the vinegar what it is, and what makes it more healthy. You should use vinegar that has at least 8% acidity, to keep the pickles from spoiling. Also make sure all the cucumbers are covered with brine or they’ll spoil, especially after opening the jar.

Use fresh whenever possible Pickling cucumbers make all the difference. They are smaller at maturity and don’t have as many seeds, and are more crisp. Recipes wanted the cucumbers to be pickled within 24 hours of being picked. You’d have to have twenty plants to have enough cucumbers to pickle in quantity all at once, and then you’d be pickling twice a week. I kept ours in the refrigerator until we had enough, with some loss of crispness but that couldn’t be avoided. I had planted some dill, but not enough and not early enough for the recipe. It calls for the seed head, but I used dried dill instead since mine weren’t in bloom yet. We also put a grape leaf at the bottom of each jar because the tannin is supposed to help keep the pickles crisp. Many old fashioned recipes call for the addition of alum for that purpose; aluminum has been linked to Alzheimer’s, so finding and adding alum is a personal choice. I learned that you must cut off the blossom end of the cucumber because it has enzymes that will cause the cucumber to rot. That is nature’s way of making sure the seeds are dispersed, but doesn’t help with pickling. Larger cucumbers should be cut into disks or slices and pickled. If the cucumbers are yellowish and seedy, don’t pickle them. They are too old.

Grape leaf, garlic, dill and pickling spice in sterlized, hot jars Use wide-mouth jars if you have them. I don’t, and stuffing the cucumbers into the jar would have been a lot easier if I had.

The best gadget ever for picking up hot jars No recipes tell you when you they are done. I read where a ‘freshly’ canned food was put up in the last two years. We tried ours after 5 weeks and they were very good.

Sterilize jars and lids while simmering brine The origins of this recipe is the Ortho Complete Book of Canning, but I have tweaked it. I hope you like it: many happy pickles to you.

Pour hot brine over cucumbers Fresh-Pack Dill PicklesAuthor: Diane C. KennedyRecipe type: CondimentServes: Lots!A wonderful dill pickle recipe; not too garlicky, not too sour or salty, but with excellent flavor and bite.Ingredients- 3 quarts water
- 1 quart cider vinegar
- ½ cup pickling salt
- 1 fresh grape leaf per quart (optional)
- 1 head fresh dill per quart, or ½ teaspoon dried dill weed each quart
- ½ teaspoon mixed pickling spice per quart
- 1 clove garlic, peeled and halved, per quart
- 5 pounds small pickling cucumbers less than 4 inches long, washed and blossom ends removed
- 4-7 quart wide-mouth canning jars and lids, sterilized and kept hot
Instructions- Combine water, vinegar and salt in a pot and allow to simmer
- Place grape leaves, dill, garlic and pickling spice in the bottom of each clean, hot quart jar
- Pack in cucumbers without breaking or bruising them. (It is best to do one jar at a time so that jars and contents remain hot)
- Pour simmering vinegar solution over cucumbers, leaving ½ inch headspace from top of jar; run a spatula around the inside to release air.
- Wipe mouths of jars and seal with lids.
- Process in boiling water bath with water an inch over the jars, for twenty minutes
- Cool, label and store the jars in a dark place.
- Yields about 4 quarts, although we made 7.
- Try after five weeks and store in refrigerator after opening.

Label with a date! -
Herb-Fresh Tomato Soup
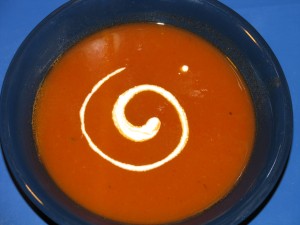
Soup with a swirl This recipe I copied from a newspaper when I was a teenager, and embellished on over the years. The dollop of whipped cream on top always appealed to me. It makes a very satisfying tomato soup. It is a good way to use an abundance of tomatoes. The key to the great flavor is to use low-acid tomatoes, and fresh basil and thyme. Of course, you can substitute canned tomatoes and dried herbs as well; if you do that, you can just blend up the cooked soup at the end. I have a lot of yellow tomatoes, which are not high-acid. I had an idea of making a golden tomato soup, but the tomato paste in the recipe turned the soup red, of course. I entertained ideas about making a tomato paste from yellow tomatoes, but I’m not sure I’m that ambitious.
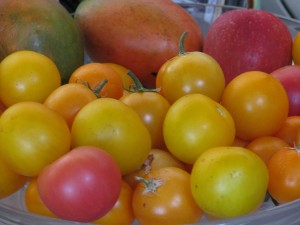
A bowl full of color (those are mangos in the back!) There are two ways of making this soup from fresh tomatoes, both of which incur a little extra effort. The first is to blanch then peel the tomatoes, and squeeze out the seeds. Then after the soup is cooked you can just puree the soup in a blender. This makes a little thicker soup. The other way is to quarter the whole tomatoes and cook, then at the end turn the soup through a food mill, and strain out the seeds. This soup is a little thinner. You don’t want to blend up the seeds and peel or the soup will be bitter. Both ways make a fresh, tasty soup that can be served hot or cold, and is great with cheesy croutons or sandwiches.
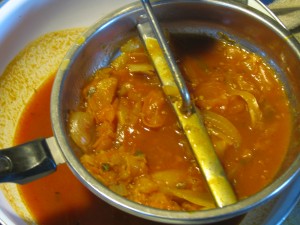
Press through a food mill The dollop of whipped cream can become a drizzle, or be eliminated. If you’d rather have a cream of tomato soup, then add more milk or cream to the soup and gently heat (but not boil) and then serve.
Below is the recipe for the food mill method.
Herb-Fresh Tomato SoupAuthor: Diane C. KennedyRecipe type: SoupPrep time:Cook time:Total time:Serves: 6A garden-fresh tomato soup that sings of summer. This soup should accompany a sandwich, salad, or be the first course of a larger dinner.Ingredients- 2 T butter
- 2 T olive oil
- 2 medium onions, thinly sliced
- 2 pounds fresh (low acid, if possible) tomatoes, quartered (about 5 cups)
- 1 6 oz can tomato paste
- 2 T snipped fresh basil (or 2 teaspoons dried crushed)
- 4 teaspoons snipped fresh thyme (or 1 teaspoon dried crushed)
- 3 cups vegetable broth
- 1 T cooking sherry, red wine or Tequila (optional)
- 1 teaspoon brown sugar (optional)
- 1 teaspoon salt
- ⅛ teaspoon pepper
- Dollop of unsweetened whipped cream (if desired)
Instructions- In a large saucepan, combine butter and oil and heat until butter melts.
- Add onion; cook until tender but not brown.
- Stir in tomatoes, paste, basil, thyme, sugar and alcohol (if using).
- Mash tomatoes slightly.
- Add vegetable broth.
- When boiling, reduce heat, cover and simmer 40 minutes.
- Press through food mill.
- Strain.
- Return mixture to saucepan.
- Stir in salt and pepper (to taste).
- Reheat and serve with a dollop or drizzle of cream and a sprinkling of herbs on top.
-
Candying Kumquats
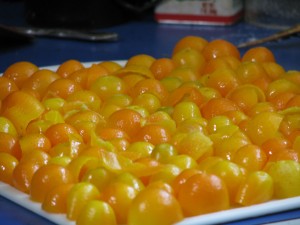
An army of kumquat halves We have two small but prolific kumquat trees. Kumquats are very small citrus that are tart and sweet at the same time, and you eat the skin and all whole. Kind of scary. Not wanting to waste food, my daughter picked a whole batch of them and was determined to juice them. And she did, one tiny half at a time! There was about half a cup of juice in all, which she froze in plastic butter molds for future use in drinks, etc.
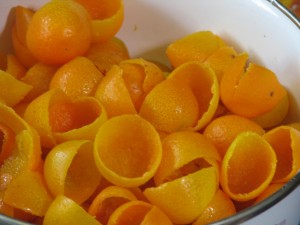
De-pithed kumquat shells Then we had all these little half shells, so she carefully scraped the pith out of all of them and candied them. The idea was to make little candied shells in which we’d put little scoops of vanilla ice cream, lemon sherbet, or something yum. We tried a couple with homemade vanilla ice cream, and it was worth all the work.
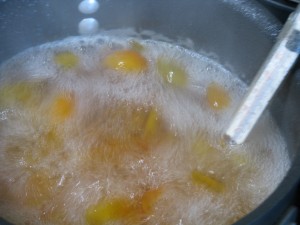
Cooking kumquats in simple syrup The kumquats needed to dry round, like little bowls, so I picked some more kumquats (yes, there are still more!), halved them and used them as molds for the shells, which were put onto the halves like little hats.

Using kumquat halves as molds for shells All the split ones were set aside, and then everything was sugared and dried. Several years ago we candied orange and lemon peel and I pulled some out of the bags now and then for use in baked goods. Now we have candied kumquat peels and shells.

Sugaring the peels and letting them dry But we still had all those kumquat halves that we’d used as molds. We also had half a saucepan of simple syrup in which the kumquats had been cooked. So, not wanting to waste, we put the kumquat halves into the syrup and boiled it again until the halves were candied and then I put them in jars and sealed them. I’m not sure what I’m going to do with them, but they can be used to decorate desserts.
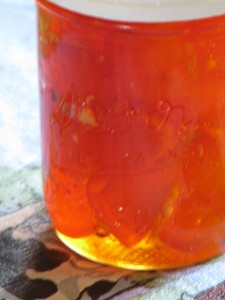
Candied kumquat preserves in syrup I also had another ginger beer recipe that called for slicing the ginger, cooking the slices in a sugar and water mixture until reduced, then using the liquid as a base for a ginger drink. The slices could then be sugared and dried and eaten. I keep candied ginger from Trader Joe’s in the car to snack on, because ginger helps with car sickness or an upset stomach. These homemade ginger slices were quite hot, so I think I’ll save them to use in cakes and pies instead.
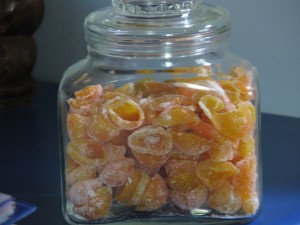
Stored candied kumquat shells and peels So it was a day of sugaring, preserving and messing about in the kitchen. We now have seven quarts of pickles, a couple of bags of dried kale that is not only good to munch on, but great to crumble over rice or noodles, jars of candied kumquats, a jar of sugared kumquat peel, a bag of candied ginger slices, some miscellaneous jam, and lots of zucchini with more to come!
-
Freestyle Peach and Apricot Tart
Freestyle Peach and Apricot TartAuthor: Diane C. KennedyRecipe type: DessertPrep time:Cook time:Total time:Serves: 8A handsome, rustic dessert that is easier to make than a regular pie or tart, and delicious, too!Ingredients- For Pastry:
- ½ cup cold unsalted butter
- 1¼ cups all-purpose flour
- ½ teaspoon cinnamon
- 1 beaten egg yolk
- 2-3 tablespoons ice water
- For Filling:
- ¼ cup granulated sugar
- 4 teaspoons all-purpose flour
- ¼ teaspoon freshly ground nutmeg
- 3 cups total sliced, peeled peaches and apricots
- 1 tablespoon lemon juice
- 1 beaten egg
- Powdered sugar
Instructions- For Pastry:
- In a mixing bowl cut butter into flour with a pastry blender until pieces are small pea-sized.
- Stir together egg yolk and 1 tablespoon of the ice water
- Graually fold egg yolk mixture into flour mixture.
- Using a fork, gently toss rest of ice water one tablespoon at a time into flour mixture, till all the dough is moistened.
- Gently press together dough until you can form a ball.
- If necessary, cover dough with plastic wrap and refrigerate for ½ an hour or more until the dough is easy to handle.
- Line a baking sheet with aluminum foil and sprinkle it lightly with flour.
- Place the dough in the middle and roll to a 13-inch circle; a chilled rolling pin will help with this, or lightly dusting the top of the dough with flour (don't overdo!).
- For Filling:
- Mix together granulated sugar, flour and nutmeg, then stir in fruit and lemon juice.
- Mound fruit mixture in the center of the crust, leaving a 2-inch border.
- Fold border up over fruit in an artsy, farmhouse sort of way, leaving the middle exposed.
- Combine the egg and 1 tablespoon water and use it to brush onto the top and sides of crust for browning.
- Bake in a 375F oven for 40-45 minutes until crust is golden and fruit is bubbling.
- To prevent overbrowning, you can cover the edge with foil for the last 10 minutes of baking.
- Cool 30 minutes on the baking sheet.
- Dust edges with powdered sugar, if desired.
- Serve as is, or with vanilla ice cream or whipped cream.
-
Roasted Radishes, or What Not to Bring to a Party

Radishes About to be Roasted I don’t have much luck bringing food to events. When I need to bring food to a party, I seem to have some strong internal drive to fix the most inappropriate thing, and go through agonies to make it. Some mischievous elf in my head sends down strange images to my consciousness telling me what to make as soon as I volunteer. The food is good…. it is usually a recipe that I’ve made before and think is interesting and different. I’ve brought cornbread made with blue cornmeal to picnics, and people have shunned it thinking it was blueberry flavored, or an ugly homemade unfrosted cake, and gone on to the easily recognizable chain-store brand cookies lined up in a clamshell container.
When asked to bring a cake, I make some complicated thing that never looks as good as the picture in my head. My cakes are very tasty, but my decorating skills are, shall we say, possible candidates for cakewrecks.com. I’ve done a cake for a grand opening of a park where I simulated a pond with cattails made of broken pretzel sticks, or that is what it was supposed to look like. I made not one but three types of jelly roll cake with three different fillings for a bridal shower, and the day was so hot that the cakes kept sticking and sliding and I had to keep running up and down the stairs to the garage refrigerator to chill them. I actually sat down and cried because I was so frustrated and had spent the entire day baking in a heat wave with a mess to show for it. I ended up arranging the individual cakes in a flower shape and sprinkled dried rose buds and edible glitter around. It looked pretty, if amateurish, but I knew they’d taste wonderful. It was so hot in the car I thought I would be redecorating my Prius with homemade lemon curd and chocolate filling. I had to stick the large pan in the surprised hostess’s refrigerator, which took up a lot of space. Then when it was cake time, I found that the jelly rolls had already been sliced up and plated so that you couldn’t tell the flavors apart and all the rosebuds thrown out, without the bride-to-be or anyone else even seeing it. I could have just made a sheet cake and everyone would have been happy.
I’ve brought vegetarian main dishes that no one but my children and I seem to want to eat, even though they aren’t creepy tofu-y mock turkeys or anything. Labeling a dish ‘vegetarian’ is like putting a curse on it, although many dishes other people bring don’t have meat in them either. To be ‘vegetarian’ means scary, weird food of unknown origin that probably tastes like sprouts or tofu or whole wheat.
I know when my offerings are rejected, it isn’t really the food… the food tastes good. That is, if anyone dares eat it. It is just out of place, just as I am at most parties. My food and I belong at small gatherings of friends who are expecting a new experience. Who want to try something different and talk about it. Who enjoy subtleties of flavor and the goodness of fresh herbs and spices. Who don’t judge on how good a dish appears, but how it tastes. Who are forgiving and especially have a good sense of humor.
Which brings me to another example of something not to bring to most parties: roasted radishes. Especially to one where there is a lot of drinking going on. Everyone will wonder what they are and no one will touch them because there is perfectly predictable Albertsons layered nacho dip and bagged chips right next to them. Since roasted radishes aren’t the prettiest looking things, they will be the last edible thing on the buffet table besides the really, really cheap half-finished bag of corn chips, and when everyone is really, really drunk, some unpleasant personal comments might be said about their appearance. The radishes will be cold and soggy by that time, too, and not the best thing for someone with a lot of alcohol in his or her system to put into his or her mouth at that point. However, if served at home as an interesting appetizer along with something less scary-looking, these are just great. No, really, they are. You should try them. I was impressed enough to try to force them on strangers at someone’s home, so you should be, too.

Roasted Radishes dressed up for a party Growing radishes is very easy and quick, and roasting them gives you something to do with them. Radishes only take a few weeks to mature, so they are often the first thing up and ready in the garden. Give this recipe a try the next time you roast veggies; many people who don’t really like radishes enjoy them this way.
Roasted RadishesAuthor: Diane C. KennedyRecipe type: Side DishPrep time:Cook time:Total time:Roasting radishes changes their flavor and texture to something new and delightful.Ingredients- Three bunches radishes, preferable different colors if you can find them
- Three tablespoons extra virgin olive oil
- ½ teaspoon dried thyme leaves
- ⅛th teaspoon cayenne
- Freshly ground black pepper
- Coarse salt
Instructions- Preheat oven to 425 F.
- Wash radishes and cut all but a little tuft of radish leaves off of each radish. Don't cut off the roots.
- In a medium bowl whisk oil, thyme, cayenne and black pepper.
- Add radishes and toss to coat.
- Pour radishes onto a flat baking pan and drizzle with any remaining oil mixture.
- Roast 40 - 50 minutes, turning once midway through roasting, until a knife easily slides into a radish and they are lightly browned.
- Sprinkle or grind coarse salt over the tops.
- Serve immediately.