-
Lavender Cookies with Rose Water Drizzle

This is not the everyday, lunchbox type of cookie. This is the cookie you put a sign next to with the name on it, and listen to the oohs and ahhs and hmmms when it is sampled. These coconut keto cookies are buttery and with no added extract have a very light lavender flavor. The rose water icing and coconut oil should be added sparingly; it is better even to make the icing the day before to let the rose fragrance mellow some. You don’t want cookies that taste like hand lotion.
That said, these are fun to make, smell great, taste good, and are perfect for teatime or to bring to a ladie’s function. Don’t forget the sign.
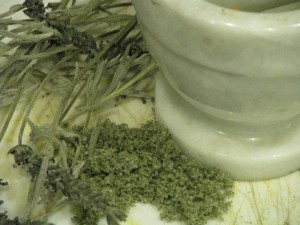
Most lavender recipes require dried blossom. This recipe calls for dried leaves. If you don’t have dried leaves, you can set a few sprigs in the sunshine on a hot day, or dry them at lowest temperature in the oven or toaster oven. My toaster oven has a ‘dehydrate’ setting, and it did an admirable job drying some fresh sprigs. You don’t want nasty bits of leaf in your cookie. Use a mortar and pestle to grind up the dried leaves. The result should be like fluff. Yep. It doesn’t powder, it fluffs.
Rose water can be found at International markets, some grocery stores, many liquer stores, or online. If you can’t find it, or just don’t like the smell or taste of rose, then leave the icing unflavored, or add a drop of vanilla.
 Lavender Cookies with Rose Water DrizzleAuthor: Diane C. KennedyRecipe type: DessertPrep time:Cook time:Total time:Serves: 4 dozenAn English teatime-type cookie.Ingredients
- ½ cup butter, softened
- 1 cup sugar
- 2 eggs
- 2 teaspoons lavender, crushed until fluffy
- 1½ cups flour
- 2 teaspoons baking powder
- ¼ teaspoon salt
- For icing:
- 2 cups powdered sugar, sifted
- 5 - 6 teaspoons water
- 6 teaspoons (or less... try it!) rose water
Instructions- Preheat oven to 375 degrees F.
- In a medium bowl, cream together the butter and sugar.
- Add the eggs.
- Add lavender, flour, baking powder and salt.
- Drop by small teaspoonfuls onto an ungreased cookie sheet. Leave space between for spreading.
- Bake 10 -12 minutes, until edges begin to turn brown.
- Cool on racks.
- To prepare icing, mix the powdered sugar with water and rose water until it has a nice, non-globby drizzly consistency.
- Drizzle over cooled cookies.
-
A Painless Breakfast, and a Bombilla

I'm all over this medicine! Food is the ultimate resource for health. As my body complains ever louder about all the years of abuse I’ve put it through, I’m turning to diet to help with the pain. Certain foods have anti-inflammatory properties, and they aren’t hard to eat at all. Cinnamon, turmeric, and ginger are high on the list. Cooked asparagus is excellent for kidneys and liver, and there is speculation that it cures serious illness as well. Whole eggs are much more healthy to eat than separating out the white and throwing away the yolk. The two parts compliment each other. As well great sources of protein, eggs are excellent for the eyes. The vitamin C found in fruit is an essential boost to your immune system, and helps other vitamins work better.
I also take some supplements. I take a multi-vitamin, a couple of natural menopausal relief pills, a vitamin C, and a couple of glucosamine/chondroitin tablets. G/C is a miracle supplement if you have arthritis. It helps keep the joints juicy.

Hot ginger tea; good for your tummy and good for your joints. So for mornings after a full day of weeding, carrying, hauling, flinging, and planting, I need everything I can get to help get my hands and back moving again. My ideal painless breakfast is: an egg from one of my hens, sprinkled with a turmeric and pepper combination (pepper is supposed to aid turmeric), some Trader Joe’s frozen grilled asparagus, heated, a piece of toast liberally sprinkled with cinnamon and coated with organic (sometimes home-harvested) honey, orange juice and a hot cup of ginger tea. I keep a small white container of cinnamon on the table, as well as a small bowl of the turmeric and pepper combination. That way I don’t forget to sprinkle it on my food. Inflammation is the source of almost all illness. If you can fight inflammation naturally, you’ll be a long way ahead health-wise. You’ll be relieved from pain that you never knew you had!

Bombilla I considered giving the bombilla its own post, but it was in the breakfast photo so I’ll talk about this wonderous gadget here. A bombilla is a metal or bamboo straw with a strainer on the end. Ingenious! Common in South America, it is commonly associated with the drinking of the new old fad tea yerba mate. However, to my delight it works perfectly with loose leaf and herbal teas! Instead of snapping and screwing and pressing tea strainers, I just put loose tea in my cup, brew it and drink it via the bombilla! So easy! Afterwards I scoop the spent tea into the compost, rinse the cup and the bombilla, and its good to go for the next batch. Loose leaf tea is such a better experience than using tea bags. With the bombilla, I now have herbal or loose leaf tea almost every time. Bombillas have transformed my drinking experience! I believe they are available at international marketplaces, but I bought mine online at Amazon.com. I bought two for me and my daughter, who took hers to college, and another as a gift for my son, and then two more as extras at home. Never can have enough bombillas! What a concept! A perfect drinking implement! My life will never be the same. Better still, I can now sip hot tea without losing my place in my book, or steaming up my glasses!
-
What To Do With Grapefruit
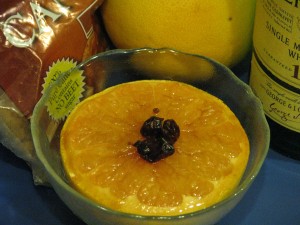
Grapefruit, all grown up. Every once in awhile someone gives me a grapefruit. One or two a year are just about all I can eat. Its not that I don’t like grapefruit. I certainly respect it. It is high is vitamin C and is supposed to be a good diet food. I think that is probably because it is so sour and bitter – even the pink kind – that you can’t taste anything else for hours after eating one.
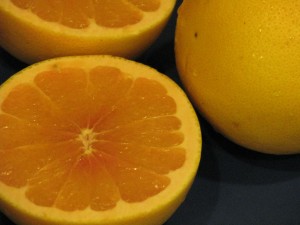
Bare naked grapefruit. My mother would serve us grapefruit halves. She had a set of grapefruit spoons I always coveted that had serrated edges, but they disappeared at some point and I’ve never seen any like them. The sharp edges would allow you to dig out the grapefruit sections without actually arm-wrestling with the fruit. She’d also often ‘section’ the halves, using a paring knife to cut each section free so that all we had to do was scoop them out. She left little reason for us to not eat them. Of course, not eating my mother’s cooking was unheard of anyway.

If you section the grapefruit first, you could probably get more whiskey in there. To make grapefruit much more appealing, she would doctor it up with brown sugar, whiskey and then broil it and serve it warm. Wow did that ever improve the taste! Since grapefruits are making the rounds right now, and no one else I’ve spoken with seems to have heard of this method of serving them (their ears sure perk up when I tell them, though!), I thought I’d do everyone a favor and print the recipe. The Grapefruit Diet suddenly doesn’t look so bleak.
Broiled GrapefruitAuthor: Diane C. KennedyRecipe type: SidePrep time:Cook time:Total time:Serves: 2This method of preparing grapefruit I learned from my mother, Beth Cywar, a fabulous cook and a nutritionist before her time. She also believed that food wouldn't do anyone any good if they wouldn't eat it.Ingredients- One grapefruit, cut in half widthwise.
- 1 - 2 teaspoons brown sugar
- 1 - 2 teaspoons whiskey
- A few fresh or dried berries (optional)
Instructions- You may section the grapefruit or not; your choice. Sectioning would probably allow more whiskey to seep in, and would be a little easier to eat, but it is optional.
- Place halves on foil or an oven-proof dish, or on a broiler pan.
- Start the broiler. A toaster oven works great.
- Sprinkle the grapefruit halves with the brown sugar.
- Slowly drizzle the whiskey over the halves.
- Broil until warm and slightly brown and sizzling, about ten minutes.
- Adorn with fresh or dried fruit, or if you want to be retro, a marashino cherry, and serve.
-
Passionfruit Curd
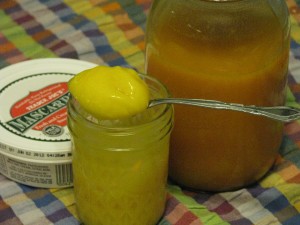
Passionfruit curd. Yum. Rather than post photos of the rabbits eating my vegetables,

or other Eastery things, I thought I’d put in a recipe that is rather exotic. If you have a passionfruit vine (the ones that produce edible fruit) you may be inundated with the fruit about now. Also the flowers were named passionflowers because of the Christian symbolism read into the shape of the flowers. I always wondered about this, but I figured that faced with ‘heathens’ who ate this aromatic, voluptuous and kind of sexy fruit, some Christian missionaries decided to put the stamp of Christianity onto the plant rather than try to ban its consumption. That’s just my theory, of course, but it makes sense. Therefore a post on passionfruit for the passion of Christ on Easter. Yep, I’m stretching it, but you’ll like the recipe.
Anyway, passionvines have abundant growth (as I mentioned in my post about building a trellis for them http://www.vegetariat.com/2012/03/questionable-carpentry/).

Gorgeous flowers. There are many colors of flowers of both the ornamental and edulis varieties. The flower has a tiny fruit all ready to go and awaiting some friendly bee to come rub herself all over the anthers and stamens (the missionaries are shuddering) and pollinate.

Looks like the fruit is wearing an Easter bonnet! Kind of. Okay, it doesn't. The fruit grows as the flower fades. There is some mother-child allusion somewhere in there but you’ll have to go there yourself.

A developing passionfruit. When the fruit is ready to fall, a good shake of the vines will make them come down. Usually they are still smooth-skinned at this point. You want to wait until the fruit starts to wrinkle before it is sweet, ripe and ready. (I’ll not touch that one at all.)

The fruit falls off still smooth... wait until it wrinkles to use Don’t eat the skin, but cut the fruit in half. Many people like to eat the seeds as well as the pulp. I’m not one of them, and neither is my daughter who very patiently sieved the insides of about 80 passionfruit to obtain the juice. I like to add the juice to tangerine juice for breakfast. We’ve also successfully made a hedonistic passionfruit ice cream that was stupendous. This time we decided to make passionfruit curd.

Wait until they're wrinkly, then scoop out the insides. I’ve posted already on how to make lemon curd (http://www.vegetariat.com/2011/03/when-life-gives-you-lemons-make-lemon-curd/). (You’re wondering, what is UP with this woman and curd, anyway?). The passionfruit curd is slightly different, but yet has that nice bite to it that doesn’t make it too sweet. I thought this curd came out tasting a little eggy, but I believe that is because we used eggs from our own spoiled hens, which have a definate healthy flavor to them. The eggs, not the hens (that we know of, nor will we find out). It was all okay, though.
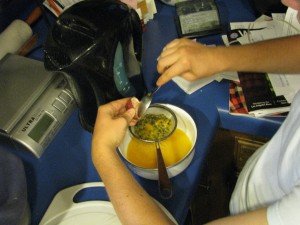
Scoop and strain. We made two half-pints, and I didn’t ‘can’ them. However you may sterilize the jars and lids, add the hot curd, and give them a 15 minute hot water bath and the curd will last for months. I still refrigerate it, just to be on the safe side.
I found the original recipe in Nigella Lawson’s How To Be A Domestic Goddess. She stirs some passionfruit seeds back into the curd, which looks nice (if you like the fish egg look to your food) and can certainly be done for all of you who enjoy the seeds. I like my curd seedless. On scones. With mascarpone cheese. Mmmm.
Happy Easter!
Passionfruit CurdAuthor: Diane C. KennedyRecipe type: SpreadPrep time:Cook time:Total time:This wonderful spread based on Nigella Lawson's recipe can be used to top baked goods, put in a pie shell, in a jelly roll cake, or used any way you would lemon curd, jam or jelly. It makes an exotic gift, too!Ingredients- 12 passionfruit
- 2 large eggs
- 2 large egg yolks
- ½ cup granulated sugar (superfine if you have it)
- 8 tablespoons unsalted (good quality) butter
- 2 sterilized ½ pint jars
Instructions- Cut the passionfruit in half and scoop out the insides into a sieve.
- With a spoon, strain the juice into a measuring cup. You should have about 10 tablespoons, or a scant ⅔ cup of juice. If you'd like seeds in the curd, reserve the pulp of the 12th one instead of straining it.
- In a bowl beat the eggs, yolks and sugar together.
- In a saucepan, melt the butter over low heat.
- Stirring continuously, add the passionfruit juice and then the sugar mixture, being careful not to cook the egg.
- Keep cooking and stirring until the mixture thickens, about five minutes. It should coat the back of the spoon.
- Take the pan off the heat. If you have reserved the pulp of that one last fruit, here is where you whisk it into the mixture.
- Pour the curd into the jars and seal.
- Store in refrigerator. Try it on scones with mascarpone cheese. Really. I mean it.
- Makes two half-pint jars full, about 1¾ cups.
-
Creamy Cauliflower Caraway Soup
The other night I had the February blahs. I was hungry, felt as if I was fighting a cold, worn out from laboring in the garden, and wanted comfort food. I had very little in the vegetable tray, but what I had was perfect for this soup. I made it that night, and I refined it tonight.
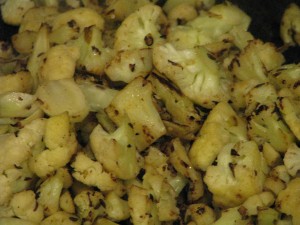
This is a healthy, low-calorie, vegan soup that is pureed smooth and silky. Two factors make this soup special. First, you almost char the cauliflower and caraway in a very hot pan until it is dark brown. I’ll call it deeply browning, because I don’t want that burnt flavor of charring. I was once served a tomato soup at the Four Season’s Resort which obviously used charred tomatoes, and it tasted so burned that I couldn’t eat it. In fact, it nauseated me, like when you really burn something on the stove and that smell is all over the house. I don’t think that that was the response they were looking for! Deeply browning the cauliflower brings out a wonderful rounded flavor (you can deeply brown the cauliflower, add a little broth and steam for a few minutes, and serve it this way as a side dish… delicious!). The caraway releases its flavor in the heat, and then becomes a very subtle note in the soup so that you really can’t distinguish it. If you would like a heavier caraway flavor, just increase the amount of seeds.
- Deeply brown the cauliflower.
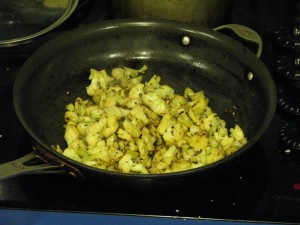
The soup is pureed and is naturally creamy with the addition of the potatoes. While the frying pan is cooling you use it to toast the salt and cayenne, again releasing and deepening the flavors. Use this as a topping, which is then stirred into the soup by the guest. This soup doesn’t take long to make and is perfect for a cool winter’s evening, and doesn’t make the house smell like cauliflower, either.

Sprinkle heated spices on top, then have guests stir in.
Creamy Cauliflower Caraway SoupAuthor: Diane C. KennedyRecipe type: EntreePrep time:Cook time:Total time:Serves: 4A creamy, low-fat vegan vegetable soup that is fast, easy and very satisfying.Ingredients- 1 shallot, chopped
- 4 tablespoons olive oil, divided
- 1 medium head cauliflower, chopped (about 4 cups)
- 1 teaspoon caraway seeds
- 1 stalk celery, chopped (about ¼ cup)
- 1 medium potato, peeled and chopped
- ½ cup dry white wine (not sweet!)
- 1 tablespoon coarse salt
- ⅛th teaspoon cayenne pepper
Instructions- In a heat-tolerant frying pan, add two tablespoons olive oil and heat on high until almost smoking.
- Add cauliflower bits (watch for splashing!), caraway seeds and stir.
- Allow cauliflower to cook between stirring so that it develops dark brown marks on it. It should smell savory but not burned.
- Meanwhile, heat other two tablespoons of olive oil in a medium saucepan.
- Stir in shallots, celery, potato and wine.
- Cook until wine is reduced to very little.
- Add cauliflower and caraway to saucepan. Don't wash the frying pan yet.
- Add broth and one can of water to saucepan.
- Cover and bring to a boil, then reduce to simmer for 30 minutes.
- In the cooling frying pan, stir together the cayenne pepper and salt and let it darken without burning. Keep in reserve.
- When soup is done, blend it until it is smooth, and caraway is as fine as your blender or VitaMix can make it.
- Pour back into saucepan and check for seasoning.
- Ladle into bowls.
- With a spoon (not your fingers... cayenne gets everywhere!) sprinkle some of the cayenne and salt mixture onto the soup.
- Either swirl it decoratively, or have guests stir it in before eating.
- Deeply brown the cauliflower.
-
Streusel Gingerbread Muffins

Gingerbread Streusel Muffins I love gingerbread. Take gingerbread, put some extra zing to it with freshly grated ginger, deepen the dark flavor with a tablespoon of cocoa, and sprinkle some gingery streusel on the top and wow, what a muffin!
Streusel Gingerbread MuffinsAuthor: Diane C. KennedyRecipe type: Breakfast/DessertPrep time:Cook time:Total time:Serves: 18These gingerbread muffins have an extra kick and a deeper flavor from special ingredients.Ingredients- 2 cups all-purpose flour
- 1½ teaspoons baking soda
- 1½ teaspoons ground ginger
- 1 tablespoon unsweetened baking cocoa
- 1 teaspoon salt
- 1 teaspoon cinnamon
- ⅛ teaspoon ground nutmeg
- ⅛ teaspoon ground cloves
- 1 tablespoon freshly grated ginger root
- ½ cup dark molasses
- ½ cup granulated sugar
- ½ cup vegetable oil
- ½ cup boiling water
- 2 large eggs, whisked
- Streusel topping:
- 1 cup granulated or brown sugar
- 2 tablespoons cinnamon
- ½ teaspoon ground ginger
- 2 tablespoons finely minced candied ginger
- 1 cup all-purpose flour
- ½ cup (one stick) butter, softened
- ½ cup all-purpose flour
- 4 tablespoons butter, softened
Instructions- Preheat oven to 325F.
- Line or grease 18 muffin cups.
- In a large bowl, sift together flour, baking soda, ground ginger, salt, cinnamon, nutmeg, cloves and cocoa powder.
- In a medium bowl, whisk together molasses, sugar, oil, water, eggs and grated fresh ginger.
- Add molasses mixture to flour mixture until well combined.
- Divide batter evenly among prepared muffin cups (an ice cream scoop really works!), each cup half full.
- In a medium bowl, combine the sugar, cinnamon, ground ginger and flour.
- Cut the butter into small bits and using a pastry blender, forks or your fingers, work the butter into the mixture until it is crumbly and there are no large chunks of butter.
- Stir in minced candied ginger.
- Sprinkle streusel on top of muffins, pressing lightly to firm it up.
- Bake 18 - 24 minutes, or until wooden toothpick inserted in the centers of the muffins comes out cleanly.
- Remove muffins from oven and cool.
-
Pepitas (Roasted Pumpkin Seeds)
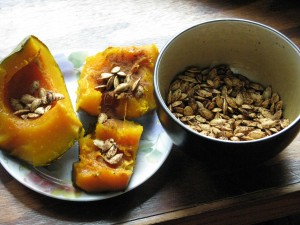
Chili-lime pepitas are wonderful as a topping! All those lovely seeds that you scrape out of pumpkins and winter squash are little nuggets of nutrition, including protein. Pepitas can be a little chewy, but have a popcorn-like flavor and can be very addicting. To seperate the freshly scraped seeds from the pumpkin fibers that encase them, plop the whole mess into a bowl full of water and rub with your fingers. The seeds seperate easily. Compost the fibers, and dry the seeds. You can do this by blotting them or wringing them out in a towel, or allowing to set in a sieve, if you aren’t in a hurry.
Pepitas (Roasted Pumpkin Seeds)Author: Diane C. KennedyRecipe type: SnackPrep time:Cook time: -
How To Preserve Squash and Pumpkin
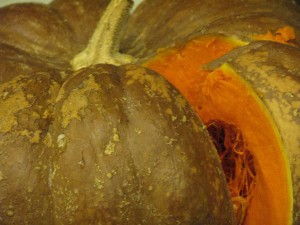
Test for doneness; if the flesh isn't soft, continue baking. You have this wonderful pumpkin sitting around, waiting to be eaten. The holidays pass and… there it sits. You don’t want to let it go bad, but you don’t have a use for it right away. What to do?
Here’s how to make your own pumpkin or squash puree and preserve it by freezing. I haven’t seen reliable methods of canning puree so I opt for the freezer method in plastic bags. I know, I too want to eliminate plastic bags from my life. However I own freezer bags and I will use them.

Stack the freezer bags and freeze flat First of all, choose a pumpkin bred for taste, such as Sugar Baby; Jack o’lantern pumpkins aren’t that tasty and are usually very fibrous. Wash your pumpkin or winter squash (not summer squash, like zucchini or crookneck) without soap. There are two good options for cooking the squash (pumpkin is a type of squash, so I’ll just say squash from now on): steaming or baking. Baking is the best method in my opinion. First of all, you can stick the whole squash into the oven and bake it, whereas if steaming you must cut up the squash and with some of these hard-skinned beauties that task can be difficult and dangerous (it is easy for the knife to slip). Secondly, steaming adds a lot of moisture to the squash, and it must be drained after pureeing before you freeze it, or else it will be too watery to use in pies and other baked goods. I steam squash when I want to serve it for dinner because it is quick and it preserves nutrients. Baking removes a lot of the moisture and increases the flavor of the squash. Some people recommend boiling it, but the squash would have to be whole, and dealing with a huge pot of boiling water is just not necessary.
If you are going to be obstinate and want to steam the squash, then cut it up, scoop out the seeds (save for replanting or making pepitas, recipe: Pepitas 1/15/12), steam until fork-tender, scoop out the flesh, puree it in batches, and leave it sit in a bowl, covered, in the refrigerator overnight. Water will seep out. Or tie into cheesecloth suspended over a bowl and allow to drain.

Quarter and scoop the seeds out of small pumpkins. If you are going to bake it, heat the oven to 400 degrees F. Lightly oil the outside of the washed squash. Line a baking dish with foil. If you have a whopper, just pop in the pumpkin (remove the stem if there is one).

You can bake a whole squash. If you have a thinner skinned pumpkin, you can carefully cut it into quarters, scoop out the seeds, and place on a piece of foil on a cookie sheet. I bake them face-up to improve flavor and remove moisture.

Baking brings out the flavor. Bake a large squash for about 60 minutes, until you can slide a knife easily into it. If you have a large, thick-skinned squash, you may need to leave it in up to another half an hour. If you have a thinner skinned pumpkin such as Sugar Baby, you may test it for doneness after 45 minutes. Allow the squash to cool, then slice it into chunks. Scoop out the seeds (no good for planting now, but still good for making pepitas) and then scoop out the flesh from the skin. Puree flesh in batches until there is no fiber left. If the puree looks thin (think of the consistency of canned pumpkin), then either leave it covered in a bowl in the ‘fridge overnight and pour off excess water the next day, or strain through a cheesecloth.
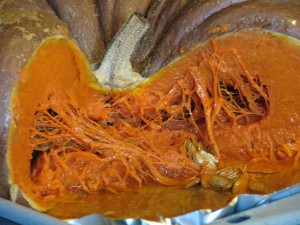
After baking it isn't pretty, but it sure is easy to cut! Once your puree is ready to go, then I suggest you measure it by 3/4 cupfuls into plastic freezer bags. That’s how much puree is in a 15 -oz can of pumpkin, and what pie recipes call for. Or if you have other recipes in mind with other measurements, freeze in those increments.

Some squash like this Cinderella pumpkin is more fiberous than others After filling the freezer bags (and I guarantee that you’ll get pumpkin everywhere!), flatten the bags and place on a cookie sheet that will fit into your freezer. Stack the bags (make sure to label with type of squash and date!) and freeze. They will be flat and much easier to deal with. Freeze for about six months.
Of course, before you freeze it all, save 1/2 a cup and make my Spiced Pumpkin Scones (posted on January 10, 2012).
-
Crunchy Cayenne-Cashew Candy
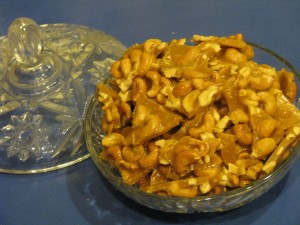
Bite-sized pieces of sheer yum (in my mother's candy dish). I don’t like very spicy foods. I like to taste the nuances of my food and not allow heat to overrule the flavors. However, a little heat now and then can be very nice. Heat can also be medicinal, helping everything from stomach upset and preventing colds to relieving the pain of arthritis. I have the perfect solution: a buttery, crunchy candy that has just a little burn to it. Yum! Originally from Gourmet magazine, I’ve been making it annually for Christmas for many years now, and it is hard to not polish off.
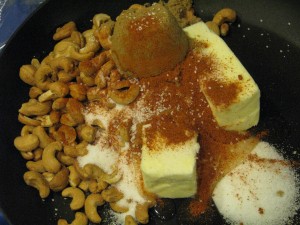
Put everything into a pan! It is simplicity itself to make. You put all the ingredients into a pan, heat it until the butter and sugar melts, turn up the heat until it begins to clump, pour it out onto a buttered cookie sheet and wait for it to harden. If it is still sticky, put the pan in the refrigerator for five minutes.
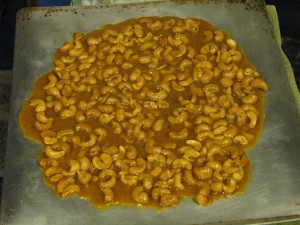
Pour out onto cookie sheet to cool. Crunchy Cayenne-Cashew CandyAuthor: Diane C. Kennedy (Gourmet magazine)Recipe type: DessertPrep time:Cook time:Total time:Buttery, crunchy, sweet, salty candy with a slight burn. Yum!Ingredients- 2 cups whole salted cashews
- 10 tablespoons (1¼ sticks) unsalted butter
- ½ cup granulated sugar
- ¼ cup packed brown sugar
- 1 tablespoon light corn syrup
- 1 teaspoon cayenne pepper
- ¼ teaspoon salt
Instructions- Butter a nonstick baking sheet and put aside.
- Combine all the ingredients in a large nonstick skillet.
- Stir over low heat until the butters melt and the sugars dissolve.
- Increase heat to medium and boil, stirring constantly until mixture turns golden brown, thickens and begins to mass together (about 5 minutes).
- Immediately pour out onto prepeared baking sheet, spreading evenly.
- Cool completely.
- Break into pieces.
- Makes about 1⅓ pounds.
-
Forget ‘Em Cookies

Store in a moisture-free container You really can’t forget these cookies. First of all, they are so tasty. Secondly, they are low fat and high in protein. Thirdly, they are exquisitely easy to make, especially after a day of baking. If you have two left-over egg whites (maybe from making lemon curd {see recipes}), you can make these merangues in a matter of minutes. Stir in some mini chocolate chips or broken chocolate pieces (or try toffee pieces, or crushed peppermint, or even some tiny mixed candied fruit), plop teaspoonfuls onto foil-lined baking sheets, put them in a 350F oven and turn off the oven. Leave sit with the door closed for 8 hours. Bingo. Beautiful, Christmassy, crunchy on the outside, slightly moist on the inside, with a definate chocolate yum. Make sure you use chocolate that you really like, because the flavor is dominate. You can also make these plain and they’d be just as wonderful. So make some, forget them… but remember them the next day! Store in a moisture-free container, because they will absorb moisture from the air and become sticky. If that happens, pop them back into the oven and turn off the heat again.
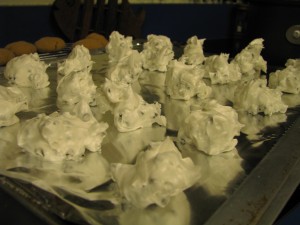
Mounds of fluffy goodness
Forget 'Em CookiesAuthor: Diane C. KennedyRecipe type: DessertPrep time:Cook time:Total time:Easy overnight meringues that take hardly any time to prepare, use up extra egg whites, and bake using residual heat from your oven. How environmentally friendly is that?Ingredients- 2 egg whites
- ½ teaspoon vanilla extract
- ¼ teaspoon cream of tartar
- ½ cup superfine sugar (or regular sugar)
- 6 oz. mini chocolate chips, chopped chocolate, crushed peppermint, toffee pieces, (optional)
- 1 cup chopped macadamia nuts or pecans (optional)
Instructions- Preheat oven to 350F
- Beat whites, vanilla and cream of tartar at high speed of an electric mixer until foamy.
- Gradually add sugar one tablespoon at a time until sugar is dissolved and soft peaks form (2-4 minutes; don't overbeat)
- Fold in chocolate and nuts, or whatever you choose. Or leave them out. It's your cookie!
- Drop mixture by heaping teaspoonfuls onto cookie sheets lines with aluminum foil.
- Place in oven.
- Turn off heat immediately.
- Forget 'em for 8 hours (don't even open the oven door!)
- Carefully remove cookies from foil
- Store in an airtight container for up to 1 week.
- Depending on whether you add chocolate and nuts, makes between 2 and 4 dozen.