-
Cooking with Nettles
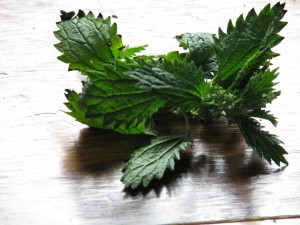
Stinging Nettle Yes, I mean stinging nettles. I’ve already covered in another post about the highly nutritious qualities of this lawn and wetlands weed. One of my friends has taken up the cause and has prepared nettles in soup and as a cooked green for her family. Eat your weeds! (Just be sure what they are, first.)
Stinging nettles (Urtica dioica) are annual plants that come up in nitrogen-rich soil that is well watered, such as in lawns, around farm animals and by streams. The plants are covered with tiny sharp hairs that are tipped with chemicals that cause a stinging sensation when handled. The sting may cause a slight bump on the skin and will go away on its own without spreading. A dab of vinegar will de-acidify the affected parts and should reduce or eliminate the sting. The effect is not like that of poison oak (Toxicodendron diversilobum) which contains an oil that spreads to whatever touches it.
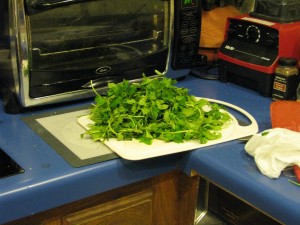
This amount of nettles cooks down to 1/4 – 1/2 cup. You’ll need a lot more for this recipe. Nettles are known throughout Europe as a spring green and there are many recipes available for cooking it. The leaves are delicate and fresh-tasting, and the stems a little tougher but also edible.

Crustless nettle quiche tartlet To harvest nettles, wear gloves or use a plastic bag turned inside-out over your hand for protection. As with most greens the youngest are the most tender. Wash the nettles while wearing rubber gloves. Blanch the nettles 1 – 2 minutes in a pot of boiling water. That eliminates the stinging chemicals completely. Don’t cook longer at this point because the leaves will fall apart. You can now eat the nettles or use them in another dish. I’d advise chopping up the stems before or after blanching because they can be stringy. Use blanched nettles in soups, quiches, or fillings as you would spinach. Hint: don’t tell your family what they’re eating until after they’ve eaten it!
Crustless Nettle QuicheAuthor: Diane KennedyRecipe type: Main dish, side dish or breakfastCuisine: EuropeanPrep time:Cook time:Total time:Serves: 6Substitute blanched nettles for spinach in this simple crustless quiche for more nutrition and fewer weeds!Ingredients- 1 Tablespoon olive oil
- 1 chopped onion
- 10 ounces blanched chopped nettles (measured after cooking)
- 5 eggs, beaten
- 3 cups grated cheese such as Munster, or a mixture of parmesan and mozzerella, or whatever you have that isn't too tangy.
- A pinch of ground nutmeg
- Salt and pepper to taste
- Optional: cooked vegetarian bacon or sausage, crumbled.
Instructions- Preheat oven to 350 degrees F.
- Lightly grease one 9-inch pie pan or 6 - 8 tart tins or Pyrex custard cups.
- Wearing gloves, harvest and wash enough nettles to make 10 ounces cooked, about one stuffed plastic grocery bag full or more.
- Blanch nettles in boiling water for 1 -2 minutes.
- Chop nettles into fine pieces (the stems can be stringy if kept long)
- Heat olive oil in a medium skillet over medium-high heat.
- Cook onion until translucent, 8 - 10 minutes
- Add nettles and stir until the extra water is absorbed.
- Add ground nutmeg to the nettles.
- In a large bowl combine the beaten eggs, cheese, salt and pepper and vegetarian meat if using.
- Add spinach mixture to eggs and stir to combine.
- Pour into prepared pan or pans.
- Bake 30 minutes or until centers have just set. Don't over bake.
- Cool for ten minutes before serving.
-
Kamoodles: Cooking with Kamut Flour
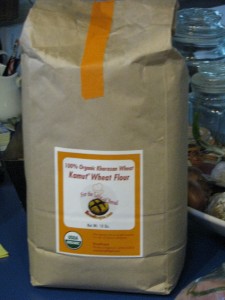
Organic Kamut flour A friend gifted me with a bag of Kamut® flour. Kamut® is the trademarked brand name for what is commonly known as khorasan
wheat, an ancient relative of modern durum wheat used by the ancient Egyptians which has finally made a comeback in popularity. It is a relative of duram wheat and very high in protein as well as trace ingredients such as magnesium, selenium and zinc. Kamut® has a buttery flavor and the grains can be cooked and eaten just like other grains, for breakfast, in addition to other foods as an extender, as a flavored filling, etc.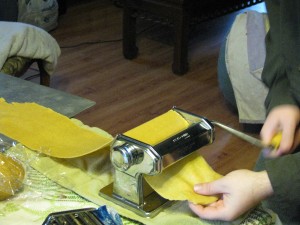
Rolling out kamut noodles Kamut® flour is a little heavier than processed white wheat flour, but much lighter than typical whole wheat flour. Therefore it may be used as a substitute for either flour without a sacrifice in flavor or texture.
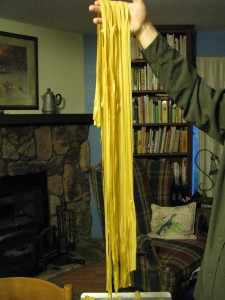
Very long noodles My son is visiting and we decided to use Kamut® flour in place of semolina.
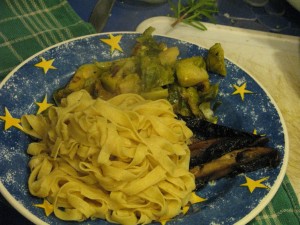
Kamoodles with portabella and broccoli. Kamut® noodles? Kamoodles!
KamoodlesAuthor: Diane KennedyRecipe type: Side DishCuisine: AmericanPrep time:Cook time:Total time:Serves: 6Kamut flour makes this side dish nutritious and delicious.Ingredients- Two cups organic kamut flour
- Three eggs
- Up to ¼ cup water as needed
- White flour for shaping
Instructions- Measure kamut flour into a large bowl.
- Mix eggs in a measuring cup or bowl until lightly combined.
- Make a well in the center of the flour and pour in eggs.
- Mix until completely combined.
- Form dough into a ball. If dough is too dry, add water a little at a time until dough sticks together enough to form a ball.
- Gently knead the dough a couple of minutes until it is slightly elastic.
- Wrap dough in plastic wrap and let sit for half an hour. If kept longer, refrigerate.
- Divide dough into quarters.
- Following the directions on your noodle machine, feed dough through repeating until it is at its thinnist level, then feed through cutter to make wide noodles.
- Hang noodles until all the dough is processed.
- Boil a large pot of lightly salted water (salt optional).
- When all kamoodles are cut, feed them gently into the boiling water and cook 2 - 3 minutes.
- Drain noodles.
- Serve with butter, or any other way you like to eat noodles.
The chapatis, which are the Indian version of tortillas or fry bread or pita bread, are simple and quick to make. With Kamut® flour they are far more nutritious. Besides, Kamut® chapatis is almost as fun to say as kamoodles!
Kamut chapatis For 12 chapatis, mix 2 1/3 cups Kamut® flour with a tablespoon of olive oil and up to 1 1/3 cup water until it sticks together. Form it into a dough ball. Allow it to rest for several minutes. Divide dough into twelve equal pieces. Heat a skillet on medium-high heat and add a scant teaspoon of olive oil. On a lightly floured board roll out the Kamut® chapatis to a 10-inch circle. When skillet is hot, transfer rolled-out chapatis to it and cook 3-4 minutes on each side then remove. They should develop slight brown marks from the skillet and may puff just a little.

Kamut chapatis with curry and avocado. Keep warm while you finish cooking the rest. Serve with butter, spreads, as a scoop for curry, in place of tortillas for Mexican food, and as a fold-over sandwich. Yum!
I’ve also very successfully substituted one cup of Kamut® flour for one of the two cups of regular flour in my Spiced Pumpkin Scones. Kamut® gave them a little grainier texture that was very appealing without making them heavy. Substituting all the regular flour with Kamut® flour in a yeast bread worked beautifully, too. The loaf isn’t at all heavy as it would be if I substituted whole wheat flour. Very nutty and buttery flavor. So yum!
-
Make Your Own Soymilk
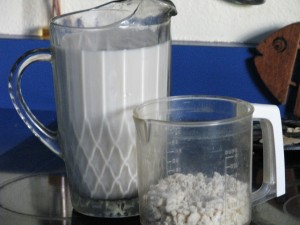
Soymilk and Okara A friend of mine, Kevin, came over and showed me how easy it is to make my own soymilk. What fun! Making your own soymilk is very economical and can be custom-flavored and sweetened to your taste. If you use organic soybeans -which I highly recommend because soybeans are one of the most sprayed crops – you can rest assured that you are serving your family a healthy, non-toxic beverage.
After Kevin showed me his way, I did a lot of research on other ways to make it, and tried some variations. Basically you soak dried soybeans (not edamame!) overnight, blend them up with water, heat it until it boils, strain it and flavor it, not necessarily in that order. Kevin’s method was to strain it before heating. I’ve found I like the results better to strain it after its hot; there isn’t any grit and it strains more quickly. Do whatever works for you.
When you make soymilk, you are actually making two products: soymilk and the high fiber and protein stuff that is strained out which is called okara. There are many recipes for using okara on the Internet, and I’ve found many in the classic cookbook, the Book of Tofu by Shurtleff and Aoyagi. Okara is virtually tasteless. If you strain your soymilk before its heated the okara is ‘fresh’ and a bit gritty. I made it into vegetarian fish patties following this recipe with good results, although they were a little too salty for me.

Fishless okara patties with sauce. If you cook your soymilk before straining, then the okara is also cooked and looks like hot farina. Okara is often mixed with grains and ‘meats’ as a nutritious additive and a food extender. It has little flavor on its own. I used some to thicken a pea soup that was too thin and it worked wonderfully. The soy industry has a lot of okara on their hands so it is usually fed to livestock. It can be frozen or dried, too. If you absolutely have too much okara then compost it, feed it to your worms or bury it around your plants.
Once you have the soymilk you can drink it plain, sweeten it with sugar, honey or whatever your choice is, flavor it with vanilla or something else, serve it cold or hot (which is the best!), or make tofu out of it.

Vanilla bean in hot soymilk Making tofu is also an easy process, which is just curdling the soymilk and straining out the solids; if you’ve ever made goat cheese then you can make tofu.
The ratio of soaked soybeans to water varies depending upon how thick you like your soymilk. Kevin showed me a 4:1 ration (water to beans) which made a thin soymilk, similar to 1% milk. I like the 3:1 ratio because the milk is creamier.
I found a good deal on Bob’s Red Mill organic soybeans on Amazon.com, the beans pricing out to .19 cents an ounce (four bags for about $19 total).
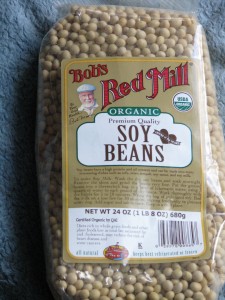
Organic soybeans. I couldn’t find them at my local Sprouts or health food store. One bag of Bob’s Red Mill organic soybeans weighs 1 lb 8 oz, which is about 4 cups of dried beans. The beans swell up by a third, so one package makes 12 cups of rehydrated soybeans. A cup of dried soybeans makes about two quarts of soymilk (and about two cups of okara), so a bag would make eight quarts. A huge savings, and I have the okara as well.
A few tips: you can easily soak a cup of beans overnight and make soymilk every few days, depending on your need and time.
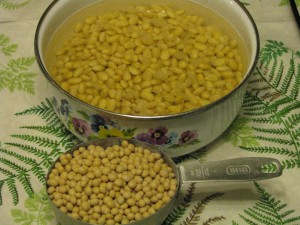
One cup of dried beans equals three cups soaked. Use a very tall pot because when you are heating the soymilk it will take forever and then just when you turn away it will come foaming up out of the pot like something possessed; a tall pot helps keep it under control. After you pour out your soymilk, wash or at least soak your pot. The soymilk residue dries hard and must be soaked again to get off. Use several layers of cheesecloth (which you can wash and reuse), or a piece of muslin to strain your soymilk.
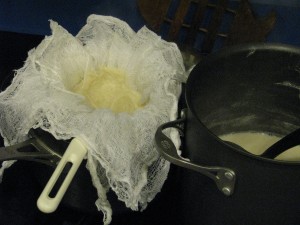
Strain okara through cheesecloth. Also the raw soymilk doesn’t smell very appetizing. It is very beany and grassy. Once it comes to a boil the smell will change into a very yummy tofuish scent.
There is also a great dissent on how long you heat the soymilk. Kevin’s recipe was to just bring it to a boil. Some recipes recommend twenty minutes of boiling. I find that five minutes heats the soymilk and cooks the okara sufficiently. Experiment.
Soymilk and OkaraAuthor: Diane Cynthia KennedyRecipe type: BeveragePrep time:Cook time:Total time:Serves: 8Fresh organic soymilk and okara- delightful and inexpensive. This recipe will make about 5½ cups of silky soymilk and about 2 cups of cooked okara.Ingredients- One cup dried soybeans, soaked overnight
- Nine cups water
- Flavoring (optional)
- Sweetener (optional)
Instructions- Drain the soaked soybeans (which will now be about 3 cups).
- Scoop a cup of soybeans and put in blender with three cups of water.
- Blend until smooth.
- Pour mixture into a tall pot.
- Repeat with the other two cups of beans.
- Heat mixture until it boils, stirring constantly. This can take some time, so I usually give it a stir now and then until it starts steaming a little, and then give it all my attention so that it doesn't foam up and overflow.
- Lower temperature, stir down the foam and simmer for five minutes.
- Line a sieve with several layers of cheesecloth or a piece of muslin (you are trying to catch fine particles) and place sieve over another tall pot or container.
- Carefully ladle soymilk into the lined sieve and allow to drain (you can wait until mixture is cooler before you do this if you'd like.) Use a spoon to move the okara out of the way as you ladle. If you double the recipe you may need to strain the okara and empty the cheesecloth before you finish straining all the milk.
- Allow the okara to drain and cool until you can handle it comfortably.
- Wrapping the cheesecloth around the okara, squeeze the bundle until all the soymilk drains out.
- Refrigerate the okara until ready to use.
- Use soymilk plain, or heat and add flavoring and/or sweetener to taste. I like honey and vanilla.
- Refrigerate cooled soymilk. The soymilk should keep for about a week refrigerated; the okara about four days.
- Animals, Bees, Chickens, Cob, Compost, Composting toilet, Gardening adventures, Health, Heirloom Plants, Herbs, Natives, Permaculture and Edible Forest Gardening Adventures, Ponds, Rain Catching, Recipes, Salads, Soil, Vegan, Vegetables, Vegetarian, Worms
Southern California Permaculture Convergence! Be there!

Southern California Permaculture Convergence If you are interested in any aspect of permaculture, such as organic gardening, herbs, planting native plants, aquaponics, natural ponds, beekeeping, keeping chickens, and so much more, then you must come to the Southern California Permaculture Convergence. It happens on March 9th and 10th at the Sky Mountain Institute in Escondido. The keynote speaker will be Paul Wheaton, lecturer and permaculturalist extraordinaire of www.permies.com fame. Oh, and I’ll be one of the many speakers as well (cough cough). The Early Bird special of only $50 for both days ends at the end of January, and then the price will rise, so buy your tickets now!
Also, for a full-on demonstration of taking bare land and creating a permaculture garden, there will be a three-day intensive class taught by Paul Wheaton on site the three days prior to the Convergence.
You can read about the convergence here at the official website, which will give you the link perm.eventbrite.com where you may purchase tickets. Also visit the SD Permaculture Meetup page to see all the free workshops that happen monthly all over San Diego.
This convergence is such a deal, you really shouldn’t miss it! And such a bargain, too. One of the best things I find that come out of these convergences is the exchange of ideas and networking among the attendees, and all the practical information you can take home and use right away. One of the largest parts of permaculture is building community, which means sharing with and assisting others.
Really. Don’t miss this! Tell your friends!
-
Delicious and Fun Thai Custard-inna-Pumpkin

Thai Custard-inna-Pumpkin I know that you lose sleep over trying to figure out how to get more vegetables into your dessert. Well, snuggle up for a good long snooze, because here’s a recipe to bring you peace! I found this recipe in the Heirloom Gardener Winter 2012- 2013 edition. The magazine is created by the people who bring you Baker Creek Heirloom Seeds (organic). A wonderful article about Thai cooking by Wendy Kiang-Spray features this intriguing recipe, and I had to try it. You hollow out a small Thai or Kabocha squash (they are drier in texture), fill it with a coconut milk custard, steam it, and Bob’s your uncle!
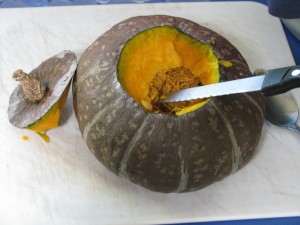
Scoop out the seeds and fibers and feed them to your chickens! I just happened to have a 2.5 lb homegrown Kabocha squash handy, so I made the recipe (adding a little cinnamon). Not wanting to be scared alone, I brought the whole cooled squash over to my friend Lara’s house, who helping me fulfill last year’s New Years resolution by teaching me basic piano. Being a vegetarian and a loyal friend, she was game to try it. It came out very good. I was impressed. I will do this again!
Troubleshooting: whisk the ingredients together. I thought I’d be fancy and put them into my VitaMix on the lowest setting, but even that added a little too much air to the custard mixture.
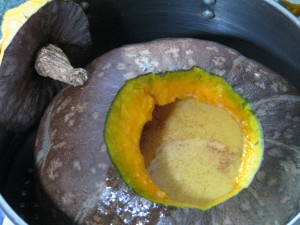
Don’t fill all the way up. Steam the lid off to the side. The top of the custard that I could see was yellowish, and I figured that this was due to the dark yolk in the eggs from my chickens, but I don’t know. Once cut into, though, the custard as a lovely white.
I turned my steamer on high until it was boiling, then turned the temperature down low and the custard wasn’t done in the allotted time. Next time I’ll keep it at a higher boil so that the steam is hotter. I cooked it much longer (I think too long because I was doing other things) and the squash split a little as it was very soft. I kept it in the steamer with something between the soft side and the inside of the steamer so that the squash would keep its shape as it cooled. After it was room temperature, I put it in the refrigerator for a short time and it the squash didn’t fall apart when I removed it.
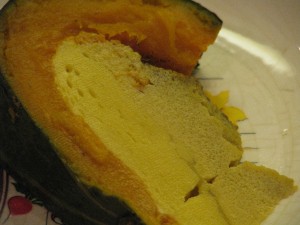
Creamy coconut custard and dry delicious squash. Ms. Kiang-Spray states in her article that this recipe is known in Thailand as Sankaya and is a classic dessert. With all the eggs and tasty squash, I’d call this breakfast or lunch, too!
Thai Custard-inna-PumpkinAuthor: Diane C. Kennedy (adapted from recipe by Wendy Kiang-Spray)Recipe type: DessertCuisine: ThaiPrep time:Cook time:Total time:Serves: 6A simple, fun, lovely dessert that people will remember as they get their beta carotene.Ingredients- 1 2 -3 pound dry-fleshed squash such as Kabocha or Thai pumpkin.
- ¾ cup coconut milk
- 5 eggs (preferably at room temperature)
- ⅓ cup sugar
- Pinch of salt
- 1 teaspoon vanilla extract
- ¼ teaspoon cinnamon
Instructions- Bring two quarts of water to a boil in the bottom half of a steamer pot.
- Use a cup to trace a circle around the top of the pumpkin.
- Cut the lid off around the guideline.
- Hollow out the inside with a spoon, making sure to get all the fibers.
- In a bowl gently whisk until combined the rest of the ingredients.
- Place the squash into the steamer basket.
- Pour custard through a sieve into the pumpkin leaving an inch to the top (filling will rise).
- Include the squash lid next to, but not on top of, the squash.
- Steam covered and undisturbed for 55 minutes until a knife inserted into the custard comes out clean.
- Remove steamer basket from over heat and allow squash to come to room temperature.
- Slice into wedges (in front of admiring company!) and serve.
- Serve at room temperature or chilled.
-
Awesome Candy Alert: Cayenne and Cashew Brittle

Spicy brittle I’m not big into candy; give me cake, pie or bread, or a good rice pudding instead. However I’ve made this brittle at Christmas for years now, and it is always a big hit. The cayenne makes a nice mild burn to counter the sweetness of the brittle. Cayenne is good for you, too, as are cashews (no matter how creepy it is that cashews grow!), so it makes sense in some distorted way that this candy is good for you. It is so easy, too. I have much less salt tolerance than the general American public. If I eat out I find myself desperately thirsty for days. The original recipe was made for high salt intake, but I have shown options on cutting it back. You don’t need it, for the delight of the candy is in the burn with the sweet. I also don’t like very hot (spicy) foods, but I like this. Make some and try to share.
Cayenne and Cashew BrittleAuthor: Diane C. KennedyRecipe type: DessertCuisine: AmericanPrep time:Cook time:Total time:A yummy easy-to- make brittle with a slow spicy burn.Ingredients- 2 cups unsalted roasted cashews, whole or pieces (you can use salted, but I don't)
- 10 tablespoons (1¼ sticks) butter (if using salted cashews, use unsalted butter)
- ½ cup sugar
- ¼ cup packed light brown sugar
- 1 tablespoon light corn syrup
- 1 teaspoon cayenne pepper
- ¼ teaspoon salt (optional)
Instructions- Butter a nonstick baking sheet and set aside.
- Combine all the ingredients in a large nonstick skillet.
- Stir mixture over low heat until the butter melts and the sugars dissolve.
- Increase heat to medium and boil.
- Stir constantly until mixture turns golden brown, thickens and masses together, about 5 minutes (if you cook it longer it won't be as shiny; too little and it will be soft but still yummy).
- Immediately pour candy out onto the prepared baking sheet and quickly spread evenly using a spatula to help.
- Cool completely.
- Break into pieces.
- Makes about 1⅓ pounds
-
Preserving Squash and a Terrific Pumpkin Chai Recipe!

Beautiful patterns on the banana squash shell. Four sugar baby pumpkins that I’d kept for myself, and three pink banana squash, were all in need of preservation. They were not keeping well due to the warmth of our hot San Diego county Fall. During a rainy break in the weather I did something about it. You can preserve cooked pumpkin and winter squash best by freezing it. If you have a pressure canner you may can pureed pumpkin or pumpkin pieces in liquid, but since I only use the water bath method that wasn’t an option.

Even sugar baby pumpkins can be difficult to cut when raw. There’s a better way! Roasting a squash isn’t difficult at all. In fact, you only have to wash it, put it on a tray in a 350F oven for about an hour (longer if its a really large pumpkin), and then slice when cooled.

Roasting a whole pumpkin makes the scooping so easy! Its easy to scrape out the seeds and then spoon out the cooked flesh out of the hardened shell. This is what I did for the sugar baby pumpkins. There was too much banana squash to fit whole into the oven, however, so I cut them into chunks, scooped out the seeds, covered them with aluminum foil (it helps steam them) and baked 350F for forty-five minutes.
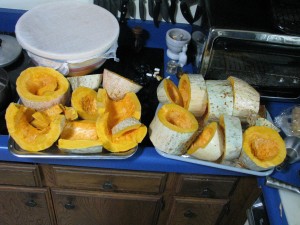
Three banana squash is a lot of squash I have more details here. I also roasted the pumpkin seeds.
Then I had a lot of squash to puree! These squash and pumpkins were dry, so I added a little water to the VitaMix and tossed in the chunks.
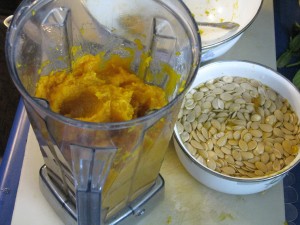
Pumpkin and seeds. I pureed batches until smooth, then spooned cups full into freezer bags. My pumpkin scone recipe calls for only half a cup, so I froze one-cup batches, as well as two-cup batches for pie. The secret to ‘vacuum-packing’ freezer bags is to close the top of the bag around a straw and then suck all the air out. It really works well, and is kind of fun, too.

Get a straw, suck out the air and presto: vacuum packed! However, the best thing that happened out of all this squashing was that I had a little less than a cup of pureed roasted squash left in the VitaMix, too little to freeze and really irritating to scoop out. It was a cold day and past lunchtime. I had an idea and spooned in what was left of some Chai tea mix, poured in vanilla soy milk, blended it until it warmed up and sat down to drink. Heaven! I’m not one for pumpkin flavored things, but this was the real deal.
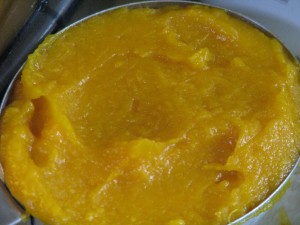
Pumpkin puree. It was so good that the next day I took a cup of the pureed squash that I refrigerated, poured in 1 1/2 cups of vanilla soy milk, a touch of orange syrup left over from candying orange peel, added cinnamon and blended until it was hot. It was thick, satisfying, a little sweet, spicy and full of beta carotene, fiber, protein and other good things. I’m sure you can do the same thing with canned pumpkin and other liquids, such as milk, rice milk, almond milk or coconut milk. If fact, I insist that you try it.

Hot Yum! Pumpkin ChaiAuthor: Diane C. KennedyRecipe type: BeverageCuisine: AmericanPrep time:Cook time:Total time:Serves: 2Cold or hot, spiced pureed pumpkin or squash mixed with the milk of your choice is extreme comfort food that is actually terrific for you!Ingredients- 1 cup cooked pumpkin or squash puree, fresh or canned.
- 1½ - 2 cups vanilla soy milk, or milk of your choice. (Less for a thick drink).
- ½ - ¾ teaspoon cinnamon, pumpkin pie spice or up to 1 scoop Chai tea mix.
- Sweetener (optional); a natural syrup would do or honey.
- ½ teaspoon vanilla (optional)
Instructions- For cold pumpkin chai mix all ingredients briefly in a blender or VitaMix.
- Taste to adjust seasonings, thickness and sweetener, and serve.
- For hot pumpkin chai, heat milk and add to the rest of the ingredients in a blender and process. If you have a VitaMix, you can add all cold ingredients and then process until it is hot.
I’m going to make some more for me right now. -
When Is Tuna Fish Not Tuna Fish?

No-kill “tuna” salad! Prior to being a vegetarian, many years ago, I did enjoy a tuna sandwich or salad now and then. A perfect dish for a hot afternoon. During my almost twenty years of vegetarianism I’ve sampled many tuna substitutes, with various results. Most of them were discontinued, or were imported to a store on the East coast and then resold and shipped. Have you ever noticed how foods that are marketed as substitutes for other foods either have quotations around their names as if someone was whispering it behind their hand? Or else the names are spelled wrong, like Tuno or Bakon. There is also the saner although still questionable method of placing the word ‘mock’ in front of the word, such as ‘mock-tuna’, which is better than misspelling. Anyway, back to the topic, in trying to keep my carbon footprint low I’m eliminating the purchase of goods that require so much shipping.
This week I discovered a marvelous tuna substitute (I say, “discovered” when really I’m probably the last to know). It is low calorie, high in protein and fiber, inexpensive, easy to prepare, doesn’t kill tuna or dolphins, and they grow here in California. I can also buy them organic. They are garbanzo beans, otherwise known as chickpeas.
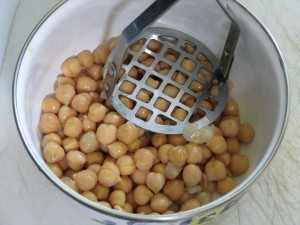
Mash garbanzos (what a great name for a bean!) until they are almost smooth. The flavor of garbanzo beans is very mild and takes well to light seasoning. Substitute mashed garbanzo beans in your favorite tuna salad or sandwich recipe. If you use Veganase – a dairy-free mayonnaise substitute – then you have a mock tuna salad or sandwich that won’t be dangerous to eat at picnics because neither the beans nor Veganase spoil quickly. Incorporating dill into the mix gives the mix a fishier flavor, since dill is so commonly paired with fish. Simple, nutritious, inexpensive and very yummy. Can’t go wrong with that!
Mock Tuna SaladAuthor: Diane C. KennedyRecipe type: EntreePrep time:Total time:Serves: 2-4A high-protein and fiber, low-cost tasty tuna substitute without any trace of mercury or dolphin!Ingredients- One can organic garbanzo beans
- 2-3 tablespoons Veganase or mayonnaise
- 1 teaspoon minced dill, preferably fresh
- 2 stalks celery, chopped
- 2 -3 cups cooked, cooled small shaped pasta, such as shells
- ¼ teaspoon ground cumin
- Salt and pepper to taste
- Chilled iceberg lettuce
Instructions- Drain and empty canned garbanzos into a small bowl.
- Mash with a potato masher until almost smooth, keeping some of the lumps for texture.
- Stir in Veganase, dill, celery, cumin, salt and pepper.
- Stir chickpea mixture into cooled noodles until well mixed.
- Serve over iceberg lettuce with a dill pickle on the side.
-
Two Sure-fire Zucchini Recipes
Zucchini plants are like cats: They both look harmless when small, so you think the more the merrier. One plant is always enough, but it is hard to plant just one seed in case it doesn’t come up. Then the sprouts are hard to thin.. what if something eats it? Then before you know it, there are five enormous plants growing giant green clubs in the dead of night, just after you’ve checked all the plants. Well, that’s my situation anyway. Too many cats; too many zucchinis. When there are enough all at one time, we’re taking them (the zucchinis, not the cats) to the Fallbrook Food Pantry along with pumpkins and tomatoes. Until then, we’re exploring new ways to eat them. And I refuse to sully cheesecake with zucchini! (yes, there is such a recipe!).
My son who is studying Culinary Arts at the University of Hawaii sent me a link to smittenkitchen.com with an exceptional zucchini pancake recipe… not sweet, very light and completely tasty. I’ll include my version. But first I want to explain my ‘discovery’, which everyone but me probably knows about anyway.
SAUTEED ZUCCHINI
I had grated zucchini for bread and had some left over. It was dinnertime and I was alone, so I experimented. I heated a skillet with a little olive oil in it, threw in the grated, undrained zucchini, and stirred it around on medium-high heat for about five minutes. When it was beginning to wilt and brown a little on the bottom, I sprinkled sesame oil on it lightly, and then gave it a touch of Bragg’s Amino Acids, which I use for many things. A light soy sauce may substitute, but Bragg’s is high in nutrition, low in salt and a wonderful flavoring. Buy it online or in health food stores. The zucchini came out tasty and with a mouth-feel of wet wide noodles. It was fantastic. I’ve since made it for my daughter a couple of times, and each time we wanted more! Imagine that! On the plus side, it used up a medium zucchini.
You really must give these pancakes a try.
Fabulous Zucchini PancakesAuthor: Diane C. Kennedy (adapted from smittenkitchen.com)Recipe type: BreakfastPrep time:Cook time:Total time:Serves: 4A light, flavorful, really good pancake that uses up a lot of zucchini and tastes like zucchini bread.Ingredients- 2 large eggs
- 3 tablespoons olive oil
- 2 tablespoons sugar (optional)
- ¼ cup buttermilk or soured milk
- ½ teaspoon vanilla extract
- 2 cups shredded zucchini
- 1 cup all-purpose flour
- ¼ teaspoon table salt
- 1 teaspoon baking soda
- 1 teaspoon ground cinnamon
- ⅛ teaspoon ground or freshly grated nutmeg
- ¼ cup semi-sweet chocolate chips (optional)
- Oil, for coating skillet
Instructions- In a large bowl whisk eggs, olive oil, sugar, buttermilk and vanilla until smooth.
- Stir in zucchini.
- In a smaller bowl, combine flour, salt, baking soda, cinnamon and nutmeg.
- Stir dry ingredients into zucchini batter, mixing until just combined.
- Stir in chocolate chips.
- Heat oil or butter in a large, heavy skillet over medium heat.
- Scoop ¼-cup rounds of batter in pan so they do not touch.
- Cook until bubbles appear on the surface, about 2 to 3 minutes.
- Flip pancakes and cook another minute or two.
- Keep pancakes warm in on a tray in the oven set on low or in a toaster oven.
- Repeat with remaining batter.
- Serve warm with or without traditional pancake toppings.
- Pancakes freeze well.
- Gardening adventures, Heirloom Plants, Permaculture and Edible Forest Gardening Adventures, Recipes, Vegan, Vegetables, Vegetarian
Kohlrabi: A New (Old) Vegetable
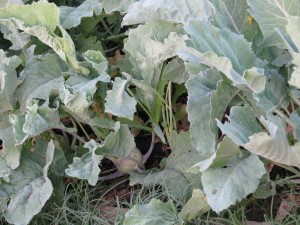
Cute hot air balloon veggie Once, my mother came home from the grocery store and was laughing about a woman who stood hands on hips in front of the produce section and announced, “I wish they’d come up with a new vegetable!”
I entirely sympathize.

The whole plant is edible! This year I planted a vegetable that I hadn’t grown, and perhaps had never eaten before. Kohlrabi. It certainly isn’t new; its been mentioned since Roman times and used on many continents. But it was new to me. The name is German, and it can be found in (East) Indian, Italian, French as well as Asian cuisine. It is very low in calories, yet very high in fiber, potassium and other vitamins and minerals.
It also is very cool looking. You can either imagine an alien, or a hot air balloon. The entire plant is edible, and can be eaten raw.
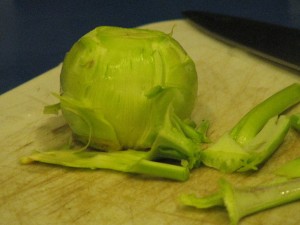
Peel the outer layer of older bulbs. When young, the leaves, stems and bulbous base can just be munched on, chopped up in salads, grated for slaw, used like jicama for dips, stir-fried, and even barbecued. When older the leafy parts should be separated from the tougher stems, like older chard leaves. The base should then be peeled before use.
The flavor is very mild, and is kind of turnip-radish-broccoli tasting. There are two types, a purple and a light green. I grew the light green, but have read that the purple variety is sweeter. I don’t know if that’s a good thing or not, but I may try that next year.
I braised and steamed the leaves, ate some of the bulb raw and stir-fried the rest. It was tasty. It was cute. It was fun to say. It was NEW.

Stir-fried kohlrabi with sesame oil and seeds, served with brown rice noodles and fresh orange. And, if you want to send a grocery store checker into confusion and hold up the line, buy some kohlrabi. They’ll have no idea.
