- Compost, Gardening adventures, Health, Hugelkultur, Other Insects, Permaculture and Edible Forest Gardening Adventures, Soil, Vegetables, Worms
Don’t Clean Up, Dig It In!

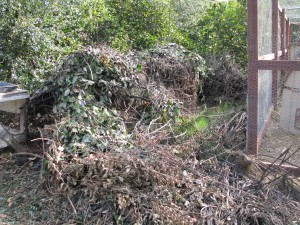
Use old vegetables to grow new ones! Tomatoes, eggplant, peppers, fennel, carrots, string beans, three kinds of basil, and probably other things I’ve forgotten about! In January of this year I wrote about Lazy Composting. Frost had killed off sweet potato and tomato vines,

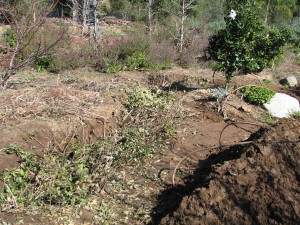
- Frosted vegetable stems are perfect.
and the soil in the raised garden beds were becoming very low.

- Soil level is very low on the raised beds.
Instead of hauling all the vines to the compost heap or bin, I thought I’d create soil in place. The raised beds are lined with chicken wire to protect veggies from gophers. Although I didn’t want to disturb the microbes and fungus in the soil, I dug out half the beds down to the wire.

- I dug out half the bed down to the chicken wire. Miss Amelia and Chickpea checking out the worm situation. I had to kick them out…the worms stay!
Then I layed all those vines right on the soil and covered them up.

- I piled on the old tomato vines, then covered them up with the soil I’d removed.
Then I did the other half…
- Spent tomato vines, with some green ‘maters still attached.

- You can see bits of the vines sticking up out of the first half. That’s okay!
… and then did the other bed. Any thick stalks in other beds which didn’t need extra soil I simply cut close to the ground so that their roots can decay in place and feed the wormies.

- Snip off vegetables at the surface and allow the roots to decay in the soil. Use the tops for mulch, or dig them in, too.
I sprinkled the whole thing with a little Epsom salts for the magnesium sulfate, and a little sugar to start the disturbed microbes feeding and reproducing heavily, which would cause them to decompose the vines more quickly.
In one bed I planted cold weather crops right away; peas, brassicas, garlic, onions and more. I am a firm practicioner of polyculture, or integrated gardening , which means that I plant an assortment of seeds of plants which will help each other in small areas instead of planting all one thing to a bed. I can still plant a row of peas so that I can string them up easily, but I’ll plant all kinds of other plants around them. Usually I don’t plant in a line at all anymore, but rather stake the plants as they need them. Often they’ll use taller plants as support. This is why planting peas and sweet peas next to trees and bushes is a great idea (they fix nitrogen in the soil which helps the tree).
In the other bed I waited to plant until March when the weather warmed up, because I was planting early summer crops. Here it is the beginning of September, and here are the beds, still producing. Even the winter veg one.

- Two of the beds, one still with winter brassicas in them in Sept.
In the bed to the right there is a yellow current tomato blocking the view, and growing into the tree. You can see a Japanese eggplant, and behind it the red is a pepper. Under the tomato and along the bed are three kinds of basil, many string bean plants, some of the sweetest carrots we’ve grown, fennel (one of which we allowed to be the host plant for the Anise Swallowtail, which ate the tops. The bottom of the fennel, which is the part we eat, will still be harvestable). In the bed to the right is the January plants still alive and kicking. Collards, kale, garlic, celery, onions, brussels sprouts, kohlrahbi and more. We’ve harvested most of the garlic and onions. We’ve harvested kale, collards and celery by cutting leaves and allowing the plant to continue to grow. The stalks are now so thick that it is hard to cut them. Out of season, these plants have had attack by cabbage moths and other bugs, but because of the integration of plants and the health of the soil, they’ve bounced right back. I’m harvesting the plants now to feed to the chickens so that I can use the bed for something else soon.
So what happened? A teaspoon of great soil has a billion microbes in it, a million fungi, tens of thousands of amebas, bacteria and all kinds of things we don’t even know about yet. This is a good thing. This is the secret to continued life on this planet. Healthy soil doesn’t wash away, doesn’t erode, feeds the underground waterways, grows excellent food for healthy wildlife and healthy humans. If we feed the soil, we save the planet. That simple. That means no Roundup, no GMOs, no chemical (even organic) fertilizer. Just compost. Very cheap and easy.
Vegetables tend to like a soil that is heavier in bacteria than in fungus, although both should be present. Woody plants such as bushes and trees tend to like a more fungal soil. The vines that I buried had both dry (stems) and wet (green leaves and tomatoes) on them. The stems made the fungus flourish in the soil, and the green bits made the bacteria active. There wasn’t enough matter to become anaerobic, or to rob nitrogen from the soil. The vines weren’t compacted so lots of soil surrounded all the parts, aiding in quick composting and keeping the soil aerated. Water could be absorbed better as well.
If you are starting a garden and want to buy compost, be careful of what stores sell you. In August I was asked to look at a few raised beds that hadn’t succeeded. The soil was low in the beds, there were a few straggly pepper plants, a poorly tomato and some brassicas of some sort which were so stunted that they were just green balls of leaves. When I pulled one up there was white stuff on the roots. A couple of strawberry plants looked very healthy but unproductive. I tried the soil and couldn’t get my finger into it because the roots from those poor peppers had made a thick mat just under the surface of the dirt well beyond their dripline. Two major things were wrong. One was the dirt in the beds. Splinters of shredded wood made up the bulk of it. The woman who had asked me to look at the beds said that she had described her project at Home Depot and they’d recommended two kinds of bagged stuff. I say stuff, because it isn’t soil. What they recommended would be appropriate for hardwoods such as bushes and trees, or acid-loving plants. That is why the strawberries were healthy, only they were in the full sun in a searing hot place and would have done much better under the shade of other plants. I showed the white stuff on the brassicas to her; it was fungal net, which showed the high fungal activity in the soil. Perfect for trees, not perfect for vegetables. Also the brassicas are cold-weather plants and just won’t develop in our summer heat here in San Diego County. They should be planted from October through the beginning of March. The spongy soil… honestly, I’ve never before felt root mat so thick that I couldn’t wiggle my finger into the soil… was the result of desperate plants and poor watering. A custodian would occasionally hose water the beds, which meant that he’d shoot some water on them for a few minutes every day or so. This topical water didn’t sink into the bark-heavy soil. It was only enough to water the top, so the plant roots couldn’t go deep. It was often enough that the plants didn’t die entirely, but survived stunted and striving for water and nutrition that the fungal soil wasn’t providing. Vegetables (and roses!); indeed, most plants except grasses and seedlings, need deep watering less frequently. This allows the roots to go where they want to go, deep into the ground where they can mine nutrients and stabilize the plant. My advice for her was to dig in the few plants that were there, use the compost in the compost bin next to the beds, even if it wasn’t decomposed and add some vegetable-friendly soil to the beds to bring up the heighth. I recommended mixing seeds and scattering them, making sure she planted winter crops, not corn or tomatoes. I also recommended a long watering twice a week; none when it starts raining. If it ever does.
Recommending permaculture techniques to people makes me want to work in the garden! That is because there is so much life, so much success, so many happy surprises and such great feelings that come out of naturally planted gardens. Rows of veggies look so neat and peaceful, but beds chock full of veggies are more fun, better tasting and far more productive.
I just wanted to follow up on the old post about digging in the vines and show you how well the plants did. I have never fertilized these beds after burying the vines and sprinkling on the Epsom salts and sugar. All this growth is due to the happy microbes making nutrients available to the vegetable roots. If you think about it, plants in the wild shed their seeds and then either completely die off or drop leaves. The seeds naturally grow up through the debris of the last generation. Makes sense, doesn’t it?
When these beds are done (if they ever are! They keep producing!) I will practice no-dig gardening on them and simply cut all the plants at the soil surface and drop the tops. I’ll plant seeds for winter crops right in among the debris of the summer crops. They’ll use the nutrients, shade and support of the old crops to grow. October is a good planting time for winter crops because the weather finally changes and the daylight hours are shorter which these plants need. What to plant? Potatoes, garlic, onions, Brussels sprouts, cabbage, peas, broccoli, cauliflower, rhubarb, kohlrabi, celery and much more. Cover crops when it frosts and allow good drainage for the potatoes when it rains. Be sure if you buy starter sets that they are guaranteed organic! Best of all plant organic seeds… they do the best of all and are the best value.
Have a happy, easy Fall garden!
- Compost, Composting toilet, Gardening adventures, Hugelkultur, Permaculture and Edible Forest Gardening Adventures, Ponds, Rain Catching, Soil
Rain Catchment Awesomeness (and some BSP)

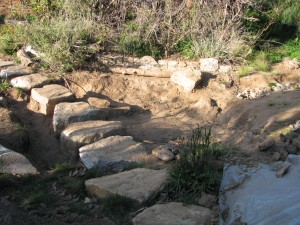
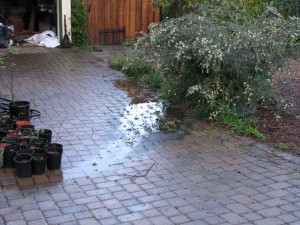
Water flowed over the stone steps First, a little BSP (blatant self-promotion). There is a wonderful ezine called San Diego Loves Green featuring topical local articles and snippets that reflect on the growing green community here in, you guessed it, San Diego. The San Diego Permaculture Group has an ongoing column, and yesterday I was the guest writer. My article is on the importance of planting natives , with some information that you might find surprising, or that you may have already read in my blog about the same subject. Also (more BSP) if any of you attended the Southern California Permaculture Convergence this weekend, and still yet, if any of you listened to my talk on soil, first of all I’d like to thank you for your attention and attendance, and I hope I answered your questions and solved some problems for you. You can search on my blog for many posts concerning nitrogen -fixing, or 50 Ways to Leave Your Compost , and see my composting toilet (I went to a Garden Potty).
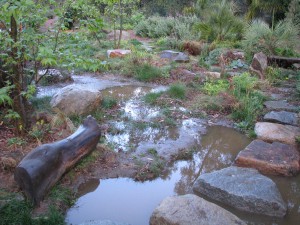
We had almost two inches of rain on Thursday night. In San Diego we rarely receive the long soaking rains that we really need. Instead we must be ready for flash floods. If you are familiar with Finch Frolic and the labors we’ve been undertaking in the last two years to hold the rainwater, then you may be curious to find out how the property survived this last middle-of-the-night flooding and hailstorms. If you remember, not only is there the water flowing off the roof and falling onto the watershed property, but also an unmeasurable amount that is purposely channelled runoff from all the neighbor’s properties that runs through mine.
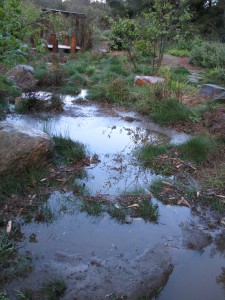
All basins full! Since the permaculture project was installed I haven’t had any of the erosion that plagued the site. As of last year I’m pretty sure that every drop that falls on my property is caught, in rain catchment basins, the ponds, and in the loam and compost in the guilds. The challenge was to also keep all the neighbor’s water on my property as well! I’m thrilled to say that we almost did it!
There is a new bog area being designed by Jacob Hatch just above the big pond.
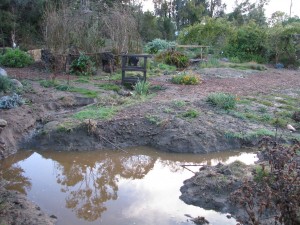
The new bog area This area had been designed to channel overflow water from the rain catchment streams around the pond and down a black tube to the stream bed below. Greedy me wants all that water! With the creation of another silt basin, and now that there is vegetation in the stream to hold onto the silt, I’ve made the water now flow directly into the big pond. There are planned overflows from the big pond, and water did overflow where it was supposed to.
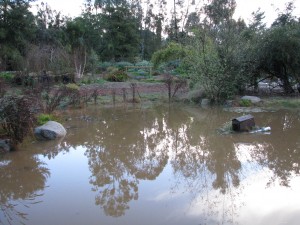
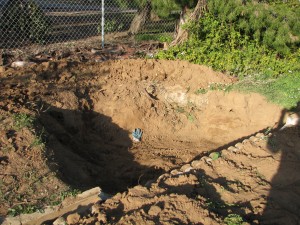
The big pond was filled to capacity, making the duck house do a sinking ship impression because of the length of the rope attached to the anchor wasn’t long enough. The first rain catchement basin was enlarged a lot so as to catch water higher on the property.
The first catchment basin was deepened There is decomposed gravel in that one so the water perculates quickly, thank goodness, as most of the other basins hold water due to the clay composition of the soil.
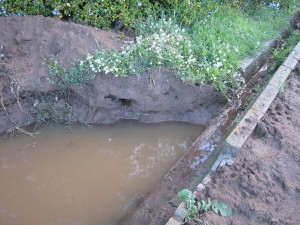
Water following the basins. Also, a rain catchement basin was created along the top of the cement channel that normally funnels water off the property.
New basin, empty A series of these will be created all along the channel, allowing water to slow, gather and perculate along the length of the property, with no outlet at the end.
Full! This will take some of the flow pressure off of the water diverted down into the main series of basins.
The only area breached was actually due to a gopher hole whose origin must be in the stream. I could tell by the swirls in the mulch where the erosion happened.
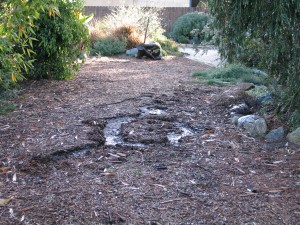
Swirls tell of a breach. There is also the slight problem of water flowing down my own driveway and then down the trail.
Water funneled down my driveway. I think a small hugelkultur bed might slove that problem.
The verdict? Almost all the water was retained on the property,even that of the neighbor’s! A few tweaks and we are well on our way to total rainwater dominance! Mwwahahahahahahaha!

Mwwahahahahahahaha! - Compost, Gardening adventures, Hugelkultur, Permaculture and Edible Forest Gardening Adventures, Rain Catching, Soil, Vegetables
Hugelkultur: Irrigating with old wood
Hugelkultur is a joy forever. Hugelkultur is a German word (pronounced hoogle culture: it should have some umlauts over the first ‘u’ but I have no idea how to do that) which translates as hill culture. It is a process of building raised beds with a core of old wood. The benefits are that as the wood decomposes it not only releases nutrients into the soil, but it holds water like a sponge. Rain water is collected inside the bed, then as the warmer weather sets in and heat dries out the outer shell, it will wick that moisture back out. Presto! Irrigation in the dry season. As the wood decomposes it creates air holes into which deeper roots may penetrate and absorb nutrients that aren’t being washed into the ground water. Also, growing on a tall hugelkultur bed makes harvesting easier because vegetables are often located higher off the ground. The process was popularized by Sepp Holzer, although he didn’t actually call it that.
Hugelkultur may be started flat on the ground, by hand or by machine, dug into the ground, stacked very tall or short, or even level to the ground. The best way to build a bed is to place it on contour where rainwater will collect, preferably facing North and South so that both sides receive equal sun.
I have areas of ground that are either very heavy clay, or are decomposed granite with stones left over from the building of the house. Some trees don’t receive the drainage they need from irrigation because of the clay, which causes the roots to suffocate, or else plants dry up because water perculates too swiftly through the soil.
This brush pile against the fence was reduced to a quarter of its size. I also have stacks of brush that were left when the garden was created as hiding places for animals while the garden grew. I don’t need that many brush piles anymore now that the garden is large. I have three wire cages filled with woodier weeds and prunings that are in ‘slow compost’ mode, and leftover trimmings from bamboo used in bridge construction. Perfect hugelkultur components!
I targeted an area between the pathway and a plant guild with two apricots and vegetables in it. When it rains that area has standing water on it because of the clay content. The area should become part of the guild, but the soil needs mucho amending. I have areas like this all around the property. How to amend two acres of soil? How to get rid of the ever-rising mountains of prunings? How to make the rain water permiate the soil and perculate down rather than sheet across? One guess. Yep, hugelkultur. I bury that wood!
I had made a small hugelkultur experiment a year ago with a raised strawberry bed. There was old lime firewood rotting on the property, so I placed several of these logs along the side of the bed, then covered them with soil and planted strawberries. It worked very well. The strawberries loved the acid, even growing into the decomposing logs, and the logs held the moisture. Some wonderful showy fungus came up, too. I will be reworking that bed and this time I will cover the ground with logs, throw on some llama or horse manure, cover with compost and replant the strawberries. I shouldn’t have to fertilize that bed or add soil for a long time.
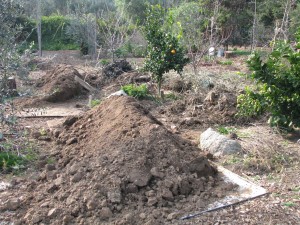
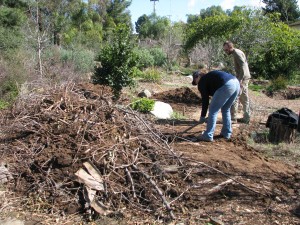
For the big hugelkultur bed I wanted a deep hole that would capture rain and allow the wood to absorb it. My faithful assistants Lori and Steve and Jacob work on this project with me. Steve and Lori dug this ginormous serpentine pit about 2 1/2 feet deep and the same wide.

Lori and Steve digging a huge trench. Since the paths had just been covered with mulch, the dirt was piled on top of plywood layed over the mulch for protection.
Plywood over the paths helped keep things neat and tidy. Then we began filling the bed with the largest wood first.

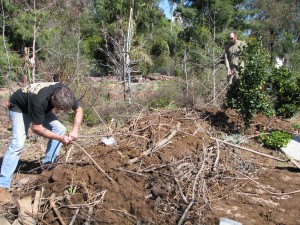
The empty trench with still-intact drip systems over it. We didn’t have large logs which would have worked well, but we had lots of thick branches. This hole took a lot of prunings and we jumped on them to compact them down.
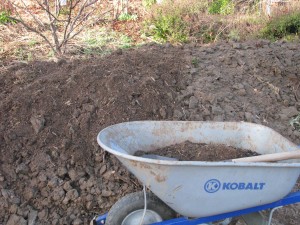
A bear trap! There are a lot of branches in this pit. The hugelkultur bed was left for a few days to settle (and we had run out of time and energy that first day!), and then we worked on it again. Extra dirt from the rain catchment basins that the men were enlarging was hauled down and thrown into and around the wood.
Dirt was added to the mix The mound was watered well. In dry areas it is important to water the wood and the soil well as you are building or else the bed will want to draw water from the area around it, drying up any seeds or plants planted on it.

Some of the long pieces that really stuck out were pruned off. Of course if this is a temporarily boggy area, the hugel bed would help dry it out. There were subterranean irrigation lines across the area already, and since we have a dry climate and the wood I used wasn’t old spongy logs and would take some time to become absorbant, we reestablished the drip system across the top of the hugel bed.
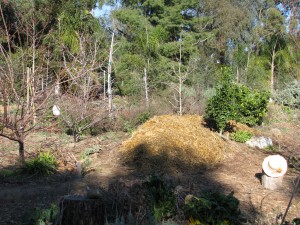
Steve reconnecting the subterranean drip, which runs from a well powered by solar. Because there weren’t large logs, there were a lot of spaces to fill with dirt. Gradually the mound grew and was sloped down to the pathway. Finally a couple of inches of dirt was packed on top. Unfortunately this was mostly clay from the excavation site, but if it had been good soil to begin with, I wouldn’t have needed the hugel bed now, would I? Yes, I did give it a sprinkling of sugar just to get the microbes feeding.

All topped up! There was so much clay that this could have been a big fire pit! The next day I dug up soil from the bottom of the wire cages that were now empty of branches, vines, and sticks. In less than a year since making the wire beds they’d begun to decompose and there was several inches of nice soil at the bottom. I hauled it over to the new bed and topped the clay with the compost.
Guess which half has the good soil on it? I want to break up the clay soil so I threw around a cover crop mixture of peas and wheat. The peas will fix nitrogen in the soil, the wheat roots will stabilize and break up clay, I can harvest food from both and then slash and drop the plants to bring nutrition to the soil surface. I also had a bag of mixed old veggie seeds. Last year or so ago I pulled out all my little envelopes of veggie seeds that were very old and mixed them all up. I planted batches around the property and had many things germinate. I still had about 2 cups of the seed left so I threw it around the new hugelbed along with the cover crop. Why not? If the seed isn’t viable, no loss. If it is, terrific! I can always transplant the sprouts if there are too many of any one thing.

Organic cover crop and a bag of old mixed veggie seeds. I watered the seed down, and then raked out the old straw from the Fowl Fortress. Here is a warning about straw: it will germinate. People say straw doesn’t have seeds in it because the seeds are all in the tops which is cut as hay, but they lie. They live in a dream. Straw still has seeds in it and I had a nightmare of a time weeding pathways the first year of the garden because they were all strewn with straw mulch. However if you put straw down for your hens first, they will eat all the seeds, poo on it, kick it around in the dirt, and then you will have a much better quality straw to use. Straw is difficult to get wet, and it needs to be wet when placed on the bed unless you live in a wet climate or have timed the planting to be just before a long soaking rain.

A thick layer of wet straw went over the top of the scattered seeds. Even then it is good to soak the straw first and then apply it to the bed. Some people soak the straw in an enriched liquid, using manure tea, kelp, microbial brews, organic molassas, etc. The mulch acts as an insulator for moisture and warmth (the decaying wood will eventually produce some heat to warm the little plant feet), and a suffocator for weeds. It can also be a home for sow bugs if too thin. In wetter climates the straw layer can be an inch or so thick. In drier climates the straw or whatever you use as a top mulch should be several inches thick or else it will just wick moisture out of the bed. The same rule applys when using newspapers as a mulch. TIP: don’t let your chickens near the new bed! They will ‘rediscover’ their old mulch and start kicking all your work apart!
If I had wanted to plant established plants on the hugelkultur bed rather than seeds, I would have forgone spreading compost and just covered the poor soil on the mound in wet newspaper or cardboard, and then piled on the straw mulch. To plant I would have cut a hole through the paper, added a handful of good compost and planted in the hole.
So the bed was done, and just before a predicted rain event, too. As it rains the water will roll into the bed, be absorbed and held by the soil around the branches which will eventually begin to absorb the moisture as they decay. The seeds will sprout through the mulch and their roots will hold and amend the clay on the mound. Eventually the roots of the apricot trees will reach over towards the hugel bed, and that patch of icky clay soil will become beautiful. All the while I can still grow crops on the raised bed. My three wire bins are empty, an enormous brush pile is reduced to a small mound, and extra dirt found a new home. Plus we all had some fantastic upper body workouts. A winning situation all around.
More hugel beds will be created in troubled spots; some may only be a couple of feet long below a tree’s root line to help with soil drainage while amending the planting bed.
Wire cages filled with old weeds, prunings and vines are terrific for hugels! If you are in an area where the top mulch might wash away in heavy rains, make a latticework of sticks held down with landscape pins or more sticks over the top of the straw. Or cover with wire until the plants begin to sprout; you don’t want the wire to remain on the bed.
So try a hugelkultur bed, big or small. You’ll wonder why you never tried it before.
- Animals, Birding, Compost, Gardening adventures, Living structures, Permaculture and Edible Forest Gardening Adventures, Photos, Ponds, Rain Catching
Frost on the Pathways
It doesn’t often frost here in Fallbrook, which is located about an hour from both the mountains and the Pacific in northern San Diego county. When it does, the fruit growers have to take drastic steps to keep their citrus, avocados and other tender plants from dying. The last frost happened after a long steady rain, just after a thick mulch was applied to all the trails here at Finch Frolic Gardens (thank you, Lori!). I awoke to a magical result: just the pathways had turned white with frost. Beautiful! (You can click on the photos to enlarge).
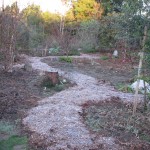
Frost on the newly mulched trail. 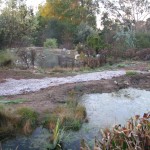
Between the two ponds. 
Ice skating rink for birds. 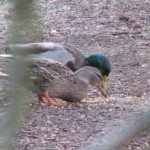
Mr. and Mrs. Mallard enjoying some breakfast scratch. 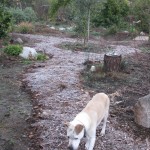
Sophie following the trail 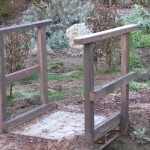
Little frosty bridge 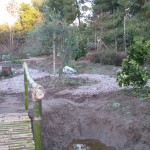
Past the new little bamboo bridge. 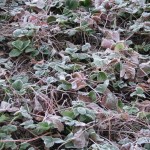
Strawberries to Frost: “Bring it on!” 
These wildflowers survive frost just fine. Winter blooms, too! You May Also Like

Native Insects and IPM
- Animals, Bees, Chickens, Cob, Compost, Composting toilet, Gardening adventures, Health, Heirloom Plants, Herbs, Natives, Permaculture and Edible Forest Gardening Adventures, Ponds, Rain Catching, Recipes, Salads, Soil, Vegan, Vegetables, Vegetarian, Worms
Southern California Permaculture Convergence! Be there!

Southern California Permaculture Convergence If you are interested in any aspect of permaculture, such as organic gardening, herbs, planting native plants, aquaponics, natural ponds, beekeeping, keeping chickens, and so much more, then you must come to the Southern California Permaculture Convergence. It happens on March 9th and 10th at the Sky Mountain Institute in Escondido. The keynote speaker will be Paul Wheaton, lecturer and permaculturalist extraordinaire of www.permies.com fame. Oh, and I’ll be one of the many speakers as well (cough cough). The Early Bird special of only $50 for both days ends at the end of January, and then the price will rise, so buy your tickets now!
Also, for a full-on demonstration of taking bare land and creating a permaculture garden, there will be a three-day intensive class taught by Paul Wheaton on site the three days prior to the Convergence.
You can read about the convergence here at the official website, which will give you the link perm.eventbrite.com where you may purchase tickets. Also visit the SD Permaculture Meetup page to see all the free workshops that happen monthly all over San Diego.
This convergence is such a deal, you really shouldn’t miss it! And such a bargain, too. One of the best things I find that come out of these convergences is the exchange of ideas and networking among the attendees, and all the practical information you can take home and use right away. One of the largest parts of permaculture is building community, which means sharing with and assisting others.
Really. Don’t miss this! Tell your friends!
You May Also Like
Native Insects and IPM
- Animals, Bees, Birding, Gardening adventures, Other Insects, Permaculture and Edible Forest Gardening Adventures, Ponds, Reptiles and Amphibians, Soil, Worms
Fall Morning

The birdwatching garden. I use the kitchen table as a work center, but spend a lot of time not working. That is because from the big dusty windowseat, through the spiderwebs that catch sunlight in the corners of the glass I watch a fairytale of animals. Song sparrows with their formal stripes and classy single black breast spot hop along the uneven flagstone walkway. The walkway, recently weeded, is again being compromised by sprouts. The small pond wears a heavy scarf of peppermint along its north side, and a mixture of fescues and waterplants around the south. A waterlily bravely floats pads on the still water after having been drastically thinned last month. A calla lily opens partially white, partially green.
Below the window in a dish of seed set low for ground feeders are house finches, the males’ proud red fading like the leaves of the Japanese maple behind the green bench. Lesser goldfinches skeletonize the leaves of sunflowers that have sprouted from birdseed; a nuthatch and a mountain chickadee take turns on the hanging suet feeder, both noisy and reminding me of pine forests. A pair of crows who have lived near this garden for years, but who have been about other business during the summer, are reunited on the telephone line. She grooms his feathers and he leans into her. I’ll have to put treats out for them, to keep on their good side. A Nutall’s woodpecker looks like a childhood toy by hopping straight up the big pine. I grin a welcome to a couple of white crowned sparrows, the forefront of the migratory flock. These spirited and chatty birds shuffle leaves onto my walkway every morning, and I quite happily sweep the leaves back for the next round. It is a ritual just between us. A young scrub jay swoops in with much show, seeing how big a reaction he can get from startling the smaller birds clustering at the feeders or taking warm dirtbaths. He lands on a small trellis and pecks out seeds from a sunflower I propped up after its yellow glory faded. Finches visit when he leaves and take their share of this high protein food.
")
House finch nabbing sunflower seeds ( photo taken through a dirty window! Sorry!) The outside water is turned off; I should be on my knees in mud down by the chicken coop right now fixing a break in the pipe but I am held here by the autumnal light. Even in the morning it slants at a kinder angle, bringing out the gold in the leaves. Later when the water resumes the dripper on the bird bath will start and sparrows, finches, towhees and random visitors will sip drinks and take cleansing baths. One of my favorite sights is watching a group of finches taking turns in the bath, daring each other to stay longer and become wetter. Their splashing sends a cascade of drops into the sunlight. They give Finch Frolic its name. Now the only visitors are honeybees taking water to hydrate their honey. I emphathize with these bees. Only the older females do the pollen gathering, carrying heavy loads in their leg sacks back to the hive until they die in flight. A useful life, but a strenuous and unimaginative one.
Perhaps today there will also be a house sparrow, or a common yellowthroat or a disagreeable California towhee, what everyone knows as a ’round headed brown bird’. Or maybe the mockingbird will revisit the pyracantha berries, staking them out as his territory while finches steal them behind his back. I hear the wrentit’s bouncey-ball call, but as they can throw their voices I usually don’t spot them. Annas hummingbirds spend all their energy guarding the feeders, stopping to peer into the window to see if I’m a threat. My black cat Rosie O’Grady stares back, slowly hunching, mouth twitching with a soft kecking sound as if she could hunt through a window. I see that the hanging tray of grape jelly needs to be taken in and washed because the orioles have all migrated. Rosie is given up by the hummingbird and instead she watches cat TV as the birds shuffle in the Mexican primrose below the window.
I don’t see either of the bunnies this morning, Primrose or Clover. They live under the rosemary bush, and perhaps in the large pile of compost in the corner of the yard. I’ve watched them nibble the invasive Bermuda grass, and pull down stalks of weedy sow thistle and eat the flowers and seeds. They do no harm here, and are helping with the weeding; I love watching them lope around the pathways living in cautious peace.
Unseen by me by where I sit, mosquito fish, aquatic snails, dragonfly larvae, strange worms and small Pacific chorus frogs hang out in the pond and under the overhanging lips of flagstone I placed there just for them. Under the plants are Western fence lizards big and small awaiting warmth from the sun to heat up the rocks so they may climb the highest stone in their territory and posture while the heat quickens their blood. A mouse scurries between plants, capturing bits of birdseed scattered by the messy sparrows. The soil is good here, full of worms and microbes and fungus. Everything is full of life, if you only know how to look for it. You can smell it. You can feel it.
Now comes the spotted towhee, black headed with white patterns on his wings and reddish sides. Once called the rufous-sided towhee, he is bold and handsome, his call a long brash too-weeet. He sassily zig-zags down the narrow flagstone pathway looking for bugs.

Spotted Towhee grubbing in his fancy clothes, so bright after a molt. I haven’t seen the rat family for a few days. The four youngsters invade the hanging feeders, tossing each other off and being juvenile delinquents. At night I hear the screech of a barn owl, which might be my answer.
The oxblood lilies – always a surprise during the dry and the heat of September, have almost all faded, but sprouts of paper white narcissus are beginning to break ground. They are Fall flowers here, usually done by Thanksgiving.
It is Fall. Finally. The world of my garden is tired and ready for a rest from the heat, the mating, the child rearing, the dryness, the search for diminishing food, the hiding so as not to become food. Although the days here are still in the high 80’s the evenings bring coolness and a much-needed dampness. Rain won’t come until November or later. But we wait for it, the animals, the plants and I. And time passes as I sit at the table and watch. I know of no better way to spend an autumn morning.
You May Also Like
Native Insects and IPM
- Animals, Bees, Birding, Chickens, Compost, Gardening adventures, Health, Other Insects, Permaculture and Edible Forest Gardening Adventures, Photos, Ponds, Quail, Rain Catching, Reptiles and Amphibians, Soil
I Went to a Garden Party….

AAUW Garden Tour Saturday was the AAUW Garden Tour. What a glorious day. I expected about a hundred visitors, and made 120 handouts. Sometime in the early afternoon I guess they ran out, and I didn’t know about it for awhile. I made 25 more for the last two hours, and have five left. One of the docents said that some had been turned back in during the morning. Every couple probably took just one… wow, that’s a lot of people.
I’d been talking to the garden all week, asking the blooming plants to hold that thought for a few more days, and encouraging the nonblooming ones to get a move on. The plants did what I asked! There were so many flowers out Saturday, it was amazing. Heirloom roses, Gideon’s Trumpet, ranunculus, herbs, wildflowers, and waterlilies. The garden, apparently, also was also all for proof in advertising, as in standing behind the NWF Habitat sign on the front gate. So many kinds of butterflies and dragonflies were out for the first time this year that people remarked on it. In the afternoon, there were sightings of a king snake all over the property; I think it had to have been three kingsnakes. One was moved from the refreshment area, but he came back, and then as I was standing by the pond talking to some ladies one came past us. Another was sighted up in the driveway. Roger sighted a gopher snake. No one shrieked or complained; either these were hardy people, or the idea that this was a habitat yard made them keep calm. It also backed up my claims of letting snakes deal with gophers and rodents! One man spotted a baby bunny under the Withy Hide bench. By one o’clock, it was funny. It was as if a button had been pressed to turn the garden on, and all the features were working! What a glorious day.
Jacob (Aquascape Associates) and Roger (landscape architect) and I answered questions for most of the day; the last four visitors left at four. So many people asked questions about permaculture, soil, beekeeping, cob ovens and rain catchment that I know that I couldn’t answer everyone’s questions. Of course there were some who like a tidy, orderly garden, and that is fine. If everyone came away with some idea how to work with nature rather against it, to use chemicals less, to grow organic food, to repurpose, to compost their kitchen waste and weeds, then what a lot of small ripples of good will come of it.
Thank you to my dear friends who helped prepare the garden so that it looked stunning. And thank you to the snakes, butterflies, bees, dragonflies, birds, bunnies and who-knows-what-else that came out to perform for the visitors! And thank you to everyone who visited! No casualities; all good.
Here are some photos, although my camera doesn’t do the colors justice:

AAUW Garden Tour 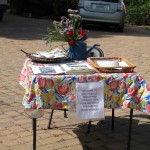
Welcome! Look at photos of how it was. 
Main entrance walkway 
Walkway into the Nest 
One of the many trails 
A palm sitting stump between guilds by the driveway 
A green melon under variegated lemon, with native grasses. 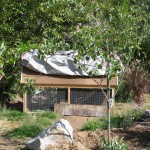
Quail hut, with privacy boards up. 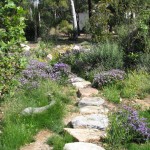
Status and wildflowers across the stone walkway 
Cool spot under the upper pepper tree 
Roger and visitors by the Withy Hide 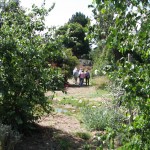
Some of the first visitors of many 
Pickerel blooming in the little pond 
Gideon’s Trumpet keeping blooms and aroma until the tour 
Jacob teaching about natural ponds 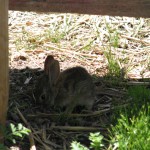
Baby bunny under the Withy Hide bench 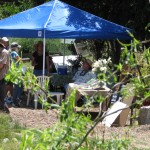
Roger answering questions 
View from the Bee Garden gate 
Cool spot under the pepper tree You May Also Like
Native Insects and IPM
- Gardening adventures, Humor, Permaculture and Edible Forest Gardening Adventures, Rain Catching, Soil
Seven Hundred Gallons of Cooties

That's a lot of tea. One of the amazing and useful things I learned in my Permaculture Design Course was how to brew microbes in a bucket. Yes, I know, most women like champagne and jewelry. I like compost and worms. Whatever. Microbes are the microscopic creatures that make dirt into soil. By brewing a microbial tea you can so supersaturate the water with microbes that giving your plants just a small drink of it will greatly improve their health. That is because microbes eat plant litter and other decaying things and make available (and by ‘make available’ I mean ‘poop out’.) (Sorry.) more of the nutrients such as minerals that can be locked in the soil. Adding microbes to poor soil is a good thing.

Fish tank water, paint strainer and aerator: tools for microbial brewing. To make a microbial brew, you put good compost in a mesh bag such as a paint strainer or layers of cheesecloth. Obtaining compost from various sources gives you a good mix of microbes because not all the same microbes live in all soils. Suspend this bag in a five-gallon bucket of water, add a little organic molasses for the microbes to eat (like sugar to yeast), and if you want other soil additives such as rock sulphate, blood or bone meal, etc. I used water from my fish tank. Then you oxygenate the water with a fish tank aerator. After thirteen hours the microbes will have reproduced to a maximum capacity and the brewing is finished. You should use the brew within a few hours.

I'm not sure what made it foam, but it looked more like a brew. So, I did this a couple of times last Fall. Meanwhile, Jacob, who still maintains the Aquascape projects and volunteers some time here, managed to have donated to me a 700-gallon tank. It had been used for organic fertilizer.

The tank. The target: under the balcony. Jacob brought it over in his pick-up, and with the building of an impromptu scaffold he, my daughter and I (but mostly him) rolled it into place by my garage without damaging the propane tank or each other. Then he re-routed a rain gutter from my paltry 50-gallon rain barrel into the 700-gallon tank.

Trying not to crush the propane tank. The tank filled after a few rains, and I used most of the water recently between rains. Then the last two rains filled it to the top. Jacob, who is into aquatic microbes with which to balance natural ponds, microbes being referred to as ‘cooties’, suggested turning the entire tank into a cootie-brewing container. That way I’d not just be watering the plants, I’d be giving them a microbial smoothie. A cootie cocktail.

The tank, full of rainwater from the gutter, becoming a microbe farm. Always up for doing the improbable, I filled a paint strainer with some fine samples of soil from several long-established areas of my yard, and suspended it inside the tank. In went an entire bottle of molasses, which is a drop in the bucket, so to speak. Then in went my little fish tank aerator, quivering in fear at the impossible task of aerating 700-gallons of water. I took a water sample and then plugged the thing in. That was a few days ago. I have no idea how well the microbes are brewing, since the aerator is barely stirring the water. The water has turned brownish, which I take to be a good sign. The warmer temperature is perfect for the little guys; springtime for microbes. I think I may have a microscope left over from my older brothers – circa 1950-something – in the garage somewhere, with which I can compare water samples to see if anything is happening. I figure, even if it isn’t, there is no harm done, and even if some microbes have flourished the water has improved.

The aerator down inside the now-brownish cootie water. There are many quips I can make about this whole project. For instance, here are several million pets I don’t have to take to the vets. Or, I really love to cook, and since I enjoy making soup this project is a natural. However I just think the whole idea of making 700 gallons of microbial tea is so funny that no matter how the project ends up, I think the laugh is worth it. If I can’t do something bizarre, it isn’t worth doing!

Microbes are amazing, aren’t they?
And so are tadpoles, which are thriving not unlike microbes, but in my pond. (A belated happy April Fools.)
-
Soil: Weeding by Sheet Mulching

Sow thistle For this next part of how to build soil by weeding, I’ll discuss one of the easiest and laziest ways. If you want nothing to grow in an area, and don’t care about how it looks or length of time, then sheet mulching may be for you. I’ve used cardboard and newspapers around my vegetable beds with great success. To fully knock out tough weeds such as Bermuda grass, you should put down a good inch of newspaper or cardboard (or a combination). If you are using newspaper, leave the sections intact or else the wind will blow it everywhere, or cover it with a piece of cardboard. Water it in and let it rot.
If you have old plywood lying around, drag it over to your weed patch and pop it on top. Walk over it all you want, just watch out for old nails.

Sheet mulching with plywood... at work! Another method is to water your weeds, then cover them with thick black plastic held down with rocks. On hot days the weeds will cook under the plastic. I’ve used this before successfully, but now I would only use it if I had the plastic already. I’m trying hard to not contribute to the creation of more plastic.

The area after the plywood was removed. Then there is sheet mulching where you actually build your soil over the top of weeds. The new catch-phrase for this is lasagna gardening. Start with a layer of corrugated cardboard or three layers of newspapers (or a combination!) right on top of your weeds and where you want to plant (this isn’t for clearing pathways). Water this in really well. Then gather together compost items such as coffee grounds, weeds (without seeds), grass clippings, shredded paper, seaweed or algae… whatever you can compost. Sort your compost into browns and greens. Browns are mostly dead stuff such as leaves, shredded paper, pine needles and dried plant clippings. Greens are fresh things like dinner scraps, green cut grass… anything with some life still left in it. Manure is perfect for your ‘greens’ pile. Chasing down landscapers as they rake leaves and bag up grass from their lawnmowers is a good way to collect ingredients. Now start layering. The best ratio would be two parts brown to one part green, but don’t stress over it. The green stuff will heat up and cook the browns. Depending on how much stuff you can layer, your bed should be about two feet high, and however long that you want it. Water it regularly. Within weeks your lasagna will have sunk down into fantastic garden soil. If you want to plant right away, then add several inches of compost to the top. Otherwise, let it sit a season and you’ll be able to plant right into it. The newspaper or cardboard at the bottom will help suppress weeds and keep it moist. Remember that the deeper your loam, the more rainwater it will hold and the less you’ll need to water.
What all of these methods of weeding does, is to decompose the weeds right where they are. The minerals that they hold in their leaves are distributed into the soil, and as their roots decompose they leave tunnels for worms and other soil creatures to move around in. You are keeping the soil moist and dark, which are wonderful conditions for our soil friends to flourish. I’ve left plywood down on pathways during the entire growing season, and when lifting a piece have discovered treasures such as newts and salamanders underneath, that I wouldn’t have seen otherwis. They are great bug eaters for the garden. Sheet mulch also can harbor slugs and ants, but they are easily dealt with, especially if you have chickens!
Sheet mulching is very easy, it combats even tough weeds, it builds soil, and it repurposes things you might normally put into the trash. So save all those boxes from Christmas, the contents of your paper shredder, what newspapers you didn’t use to light the fireplace, your garden waste, your kitchen waste, and whatever your neighbors want to get rid of (tell them you’re making lasagna with it!) and begin layering. You are helping your garden, helping your soil creatures, building loam, opening underground stores of minerals for usage by plants, making your fruit and vegetables rich with nutrition, lightening your impact on the dump, creating a beautiful garden, and all without backbreaking work and certainly no chemicals! Just say, “NO!” to Monsanto!
-
Soil: Weeding

Lesser goldfinch eating sow thistle seeds. Good soil is the basis of life as we depend upon it. Rich, loamy soil with a neutral pH is what every gardener dreams of. The smell of fresh soil is called geosmin, which is a scent released by happy soil. Good soil makes for healthy plants, which in turn grow healthy fruits and vegetables.
Soil is different than dirt. Dirt is what happens on a roadway after a lot of traffic passes over it and the oxygen is compressed out of it. Dirt is what is left when erosion is allowed to carry off topsoil. Dirt is what remains after unsustainable farming practices where chemical fertilizers are dumped onto plants year after year until nothing will grow anymore. Dirt is what most people have when they move into a new house, because to make the property level all the topsoil has been scraped off and buried. Dirt is nearly dead. But dirt is an ingredient in soil, and luckily Mother Nature is always trying to repair the soil. What we call weeds grow in dirt because these are plants on a mission to bring dirt back to life.
Plants have different jobs in nature. Some have deep tap roots to mine minerals from deep down, bring them up to their leaves which die and transfer the minerals to the surface. Some are groundcovers. Some attract insects. Some fix nitrogen in the soil. Some provide a shady canopy. Most provide mulch in the form of fallen leaves, twigs, flowers and fruit. Some provide habitat for animals, whose droppings fertilize the ground. Plants help each other in a symbiotic relationship, and permaculturalists call a set of these plants guilds.
Now look at weeds in a vacant lot and try to identify them. Wild radish? It has an enormous taproot that breaks apart hard soil, then mines deep minerals and delivers them to the topsoil in the form of leaves. It also attracts bees and other pollinating insects. As does mustard, which has a very tough root system that also breaks up hard soil and creates tunnels for worms and other soil creatures to move through. As the plants die off, so do the roots, which decay and feed the microbes and worms, whose castings turn dirt into perfect soil. Grasses hold onto the soil keeping it from eroding away, shades the soil from harsh sunshine, retains water and provides good habitat for worms as well as food for birds, depending upon what type of grass is growing. All plants have a purpose, even if they aren’t in their native environment.
However we don’t want our gardens to be like vacant lots. Usually, quite the opposite. Many people will look at their backyard full of weeds and poor soil and decide just to dump white sparkly rock all over it and stick in some unhappy cactus. These people are actually much kinder to the soil than those who start the relentless, expensive, laborious and deadly cycle of spraying chemical weed killer, dumping on chemical fertilizer, forcing plants to grow in areas not suited to them and yet never creating soil.
When you use permaculture practices in your garden, the most work is done in the first year. You plan your garden for functionality, plan plant guilds, plot out your own usages and desires, and then plant accordingly. You may plant close together, but keep in mind the needs of the adult tree. Don’t plant invasive plants unless they are properly contained. Don’t plant vines without installing support systems such as trellises first. Lay the groundwork for your garden. Don’t spray. Don’t pour lots of money into chemicals. Don’t even till unless your soil is horrible and you can’t wait to plant (and then, only till once and then never ever again!). There is a lot less physical labor to do in a first year permaculture garden than one with chemicals, and none of it involves poison!
Permaculture makes you look at everything in different ways, even things that conventionally seem bad. Instead of looking at your weeds as devil spawn, look at them with a view to what their purpose is in the garden. What are they telling you about the soil? I’ve talked about this in earlier posts, about what type of soil supports different types of weeds. For instance, nettle grows in high nitrogen areas. Now think of the weeds as a potential crop. Lambs quarters, purslane, even stinging nettle are all edible (boil the nettle briefly to dissolve the acid) and very healty for you. Dandelion wine! Or think of the medicinal values. Watch your weeds for awhile. Do birds eat the seeds? Are they covered in ladybugs? So now that you know your weeds a little better, you may think more fondly of them and perhaps allow some of them to live. Or even reserve a corner of the property for weeds to grow just for those birds, insects and your own harvesting. I’ve allowed purslane and scarlet pimpernel to grow over newly planted areas because they helped hold the soil, preserve moisture and helped prevent more nasty weeds from growing. Now you’re thinking: but what if they reseed? Well, of course they’re going to reseed unless you don’t let them live that long. Seeds are coming onto your property via air, animals and your own shoes every day. There is a horror about reseeding weeds that is all blown out of proportion. Have you ever cut all the weeds and had none come up the next year? Only if you dump Roundup or other chemicals on plants and kill them and everything around them in an annihilation of all that’s good along with all that you don’t want, do you keep anything from growing in that area. So how do you get rid of weeds? Okay, hold that thought.
How makes up good soil? Decomposed organic matter. It is actually the microbes and worms in the soil that make soil alive and healthy, and they are decomposing all that organic matter. How do you get good organic matter? Haul truckloads of horse manure from a farm? Save kitchen waste? Have a worm bin and harvet the castings every six months? Wait until trees are mature and harvest the leaves? Well, yes to all of these, but in the meanwhile, as it often is in nature, the answer is right in front of you: the weeds!
That’s right! Weeds are just compost that hasn’t happened yet. The fastest way to develop good soil when you have no other resources (or not enough resources) is to help nature along. Define your walkways (where foot traffic will compress the soil and where you don’t want anything to grow), and then when you pull weeds, toss them in your garden beds. If you weedwhip or mow, rake the cuttings into the beds. If you do this prior to the weeds setting seed, fine, but don’t lose sleep if you haven’t. You’ll grow some more weeds… great! More compost! I hand pull most of my weeds and then throw them in the guilds under the plants, root ball up. Within a few weeks they have decomposed, and all those nutrients they were holding in their leaves and roots have been delivered to the soil in the same areas. (If you have different types of soil on your property, keep the weeds near where they grew because they were busy amending that particular soil). The layer of weeds will also suppress other weeds from coming up, and will hold in moisture. Sure beats hauling weeds to a compost heap, and certainly beats having the trashman haul off plants that are holding nutrients from your garden soil!
There are exceptions to this practice. Invasive weeds such as Bermuda grass, Johnson grass, and anything that spreads via underground runners (rhyzomes) should not be handled this way. These useful plants for a vacant lot are terrors of your garden. However they can become useful. If you have a compost heap that really heats up, you can cook the weeds in it. What I do is put the weeds in an old trashcan, put the lid on it and let it sit in the heat for weeks until the weeds are cooked and completely dead. If it is Bermuda grass or Johnson grass, I also pound a stake through its heart. Then I compost it. Putting it in a trashbag works, too, but then you’d be contributing to the plastic industry in one more way and also to the landfill. I have set out trashcans with Johnson grass in it to go to the dump when I had so much that I had no place to cook it, and figured that sending organic weed material to the dump really can’t hurt.
How does one get rid of invasive weeds without spraying? Relentless hand-pulling in combination with occlusion, which is covering it with plywood, thick layers of cardboard, black plastic or whatever you have that will deprive it of what it needs to live.
This has been a long, lecturing post, and I apologize (if anyone actually has read to this point!) . I want you to look at the varied functionality of everything in the garden. If you have a problem, can you turn it into a benefit? For instance, if you have a wet clay area, why not harvest the clay from it to build a cob oven or garden feature, and let the depression become a natural pond? Or sheet mulch that area (what some people call lasagne mulching), which I won’t go into here but simply search the Internet for it and you’ll find hundreds of examples. Or plant peppermint or spearmint, or some other wetland-loving plant such as watercress… all of which are edible.
In subsequent posts I’ll talk more about different types of weeding and soil building. For now, go


