- Building and Landscaping, Gardening adventures, Hugelkultur, Permaculture and Edible Forest Gardening Adventures, Rain Catching, Recycling and Repurposing, Soil, Water, Water Saving
Irrigation for Drylands, Part 1: Options

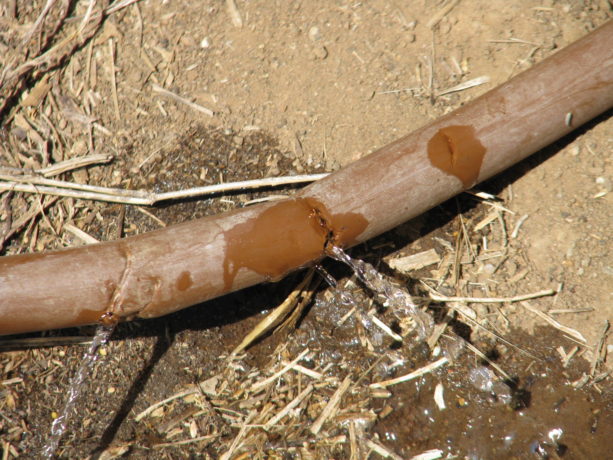
This tubing is so easily nicked that weeding around it often results in a bad leak that isn’t detected for awhile. Leaks cause flooding with dry areas past them on the line. A previous draft of this post was about 2,000 words of mostly rant against Netafim, so I’m starting over trying to be more helpful. You’re welcome.
In Southern California, and many dryland areas, if you are to grow food crops you have to irrigate. I have met several people who believe that they can ‘dry farm’ crops such as grapes here, and that is problematic. Even in Central California where they receive many inches more rain than we do, farmers struggle in the long hot, dry summers.
There are many ways to water, and I’ll address as many as I can.
The first and most important step for irrigating your property is installing the earthworks that will harvest what rain we do receive and allow it to percolate into the soil. Paring that with burying wood and other organic material to hold that water, planting in shallow depressions rather than on raised mounds and sheet mulching will greatly increase the health of your plants and decrease your water bill.
For delivering captured or purchased water you’ll need some kind of tubing and a force to deliver the water. We’ll discuss the natural methods first:

Ollas (oy-ahs) should have a lid or stone or something to block the top, to keep creatures from falling in and drowning. Photo from link page. For small yards, or for orchards with lots of labor, burying ollas (porous clay pots) in the center of a planting area is a wonderful idea. There is a really good article with diagrams and suggestions here. You can manually fill the ollas by carrying water to them (the best would be from rain barrels), or dragging a hose around to fill them. Or they can be combined with a water delivery system of pipes as discussed below. Water is then drawn through the porous pots by the dry soil around them, and thus to plant roots. There is a tutorial about making inexpensive ollas from small clay pots, and interesting comments, here. There are problems, but then, there are problems with everything. Clay pots can break, especially if you have soil that freezes or foot traffic. A larger pot doesn’t mean that water will be delivered farther underground; absorption is based on soil density. This is a system that you need to monitor and replace periodically. On the plus side, clay is natural and will decompose in the soil. Many years ago, long before I ‘discovered’ permaculture, I buried gallon milk jugs in which I punched small holes by some trees beyond any irrigation pipes. I didn’t know about ollas then; I just thought it was a good idea to get water close to the roots of the plants. This really worked and those trees are mature and still exist almost thirty years later, and still don’t have irrigation to them. However, I found that the plastic milk jugs become brittle and break apart, as will plastic soda bottles, and you really don’t want to bury plastic. Clay is much better.

Clay pipe photo from Permanomades. Please follow link to website. These look very large, but are not. Next would be delivering water via some kind of pipe. Clay pipes are the most natural, but unless you have the clay, the labor and the time to create lots of long, hollow clay pipes, this is a pricey option. Clay pipes break easily, too.

Split bamboo delivers water downhill. Photo from link page. If you have lots of bamboo you can season it, split it, remove the nodes (partitions) and then mount it to deliver water to individual plants, to ollas, or to swales. Again, you need time, bamboo, labor and some expertise. There is a good article about it here.
Plastic:
There are a lot of plastic pipes out there, and although I hate to invest in more plastic, it is often a necessary evil. Drip irrigation comes in many forms. There are bendable tubes that ooze, tubes that have holes spaced usually 12″ or 24″, tubes that can be punctured and into which spray heads are inserted, and tubes which can support spaghetti strands that are staked out next to individual plants. The popularity of drip irrigation has been huge in water-saving communities. Unfortunately they have lots of problems. Here I’ll indulge in just a little rant, but only as an illustration.
One of the big problems with flexible tubing in arid areas is the high mineral content of the water and what it does to these tubes. Any holes -including those in small spray heads- will become clogged with minerals.

A nozzle that is clogged next to a hole that is not. Flushing the system with vinegar works for a short time, but eventually the minerals win. If the tubing is buried, then it is virtually impossible to discover the blocked holes until plants begin to die. Tubing above ground becomes scorched in the sun and breaks down.
Also, flexible tubing is extremely chewy and fun with a little drink treat as a reward.

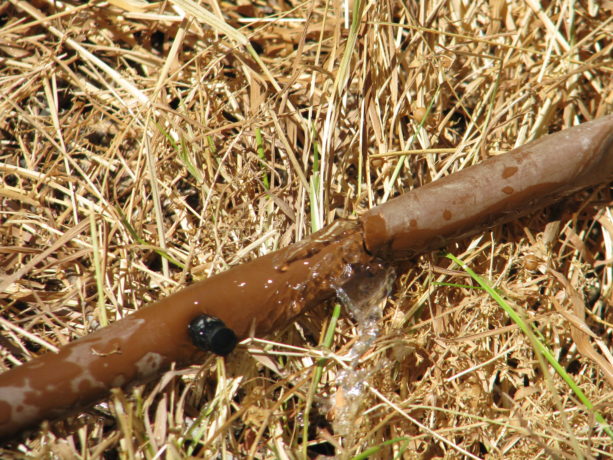
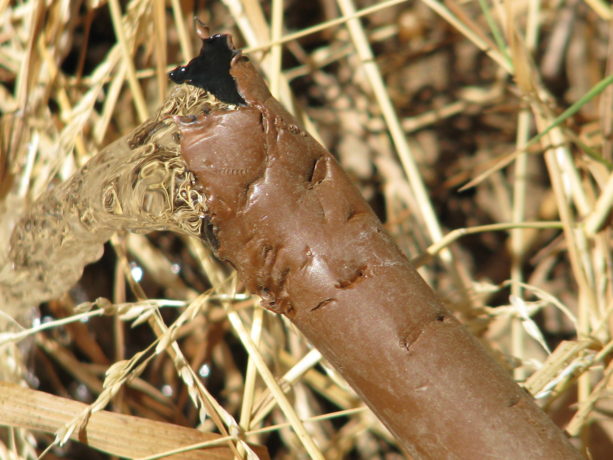
Coyotes and many other animals find flexible pipe so fun to chew. This is the opinion of gophers (who will chew them up below ground and you won’t know unless you find a flood or… you guessed it… dying plants), coyotes (who will dig the lines up even if there is an easier water source, because tubing is fun in the mouth), rats (because they are rats), and many other creatures. Eventually a buried flexible system will be overgrown by plant roots, will kink, will clog, will nick (and some products such as Netafim seem to nick if you even wave a trowel near it), and will be chewed. Some plants will be flooded; others will dry up. You will have an unending treasure hunt of finding buried tubing and trying to fix it, or sticking a knife point into the emitter holes to open them up and then having too much water spray out.
Plus, drip irrigation is not good for most landscape plants. Most woody perennials love a good deep drink down by their roots, and then let go dry for a varying time depending upon the species, weather and soil type. Most native California plants hate drip irrigation. According to Greg Rubin, co-author along with Lucy Warren of The California Native Landscape (Timber Press; March 5, 2013) and a San Diego native landscaper, native plants here enjoy an overhead spray such as what a rain storm would deliver. Some natives such as Flannel Bush (Fremontia) die with summer irrigation and are especially intolerant of drip. Drip is most appropriate with annuals or perennials that have very small root bases and that require regular watering. Small root balls are closer to the hot surface and will dry up more quickly. Vegetables, most herbs and bedding plants can use drip. Plants that have fuzzy leaves that can easily catch an air-born fungal disease such as powdery mildew are better watered close to the ground rather than with an overhead spray of chlorinated water.
Then there is PVC, the hard, barely flexible pipe that is ubiquitous in landscaping for decades. PVC is hard to chew, can be buried or left on the surface if covered with mulch (to protect from UV rays), is available in a UV protected version if you want to spend the extra money and still give it some sun protection, utilizes risers with larger diameter water deliver systems such as spray heads, bubblers, and even drip conversion emitters that have multiple black spaghetti strands emerging from them like some odd spider.
At Finch Frolic Garden I had taken advice to install Netafim, a brown flexible tubing with perforations set 12″ apart, which was buried across the property from each valve box. It has been a living nightmare for most of that time. Besides all the reasons that it could fail (it did all of them) listed above, it also at its best delivered the same amount of water to all of the plants no matter what their water needs. It was looped around most trees so that the trees would receive more water, but since then roots have engulfed the tubing, cutting off the water flow. There are areas with mysterious flooding where we can’t trace the source without killing many mature plants.
Over the past year we’ve lost about 1/4 of our plants including most of our vegetables, because we plant where there should be water, and then mysteriously, there isn’t any. Flushing with vinegar helped a little, but whatever holes are still functioning are closing up with mineral deposits. Okay, I’m ranting too much here. But this was an expensive investment, and an investment in plastic, that has stressed me and my garden. So upon weighing all my alternatives I’ve decided to install above-ground PVC with heads on risers that either spray or dribble, and the dribblers will go into fishscale swales above plants.

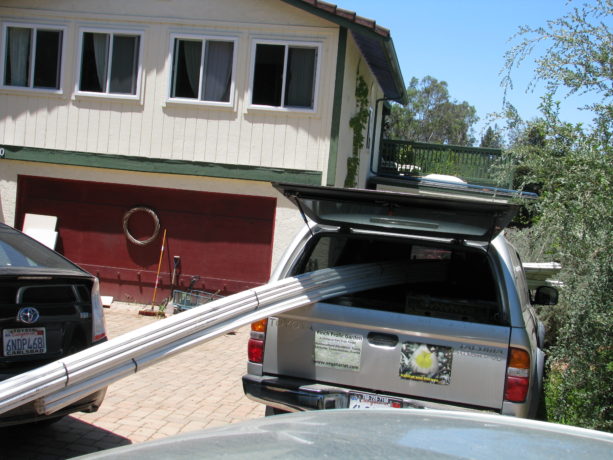
Twenty-foot lengths of PVC can fit in the Frolicmobile, and sure beats carrying it down the property. In the next few posts in this series I will talk about how to draw up an irrigation plan, installation, valves and other watering options, as Miranda and I spend our very hot summer days crawling through rose bushes and around trees gluing, cutting, blowing out and adjusting irrigation. Thanks for letting me vent.
You can read Part 2 Evaluating Your System here, Designing Your System Part 3 here , and Part 4 Conclusion here.