-
Make Your Own Soymilk

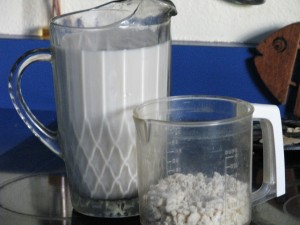
Soymilk and Okara A friend of mine, Kevin, came over and showed me how easy it is to make my own soymilk. What fun! Making your own soymilk is very economical and can be custom-flavored and sweetened to your taste. If you use organic soybeans -which I highly recommend because soybeans are one of the most sprayed crops – you can rest assured that you are serving your family a healthy, non-toxic beverage.
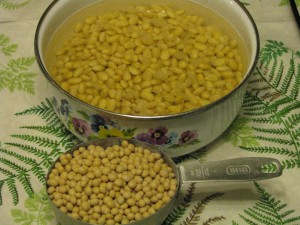
After Kevin showed me his way, I did a lot of research on other ways to make it, and tried some variations. Basically you soak dried soybeans (not edamame!) overnight, blend them up with water, heat it until it boils, strain it and flavor it, not necessarily in that order. Kevin’s method was to strain it before heating. I’ve found I like the results better to strain it after its hot; there isn’t any grit and it strains more quickly. Do whatever works for you.
When you make soymilk, you are actually making two products: soymilk and the high fiber and protein stuff that is strained out which is called okara. There are many recipes for using okara on the Internet, and I’ve found many in the classic cookbook, the Book of Tofu by Shurtleff and Aoyagi. Okara is virtually tasteless. If you strain your soymilk before its heated the okara is ‘fresh’ and a bit gritty. I made it into vegetarian fish patties following this recipe with good results, although they were a little too salty for me.

Fishless okara patties with sauce. If you cook your soymilk before straining, then the okara is also cooked and looks like hot farina. Okara is often mixed with grains and ‘meats’ as a nutritious additive and a food extender. It has little flavor on its own. I used some to thicken a pea soup that was too thin and it worked wonderfully. The soy industry has a lot of okara on their hands so it is usually fed to livestock. It can be frozen or dried, too. If you absolutely have too much okara then compost it, feed it to your worms or bury it around your plants.
Once you have the soymilk you can drink it plain, sweeten it with sugar, honey or whatever your choice is, flavor it with vanilla or something else, serve it cold or hot (which is the best!), or make tofu out of it.

Vanilla bean in hot soymilk Making tofu is also an easy process, which is just curdling the soymilk and straining out the solids; if you’ve ever made goat cheese then you can make tofu.
The ratio of soaked soybeans to water varies depending upon how thick you like your soymilk. Kevin showed me a 4:1 ration (water to beans) which made a thin soymilk, similar to 1% milk. I like the 3:1 ratio because the milk is creamier.
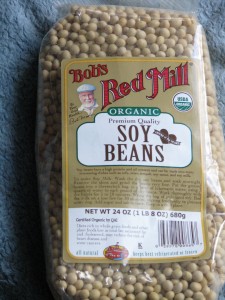
I found a good deal on Bob’s Red Mill organic soybeans on Amazon.com, the beans pricing out to .19 cents an ounce (four bags for about $19 total).

Organic soybeans. I couldn’t find them at my local Sprouts or health food store. One bag of Bob’s Red Mill organic soybeans weighs 1 lb 8 oz, which is about 4 cups of dried beans. The beans swell up by a third, so one package makes 12 cups of rehydrated soybeans. A cup of dried soybeans makes about two quarts of soymilk (and about two cups of okara), so a bag would make eight quarts. A huge savings, and I have the okara as well.
A few tips: you can easily soak a cup of beans overnight and make soymilk every few days, depending on your need and time.

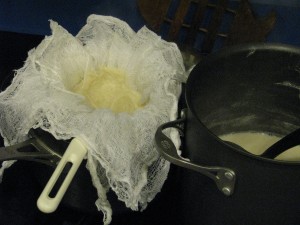
One cup of dried beans equals three cups soaked. Use a very tall pot because when you are heating the soymilk it will take forever and then just when you turn away it will come foaming up out of the pot like something possessed; a tall pot helps keep it under control. After you pour out your soymilk, wash or at least soak your pot. The soymilk residue dries hard and must be soaked again to get off. Use several layers of cheesecloth (which you can wash and reuse), or a piece of muslin to strain your soymilk.

Strain okara through cheesecloth. Also the raw soymilk doesn’t smell very appetizing. It is very beany and grassy. Once it comes to a boil the smell will change into a very yummy tofuish scent.
There is also a great dissent on how long you heat the soymilk. Kevin’s recipe was to just bring it to a boil. Some recipes recommend twenty minutes of boiling. I find that five minutes heats the soymilk and cooks the okara sufficiently. Experiment.
Soymilk and OkaraAuthor: Diane Cynthia KennedyRecipe type: BeveragePrep time:Cook time:Total time:Serves: 8Fresh organic soymilk and okara- delightful and inexpensive. This recipe will make about 5½ cups of silky soymilk and about 2 cups of cooked okara.Ingredients- One cup dried soybeans, soaked overnight
- Nine cups water
- Flavoring (optional)
- Sweetener (optional)
Instructions- Drain the soaked soybeans (which will now be about 3 cups).
- Scoop a cup of soybeans and put in blender with three cups of water.
- Blend until smooth.
- Pour mixture into a tall pot.
- Repeat with the other two cups of beans.
- Heat mixture until it boils, stirring constantly. This can take some time, so I usually give it a stir now and then until it starts steaming a little, and then give it all my attention so that it doesn't foam up and overflow.
- Lower temperature, stir down the foam and simmer for five minutes.
- Line a sieve with several layers of cheesecloth or a piece of muslin (you are trying to catch fine particles) and place sieve over another tall pot or container.
- Carefully ladle soymilk into the lined sieve and allow to drain (you can wait until mixture is cooler before you do this if you'd like.) Use a spoon to move the okara out of the way as you ladle. If you double the recipe you may need to strain the okara and empty the cheesecloth before you finish straining all the milk.
- Allow the okara to drain and cool until you can handle it comfortably.
- Wrapping the cheesecloth around the okara, squeeze the bundle until all the soymilk drains out.
- Refrigerate the okara until ready to use.
- Use soymilk plain, or heat and add flavoring and/or sweetener to taste. I like honey and vanilla.
- Refrigerate cooled soymilk. The soymilk should keep for about a week refrigerated; the okara about four days.