- Animals, Bees, Birding, Building and Landscaping, Chickens, Cob, Compost, Composting toilet, Fungus and Mushrooms, Gardening adventures, Giving, Health, Heirloom Plants, Hiking, Houses, Hugelkultur, Humor, Living structures, Natives, Natural cleaners, Other Insects, Permaculture and Edible Forest Gardening Adventures, Pets, Photos, Predators, Quail, Rain Catching, Recycling and Repurposing, Reptiles and Amphibians, Seeds, Soil, Vegetables, Water Saving, Worms
Special Tours for Aug. and Sept., 2014

Come take a tour of a food forest! Normally tours of Finch Frolic Garden are held by appointment for groups of 5 – 15 people, Thursdays – Mondays. Cost is $10 per person and the tour lasts about two hours. By popular demand, for those who don’t have a group of five or more, we will be hosting Open Tour days for the first 15 people to sign up in August and September. They will be Sunday, August 10 and 24, Sept. 7 and 21, and Thursdays August 7 and 28, and Sept. 11 and 25. Tours begin promptly at 10 am. The tours last about two hours and are classes on basic permaculture while we tour the food forest. I ask $10 per person. Please reserve and receive directions through dianeckennedy@prodigy.net. Children under 10 are free; please, no pets. Photos but no video are allowed. Thank you for coming to visit! Diane and Miranda
- Animals, Bees, Birding, Books, Building and Landscaping, Chickens, Cob, Compost, Composting toilet, Fungus and Mushrooms, Gardening adventures, Heirloom Plants, Hugelkultur, Humor, Living structures, Natives, Natural cleaners, Other Insects, Permaculture and Edible Forest Gardening Adventures, Ponds, Predators, Quail, Rain Catching, Recycling and Repurposing, Reptiles and Amphibians, Seeds, Soil, Water Saving, Worms
Permaculture Lectures At Finch Frolic Garden, June 2014
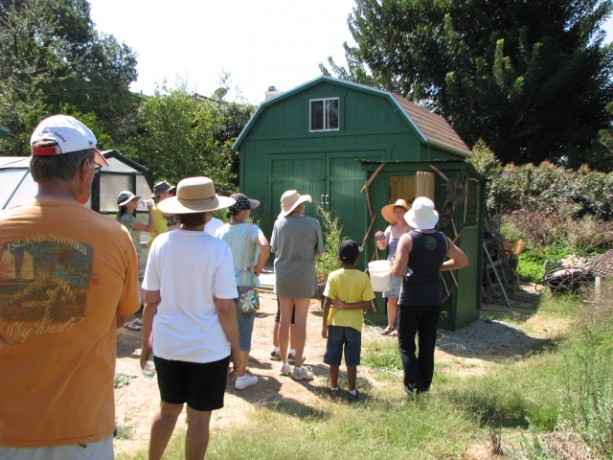
Tour Finch Frolic Garden! Permaculture Lectures in the Garden!
Learn how to work with nature and save money too
Finch Frolic Garden and Hatch Aquatics will present four fantastic, information-filled lectures in June. Join us at beautiful Finch Frolic Garden in Fallbrook, 4 pm to 6 pm, for refreshments and talks on…
Saturday, June 7: Introduction to Permaculture and Finch Frolic Tour: We’ll take you through the main precepts of permaculture and how it can be applied not only to your garden, but to yourself and your community. Then we’ll tour Finch Frolic Garden and show rain catchments, swales, plant guilds, polyculture, living buildings and so much more.
Saturday, June 14: Your Workers in the Soil and Earthworks: Learn the best methods for storing water in the soil and how to replace all your chemicals with actively aerated compost tea and compost.
Saturday, June 21: Aquaculture: You can have a natural pond – even in a tub! How natural ponds work, which plants clean water and which are good to eat. Even if you don’t want a pond, you’ll learn exciting information about bioremediation and riparian habitat.
Saturday, June 28: Wildlife in your Garden: What are all those bugs and critters and what they are doing in your yard? We’ll discuss how to live with wildlife and the best ways to attract beneficial species.
Your hosts and lecturers will be
Jacob Hatch Owner of Hatch Aquatics. With years of installing and maintaining natural ponds and waterways, and a Permaculture Design Course graduate, Jacob has installed earthworks with some of the biggest names in permaculture.
Miranda Kennedy OSU graduate of Wildlife Conservation and wildlife consultant, Miranda photographs and identifies flora and fauna and maps their roles in backyard ecosystems.
Diane Kennedy Owner of Finch Frolic Garden, lecturer, consultant, Permaculture Design Course graduate, former SDC Senior Park Ranger, Diane educates homeowners on how to save money and the environment while building their dream gardens.
Each class limit is 50 attendees, so please make pre-paid reservations soon before they fill up. Fee for set of four lectures and tour is $45 per person. Single session fee is $20 per person. Contact Diane Kennedy at dianeckennedy@prodigy.net for reservations and directions.
You will not want to miss this fascinating and useful information!
-
Fruit Flies – How To Be Rid of them Naturally

A jar, plastic and ACV. Works like a charm. It is fruit season and citrus and stonefruit are becoming ripe in the garden. When the fruit comes to the kitchen, and particularly when the peels and pits go into my open compost bucket, fruit flies appear as if by magic. It is amazing how quickly they show up and how quickly they reproduce. Fruit flies are busy laying eggs in any spot on any fruit or juice vegetable such as tomato. Gross. Here is a quick and inexpensive method of trapping and -unfortunately- killing the little things. I don’t like to kill anything, but I don’t know of a way to get around this, even when I drape towels over the fruit.
Take a small canning jar or baby food jar – something like that. Use the rim of the lid of a canning jar, or just a strong rubberband. You’ll also need a small piece of plastic to cover top of the jar; you can reuse some cellophane or part of an old plastic bag.
Fill the jar only about halfway with apple cider vinegar – not white distilled vinegar. Place the plastic over the top and secure with the lid rim or a rubber band.

A fruit fly finding a way in. Take a toothpick and prick tiny holes in the plastic. Set the jar near where the fruit flies accumulate and forget about it. Be sure to remove other lures such as old kitchen scraps or fruit, or cover it with dishtowels. That’s that. The flies swarm to the jar and eventually disappear into it and can’t get out.
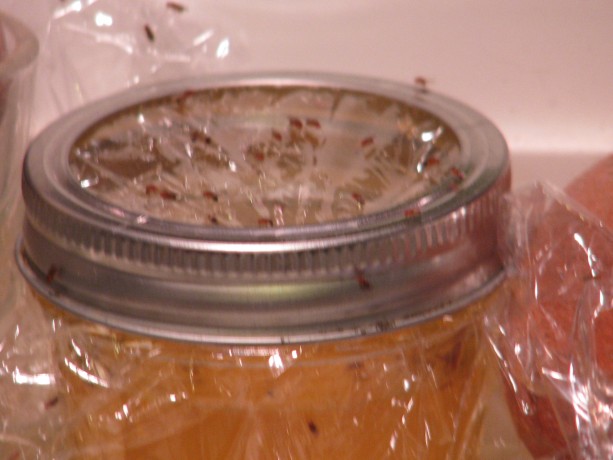
A kind of blurry photo of lots and lots of fruit flies queuing up to get inside. - Animals, Bees, Birding, Compost, Fruit, Fungus and Mushrooms, Gardening adventures, Herbs, Hugelkultur, Natives, Other Insects, Permaculture and Edible Forest Gardening Adventures, Ponds, Predators, Rain Catching, Reptiles and Amphibians, Seeds, Soil, Vegetables, Water Saving, Worms
The Mulberry Guild
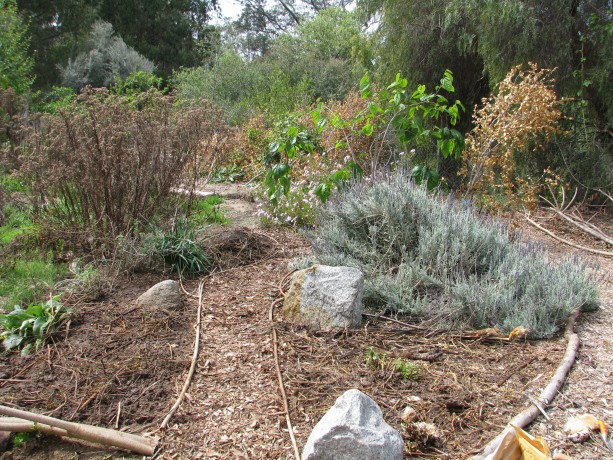
The renovated and planted mulberry guild. One of our larger guilds has a Pakistani mulberry tree that I’d planted last spring, and around it had grown tomatoes, melons, eggplant, herbs, Swiss chard, artichokes and garlic chives.
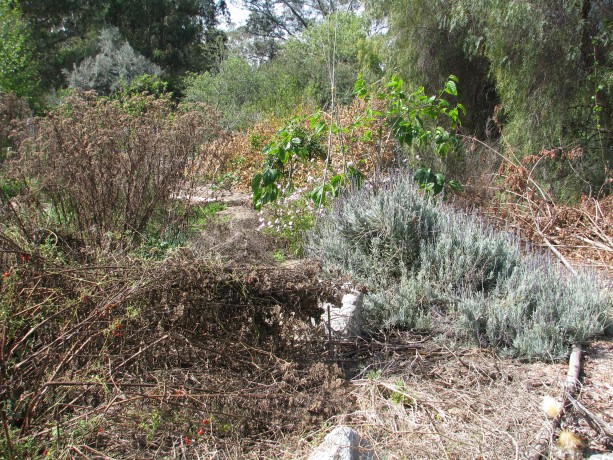
Mulberry guild with last year’s plant matter and unreachable beds. This guild was too large; any vegetable bed should be able to be reached from a pathway without having to step into the bed. Stepping on your garden soil crushes fungus and microbes, and compacts (deoxygenates) the soil. So of course when I told my daughter last week that we had to plant that guild that day, what I ended up meaning was, we were going to do a lot of digging in the heat and maybe plant the next day. Most of my projects are like this.
Lavender, valerian, lemon balm, horehound, comfrey and clumping garlic chives were still thriving in the bed. Marsh fleabane, a native, had seeded itself all around the bed and had not only protected veggies from last summer’s extreme heat, but provided trellises for the current tomatoes.
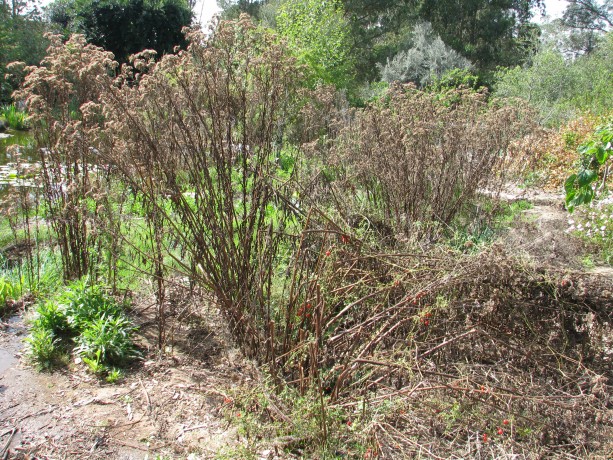
Fleabane stalks from last year, with new growth coming from the roots. Marsh fleabane is an incredible lure for hundreds of our tiny native pollinators and other beneficial insects. Lots of lacewing eggs were on it, too. The plants were coming up from the base, so we cut and dropped these dead plants to mulch the guild.
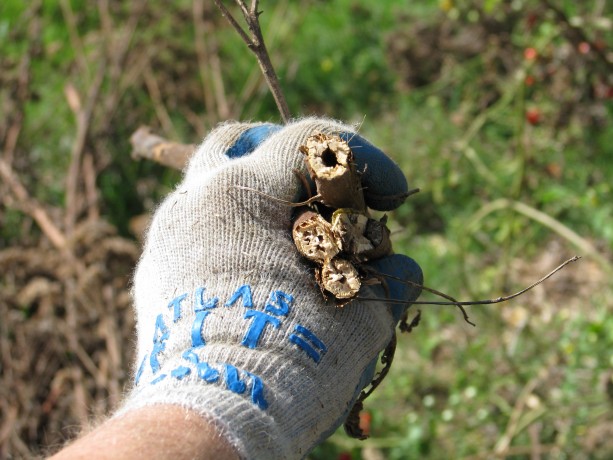
The stalks of fleabane are hollow… perfect homes for small bees! The stems were hollow and just the right size to house beneficial bees such as mason bees. This plant is certainly a boon for our first line of defense, our native insects.
We also chopped and dropped the tomato vines. Tomatoes like growing in the same place every year. With excellent soil biology – something we are still working on achieving with compost and compost teas – you don’t have to rotate any crops.

Slashed and dropped tomato and fleabane. We had also discovered in the last flood that extra water through this heavy clay area would flow down the pathway to the pond, often channeled there via gopher tunnels.
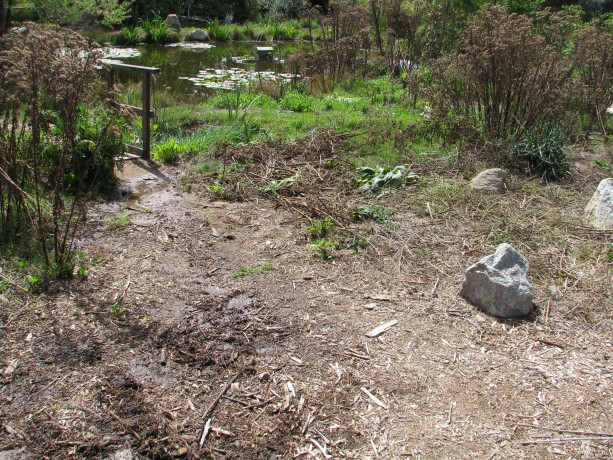
The pathway is a water channel during heavy rains. It needs fixing. We decided to harvest that water and add water harvesting pathways to the garden at the same time. We dug a swale across the pathway, perpendicular to the flow of water, and continued the swale into the garden to a small hugel bed.

Swale dug on contour through the pathway and across the guild. Hugelkultur means soil on wood, and is an excellent way to store water in the ground, add nutrients, be rid of extra woody material and sequester carbon in the soil. We wanted the bottom of the swale to be level so that water caught on the pathway would slowly travel into the bed and passively be absorbed into the surrounding soil. We used our wonderful bunyip (water level).
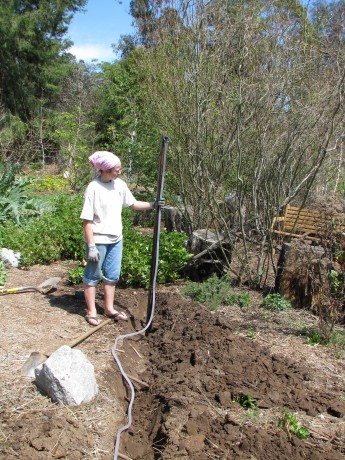
Using a bunyip to make the bottom of the swale level. Water running into the path will now be channeled through the guild. Because of the heavy clay involved we decided to fill the swale with woody material, making it a long hugel bed. Water will enter the swale in the pathway, and will still channel water but will also percolate down to prevent overflow. We needed to capture a lot of water, but didn’t want a deep swale across our pathway. By making it a hugel bed with a slight concave surface it will capture water and percolate down quickly, running along the even bottom of the swale into the garden bed, without there being a trippable hole for visitors to have to navigate. So we filled the swale with stuff. Large wood is best for hugels because they hold more water and take more time to decompose, but we have little of that here. We had some very old firewood that had been sitting on soil. The life underneath wood is wonderful; isn’t this proof of how compost works?
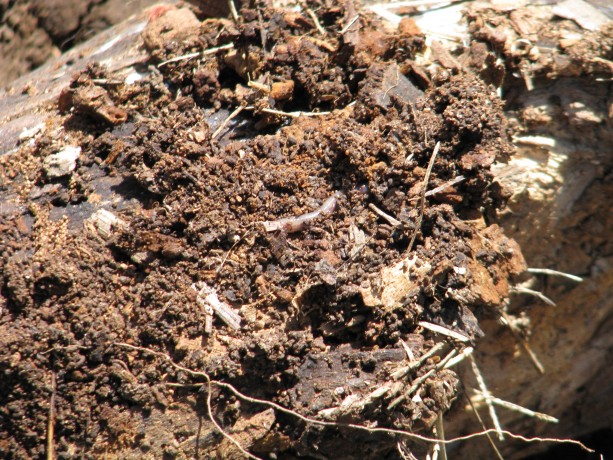
The activity under an old log shows so many visible decomposers, and there are thousands that we don’t see. We laid the wood into the trench.
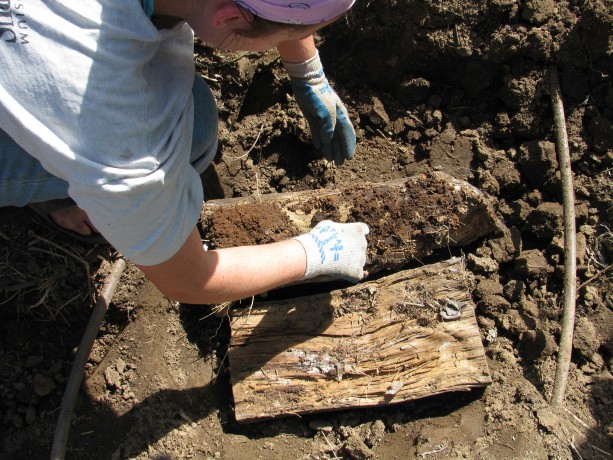
Placing old logs in the swale. If you don’t have old logs, what do you use? Everything else!

This giant palm has been a home to raccoons and orioles, and a perch for countless other birds. The last big wind storm distributed the fronds everywhere. We are wealthy in palm fronds.
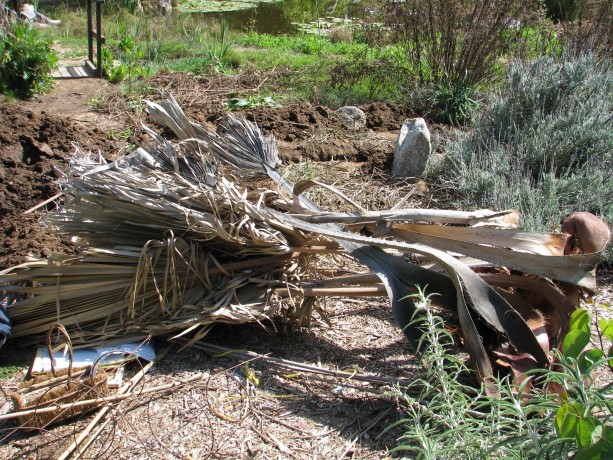
Three quick cuts (to fit the bed) made these thorny fronds perfect hugelbed components. We layered all sorts of cuttings with the clay soil, and watered it in, making sure the water flowed across the level swale.
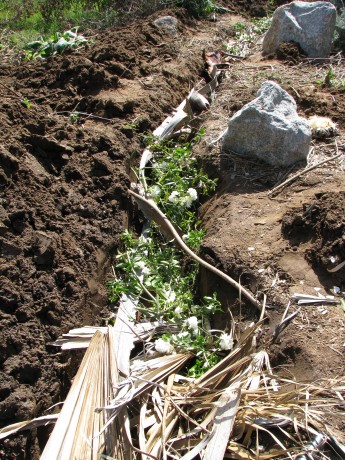
We filled the swale with fronds, rose and sage trimmings, some old firewood and sticks, and clay. As we worked, we felt as if we were being watched.
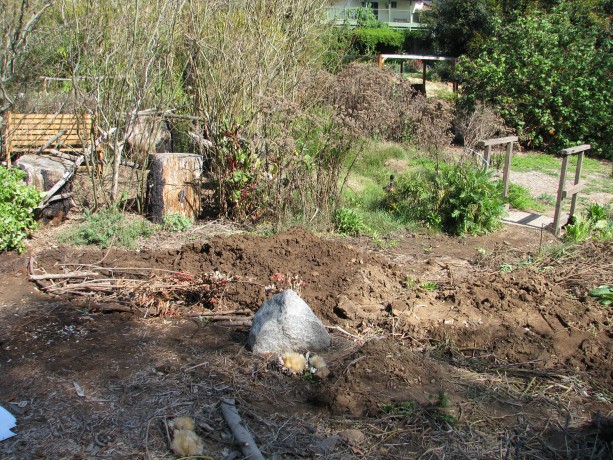
Can you spot the duck in this photo? Mr. and Mrs. Mallard were out for a graze, boldly checking out our progress. He is guarding her as she hikes around the property, leading him on a merry chase every afternoon. You can see Mr. Mallard to the left of the little bridge.
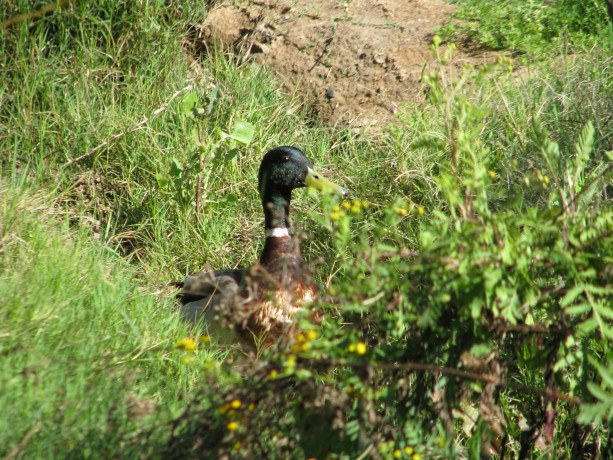
This male mallard and his mate, who is ‘ducked’ down in front of him, enjoyed grazing on weeds and watching we silly humans work so hard. After filling the swale, we covered the new trail that now transects the guild with cardboard to repress weeds.
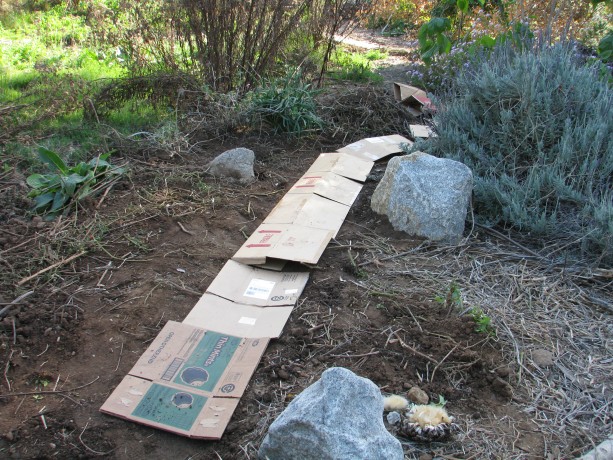
Cardboard laid over the hugelswale. Then we covered that with wood chips and delineated the pathway with sticks; visitors never seem to see the pathways and are always stepping into the guilds. Grrr!

The cardboard was covered with wood chips and the pathway delineated with sticks. Where the trail curves to the left is a small raised hugelbed to help hold back water. At this point the day – and we – were done, but a couple of days later we planted. Polyculture is the best answer to pest problems and more nutritional food. We chose different mixes of seeds for each of the quadrants, based on situation, neighbor plants, companion planting and shade. We kept in mind the ‘recipe’ for plant guilds, choosing a nitrogen-fixer, a deep tap-rooted plant, a shade plant, an insect attractor, and a trellis plant. So, for one quarter we mixed together seeds of carrot, radish, corn, a bush squash, leaf parsley and a wildflower. Another had eggplant, a short-vined melon (we’ll be building trellises for most of our larger vining plants), basil, Swiss chard, garlic, poppies, and fava beans. In the raised hugelbed I planted peas, carrots, and flower seeds.
In the back quadrant next to the mulberry I wanted to trellis tomatoes.
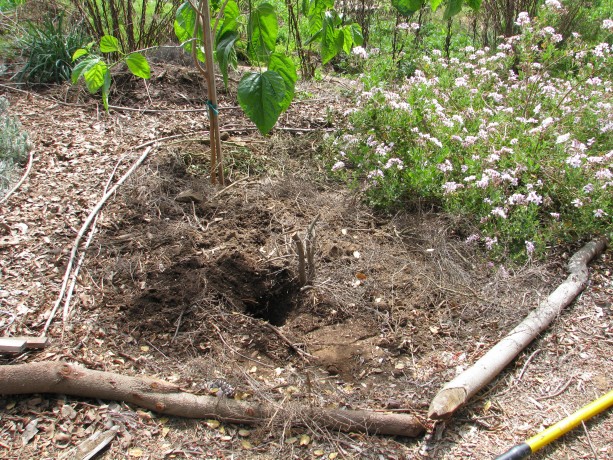
This quadrant by the mulberry needed a trellis for tomatoes. I’d coppiced some young volunteer oaks, using the trunks for mushroom inoculation, and kept the tops because they branched out and I thought maybe they’d come in handy. Sure enough, we decided to try one for a tomato trellis. Tomatoes love to vine up other plants. Some of ours made it about ten feet in the air, which made them hard to pick but gave us a lesson in vines and were amusing to regard. So we dug a hole and stuck in one of these cuttings, then hammered in stakes on either side and tied the whole thing up.
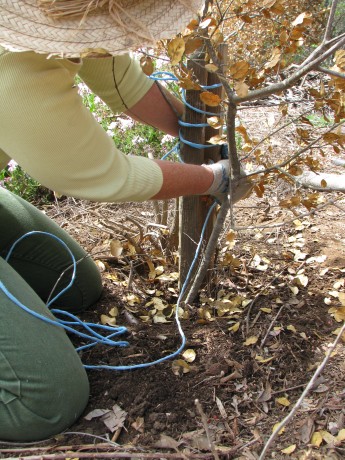
Tying the trunk to two stakes with twine taken from straw bales. Love the blue color! The result looks like a dead tree. However, the leaves will drop, providing good mulch, the tiny current tomatoes which we seeded around the trunk will enjoy the support of all the small twigs and branches, and will cascade down from the arched side.
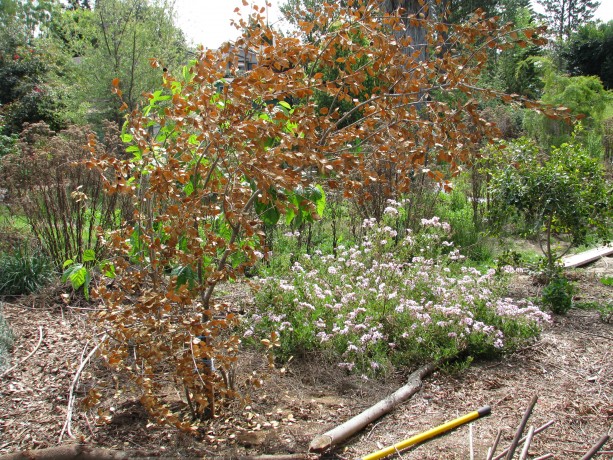
The ‘dead tree’ look won’t last long as the tomatoes climb over it and dangle close to the path for easy harvesting. We seeded the area with another kind of carrots (carrots love tomatoes!) and basil, and planted Tall Telephone beans around the mulberry trunk to use and protect it with vines. We watered it all in with well water, and can’t wait to see what pops up! We have so many new varieties from Baker Creek Heirloom Seeds and other sources that we’re planting this year! Today we move onto the next bed.
- Beverages, Breakfast, Fruit, Permaculture and Edible Forest Gardening Adventures, Recipes, Vegetarian
The Passion of the Fruit: Homemade Juices
Hi there. It’s Miranda the Guestblogger again, and today I want to talk to you about juice. You know, The Big Drip – Drosophilid Milk, Agua Fresca, Drupe’s Tears, Essence of Mesocarp: JUICE.
Here at Finch Frolic Garden, we like a nice fresh juice. As I am officially the FFG Harvester (a.k.a. Fruit Maven), I also take on the mantle of One Who Figures Out What To Do With Some Of The Stuff That’s Been Harvested – and let me tell you, that’s not a title to take lightly.
In the summer, it’s hard to keep up with all the produce and we hate to waste anything, even though spoilt food just goes back into the soil via compost here. We really like to get our produce into our mouths, though. Therefore, a lot of our fruit bounty gets juiced and frozen to keep. I want to walk you through some of our juiceplorations.
Finch Frolic Redoubtable Fruit of Almost Every Month in the Year: the Purple Passionfruit. These exotic and fragrant fruits are dropped by the bushel-load from our vigorous vines almost continuously, but overwhelmingly in midsummer. I pick them off the ground under the vines and wait for their smooth purple shells to wrinkle over in ripeness. Then the process begins.
I sit down for this and usually bring up a show on my laptop, because it takes a while. I have the bag or bowl of fruit on my right and a plastic bag looped over the back of a chair on the other side for the empty shells.
A fruit is picked up, dipped in a bowl of water, then wiped quickly on a paper towel and deposited on a cutting board that has a little rim on it to catch juice.
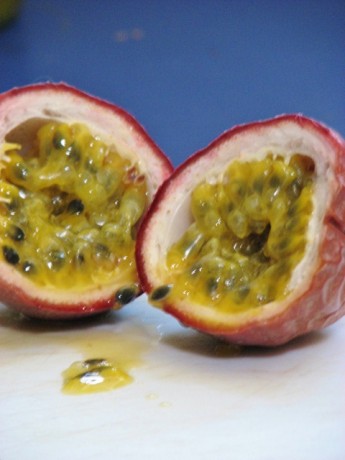
With a sharp knife, I halve the fruits and use a spoon to scoop the many little packets of bright gold-orange juice and hard black seeds into a bowl. Those packets have to be broken to get the juice.
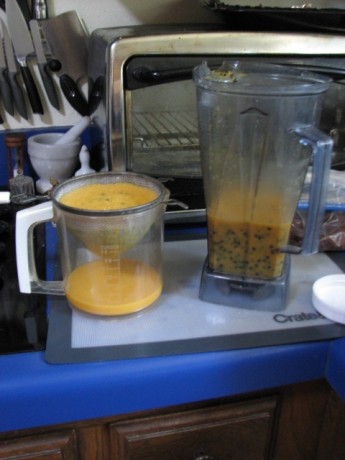
I used to press the pulp into the mesh of a sieve with a spoon, but that’s hard on the hands and on the sieve. Now, I throw it in our Vita-Mix and turn it up to 3, tops – you want to spin all the juice off the seeds, but you don’t want to chop up the seeds. I judge whirl completeness by whether or not the little black seeds are free-floating as they sit in the mixture.
Then I run it through a sieve to separate out the juice.
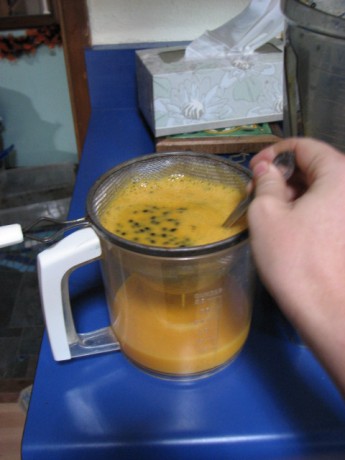
To get the most juice out of it, you swirl a spoon through the pulp as it sits in the sieve. 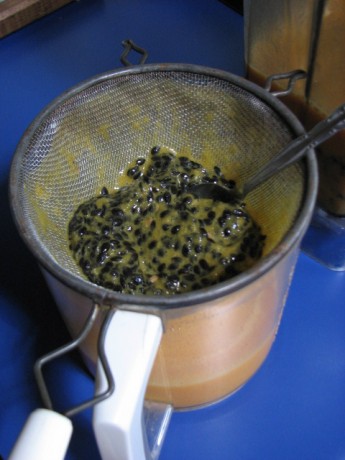
All juiced out. This sounds very labour-intensive – and it is – but it’s worth it to us to use our fruit. We don’t eat passionfruit straight – the seeds are a little too gross. We do, however, use the juice in anything we can make an excuse to, and it keeps frozen into cubes for a long time. And the leftover seeds make a fun treat for our hens.
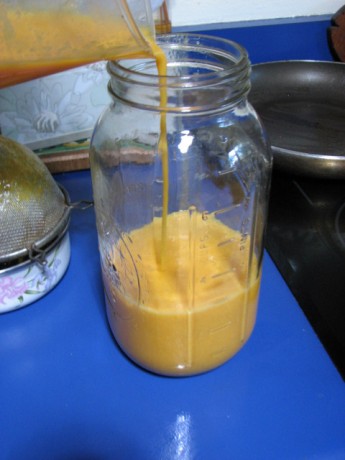
Glowing, beautiful, tangy, fresh passionfruit juice! In the fall, we’re overwhelmed with lovely big pomegranates from our one big pomegranate tree. This year, we’ve had more than ever and we didn’t want to waste any.
Once harvested, though, the poms need to be processed. Diane and I camped out every evening for a couple weeks cutting poms in half and hand-picking the arils. Recently, after a friend let us try out her juicer, we acquired one for ourselves, eliminating the need for the rest of the process with poms, but it is the same process I still use for grapes, apples and melons, so I’m going to tell you about it anyway.
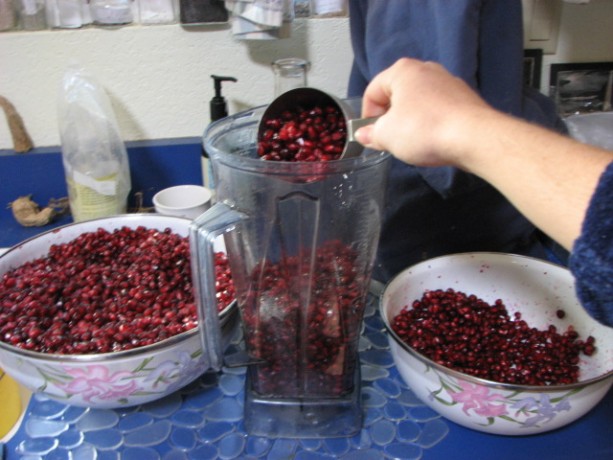
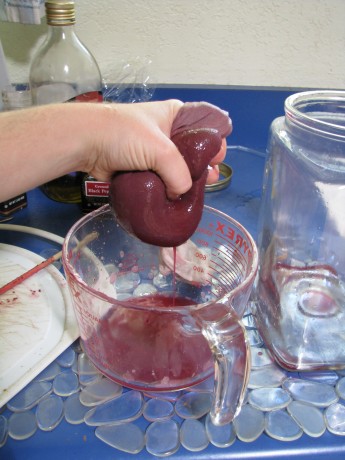
I put the arils in the Vita-Mix and turn all the way up to completely blend the seeds. The blended pom also gets strained, but because the particles are finer than the passionfruit pulp, a mesh sieve isn’t sufficient. No, what you need is a sock.
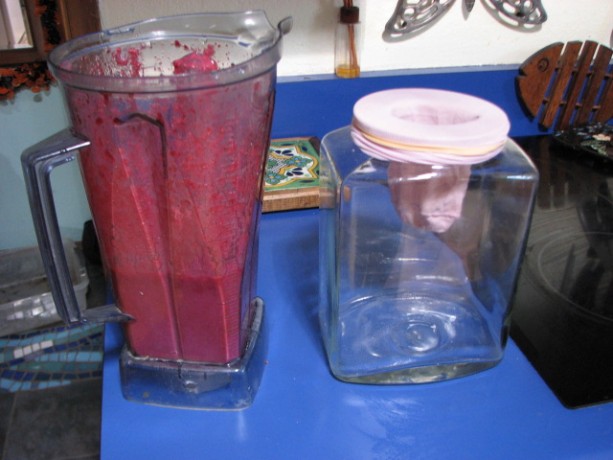
A nice clean women’s nylon sock is perfect. 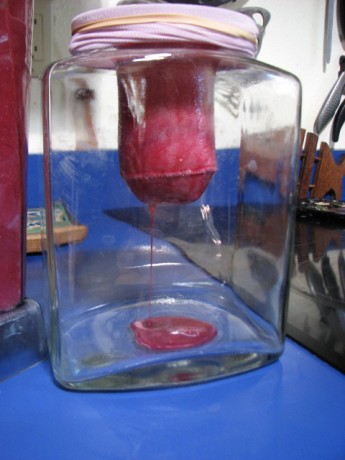
Hanging allows pure juice to come through. To get all the juice out, though, squeezing is necessary, and that puts a little more must in the juice, like fine fruit silt.
It’s also very taxing on the hands, because the sock must be hand squeezed, but it helps get the most juice from the fruit. This second straining produces interesting dry, crumbly must that comes out of the sock like purple Play-Doh.
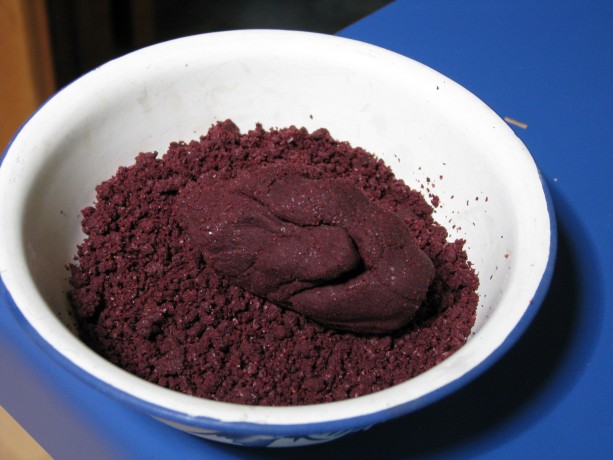
Also a salutiferous treat for the hens! Like the passionfruit, we use the pom juice as much as we can. For instance, we reduced the juice and I experimented with some pomegranate ice-creams:

Chocolate makes an excellent palate cleanser, if you ask us. I also diluted the concentrate with water to make a lovely breakfast juice. We even poached pears with the juice for Christmas dinner – a lovely rose colour and delicate fruity flavor.
The fun never ends with fruit!
So, that’s a little peek at the juiceinations that go on here at Finch Frolic. Happy juicing to you!
TTFN!
Miranda the Fruit Maven
- Animals, Chickens, Cob, Compost, Composting toilet, Fruit, Gardening adventures, Giving, Grains, Health, Herbs, Houses, Hugelkultur, Humor, Living structures, Natives, Natural cleaners, Permaculture and Edible Forest Gardening Adventures, Ponds, Rain Catching, Recipes, Seeds, Soil, Vegan, Vegetables, Vegetarian, Worms
San Diego Permaculture Convergence, Nov. 9 – 10, 2013
There is a fantastic, information-packed permaculture convergence coming up at the beautiful Sky Mountain Institute in Escondido.
 It will be two days packed with great information for a very reasonable price; in fact, scholarships are available. Check out the website at convergence@sdpermies.com. On that Sunday I’ll be teaching a workshop about why its so important to plant native plants, how to plant them in guilds using fishscale swales and mini-hugelkulturs. Come to the convergence and be inspired!
 -
Plum Clafoutis!

Plum clafouti. Yum. OMG! How could I not have told you about clafoutis yet? If you have ripe plums, peaches, apricots… any stonefruit… and you need something to do with them, this is it! Clafoutis (clow-FOO-tee) is a baked dessert (or breakfast!) that is simple to make and absolutely yummy. Ripe fruit, especially those that are a little too ripe to eat fresh because of the texture, is topped with a flour and custard batter and baked.

Serve plum clafouti warm or at room temperature. So yum. The result is firm enough to not gross out those who don’t like the texture of custard (like my daughter), not too sweet, and makes the flavor of the fruit bloom in your mouth. This is different than Plummy Skillet Cake, which is also wonderful. Of course clafoutis

Because of its simple ingredients and low sugar, clafouti is wonderful for breakfast. Peach clafouti is shown here along with asparagus and soy sausage. is good with ice cream, but just powdered sugar on top for decoration or plain is fine. You can make it with liquid egg substitute and non-dairy milk substitutes; I used our hen’s eggs and organic soy milk. Plums are absolutely delicious in a clafoutis, but we’ve used peaches and apricots as well with great results.
Plum ClafoutisAuthor: Diane KennedyRecipe type: Dessert or BreakfastCuisine: FrenchPrep time:Cook time:Total time:Serves: 6A simple and delicious baked fruit dessert.Ingredients- (You can halve the ingredients and bake in a square pan instead)
- ¼ cup butter (or veg oil or coconut butter)
- Pitted plums cut into thin wedges (think what size you like to bite into) (five cups)(you can use a mixture of stonefruit, too)
- ½ cup granulated sugar, divided (you can eliminate or reduce this amount if you like a tart dessert, if your fruit is very sweet, or use a sugar substitute)
- 4 eggs or equivalent liquid egg substitute
- ½ cup unbleached all-purpose flour (or a mix of other flours)
- ½ teaspoon salt (opt)
- 1 cup milk or milk substitute
- 1 tablespoon vanilla extract
- ½ teaspoon almond extract
- Confectioner's sugar for dusting
Instructions- Move oven rack to the middle and heat to 400F.
- Place butter in a 9 x 13 inch baking dish and put in oven to melt butter.
- In a medium bowl, toss the plums with ¼ cup sugar.
- With oven mitts, remove hot dish from oven and swirl melted butter to coat bottom and partially up the sides.
- Spread plums evenly on bottom of baking dish.
- In a medium bowl, whisk the eggs until blended.
- In a separate bowl, whisk the remaining ¼ cup sugar with the flour and salt.
- Whisk the sugar and flour mixture into the eggs.
- Whisk in the milk, vanilla and almond extracts.
- Pour the batter evenly over the plums.
- Bake 40 - 45 minutes until the clafoutis is lightly browned and the center has puffed up.
- Cool on a wire rack.
- Dust with confectioner's sugar and serve warm, plain or with ice cream. Or hard sauce. Or whatever you like. Use a French accent when announcing dessert.
- Eat within a couple of days or it becomes soggy.
- Store covered at room temperature.
-
Melon Pie!?!

Melon. Pie. Nom. It is melon time in the garden. Fresh green melons served with a little lime juice, or fresh orange melons served with a little lemon juice, are just heaven. When you have too many melons, it is time to look for things to do with them.
Last year we froze melon slices in a mild sugar syrup. This worked well when using the melons in something; the texture was too goopy for eating fresh with any pleasure.
This year I found a recipe in my Baker Creek Heirloom Seed catalog for melon pie. Melon pie? I did a little Googling on the subject and found a lot of melon pie, cake and bread recipes. Who knew? Well, not me anyway.
This recipe works for any melon, the more fragrant the better. It was written for Mother Mary’s Pie Melon, an heirloom that we grew this year. It is small and fragrant, and just makes the right amount of melon the recipe. The version of the recipe in the catalog – which is also in their book The Baker Creek Vegan Cookbook – is vegan. I’ve changed it to vegetarian and you can do what you want with it. The cookie-like crust paired with the creamy yet firm filling is wonderful. Top it with a little whipped cream! They suggest topping with toasted coconut, but I’m not that much of a coconut fan. However I could really see this topped with merangue, like a lemon merangue pie. Yep.
Melon PieAuthor: Originally from Baker Creek Vegan CookbookRecipe type: DessertCuisine: AmericanPrep time:Cook time:Total time:Serves: 8A fragrant, yummy pie with a perfumy melon flavor and crisp cookie crust.Ingredients- Crust:
- ½ cup butter or vegan alternative
- ¼ cup packed brown sugar (or white)
- 1¼ cups unbleached flour (organic if possible)
- Filling:
- ½ cup sugar
- 3 Tablespoons cornstarch (organic if possible)
- 1 egg, beaten
- 1½ cups cubed melon, liquified in blender (makes 1½ cups)
- ¼ cup water
- 3 Tablespoons butter or vegan alternative
- 1 teaspoon fresh squeezed lemon juice
Instructions- Prepare crust: beat butter and sugar in mixer until fluffy.
- Add flour and mix thoroughly.
- Press into bottom and sides of a 9" pie pan.
- Bake crust at 375F for 10 - 12 minutes until lightly browned.
- Meanwhile, stir sugar and cornstarch together in medium saucepan and set aside.
- Blend egg, melon and water together until smooth.
- Over medium heat, gradually stir melon mixture into cornstarch mixture, stirring constantly until mixture thickens and begins to boil, about ten minutes. Don't rush!
- Reduce heat and cook 1 minute more.
- Remove from heat and stir in 3 T butter and lemon juice.
- Pour into pie shell, cool and then refrigerate at least an hour before serving.
- Serve with whipped cream... or not.
-
Black Plum and Basil Granita
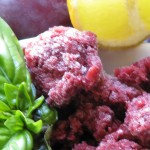 This is an interesting and delicious way to use some of those plums that ripen overnight. Basil is also in season, and combining it with the heavenly, winey flavor of ripe black plums is amazing. If you grow other types of basil such as lime basil or cinnamon basil, use those instead, reducing the lime juice to 1 tablespoon.
Granita is juice that is partially frozen, forked around a little, then refrozen. You don’t need an ice cream maker. Easy, quick and nutritious, too!
Black Plum and Basil GranitaAuthor: Diane C. KennedyRecipe type: DesertCuisine: AmericanPrep time:Cook time:Total time:Serves: 8½ cup servingsBasil and allspice give a wonderful depth of flavor to winey black plums in this frozen treat.Ingredients- 1 cup water
- ⅔ cup granulated sugar
- ¼ teaspoon vanilla extract
- ⅛ teaspoon salt
- 6 whole allspice (if you don't have allspice berries, use a small piece of cinnamon stick)
- 1½ pounds black plums, pitted and quartered
- 2 tablespoons fresh lime juice
- ¾ cup basil leaves (not packed)
Instructions- In a large saucepan combine water, sugar, vanilla, salt, allspice and prepared plums and bring to a boil.
- Reduce heat and simmer for 15 minutes or so, stirring occasionally, until the plums begin to fall apart.
- Pour into a small bowl set in ice water in a larger bowl and cool completely.
- Fish out and discard the six allspice.
- In a blender or VitaMix process plum mixture, basil and lime juice until well blended.
- Press the plum mixture through a fine sieve over a bowl and discard solids. If you have a VitaMix you may not have any residual solids; the granita will be cloudier but will be more nutritious. Don't worry about it.
- Pour the mixture into an 8-inch square glass or ceramic baking dish.
- Cover and freeze until partially frozen, about 2 hours.
- Scrape with a fork, crushing any lumps, and smooth down again.
- Freeze for 3 more hours, scraping with a fork every hour so that it doesn't freeze as a cube, until completely frozen.
- Serve in small scoops; really nice paired with little vanilla cookies.
-
Fruit Tree Guilds: Making Your Trees Healthy and Happy
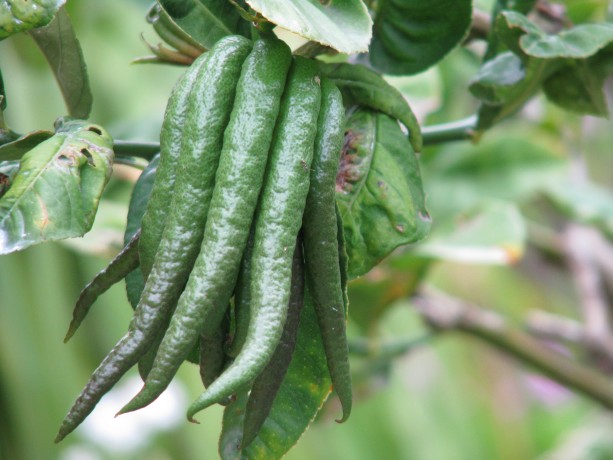
An unripe Buddha’s Hand citron. When bright yellow it freshens a room with a citrusy floral fragrance; is zest is wonderful in cooking and it can be candied. Or simply stuck up a sleeve and used to frighten people. A guild in permaculture terms is, as you know, an arrangement of symbiotic plants that serve as a plant community for the benefit of the whole. Visitors to Finch Frolic Garden often remark that planting guilds sounds so difficult; that they’d need to study so much about plants that it would be impossible for them to do. Not so. However, it isn’t just a whole bunch of plants planted so that they are stepping on each other’s shoes. The typical permaculture plant guild is defined by plants which do these functions: an upper canopy tree (shade, mulch from falling leaves, deep tap roots, roosting for birds which poop, hunt, etc., traps humidity, catches and filters rain and fog moisture), a lower canopy tree (same functions but shorter), a ground cover (habitat for small hunters and moisture trap), a miner plant (deep tap root to bring nutrients from deep in the soil to its leaves which deliver said nutrients when they decompose, and tap root breaks up soil and gives passage for water and worms), a nitrogen-fixing plant (works symbiotically with bacteria to trap nitrogen from the atmosphere on root nodules, which release into the soil when the top dies), and a pollinator-attractor (flowers for bees and all the tiny native bees, wasps and flies).
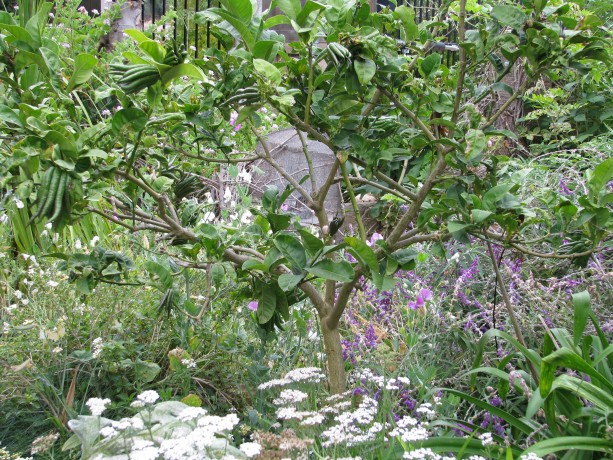
Buddha’s Hand citron (Citrus medica) happy in a guild of yarrow, sweet peas, artichoke (the leaves of which are regularly slashed and dropped), Cleveland sage, scented geranium and a variety of bulbs. The formula isn’t that complicated. I challenge you to come up with an example of each right now. Yes, you can do it. (Dum dee dum… I’m waiting for you to be done before I move on. ) Have it? Okay, here’s a quick example. Mulberry, dwarf peach, strawberries, carrots, sweet peas, dwarf yarrow and fava beans. The canopy trees will lose their leaves allowing sun to warm the understory plants in the winter. Strawberries make an excellent ground cover that grows food and loves the fungus-rich loam made by decomposing leaves. Carrots like cool weather and will thrive until ready to be pulled (and tops broken off and thrown on the ground) about when the trees fully leaf out. Sweet peas attract insects, smell great, and as a bonus are nitrogen fixers, and can twine up the tree trunks. Dwarf yarrow helps choke out grass, is used for many purposes including as a dye plant, and its flowers are clusters of small flowers perfect for the tiny pollinators, and bush peas are completely edible and also fix nitrogen. See? Easy.
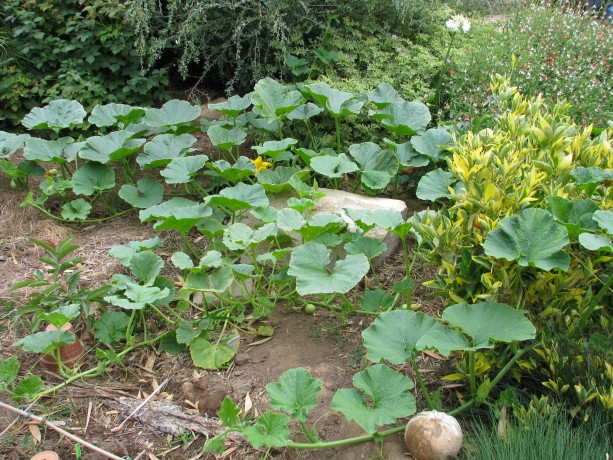
Just in time for summer’s heat, a kabocha squash is rapidly covering the ground around the variegated dwarf orange and a young pink guava. I have to pull squash out of trees because they think they own the world, and it hurts to hit your head on a dangling pumpkin. I leave the vines to decompose in place after harvest. I have many, many trees which were all planted at the same time, and some of them have been neglected. A combination apple tree had been planted in extremely heavy clay and it hasn’t grown much in two years although it keeps trying to produce fruit. Bermuda grass (I cross myself when I mention it) has infiltrated the area to about four inches down. It is helping to break up the clay, but it is also choking out everything else. Plant guild time.

Bermuda grass in heavy clay right next to the trunk: no good. Last weekend I spent about three hours in the morning (mercifully before the June gloom dissipated so I didn’t roast in the heat) digging up and pulling out as much Bermuda grass as I could from the clay. I’d even soaked the area well the night before. That was the stuff of cob ovens. When I’d finally cleared past the tree (I’ll continue another day; there’s only so much of that my hands can take!), I shoveled in some pigeon guano that my good friends up the street deliver to me (tied with a ribbon! Christmas comes all year for a gardener!). The guano is very high in urea… you can smell the ammonia, but it also has feathers, corn and pigeon peas in it. Pigeon peas are a perennial legume that set nitrogen and produce wonderful pea pods for stir-fry. I watered it in well.
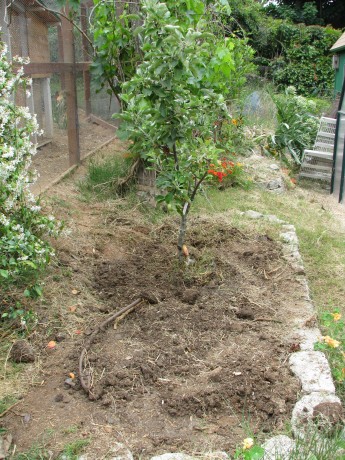
This apple was planted in clay in this planter. Never create a planter around an existing tree; mulch around the trunk will kill it. I had purchased some plants for the area, but to keep costs down just chose some that would fill out and help choke out the angry Bermuda grass bits yearning for revenge. Also, the tree is close by Harry Mud, the cob oven, so I wanted pizza-themed plants for easy picking. I planted strawberries right by the trunk inside the gopher cage in which the tree is planted. They will help retain moisture without compromising the bark of the tree. You never want to pile mulch up around the base of a tree above the root ball because you will rot your tree.
I also planted a tomato, a perennial basil, garlic chives all around the edge (bug protection), sunflowers, a prostrate rosemary and French tarragon. The pigeon peas and corn will very likely sprout. What I didn’t have was an upper canopy, but the tree is on the east side of a shed which protects it from the worst of the summer afternoon sun, and there is a grapevine nearby which produces leaf litter. When daffodil bulbs are readily available in the late Fall I’ll plant a ring of them around the drip line. Gophers don’t eat them, they help keep away the grass, they break up the soil and they are one of my favorite flowers (ranking second to sweet violets). All these plants as they grow up, down and across will help the apple tree, and the apple tree will help them. All of them produce food within easy reach of the cob oven and outdoor dining, are attractive and smell good, too. The tree should flourish. I don’t kid myself that I won’t be pulling Bermuda grass in the future, but the plants will help control it by shading and crowding out.
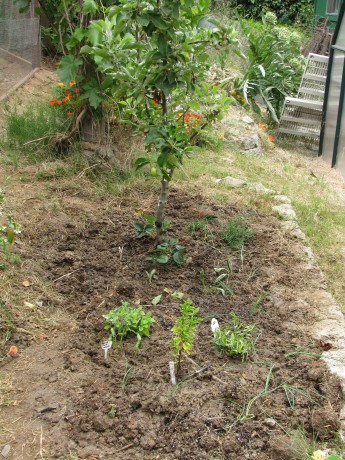
It doesn’t look like much now, but there are eleven support plants/seeds to help the apple tree now. Friends! If you have citrus trees you should plan a little differently. When trying to understand a plant, think of where it came from and in what growing conditions it thrived. Avocados are from South America, with humidity, rainfall, protection from intense heat, deep leaf litter and adequate drainage. Stonefruit are from areas with cold winters; their leaf drop keeps the roots protected from the freezing that triggers the trees to set fruit (chill factor).

This citrus was planted before the bamboo grew up to shade it. Notice how the leaves grow straight up, and none below? It is aiming to collect light at noon, which is the only direct sun that it receives. He needs to be moved. We think of citrus trees perfuming the air of Spain, Greece or Arabia, but actually they come from Southeast Asia and before that, New Guinea and Australia. All of these places have warm or hot temperatures and plenty of sunlight. Although you can plant stonefruit close together, for citrus it is best to ensure that the trees receive lots of direct sunlight or they will drop leaves and have stunted growth.
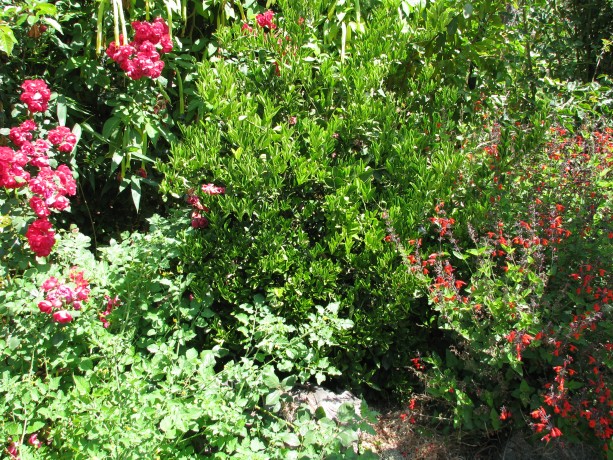
This citrus receives sun all day, and is very happy with the tomato, roses and sage that surround it. Raking all the leaves out from under your trees is so wrong. The tree drops leaves because it needs them on the ground around its roots, not because its careless or its waiting for a human to come by and clean up its mess. Leaf mulch makes the ideal conditions for microbial growth and perfect soil, so let it sit. Augment the mulch by giving your tree company of other plants. Unless the tree is allelopathic (secretes a substance that keeps anything from rooting nearby so that it doesn’t like competition, such as walnuts and eucalyptus) then in nature it reseeds close by and allows other plants to grow under it. Give your trees some appropriate company, and you’ll be rewarded with lots of food, medicine, habitat and very little work except for harvesting. Can’t beat that with a stick.

