- Animals, Bees, Birding, Books, Building and Landscaping, Chickens, Cob, Compost, Composting toilet, Fungus and Mushrooms, Gardening adventures, Heirloom Plants, Hugelkultur, Humor, Living structures, Natives, Natural cleaners, Other Insects, Permaculture and Edible Forest Gardening Adventures, Ponds, Predators, Quail, Rain Catching, Recycling and Repurposing, Reptiles and Amphibians, Seeds, Soil, Water Saving, Worms
Permaculture Lectures At Finch Frolic Garden, June 2014
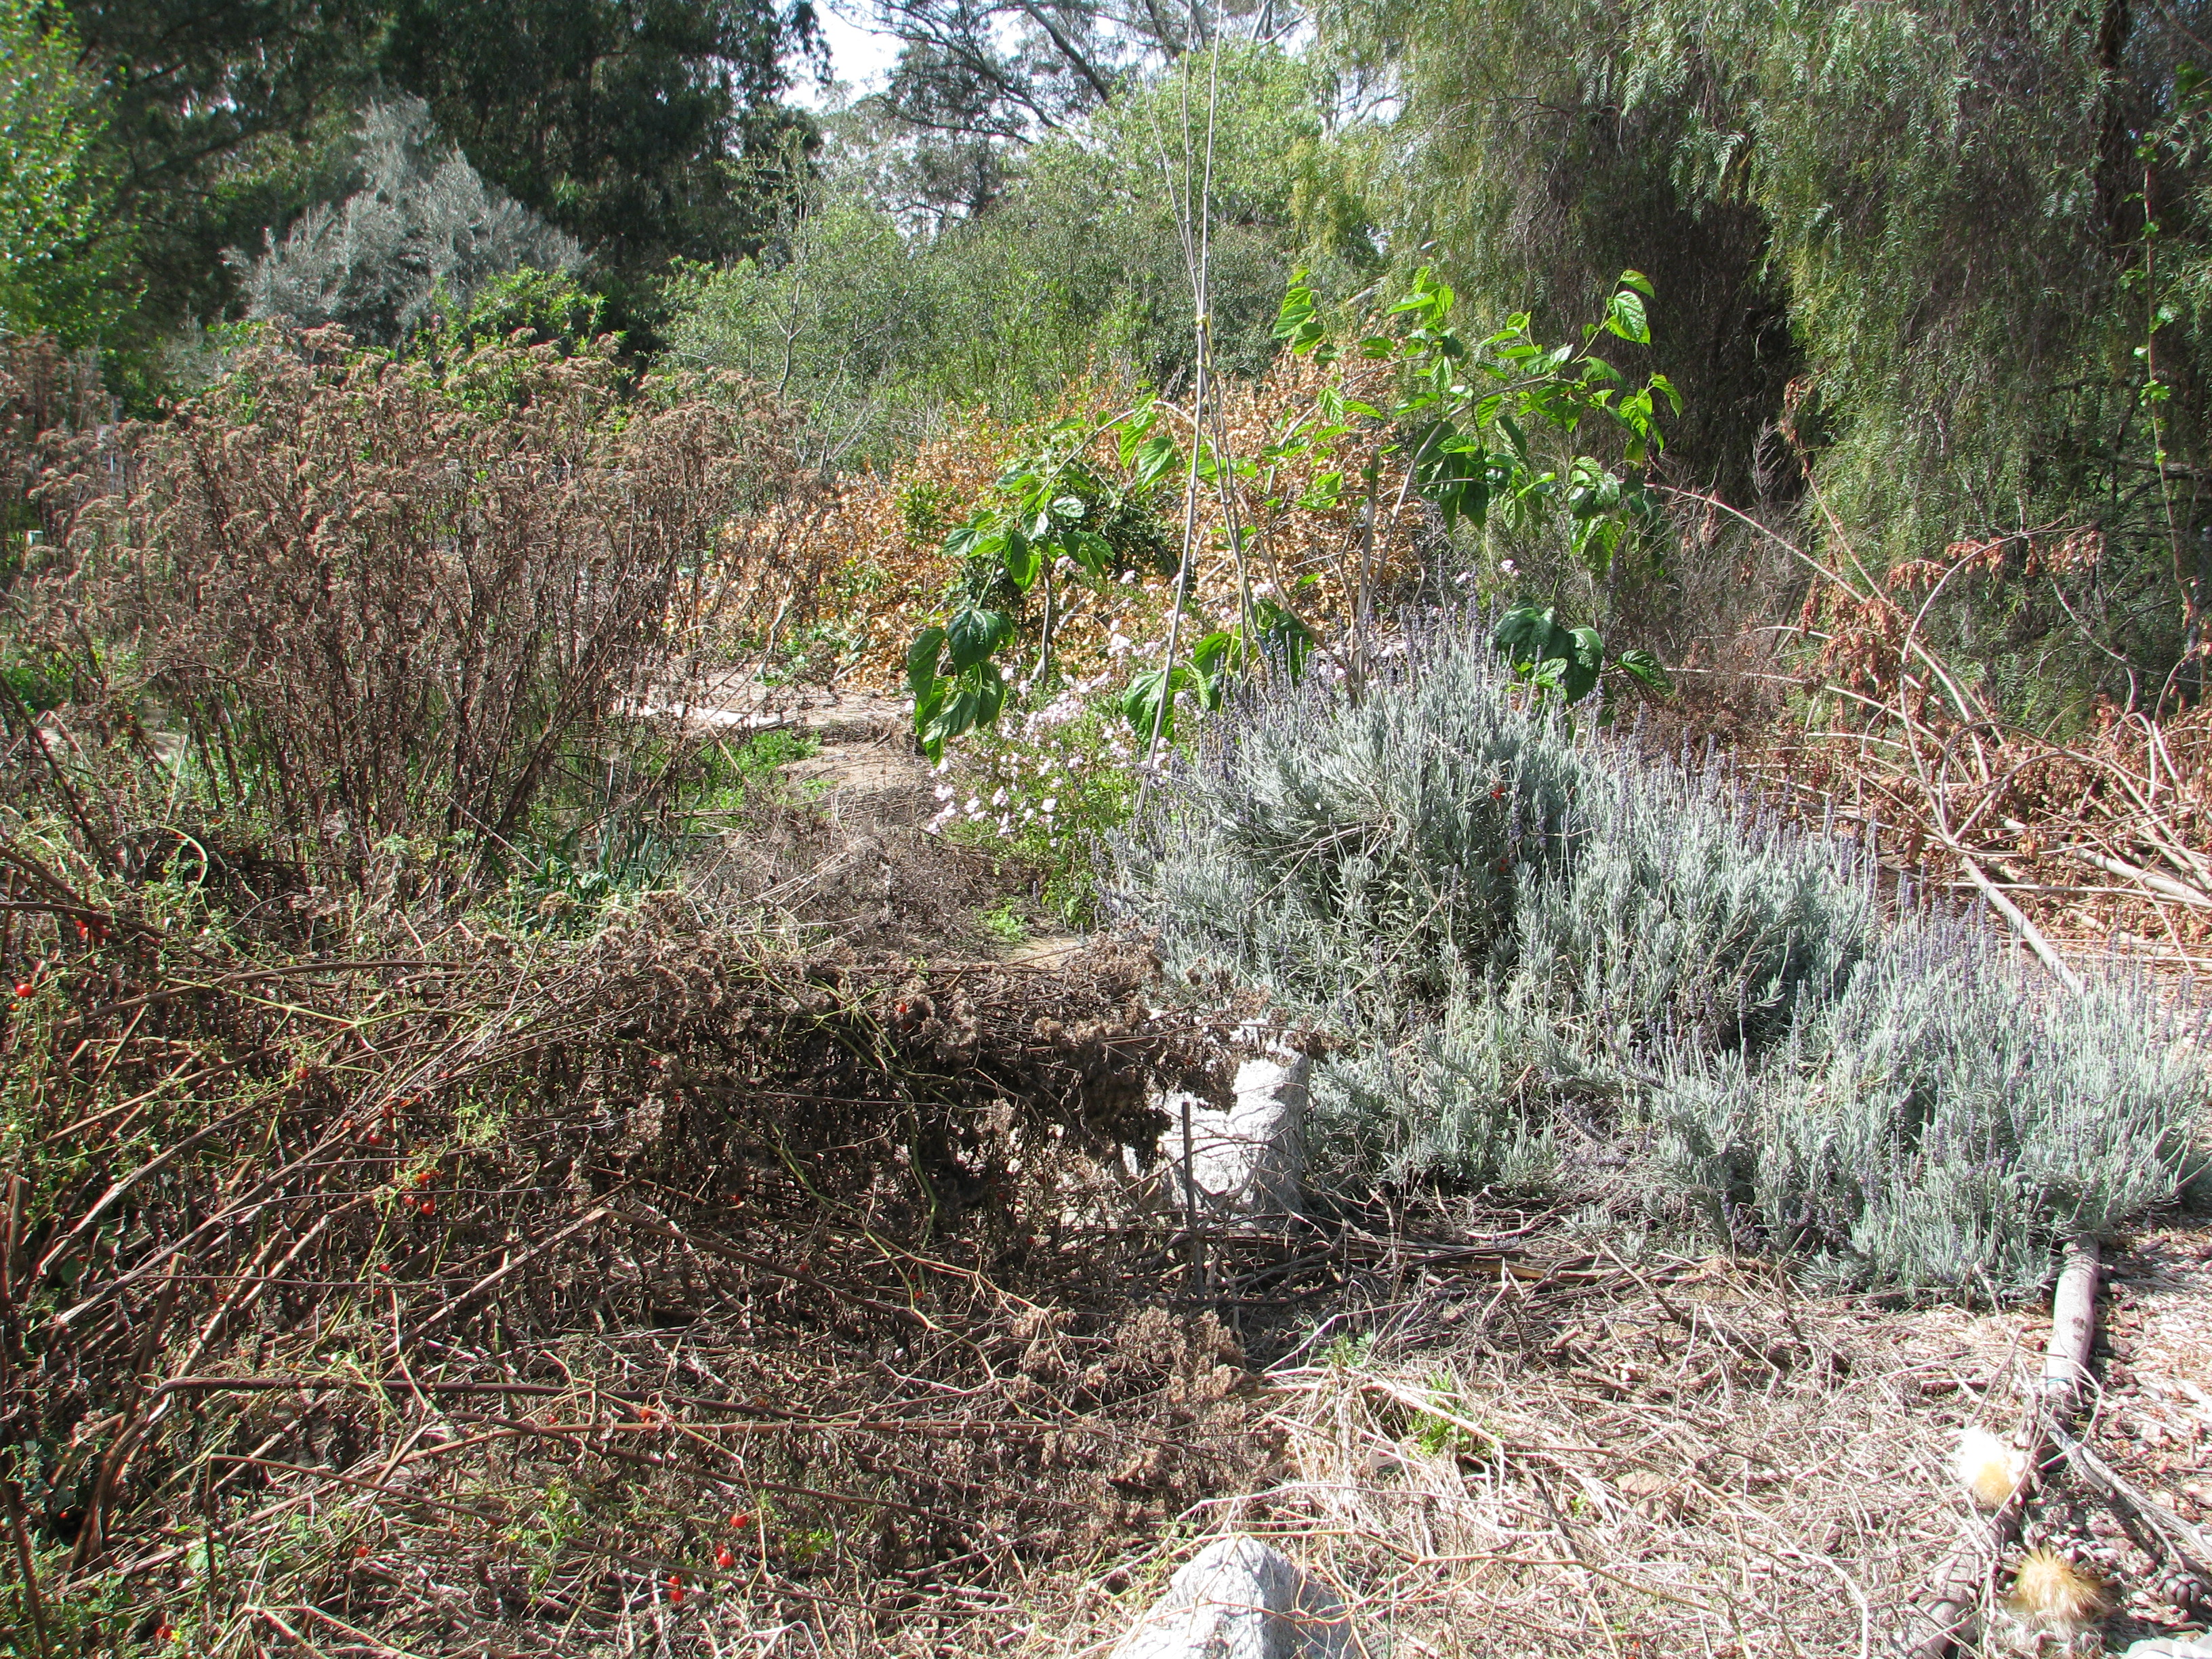
Tour Finch Frolic Garden! Permaculture Lectures in the Garden!
Learn how to work with nature and save money too
Finch Frolic Garden and Hatch Aquatics will present four fantastic, information-filled lectures in June. Join us at beautiful Finch Frolic Garden in Fallbrook, 4 pm to 6 pm, for refreshments and talks on…
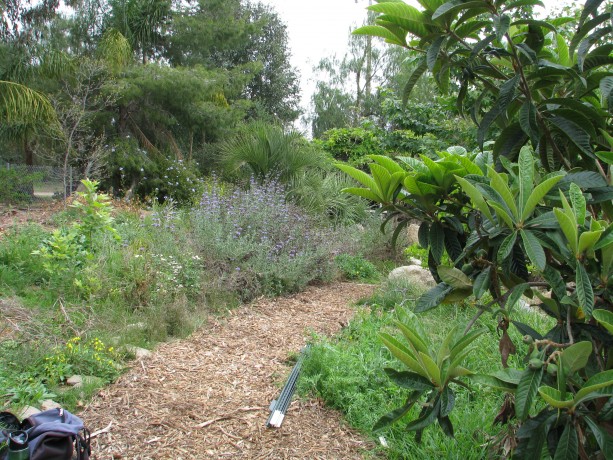
Saturday, June 7: Introduction to Permaculture and Finch Frolic Tour: We’ll take you through the main precepts of permaculture and how it can be applied not only to your garden, but to yourself and your community. Then we’ll tour Finch Frolic Garden and show rain catchments, swales, plant guilds, polyculture, living buildings and so much more.
Saturday, June 14: Your Workers in the Soil and Earthworks: Learn the best methods for storing water in the soil and how to replace all your chemicals with actively aerated compost tea and compost.
Saturday, June 21: Aquaculture: You can have a natural pond – even in a tub! How natural ponds work, which plants clean water and which are good to eat. Even if you don’t want a pond, you’ll learn exciting information about bioremediation and riparian habitat.
Saturday, June 28: Wildlife in your Garden: What are all those bugs and critters and what they are doing in your yard? We’ll discuss how to live with wildlife and the best ways to attract beneficial species.
Your hosts and lecturers will be
Jacob Hatch Owner of Hatch Aquatics. With years of installing and maintaining natural ponds and waterways, and a Permaculture Design Course graduate, Jacob has installed earthworks with some of the biggest names in permaculture.
Miranda Kennedy OSU graduate of Wildlife Conservation and wildlife consultant, Miranda photographs and identifies flora and fauna and maps their roles in backyard ecosystems.
Diane Kennedy Owner of Finch Frolic Garden, lecturer, consultant, Permaculture Design Course graduate, former SDC Senior Park Ranger, Diane educates homeowners on how to save money and the environment while building their dream gardens.
Each class limit is 50 attendees, so please make pre-paid reservations soon before they fill up. Fee for set of four lectures and tour is $45 per person. Single session fee is $20 per person. Contact Diane Kennedy at dianeckennedy@prodigy.net for reservations and directions.
You will not want to miss this fascinating and useful information!
You May Also Like

Native Insects and IPM
- Building and Landscaping, Compost, Fungus and Mushrooms, Gardening adventures, Heirloom Plants, Hugelkultur, Natives, Permaculture and Edible Forest Gardening Adventures, Rain Catching, Seeds, Soil, Water Saving
The Albedo Effect: How Bare Earth Causes Wild Weather
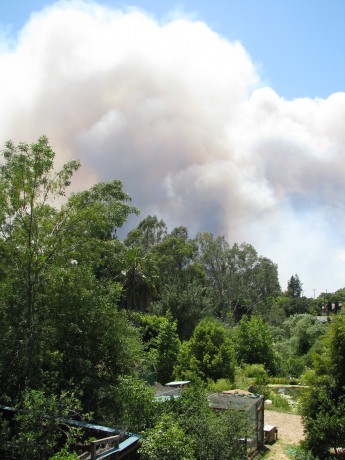
This week’s 100F+ temperatures and high Santa Ana winds have fueled three fires close to us. It is May, not October. Albedo is a reflection coefficient. In layman’s terms it is the effect that happens when sunlight is reflected off of white areas. There is the high albedo of bare earth, snow and ice, and clouds, and the low albedo of water and vegetation. There is less reflection from dark areas such as off of water and green areas, and darker areas, just like dark clothing, absorbs more heat rather than reflects it like white clothing does. There are arguments that we should cut down all the trees to increase white space to stop global warming. NO! The plant life that occupies the green spaces transpire water and excess heat into the air, causing cloud cover. Clouds, of course, insulate the earth from the sun and their albedo effect is cooling to the earth, not to mention that clouds amass moisture and – bingo – you get rain. It is the loss of green areas and the desertification of large masses of Africa, and the in-progress desertification of the already drier areas of the world (such as California) that makes the albedo effect one that is helping warm our climate. Great tracks of land now reflect light into cloudless skies; water sources dry up and plants die so transpiration disappears. The loss of air-borne water (evapotranspiration) allows areas around the desert area to also dry out. The rapid change of climate due to desertification, loss of topsoil and the resulting erosion and the melting of our ice caps (creating larger oceans and thus larger thermal masses to reflect heat) causes severe weather patterns – weather patterns that balance out huge dry desert areas with destructive rain and wind storms in other areas. Drying areas ignite… here in San Diego North County there are five fires burning as I sit, and heavy smoke and ash rain down on everything between them. My house is not threatened at this time, but we may be evacuated. So many people are evacuated right now and the highways are packed. There is another fire near San Diego, and two between here and Los Angeles. It is May – usually we have these temperatures, wild winds from the desert called Santa Ana winds, and fire threat in October. Our lack of rain doesn’t bode well for California.
My point is that to help balance nature out again, we need to hurriedly lessen the amount of reflected light in areas where we were traditionally covered by plants. We need to plant. We need to plant native plants. We need to re-green our landscapes, in each backyard and vacant lot, as quickly as we can. Allow the plants to keep moisture in the soil, to slow flooding, to transpire moisture into our atmosphere so that rain comes back to the desert areas. We need to hold what rain that falls in our soil by burying wood (hugelkultur), by creating level swales and mulching, mulching, mulching. Yet on trash day I see bags and bags of leaves set on the street ready to go to the dump. We need to stop erosion areas by using whatever means we can to keep the topsoil back. We need native trees with long roots that will hold the soil, build topsoil and transpirate.
Of course you probably can’t afford lots of plants, so plant natives that will quickly grow large. Between the slower-growing oaks, plant sages, mallows, ceanothus, quail bush and other bushes that cover 10 -15 feet of dry earth. Under them will be moisture, protected soil with mulch from their leaves, and habitat for lizards, frogs, small birds and hundreds of insects. These bushes will help shade young oaks, sycamores, and other trees and keep their trunks from scorching.
Throw down seeds of California fescue (Festuca californica var. parishii) to hold soil and cover the dry, reflective areas. This native grass is tough and doesn’t cause trouble like non-native grasses. You can seed it with California poppies, lupine and other native flowers. Aggressively weed out non-native species.
Since I was little, in the 60’s, I heard the mantra ‘plant a tree’. Obviously we haven’t been doing that. I think it should be changed to ‘plant a tree and don’t cut down any more because the earth can’t afford it’!
Please plant! And all my hope goes to you and yours who are threatened or have had losses from our severe weather.
- Animals, Birding, Chickens, Gardening adventures, Heirloom Plants, Humor, Permaculture and Edible Forest Gardening Adventures, Photos, Ponds, Reptiles and Amphibians
Happy Easter!

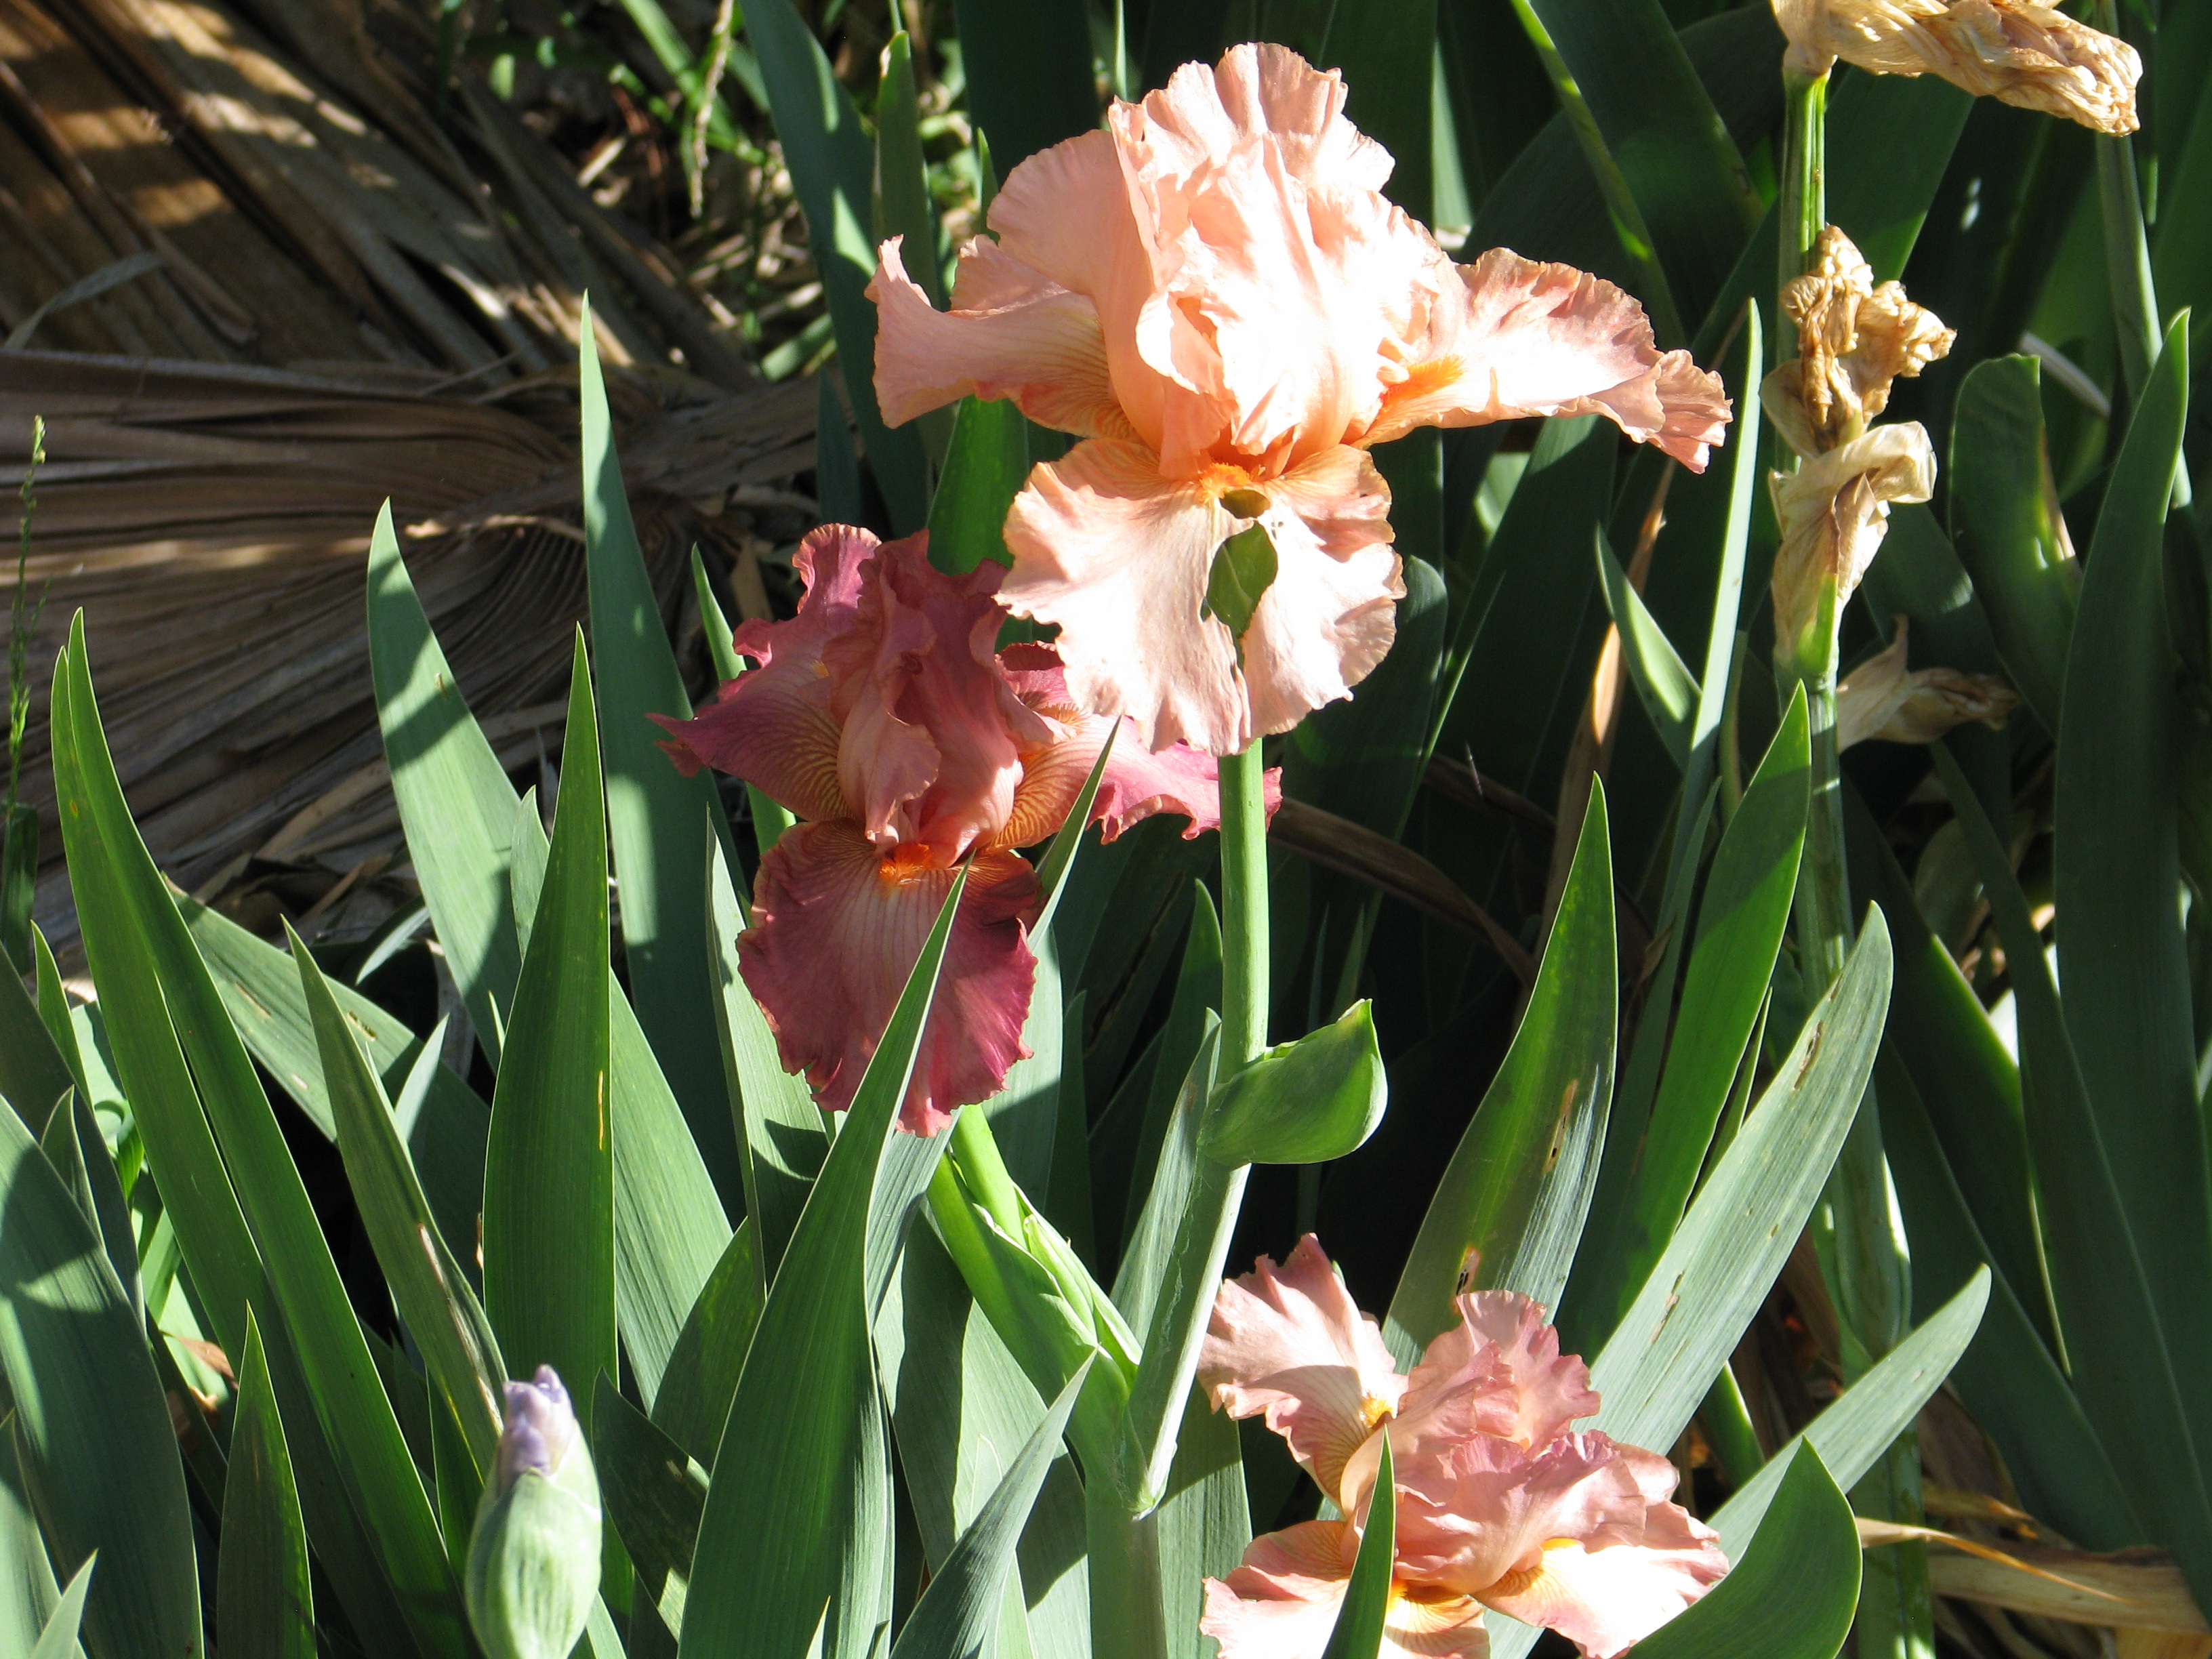
Heirloom irises from my good friend Jean are blooming. 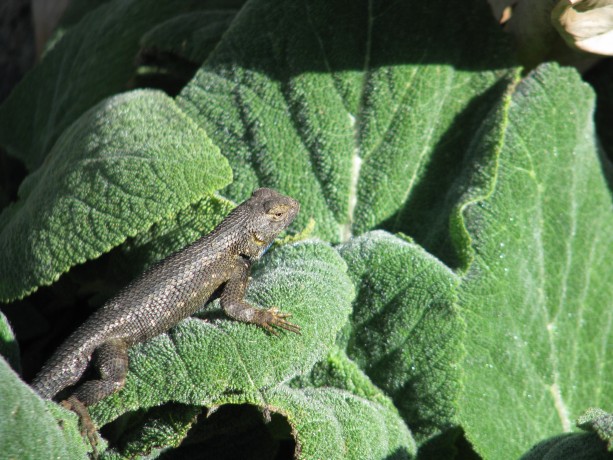
A Western fence lizard suns and guards his territory atop a clary sage leaf. See the flash of blue under his chin to attract the ladies? 
This green calla lily is gorgeous. 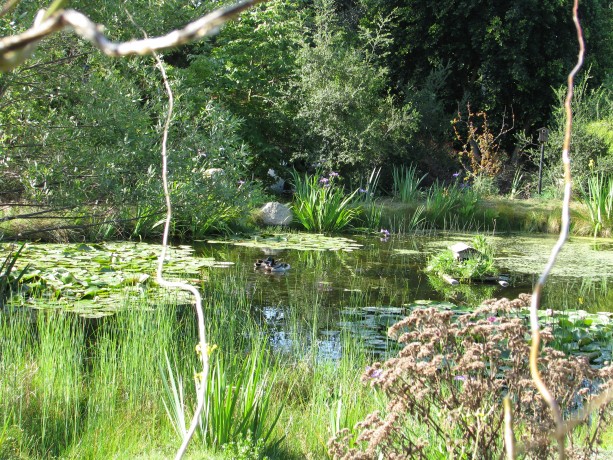
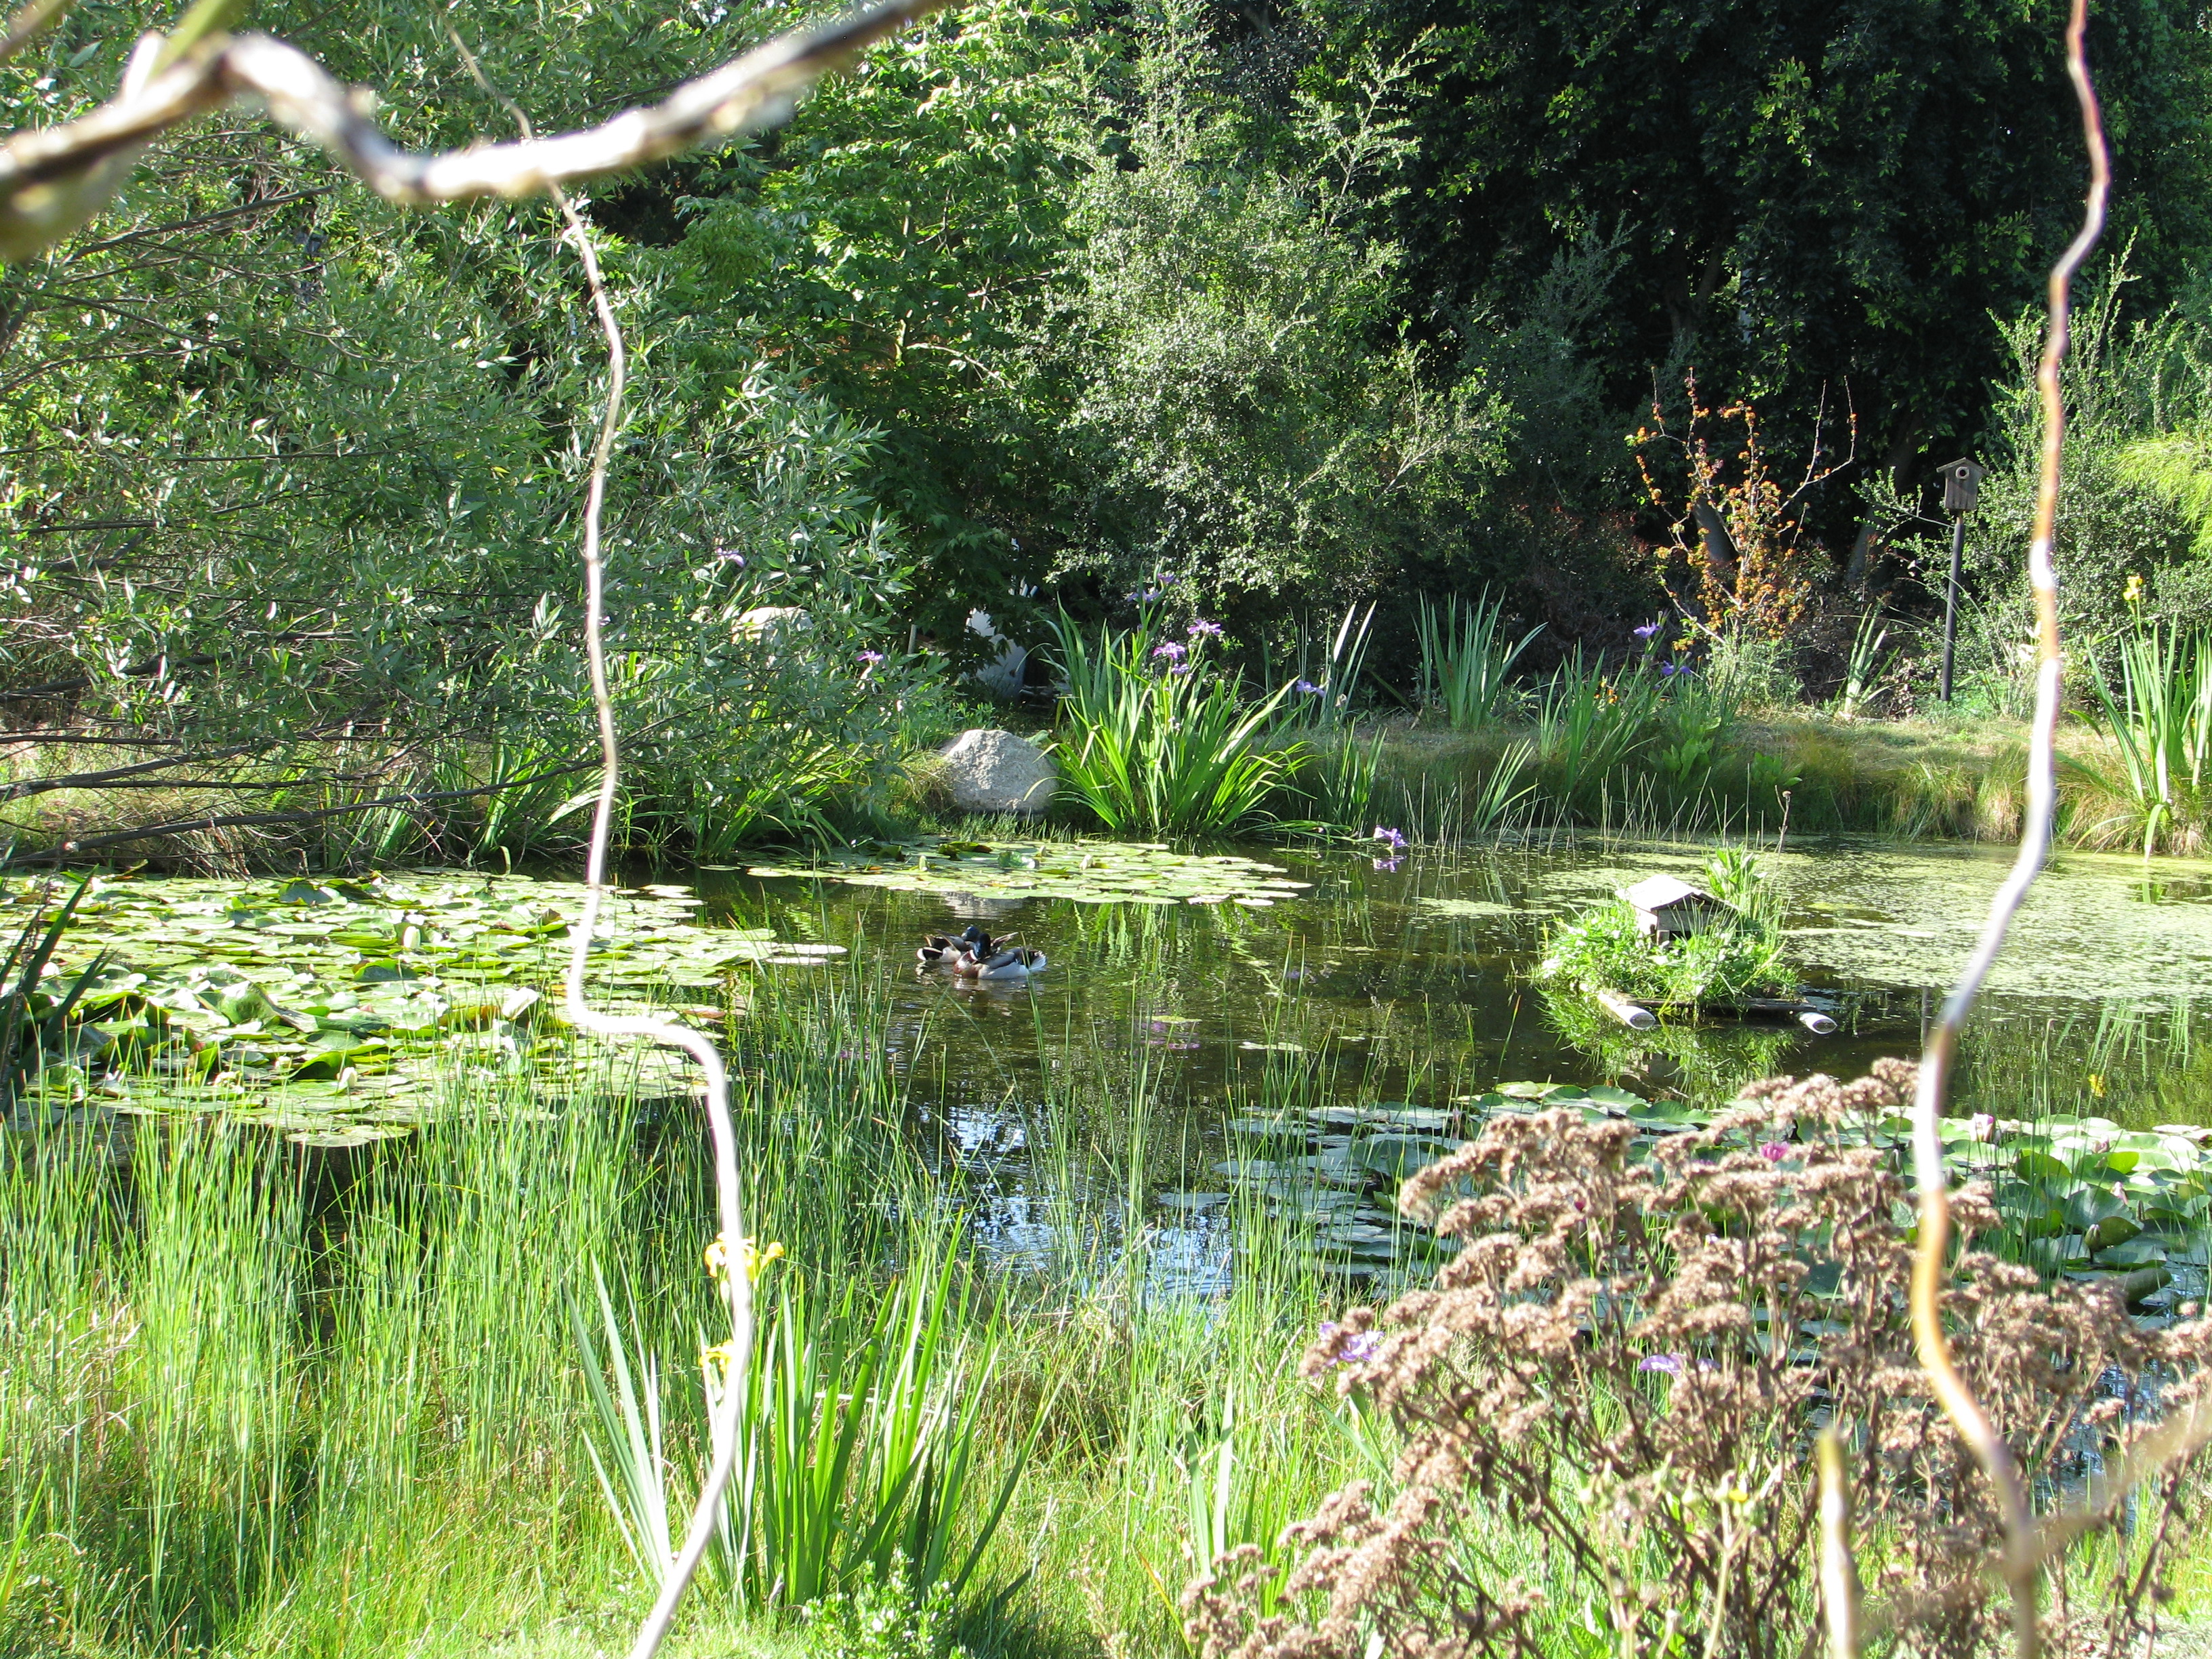
Framed by curly willow from the Withy Bird Hide, two drakes swim in the pond on Easter morning. 
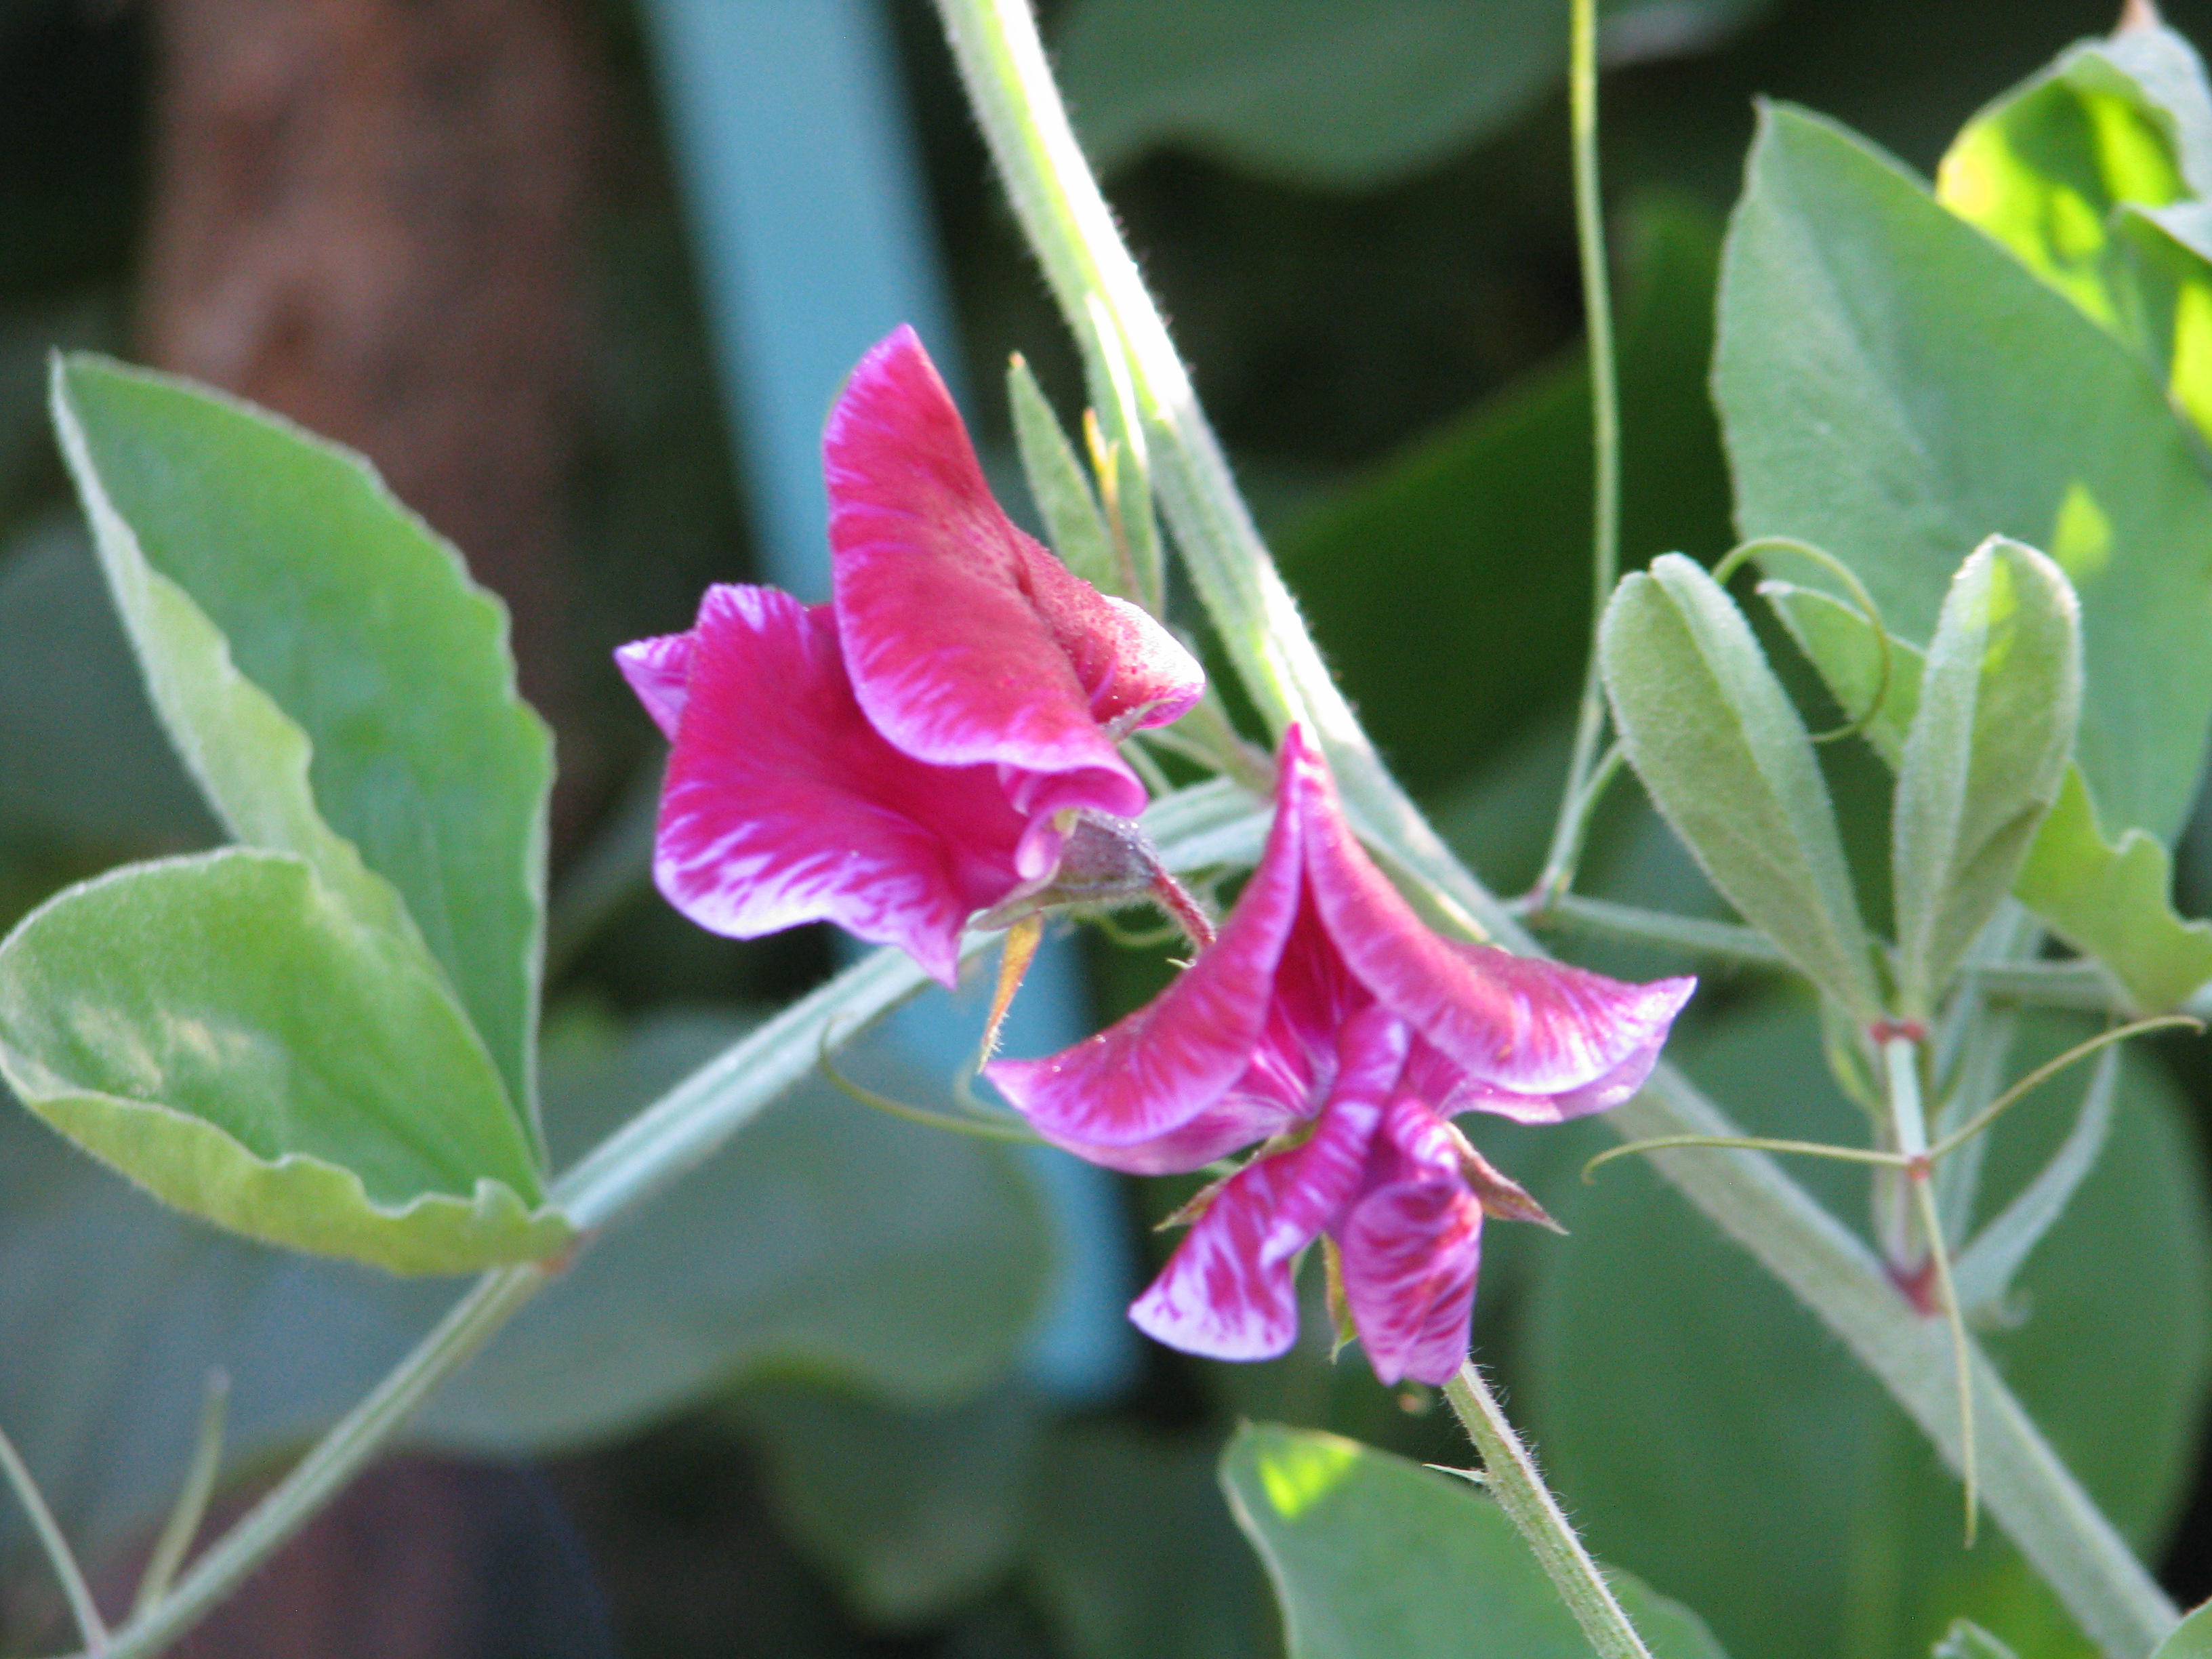
Sweet peas are still blooming. They hold the permaculture precept of everything having three purposes: they are nitrogen fixers, they are edible, and they are gorgeous. 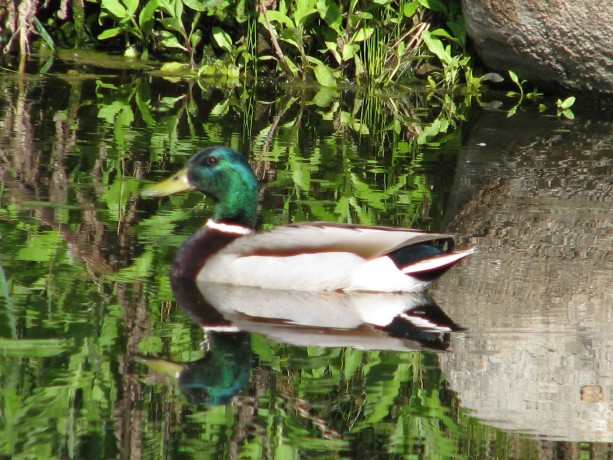
A fancy drake who showed up this morning. 
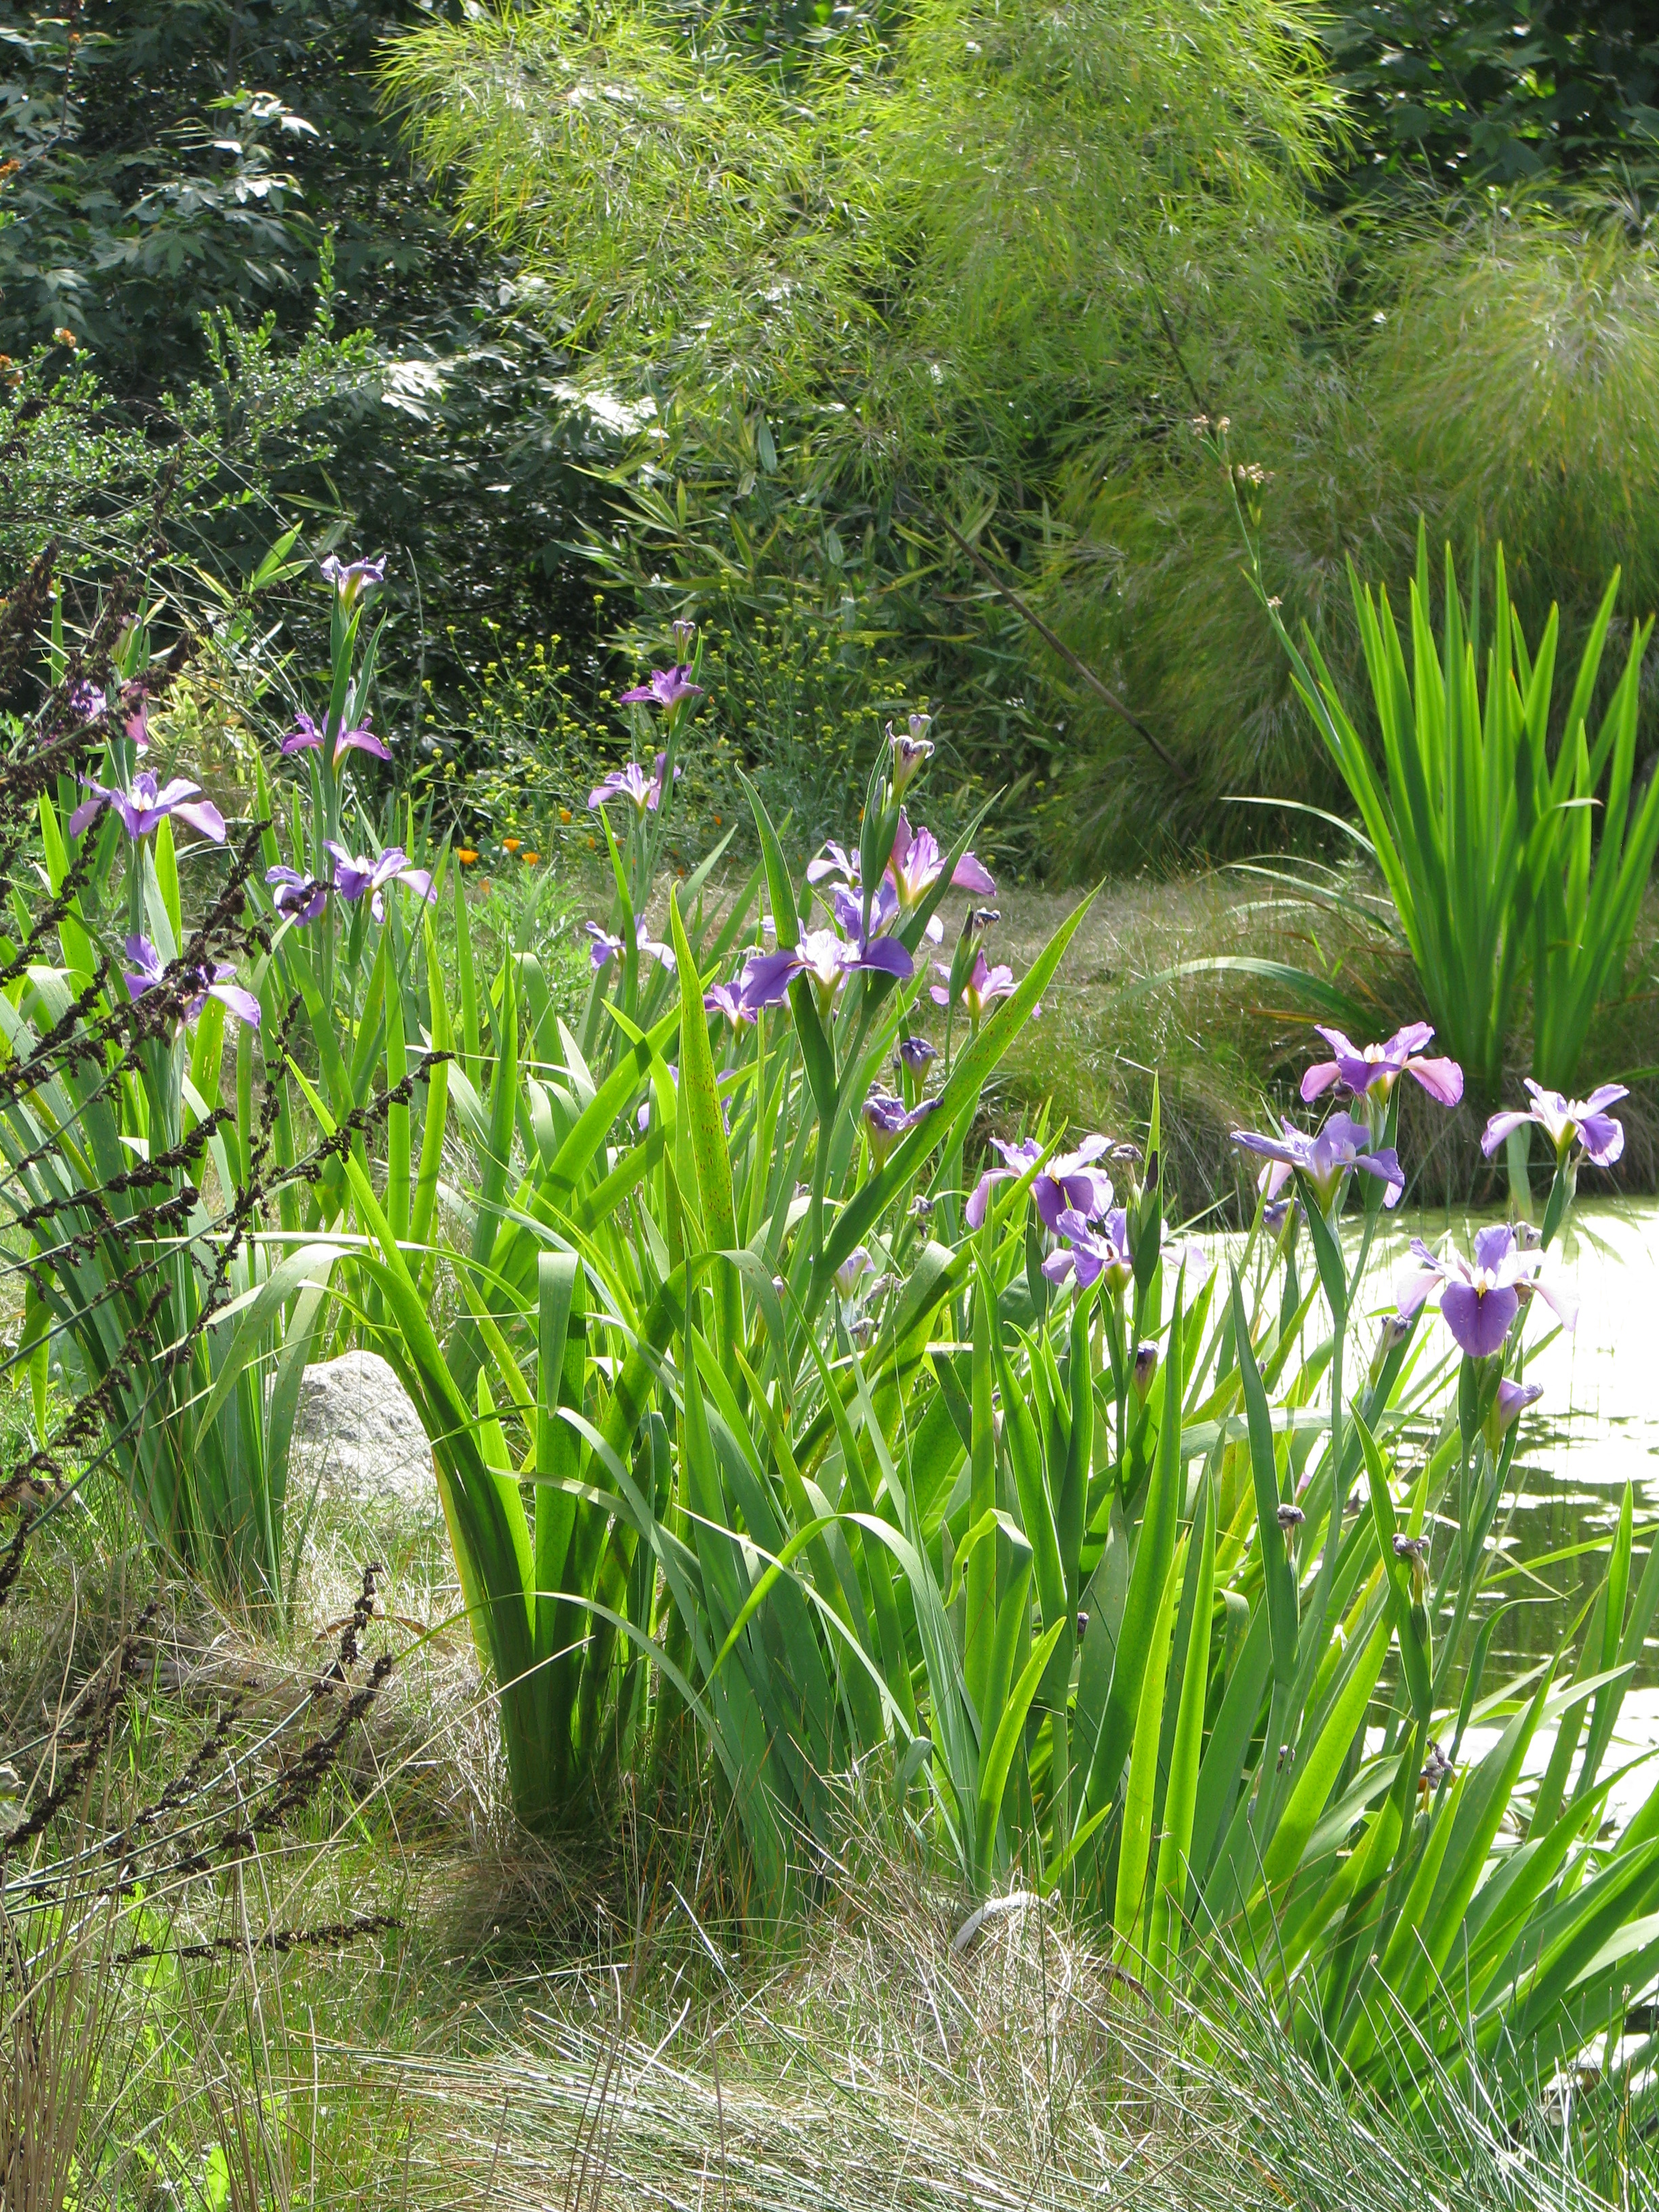
The irises surrounding the pond are spectacular right now. Blue, dark blue and yellow flag. 
Baby bunny has been growing out his ears. He’s enjoying a warm dirt bath. 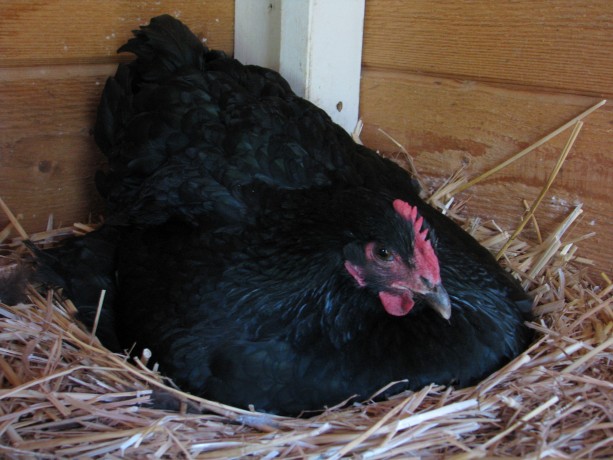
Mulan has gone broody. Such a large chicken puddles out over the wooden egg she’s trying to hatch. We’re feeding her an oatmeal mixture in a dish because she won’t come down during the day. 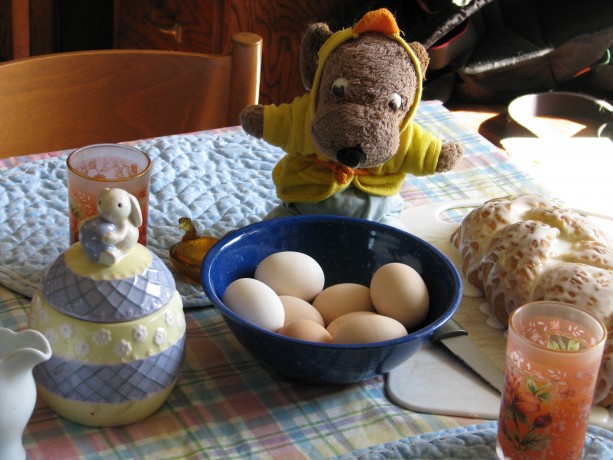
Easter breakfast. Hard boiled eggs, naturally colored by our hens, fresh tangerine juice, our traditional stollen from my mother’s recipe, and Peanut in his chicky robe ready to launch into the food. Peanut doesn’t act his age, of about 40+ years, but has traveled and been photographed extensively in Europe and Ecuador. Its nice that he wakes up for holidays. You May Also Like
Native Insects and IPM
- Animals, Compost, Fungus and Mushrooms, Gardening adventures, Permaculture and Edible Forest Gardening Adventures, Soil, Water Saving
Actively Aerated Compost Tea

Aerator, molasses, a paint strainer full of compost and a bucket of water. There are many teas for the garden. Manure tea is made by steeping… you guessed it… well-aged manure in water for several days. Well-aged is the key. Many years ago I gathered horse manure, made a tea and righteously spread it – and all the Bermuda grass seed that was in it – all over my vegetable garden. I’m still battling the grass. With fresh manure you are also brewing some nasty bacteria with which you really shouldn’t be dealing. Allowing well aged or composted manure to brew for a couple of days will produce a nice nutrient tea for your plants. There are better brews for your effort.
Plain compost tea is when you take samples of good soil and allow them to steep in water for several days and use that. This brew has some microbes and basic nutrients in it and is better than plain water for enhancing your soil and as a foliar spray.
However there is a super brew called actively aerated compost tea. It is very simple and inexpensive to make and it works wonders. There are many recipes for it, depending upon how analytical you want to become. Studying your soil under a microscope and following the advice of Dr. Elaine Ingham will give you the premium tea for your particular soil. Dr. Ingham and Dr. Carole Ann Rollins have many books out on the subject of microorganismsin the soil which are all fascinating and well worth the read; if you ever have the chance to hear Dr. Ingham speak, take it!
I don’t tinker with my tea at this time because I just don’t have the time for it. You may not, either. So this is the basic aerated compost tea recipe that will revitalize your soil:
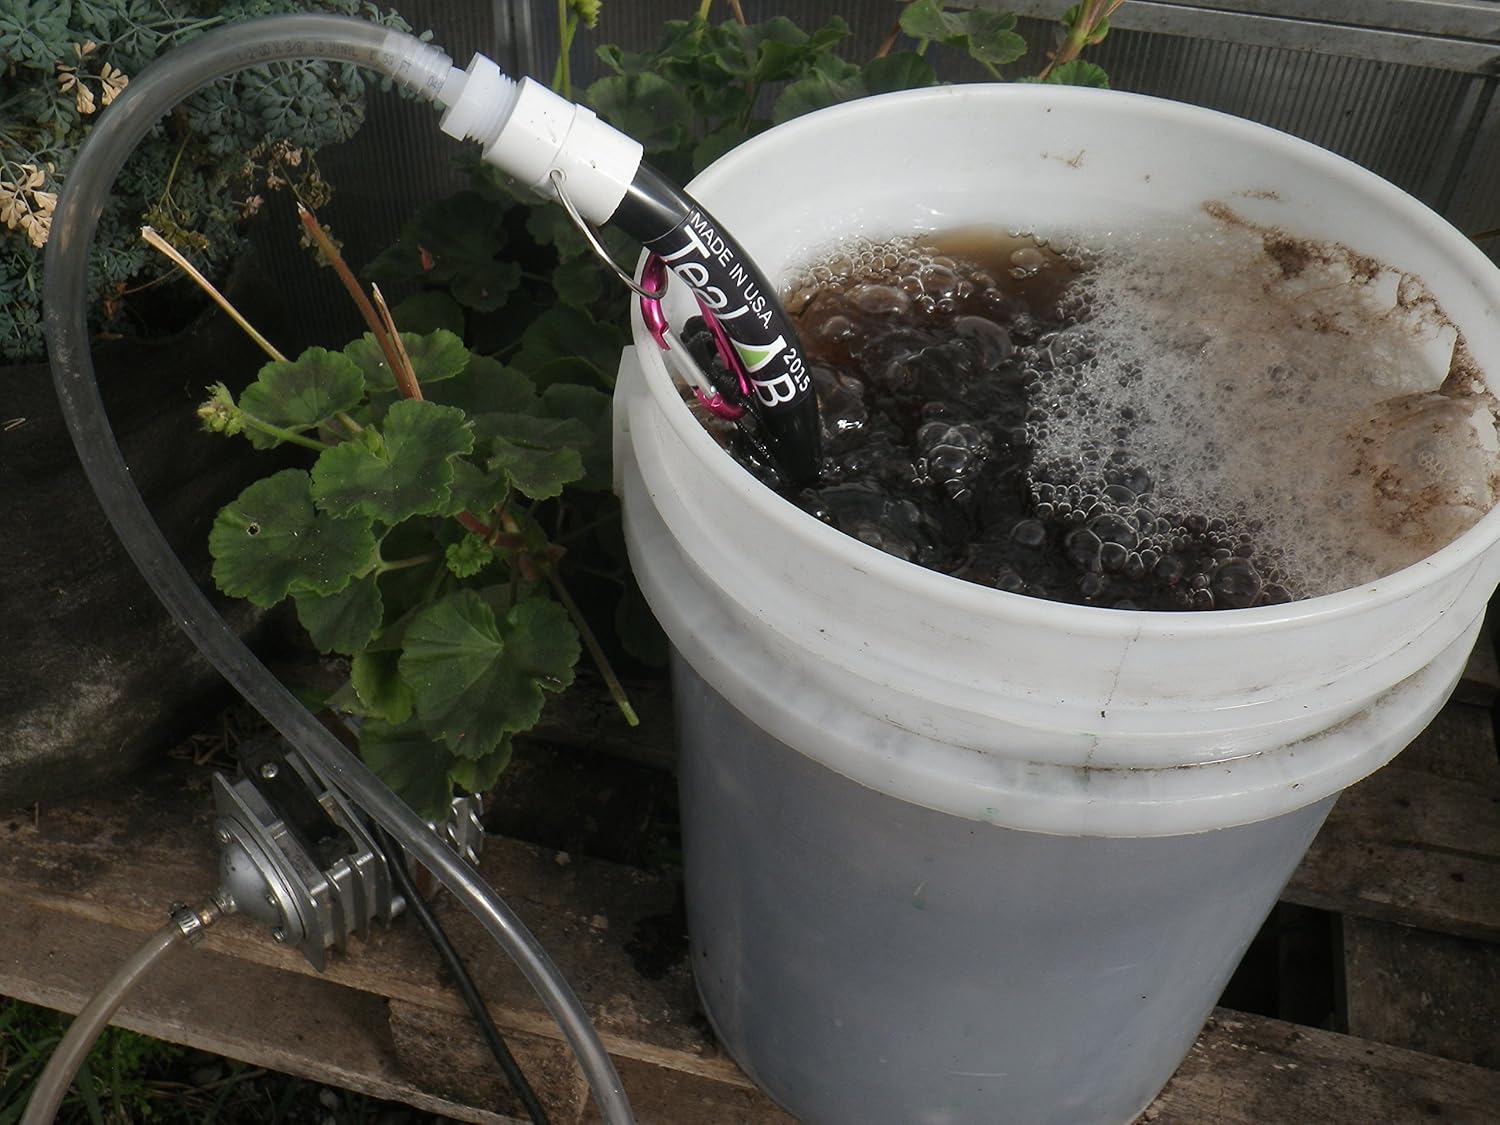
You will need a 5-gallon bucket, a paint strainer or cheesecloth or an old sock, a fish tank aerator or air bubbler, and one or all of these: organic unsulphered molasses, organic flours, organic corn meal, kelp. I have had excellent luck with TeaLab’s Bubblesnake Compost Tea Brewer. I don’t get anything for the plug, I just found that the kit really works and is easy to buy. I purchased through AmazonSmile.
Fill the bucket with either rainwater or tapwater that has stood for at least a day for the chlorine to have evaporated.
Take the paint strainer or sock and fill it with samples of good soil from around your property. If you don’t have any good soil, then add the best you have and then take good soil from areas as close to your property as possible. If you will be using the tea on bushes and trees, then be sure to take soil from under the same. Woody plants like highly fungal soil. If you will be using the tea for annuals and veggies, then go heavy on fine, well-composted soil that is bacteria-rich. Do the best you can; you can’t go wrong unless you take soil that has been sprayed with chemicals, use treated wood chips, or anaerobic soil (you’ll smell it if you do).
Tie the top of the cloth and put it into the bucket. You may tie twine or something around it so that you can haul it out of the bucket if you’d like. This is important on larger containers, but not so much with the small bucket.
Place the aerator or bubbler in the bucket, making sure the air intake hose is clear, and plug it in.
Add about a half tablespoon of molasses. It is important that the molasses is unsulphered and organic for the same reasons that the water shouldn’t have chlorine in it or the soil any chemicals: those things will hurt the microbes that you will be growing. For growth of other microbes, add about a teaspoon of any or all of the following: organic cornmeal, organic wheat flour, liquid kelp, and if you have it tucked away in your shed, bonemeal and bloodmeal (otherwise don’t buy it specially!). So the more different foods you add, the less of each that you use. Two tablespoons of food is about all you want; don’t have a big glob of it floating in your bucket.
Allow the aerator to do its thing for about 13 hours. When its done it should look and smell like sweet tea. Use it within a couple of hours or the creatures will use up all the oxygen and it will go bad. There is much discussion about how long you brew it, etc., just as there are hundreds of stew recipes. This is the recipe taught me in my PDC and one I’ve heard elsewhere. If your tea smells bad, any hint of ammonia or ‘off’ smells, don’t apply it to your plants. You’ll be hurting them. Be sure you have good compost, fresh water and proper aeration, and don’t let it sit too long.
What you are making is not just tea, it is soil inoculant. The micororganisms in the compost will feed on the molasses and oxygen, reproducing until at about 13 hours their numbers will peak and begin dying off a little. The tea should be used within a couple of hours.

Brew the tea for 13 hours then gently apply as a soil drench or foliar spray. What this tea is doing when applied, is establishing or boosting the fungus, bacteria, amoebas, nematodes, and other soil inhabitants in your dirt, all of which are native to your particular area. If you have decent soil already, then you can use this tea 1:10 parts dechlorinated water. If you have rotten dirt, use it straight along with a topping of compost. Compost, whether it be cooked composed compost, straight leaf matter, shredded wood, logs, damp cardboard or natural fabrics, all provide shelter and hold moisture in so that your microbes have habitat. Compost, of course, is the best source of food, moisture and shelter for them.
Apply the tea with a watering can, or a sprayer that has a large opening for the nozzle if you are using the tea as a foliar spray. A squeeze-trigger bottle used for misting has too narrow an opening and will kill a lot of the little guys you have just grown.
Using the tea as a foliar spray will treat disease, fungus and nutrient deficiencies, and help protect plants against insect attack. Instead of spraying sulfur or Bordeaux solution on your trees as is preached by modern gardening books, use compost tea on the leaves and around the drip line. When applied to leaves, the plant’s exudates hold the beneficial microorganisms to the stomata or breathing holes protecting them from disease and many harmful insects. You can’t overdose with compost tea.
All the additives that are recommended to ‘improve’ your soil are bandages not solutions. Think of the billions of soft-bodied creatures living in your soil, waiting for organic matter to eat. Then think of the lime, the rock dusts, the gypsum, the sulfur, the NPK concentrated chemical fertilizers (even derived from organic sources), poured onto these creatures. It burns them, suffocates them and kills them. Your plants show some positive results to begin with because they’ve just received a dose of nutrients, both from what you applied and from the dead bodies of all those murdered microbes. However the problem still is there. The only long-term solution to locked-up nutrients in the soil, hard pan, heavy clay, sand, compaction, burned, or poisoned soil, is good microbe-filled compost. Remember that microbes turn soil into a neutral pH, and allow more collection of neutral pH rainwater. Nutrients in the soil all become available at a neutral pH; there is no such thing as an iron-deficient soil. The nutrients are just locked away from the roots because of the lack of microbes and the pH.
There are compost tea brewers of all sizes, and lots of discussion about how well they work and whether they actually kill off a lot of microbes. See Dr. Elaine Ingham’s work for discussion on different brewers. For large scale operations there are large tanks with aggressive aerators, and the tea is sprayed from the tanks from a truck bed directly on the fields. If you can’t compost your entire property, then spraying compost tea is the next best thing.
If you’d like to be more involved with the biology of your tea, see Qualitative Assessment of Microorganisms by Dr. Elaine Ingham and Dr. Carole Ann Rollins. This book has photos of different soil components as they appear under a microscope, identifying and explaining them. By studying your soil’s balance through a microscope and then tweaking your tea to compensate you’ll be making the most powerful soil inoculant you can.
You May Also Like
Native Insects and IPM
- Arts and Crafts, Gardening adventures, Heirloom Plants, Living structures, Permaculture and Edible Forest Gardening Adventures, Seeds, Soil, Vegetables
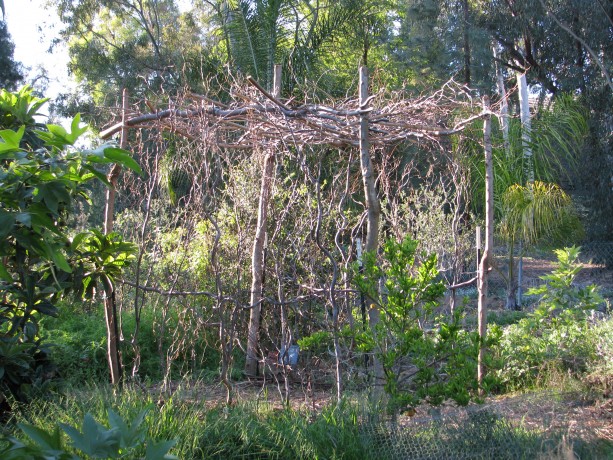
Curly Willow Trellis
A walk-through squash trellis. The vines will give it stability, and hang through. Thanks to generous friends, free seed opportunities and wonderful seed catalogs, we have many, many squash varieties to choose from this year. We also want to grow vertically where we can to save space so my daughter and I are creating trellises. No builder, I, but we’re hoping these will last for years to come.
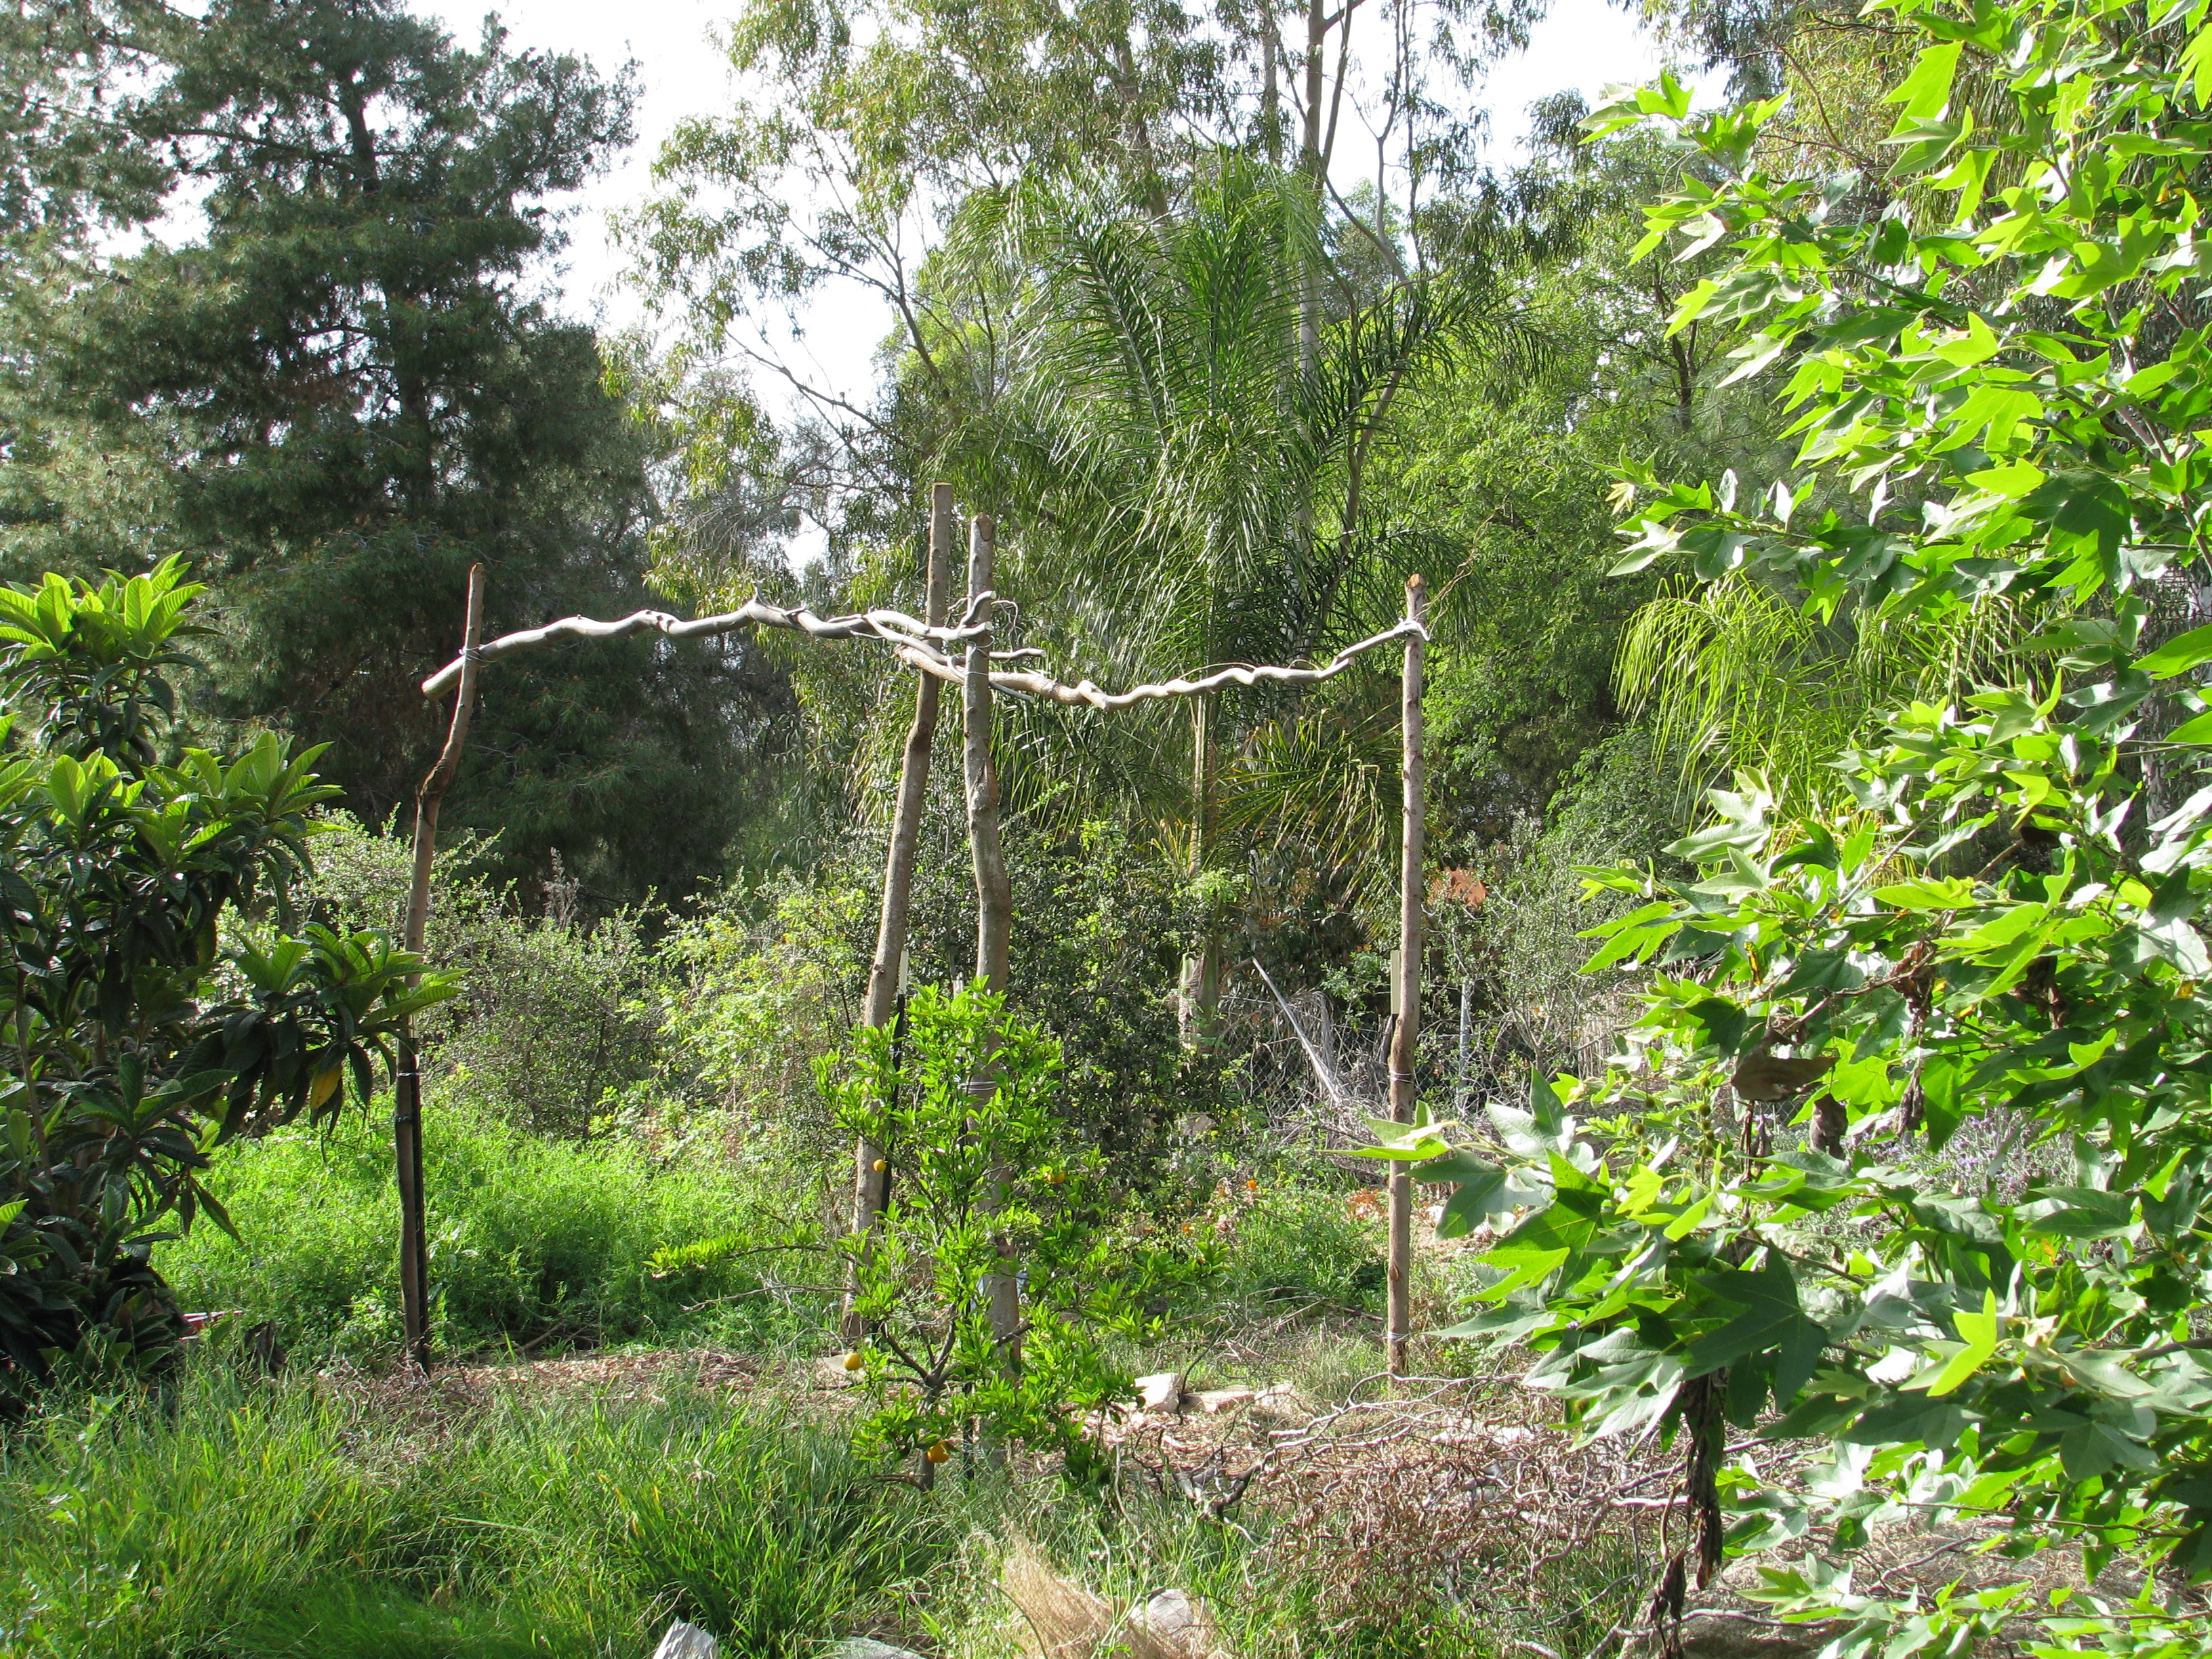
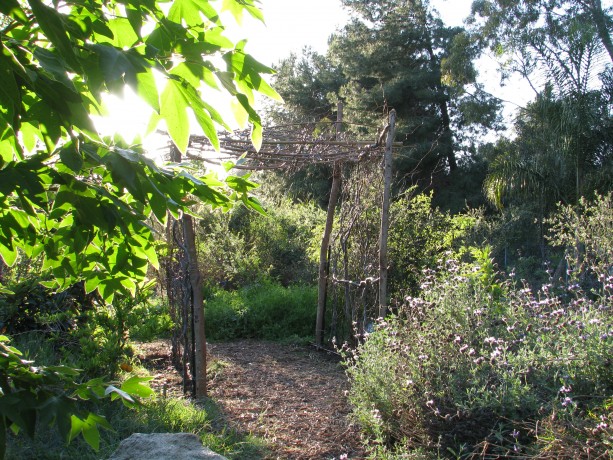
This part of the trail was perfect for vertical growing space. This area of the upper trail isn’t lovely when not covered by vines. It is also quite warm when people are touring and it could use some shade and interesting focal point. Miranda had cut down a large curly willow tree a few months back (it was taking too much water from an avocado). We used a couple pieces of the trunk to inoculate with mushroom spores, and the rest was fair game for a trellis.
Curly willow (Salix matsudana ‘Tortuosa’) has wonderfully shaped branches that twist and curl naturally. You’ll see it often in bouquets, where it usually roots while in water. This willow enjoys more sun and a little less water than native willows do. Willows all produce salicin, the pain-killing ingredient that has now been synthetized as aspirin. Willows also produce a rooting hormone which can be used to encourage sprouting and rooting of other plants. Cut up a willow branch, soak it in water for a couple of days (if water is chlorinated, leave it sit for a day before adding willow) and use to water seedlings.

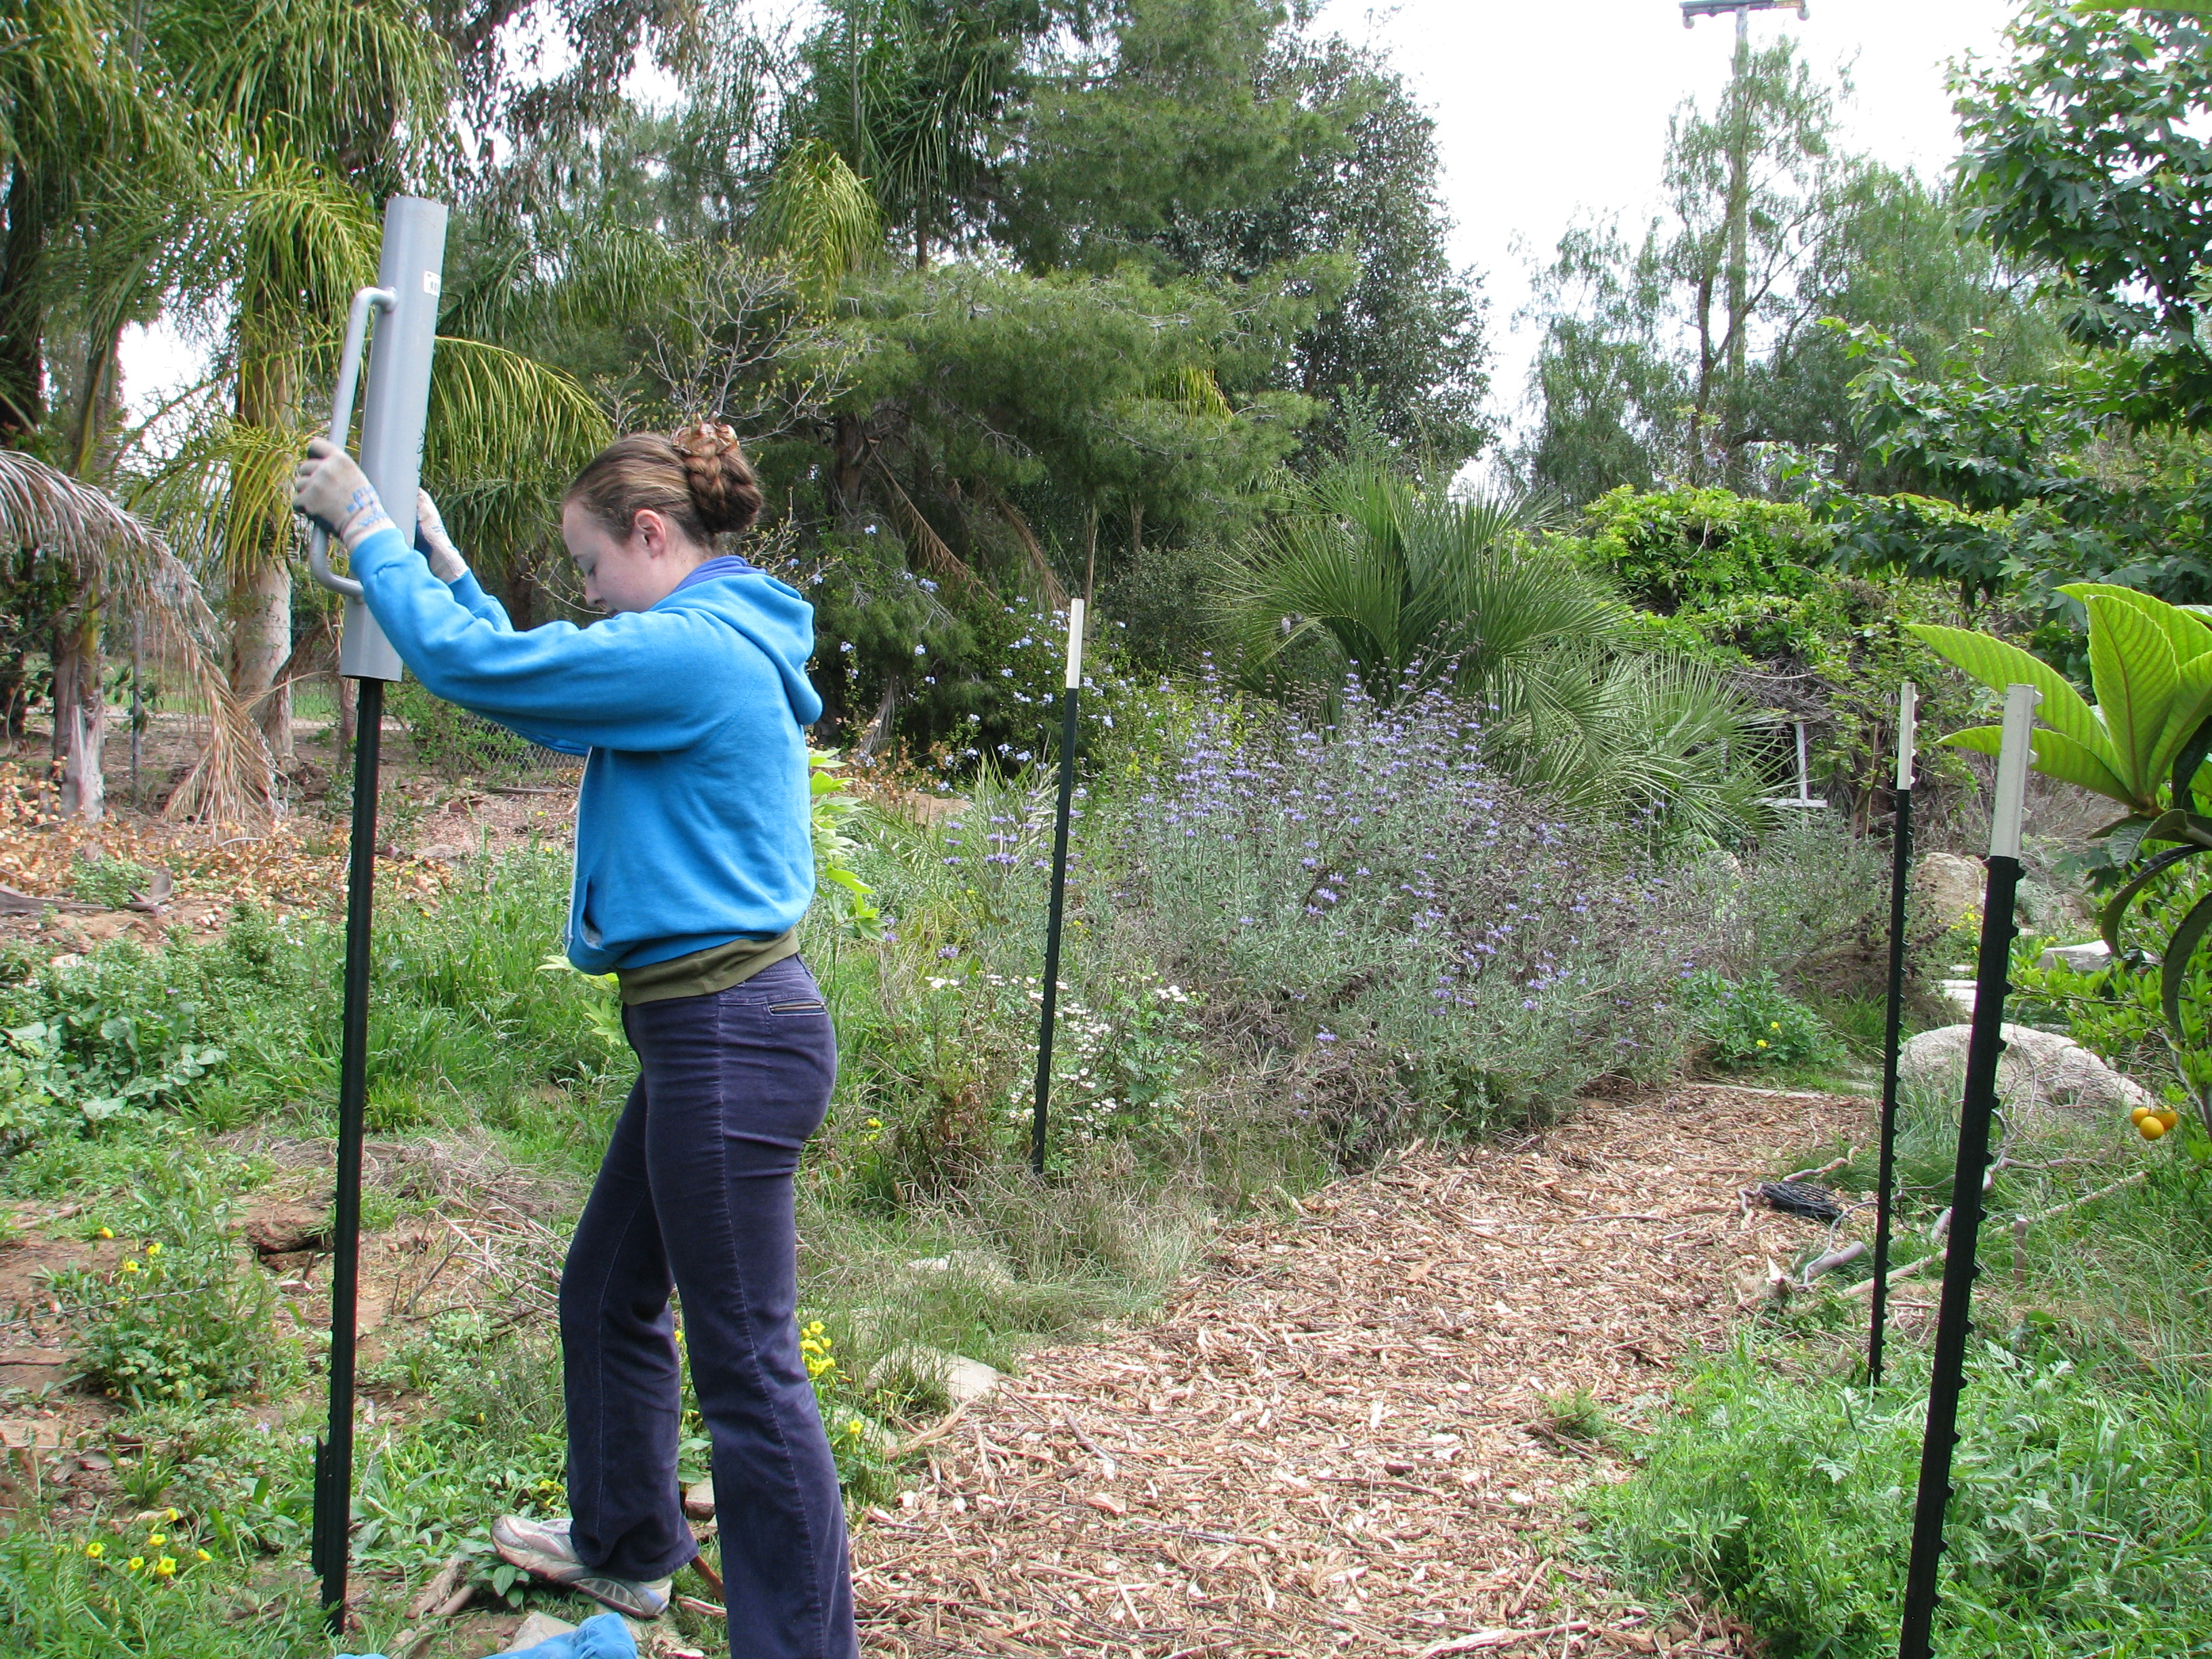
Miranda makes this look so easy! After we’d put these in, a friend recommended sliding the post pounder over the post before standing it up… for we short people who have trouble lifting the really heavy thing over our heads! Wanting to avoid cutting wood and nailing things together, we sunk four T-posts into the corners. The trellis is six feet across and eight feet wide; any wider and we would have put a center post on each side as well.

We wired on curly willow trunks in the corners, and wired long branches across the tops and the middle. We wired on the side posts and cross posts, cutting long branches from the willow. This willow was long dead; fresh willow could be sunk into the ground and it would root to make a living trellis, like the Withy Hide. We didn’t want that here, though.

We laid long whips from a Brazilian pepper tree across, then wove curly willow through for the top. We stood smaller branches upright along the sides and wired them on, keeping in mind spaces where the squash vines will want to find something on which to grab. Over the top we laid long slim branches from a Brazilian pepper that is growing wild in the streambed and really needs to come out. By pruning it and using the branches, we’re making use of the problem. In permaculture, the problem is the solution! I wanted to make an arched top and tried to nail the slim branches in a bended form, but this was difficult and didn’t work for me. I didn’t want to spend days finishing this… too much else to do! So we laid the branches over the top, wiring some on, and then wove curly willow branches long-wise through them. This weaving helps hold the branches in place, will give the vines support, and brings together the look.
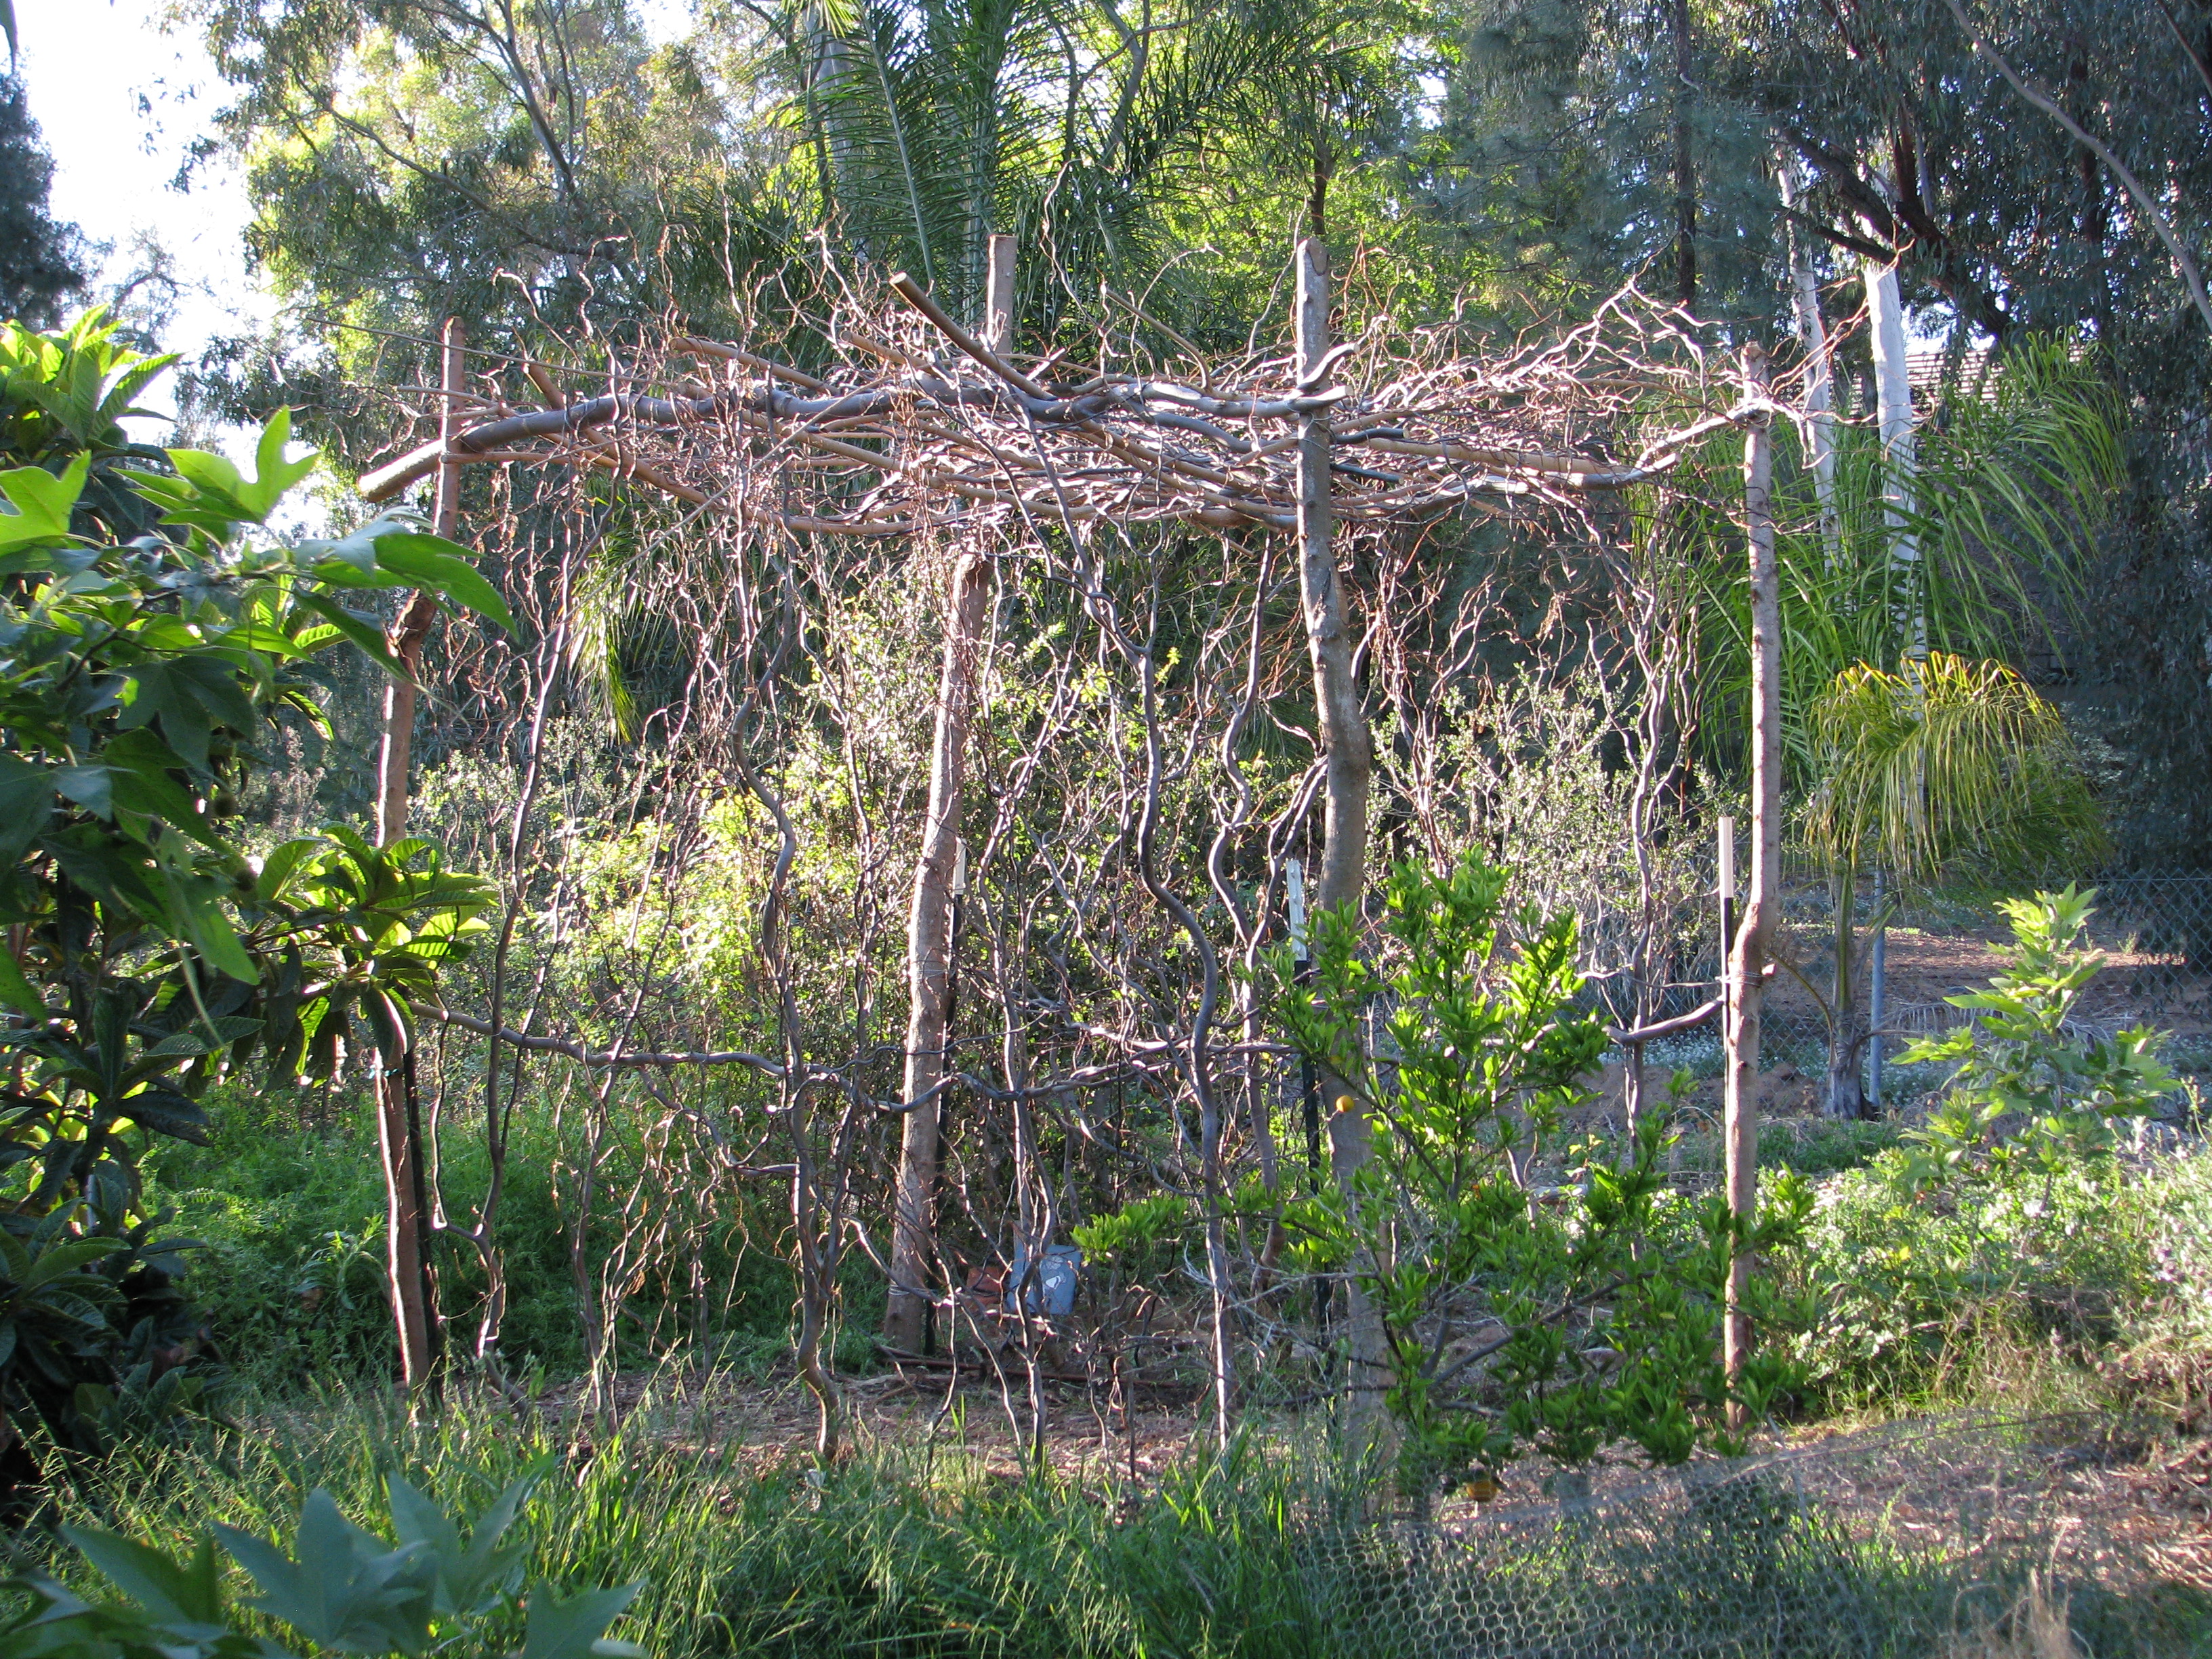
We planted four kinds of squash along the poles. And it was done. It should stand up to wind. We may need to add some vertical support depending upon the weight of the squash vines. We planted four varieties of squash that have small (2-3 lb.) veg. We planted four seeds of each, two on either side. We also planted some herbs, flowers and alliums, and some perennial beans, the Golden Runner Bean.
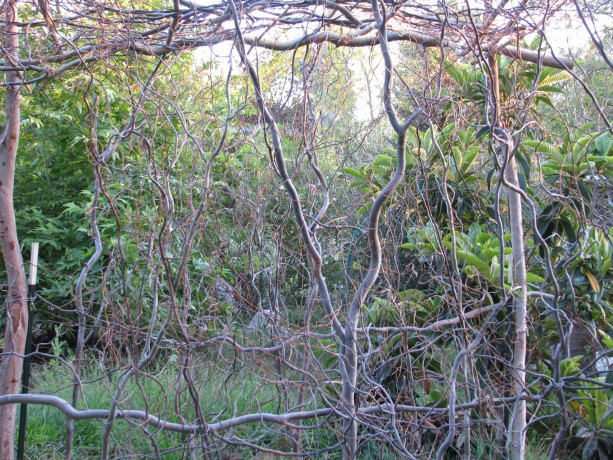
Architecturally interesting when not covered by squash as well. If nothing else, it is lovely and interesting to look at; better in person than in the photos. We can’t wait for the squash to start vining! Now, onto the next trellis.
- Animals, Bees, Birding, Chickens, Cob, Compost, Composting toilet, Fungus and Mushrooms, Gardening adventures, Health, Heirloom Plants, Hiking, Humor, Living structures, Natives, Natural cleaners, Other Insects, Permaculture and Edible Forest Gardening Adventures, Pets, Photos, Ponds, Predators, Quail, Rain Catching, Reptiles and Amphibians, Seeds, Soil, Water Saving, Worms
Finch Frolic Facebook!
Thanks to my daughter Miranda, our permaculture food forest habitat Finch Frolic Garden has a Facebook page. Miranda steadily feeds information onto the site, mostly about the creatures she’s discovering that have recently been attracted to our property. Lizards, chickens, web spinners and much more. If you are a Facebook aficionado, consider giving us a visit and ‘liking’ our page. Thanks!
You May Also Like
Native Insects and IPM
- Animals, Bees, Birding, Compost, Fruit, Fungus and Mushrooms, Gardening adventures, Herbs, Hugelkultur, Natives, Other Insects, Permaculture and Edible Forest Gardening Adventures, Ponds, Predators, Rain Catching, Reptiles and Amphibians, Seeds, Soil, Vegetables, Water Saving, Worms
The Mulberry Guild
The renovated and planted mulberry guild. One of our larger guilds has a Pakistani mulberry tree that I’d planted last spring, and around it had grown tomatoes, melons, eggplant, herbs, Swiss chard, artichokes and garlic chives.

Mulberry guild with last year’s plant matter and unreachable beds. This guild was too large; any vegetable bed should be able to be reached from a pathway without having to step into the bed. Stepping on your garden soil crushes fungus and microbes, and compacts (deoxygenates) the soil. So of course when I told my daughter last week that we had to plant that guild that day, what I ended up meaning was, we were going to do a lot of digging in the heat and maybe plant the next day. Most of my projects are like this.
Lavender, valerian, lemon balm, horehound, comfrey and clumping garlic chives were still thriving in the bed. Marsh fleabane, a native, had seeded itself all around the bed and had not only protected veggies from last summer’s extreme heat, but provided trellises for the current tomatoes.
Fleabane stalks from last year, with new growth coming from the roots. Marsh fleabane is an incredible lure for hundreds of our tiny native pollinators and other beneficial insects. Lots of lacewing eggs were on it, too. The plants were coming up from the base, so we cut and dropped these dead plants to mulch the guild.
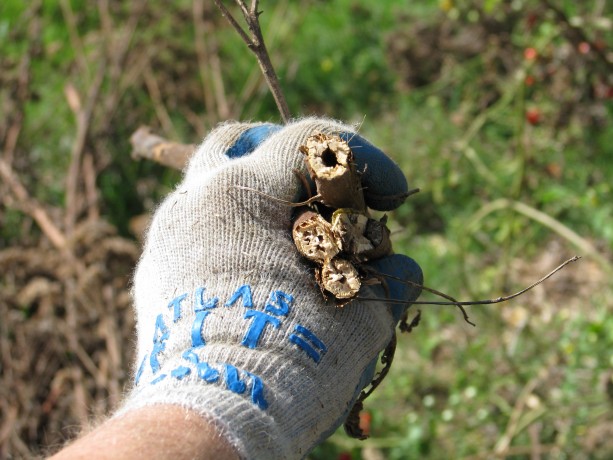
The stalks of fleabane are hollow… perfect homes for small bees! The stems were hollow and just the right size to house beneficial bees such as mason bees. This plant is certainly a boon for our first line of defense, our native insects.
We also chopped and dropped the tomato vines. Tomatoes like growing in the same place every year. With excellent soil biology – something we are still working on achieving with compost and compost teas – you don’t have to rotate any crops.

Slashed and dropped tomato and fleabane. We had also discovered in the last flood that extra water through this heavy clay area would flow down the pathway to the pond, often channeled there via gopher tunnels.
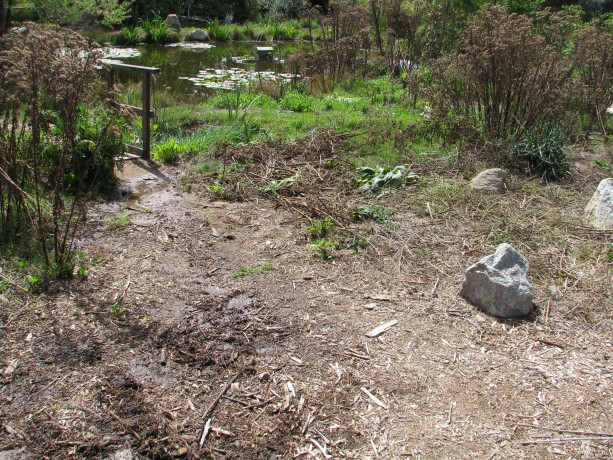
The pathway is a water channel during heavy rains. It needs fixing. We decided to harvest that water and add water harvesting pathways to the garden at the same time. We dug a swale across the pathway, perpendicular to the flow of water, and continued the swale into the garden to a small hugel bed.

Swale dug on contour through the pathway and across the guild. Hugelkultur means soil on wood, and is an excellent way to store water in the ground, add nutrients, be rid of extra woody material and sequester carbon in the soil. We wanted the bottom of the swale to be level so that water caught on the pathway would slowly travel into the bed and passively be absorbed into the surrounding soil. We used our wonderful bunyip (water level).
Using a bunyip to make the bottom of the swale level. Water running into the path will now be channeled through the guild. Because of the heavy clay involved we decided to fill the swale with woody material, making it a long hugel bed. Water will enter the swale in the pathway, and will still channel water but will also percolate down to prevent overflow. We needed to capture a lot of water, but didn’t want a deep swale across our pathway. By making it a hugel bed with a slight concave surface it will capture water and percolate down quickly, running along the even bottom of the swale into the garden bed, without there being a trippable hole for visitors to have to navigate. So we filled the swale with stuff. Large wood is best for hugels because they hold more water and take more time to decompose, but we have little of that here. We had some very old firewood that had been sitting on soil. The life underneath wood is wonderful; isn’t this proof of how compost works?
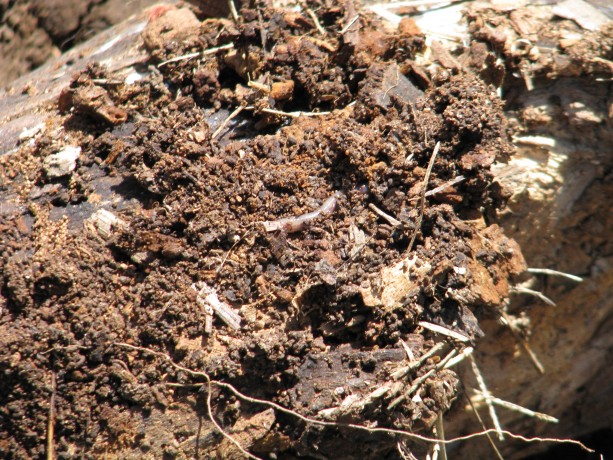
The activity under an old log shows so many visible decomposers, and there are thousands that we don’t see. We laid the wood into the trench.
Placing old logs in the swale. If you don’t have old logs, what do you use? Everything else!
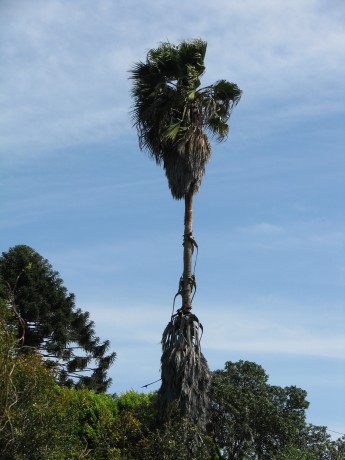
This giant palm has been a home to raccoons and orioles, and a perch for countless other birds. The last big wind storm distributed the fronds everywhere. We are wealthy in palm fronds.
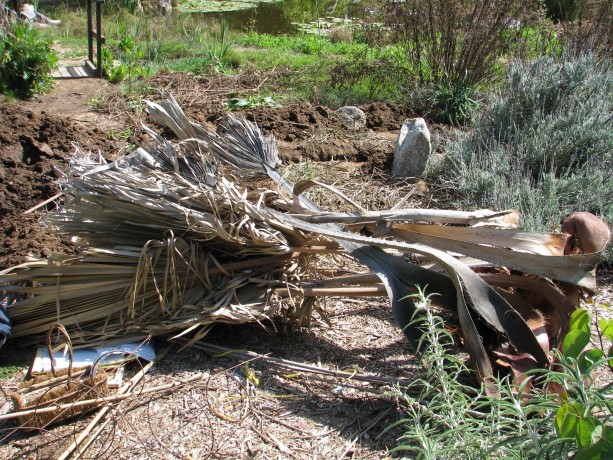
Three quick cuts (to fit the bed) made these thorny fronds perfect hugelbed components. We layered all sorts of cuttings with the clay soil, and watered it in, making sure the water flowed across the level swale.
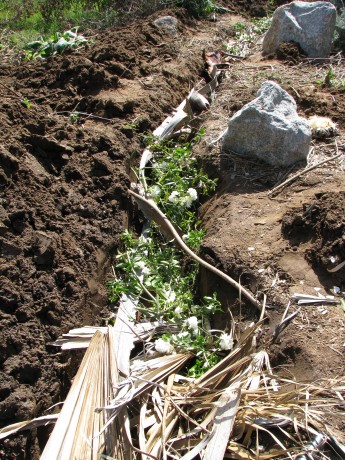
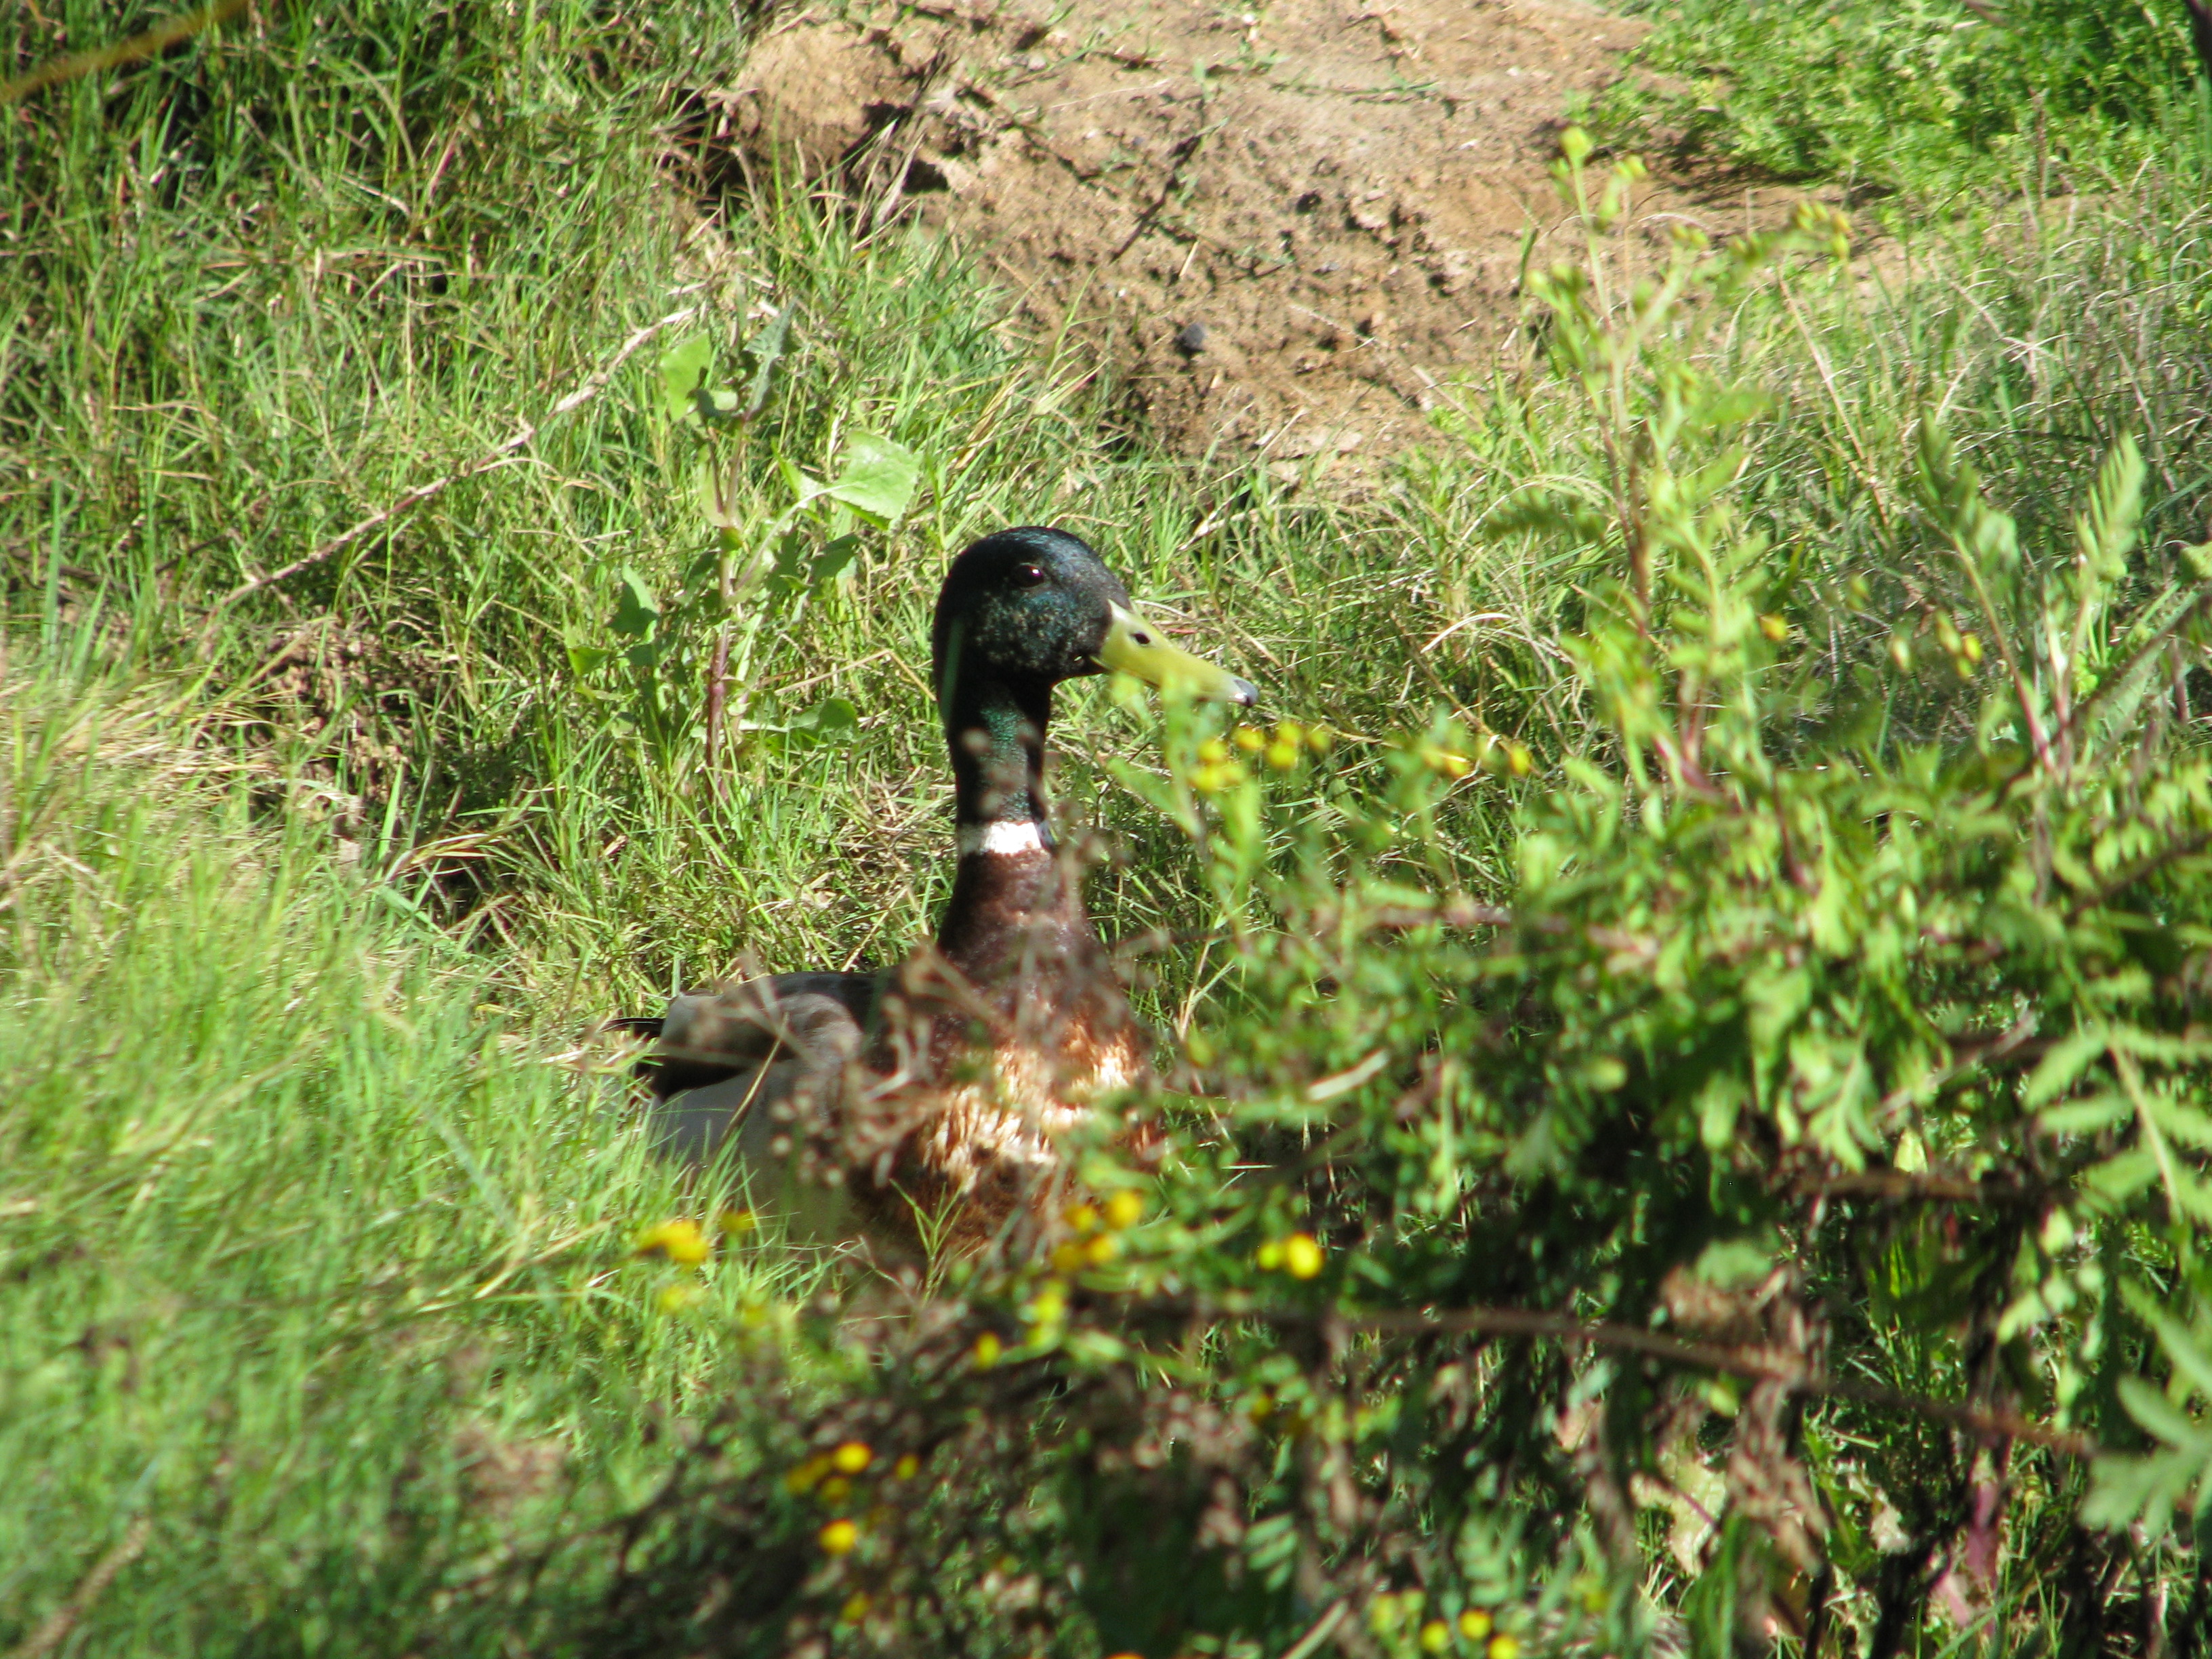
We filled the swale with fronds, rose and sage trimmings, some old firewood and sticks, and clay. As we worked, we felt as if we were being watched.
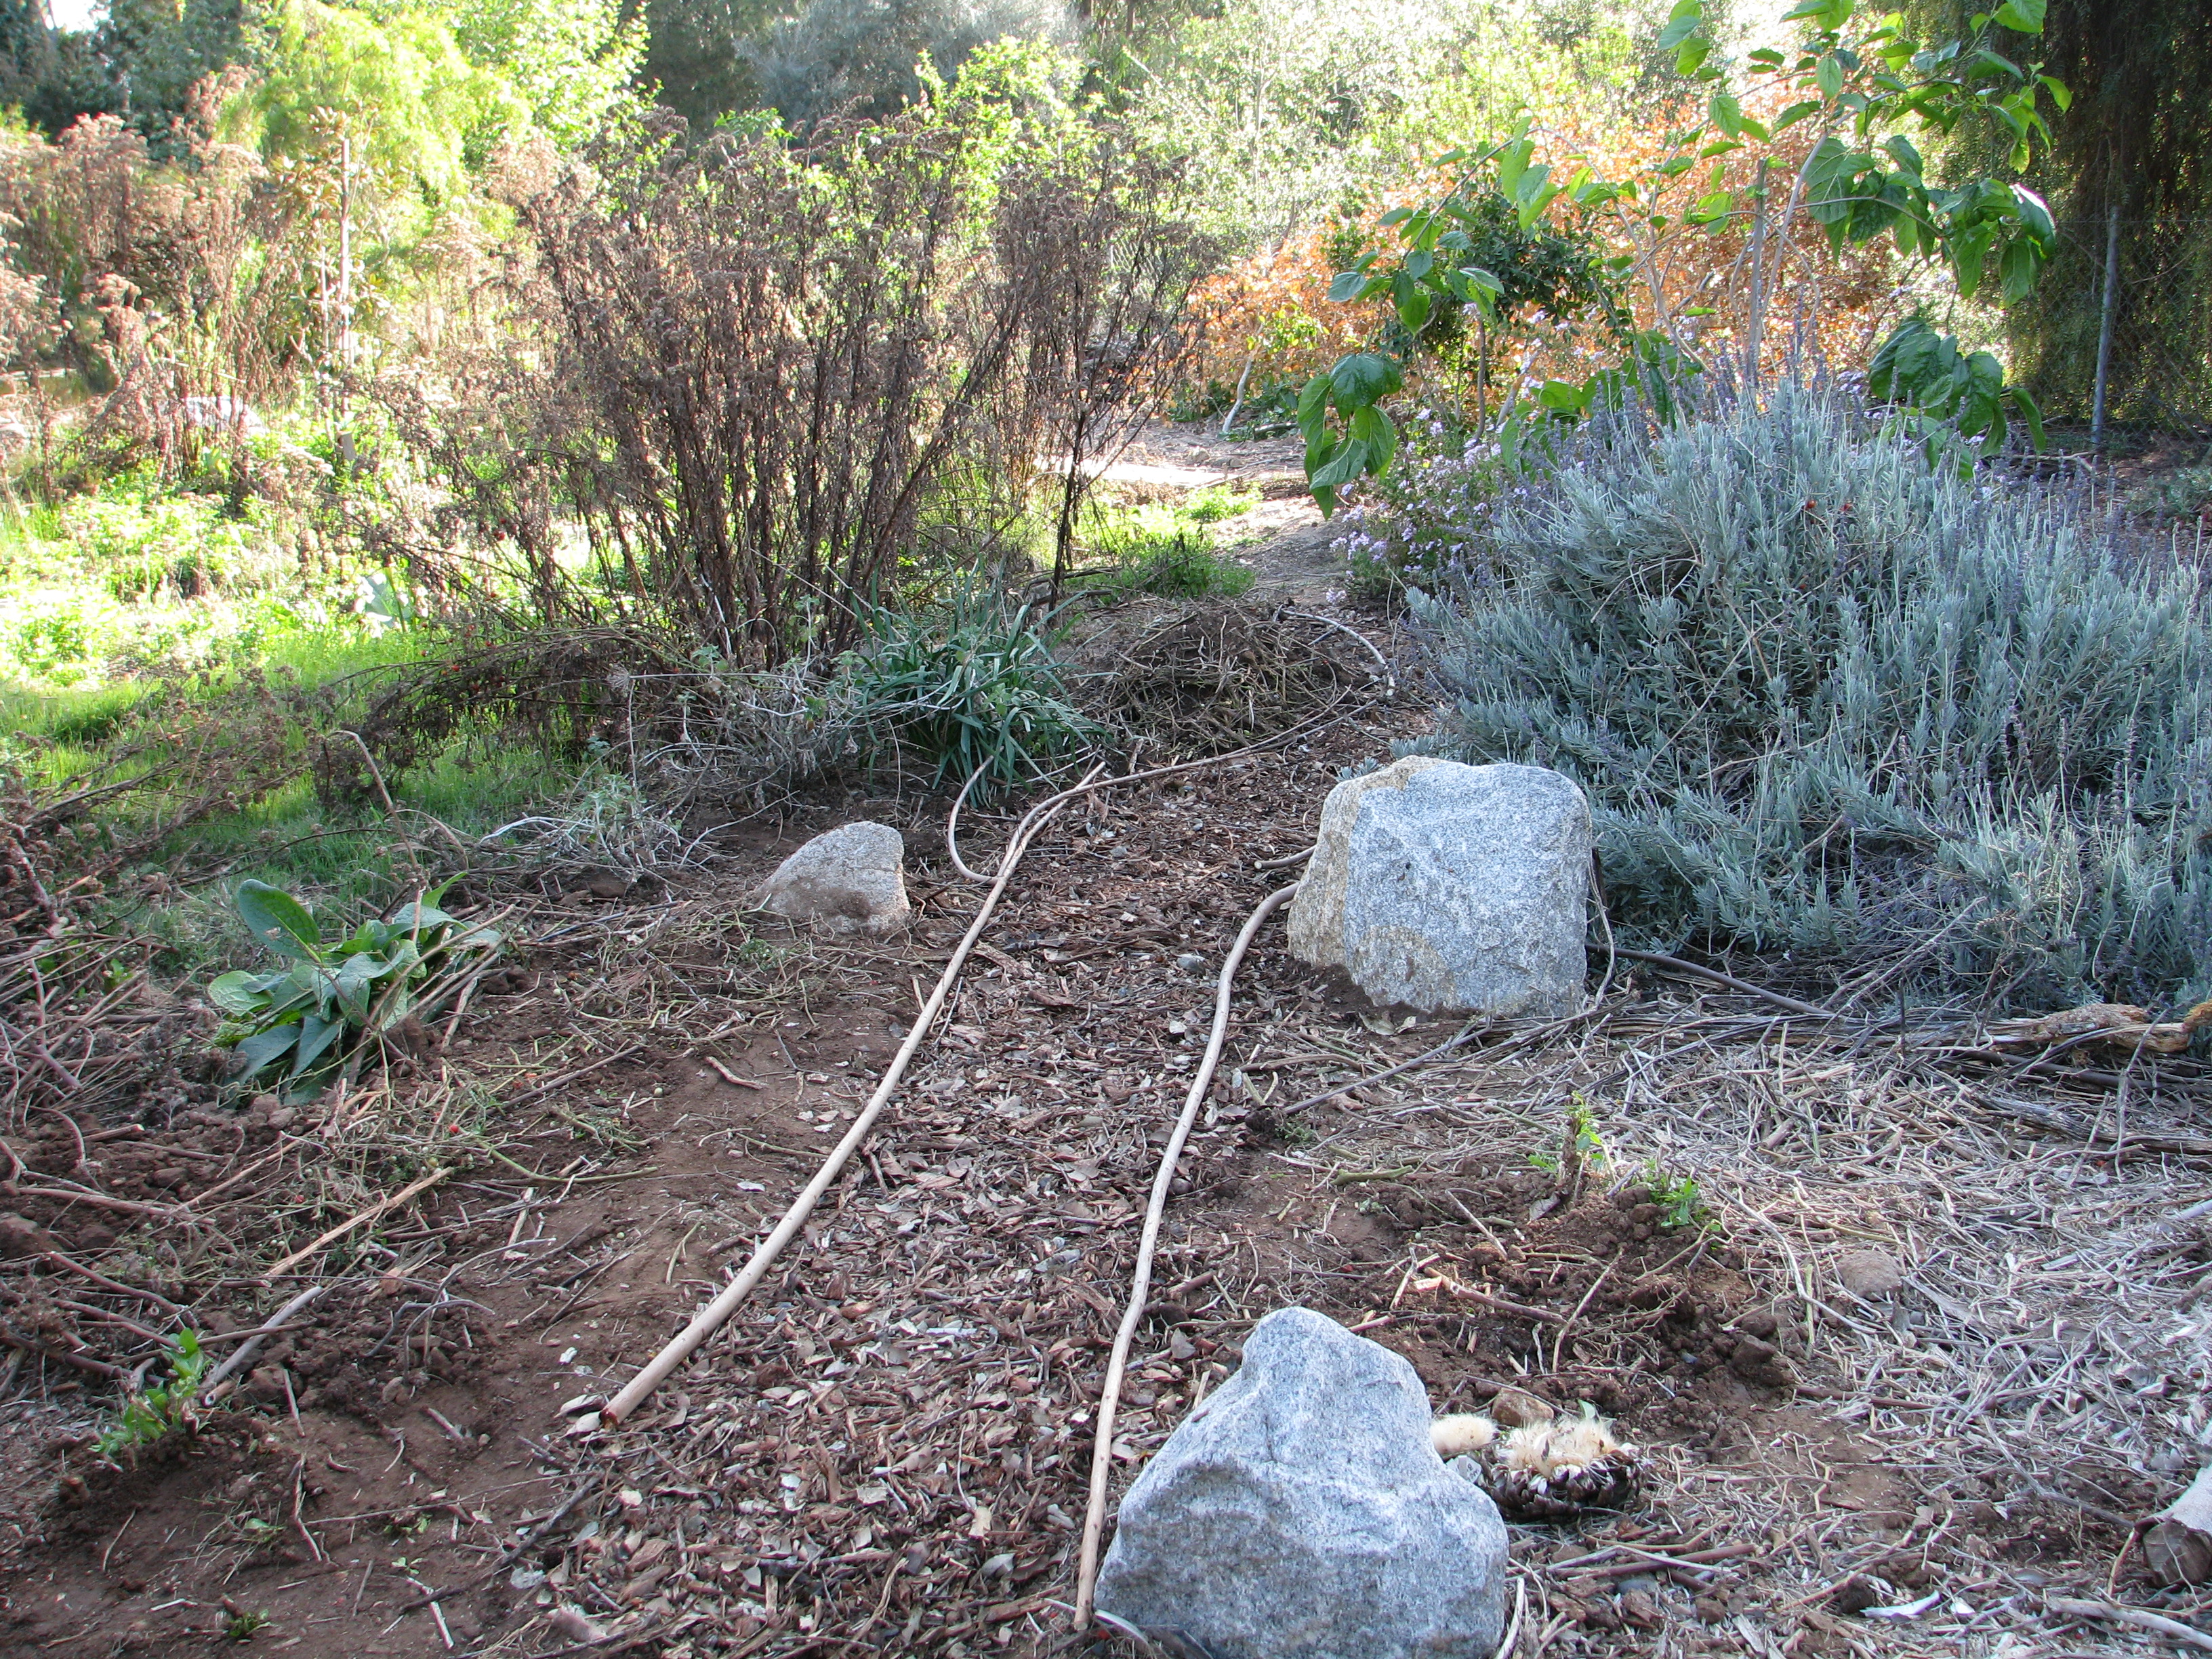
Can you spot the duck in this photo? Mr. and Mrs. Mallard were out for a graze, boldly checking out our progress. He is guarding her as she hikes around the property, leading him on a merry chase every afternoon. You can see Mr. Mallard to the left of the little bridge.

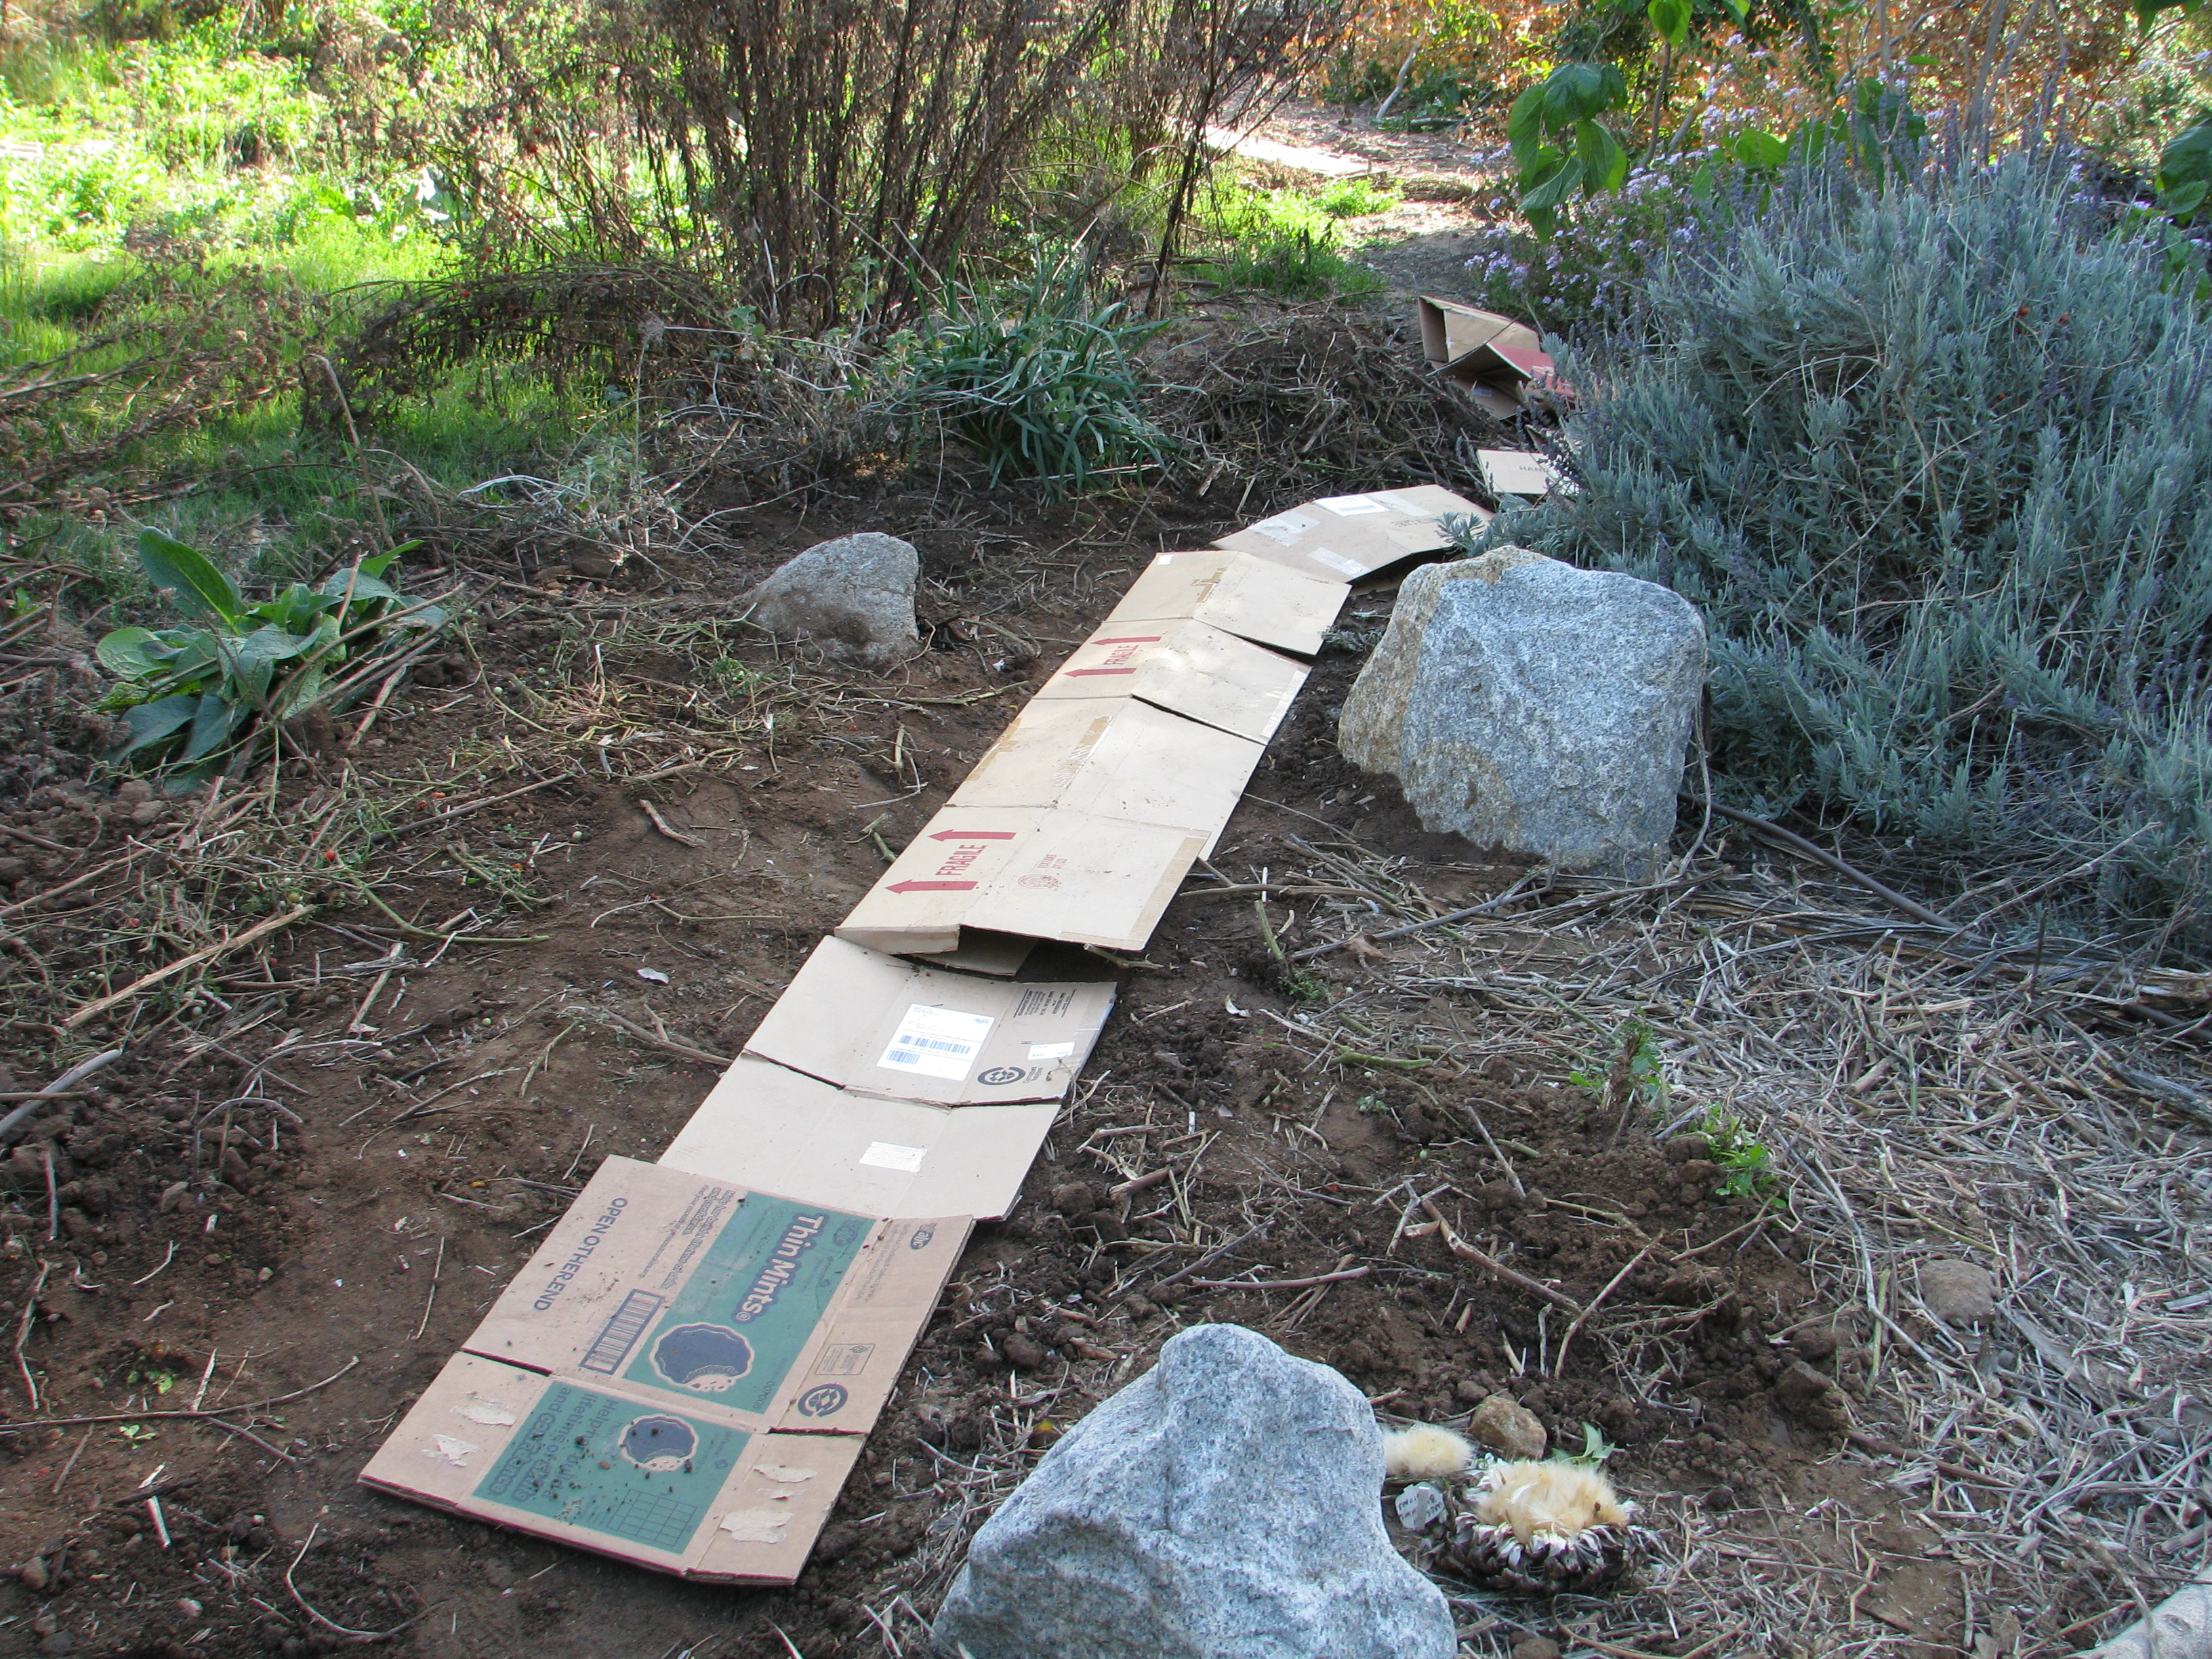
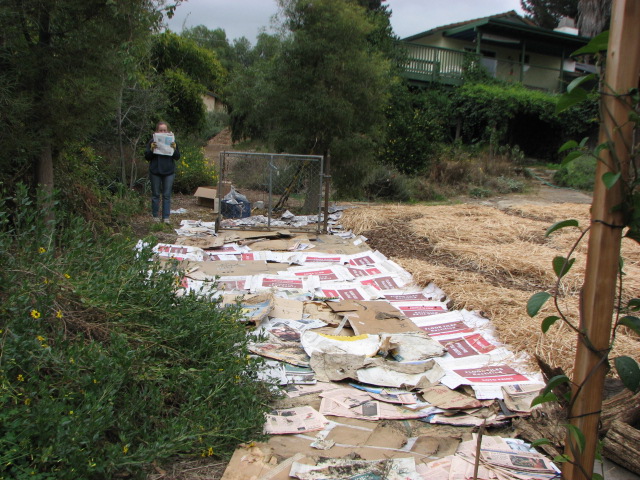
This male mallard and his mate, who is ‘ducked’ down in front of him, enjoyed grazing on weeds and watching we silly humans work so hard. After filling the swale, we covered the new trail that now transects the guild with cardboard to repress weeds.

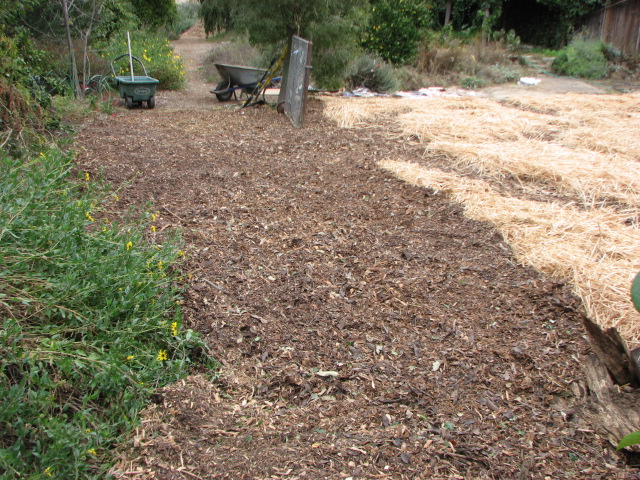
Cardboard laid over the hugelswale. Then we covered that with wood chips and delineated the pathway with sticks; visitors never seem to see the pathways and are always stepping into the guilds. Grrr!

The cardboard was covered with wood chips and the pathway delineated with sticks. Where the trail curves to the left is a small raised hugelbed to help hold back water. At this point the day – and we – were done, but a couple of days later we planted. Polyculture is the best answer to pest problems and more nutritional food. We chose different mixes of seeds for each of the quadrants, based on situation, neighbor plants, companion planting and shade. We kept in mind the ‘recipe’ for plant guilds, choosing a nitrogen-fixer, a deep tap-rooted plant, a shade plant, an insect attractor, and a trellis plant. So, for one quarter we mixed together seeds of carrot, radish, corn, a bush squash, leaf parsley and a wildflower. Another had eggplant, a short-vined melon (we’ll be building trellises for most of our larger vining plants), basil, Swiss chard, garlic, poppies, and fava beans. In the raised hugelbed I planted peas, carrots, and flower seeds.
In the back quadrant next to the mulberry I wanted to trellis tomatoes.

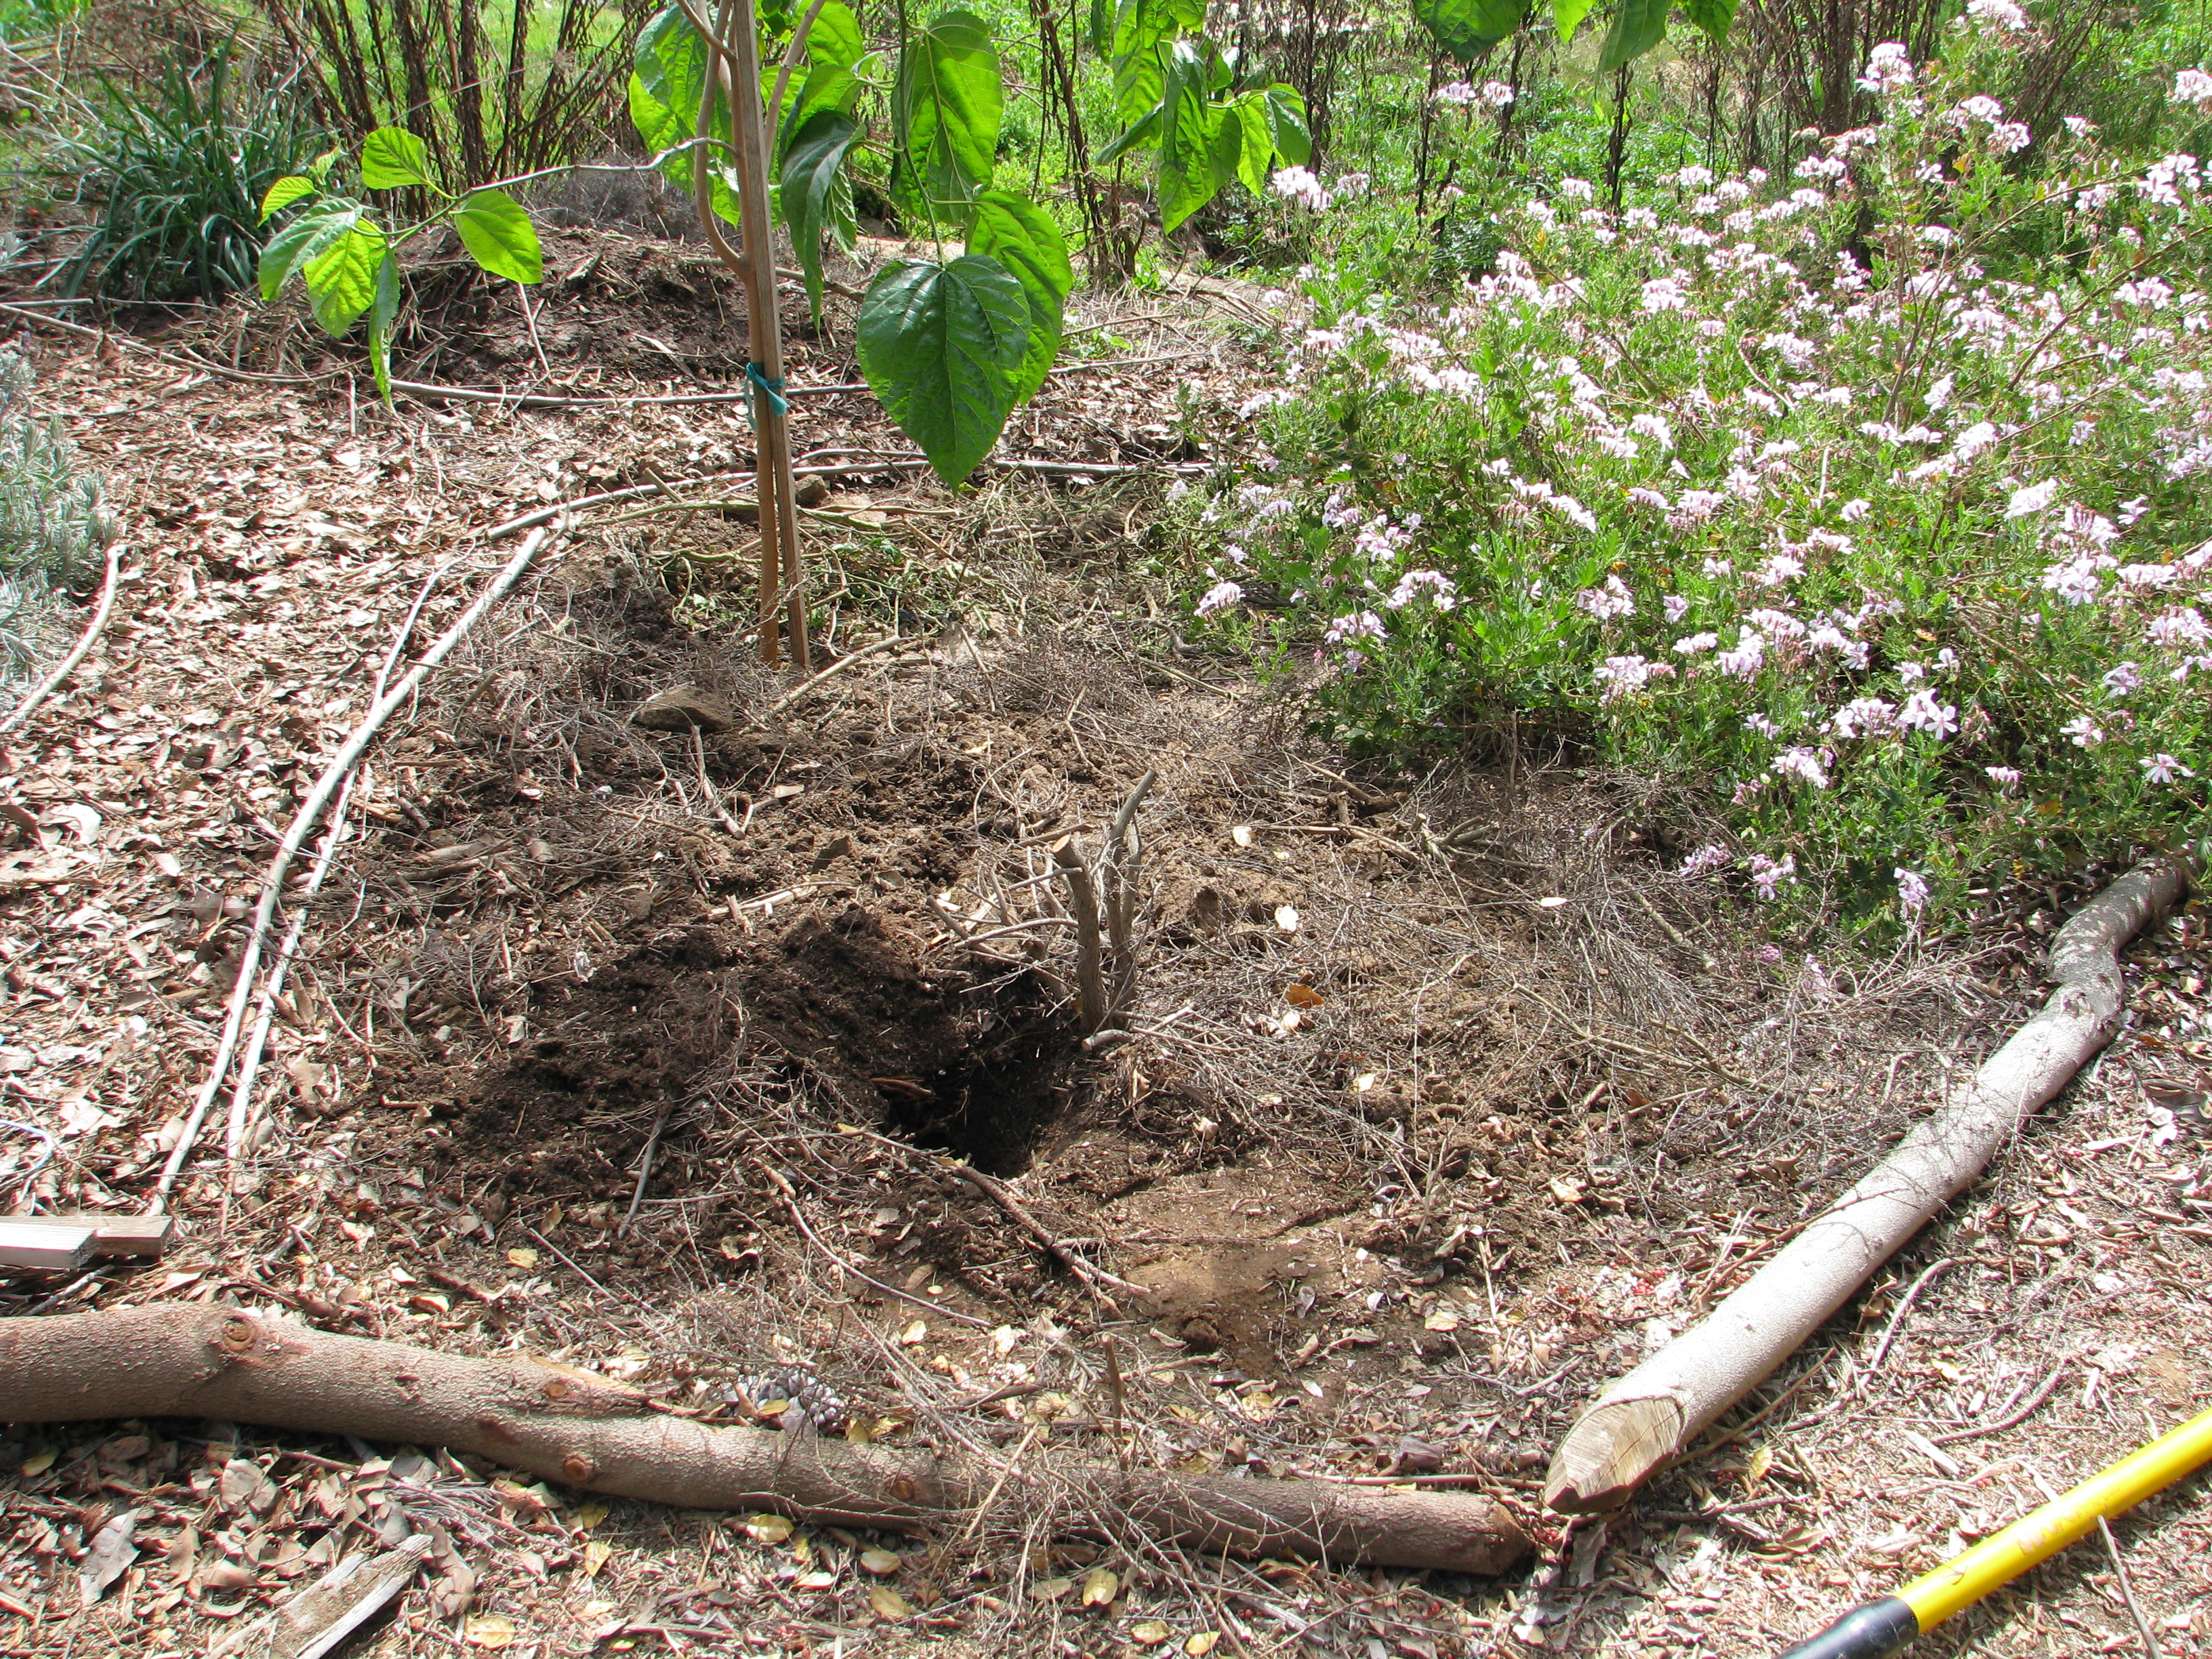
This quadrant by the mulberry needed a trellis for tomatoes. I’d coppiced some young volunteer oaks, using the trunks for mushroom inoculation, and kept the tops because they branched out and I thought maybe they’d come in handy. Sure enough, we decided to try one for a tomato trellis. Tomatoes love to vine up other plants. Some of ours made it about ten feet in the air, which made them hard to pick but gave us a lesson in vines and were amusing to regard. So we dug a hole and stuck in one of these cuttings, then hammered in stakes on either side and tied the whole thing up.
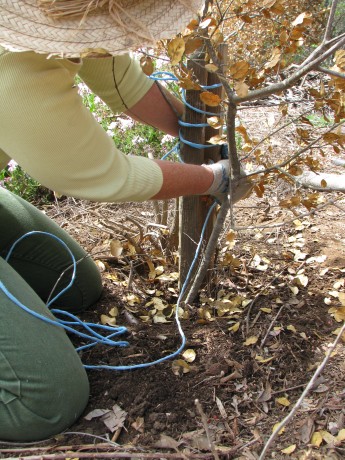
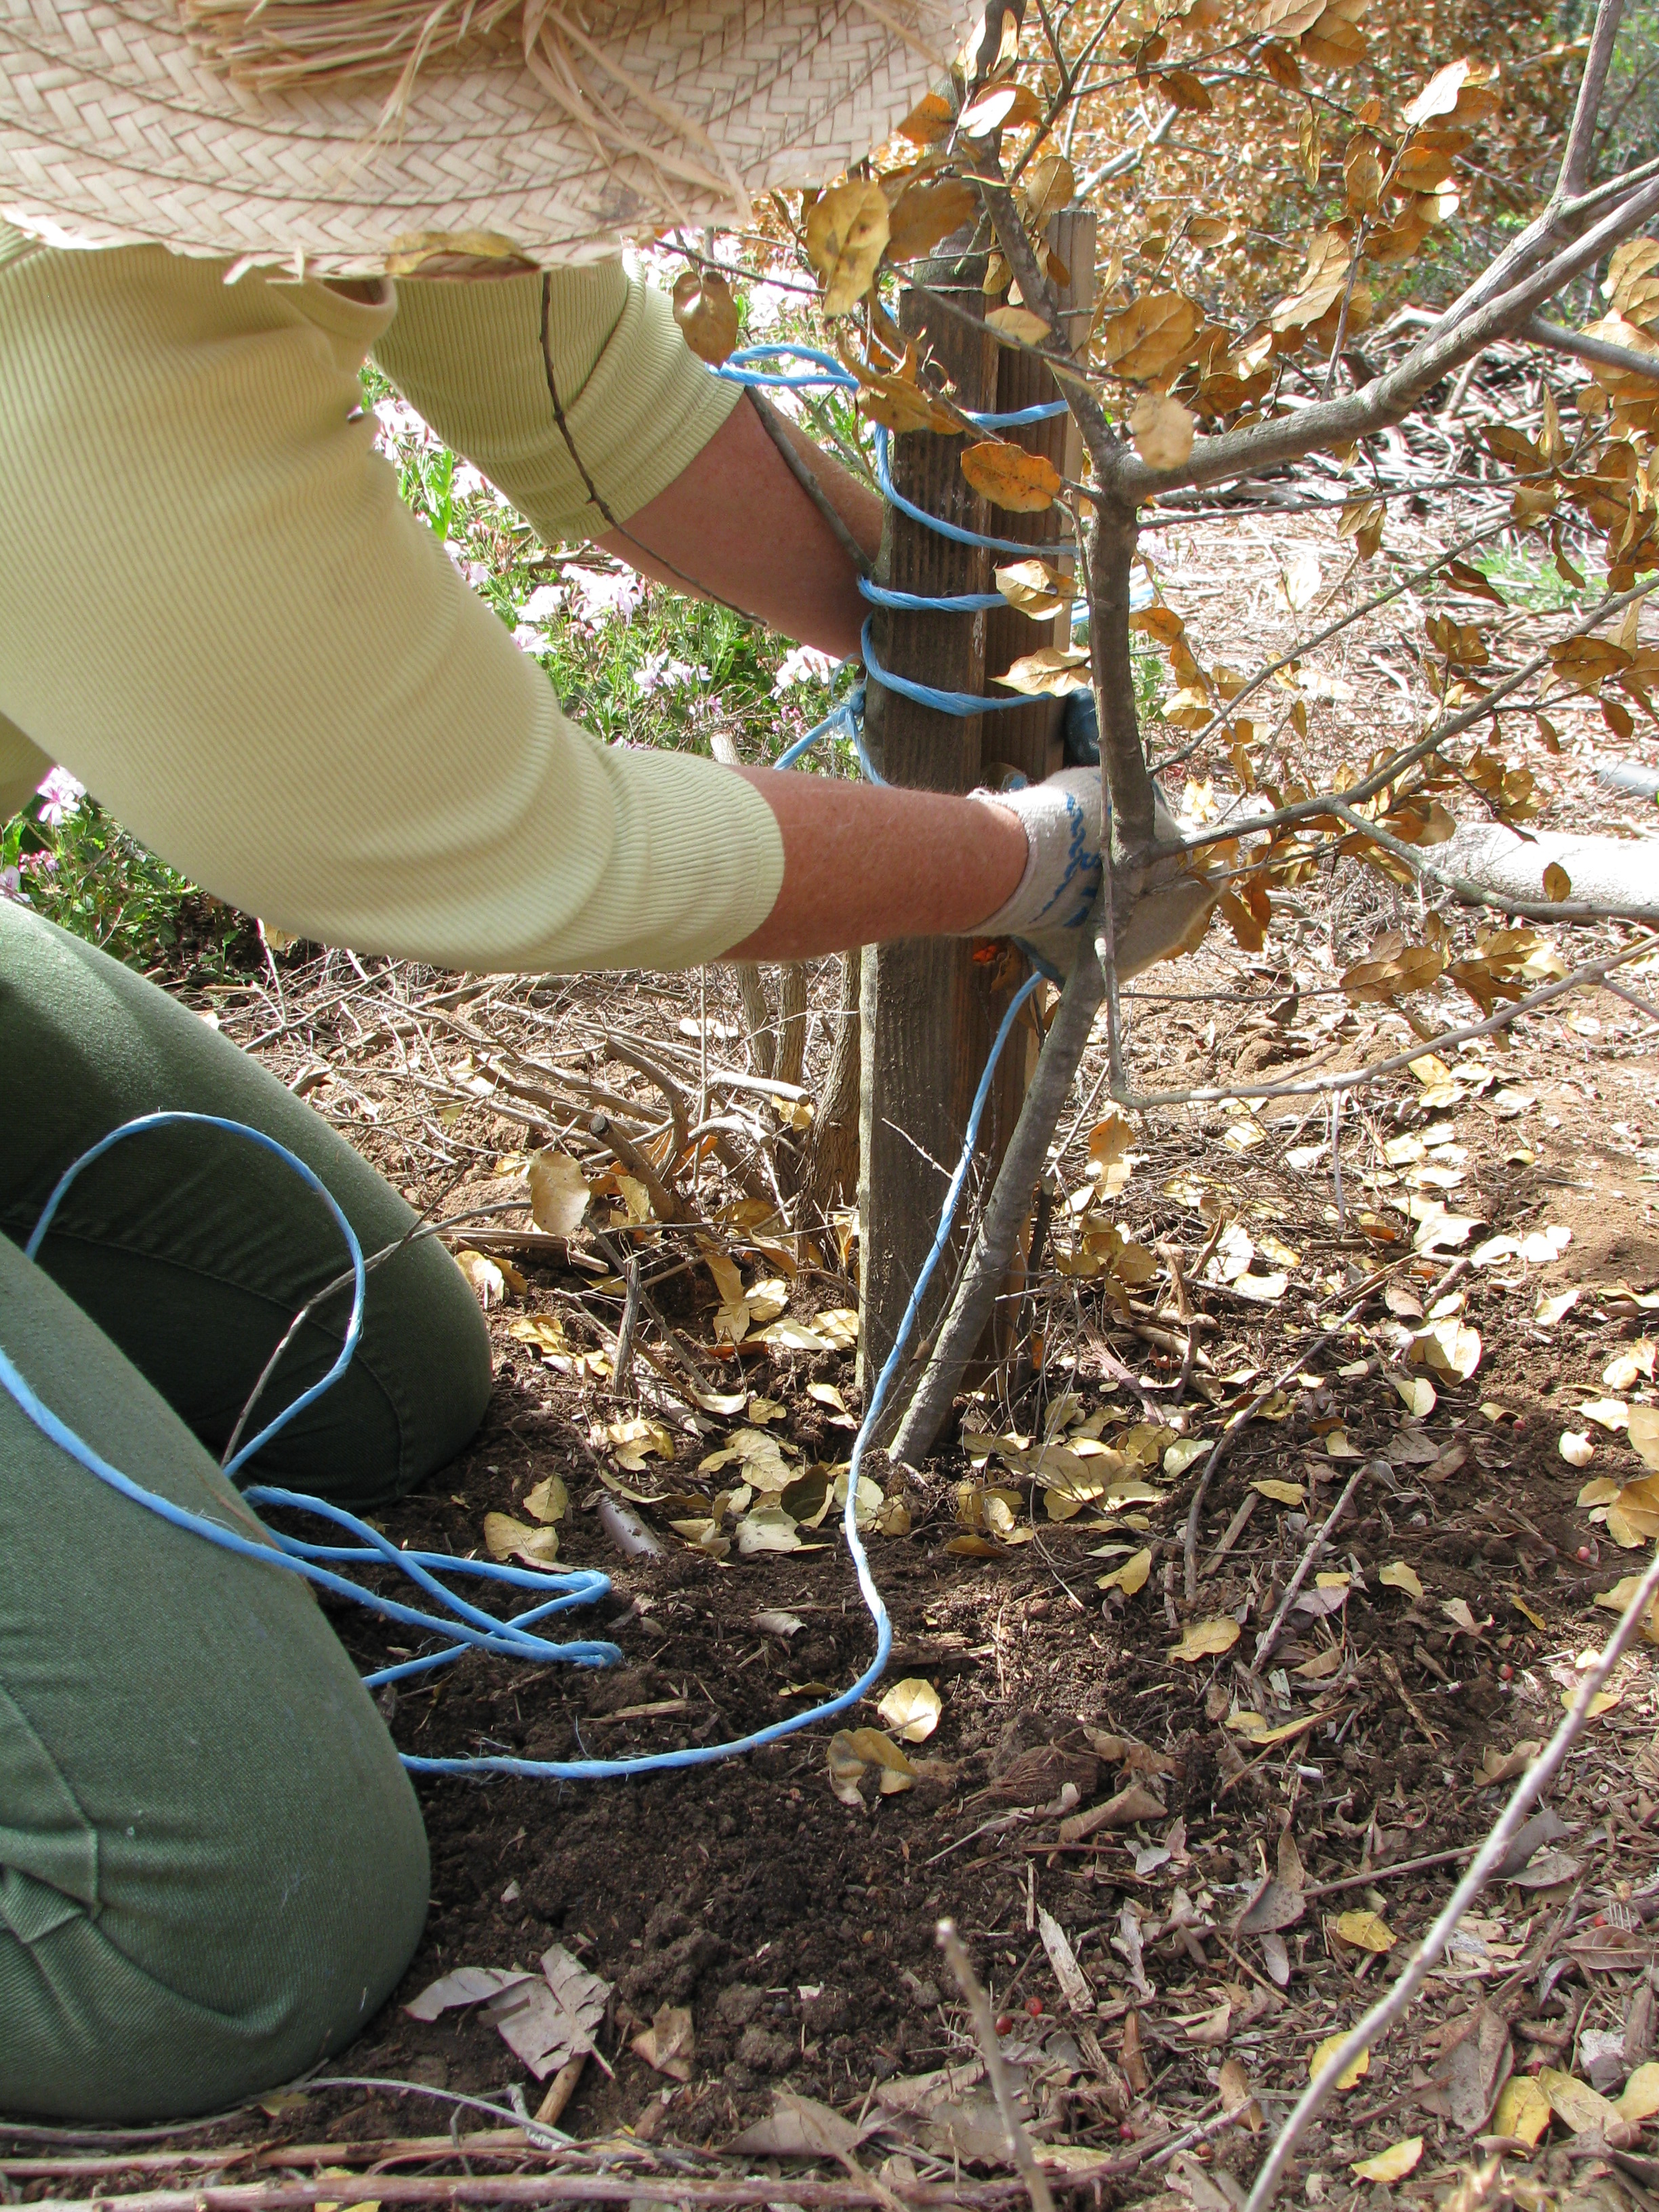
Tying the trunk to two stakes with twine taken from straw bales. Love the blue color! The result looks like a dead tree. However, the leaves will drop, providing good mulch, the tiny current tomatoes which we seeded around the trunk will enjoy the support of all the small twigs and branches, and will cascade down from the arched side.

The ‘dead tree’ look won’t last long as the tomatoes climb over it and dangle close to the path for easy harvesting. We seeded the area with another kind of carrots (carrots love tomatoes!) and basil, and planted Tall Telephone beans around the mulberry trunk to use and protect it with vines. We watered it all in with well water, and can’t wait to see what pops up! We have so many new varieties from Baker Creek Heirloom Seeds and other sources that we’re planting this year! Today we move onto the next bed.
You May Also Like
Native Insects and IPM
- Compost, Fungus and Mushrooms, Gardening adventures, Hugelkultur, Permaculture and Edible Forest Gardening Adventures, Soil
More Spores: Planting Garden Giant and Shaggy Mane Mushrooms
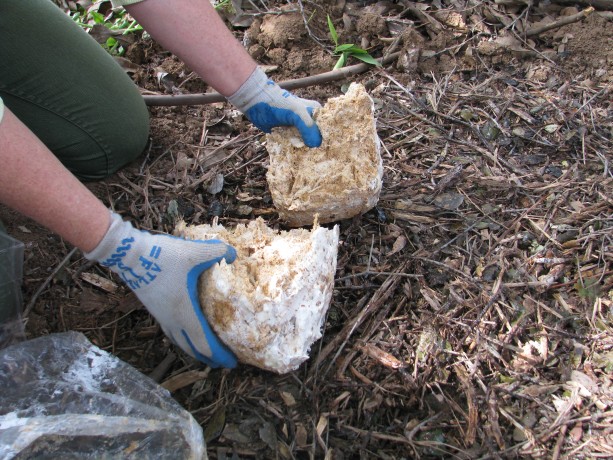
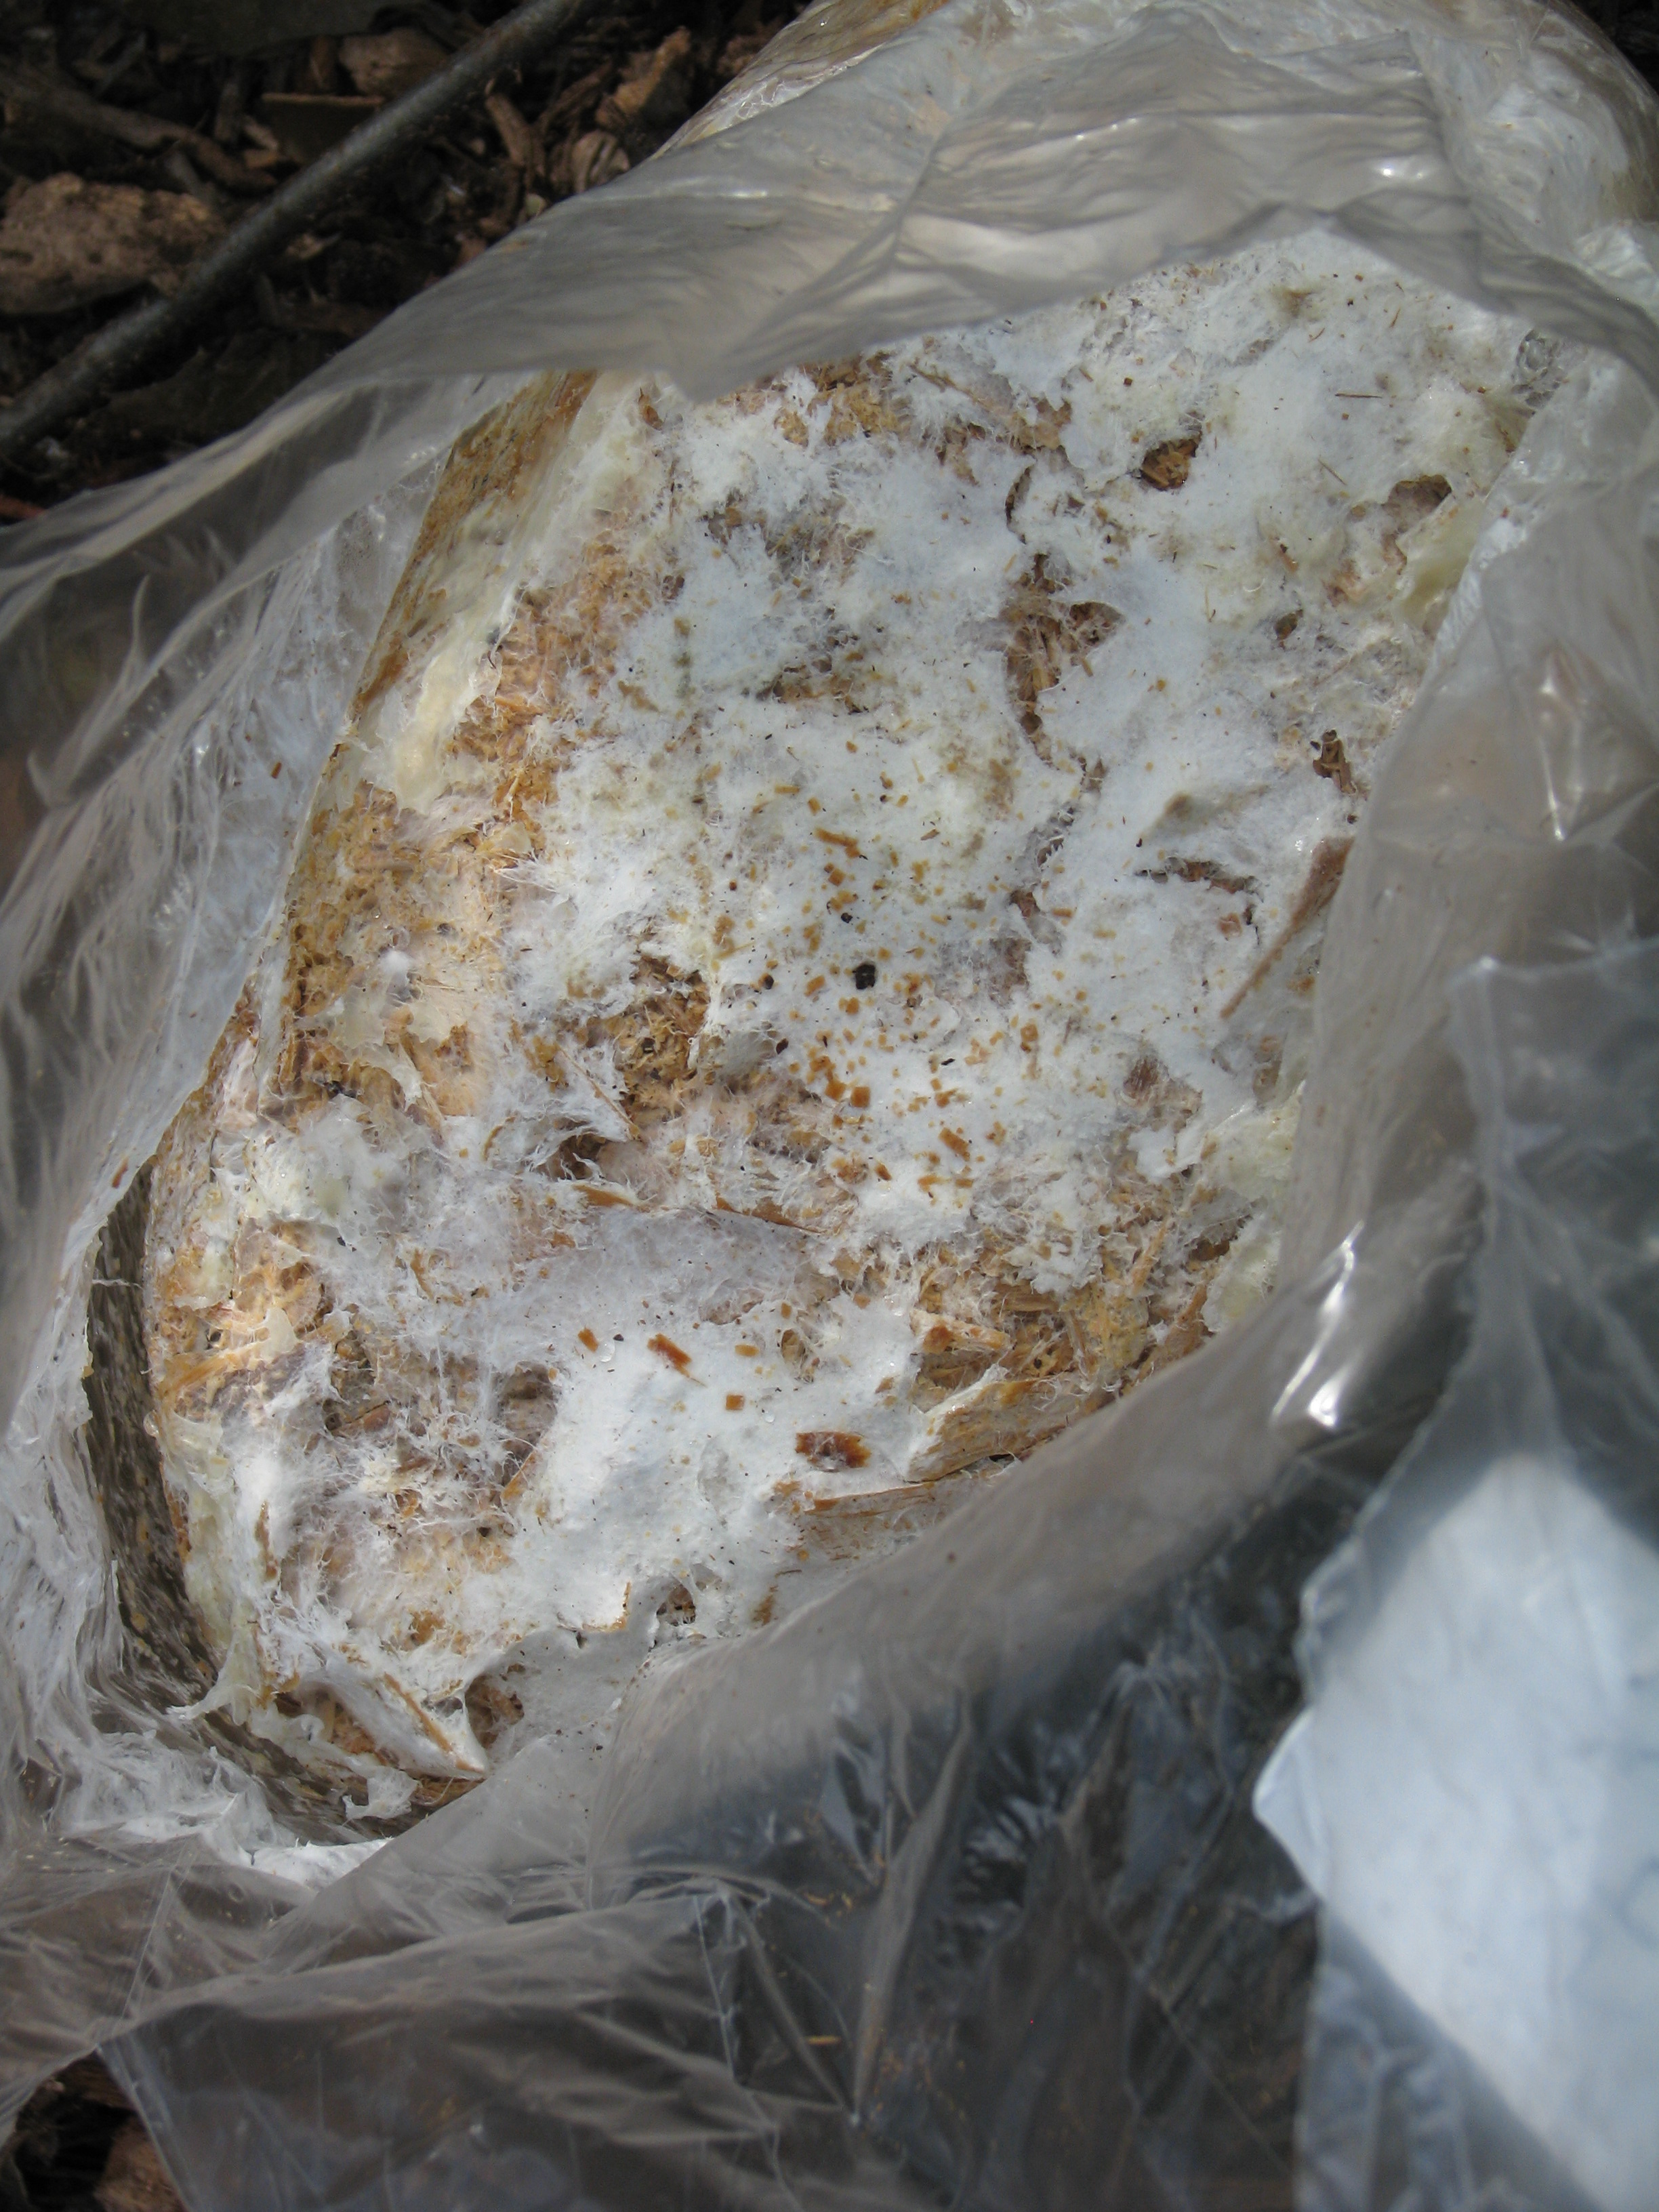
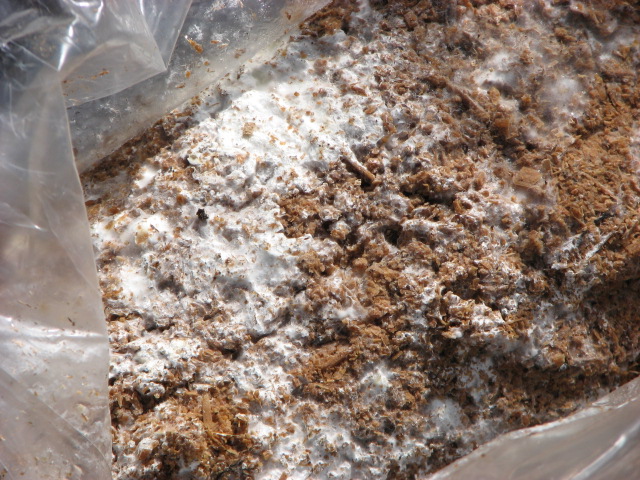
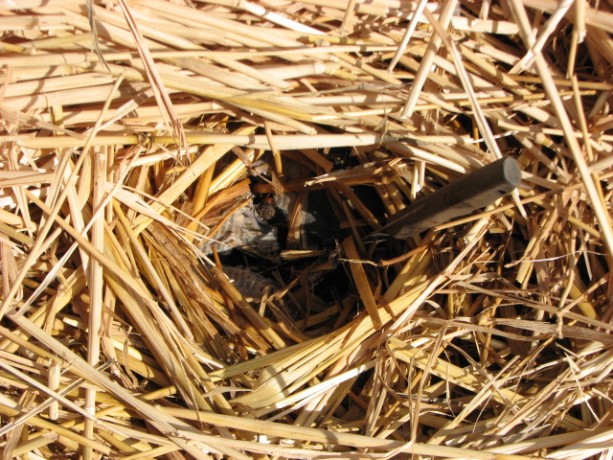
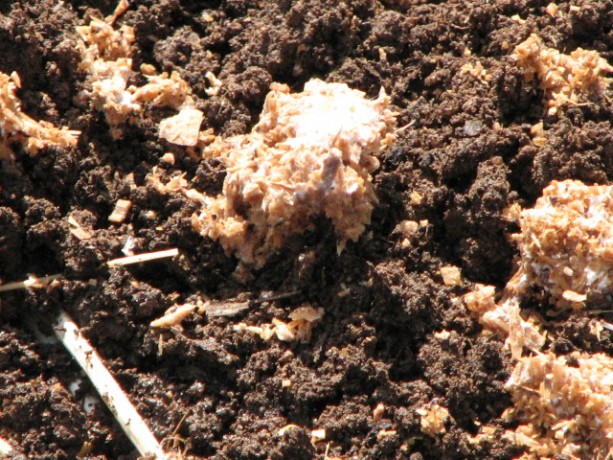
Breaking apart the large square of inoculated sawdust. The last scintillating post was about how we distributed oyster mushroom spawn in the straw in our new vegetable garden. Today we planted more shrooms… but not the last! “Where will it end?” you cry. I’m not sure myself; I guess it depends on how well we can grow mushrooms here in the drought-stricken west. It is the last week in February and we’ve had 70 degree – 90 degree daytime temperatures all month long, and less than a 1/2 inch of rain this year. This is our rainy season. Some mushrooms do grow here, although they aren’t very apparent this dry year. We certainly don’t have the high humidity, frequent rain and acidic loam that characterizes areas such as Northern California and the Pacific northwest where mushrooms are everywhere.

Shaggy Mane spores growing all over the bag. I bought two bags of spores, of Giant Mushroom and Shaggy Mane mushrooms, both of which are edible and can stand warmer climates, as long as they are shaded and receive water. My daughter and I strolled all over the property considering different spots. There aren’t a lot of areas which are shaded all day, which receive water or are close to water, and where shrooms would be safe from nibbling animals. We decided upon the small group of old lime trees (and one orange) that are between the fenced backyard and the Fowl Fortress.
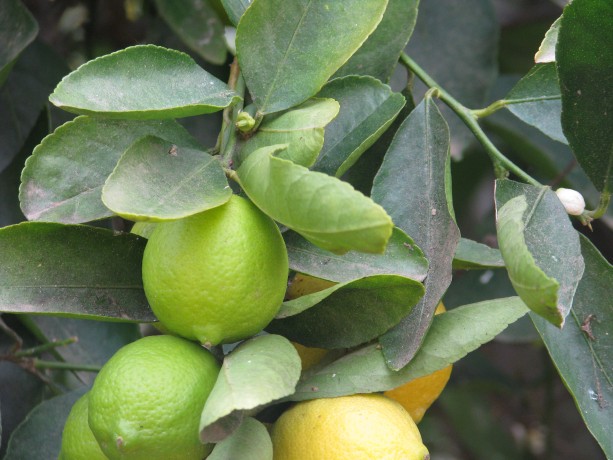
Limes look so very pretty, until they draw blood! I’m not a fan of lime trees. When I was 11, my parents moved me and my sister to a four-acre lime grove in Vista, CA. I grew up enjoying the smell of lime blossoms, walking through tens of thousands of bees (pre-Africanization), climbing up the few avocado trees and pretending I was a spy and bad guys were looking for me. But when I was older I was paid to care for the lime trees. I became disenchanted. They are nasty. Their thorns and small dead twigs scratch and catch, they are often full of ants which are harvesting aphids on the leaves, and they are short trees, so to pick limes or do anything for them you have to duck under the canopy and usually end up losing some hair and bleeding from the thorns.

A group of citrus trees, with logs cut for mushroom inoculation and some old chicken wire that is ready for a hugelkultur burial. So of course as an adult I moved onto property with a lot of lime trees on it. Limes aren’t very profitable, either. I keep the trees because I don’t water them yet they thrive, and I don’t believe in killing trees for no reason. Now their canopy can be put to good use.

We always find some lost treasure from the previous property owner. I purchased organic mycelium from Paul Stamet’s Fungi Perfecti. He wrote many books on growing mushrooms and has had startling results using oyster mushrooms for soil remediation and with turkey tail and other mushrooms for fighting cancer and other illnesses. Mycelium Running is an incredible book.
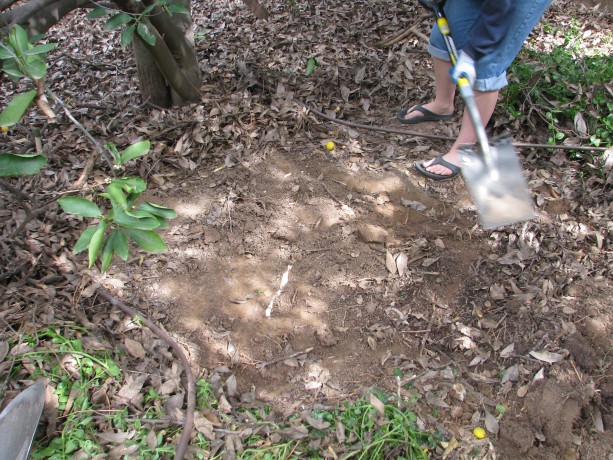
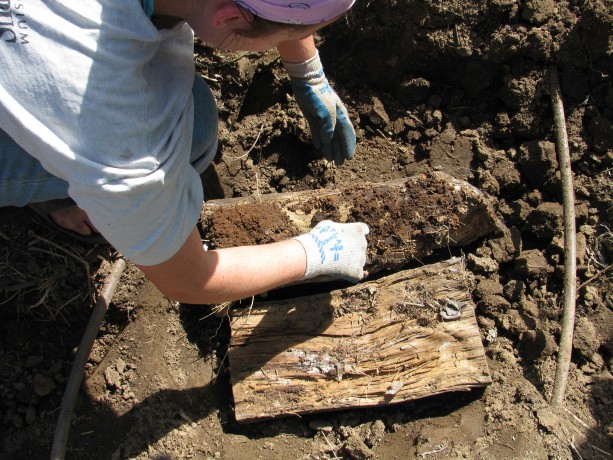
Clearing a level area under a lime tree. For the Garden Giant shrooms, we hacked through dead branches and pulled away a lot of red apple iceplant that has slowly been taking over from the neighbor’s property. We dug about two inches into the ground to help insulate the wood chips that would be placed in there, and watered it in well with what was left of the rain water from our large tank.
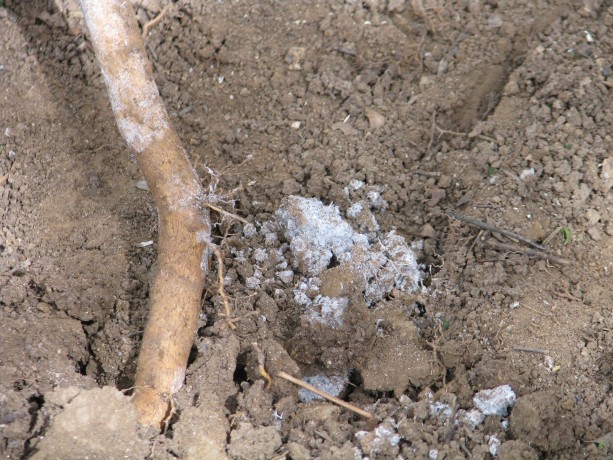
Mycelium is already busy around the roots of the lime and ash trees, even in this dry ground. We’d just received a truckload of chipped oak from landscapers, and that was perfect for this variety of mushroom. We spread out a couple of inches of chips, watered it well, spread the inoculated wood chips on top,

Spreading the mycelium… so many little spores! spread a couple more inches of chips over, mixed them up with our hands to spread the spores throughout the chips, and watered again. With luck, they should be up in a couple of weeks.
The final Garden Giant bed. Next to another tree we dug a 3×3 area just an inch down. Shaggy Mane lives in vegetative compost rather than the highly fungal wood chips, and can live in a variety of stuff.
Vegetative compost mixed with straw and leaves for this long-term mushroom. We removed the more composted stuff from our cold compost bin and mixed it with very poopy straw from the chicken coop (thanks, girls!), and ash leaves. The spores were mixed well into this combination and watered in.

Mixing in Shaggy Mane spores with the compost. I topped it with leaves just to help keep the moisture in. We won’t see production from these until next winter when the temperature drops to below 60 degrees F. When they do ‘fruit’, as the mushrooms are called, we can add new compost alongside and the spores will creep over for another year’s growth.

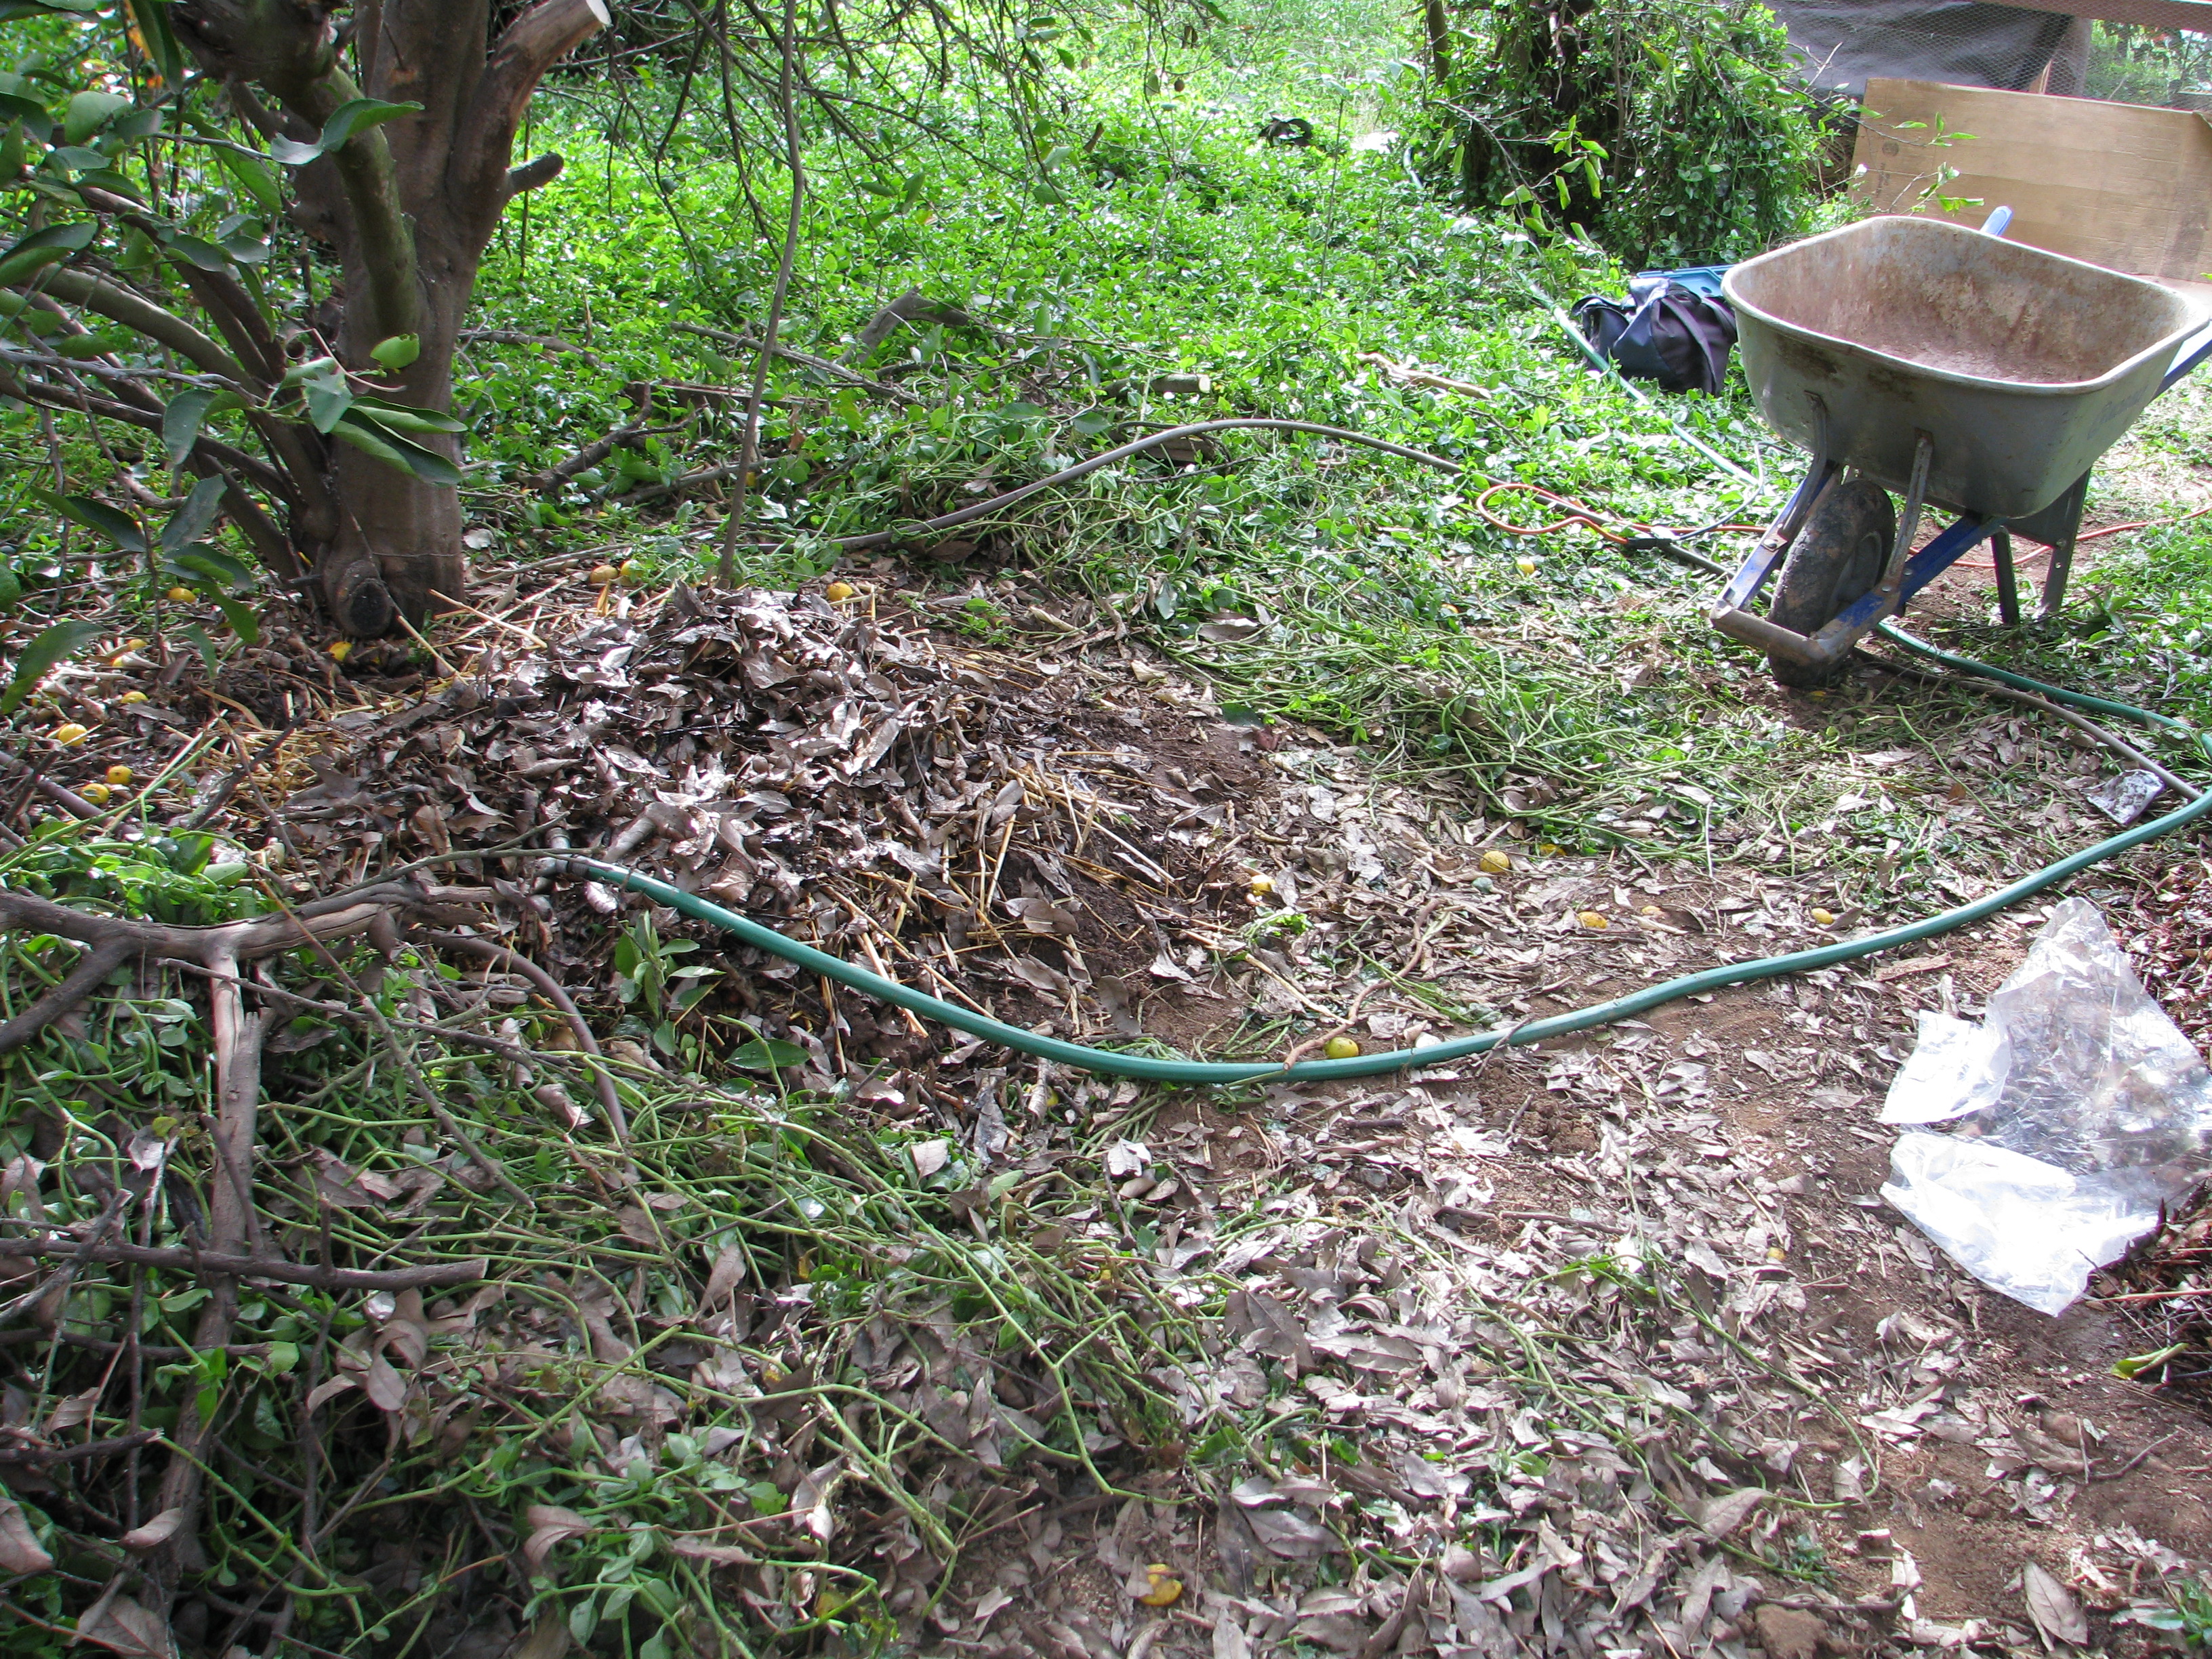
To assist with the moisture I’m going to have the greywater empty along these trees to keep the ground moist and the humidity up. Also, there are drip lines from the well along here and I think the addition of some above-ground sprayers will handle our watering needs without using domestic water.

The white tables are set under an orange tree, and are where inoculated logs will go. Under the orange tree, which is a fine tree but very neglected and hidden by the vicious lime trees, we decided to set up for our next installment of mushroom growing. We’ll be drilling holes in oak logs and growing four kinds of shrooms on them. I’m sure you just can’t wait!
- Compost, Fungus and Mushrooms, Gardening adventures, Hugelkultur, Permaculture and Edible Forest Gardening Adventures, Rain Catching, Seeds, Soil, Vegetables, Water Saving, Worms
Planting Spores in the Garden

The mycelium is white in the sawdust and ready to go. If you remember the trenching, filling and designing the new veggie patch, then this post will make more sense to you.

The next step was to cardboard the pathways where Bermuda grass has been taking over, then mulch them as well. The mulch makes it all look so nice!

Covered with mulch, the cardboard is only a memory. Next it was time to plant. We’d already transplanted three-year old asparagus, and hopefully not shocked them so much that they won’t produce well this year. The flavor of fresh asparagus defies description.

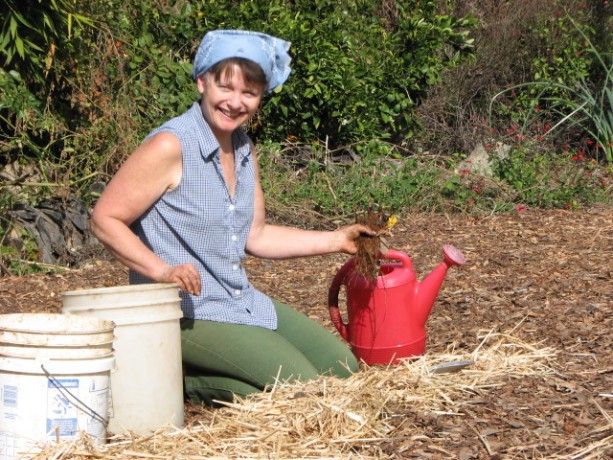
Asparagus popping up some feather shoots from its new home. The strawberry bed was older and completely taken over by Bermuda grass, so it all was buried and I purchased new organic and extremely reasonably priced bareroot strawberries.
A bundle of twenty-five strawberries. I purchased two June-bearing types and three ever-bearing, heat-loving types, from www.groworganic.com. When they bloom this year we’ll have to nip off the buds so that next year when their roots have taken hold and fed the crown, we can have lots of strawberries.

Soaking the strawberry roots for a few minutes rehydrates them. We planted some in the asparagus bed, which will do nicely as groundcover and moisture retention around the asparagus, while the asparagus keeps the heat off the strawberries. Some we planted around the rock in the center of the garden. The rest will be planted around fruit trees as part of their guilds.
Strawberries surround the rock. We also planted rhubarb in the asparagus bed; these poor plants had been raised in the greenhouse for several months awaiting transplanting.
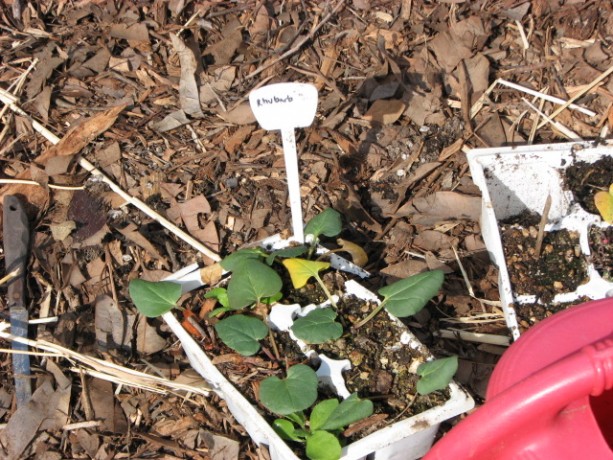
Rhubarb, really eager to be put in the ground. Hopefully the asparagus will protect them from the heat. I plan to raise more rhubarb from seed and plant them in other locations on the property, aiming for the coolest spots as they don’t like heat at all.
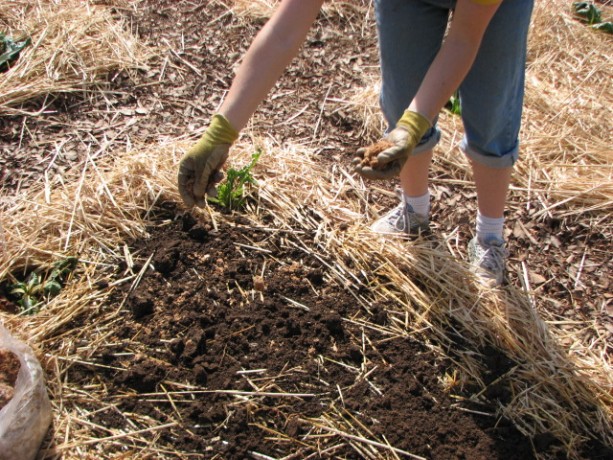
With a strong knife (weak blades may snap) cut a cross in wet cardboard the pull aside the edges. The way to plant through cardboard is to make sure that it is wet, and using a strong knife make an x through the cardboard. Use your fingers to pull the sides apart. Stick your trowel down and pull up a good shovel full of dirt (depending on how deeply your plant needs to go.
Insert a trowel through the hole and scoop out some dirt. The base of plants and the crowns of strawberries should all be at soil level. Seeds usually go down three times their size; very small seeds may need light to germinate). Gently plant your plant with a handful of good compost, then water it in. You won’t have to water very often because of the mulch, so check the soil first before watering so that you don’t overwater.
Don’t forget to water in the plants! For the first time in years I ordered from the same source Jerusalem artichokes, or Sunchokes as they’ve been marketed. They are like sunflowers with roots that taste faintly like artichoke. We planted some of them in one of the quadrants, and the rest will be planted out in the gardens, where the digging of roots won’t disturb surrounding plants.
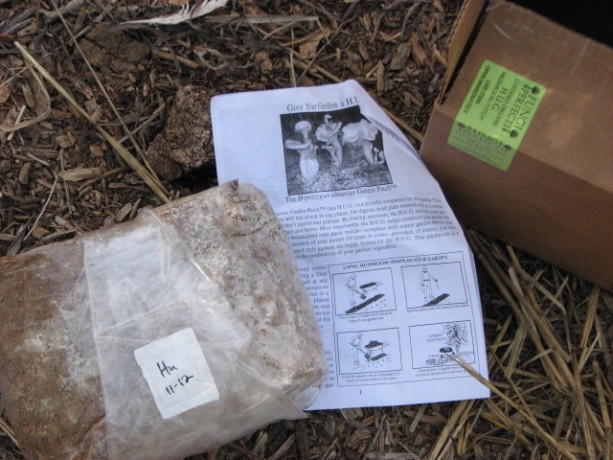
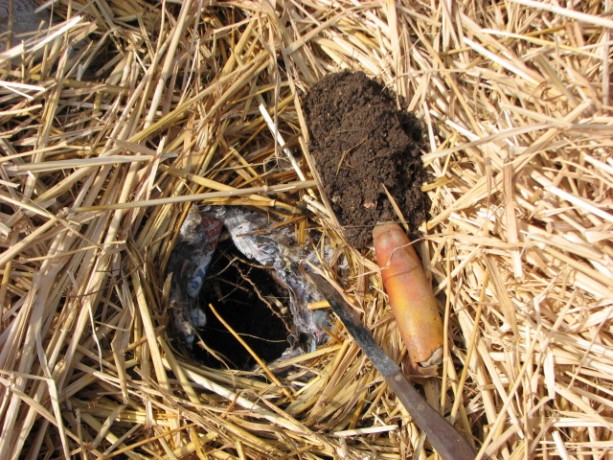
The oyster mushroom kit, or H.U.G. You’ll have to visit Fungi Perfecti to read up on it. Most excitingly, we’ve purchased mushroom spores from Fungi Perfecti, which is Paul Stamet’s business, the man who wrote Mycelium Running and several other books about growing mushrooms for food and for health. We bought inoculated plugs, but that will be another post. Almost as exciting are the three bags of inoculated sawdust to spread in the garden! They sell an oyster mushroom that helps digest straw and mulch, while boosting the growth of vegetables and improving the soil. You also may be able to harvest mushrooms from it! Talk about a wonderful soil solution, rather than dumping chemical fertilizers on the ground!
We’d already covered our veggie beds with wet cardboard and straw.
Really good soil from what is now a mulched pathway. To give the mycelium a good foundation I dug up good soil from one of the field beds, which needed an access path through the middle. By digging out the path I created new water-holding swales, especially when filled with mulch.
We pulled aside the straw. In the veggie garden we raked back the straw and lightly topped the wet cardboard with soil. On top of that we sprinkled the inoculated sawdust.
Good soil over cardboard. On top of that we pulled back the straw and watered it in.
Sprinkling spore-filled sawdust over the soil. The fungus will activate on the wet soil, eat through the cardboard to the layers of mushroom compost and pidgin poo underneath that and help make the heavy clay beneath richer faster.
The fungi will immediately begin to colonize the wet soil. We treated the two top most beds which have the worst soil, the sunchoke bed and the asparagus bed. In four to six weeks we may see some flowering of the mushrooms, although the fungus will be working even as I sit here. There are several reasons why I did this. One, it is just totally cool. Secondly, there is no way for me to purchase organic straw. By growing oyster mushrooms in it, I’m hoping the natural remediation qualities of the oyster fungus will help cleanse the straw as it decomposes. Oyster mushrooms don’t retain the toxins that they remove from soil and compost, so the mushrooms will still be edible. Fungus will assist rebuilding the soil and give the vegetables a big growing boost. I know I’ve preached that vegetables like a more bacterial soil rather than fungal. This is true, except that there are different types of fungus. If you put wood chips in a vegetable bed, you’ll activate other decomposing fungus that will retard the growth of your tender veggies; the same wood chips around trees and woody plants will help them grow. However these oyster mushrooms will benefit your veggies by quickly decomposing compost and making the nutrients readily available to the vegetables. Their hyphae will help the veggie’s roots in their search for water and nutrients, too.
Straw is over the top and watered. We can continue to plant in the beds as the fungus does its magic. The other two bags of inoculated spores are for shaggy mane and garden giant, which we’ll find homes for in compost under trees. More on that as we progress. It is so nice to be planting, especially since these are perennial plants where the most work is being done now. Now we just need some rain!
- Compost, Gardening adventures, Hugelkultur, Permaculture and Edible Forest Gardening Adventures, Rain Catching, Soil, Vegetables
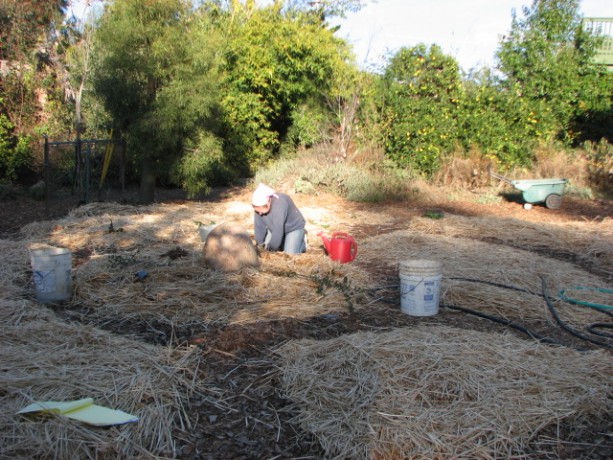
The Sunken Bed Project, Part 3
The un-raised bed as of this morning. Today my daughter and I made good headway in the completion of the garden. In the morning the bed still had some veggies that needed transplanting, the ground needed smoothing, the giant clumps of asparagus plants we’d hauled out needed to be planted right away because they were already trying to come out of dormancy, and we certainly didn’t want to lose this spring’s crop.
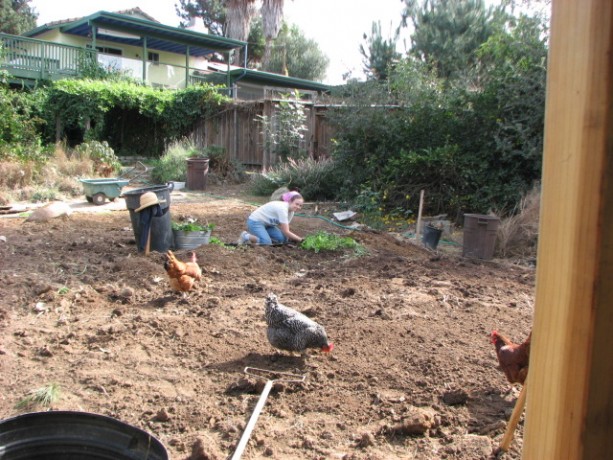
Transplanting and some fine-tuning by the girls. We let the girls loose since we were watching out for coyotes. They loved the grubs and unfortunately, the valuable worms too. Lark, the barred rock in the foreground, was up to her old tricks of jumping onto my shovel and quickly kicking half the dirt off in search of bugs. Miranda painstakingly dug up lots of salad greens for transplanting. We both dug up and pulled out lots of Bermuda grass as we went. The trash cans are full of it.
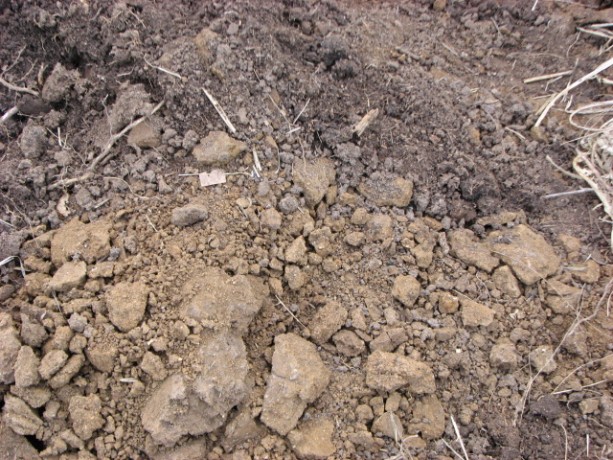
The difference between the heavy clay and the good garden soil is striking. While digging those 2 foot deep trenches we unearthed a lot of clay. On the surface the colors of what had been good garden soil next to what lay under it was very clear. With the deep hugelkultur beds and the sheetmulching, all this clay will be turned into microbial rich soil.
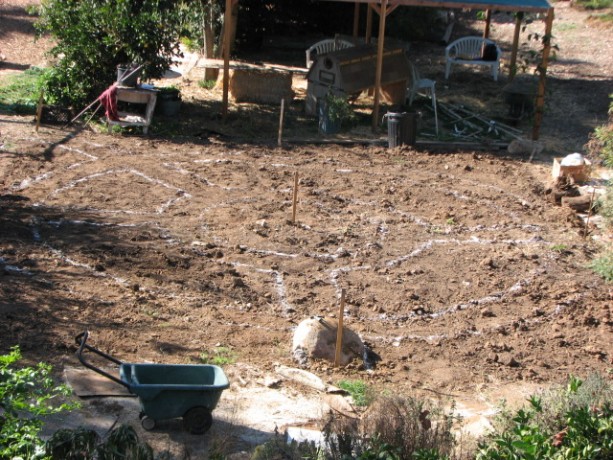
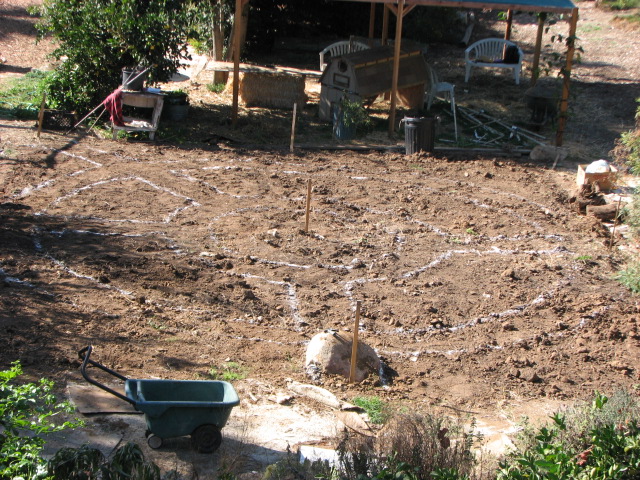
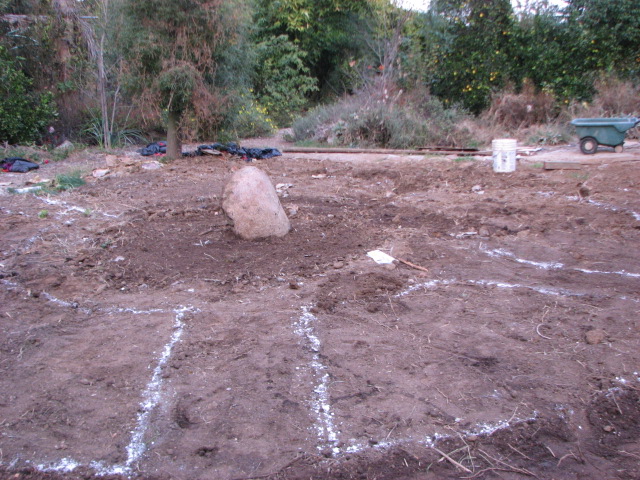
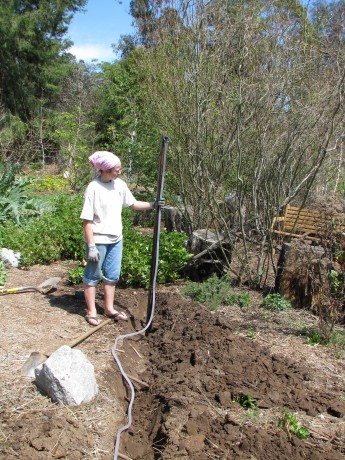
We measured off and marked the pathways and beds with gypsum. Finally we were able to measure off and draw out the design of the garden. We used gypsum which is good for the soil. So many people use spray paint to mark the ground… just don’t! Toxic fumes and toxic chemicals in the soil. If you don’t have gypsum, use flour! The light is bright in the above photo so you can’t see the design so well. We had carefully drawn out several designs on graph paper. An intricate Celtic design was the most favorable one until I’d realized the garden wasn’t square but rectangular. It was just as well because it would have been a nightmare of measuring. This one has 2′ wide pathways from prime entry angles (a wheelbarrow can fit), each planter bed is easily reached from all sides, and the circular design is pleasing and fun.

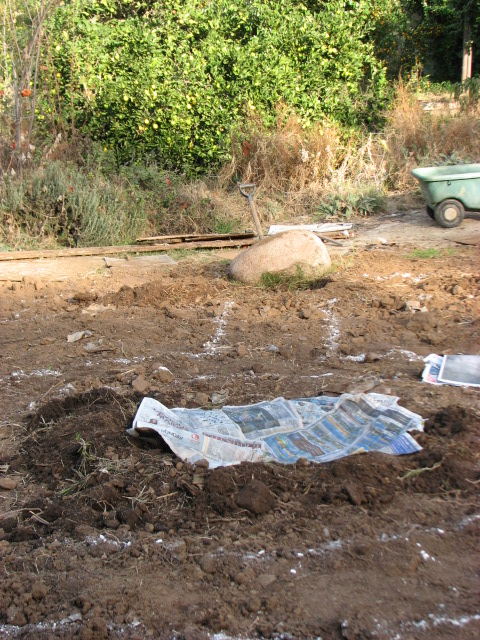
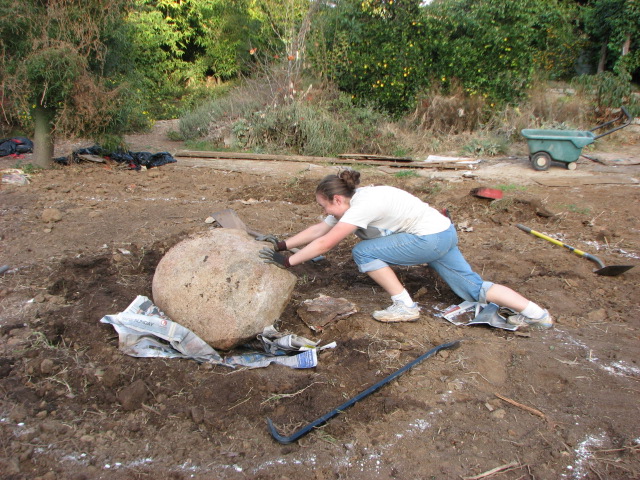
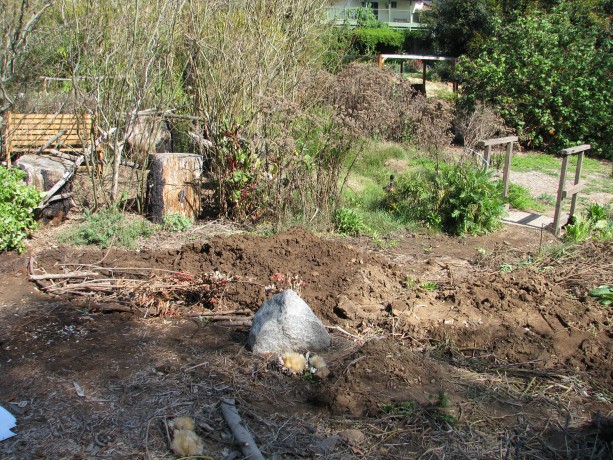
There was this rock…. There was a big flaw in the plan. There was this boulder that had been placed during the original construction of the garden. It didn’t serve a purpose, it was always in the way, it was a shelter for Bermuda grass, and it wasn’t attractive. Now it was at the head of one of the pathways. It had to go. My daughter and I decided to move it to the center of the garden. After transplanting the heavy batches of asparagus, we dug out a hole for the rock to sit in; when placing boulders it is visually more attractive if the boulder is buried at least a quarter of its size into the ground to look natural. We placed wet newspapers around the hole so that the boulder would sit on them and they would block Bermuda grass from emerging.
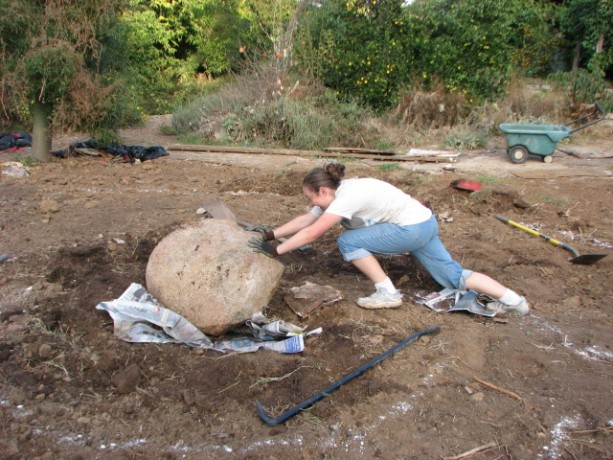
One of the methods used to move the rock, and build up good bone density and muscle. Although the garden was sloped down from the boulder, the rock wasn’t round and didn’t want to roll. We dug out a pathway for it, and using a long crowbar and a digging bar we managed to turn it over. We pushed and heaved and balanced and flipped it until it was right at the rim of the hole, and then things became difficult because it wasn’t positioned in the way we wanted it. The rock has a flat side, and is long. Miranda suggested that the tall side should stand up for birds to perch on, and I liked the Half-Dome look to it. We heaved the rock into the hole, then walked it around, tipped it up, centered it, and eased it into place, using the bars and all of our strength. Luckily the boulder didn’t roll on a foot, or the bar slip and break my collarbone. Finally we tiredly decided that the position it was in was good enough and we were both happy. Exhaustion had much to do with this decision. Miranda propped it up with clay chunks as I held it in place with the digging bar, then backfilled around it. It looks fantastic; a good central point for the garden, and a source of thermal retention.
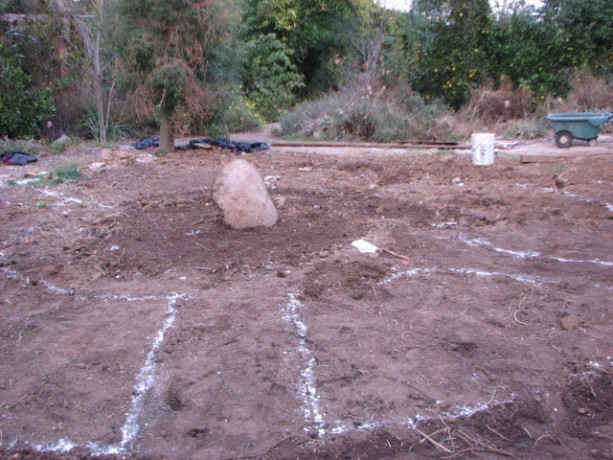
The rock in place, gathering positive cosmic forces and good karma. At least, I hope so. We messed up some of our pathway lines, but we can easily redraw them. The sun was setting and the mosquitoes humming; the Pacific chorus frogs began calling by the hundreds, and the wigeon came in to feed on the pond. There were still chores and dinner to be had, but exhausted as we were, we were pretty darn proud of ourselves for moving that big guy by ourselves. Next comes the sheet mulch.

A Maxfield Parrish sunset.