- Compost, Gardening adventures, Hugelkultur, Permaculture and Edible Forest Gardening Adventures, Rain Catching, Soil, Vegetables
Hugelkultur: Irrigating with old wood
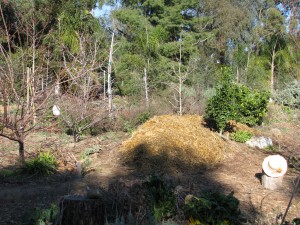
Hugelkultur is a joy forever. Hugelkultur is a German word (pronounced hoogle culture: it should have some umlauts over the first ‘u’ but I have no idea how to do that) which translates as hill culture. It is a process of building raised beds with a core of old wood. The benefits are that as the wood decomposes it not only releases nutrients into the soil, but it holds water like a sponge. Rain water is collected inside the bed, then as the warmer weather sets in and heat dries out the outer shell, it will wick that moisture back out. Presto! Irrigation in the dry season. As the wood decomposes it creates air holes into which deeper roots may penetrate and absorb nutrients that aren’t being washed into the ground water. Also, growing on a tall hugelkultur bed makes harvesting easier because vegetables are often located higher off the ground. The process was popularized by Sepp Holzer, although he didn’t actually call it that.
Hugelkultur may be started flat on the ground, by hand or by machine, dug into the ground, stacked very tall or short, or even level to the ground. The best way to build a bed is to place it on contour where rainwater will collect, preferably facing North and South so that both sides receive equal sun.
I have areas of ground that are either very heavy clay, or are decomposed granite with stones left over from the building of the house. Some trees don’t receive the drainage they need from irrigation because of the clay, which causes the roots to suffocate, or else plants dry up because water perculates too swiftly through the soil.
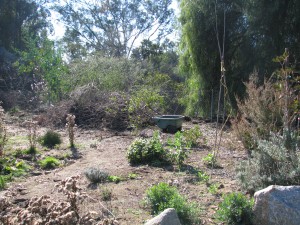
This brush pile against the fence was reduced to a quarter of its size. I also have stacks of brush that were left when the garden was created as hiding places for animals while the garden grew. I don’t need that many brush piles anymore now that the garden is large. I have three wire cages filled with woodier weeds and prunings that are in ‘slow compost’ mode, and leftover trimmings from bamboo used in bridge construction. Perfect hugelkultur components!
I targeted an area between the pathway and a plant guild with two apricots and vegetables in it. When it rains that area has standing water on it because of the clay content. The area should become part of the guild, but the soil needs mucho amending. I have areas like this all around the property. How to amend two acres of soil? How to get rid of the ever-rising mountains of prunings? How to make the rain water permiate the soil and perculate down rather than sheet across? One guess. Yep, hugelkultur. I bury that wood!
I had made a small hugelkultur experiment a year ago with a raised strawberry bed. There was old lime firewood rotting on the property, so I placed several of these logs along the side of the bed, then covered them with soil and planted strawberries. It worked very well. The strawberries loved the acid, even growing into the decomposing logs, and the logs held the moisture. Some wonderful showy fungus came up, too. I will be reworking that bed and this time I will cover the ground with logs, throw on some llama or horse manure, cover with compost and replant the strawberries. I shouldn’t have to fertilize that bed or add soil for a long time.
For the big hugelkultur bed I wanted a deep hole that would capture rain and allow the wood to absorb it. My faithful assistants Lori and Steve and Jacob work on this project with me. Steve and Lori dug this ginormous serpentine pit about 2 1/2 feet deep and the same wide.

Lori and Steve digging a huge trench. Since the paths had just been covered with mulch, the dirt was piled on top of plywood layed over the mulch for protection.
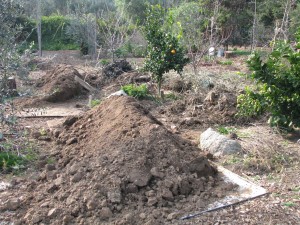
Plywood over the paths helped keep things neat and tidy. Then we began filling the bed with the largest wood first.

The empty trench with still-intact drip systems over it. We didn’t have large logs which would have worked well, but we had lots of thick branches. This hole took a lot of prunings and we jumped on them to compact them down.
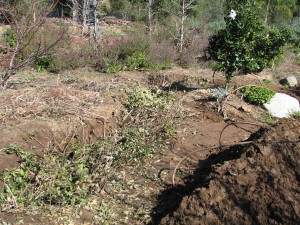
A bear trap! There are a lot of branches in this pit. The hugelkultur bed was left for a few days to settle (and we had run out of time and energy that first day!), and then we worked on it again. Extra dirt from the rain catchment basins that the men were enlarging was hauled down and thrown into and around the wood.
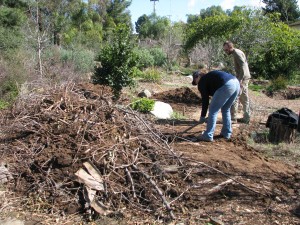
Dirt was added to the mix The mound was watered well. In dry areas it is important to water the wood and the soil well as you are building or else the bed will want to draw water from the area around it, drying up any seeds or plants planted on it.

Some of the long pieces that really stuck out were pruned off. Of course if this is a temporarily boggy area, the hugel bed would help dry it out. There were subterranean irrigation lines across the area already, and since we have a dry climate and the wood I used wasn’t old spongy logs and would take some time to become absorbant, we reestablished the drip system across the top of the hugel bed.
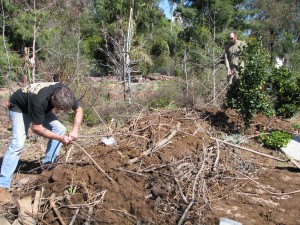
Steve reconnecting the subterranean drip, which runs from a well powered by solar. Because there weren’t large logs, there were a lot of spaces to fill with dirt. Gradually the mound grew and was sloped down to the pathway. Finally a couple of inches of dirt was packed on top. Unfortunately this was mostly clay from the excavation site, but if it had been good soil to begin with, I wouldn’t have needed the hugel bed now, would I? Yes, I did give it a sprinkling of sugar just to get the microbes feeding.

All topped up! There was so much clay that this could have been a big fire pit! The next day I dug up soil from the bottom of the wire cages that were now empty of branches, vines, and sticks. In less than a year since making the wire beds they’d begun to decompose and there was several inches of nice soil at the bottom. I hauled it over to the new bed and topped the clay with the compost.
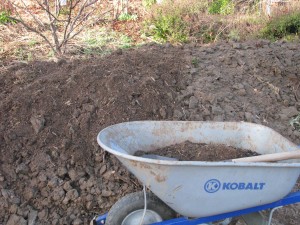
Guess which half has the good soil on it? I want to break up the clay soil so I threw around a cover crop mixture of peas and wheat. The peas will fix nitrogen in the soil, the wheat roots will stabilize and break up clay, I can harvest food from both and then slash and drop the plants to bring nutrition to the soil surface. I also had a bag of mixed old veggie seeds. Last year or so ago I pulled out all my little envelopes of veggie seeds that were very old and mixed them all up. I planted batches around the property and had many things germinate. I still had about 2 cups of the seed left so I threw it around the new hugelbed along with the cover crop. Why not? If the seed isn’t viable, no loss. If it is, terrific! I can always transplant the sprouts if there are too many of any one thing.

Organic cover crop and a bag of old mixed veggie seeds. I watered the seed down, and then raked out the old straw from the Fowl Fortress. Here is a warning about straw: it will germinate. People say straw doesn’t have seeds in it because the seeds are all in the tops which is cut as hay, but they lie. They live in a dream. Straw still has seeds in it and I had a nightmare of a time weeding pathways the first year of the garden because they were all strewn with straw mulch. However if you put straw down for your hens first, they will eat all the seeds, poo on it, kick it around in the dirt, and then you will have a much better quality straw to use. Straw is difficult to get wet, and it needs to be wet when placed on the bed unless you live in a wet climate or have timed the planting to be just before a long soaking rain.

A thick layer of wet straw went over the top of the scattered seeds. Even then it is good to soak the straw first and then apply it to the bed. Some people soak the straw in an enriched liquid, using manure tea, kelp, microbial brews, organic molassas, etc. The mulch acts as an insulator for moisture and warmth (the decaying wood will eventually produce some heat to warm the little plant feet), and a suffocator for weeds. It can also be a home for sow bugs if too thin. In wetter climates the straw layer can be an inch or so thick. In drier climates the straw or whatever you use as a top mulch should be several inches thick or else it will just wick moisture out of the bed. The same rule applys when using newspapers as a mulch. TIP: don’t let your chickens near the new bed! They will ‘rediscover’ their old mulch and start kicking all your work apart!
If I had wanted to plant established plants on the hugelkultur bed rather than seeds, I would have forgone spreading compost and just covered the poor soil on the mound in wet newspaper or cardboard, and then piled on the straw mulch. To plant I would have cut a hole through the paper, added a handful of good compost and planted in the hole.
So the bed was done, and just before a predicted rain event, too. As it rains the water will roll into the bed, be absorbed and held by the soil around the branches which will eventually begin to absorb the moisture as they decay. The seeds will sprout through the mulch and their roots will hold and amend the clay on the mound. Eventually the roots of the apricot trees will reach over towards the hugel bed, and that patch of icky clay soil will become beautiful. All the while I can still grow crops on the raised bed. My three wire bins are empty, an enormous brush pile is reduced to a small mound, and extra dirt found a new home. Plus we all had some fantastic upper body workouts. A winning situation all around.
More hugel beds will be created in troubled spots; some may only be a couple of feet long below a tree’s root line to help with soil drainage while amending the planting bed.
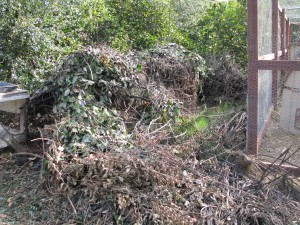
Wire cages filled with old weeds, prunings and vines are terrific for hugels! If you are in an area where the top mulch might wash away in heavy rains, make a latticework of sticks held down with landscape pins or more sticks over the top of the straw. Or cover with wire until the plants begin to sprout; you don’t want the wire to remain on the bed.
So try a hugelkultur bed, big or small. You’ll wonder why you never tried it before.
- Animals, Bees, Chickens, Cob, Compost, Composting toilet, Gardening adventures, Health, Heirloom Plants, Herbs, Natives, Permaculture and Edible Forest Gardening Adventures, Ponds, Rain Catching, Recipes, Salads, Soil, Vegan, Vegetables, Vegetarian, Worms
Southern California Permaculture Convergence! Be there!

Southern California Permaculture Convergence If you are interested in any aspect of permaculture, such as organic gardening, herbs, planting native plants, aquaponics, natural ponds, beekeeping, keeping chickens, and so much more, then you must come to the Southern California Permaculture Convergence. It happens on March 9th and 10th at the Sky Mountain Institute in Escondido. The keynote speaker will be Paul Wheaton, lecturer and permaculturalist extraordinaire of www.permies.com fame. Oh, and I’ll be one of the many speakers as well (cough cough). The Early Bird special of only $50 for both days ends at the end of January, and then the price will rise, so buy your tickets now!
Also, for a full-on demonstration of taking bare land and creating a permaculture garden, there will be a three-day intensive class taught by Paul Wheaton on site the three days prior to the Convergence.
You can read about the convergence here at the official website, which will give you the link perm.eventbrite.com where you may purchase tickets. Also visit the SD Permaculture Meetup page to see all the free workshops that happen monthly all over San Diego.
This convergence is such a deal, you really shouldn’t miss it! And such a bargain, too. One of the best things I find that come out of these convergences is the exchange of ideas and networking among the attendees, and all the practical information you can take home and use right away. One of the largest parts of permaculture is building community, which means sharing with and assisting others.
Really. Don’t miss this! Tell your friends!
-
Until Next Week….
I’m about to do the drive from Fallbrook, CA (in San Diego County) to Corvallis, OR again. Almost exactly a thousand miles. I’ll be back home in six days (I’ll be blogging as I go, though!). However, the day before a trip I get a little crazy. I whip myself into a cleaning and organizing fury. Part of it is that I like to come back to a clean house. Part of it is that I have a lot of animals and I want to make sure that they are all as set up as possible with food, water and clean bedding, even though they’ll be taken care of on a daily basis while I’m gone. Part of it is that I get a kick out of multi-tasking and coordinating, and I burn off a lot of pre-travel worry this way. I shop and stock up on animal food, I do laundry, hauling wet sheets and rugs out to the clothes line and back in again. I cook, take out recyclables and trash, pack and blog. I soak and scrub cat and dog dishes, I sweep the walkway (why? I don’t know. It will be gunky by the time I get back), I clean out the last of the honey that is dripping from crushed comb and give the bucket to the bees to clean up. (Straw on the bottom keeps the bees from becoming stuck in the honey and drowning.)

Bees cleaning up honey I water everything. I wash the dogs and their bedding. I leave unnecessary notes.
It is wise to keep out of my way on the day before a trip.
Work will go on in the yard while I’m away. I’ll tune in next week to find out the answers for….
Will the lower pond be filled, and not look like green tea?
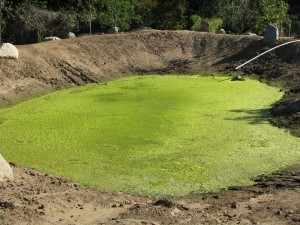
Pond algae Will these palm trunks become a bridge?
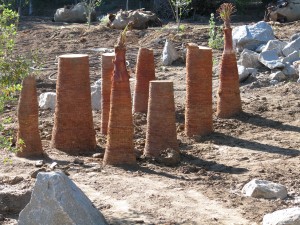
Bridge pilons Will these fancy new stairs made from cement chunks lead to something?

New Steps Will the jasmine hedge still be blooming?

Jasmine Hedge Will the giant sunflower ever look up? Will the vining vegetables take over the property?
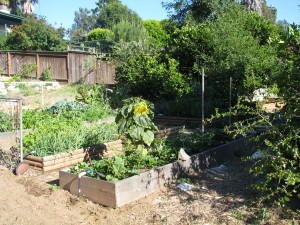
Garden Growing Will whatever is eating the stairs leave any to walk on?
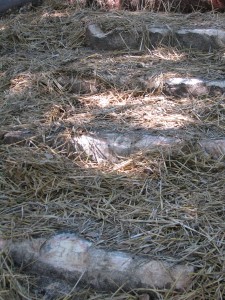
Chewed Steps Will the subterranean irrigation lines be buried?

Irrigation lines Will the kumquats ever get cuter? (Impossible. Too fun a name, to say and to spell. Go ahead, say it: “Kumquat, kumquat, kumquat.” See? Cute name for cute fruit.)

Kumquats These and other questions will (in all probability) be answered next week. Stay tuned for the answers… same bat time, same bat station.
-
Drip

Lines layed out up the property The key to any garden is the availability of water. Today I signed a contract to have a well drilled on my property to furnish irrigation and pond water. The irrigation for the permaculture project, and for most of my other gardens, will be subterranean drip. Yep, this is expensive. However, it will pay off in long-term water bills, plant loss due to drought or the heavy salt that is found in our water (the well should pull from beneath the salt penetration), and the replacement of sprinkler heads, broken PVC pipe and connectors for which my dogs and tortoise seem to aim.

Drip lines uncoiling As the plant guilds mature and roots and loam deepen, the less water I’ll need to provide for the gardens. The system will be there for the drought months, and for future unknown circumstances.

Where future plants will be I have the luxury of having a little inheiritance to spend on having others install this garden for me. That is because I do not have the luxury of having available labor in the form of willing, available and capable family members, nor do I have the physical strength in my back or hands that I once had to do it all myself. And I want it done NOW, so that I can play with it, enjoy it, plant and replant it, watch the habitat fill with animals, and show others what a success permaculture can be so they can practice it themselves.

Irrigating the beans and vines My real thrill is in my veggie garden. As I’ve mentioned before, I’ve had a garden most of the twelve years I’ve lived here, and have been foiled by bermuda grass and gophers. I finally was able to nail together boards from an old bookshelf to make raised beds, then buy on sale some pre-made raised beds. I’ve stapled aviary wire into the bottom, leveled them, filled them with a mixture of dirt, compost and whatever else that could fill those babies up. I’ve used natural fertilizers and microbes this year to energize the soil, and ran PVC pipe to each bed with a riser and a split hose bib on each one.

Double hose bibs Finally today I finished the drip system in each bed. (Yey! Hurray! Whoopee!). I’ve used drip irrigation before in the beds, with the long black soaker hoses perforated all over so that they ooze water. They say that they can be buried, but the mud cakes onto the tubing and gums it up. Also, to connect pieces you have to ram ends onto the cut ends which I have found really hard to do. Then you have one configuration of the hose with not many options for change. Ick!

Old soaker hoses I found another kind of drip hose (at WalMart) which is 75 feet of thin plastic tubing sheathed in a permiable nylon casing.

Plastic tube inside a nylon sheath The hose is fitted with a male and a female hose end, and the whole thing rolls up. Perfect!

Flexible drip hose! What I wanted was to be able to lay out drip from each hose bib on each bed that could be rolled up without a fuss when I’m working on the bed. I also wanted individual controls in the beds so that I’m not watering a bed that isn’t planted, or I can water half a bed and not the other half, or allow more water for crops such as melons and little water to crops such as quinoa… all at the same time! Complete control! Ease of use! Water savings! Ha!
Instead of using both sides of the divided hose bib for each bed, at this time, I ran one line in each bed. I can and probably will change that later which won’t be a problem, but I wanted to get these babies going! Since my beds don’t need 75 feet of hose, I lay down the amount needed then cut the end, tying a knot in it to stop the flow of water.

Tying off the end On the next section of hose I attached a female hose end, and moved onto the next bed.

Attaching female hose ends It worked! I had to adjust two of the hose bibs that leaked, but with my trusty Phillips screwdriver all went well. I have two more raised bed frames that I bought to install, and I have hose enough for both of them left over. I still have a sprained wrist (I’m really trying not to use it much, and wear a brace, but there is just so much to do!) so digging and leveling the ground for the beds is probably not a good thing for me to do right now, and I sure have a lot of weeding to do in the front yard (left handedly!), so the beds might wait.

Quinoa doesn't want much water So I’ve conquered the gophers, and I’ve conquered the hand-watering and bad drip hose, but I am seeing bits of that darn Bermuda grass coming up in some of the beds. I swear that that stuff could come up through anything. I’ve seen it break apart asphalt, and also come out the top of a six-foot pipe. Horrible, nasty stuff. Fortunately the soil is so much better in my beds now, it is easier to root around and pull the stuff out from way down low.
Anyway, that’s my drippy story for the day. I’m immensely happy about my veggie garden, and slightly less panicky about the dry days cooking all the new plants in the permaculture garden if I’m not out there dragging hoses around with my bum wrist watering for several days. And I didn’t talk about peas once. Oops!
