- Birding, Chickens, Gardening adventures, Houses, Living structures, Permaculture and Edible Forest Gardening Adventures
Building a Withy Bird Hide
I was going to continue my series on weeding, but I’ll pick it up next post. Yesterday we received almost an inch of rain. Whoopee! It wasn’t the damaging downpour we had a few weeks ago, either. It was steady and soaking. The temperatures dipped but not to frost (what a strange February!). This morning after I sat clutching my warm tea mug and doing some Internet research, I went outside to check out the yard and it felt like the first day of spring. Cool but not cold. Wet but not soggy. Cloudy and a little threatening but with patches of sunlight. Birds going nuts in all the bushes and trees. It reminded me of our first trip to England during Easter week five years back. There was this feeling, both there and here today of movement everywhere. The soil was stirring with awakening seeds and slumbering creatures.
I put on a knit hat and old clothes and a jacket (ever the lady!) and was all set to pull weeds from the wet ground. Instead I felt inspired to create a bird hide. So, right now you’re thinking of places where birds can hold up. Actually I already have these; they are brush piles all around the fence just for the purpose of providing shelter and escape venues for critters. A bird hide is actually a structure where bird watchers may watch and photograph birds without being seen by them. We have mallards, wigeon and egrets coming to our pond, as well as plenty of songbirds in the surrounding trees. I wanted a bird hide for us and visitors in which to sit and watch.
Since I can’t build anything (the whole measurement thing… I’ve already told you about that) I obtained prices from Quality Sheds in Menifee who built my two sheds so well. Expensive… yep, but not as much as hiring a carpenter, even if he used scraps from my old sheds. Then this morning I started browsing the Internet (trying to stay by that warm teacup as long as possible) and researched withy structures, tree branch structures, living buildings…. all fascinating. Withy is a bendable piece of willow, and sometimes other wood. I’ve always wanted to make a living thing out of willow; stick pieces in the ground, weave together the shoots and it roots and grows! I’ve seen living willow benches before.
So I figured I’d seize the day, this beautiful unofficial start of spring, and see if I could make a decent hide. There are other wonderful structures on the property build by Roger Boddaert and crew, so something natural would not only fit in and be ecologically more sound (than having a structure built), I know the wonderful feeling of being in a structure that is made of natural materials.
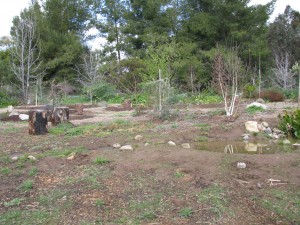
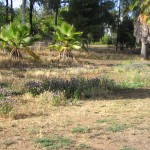
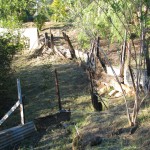
The spot. This spot was left untouched during the creation of the garden because somewhere in the area there had been a fairy ring, which is a ring of mushrooms growing out from a central fungus. I’ve given up hope that its still alive, and this is an ideal spot for watching birds both in the pond and in the trees behind.
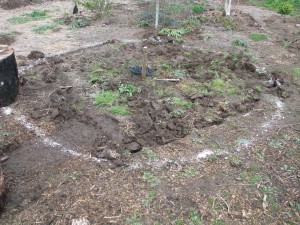
A ten-foot circle. I guessed where the center was, measured roughly five feet (I stepped on the string and held it to my head… I’m 5’3″) and made a ten-foot circle. Why ten? Eight looked too small and twelve too large. I also uncovered the irrigation lines so that I could avoid breaking them (only one casualty).

These logs have to go over there. Old burnt tree stumps had been given to me by Juan, who constructed most of the garden. They’ve been happily growing fungus and providing some habitat as they’ve sat waiting for me to figure out what to do with them. Of course, I wait for the day after a heavy rain when they are good and soaked to move them, and uphill at that! Most of them were old and light enough to roll without too much effort.
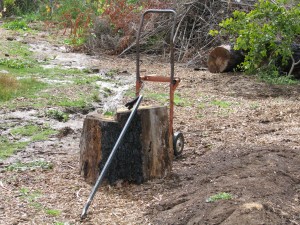
This didn't work. I ended up walking it. Then there was this squat, misshapen devil. It was just oddly shaped enough to not roll, too short and heavy to move with the dolly. Finally I just walked it, bit by bit, curse by curse. I laughed like a madwoman when I put it in place. I’m really glad that I have tolerant neighbors. I often tell my chiropractor about my garden projects. He seems to really like them, and encourages me to keep on hauling flagstone, rolling logs, etc. Hmm.
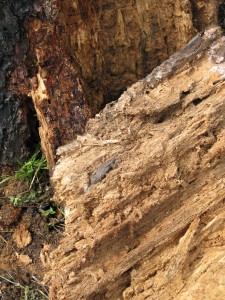
Besides growing interesting fungus, a sleepy lizard was hiding in the log. Of course, right as I position it, some of the back breaks off. There was a sleepy Western fence lizard trying to keep warm.
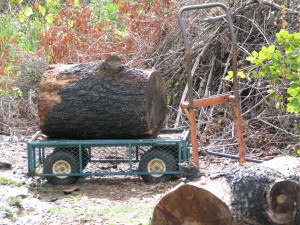
With some interesting swearing, I tipped it onto my wonderful wagon. Just when I thought I’d moved the heaviest, the last one proved to be a monster. It wouldn’t roll. It wouldn’t wheel. I brought out my incredibly handy garden cart, tipped it up, hoisted that guy onto it and off we went! It wasn’t that easy, but I did it. I had a feeling of satisfaction and accomplishment similar to when I took Tai Kwon Do with my kids, and broke a board with my hand and one with my foot. I felt as if I could chop down walls! Anyway, making this ring felt right, and perhaps their acid decomposition will inspire another mushroom ring.

If Stonehenge caught fire. Then I scavenged for old twisty branches and willow. Although I have native willow growing in the streambed, I opted for curly willow for the sides. Not only is it more architecturally pleasing to my eye, it likes full sun and is more drought tolerant than other willows.
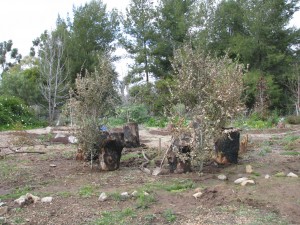
Cut oak trees stuck in for camoflage. Since the willows would just be whips yet, I wanted to kick-start the hide with some camouflage in the form of dead oak trees that hadn’t yet shed their leaves. I stuck them in the mud on either side of the main viewing window. They can be incorporated into the design as the willows grow, or come out easily. Everything is reversible! (I try not to build anything that isn’t).
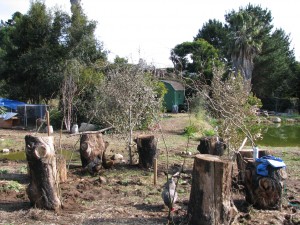
The girls helping me plant the willow withys. I managed to find some long curly willow off of the plants that aren’t even a year old in my garden yet. I want the withys to meet overhead. The ‘windows’ will be over the stumps, except for the main window looking down to the pond. The hens came over to help plant willow by standing on the shovel and in the hole slurping valuable worms. I sure loved the company.
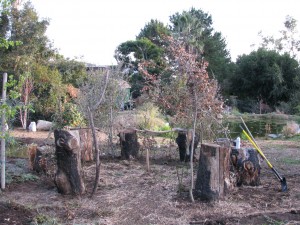
From the entrance. I planted all the willow, but didn’t really finish working on the upper portion before sunset. I really wanted to finish, too, and move on to weeding. Giving the project a little time will help me in finishing it, especially since I’m making it up as I go! I’m not weaving the structure like many willow structures are, but I will be shaping them so that they grow in the right way.

As it looks to ducks. A little anticlimactic, but I’m not done yet! The willow will be growing and filling out with leaves, making the roof canopy all in good time. I bet there are ducks in the pond right now not paying any attention to the hide! 🙂 Tomorrow I might look at it , recoil in horror, and pull everything out. Or not. I’ll let you know.
- Animals, Bees, Birding, Chickens, Gardening adventures, Heirloom Plants, Other Insects, Permaculture and Edible Forest Gardening Adventures, Photos, Ponds, Rain Catching, Vegan, Vegetables, Vegetarian
Garden’s One Year Anniversary
Happy Anniversary! One year ago on Feb. 1, 2011, I signed a contract with landscape architect Roger Boddaert (760-728-4297) to create a permaculture garden. For twelve years I’ve had this sloping property that was covered in weeds and worthless Washingtonia palms. Not only do these 2 acres slope down to a barranca, but it was filled in due to catching all the rainwater that runs from the street and properties above. I have to give credit to friend Gary B., who brought up the subject of permaculture in a conversation the year before. I’d heard the term and thought I knew what it was about, but months later when I was researching what to do with my property I remembered him mentioning it, and looked it up. I found what I was looking for. I’ve been an organic gardener for many years, have owned chickens for their eggs, have refused to till the soil so as not to kill microbes, have worked naturally with animals and plants, have created habitat, composted, recycled, collected rainwater… and all of that was permaculture. And so much more. How can one not be attracted to the term Food Forest? Certainly not a foodie and gardener like myself.
What happened on the property starting the week of Feb. 1 for the next six months altered the land so that it is truly two acres of habitat. It is useful, it is natural, and it is beautiful. Roger’s team led by Juan built beautiful walls of urbanite, planted and hauled, worked in scorching sun and frosty mornings and made what was dreamed into reality. An integral part of the garden has been diverting the water from erosion points and into rain catchment basins and natural ponds, and that is where Aart DeVos and Jacob Hatch of Aquascape (760-917-7457) came in. They also installed the irrigation. Dan Barnes did the rough and the precise tractor work (760-731-0985) and I can’t recommend his experience and skill enough. Fain Drilling dug the well (760-522-7419) and the wonderful sheds were built by Quality Sheds of Menifee (http://www.socalsheds.com) .
Along with some volunteer help from Jacob, I am the sole caretaker of the property. I am planning the plant guilds, weeding, improving soil, moving problem plants and trees and, did I mention, weed? Oh yes, then there is weeding. On Saturday May 12th, the garden will be on the Garden Tour of the Association of University Women of Fallbrook, and hopefully many people will be inspired to go organic, to create habitat, conserve water and grow extra food for the Fallbrook Food Pantry. We’ve come a long way, baby!
The following photos are comparisons between the precise location last year at this time, and today.
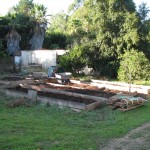
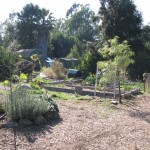
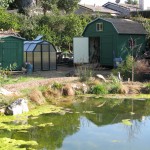
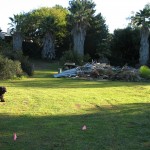
The property last February. The property today. Sophie and General loved all the excitement. They love the new gardens and pond even more. My veggie beds with the old sheds behind. My veggie beds with the new sheds and greenhouse behind. Where the big sheds were: everything usable was reused. New sheds that aren’t a safety hazard, and the greenhouse. The lower area with shed debris (lots of mowing area!). Hey, there are ponds there now! Not much for the neighbors to look at. Quite a lot for the neighbors to look at! Access to the old oak was hazardous. Palm stairs lead past the oak to a birding area. Stonefruit were old when I moved in. New stonefruit adorn what is now the Bee Garden. An erosion area sloping down to the barranca. Water won’t flow through here anymore. Lots of mowing and palm frond removal. Not so anymore. Horrible looking debris failed to hold back the embankment. Palms were used to stabilize the new paths and camoflage the supports. Old unstable stairs led to washout areas. New railings, stairs and urbanite retaining walls lead to another viewing area. The view from my balcony. Part of the old shed remains. Hey, there’s a pond there! -
Mrs. Two Shacks Builds a Fowl Go-Kart and a Hen Harem

And its a... go-kart? Okay, so… my chickens are currently in a deluxe San Diego summer unmovable chicken tractor. The tractor is too heavy for me to move, and the wheels (reused) have literally crumbled apart. Now it is November and the nights are becoming chilly, and we’re on the weekend rain schedule, unlike our other dry years. (Normally it rains the weekend after Thanksgiving when all the holiday events are happening, which gives the weeds time to grow so that everyone is mowing just before New Years.) My hens are cold. I know, it isn’t Minnesota; the nights are in the 40’s, but that is nippy to Southern California-bred chickens. I’ve been pondering what to do for some time now, and my Libra self has vacillated so much that now I’m up against it. Yesterday I devoted to trying to build a warm place for the chickens. I ended up with a go-kart.

I have a cage and a crate: I'll put them on wheels! I am not one to cut wood. I go out of my way to find matching pieces of wood in my huge and glorious scrap pile just so that I don’t have to measure and cut wood, because invariably I will cut it the wrong length. Fabric, too, (I have some interesting curtains). Determined to make a warm, cozy hen structure that was safe from predators (a coyote jumped the fence and killed Kakapo and took Linnet on Saturday. I was and am heartbroken and angry. I have three hens left. Oh, and Emerson.) I found a huge wooden crate that was used for a sculpture of a rodeo rider, which belonged to my parents. This thing has been taking up space for maybe twenty years in various locations. It looked the perfect size for three hens. I dragged it down the hill to the newly-straw-covered area in front of my new two sheds.

Hammering together four pieces of wood on wheels takes skill Fifteen years ago, at another house, in another life, I built a movable chicken coop that was gosh-darn good. I didn’t cut any wood for that one, either. Anyway, I still had the casters left. Pulling two long and two short pieces of 2×4 (notice I don’t give a length) out of the wood pile, I hammered them together and attached the casters, although not in that order, which made the hammering together more difficult. I purposefully didn’t use screws: I wanted to bang away with something hard on something yielding. I attached the crate after scraping out the spider webs. Now I wanted a caged area for the hens to be able to graze and get some sun. I still wasn’t completely sure where I was headed with all of this, but I was driving anyway. I dragged down an old large animal cage, which used to support a heat lamp for my African Spur Thigh tortoise until he outgrew it and tore the door off. I could fit it onto the front part of the… thing… and the casters would go through the holes in the bottom with a little help from a PVC hacksaw. (Cutting PVC is NOT the same as cutting wood, by the way, and I have oodles of experience with it. Red Hot Blue Glue nearly runs in my veins.)

The wheels fit through the wire! Wheee! I found some brackety-gizmos that made an L shape, and attached them to the bottom so that the cage hung down closer to the ground so that the hens could get at the grass.

L-shaped thingies, and the hammer head that kept flying off I attached two pieces of wood in a ‘T’ as a handle (trying to hammer it onto the frame through the cage), and then found an old dog choke collar with some lead still attached, and wrapped that around to help pull.

The pull handle, complete with choke chain. So, what if it rained? It needed a roof. There happened to be three of these triangular things left from the shed removal. I’m glad they were put to use. They had been a failed attempt to put up cat fencing (to keep them in the yard) on top of the shed roof by a friend who was a contractor. (He’s also the reason why the 8-foot wooden fence I asked for turned into a 5-foot fence up on bricks with a teal slanted cap running along the top… which makes a nice foothold for the cats.)

I knew there would be a use for these, if I waited long enough! I nailed these suckers on the crate, (ever try to nail something triangular?),

Ever try to hammer something triangular? (The successful nail is on the outside end!) then pulled out a piece of corrugated aluminum that wasn’t too sharp (and was also conveniently on top of the pile). It was too long, and not wide enough, so I grabbed some big scissor things I’ve had in the shed for years and cut the aluminum in half (they were tin snips!). Roughly. On purpose. Of course, the piece I cut didn’t fit, so I had to bend it in half, stepping on it, and drape it over the triangles then nail it on. The larger of the two I used towards the front, to give a little shade. The sun was going down and I had to hurry.
Then stuffing straw in the gap for insulation, adding a milk crate and straw inside for eggs, I stepped back to enjoy my creation.

Ummm, doesn't quite fit. Well, it wasn’t quite a chicken tractor, and it wasn’t quite a warm and cozy house. It was a go-kart.

Hay insulation I had thought to move it and the hens up into the relative safety of the tortoise and cat yard, since the cats were not allowed into the yard right now because two naughty individuals escape (so everyone else has to suffer, just like in school). With much pulling and pushing, I managed to get the kart around to the front of the hen house, and there it stayed overnight. I couldn’t get it any farther. The casters would work fine if the mulch wasn’t so thick, and if I didn’t have to pull it uphill. There was no way I was going to be able to get the kart uphill through the mulch into the tortoise yard.
Today I managed to move the kart over some grass, and one by one brought the hens over and popped them in. I got some very curious looks back from them. The chickens thought it was pretty fun, and enjoyed pulling at the tops of the grass sticking up through the cage, but after awhile they set up a chorus that couldn’t be ignored. And I still hadn’t solved the problem of their being cold at night! It was again about to be dark.

Hens wondering how to make it go Grabbing a rather stinky dog blanket, an old flowery sheet and a pillowcase (they were there, all right?) and the staple gun, I went to work. I stapled the blanket all across the back of their regular hen house loft, across the roof and let it dangle down in front of where they roost at night. Sticking my head in there (and holding my breath…. very doggie-smelling) I noticed a slight breeze still, so I stapled up the sheet and pillowcase. Emerson was quite baffled as to what I was doing next door.

How to make an expensive, well built chicken tractor look like junk in ten minutes. Then I brought the hens back, and figured it would have to do until after the holiday. A day and a half’s work and I have a heavy fowl go-kart and taudry drapings around the hen house, but I think the hens are warmer tonight. And, I must say, I think the kart is pretty cool-looking.

Gipsy hens Happy Thanksgiving!
- Chickens, Gardening adventures, Humor, Permaculture and Edible Forest Gardening Adventures, Vegan, Vegetables, Vegetarian
Planting Easter Dinner (in November)
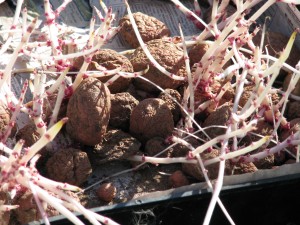
Creepy white fingers I finally was able to work in the vegetable garden today; me and my helpers, that is.
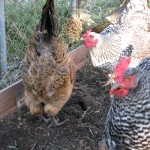
Kakapo, Miss Amelia and Lark, helping I am by no means done, but I did some major cleaning out of old veggies. Out went the tomatoes that aren’t producing, dead squash vines, weeds, a volunteer avocado tree and the two enormous zucchini plants which, although having been cut in half, abused and ignored, have still been putting on a squash a week. I have one more zuke plant left, but these big guys had to go. The compost heap is… well… a big heap.
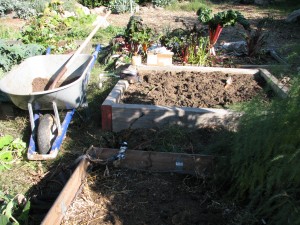
White potatoes in the closest bed, root veggies and brassica seeds in the back one As I study Permaculture, I’m more aware of the millions of microbes in the soil and the fine network of fungus that enriches plant roots. The less I disturb my garden soil, the better. After pulling the weeds, I sprinkled on GardenAlive’s soil enhancer, which are more microbes, as well as their organic Roots Alive fertilizer. I used a trowel to lightly work it all just under the soil surface, then topped it with compost from my compost bin. Having soil that is healthy, rich smelling and alive is any gardener’s dream. All those microbes free up nutrients in the soil so that your plants can suck them up and use them, which makes your veggies not only healthy and more resistant to bugs and diseases, but produce … um…. produce that is loaded with vitamins and minerals. Its like the old gardener’s joke: A gardener asks a man what he puts on his strawberries, and the man answers, “Cream.” The gardener shakes his head in disbelief and says, “I always put manure on mine.”
Potatoes from spring, which I’d stored in a dark cabinet under the house, decided they didn’t want to wait any longer.
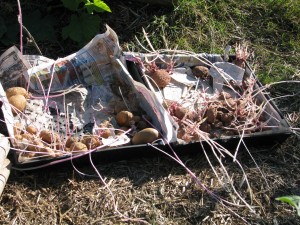
Eager potatoes Fall is a good time to plant potatoes, as long as you keep their greenery protected from frost. Since potatoes can be grown from cuttings (as well as tubers and seeds), and to produce more potatoes you slowly mound up compost or straw around the stem as it grows, I tried something with these long white fingers. I lay each potato on the soil, with the long white stem laying flat, and covered them all up with light mushroom compost.
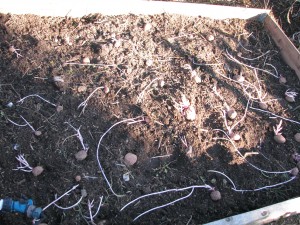
Laying down the potato stems to form new plants I’m betting that the stems will all take root and send up greenery along the nodes, using phototropism. That will multiply the number of potato plants by a lot. Then as the greenery grows, I’ll add more straw and compost around them. If all works out, sometime early next year I should be Potato Queen of Fallbrook! Of course, I had lots of help with the project.
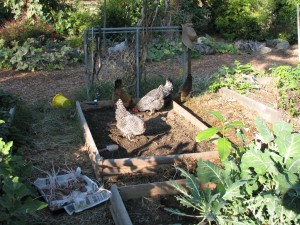
Lots of helpers. I fenced off the beds after I planted A few months ago I planted pieces of yam that had started to grow in the house. The vines flourished outside of the bed. Now that I’ve cleared the massive zucchinis out of the way, I’ve pulled the vines back into the bed, layed them out so that they (mostly) touch the soil, and have dumped mushroom compost on parts of them. The object is to allow them to root along the vines and make more yams. I’ll let you know if this works or not.

Taming the yams I’m also planting carrots and parsnips. The ‘nips won’t be ready until next spring, having improved in flavor for any frost we may receive. I’m hoping there may be some small carrots ready for Christmas dinner, but I really should have put them in last month to be sure. In will go the brassicas: Brussels sprouts (did you ever wonder if it smells cabbagy in Brussels?), broccoli and cauliflower. These guys all like a good chill, as long as they are protected from frost. More cool-weather lettuces will go in, as well as lots of endive for my tortoise. Onion sets and seeds can go in, as well as radishes. The arugula has reseeded itself again and is coming up in all the pathways, with even an elegant specimen right next to the large pond by the rushes!
You remember the pond, which was put in to attract wildlife, right?

Wildlife gathers at the watering hole.... I still have tomatoes and eggplants producing. I tied up the lazy ferny stalks of my first-year asparagus to get them out of the way. The horseradish plant seems to be doing well; I have to consider what to serve it with at Christmas. My dad loved horseradish sauce, as do I, and I grow it as a memory of him and our Polish heritage on his side. I used to make him his favorite soup, borscht, but I would never taste it because I just don’t like beets.
Tomorrow, if I can move my joints after many days of weeding, I’ll clear out the remaining ’empty’ bed and cover the unused ones with compost and straw to sit until spring. I am so glad that I can garden almost year-round!
- Bees, Chickens, Gardening adventures, Other Insects, Permaculture and Edible Forest Gardening Adventures, Vegetables
Crazy-Pot Seeds
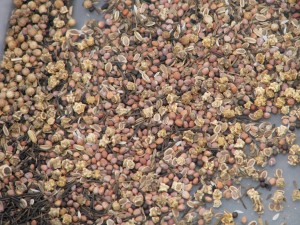
Crazy-pot mixture of veg seeds Today, the palindromic 11/11/11, was also Veteren’s Day and a day between two rainy weekends. A perfect day for spreading lots of seeds. With winter rains on their way in a month, it is important to hold the topsoil with rooted plants, and why not use a cover crop that also fixes nitrogen? My choices were hairy vetch and a tall native lupine.
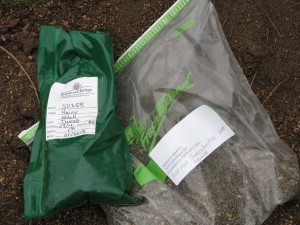
Native lupine and hairy vetch seeds I would also have liked to use white or sweet clover but sources were sold out early this year. Both my choices will have flowers that offer plenty of nectar to bees, be lovely, hold the soil, set nitrogen, and can be, if needed, sacrificed. When you ‘sacrifice’ a nitrogen-fixer, you can either turn it under or cut the tops, leaving them in place on the soil surface to decompose.
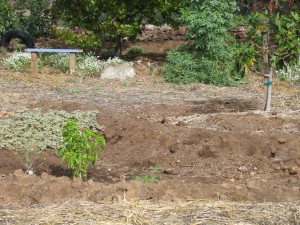
Plant guild waiting for seeds I don’t agree with disturbing my soil microbes any more than necessary, so I won’t be tilling ever again. When you cut a nitrogen-fixer, the roots release the nitrogen they hold into the soil as the tops mulch then decompose bringing lots of nutrition to the soil surface. Vetch should be a winter crop, and lupine a spring crop, if they can tell the difference here in San Diego!
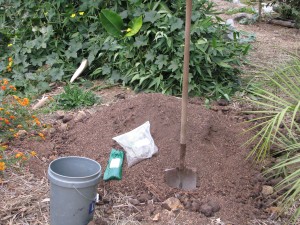
Mixing seeds with mushroom compost My method for spreading these two was to mix handfuls of each with a bucket of mushroom compost, and hand spread it in the most bare and most unfertile areas.

Broadcasting lupine and vetch seeds mixed with compost Adding the compost, I thought, helped the seed distribute more evenly, gave it a little cover since I wasn’t going to rake it in, and disguised it from birds a little.
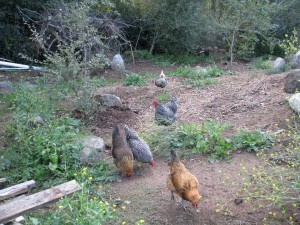
The girls. Once done, I decided it was also a good time to do something I had been looking forward to doing for years: spreading old veggie seeds. I’d done a little of this in a raised veggie bed, with some success. I have so many old packets of veggie seeds that I’m not going to use in the raised beds (I have all organic seed now), and I can’t believe that it isn’t viable. If they sprout seeds found in ancient Egyptian tombs, then I’m sure mine can sprout, too. This seeding is a very important step in the edible forest garden.
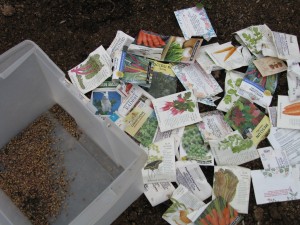
Many old winter crop seeds This year’s abundance of herbs, squash and tomatoes has been fabulous… I still have some ‘feral’ tomatoes putting on enormous fruit which I pick, polish and eat out of hand in the garden while I’m working.
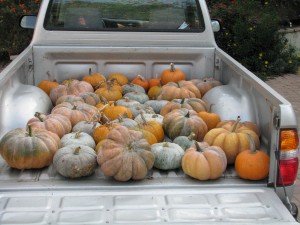
Pumpkins and squash on their way to the Fallbrook Food Pantry I opened all the packages of seed for cool-weather vegetables, such as carrots, radish, dill, broccoli rabe, and lettuces. Some such as garlic chives and onion I separated out and sprinkled near roses, since alliums are a companion plant for roses and help ward away aphids. The rest of it was mixed up in a lovely crazy-pot of seeds. I didn’t mix with compost this time, as there were fewer and smaller seeds involved. I sprinkled them then covered them with soil using my foot… the professional way to plant!
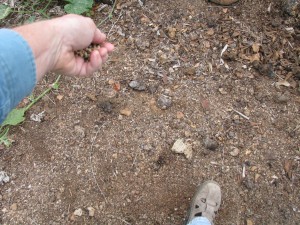
Scattering veggie seeds I am eager to see what comes up after the rain this weekend. It truely will be an edible landscape. Even if I allow the veggies to go to seed, the blooms will all be excellent bee food sources, especially the carrots and dill. None of these were nitrogen-fixers, because I used all the extra peas up in the vegetable beds this spring (see archives) improving the soil. Beans, and other warmer-weather seeds I’m holding back for February or March planting. I do have sweetpea seeds to plant out, but the lupine and vetch will be working their magic anyway.

Embankment with ragweed, now seeded with lupine and vetch 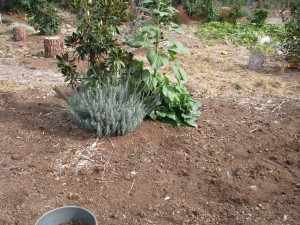
Under the soil is now daffodil bulbs, lupines, vetch and mixed vegetable seeds About ten years ago I had a short story published in the young person’s magazine Cricket called Taking Tea with Aunt Kate. In it a girl lived with her mother who was a wild, messy gardener, spreading seeds all together and having veggies and flowers mingling in riots of color. The girl’s aunt is, by contrast, perfectly coiffed and takes her to a formal ‘high tea’ at a prestigious restaurant. The girl decides that she can be a little of each woman, a little wild and a little formal. I think I’m that child! I clean the dirt out from under my nails so that I can go to the opera.
I’ll be walking the garden in the next few weeks, waiting for tell-tale sprouts (and trying to figure out if they are weeds or not!), and watching the bare areas come to life. How fun!
-
Bathing a Hen
Between harvesting, drying, weeding, watering and keeping out of the sun, we’ve been very busy with the garden and animals, so I apologize for not writing often. If you’ll remember one of our hens, Evelyn, passed away due to egg binding. Egg binding is just what it sounds like: they don’t come out, and it can be fatal. Another of our chickens, Kakapo, showed signs of trouble and we gave her baths and babied her, and now she is laying enormous eggs (poor girl!). Now Lark, the darker of the two Barred Rocks, is having trouble. She laid one egg and perhaps a weak-shelled one as well, and then nothing. We had her in a cage in the living room, gave her warm baths then put her out. Still nothing. Then yesterday she was acting very strangely during the day, so we gave her another warm bath and a massage.

Lark Spa There isn’t much else to do. Of course, we’re leaving for ten days starting tomorrow, and although there will be a housesitter living here, I don’t think chicken bathing is on her to-do list. Things always happen just before going on vacation, of course, so one of our cats isn’t looking good but refused to be caught, and our desert tortoise Homer is still missing. We have signs up (if people would stop taking them down!) and hopefully he’ll make himself known to people.
I’ll be without Internet on our trip. We will be birding and looking at historical and natural wonders in Cornwall, England, including Land’s End, Penzance, Jamaica Inn, Camelot, and the Isle of Scilly. I wanted to blog on the trip but we are keeping our luggage to carry-ons, and the choice between hiking boots and a laptop was a clear one to me. So I’ll post about our travels after the 16th. Send happy thoughts to our animals and housesitter! Take care. -
Dedicated to Evelyn

Almost time.... We’ve gathered seven eggs from the girls this week. We believe the first one was Evelyn’s, the beautiful blond Buff Orpington. The next ones are Miss Amelia’s, followed by a blue/green one from Chickpea and unbelievably, a brownish one from our other Americauna, Kakapo.

First three beautiful eggs, L-R Evelyn's, Miss Amelia's and Chickpea's The two Barred Rocks are too young yet to lay, but they certainly are interested in what is suddenly so popular about the nesting boxes.

The Barred Rocks are curious teenagers The nesting platform in the chicken tractor isn’t deep enough to keep straw from being kicked off, so I’ve put up three bee ‘supers’, which are four sides and no top or bottom. Until something else can be arranged, they do just fine.

Miss Amelia, tail up and ready to get it over Watching the girls as they become hens has been interesting. Miss Amelia sat in the nesting box and panted.

As a mom, I know how she's feeling. She allows me to pet her now, as she squats into the mating pose. It is a little disturbing, and doubtlessly frustrating for both her and Emerson who is caged separately.

Miss Amelia is desperate for... attention. Sorry! Chickpea, the big girl, jumps from box to box annoying everyone trying to nest in there. She kicks as much bedding out as she can, sending it flying across the coop with her big feet. When she’s ready to lay she goes into a chicken trance. You can wave your hand in front of her eyes and there is no response, just some panting. Then, voila! A beautiful greenish egg.

Chickpea in a trance Kakapo is the nest builder. She’ll squat down in one of the boxes then lean her head far out of it, almost losing her balance, to grab a wisp of straw to throw over her shoulder into the box.
We hadn’t seen Evelyn lay, but assumed the first egg which was pointier than Miss Amelia’s, was hers. She’d been in a mood for several days and had settled down. Yesterday, though, she sat down in the corner of the pen by her beau Emerson and took a nap in the daytime which was uncharacteristic. She appeared perfectly healthy; in fact, I commented on how red and full her wattles were. This morning we found our dear Evelyn dead on the floor in the corner of the coop. We also found two eggs with transparent shells in the lay box. There was no evidence of what made her die, but I’m guessing it had something to do with the egg-laying. We don’t know who laid the shell-less eggs, but that shouldn’t kill anyone. It is remedied with more calcium in their diets on top of their lay pellets. Perhaps she was egg-bound, or just couldn’t handle the eggs. We were horrified and greatly saddened. I buried Evelyn under the lime tree just behind the coop. Now we have five hens and a rooster. We gave the girls crushed egg shells and kale leaves, and I’ll sprinkle calcium on their food tomorrow. We’ll miss the beautiful Evelyn something terrible.

Evelyn looking great. No signs of illness. -
A Little Brown Gift (and it isn’t what you might imagine)
Yesterday’s blog post was my 100th posting. I was wondering what kind of post I should write to celebrate, when my animal family took the decision right out of my hands… and put something else back into my daughter’s hands that was cause for celebration:

Egg! I had just been reminding the girls (hens) that their egg-laying should commence in August, and since they didn’t have a calendar in their coop, what the date was. This afternoon I stepped into their coop to fill their food dispenser, and saw the first egg! So small and so perfect. We aren’t sure whose egg it is, except that it doesn’t belong to Chickpea or Kakapo the Americaunas because they will lay blue and green eggs. Our bet is on Evelyn because she was squawking a lot this week, and since she’s at the top of the pecking order, perhaps she felt that it was her duty to lay first and impress her beau Emerson. Emerson is separated from the girls by chicken wire so that he may keep company, albeit frustrated company, with them. We separated him just in time to not have fertile eggs!

Kakapo wondering how to eat it So the egg is in the refrigerator, the nesting area is replete with straw, and we are eagerly awaiting more eggs. Miss Amelia was showing signs of being disturbed about something. Passing the first egg would be quite uncomfortable, I’m sure. As a mother of two, I’m actually positive about that. Chickpea – who reminds me a bit of Meryl Streep playing Julia Child – was determined to kick all the straw off and bother her, so maybe tomorrow. What a great little brown gift!

Kakapo and Miss Amelia looking at egg -
Segregating the Rooster, or Building a Bachelor’s Quarters out of PVC

Bachelor Pad If you’ve read my earlier chicken posts, you’ll know that we bought seven hen chicks, and one of them turned into a rooster. Since we are vegetarians and animal activists (and just plain softies), I opted to try and keep him. I don’t want fertile eggs or chicks. So far the neighbors haven’t complained about the crowing and I kind of like it. The store from whence he came said that they’d give a refund, but Emerson (the rooster) would end up as an employee’s dinner or in the dumpster. Squawk! I contacted my very amenable and patient vet Dr. Pyne about ‘fixing’ him, which I found out is what capons are (which was common practice up until fairly recently, and capons were often used to sit on eggs because they were calmer than the hens. Hmmm.), but since the rooster’s, um, or-gans, are internal, this would be an involved surgery and we left it at that (he’s fixed feral cats for me, helped my tortoise, many dogs… I wish he could be my personal doctor because I’d get better treatment there!).
Since E-Day (Egg Day) is coming up in August, when the six hens will be old enough to start laying, and since Emerson has become more aggressive with them, and since the chicken tractor is too small for that many chickens anyway, I decided to add on. I am terrible at measuring things. I do just as good a job eyeballing a length or walking a thing off and counting my foot lengths as I do with yardsticks or measuring tape. I have an interesting set of curtains as proof of this. No matter how I try, and how clear-headed I am with the numbers, I get it wrong. If I am to build a thing, I have to start with pre-measured lengths and not cut them. About fifteen years ago I built a very respectable movable chicken coop that way, using 2x4x8’s, a lot of chicken wire, screws and piano casters. I didn’t cut any wood. However that had to be dismantled when we moved and I used the wood for other projects.

Facinated Audience If something bends or stretches, now, hoo-boy that’s a whole ‘nother story! I’m all over it! So today my ever-patient and forgiving daughter and I stood out in the blazing sun for a good eight hours and glued together a chicken coop extension made of leftover 3/4 inch PVC water pipe! My sketch, of course, was on the back of some unopened junk mail, but I only had to run to the hardware store once in the middle of the day for some extra fittings. Much as I don’t want to contribute any more to the manufacturing of plastic, I had all this pipe leftover so I’m recycling. The coop is a rectangle divided in half lengthwise with chicken wire, so half of it becomes a bachelor quarters for Emerson, and the other half an extended run for the hens. They will access it through a hole cut into the wire on the side of their coop, and they can keep company with Emerson on two sides of the coop without being, um, disturbed. Emerson isn’t going to be very happy about it, but we certainly didn’t ask him to be a rooster, either! In fact, he was the smallest and least-aggressive looking chick in the bunch.

The door was made of 1/2 inch PVC PVC is fun to glue; it bends and is forgiving, and if it is a little off, on a project like this, it’s okay! If anyone ever asked me what kind of fingernail polish I use, I’d have to say Red Hot Blue Glue. Working with wire is another story. I believe that all discontented former employees, people with grudges who believe that the world is either out to get them or owes them more than what they have, all work at poultry wire companies. Rolls of wire are treacherous and evil. When you uncoil the thin wire that binds each roll of tightly wound chicken wire (or any other, for that matter), the roll slips and tries to nip off your fingers. The outer edge is raggedly folded under, and the cut ends poke out at angles so as to scratch you and draw blood no matter how careful you are. As you reach the end of the roll it requires almost superhuman strength to unroll, and if you are working alone it will recoil with a snap that can take you up with it. Any work with poultry wire, no matter how innocent, ends in several copiously bleeding scratches and possible loss of limb.

Framed! By seven o’clock tonight, we’d finished his side enough to move him in. My daughter went to catch him and boy did he put up a fuss, making all the girls panic. You’d think we’d tortured him every day since his second day on earth instead of treating him as a pet. Perhaps I should put a photo of a dumpster or a stewpot up in his quarters just to make him reconsider his behavior.

Wire around all sides So tonight Emerson is separated. The girls were very concerned and he looked confused, but they share a wall at night and can plainly see each other. He has a roost near theirs, too. We didn’t get the girl’s side attached yet, and we need more chicken wire for their roof (we wired a tarp over it temporarily). I’ve also decided that I will put wire on the bottom as well. The PVC is lightweight and I’m afraid of raccoons getting under it. I could always put it on small wheels and make a chicken tractor out of it, or fill the entire thing with water to make it heavier! Or not.
I point out to my daughter constantly that other people are at the beach, or doing some typical summer activity, while we glue a coop, cob an oven, trim nails on our cat… all of which draw blood, come to think of it. The chickens are laughing.
-
Is She a He???
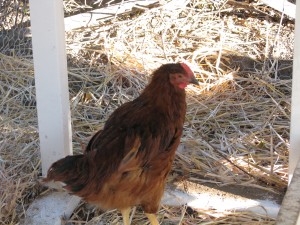
Rooster in Disguise? Problems in Chicken Land! Of the seven hens we’ve raised from chicks, one has played us false! Or so my daughter (the birder) speculated upon her arrival home from college. Our one Rhode Island Red, which is a larger breed so we chose the smallest chick in the batch, is showing signs of not being, shall we say, hennish. First of all, she is large. Really big feet. Ever hear the Fats Waller song, Your Feets Too Big? That applies here. Most notably, though, are her tail feathers, which are starting to take on a more colorful life of their own. They are a little longer and have some bluish-green hues in them that hens, well, just don’t care about. She has become a bully to all the others, especially the largest Americauna, Chickpea.
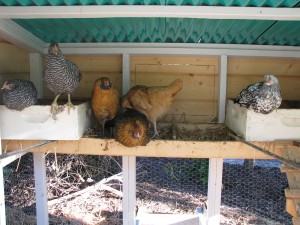
And I thought they were being hen pecked! I had attributed the temper to her being a redhead, but apparently there are other explanations. She is developing admirable wattles, which is something I don’t get to say to just anyone. Also, she has very shiny neck feathers, and roosters have an oil gland they use to preen their feathers. However, she hasn’t yet crowed, but Internet research tells us that some crow early, some late, some not at all. Also, she hasn’t grown spurs yet, but the story is the same as the crowing. One chicken site informed us that it was easy to sex Rhode Island Red chicks because the females have a black stripe on their heads.

It seems like only yesterday.... No stripe on this one, yet if it is so easy to sex them, why was this male in with the females at the store? If indeed she is a male.

Trying to blend in.... So what if she is a he? I don’t know yet. My neighbors would have a fit if I had a crowing rooster in my yard. Rural as it is here, there is a certain peacefulness that rolls across the land and a screaming bird just doesn’t fit in. Also, I’m a lacto-ovo vegetarian. I eat eggs, but not animals, so I don’t want fertile eggs or chicks. Nor do I want my other girls harassed all the time. However, I’ve raised this bird from a day old, and I don’t give over my responsibilities lightly. The hens won’t begin to lay for a couple more months, so I have some time to consider.
I wonder if my vet would fix a chicken?
Here is the whole cast of characters:
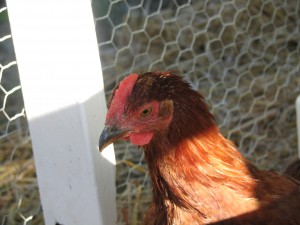
Emerson Emerson: if our speculation is in error, and she is not a he, but she is a she, then she can assume the name Emily.

Blondie/Evelyn Blondie. Not the most original name, but the song Heart of Glass comes to mind whenever I see her. Blondie is Emerson’s chosen consort (another reason Emerson must be a male…. going for the blonds!) UPDATE: Blondie has been renamed Evelyn to move from music to fiction genres. Emerson, Miss Amelia and Eveyln are all characters in Elizabeth Peter’s Amelia Peabody series.

Lark 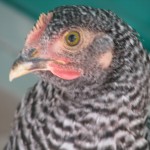
Linnet Lark and Linnet: the youngest chickens by a few weeks, these Barred Rocks pair off and are quite smart. Comparatively. Lark is darker than Linnet.
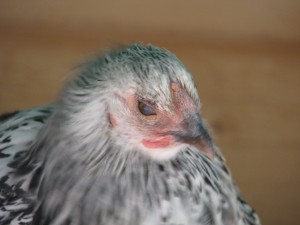
Miss Amelia Miss Amelia: the Silver Wyandotte. Named after the intrepid heroine of Elizabeth Peters’s Amelia Peabody historical archeological mysteries. She likes to sit on the highest perch.

Kakapo (a New Zealand bird... she looks like one!) Kakapo: the lighter colored Americauna. Her posture and neck feathers are much like the New Zealand bird after which she is named.

Chickpea Chickpea: the largest Americauna since the beginning, but the most picked upon. Her coloring is dark where Kakapo’s is light. She manages to hide under the others effectively.
If it’s not one thing, it’s another!
