- Animals, Bees, Gardening adventures, Grains, Health, Heirloom Plants, Herbs, Other Insects, Permaculture and Edible Forest Gardening Adventures, Planting, Seeds
Growing and Eating Seeds
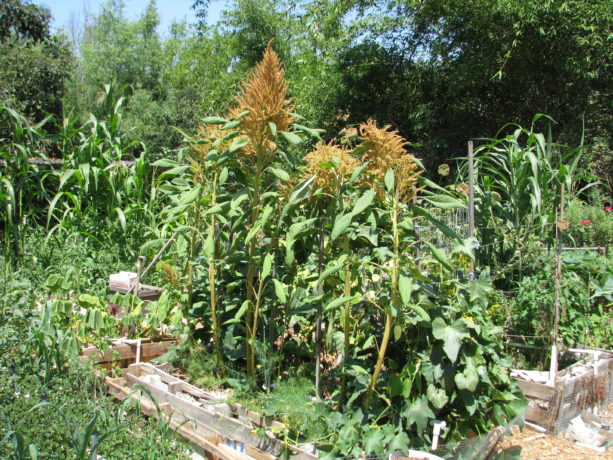 We eat seeds everyday. Grains, nuts, beans and, well, seeds, are all seeds. A seed is an embryonic plant covered with a seed coat. A grain is a dried fruit. In this blogpost I’m going to concentrate on true seeds.
Grains are usually seeds from grasses, although there are common exceptions to that rule such as the amaranth below. Seeds contain the magic that makes a plant out of a speck; a towering oak from an acorn. Seeds are highly nutritious for humans as well, but often are just used as a flavoring (think of an ‘everything’ bagel). Many have been used medically for relieving everything from eczema to mental issues. Some seeds such as grains are difficult to prepare for eating on a small scale, such as rice. Separating seeds from chaff takes a lot of steps that may not be practical for the handful of food at the end of the process. However there are many seeds that we commonly eat that are easily grown among the veggies, or even in a flower bed. Here are some that we grow at Finch Frolic Garden Permaculture:
Let’s start with one of my favorite flavors, the sesame seed.
 Sesame (Sesamum indicum) seeds grow on small upright plants about 2 – 3′ high that have lovely tubular flowers.
  Bees love to crawl into them. Its a pretty plant and flower, so could easily be incorporated into an ornamental area. There are both black and white sesame seed plants; the white seed is really brownish as it has a seed coat. Sesame is also called benne seed. Once harvested sesame seeds should be stored in a dark cool place or refrigerated. The seeds can be used raw, or better still lightly toasted in a dry pan before sprinkling over your food. So very yum. Tip: sesame pods become tight as they dry and then split with force, throwing the seeds away from the plant. If you want to harvest any then watch the pods as they dry on the plant and then cut and hang in a paper bag to catch the seeds as they fly, or break open with your hands.
Amaranth:
Amaranth (Amaranthus spp.) is a very tasty, easily grown seed that is considered a grain. It was a major food of the Aztecs, and almost completely destroyed by the Spanish after their conquest of that civilization. Amaranth was too sneaky though and survived. It is easily digestible, high in protein and full of other nutrition. It has wild as well as ornamental varieties, but all are edible (be sure what you are eating!) Love-lies-bleeding is the dramatic name of the long red tasseled kind.


All are great for birds as well as humans.

Pigweed and lambsquarter are its weedy relatives. All of them have edible leaves, although some varieties are more tasty than others. Older leaves are better cooked. The tall varieties can grow 8′ tall or so, may need staking, and make good shade plants for others that need sun protection. When you start to see birds on the flowers then the seed should be ready. Another way to check is to gently rub the flowers between your fingers and see if seeds come off as well as the petals. If so, then over a clean, dry bucket rub the cut flowers between your fingers. Winnow the chaff away over a mesh screen or in the wind, or by gently blowing it away from the seed. Now you need to completely dry the seed in the sun, and then store in a dry, dark cool place. Use within six months for best results.
Poppy seeds:
 No, not the opium kind, the lemon-poppy seed cake kind, although both are varieties of Papaver somniferum. Look for seeds for Breadseed Poppy varieties. This is another beautiful ornamental with striking seed pods that can be dried and used in flower arrangements. Poppies enjoy poor, disturbed soil. The seeds are tiny so need to be exposed to daylight to germinate. The flowers are beautiful; frail and feminine. The seed pods are rounded and have tiny holes at the top where the seeds come out of, so be careful when you are working around the drying pods or you’ll scatter seeds. Or just let some drop and they will come up next year.
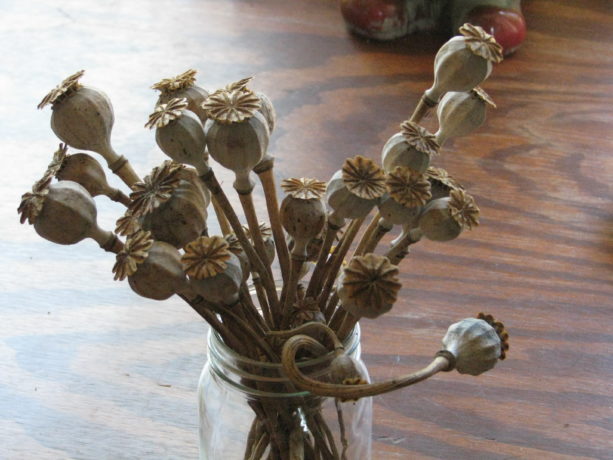
 Allow the pods to dry on the stem and then carefully cut. Shake the seeds out into a jar and store in a cool, dark place. Use raw or lightly toasted. Be sure not to eat them before taking a drug test, or you’ll test positive.
Basil seeds:
 Basil seeds aren’t well known for their culinary use in the US, but they are nutritious and useful. The seeds of the sweet basil plant (Ocimum basilicum) not Holy Basil (Ocimum tenuiflorum), when soaked make the water gelatinous, as chia seeds do, so are used to thicken drinks and foods. You don’t have to soak basil seeds to use them though. The flowers are delightfully edible as well. Use them for additional flavor and nutrition by tossing them raw into salads, salad dressing, breads, or just about anything. Letting some of the basil plant go to seed (while pinching other stems to keep it leafing) will attract small native pollinators to your garden. When the flowers dry, the seeds are ready to be shaken off into a clean, dry bucket or bag.
 Coriander:
You probably know cilantro or Chinese parsley as the love-it-or-hate-it herb found in salsas and many Mexican or East Indian dishes. Cilantro (Coriandrum sativum) seed is called coriander. Coriander seed is usually used ground and used in curry mixtures, soups and meat dishes. It is an historical herb, being used in ancient India, China and Egypt. It has a kind of lemony taste that is unique.
Celery seeds:
Celery (Apium graveolens) seeds are marvelous savory additions to soups, particulary tomato. I grind it up in a mortar and throw it in soups and stews to round out the flavor. We grew celery one year -although I have no photos of it – and because of the warm weather the celery stalk flavor was quite strong. However the seeds were delightful. Celery is a cool-season plant and the stalks should be covered to keep pale green and mild flavored. Or just let them grow for the seed. There is a wild variety that grows in marshlands, but please be very careful if you harvest from it because it looks similar to the very poisonous water hemlock (Cicuta).
Fennel:
If you’ve sipped ouzo, aguardiente or anisette, you’ve tasted the seeds of the fennel plant. Fennel (Foeniculum vulgare) is the brother of anise, and both have escaped gardens to be a troublesome weed. Fennel bulbs are absolutely amazing lightly steamed, and then baked in vegan butter and topped with vegan Parmesan. The leaves are fantastic stirred into eggs or salads, and the seeds are incredible flavorings for baked goods, candies and obviously alcohols. Miranda candied fennel seeds for me. They have been used to try and mask cigarette or alcohol breath, but really… who is kidding who? They do make a great breath freshener chewed. The plants are frondy, tall and have pretty umbels of flowers that native insects love.
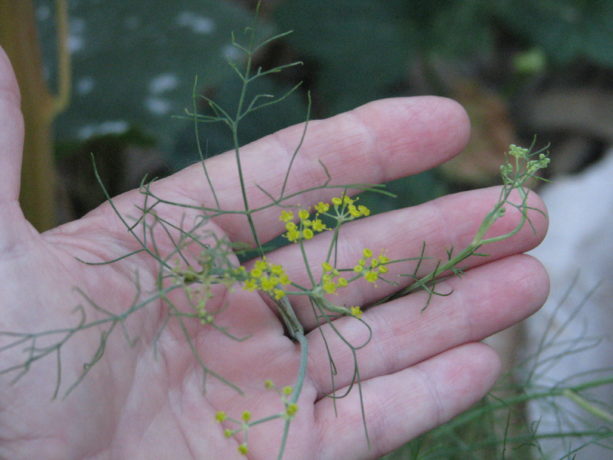 Grow some for the bulbs (protect them from gophers!) and let others go to seed. Cut and hang upside down to collect the seed in a bag or else you’ll have fennel everywhere. And that may not be a bad thing.
Sunflower
I don’t know anyone who isn’t familiar with sunflower seeds; certainly the shells were routinely spit out all over campus as a cool snack when I was in college and probably still are. At least they are biodegradable. Sunflowers (Helianthus annuus) are one of the few edible seeds native to North America, and they are protected in an attractive hull. Some varieties are small, multi stemmed and ornamental, and others are grown for their fabulously large seed heads. Birds love eating the green leaves as part of their healthy diet, so grow extra. The seed heads should be left to dry on the stalk, and then cut and shaken to de-seed. Good pollination is important to produce seeds with good ‘meat’ inside.
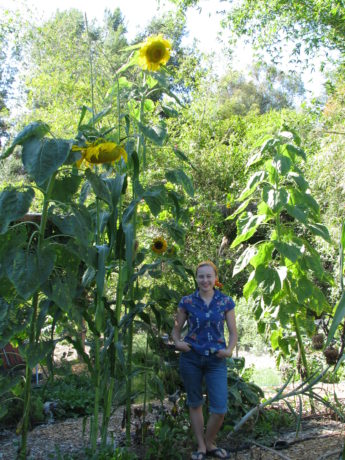
Eat them raw or toasted; they are full of good things for your body. (Miranda is 5’1″ in the photo, not tiny. I like that one of the heads seems to be checking her out.)
Dill
Dill (Anethum graveolens) is another double happiness plant. The leaves are tremendous used fresh or dried, and the seeds are fantastic as well. We use the whole seed heads in our dill pickle recipe. It goes well with fish, or in our case vegan fish. Grind them or use them whole, but definitely stir them into sauces, soups, dressings, dips, etc. Dill, like fennel, will reseed, but that isn’t a bad thing. They look pretty much like the fennel plant above.
Caraway:
We’ve grown caraway (Carum carvi) in the past, but I have no picture for you. Just refer to the photo above of the fennel and it will be close, as they are in the carrot family. You’ll find caraway in rye breads, liquors and cheeses, and in some areas the young leaves and roots are also eaten. They are dried and harvested just like the fennel and dill.
There are other seeds that we haven’t grown. We’ve tried to grow cumin and annatto seeds, but have failed to make them germinate; there is always next year. Some seeds are so small, such as chia, that you’d have to grow a lot of plants to harvest just a little seed. Seeds are such a vital nutritional and flavorful part of our diets, and so fun to grow that everyone should sprinkle edible seed-bearing plant seeds throughout their garden. As seeds dry and keep fresher longer than dried leaves (such as basil or dill), that fresh taste of the garden can last through until next year’s harvest time again.
- Breads, Breakfast, Cake, Condiments, Dessert, Frosting, Permaculture and Edible Forest Gardening Adventures, Recipes, Sauces, Vegan, Vegetables, Vegetarian
Making Ethical Butter

Vegan butter! I’ve labeled myself an ‘ethical vegetarian’ for nearly two decades. I stopped eating animals when I became horrified at the dichotomy of having glue traps under the house to catch wild rats and mice (and any poor, poor animal that happened upon it, such as lizards. Glue traps are horrendously cruel. I hadn’t put them there.) and a cage with an exercise wheel and specialty food for ‘pet’ mice in the bathroom. Justice is a man-made effort, and by not eating animals I was no longer approving of mass torture by buying into it. Although I no longer ate animals, I have still indulged in animal products, namely dairy products. Slowly it has sunk in how badly animals are treated for those, too. As someone who loves cooking, it has been difficult for me to wean away from dairy products. Butter is especially difficult. Unlike hens who have been bred to continuously lay without needing the services of a rooster, dairy cows must be lactating to produce milk. Cows are usually artificially inseminated, then after giving birth their calves are replaced by milking machines. The calves are most often slaughtered for veal. This process is repeated until the cow is used up from the constant pregnancies and lactating, and then she is slaughtered. This horrible practice is disguised by advertisements showing happy cows grazing in fields. That is a fantasy. ‘Grass fed’ and ‘pasture raised’ are sly terms that give you an image that is nowhere near to the truth. Please read Michael Pollen’s Omnivore’s Dilemma to understand where your food comes from and why.
To find an acceptable butter substitute has been an expensive and frustrating endeavor. For awhile I used a dairy substitute from Trader Joe’s, who I swear keeps tabs on what I buy the most and then discontinues it. All other butter substitutes either taste horrible, can only be used for spreading, or more commonly contain palm oil. The sudden fad for palm oil has created extreme clearance for the growing of palm in the areas which are habitat for the orangutan; indeed, if we don’t curtail our consumption of palm oil quickly the orangutan will go extinct within our lifetimes.
I finally found a recipe for a butter substitute that works pretty well for both spreading and baking. It is made mostly of refined coconut oil. At this point coconut oil is sustainably produced – please make sure that you support companies that do so. Refined organic coconut oil has no flavor or scent; unrefined has a mild coconut flavor and a toasted coconut scent. If you are using a batch of this butter for baking where coconut flavor is desired, then use the unrefined.
This recipe is by no means my own. I found it and a detailed description of the science behind it at VeganBaking.net . There are several options listed and a lot of cooking science behind the butter.
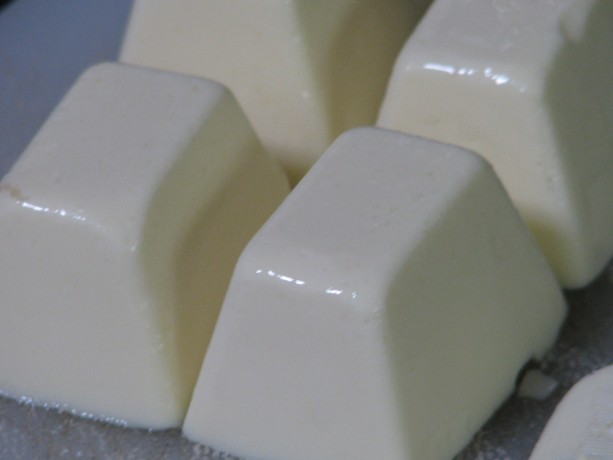
The mouth-feel is amazingly creamy and satisfying. I used the basic recipe, Regular Vegan Butter, Coconut Oil Base. The recipe calls for curdling the soy milk, which will drive the butter flavor. I tried the full teaspoon of cider vinegar, then half cider vinegar and half coconut vinegar, then just half a teaspoon of coconut vinegar, and finally no vinegar, and thus no curdling, at all. I found for my taste that the vinegar flavor carried through and was much too dominant. Even at just half a teaspoon it was so noticeable to me that I didn’t like it on toast. It was good, however, when my daughter used it on sourdough and topped it with fresh avocado. The slight vinegar flavor enhanced the avocado deliciously.
The batch I made without vinegar seemed perfect. The mouth-feel of this butter with or without the vinegar is creamy and all that a high-fat butter should be. It looks, cuts and spreads like butter. The flavor is creamy and very mild, almost like a slightly salted sweet butter. This was a winner for me. For the soy milk I used Trader Joe’s Organic Plain, which does have some sweetener in it. I’ll try with an unsweetened plain organic soy milk another time.
I keep my butter on the counter. I know that organic butter holds its shape better in the heat than processed butter, but both stay stable unless the temperature is in the 80’s. Coconut oil melts at 76F, and in my summertime Southern Californian kitchen, this vegan butter must be kept in the refrigerator. The butter is hard when needed, so the next batch I will take the author’s advice and swap out a tablespoon of coconut oil with regular oil to make it more spreadable.
I wanted to test the butter in cooking and baking. I melted it in a pan and cooked eggs and other breakfast items in it successfully. I used it on toast and on mashed potatoes with great success. The experiment with shortbread cookies went wrong, however, but I don’t think that that was the butter’s fault. These were lemon rosemary shortbread cookies, and contrary to my baking sense I followed the author’s (another blog) directions and didn’t sift the powdered sugar before adding it. There were lumps, therefore, in the batter and I mixed it extra to try and beat them out, which I believe was responsible for making the cookies tough. They were flavorful, but not crumbly. Oh well, I’ll just have to try again! The cookies rolled out, cut, and baked well, retaining their shape and performing as well as with cow’s butter.
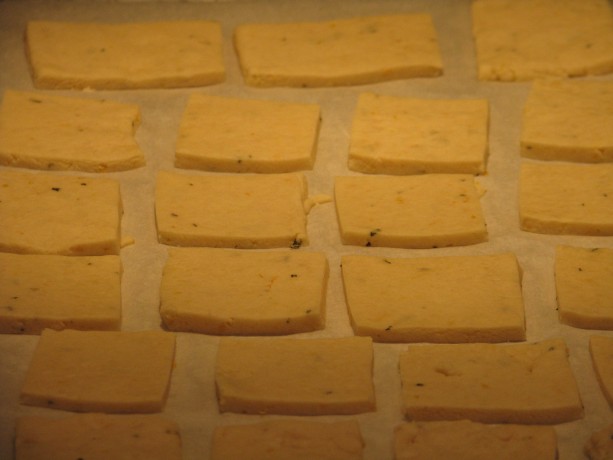
Shortbread didn’t spread using this butter, which was great. I don’t have a finished photo of the lemon-rosemary cookies because, well, they were eaten. As with all substitutions, there is always a difference and vegetarians and vegans have to embrace it. Of course fake bacon and ground ‘meat’ is not quite the same: the great part is that it is far more healthy for your body (lower fat, few preservatives if any, often organic, and not the pesticide-drenched and drugged animals that people eat) and doesn’t perpetuate the extreme cruelty to animals about which humans have become nonchalant. Yes, other animals aren’t kind when feeding off of other animals (those which aren’t vegetarians). Yet we as humans have the option the others don’t, to make eating choices.
Here is the basic revised recipe; please see the original blogpost on VeganBaking.net and give the options a try. I found xanthan gum from Bob’s Red Mill at my local grocery store, and liquid lecithin and coconut vinegar online through Amazon.com.
You can double or triple the recipe with no problem! Enjoy.
Recipe update: I’ve since made some changes to the recipe, exchanging some vegetable oil for some coconut oil for more spreadability, and adding a little more salt for a more satisfying (to me) taste when spread on toast. I’ve been using this butter for a month now, and have noted that: when melting in a hot pan it will brown faster than regular butter, so keep the temperature down, that it will melt and separate at room temperature (its summer now, so the kitchen is usually in the 70’s – in the winter it will be different) so I keep it in the refrigerator. I found butter stick molds that have the teaspoon markings along the side, so I’ve made 8x the original recipe and poured it into the butter molds, then wrapped each unmolded stick in wax paper and frozen them.
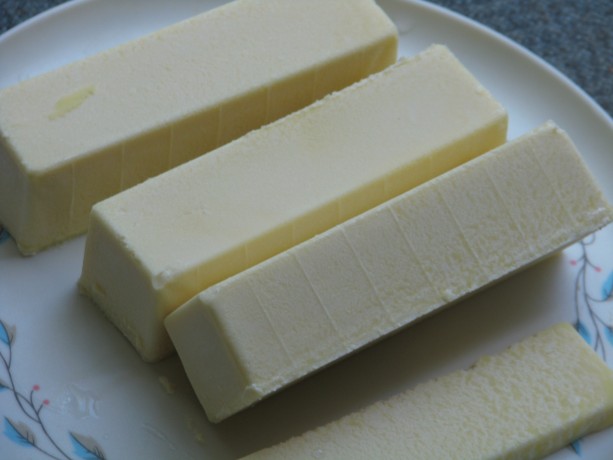
Vegan butter sticks with teaspoon markings along the side for ease in baking. I’ve also poured it back into the cleaned coconut oil jars and frozen them, keeping one in the refrigerator for unmeasured use. I’ve used it along with a non-dairy creamer in the Chocolate Ganache recipe and it is very chocolaty, but not as rich as the original. Part of that is due to the creamer; heavier creamer will produce creamier results, but in no way was it disappointing. It was very tasty, but not as heavy. When refrigerated it didn’t solidify as much as the other, so more chocolate might need to be added depending upon the type of creamer used but it was still spreadable and yummy.
Another Recipe Update:
I’ve been making the butter with unsweetened organic rice milk and it turns out well. At first it tasted too light to be satisfying, but when I had dairy butter at a restaurant it tasted greasy and heavy – my taste buds wanted the vegan butter! I found out that even when the kitchen is colder than the melting point of the coconut oil, it isn’t a good idea to leave the butter refrigerated because unlike dairy butter it will grow mold. The rice milk butter with the increased vegetable oil makes it perfectly usable from the refrigerator. I make sticks and freeze them in a freezer bag for baking and pour the rest into glass jars with screw-on caps for spreading. The jars are kept in the freezer until needed, then switched to the refrigerator. I’ve made biscuits, cookies, cakes, scones and breads with this butter, and with proper handling they all come out just fine. We offered both dairy and vegan butter to our holiday guests and they didn’t detect much of a difference. Since vegan butter is so much lower in calories, and coconut oil is so good for you, I don’t have to hesitate to use it. It is actually part of my weight maintenance program!
Ethical ButterAuthor: Mattie, at VeganBaking.netRecipe type: CondimentCuisine: VeganPrep time:Cook time:Total time:A wonderful vegan butter with no palm oil, but lots of options. My version is without curdling the soy milk. Please see the original excellent post for more explanations and options.Ingredients- ¼ cup + 2 teaspoons organic plain soy milk
- ¼ + ⅛ teaspoon salt (I increased the total salt to ½ t. for spreading butter)
- ½ cup + 2 Tablespoons + 1 teaspoon (130 grams) refined coconut oil, melted to room temp. (For more spreadability, I used ½ cup coconut oil and changed the 2T and 1 t to vegetable oil, along with the following 1 T for a total of 2 Tablespoons and 1 teaspoon vegetable oil.)
- 1 Tablespoon vegetable oil or light olive oil
- 1 teaspoon liquid soy lecithin or liquid sunflower lecithin or 2 ¼ teaspoons soy lecithin granules
- ¼ teaspoon xanthan gum or ½ + ⅛ teaspoon psyllium husk powder (I used xanthan gum)
Instructions- Combine soy milk and salt in a food processor or blender.
- Melt the coconut oil until it is just room temperature and barely melted.
- Add the coconut oil and the rest of the ingredients to the soy milk.
- Blend or process for about 2 minutes on low.
- Pour into ice cube trays, or into butter molds or trays.
- Freeze until firm, about an hour.
- Serve.
- Keep wrapped in refrigerator for a month, or frozen for a year.
- Makes one cup.
- Animals, Birding, Chickens, Gardening adventures, Heirloom Plants, Humor, Permaculture and Edible Forest Gardening Adventures, Photos, Ponds, Reptiles and Amphibians
Happy Easter!

Heirloom irises from my good friend Jean are blooming. 
A Western fence lizard suns and guards his territory atop a clary sage leaf. See the flash of blue under his chin to attract the ladies? 
This green calla lily is gorgeous. 
Framed by curly willow from the Withy Bird Hide, two drakes swim in the pond on Easter morning. 
Sweet peas are still blooming. They hold the permaculture precept of everything having three purposes: they are nitrogen fixers, they are edible, and they are gorgeous. 
A fancy drake who showed up this morning. 
The irises surrounding the pond are spectacular right now. Blue, dark blue and yellow flag. 
Baby bunny has been growing out his ears. He’s enjoying a warm dirt bath. 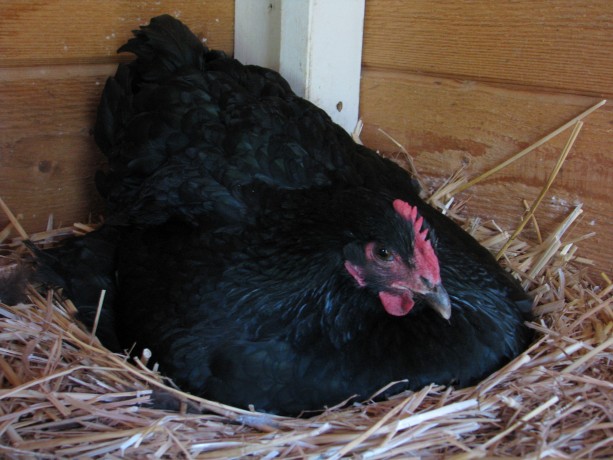
Mulan has gone broody. Such a large chicken puddles out over the wooden egg she’s trying to hatch. We’re feeding her an oatmeal mixture in a dish because she won’t come down during the day. 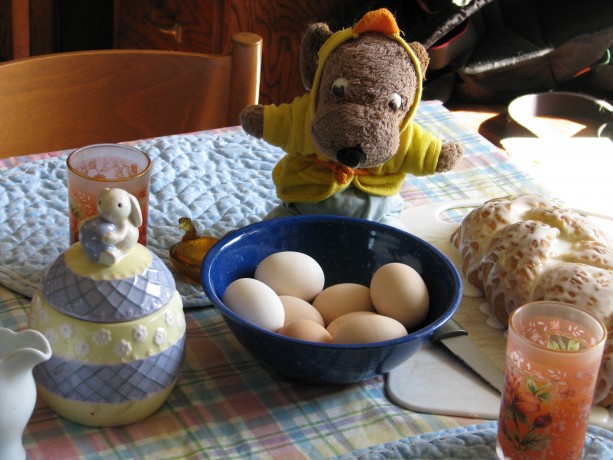
Easter breakfast. Hard boiled eggs, naturally colored by our hens, fresh tangerine juice, our traditional stollen from my mother’s recipe, and Peanut in his chicky robe ready to launch into the food. Peanut doesn’t act his age, of about 40+ years, but has traveled and been photographed extensively in Europe and Ecuador. Its nice that he wakes up for holidays. -
Spicy Chocolate Squash Bread

Cocoa + squash + habinero = YUM. My collegiate daughter needed a recipe to use up leftover frozen kabocha squash. She found a chocolate kabocha bread recipe, adapted it for ingredients she had on hand, and sent me the recipe. I’m such a proud foodie mom: this is the first recipe she’s sent to me. She had substituted yogurt for the oil, and only had cinnamon as a spice, but really liked the results. She said that it was kind of like hot chocolate in bread form; not too sweet and not too plain. Hot chocolate in bread form? I’m so there.
Today has been cold and a little rainy. My shoes and socks were wet from standing in wet grass trying to coerce my 100-lb tortoise back inside his heated room before he became too cold to move. I had some thawed pink banana squash puree leftover from making pumpkin scones for my son last weekend. It was so squash bread time.
I had all the spices, but I changed them up a little. I added some freshly ground nutmeg in place of some of the cinnamon. Due to conversations with others in my exercise class about eating fresh homegrown fruit with chili pepper and other warming spices sprinkled on them (spring fantasies!) I thought I’d heat up this recipe, too. Before Christmas I purchased some habinero powder at Old Town Spice Merchants in Temecula, and fell in love with their habinero sugar which they sprinkled over samples of dark chocolate brownies. I added some habinero powder to this recipe and it is fantastic.
The loaf took an hour and five minutes to bake. It was slightly crispy on the crust and dense, moist and dark on the inside. Yet it wasn’t cloyingly heavy or too wet. The cocoa flavor was satisfying; too often cocoa recipes taste as if the chocolate was just a coloring rather than a flavoring. This was good. The spices were just enough and not overpowering. The habinero powder was just right, making just a little heat in the mouth that really accented the chocolate flavor and warmed me up from the inside. I am freezing the rest of it, just so I don’t eat any more today. It was really wonderful, and it had vegetable in it, too! Thanks, daughter of mine!
I’m sure you could eat this with cream cheese, marscapone cheese, or dust it with powedered sugar, but it doesn’t need anything. Not even, apparently in my case, a fork or plate. So much for dieting today.
Spicy Chocolate Squash BreadAuthor: Diane and Miranda KennedyRecipe type: DessertPrep time:Cook time:Total time:Like spicy hot chocolate in bread form.Ingredients- 1½ cups all-purpose flour
- ⅓ cup unsweetened cocoa powder
- 1 teaspoon baking soda
- ½ teaspoon ground cinnamon
- ¼ teaspoon ground nutmeg
- ¼ teaspoon ground ginger
- ¼ teaspoon ground cloves
- ⅛ teaspoon habinero powder (or ¼ teaspoon if you like it spicier. It will be a slow warm heat in your mouth)
- ¼ teaspoon salt
- 1⅓ cups sugar
- ⅓ cup vegetable oil or plain yogurt
- 1 cup squash or pumpkin puree (or plain canned pumpkin)
- 1 large egg
Instructions- Preheat oven to 350 degrees F.
- Grease and lightly flour an 8½ x 4½ inch loafpan.
- In a medium bowl, sift together all the dry ingredients.
- In a large bowl combine the oil, puree and egg until well combined. Beat in dry ingredients until well blended. (If using electric mixer, beat on low speed. You don't want a lot of air in the batter).
- Pour batter into prepared pan.
- Bake 350 degrees F for 1 hour and five minutes, or until a toothpick stuck into the center comes out clean.
- Cool on a wire rack for fifteen minutes then cut around loaf and turn out onto a plate or wire rack.
- Serve warm, or any way you'd like to!
- (Options: serve with cream cheese, marscapone cheese, or dust with powdered sugar. It is also great drizzled with chocolate frosting (what isn't?) or with chocolate ganache. Both recipes can be found on my blogpost on Buttermilk Chocolate Ganache Cake).
-
Kamoodles: Cooking with Kamut Flour
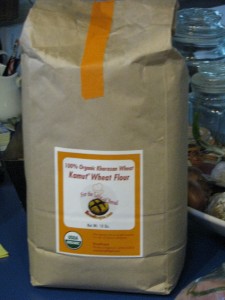
Organic Kamut flour A friend gifted me with a bag of Kamut® flour. Kamut® is the trademarked brand name for what is commonly known as khorasan
wheat, an ancient relative of modern durum wheat used by the ancient Egyptians which has finally made a comeback in popularity. It is a relative of duram wheat and very high in protein as well as trace ingredients such as magnesium, selenium and zinc. Kamut® has a buttery flavor and the grains can be cooked and eaten just like other grains, for breakfast, in addition to other foods as an extender, as a flavored filling, etc.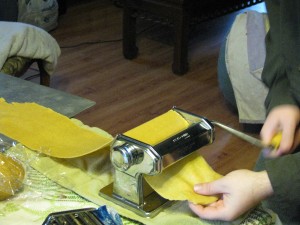
Rolling out kamut noodles Kamut® flour is a little heavier than processed white wheat flour, but much lighter than typical whole wheat flour. Therefore it may be used as a substitute for either flour without a sacrifice in flavor or texture.
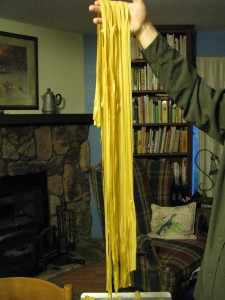
Very long noodles My son is visiting and we decided to use Kamut® flour in place of semolina.
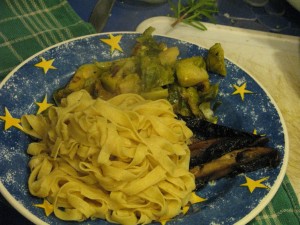
Kamoodles with portabella and broccoli. Kamut® noodles? Kamoodles!
KamoodlesAuthor: Diane KennedyRecipe type: Side DishCuisine: AmericanPrep time:Cook time:Total time:Serves: 6Kamut flour makes this side dish nutritious and delicious.Ingredients- Two cups organic kamut flour
- Three eggs
- Up to ¼ cup water as needed
- White flour for shaping
Instructions- Measure kamut flour into a large bowl.
- Mix eggs in a measuring cup or bowl until lightly combined.
- Make a well in the center of the flour and pour in eggs.
- Mix until completely combined.
- Form dough into a ball. If dough is too dry, add water a little at a time until dough sticks together enough to form a ball.
- Gently knead the dough a couple of minutes until it is slightly elastic.
- Wrap dough in plastic wrap and let sit for half an hour. If kept longer, refrigerate.
- Divide dough into quarters.
- Following the directions on your noodle machine, feed dough through repeating until it is at its thinnist level, then feed through cutter to make wide noodles.
- Hang noodles until all the dough is processed.
- Boil a large pot of lightly salted water (salt optional).
- When all kamoodles are cut, feed them gently into the boiling water and cook 2 - 3 minutes.
- Drain noodles.
- Serve with butter, or any other way you like to eat noodles.
The chapatis, which are the Indian version of tortillas or fry bread or pita bread, are simple and quick to make. With Kamut® flour they are far more nutritious. Besides, Kamut® chapatis is almost as fun to say as kamoodles!
Kamut chapatis For 12 chapatis, mix 2 1/3 cups Kamut® flour with a tablespoon of olive oil and up to 1 1/3 cup water until it sticks together. Form it into a dough ball. Allow it to rest for several minutes. Divide dough into twelve equal pieces. Heat a skillet on medium-high heat and add a scant teaspoon of olive oil. On a lightly floured board roll out the Kamut® chapatis to a 10-inch circle. When skillet is hot, transfer rolled-out chapatis to it and cook 3-4 minutes on each side then remove. They should develop slight brown marks from the skillet and may puff just a little.

Kamut chapatis with curry and avocado. Keep warm while you finish cooking the rest. Serve with butter, spreads, as a scoop for curry, in place of tortillas for Mexican food, and as a fold-over sandwich. Yum!
I’ve also very successfully substituted one cup of Kamut® flour for one of the two cups of regular flour in my Spiced Pumpkin Scones. Kamut® gave them a little grainier texture that was very appealing without making them heavy. Substituting all the regular flour with Kamut® flour in a yeast bread worked beautifully, too. The loaf isn’t at all heavy as it would be if I substituted whole wheat flour. Very nutty and buttery flavor. So yum!
- Animals, Books, Breads, Chickens, Compost, Gardening adventures, Giving, Health, Humor, Permaculture and Edible Forest Gardening Adventures, Pets, Recipes, Reptiles and Amphibians, Soil, Vegetables
The Life of Di, or Fall At My House
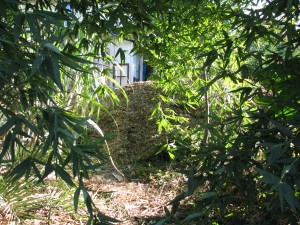
“And here’s another fine mess you’ve gotten me into!” I like to be involved with many projects at once. I picture my life as an opal, my birthstone, full of swirled colors and hues. I have several books going at once, projects chipped away at around the house, volunteer responsibilities strewn across my week, and far too many animals and acres to care for. When I’m exhausted I can spend a day on the couch reading with no trouble at all being the picture of laziness. Prior to Thanksgiving I underwent a skin cancer preventative treatment on my face and hands, which required applying a topical cream twice a day that brings suspicious cells to the surface and burns them off. By the end of the second week I was quite a mess, and then took another week to heal enough to be seen in public without alerting the zombie hunters. The treatment, needless to say, kept me from being in sunlight, therefore housebound. Always loving a clean, organized house but never actually completely cleaning or organizing, I figured I’d get some work done. I tried sorting about 15 boxes of photo albums left by my mother and grandmother… and got through one box before I had to stop. I wanted to bake bread, and I wanted to find something to do with the small amount of hops we harvested, so I experimented with a recipe that had a starter, sponge and rising that altogether took five days. The Turnipseed Sisters’ White Bread from the classic Bernard Clayton’s New Complete Book of Breads .

Turnipseed Sisters’ White Loaf starter made with hops. The starter really smelled like beer. Not in a pleasant way, either. However the bread was good, and baking was fun.

Good sandwich and toast bread. Just the extra carbs I needed for sitting on my butt for two weeks, right? Then I wanted to thin, clean and alphabetize the fiction section in my living room.

Books piled alphabetically… a little later there was a small avalanche. Yes, I have enough books in my house that they are in sections. Former school librarian and bookstore worker here. I haven’t done the non-fiction section as yet, which extends to most of the other rooms in the house. Maybe next year? I did a little writing, a lot of reading, surrounded by my elderly dog Sophie

Sophie enjoying good sleeps. who keeps returning from the brink of death to sleep about 23 hours a day, and one of my hens, Viola, who suddenly went lame in one leg.

Viola on a healing vacation. All advice was to cull her, but I thought that she pulled a muscle and hadn’t broken her leg, and being vegetarian I don’t eat my pets. Viola has been recuperating in a cage in the dining room, gaining strength in that leg, laying regular eggs, having full rein of the front yard, and crooning wonderfully. As I count wild birds for Cornell University’s Project Feederwatch, I keep an eye on the hen. The cats ignore her, thank goodness. I’ve quite enjoyed having a chicken in the house. Yep, I’m starting to be one of those kinds of aging ladies.
In between I’d spend time crawling under bushes to push and shove my 100-pound African spur thigh tortoise out of his hiding spot and into the heatlamp-warmed Rubbermaid house he shuns so that he wouldn’t catch cold in the chill damp nights. I always come out victorious, with him angry and begrudgingly warm, and with me wet, muddy, hair full of sticks and hands full of scratches. Does anyone have a life like this?

“I’m performing advanced trigonometry in my head, don’t bother me, Woman!” Finally my skin healed enough so that I was able to venture outdoors.
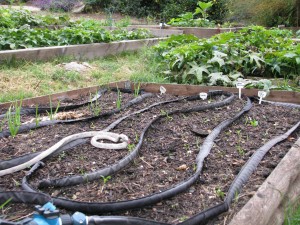
Garlic and seed sprouts guarded from birds by a rubber snake. I planted seeds of winter crops: collards, kale, garlic, onions, carrots, Brussels sprouts and broccoli rabe, and prepared raised beds for more.
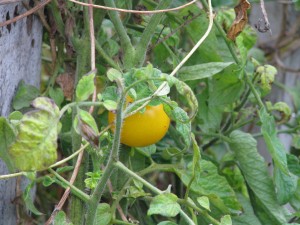
Yellow perfection tomatoes still ripening, as are the green zebra. I ordered organic pea, lupine and sweet pea seeds from Baker Creek Heirloom Seeds , all nitrogen-fixers to plant around the plant guilds.

Pepperoncini still producing. On Thanksgiving I hiked 1200 feet up Monserate Mountain in a record slow time; all that sitting and all that bread causing me to often stop and watch the slow holiday traffic on Hwy. 15, and be very glad that I was on a hike instead.
The neighbors had their annual tree butchering, paying exorbitant sums to have the same so-called landscapers come in and top their trees (shudder!) and thin others… for what reason I have no idea. Because being retired Orange County professionals they believe that trees need to be hacked back, contorted, and ruined? Possibly.
Please, please, please, friends don’t let friends top trees! Find an arborist who trims trees with an eye to their health and long-term growth and immediate beauty. A well-pruned tree is lovely, even just after pruning. A topped tree is brutal and ugly.

A topped coral tree. Ugh! Anyway, the upside is that I claimed all the chips, giving new life to the ravaged trees as mulch for my pathways. Two truckloads were delivered. I think I have enough for the whole property.
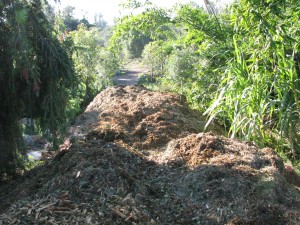
“The bear went over the mountain to see what he could see. He saw another mountain…” How to spread it? Yep, one wheelbarrow full at a time.

One wheelbarrow at a time. I can now condition myself for more hiking and weight lifting without leaving the property. The heaps have a lot of pine in them (they thinned the pine trees!???) so there is a pleasant Christmassy smell emanating from the heaps.
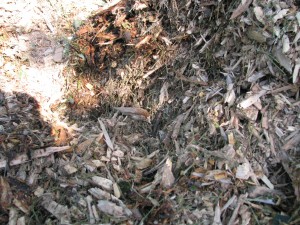
Hot steamy mulch. They are also very high nitrogen and were hot in the center on the second day and this morning were steaming right after our brief rain shower. Mulch piles can catch fire; when I worked for San Diego County Parks we rangers would joke about who had been called out by the fire department when their newly delivered mulch pile had caught fire in the night.
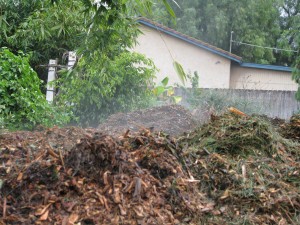
Steam from the mulch mountains. I stood on it just now and steam went up my pant legs and warmed me up! I also received a gift of seven 15-gallon nursery containers of llama poo!

The wealth of llama poo. Hot diggity! Early Christmas: My diamonds are round and brown, thank-you. I layered them in the compost heap and am ready for more.
I also wholeheartedly participated in Small Business Saturday, finding happy locals and crossing paths with friends and aquaintences at several stores. I received my first Merry Christmas from a man at Myrtle Creek Nursery’s parking lot as he waited for his son’s family to pick out a Christmas tree. I do love this town.
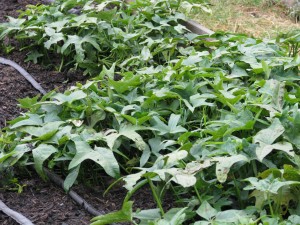
Sweet potatoes ready to harvest for Christmas dinner. That catches me up. Lots of projects, lots of volunteering, lots of cleaning up to do before my daughter comes home for the holidays and despairs at my bachelorette living. Lots of mulch to move. Lots of really great friends. Lots of sunscreen to wear. Lots to be thankful for.
-
Two Sure-fire Zucchini Recipes
Zucchini plants are like cats: They both look harmless when small, so you think the more the merrier. One plant is always enough, but it is hard to plant just one seed in case it doesn’t come up. Then the sprouts are hard to thin.. what if something eats it? Then before you know it, there are five enormous plants growing giant green clubs in the dead of night, just after you’ve checked all the plants. Well, that’s my situation anyway. Too many cats; too many zucchinis. When there are enough all at one time, we’re taking them (the zucchinis, not the cats) to the Fallbrook Food Pantry along with pumpkins and tomatoes. Until then, we’re exploring new ways to eat them. And I refuse to sully cheesecake with zucchini! (yes, there is such a recipe!).
My son who is studying Culinary Arts at the University of Hawaii sent me a link to smittenkitchen.com with an exceptional zucchini pancake recipe… not sweet, very light and completely tasty. I’ll include my version. But first I want to explain my ‘discovery’, which everyone but me probably knows about anyway.
SAUTEED ZUCCHINI
I had grated zucchini for bread and had some left over. It was dinnertime and I was alone, so I experimented. I heated a skillet with a little olive oil in it, threw in the grated, undrained zucchini, and stirred it around on medium-high heat for about five minutes. When it was beginning to wilt and brown a little on the bottom, I sprinkled sesame oil on it lightly, and then gave it a touch of Bragg’s Amino Acids, which I use for many things. A light soy sauce may substitute, but Bragg’s is high in nutrition, low in salt and a wonderful flavoring. Buy it online or in health food stores. The zucchini came out tasty and with a mouth-feel of wet wide noodles. It was fantastic. I’ve since made it for my daughter a couple of times, and each time we wanted more! Imagine that! On the plus side, it used up a medium zucchini.
You really must give these pancakes a try.
Fabulous Zucchini PancakesAuthor: Diane C. Kennedy (adapted from smittenkitchen.com)Recipe type: BreakfastPrep time:Cook time:Total time:Serves: 4A light, flavorful, really good pancake that uses up a lot of zucchini and tastes like zucchini bread.Ingredients- 2 large eggs
- 3 tablespoons olive oil
- 2 tablespoons sugar (optional)
- ¼ cup buttermilk or soured milk
- ½ teaspoon vanilla extract
- 2 cups shredded zucchini
- 1 cup all-purpose flour
- ¼ teaspoon table salt
- 1 teaspoon baking soda
- 1 teaspoon ground cinnamon
- ⅛ teaspoon ground or freshly grated nutmeg
- ¼ cup semi-sweet chocolate chips (optional)
- Oil, for coating skillet
Instructions- In a large bowl whisk eggs, olive oil, sugar, buttermilk and vanilla until smooth.
- Stir in zucchini.
- In a smaller bowl, combine flour, salt, baking soda, cinnamon and nutmeg.
- Stir dry ingredients into zucchini batter, mixing until just combined.
- Stir in chocolate chips.
- Heat oil or butter in a large, heavy skillet over medium heat.
- Scoop ¼-cup rounds of batter in pan so they do not touch.
- Cook until bubbles appear on the surface, about 2 to 3 minutes.
- Flip pancakes and cook another minute or two.
- Keep pancakes warm in on a tray in the oven set on low or in a toaster oven.
- Repeat with remaining batter.
- Serve warm with or without traditional pancake toppings.
- Pancakes freeze well.
-
Spiced Pumpkin Scones
Spiced Pumpkin SconesAuthor: Diane C. KennedyRecipe type: BreadPrep time:Cook time:Total time:Serves: 6Tender, healthy, satisfying scones for breakfast, break or dessert.Ingredients- 2 cups all-purpose flour
- ¾ cup granulated sugar
- 1 tablespoon baking powder
- ¼ teaspoon salt
- ½ teaspoon ground cinnamon
- ½ teaspoon ground nutmeg
- ½ teaspoon ground ginger
- ¼ teaspoon ground cloves
- ½ cup pureed pumpkin, canned or fresh (make sure fresh is drained)
- 3 tablespoons milk or milk substitute
- 1 large egg
- 6 tablespoons cold butter, cubed
- For Icing (optional):
- ¾ cup powdered sugar, sifted
- 1-2 tablespoons milk or milk substitute
- ¼ teaspoon ground cinnamon
- ⅛ teaspoon ground nutmeg
- pinch each of ground ginger and ground cloves
Instructions- Preheat oven to 425 degrees F.
- Grease a cookie sheet and dust with flour
- In a large bowl, whisk together the flour, sugar, baking powder, salt and spices.
- In a separate bowl, whisk together the egg, milk and pumpkin.
- Cut butter into dry ingredients using a pastry cutter, forks or your fingers, until there are no butter chunks left, and it is like fine crumbs.
- Fold the wet ingredients into the dry.
- Form dough into a ball. Dough should be sticky, but not stick to baking sheet, so add a little more flour if necessary.
- Pat dough onto prepared baking sheet into 9x3x1" rectangle.
- Using a greased knife (spray with cooking spray), cut rectangle into thirds.
- Cut each third diagonally to form a total of six rectangles. (If you want smaller ones, cut these in half to form twelve).
- Gently pull each section apart so that there is a half an inch between each scone (for even baking).
- (Alternatively, form dough into large circle 1" high, and cut crossways into wedges, and pull slightly apart).
- For six large scones, bake 14 - 16 minutes until slightly browned; for twelve smaller scones, bake 10 - 12 minutes until slightly browned.
- Remove scones to wire cooling tray set over a plate or piece of foil, and cool completely.
- Meanwhile, mix together icing ingredients until smooth, if using.
- Drizzle icing over cooled scones and serve.
- Serve plain, with marscapone cheese, cream cheese or butter.
What to do with leftover pumpkin? Here is the perfect thing, spiced pumpkin scones. Hearty without being heavy, healthy without being icky, these scones are more than just a morning treat. I used fresh pureed sugar-baby pumpkin, but canned pumpkin (unseasoned) works fine, too. The dough is a little damp, so instead of cutting the scones and removing them to a baking sheet, it is easier to form the scone dough right on a floured baking sheet and then cut them. The way I show how to do it makes large scones; you may cut them smaller and reduce the baking time. The scones are great without the icing. Eat them plain, with butter or best of all, with a smear of marscapone cheese or cream cheese. They also keep well for the next day, and freeze beautifully. Wrap them individually in foil and freeze, and when defrosted they are just as good as fresh. -
Popovers (and a Pumpkin Turkey Cake Story)
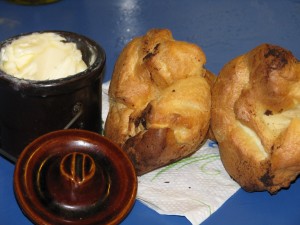
Serve Popovers Hot Popovers are usually thought of as a type of roll to make with roast beef, using the suet as the shortening and using the popovers to sop up the beef ‘juices’. In the immortal words of Penfold of the Danger Mouse cartoons, “Oh, ick!” I’ve made vegetarian popovers for many years and they are not only extremely easy to make, but fun to eat. My recipe contains dairy products, but any vegan cook could whip some up with rice or soy milk.
Popovers are made from a simple batter which relies on very high heat and steam to make them puff. There are two baking temperatures, the first is high to create steam for the lift-off, so to speak, and the second is moderate for the cooking through to the tender insides. For the last few minutes of baking you should stick each popover with a fork to release the steam, otherwise they’ll end up soggy.
You have to eat popovers right away, with as much butter as your conscience will allow. Or use them to sop up vegetarian gravy. You can also add cinnamon or nutmeg into the batter and serve them for breakfast.
For years I made popovers in oven-proof custard dishes. They didn’t rise as high and were wider than normal, but me and my children managed to choke them down pretty well.

Oven-proof custard cup Then I bought myself a real popover pan. I’m a real sucker for shaped baking pans. I think I could keep Nordicware in business if I didn’t control myself.

Popover Pan I don’t even bake very much anymore, but I do love my castle bundt pan, or turkey cake pan that my daughter bought me (there is a story there. I’ll tell it later*.) There are worse vices. I think. The popovers in the popover pan look terrific and are very impressive, but they eat just the same way that the custard cup ones did. So, go make some popovers! What are you waiting for?

All popped and waiting for butter! PopoversAuthor: Diane KennedyRecipe type: BreadPrep time:Cook time:Total time:Serves: 6Popovers without the suet, for lacto-ovo vegetarians and the world!Ingredients- 1 tablespoon butter or vegetable oil
- 2 eggs
- 1 cup milk
- 1 tablespoon vegetable oil
- 1 cup all-purpose flour
- ¼ teaspoon freshly ground pepper (opt.)
- ½ teaspoon ground cinnamon or nutmeg if you are making breakfast popovers)
Instructions- Heat oven to 400 degrees F.
- Put ½ teaspoon of butter or oil in each of six 6-ounce oven-proof custard cups or in each cup of a popover pan. Coat the bottom and sides.
- Place custard cups on a cookie sheet, if using.
- In a blender, mixer, or in a bowl with a wire whisk, beat eggs, milk and oil until combined. Beat to blend; don't incorporate too much air into the batter.
- Add flour (and spice if using) and combine until smooth.
- Divide batter between prepared cups; each should be half full.
- Bake for twenty minutes in 400 degree oven, then reduce the heat to 350 and bake fifteen minutes more.
- Turn oven off.
- With the tip of a knife or a fork, prick the tops of the popovers and allow them to stay in the oven for about five minutes more. Popovers should be firm and crisp on the outside, and tender on the inside.
- Remove popovers from oven; turn out of pan or cups and serve immediately.
- Makes six.
* Okay, so here’s the turkey cake story. My daughter gave me this fabulous turkey cake mold last year. I decided to have Thanksgiving early with my son, then fly to her university to have Thanksgiving with her. I made most of the meal and packed it up in my carry-on (no liquids!). After some debate with myself, I caved in to my sillier side and baked a pumpkin cake in the turkey pan and sandwiched the sides together with buttercream frosting. It looked perfect! I wrapped that sucker up in lots of plastic wrap, stuck in on top in my carry-on, and headed for Carlsbad airport.Flying out of a small airport is the only way to go. Small lines, easy parking, and a not-so-hostile security. When my carry-on went through the X-ray machine, I wasn’t surprised when they pulled it off and called me over. I explained to the very nice female officer that the dark blob in my bag was a pumpkin cake shaped like a turkey. She said that they’d have to check it again, which they did. She and another security officer had a good laugh at the image and when she brought it back to me she said that in profile it looked exactly like a small real turkey on the screen. Then much more seriously she asked if I was going to change planes on my trip. When I told her that I was, in Los Angeles, she quickly advised, “Don’t go out of the security area there!” I don’t think the Los Angeles airport security force, on a high-risk day-before Thanksgiving holiday, would feel so friendly towards my turkey cake.
