Vegetarian
-
Popovers (and a Pumpkin Turkey Cake Story)
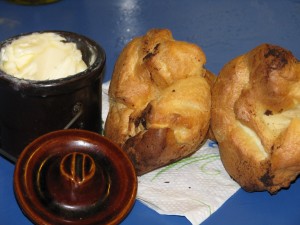
Serve Popovers Hot Popovers are usually thought of as a type of roll to make with roast beef, using the suet as the shortening and using the popovers to sop up the beef ‘juices’. In the immortal words of Penfold of the Danger Mouse cartoons, “Oh, ick!” I’ve made vegetarian popovers for many years and they are not only extremely easy to make, but fun to eat. My recipe contains dairy products, but any vegan cook could whip some up with rice or soy milk.
Popovers are made from a simple batter which relies on very high heat and steam to make them puff. There are two baking temperatures, the first is high to create steam for the lift-off, so to speak, and the second is moderate for the cooking through to the tender insides. For the last few minutes of baking you should stick each popover with a fork to release the steam, otherwise they’ll end up soggy.
You have to eat popovers right away, with as much butter as your conscience will allow. Or use them to sop up vegetarian gravy. You can also add cinnamon or nutmeg into the batter and serve them for breakfast.
For years I made popovers in oven-proof custard dishes. They didn’t rise as high and were wider than normal, but me and my children managed to choke them down pretty well.

Oven-proof custard cup Then I bought myself a real popover pan. I’m a real sucker for shaped baking pans. I think I could keep Nordicware in business if I didn’t control myself.
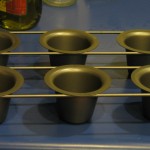
Popover Pan I don’t even bake very much anymore, but I do love my castle bundt pan, or turkey cake pan that my daughter bought me (there is a story there. I’ll tell it later*.) There are worse vices. I think. The popovers in the popover pan look terrific and are very impressive, but they eat just the same way that the custard cup ones did. So, go make some popovers! What are you waiting for?
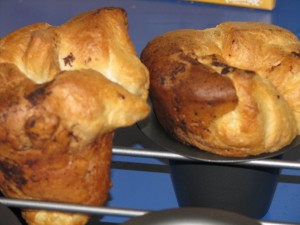
All popped and waiting for butter! PopoversAuthor: Diane KennedyRecipe type: BreadPrep time:Cook time:Total time:Serves: 6Popovers without the suet, for lacto-ovo vegetarians and the world!Ingredients- 1 tablespoon butter or vegetable oil
- 2 eggs
- 1 cup milk
- 1 tablespoon vegetable oil
- 1 cup all-purpose flour
- ¼ teaspoon freshly ground pepper (opt.)
- ½ teaspoon ground cinnamon or nutmeg if you are making breakfast popovers)
Instructions- Heat oven to 400 degrees F.
- Put ½ teaspoon of butter or oil in each of six 6-ounce oven-proof custard cups or in each cup of a popover pan. Coat the bottom and sides.
- Place custard cups on a cookie sheet, if using.
- In a blender, mixer, or in a bowl with a wire whisk, beat eggs, milk and oil until combined. Beat to blend; don't incorporate too much air into the batter.
- Add flour (and spice if using) and combine until smooth.
- Divide batter between prepared cups; each should be half full.
- Bake for twenty minutes in 400 degree oven, then reduce the heat to 350 and bake fifteen minutes more.
- Turn oven off.
- With the tip of a knife or a fork, prick the tops of the popovers and allow them to stay in the oven for about five minutes more. Popovers should be firm and crisp on the outside, and tender on the inside.
- Remove popovers from oven; turn out of pan or cups and serve immediately.
- Makes six.
* Okay, so here’s the turkey cake story. My daughter gave me this fabulous turkey cake mold last year. I decided to have Thanksgiving early with my son, then fly to her university to have Thanksgiving with her. I made most of the meal and packed it up in my carry-on (no liquids!). After some debate with myself, I caved in to my sillier side and baked a pumpkin cake in the turkey pan and sandwiched the sides together with buttercream frosting. It looked perfect! I wrapped that sucker up in lots of plastic wrap, stuck in on top in my carry-on, and headed for Carlsbad airport.Flying out of a small airport is the only way to go. Small lines, easy parking, and a not-so-hostile security. When my carry-on went through the X-ray machine, I wasn’t surprised when they pulled it off and called me over. I explained to the very nice female officer that the dark blob in my bag was a pumpkin cake shaped like a turkey. She said that they’d have to check it again, which they did. She and another security officer had a good laugh at the image and when she brought it back to me she said that in profile it looked exactly like a small real turkey on the screen. Then much more seriously she asked if I was going to change planes on my trip. When I told her that I was, in Los Angeles, she quickly advised, “Don’t go out of the security area there!” I don’t think the Los Angeles airport security force, on a high-risk day-before Thanksgiving holiday, would feel so friendly towards my turkey cake.
-
Plantain Chips, or Tostones

Bananas versus Plantains A couple of years ago my daughter and I enjoyed a five-day birding tour of the high country in Ecuador, then an eight-day tour of the Galapagos islands. Being vegetarian wasn’t a challenge there; we ate very well and enjoyed foods that we hadn’t encountered before. One of the foods that was in many meals was plantain. Plantain around here means the lawn and stream-side weed that helps treat stinging nettle and insect bites. However plantain the fruit look like bananas, but are prepared very differently. High in iron, potassium and fiber, they are very versitile and often used in recipes instead of potatoes.
Plantains can be used in three stages of ripeness. When they are green they are starchy and hard to the touch. They are often boiled and mashed like potatoes. When they are yellow, they are sweeter as the starch has converted to sugar, but still not soft and are difficult to peel. When they are black, but not mushy, they are sweetest.
A common snack in South America and also in Africa are plantain chips. In Ecuador they are called tostones and sold in bags like potato chips. They are very easy to make, and very yummy to eat. Photos follow the recipe.
Plantain Chips, or TostonesAuthor: Diane KennedyRecipe type: SnackPrep time:Cook time:Total time:Serves: 2-3Fruit snack chip found in South America and Africa.Ingredients- Three plantains, yellow or slightly black
- Oil for frying
- Salt.
Instructions- Boil a small pot of water and submerge the whole unpeeled plantains for several minutes. The skins may begin to crack.
- Remove from boiling water and allow to cool.
- Peel the plantains and slice into ¾ inch disks.
- Heat enough oil on medium-high heat in a large skillet to cover the bottom.
- Lay sliced plantains in the oil and fry for about three minutes. They will be soft. Remove from oil and place on a plate lined with paper towels.
- Keep the oil temperature the same.
- Using the bottom of a glass, flatten the softened plantains so that they are very thin. Sliding a metal spatula under each chip when smashing helps. (A Puerto Rican version has you dip the disks into cold water just before refrying, to make them crisper. It would also make the oil splashier.)
- Lay the flattened disks back into the oil and fry for another three minutes or so.
- Remove the now crisp disks to a paper towel for draining.
- They will crisp even more as they cool slightly.
- Eat as is, or lightly salt, or sprinkle with chili-lime powder.
- They are very good with dip, too.
- Makes about thirty chips.

Scald whole plantains to make peeling easy 
Peel cooled plantains 
Using a spatula under the plantain slice helps when squashing with a glass 
Fry slices a second time .

Nom! -
Taking the “Ew!” out of Tofu

Working Tofu Magic I’ve been an ethical vegetarian for seventeen years, raising both my children without animal protein as well. Believe you me, packaged vegetarian foods have come a looonng way in palatability. There is a whole new world of packaging rife with misspellings and quotation marks, such as “chickn” and “bakon”, just to make sure that no hen or pig will sue the company for false representation. Many vegetarian options were simply god-awful to eat; some still are. It is still hard to find products that aren’t filled with pieces of red and green peppers (ick!), whose flavor permeate the rest of the food making it disgusting if it had been palatable at all in the beginning.
There are wonderful meat substitutes that can vary a menu and add protein, and the ability to create mock meat has become an art and can be found in many restaurants, especially Thai or Chinese. I order several times a year from May Wah in New York, who sells mock meats created in Taiwan. Morningstar Farms makes wonderful standards such as fake bacon, sausage links and patties, chicken strips and meatless crumbles (like ground beef).

A host of good pseudo-meat products When my daughter and I toured England four years ago, the popular vegetarian option on all the menus that year was mushroom risotto. We ate quite a lot of mushroom risotto, as well as some very strange stuffed onions which were stuffed… with more onions.
Although there are many interesting varieties of fake meats, the least expensive and easiest way to provide extra protein to your diet (other than beans, kale and dairy products, etc.) is to learn how to prepare tofu.
Tofu is prepared soybean curd. It comes either in a water bath tub which must be refrigerated or in asceptic pouches which can be stored at room temperature. On the label you’ll see that it comes in ‘soft’, ‘firm’ and ‘extra firm’ for different uses. Most beginners at eating tofu say that it has no flavor and it just soaks up the gravy and seasonings it is cooked with. Not so. Fresh tofu has a delicate, fresh flavor that is available to a palate that is not overly spoiled by too much salt and seasonings.

Types of tofu I’ve grown to like the soft tofu as much as the firm, cooking it so that the outside has a crisp texture and the inside is smooth, and that is the recipe I’ll give to you shortly. For those who want something chewier, there is a great trick to make tofu more meat-like. Freeze it! This works best with firm or extra-firm tofu that is in a water bath tub. Freeze it, then thaw it out, press out the water, slice it however you want and throw it into whatever you are making. It is much more like a sponge and has more texture.
For fresh or thawed tofu, you should drain it. Pressing it is easy and can be done while you are gathering the rest of the ingredients for your meal. Just put a plate on top of a cake of tofu, which is on a cutting board or plate by a sink, and set a heavy can or two on top.

Nice hat You’ll be amazed at how much water runs off. If you happen to own a Japanese pickle press (you don’t? Oh, you should!) it is really easy to press tofu.

Say 'Pickle Press' ten times fast. Go! I bought mine at Green Apple Japanese Market in Oceanside for about five dollars. The screw press holds the vegetables down into the brine, or acts as a torture device for tofu. If you press thawed tofu, it’s texture becomes so spongy that it doesn’t easily fall apart and you can squish it down pretty far! It’s fun!
A simple way to prepare tofu is to press it for no less than five minutes, slice it, and pan fry it.

Sliced tofu I use a combination of olive oil (because it is one of the most recommended foods that you can eat, and you should have about two tablespoons a day!), sesame oil for flavor, and a product called Bragg’s Amino Acids. It is similar to soy sauce or tahini sauce, but is far less salty and very healthy, providing extra amino acids to your diet. I buy it at health food stores such as Henry’s Marketplace.

Tofu and his cooking buddies If you aren’t going to go run out and buy some right now (whyever not? Pick up a pickle press while you’re out!) use a little tahini sauce, or very lite soy sauce. As these sauces cook, the salt condenses and overpowers the flavor of the foods. So, to one cake of sliced tofu, I put about two tablespoons olive oil, half a tablespoon sesame oil and one tablespoon Bragg’s Amino Acids in a frying pan and heat it to medium-high. I mix them together to cover the bottom of the pan and set in the tofu slices. The more moisture in the tofu, the more it will splatter, so I turn up the heat a little more after setting the slices in the pan. I also use a splatter guard.

Cook slices in pan with splatter screen The slices should sizzle. Cook for about ten minutes, then turn them for another five. They should be light brown. Add them to vegetables, serve them seperately or top a bowl of noodle soup with them. A varient on this recipe is to use extra-firm tofu, well drained, sliced into smaller pieces and cooked at a higher temperature for a little longer. The pieces become crispy… mmmmm!
You can add soft tofu into smoothies or puddings, or scramble them to make something that really doesn’t taste at all like eggs but can be very tasty as well as nutritious with the right seasonings.
So don’t be afraid of your tofu. Buy it as fresh as you can (there is a tofu maker in San Diego!) and play around with it. Look for tofu that specifies non-GMO soybeans. There are so many ways to prepare it, but this method is quick and simple for busy people, and very tasty, too!
-
How to Blanch

Ice Bath When preparing fresh vegetables for the freezer, the best way to do it is to blanch them. Canning vegetables is another method of storage that doesn’t rely on electricity to keep fresh, but I’m not going into canning here. For the freezer storage method, clean the vegetables (which is the most time-consuming part of the whole process. Turn on an audiobook or watch the birds out the window while you work!), then briefly submerge portions in boiling water for a couple of minutes. Immediately plunge them into an ice bath.

All You Need to Blanch 
Blanching Swiss Chard 
If You Have a Lot, Use a Larger Pot! The quick cooking softens them and sets their color, and the ice stops the cooking process.

Swiss Chard in Ice Bath 
Chard in boiling water, ice water, and awaiting blanching Then you dry the vegetables and freeze them. To dry them off, you can spread them in clean dish towels and squeeze or blot them dry, or you can drag out that old salad spinner that has lived in the cupboard for twenty years and put it to good use. If the veggies are pieces, then for ease of use you separate them on a cookie sheet and freeze for about half an hour or less, then pour them into freezer containers. For clumps, such as with Swiss chard, spinach, kale or other leafy greens, spread them out as thinly as you can on a cookie sheet and freeze, then break up and put into freezer containers. When you go to use them they won’t be frozen into one big blob, and you can use what you want to and reseal. Be sure to mark the container with the date.

Frozen Bagged Sugar Peas I’ve just had an enormous snow pea harvest, as well as three plastic grocery bags stuffed full of Swiss chard. To save water, I cleaned all the chard and a plastic grocery bag half full of snow peas, then blanched the peas first and then the chard. Besides washing the peas and chard (look back a few posts about how to cook Swiss chard), the peas had their stems pinched off and any tough vein stripped from the sides. The chard was de-stemmed and torn up. All this preparation might seem to be too much work. However, I have frozen freshly grown organic vegetables whenever I want them, and there is nothing… I repeat nothing… so good as to eat produce you raised yourself and to feed all that love and care and work and sunshine to your family.
When finished you’ll have a lot of dark water. Don’t throw it out! It is heavy with vitamins from the produce. Some hard-core enthusiasts would add it to soups or smoothies, or drink it. I cool it and water my plants with it. I try to be healthy, but some things are just going too far!
- Animals, Bees, Gardening adventures, Permaculture and Edible Forest Gardening Adventures, Photos, Vegetarian
Moving Bees

Honeycomb with Capped Cells Backyard beekeeping is catching on in the United States, and there is more pressure on local governments to relax laws that prevent people from doing so. There are many misconceptions about beekeeping, and many keepers treat the bees cruelly in their pursuit of bee products. Bees are honey hoarders, so taking some honey from a hive isn’t going to do them harm. Taking too much starves the hive during non-pollen times and is cruel. Bees are complex, fascinating, and are disappearing for unknown reasons. The most evidence to explain Colony Collapse Disorder links it to a combination of Genetically Modified crops, pesticides and herbicides, and the waves from cell phone and power towers. In other words, we are screwing them up, and we will suffer for it.
About six years ago, a bee swarm set up house in an old couch I had outdoors for my dogs to lay on. They stopped laying on it. I left the hive until I had to get rid of the couch. I was writing for the magazine Edible San Diego and interviewed a couple who were beekeepers (http://www.ediblecommunities.com/sandiego/pages/articles/summer08/secretDances.pdf ). They came over and helped me move the hive. Actually, I took photos and watched as they worked as a team. When they turned the couch over, the honeycomb hanging in contoured patterns from the springs was incredibly beautiful. I thought at the time that I understood organic beekeeping, but I doubted many of the things that I was hearing. Since then, I’ve learned a lot more about working with bees without doing harm. I glean a lot of information from Organicbeekeepers@yahoogroups.com , which is a listserve that fields questions about natural beekeeping.

What Was Under the Couch 
Comb and Bees around Couch Springs That hive was put in Langstroth boxes and my daughter and I kept them for several years. This last December during the same week, this hive and a swarm that had settled in my shed wall both disappeared. Bees don’t die in their hives if they can help it, and for both hives to abscond was strange, so it sounds like Colony Collapse. Since then I’ve planted a Bee Garden in the lower half of my property, flush with flowering plants, particularly in the color blue, that bees love and that flower at differnent times of the year. I also had a couple of Top Bar Hives built to accompany the Langstroth hive which is the American standard hive you see everywhere. I’ll talk about TBHs in another post. A friend had a swarm in a stack of enormous tree-sized black plastic nursery containers, and I took the opportunity to move them to my new bee garden.The best time to move a hive of bees is after dark. Bees are all home at that time, and they don’t fly. They will crawl, however, so you have to watch your pant legs. The stack of containers was far heavier than I had anticipated, and getting them onto the back of my truck without jolting the hive too badly (don’t want to kill the queen) was more than what we had bargained for. However it was done, roped on, and I made my unusual journey back to my house… not that far away, thank goodness!
Bees at Night are a Delight My son and I off loaded the heavy thing and left it in front of the Langstroth hive where the colony would be moved to. That way the bees could familiarize themselves with their surroundings and mark pollen-gathering sites while still in their comb. The other day I took apart the containers and moved the colony into the hive. It was a good thing that I did because the comb was so convoluted that the swarm would probably have suffered soon. Bees build comb hanging down from a surface, securing it to sides if it is available. They do this by festooning, which is where they hold on to each other’s legs across and down, and make wax from bodily secretions into linked chambers in perfect distances apart. The containers had been tipped over, stood up and moved over the roughly year and a half that the swarm inhabited them, and the comb was proof of it. The following image is of the container on its side.

Inside the Container 
Bees on Underside of Second Container It wasn’t a large hive, only about 15,000 bees. A large colony like what was in my couch could contain 30,000 to 60,000 bees during peak pollen season.
Feeling awful about having to disrupt the bees, but knowing that I was actually helping them (ants were also getting into their hive), I began to cut out the comb, looking for larvae, and attaching it to frames that would fit into the Langs. To do this you need a knife, empty frames and pieces of pre-cut wire, rubber bands, or I’ve heard, those jaw-like hair clips. All your equipment should be ready to go because it is very, very hot in the bee suit, the bees are angry with you and the more time you spend the more harmful for them, and your gloves are covered in honey and you stick to everything that you touch. When bees are under attack they send out a pheramone (which smells a little like banana) telling the returning workers that there is trouble. When they sting, they also release a smell that tells other bees that there is an intruder. However, it also alerts bees from other hives that there is a ruckus, and they are attracted so they can try to rob the hive of honey. Very much like looters taking advantage of an emergency.

Being Gentle 
Carefully cutting out comb My son was nice enough to take these photos, up until the bees took exception to paparazzi and stung him on the end of his nose. Fortunately he doesn’t swell up.
Honey Dripping from Comb I do use a smoker. Smoke doesn’t calm the bees, it just makes them order their priorities away from attacking you. They think that fire is imminent, so they begin gorging themselves with honey in an attempt to save as much food as possible in the event of hive destruction. I use only a little smoke because too much hurts the bees and doesn’t make them eat any faster. Mostly the smoke ends up blowing in my face the whole time. I used to not have any reaction to bee stings, but in the last couple of years I develop a large swelling with blisters, so I wear the full bee suit with thick clothes underneath despite the heat, rubber bands around the pant legs or boots, I use smoke and take allergy medication before I begin (I’m usually sneezing from hayfever anyway so it helps keep my nose from running while I’m suited up.)

Placing Cut Comb onto Frames The comb must be cut to fit, hanging the same way it did originally, and must be attached so that it hangs evenly. Otherwise the bees will attach it to the next frame with burr comb (comb that is used to attach honeycomb to support surfaces) and it will be hard to later remove the frames for examination without harming the bees and brood.

Placing Comb Into Hive Comb with brood goes into the middle of the bottom box, which is larger and called a brood box. A couple of frames with honeycomb go on either side of the brood for insulation and food. The frames are spaced evenly… bees like a particular width between combs. In the second box which is shallower, called a super, more honeycomb goes in along with enough frames to fill the box. Frames are traditionally fitted with pre-made wax comb on which the bees build more comb, ensuring that the comb is straight and giving them more time into honey production rather than comb production.

Pre-formed wax foundation in a frame Some use a plastic comb. Also, if you are extracting honey with a centrafugal extractor, the pre-made comb doesn’t break off as easily as regular comb, and it can be re-used. I’ve always wondered about this, since I’m not a large-scale honey producer and am mostly interested in giving the bees safe harbor, although I do like honey and pollination. I’ve recently learned from a seminar from the Backwards Beekeepers (http://beehuman.blogspot.com/) in Los Angeles that using empty frames is just fine. Giving the bees a place to start, like a thin line of beeswax or a popsicle stick helps. For these first two boxes I put in pre-formed wax frames… just a couple… between the moved honeycomb. In the other boxes that I’ll gradually stack on top as the hives grows, however, I’m going with empty frames. Let the bees do what they want. Also it has been shown that bees naturally make slightly smaller rounds in their comb than the ones of the pre-pressed wax foundation, and may be less suseptible to the mites that are a deadly scourge of honeybees.What comb I couldn’t fit into frames I swept clean of bees as well as I could and dropped into a covered pail for later crushing and honey extraction.
With most of the comb gone, there were still several thousand bees in the container that needed to be moved. I hadn’t seen the queen, and she may well have been in that last batch. I had to lift the container (which was big, round and heavy) and gently tap the bees into the open box.

- Tapping Them Out Into Hive
The ones that didn’t tap out I gently brushed with a bee brush.

Brushing Bees into Hive Still more bees were on the bottom of the other container. I placed the hive lid on the ground in front of the opening to the hive like a ramp and tapped and brushed those bees onto it. Bees like to climb, so up they went into the box! There was a lot of debris in the containers such as dirt and leaves, so I had to be careful not to get too much of it into the hive with the honeycomb.
After I moved all the bees I could into the hive, I moved my equipment away and left pieces of honeycomb on the piece of plywood next to the hive. The hive stand rests on long screws, which are placed in cans of oil to prevent ants from invading the hive, so I didn’t worry about all the drips of honey being invaded. Many bees sat on the outside of the hive and waggled their bottoms in the air producing pheramone messages. One of the messages was to inform returning gatherers how to get into the new hive, another would be the state of emergency and who to look out for. I’d hate to know what they were waggling about me!

Spreading Pheramone I covered the hive with a California off-set cover, which allows ventilation in our hot climate and another place for entry. The bees settled in and by this morning they were gathering pollen, cleaning up the honey and going about their business.
There is so much to say about bees, and there is so much we don’t know about them yet. Some interesting facts are that honeybees are not native to the US, and of the 3,000 types of bees they are the only ones that make honey. Almost all bees are female except a handful of drones who have the purpose in life of hopefully mating with a new queen. Worker bees start out tending their queen, where they acquire her particular pheramone, then they move up to housekeeping and then feeding larvae. When they get to middle age, they go out for their first flights and spend the rest of their lives as gatherers. That yellow blotch on your windshield is first-flight bee poo. Worker bees make the larvae develop into drones, queens or workers by feeding them different foods such as bee bread, honey and royal jelly.
If you are interested in backyard beekeeping, attend a meeting of the San Diego Beekeeping Society (http://www.meetup.com/The-San-Diego-Beekeeping-Meetup-Group/ ), which meets the third Monday of each month at 6 pm at Casa del Prado, Balboa Park, room 104. Read books such as the Barefoot Beekeeper by P. J. Chandler or Natural Beekeeping by Ross Conrad, or read this wonderful blog http://beekeeperlinda.blogspot.com/2007/06/honey-harvest-crush-and-strain.html. I live in San Diego County, and I have a permit for beekeeping.
Honeybees sting in defense of their colony, and with the sting comes part of their abdomen and they die. Here is a photo of the stinger that was left on the tip of my son’s nose while he was photographing me. Although stung through the suit many times (with the regretful loss of bee life that entailed) no sting reached me during this process.

Stinger -
Homemade Ginger Beer

Fresh Ginger Root I remember drinking bottled ginger beer on the rare occasions that my mother allowed us to drink soda. It’s strong gingery, spicy taste was wonderfully refreshing. I hadn’t had it for years until lately, when a friend brought some to a picnic. The kind she brought was from a small brewer and it had a richer flavor to it than what I remembered. Apparently ginger beer, which doesn’t have to contain alcohol, has made a resurgence in popularity. Some is carbonated, and some is fermented or has alcohol added.
My friend remembered her mother making a big, cloudy, thirst-quenching batch of it, but didn’t have her recipe. I had found some recipes and she and I made different batches, her with more success.
What I learned was that fermented ginger beer relied on wild yeast and was traditionally brewed in Europe by passing on the starter. World War Two was the death of the tradition.
I tried a batch of ginger beer hoping to catch wild yeast spores, but it didn’t work. I also tried a batch adding brewer’s yeast, but that didn’t work either. I made a batch with brown sugar and spices that was slowly added to day by day for a week. The results were not what I was looking for. The brown sugar was too sweet and didn’t complement the ginger flavor, and the drink itself too sharp to be pleasant.
The best recipe so far, which my friend made with success, was of course the easiest. It is from Martha Stewart Magazine, and except for the shredding of the ginger, very easy to make. It has only four ingredients.
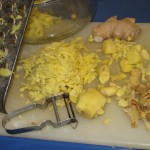
Methods of Shredding Ginger 
Shredded Ginger Homemade Ginger BeerAuthor: Martha StewartRecipe type: BeveragePrep time:Total time:Serves: 16A tasty, non-alcoholic old-fashioned drink.Ingredients- 2 pounds fresh ginger root (get the plumpest you can find or it will be fiberous and hard to cut)
- 1 gallon boiling water
- 1½ cups freshly squeezed lime juice (about 8 limes. Yellow limes are just limes that are ripe and are much jucier).
- 1½ cups white sugar
Instructions- Cut ginger root into 1-inch pieces and place in bowl of a food processor or Vita-Mix, and process until finely chopped. If you have neither machine, you can use a grater with the largest holes, but watch your fingers!
- Transfer the chopped or grated or shredded ginger to a large pot or bowl
- and add the boiling water.
- Allow to stand for one hour, or overnight.
- Drain through a fine sieve. If you would like the drink less cloudy, line the sieve with a double thickness of damp cheesecloth. Compost the solids or spread them on the ground around your plants for mulch.
- Add lime juice and sugar, stirring to dissolve.
- Serve over ice, or plain, or mixed with orange juice, or whatever suits your fancy. Refrigerate to store. I poured mine into mason jars. Stir or shake before serving. Makes 16 cups.

Add Boiling Water to Ginger 
A Drink with a Kick - Gardening adventures, Permaculture and Edible Forest Gardening Adventures, Photos, Vegetables, Vegetarian
Eating from the Garden

Mesculn Mix Beginning last week, I’ve been able to serve at least one thing from the vegetable garden every night at dinner. Peas, Swiss chard, lettuce, cilantro,radish, more peas, chives, carrots, strawberries, and, of course, peas. I munch as I water and weed, and feel that for a moment, here at least, all is right with the world. Like so many gardeners everywhere, I await the taste of my first tomato, but since my plants are no more than three inches high, I have awhile to wait.

Purslane Every year I have a bumper crop of purslane growing as a weed in my beds, and this year is no different. However, I’ve read where purslane has more Omega-3 fatty acids than many fish, something we vegetarians should be aware of. Originally from India, and supposedly Ghandi’s favorite food, this succulent member of the Portulaca family offers other nutritional benefits as well. See http://www.nutrition-and-you.com/purslane.html . If uprooted and left on the soil, the plant uses its stored liquids to produce seed and scatter them. “So there!” it says. I must admit that the thick leaves and stems are off-putting for me texture-wise, but I’ve begun to snap off young stems and include them with the lettuce I’m harvesting. I’ll have to be bold and find better uses for it in my kitchen. After all, its free!

Purslane I created two new raised beds, lined with aviary wire (which is a devil to work with. I have scratches all over.)

New raised beds I still have two more raised bed kits, which I bought last Fall in a clearance sale. I’ve leveled them, placed cardboard on the ground to deter weeds (especially the dreaded Bermuda grass!), used a staple gun to attach aviary wire across the bottom and up the insides a little, then filled with topsoil and very wormy mushroom compost, then watered it all in. I still have to add more good soil, then I’ll mix in some Garden’s Alive non-animal organic vegetable fertilizer and some microbes, just to start the beds off right.

Seed Sprouting These beds will be for the vining plants such as squash, pumpkin and melons. There is room for vines outside the beds. Already I have the seeds sprouted and awaiting transplanting, but that won’t happen until early next week.
Roger and his crew hauled over prunings from grape growers, and have used them to sparkle up the trellises to wonderful effect.

Grape vines on trellises I think they add a wonderful ethereal look to the structures.

Viney trellis As far as the ponds go, contouring is slowly being done and we all await the coming of the pump on Monday. I will not be blogging for the next few days because I will be attending the Southern California Permaculture Convergence in Malibu http://www.socalconvergence.org/ , and as I will be sleeping in a bunkhouse at Camp Hess, I’m thinking that bringing my laptop would be a bad idea. I’ll take photos and be excited to share what I’ve learned with you when I return. Have a wonderful weekend!
- Gardening adventures, Permaculture and Edible Forest Gardening Adventures, Photos, Vegetables, Vegetarian
My Gardens Today

Entranceway with Running Dog April and May are months that I often don’t remember when reflecting back at the end of the year. Spring is such a busy season. When I was raising children, and when I was working as a school librarian, these months rushed past in the haste towards summer break. As a gardener, Spring is one season when I turn into one of those Garden Designers London and since it is also the season of intense growth of both weeds and desirables, insects and increasing dryness, and for me and so many others, the inevitable allergies that keep me out of the garden for days. So I thought I’d post photos of my gardens as they stand today, in the middle of April, on threshold of Summer.

By the Front Door I’ll start at my front door and work downhill. The walkway to the front door is lined with purple lantana and a mixture of red geraniums, honeysuckle, butterfly bush and Double Delight rose. It is being enjoyed by my very silly old dog General Mischief, who just realized that I was going to let him into the house. He looks a bit like a vampire dog in this photo, though!
By my front door I have a collection of miscellaneous plants, as most people do. Two staghorn ferns given me by my mother have attached themselves in a very satisfactory way to the chain link fence. There is also a dark red ivy geranium, needlepoint ivy, some bulbs just out of bloom, a traveling (or Egyptian) onion (it’s seeds are bulbets grown on the flower) that my brother gave to me, and some sedums. When I water here I usually disturb a Pacific Chorus Frog or two. I’ve thinned and weeded and replanted this collection, but there are always more that magically appear.

Front Pond The front yard pond is full of algae, but that is all right for the moment. I don’t want a crystal clear pond; I want habitat. Because of the clear blobs of frog spawn and wriggling tadpoles hiding from the hungry mouths of the mosquito fish I keep the algae until it is no longer inhabited. Waterlilies (even the monster one! Look at other posts for an explaination) are blooming with last weekend’s sudden heat. In the foreground are Jewel Mix nasturiums with heirloom tuberoses emerging, a grey mound of lamb’s ear which has begun to pop up where I don’t expect it, and rosemary by the bird feeders. Our kitchen table has the view of the feeders, and it is from this yard that we count birds seasonally for Cornell University’s Project Feederwatch. Oh, and try not to focus on the weeds, please.

Side Gardens On the South side of my house I’ve painted the wall a Mediterranean blue to reduce the glare and create a colorful backdrop for flowers. I keep annuals in this bed, along with some bulbs and a rose that is still small that my daughter gave to me. In th photo just blooming are naturtium, alyssum, foxglove, pansies, and a delphinium that fell over and started growing upright again. My library window overlooks this yard. I was trying to keep the color scheme focusing on apricot to show up well agains the wall, but I end up planting whatever I want in here. Cosmos have again reseeded and are starting to grow rapidly; they’ll block the window by summer and be full of goldfinches. I’ve also planted a couple of bleeding hearts that I picked up in one of those bulb packages at WalMart. Usually the plant is pretty spent and they aren’t worth the money, but I somehow think that I am rescuing the poor thing. These came up but haven’t yet bloomed.
Lady Banksia Along my driveway is a Lady Banksia rose that has taken off, along with a bush mallow, a Hidcote lavender, and a late daffodil. Farther along the driveway (not shown) is a Pride of Madera (I love that name!) that is going gangbusters, a small liquidamber, rockrose, a mixture of natives and incidental plants such as a tomato that survived the winter, a Joseph’s Coat rose, and an established pine tree with a crow’s nest at the top. There are other roses and plants here, too, like a prostrate pyracantha for berries, a white carpet rose, native milkweed for the Monarch butterflies (perennial ones; the annuals are usually gone by the time the butterflies migrate here), an apricot penstamon, aloe vera, and probably the kitchen sink, too, if I root around long enough. I love tinkering around with this mess of plants, seeing what will grow and trying new combinations.
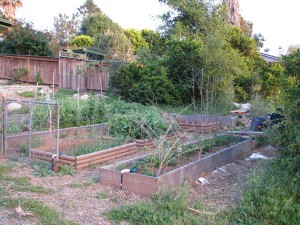
Raised Vegetable Beds In my raised vegetable beds the peas have been producing well. The shorter ones had been nibbled by crows as they were emerging, but after I put a rubber snake amongst them, the nibbling stopped. Potatoes are nearing harvest time, and I’ve already snuck out a few new potatoes and they were very good. Sometimes I’ve had potatoes with brown fiber in them and a bitter taste; no doubt due to irregular watering and soil problems. I worked hard on improving my soil and giving it a boost with natural fertilizers from Gardens Alive. There are so many peas in the garden because I planted all my old packets so that the roots will set nitrogen in the soil.
I also have growing carrots, broccoli, cilantro, parsley, endive, salad mix, parsnip, strawberries, blueberries, breadseed poppies, horseradish, asparagus, bush beans, fava beans, a yellow tomato and a red slicing tomato, garlic, shallots, red and white onions, Swiss chard, leeks, collards and basil. Most are just small guys right now.

Seedlings In my temporary nursery area I have sprouting pickling cucumbers, zucchini, quinoa (first time!), more basil, Dukat dill, cantalope, and a cooking pumpkin. I’ll sprout more squashes and maybe popcorn and sweet corn soon.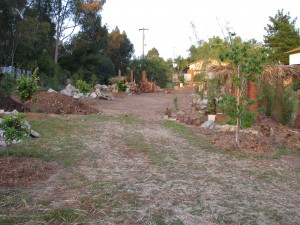
View up the Middle This is a view of the middle of my property, from the lower end up.
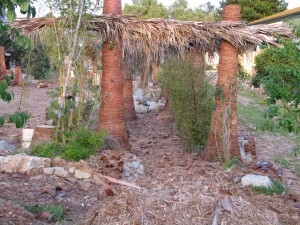
Palm Tree Walkway This is the palm tree walkway as it stands now.

Pre-Pond And this is the lower area. Notice the stakes in the ground and the tractors? They are there because today is the day the ponds will be excavated! The rain-catchment ponds, permanent habitat pond and swales will be carved, shaped and filled in the next two days, fed by water from a 4-inch well augered in the lower property. I have hired Aquascape to create habitat and rain catchment ponds; the demostrations of their work look as if humans hadn’t messed with anything. In about an hour from now, the action finally begins! After the ponds are installed, then the final plant guilds will be established, the minor amount of irrigation installed, and that will be that! I’ll keep you posted on pond development! -
How to Cook Swiss Chard
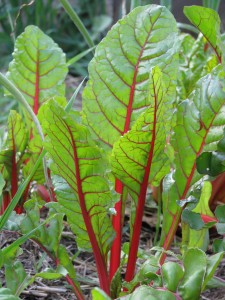
Swiss Chard Swiss chard is that bright green leafy vegetable, usually with a red mid vein, that most people inch past in the supermarkets. It looks so darn healthy it is scary, and also looks complicated and possibly bitter. I’ve been growing chard for years. One of the easiest of plants to grow from seed, this perennial in our San Diego climate reseeds itself if you let it. To harvest you cut off all the leaves except a few in the middle (to keep the plant producing food for itself). You can easily feed off of a few of these plants for years.
Chard is Mediterranean, not Swiss, but wherever its from it comes packed with antioxidants and many other great health benefits. There is the most common red veined chard that you see in the supermarket, and there is also white or yellow veined varieties. If you buy a package of seeds called Bright Lights, it contains seeds for a mixture of these. The taste difference is negligible, and since in preparing chard you usually strip the mid vein out, it really doesn’t make much difference except as color variety in the garden.
You can cut the leaves while very young and add them directly to lettuce mixes for salads, especially wilted salads. Or you can stir-fry them up or use them as you would baby spinach. The wonderful thing about chard is that you can use the old leaves as well. Older chard takes a little longer to prepare, but oh, it is worth the effort. To prepare older leaves, I fill half the kitchen sink with water, then with my fingers or a sharp knife, strip the green away from the mid veins and drop the greens into the water.
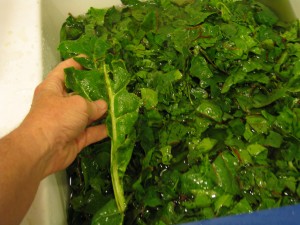
Strip the green part from the midrib Wash the greens well. If your garden doesn’t have a lot of mulch around the plants, then there might be soil kicked up on the leaves. Also, look out for any freeloaders such as snails or earwigs. I usually soak the leaves for a while, letting any thing extra float to the top or sink, then drain and rinse again. Squeeze the extra liquid from the greens and you are ready to cook.
If you want to freeze the chard for later, boil water in a big pot (depending on how much chard you have; you can do it in batches, too), then blanch the greens by briefly submerging them in the boiling water, fishing them out and bathing them in cold water to stop the cooking process. Dry the greens and freeze in containers.
This is my recipe for cooking chard, which my kids and I have loved for years. You can prepare it this way and eat directly, or use it as filling for enchiladas, frittatas, empanadas, or any other tas or das you may desire! Photos follow the print version of the recipe.
Chard SauteAuthor: Diane C. KennedyRecipe type: Side DishPrep time:Cook time:Total time:Serves: 4-6Swiss chard is easy to grow and a little more involved to prepare, but oh! how it is worth the effort!Ingredients- 2 tsp olive oil
- 1 large shallot (or half an onion, or a clove or two of garlic)
- ¼ cup vegetable broth or water
- 2 large bunches Swiss chard (or more)
Instructions- Wash, wring out, de-stem and chop large chard leaves.
- In a large saute pan (that is a frying pan with high sides), heat two tablespoons olive oil to medium high. Or, if doing a mondo-huge pile of chard, use a pot.
- Chop one large shallot, or half an onion, or a clove or two of garlic and add to pan.
- If using onion, then allow to cook for a few minutes until softened.
- Add wrung-out Swiss chard and stir a little.
- Add a quarter of a cup of vegetable broth (the greens will still hold water, so you don't need much broth. Or you can add the same amount of water).
- Cover the pan and reduce heat to low.
- Allow chard to steam for about twenty minutes (it should be simmering in there; if it isn't, turn up the heat a little).
- Lift the lid once and stir chard.
- At the end of the cooking time, remove the lid and turn up the heat.
- Allow any extra broth to cook until almost completely gone. Be careful not to scorch!
- Remove from heat, adjust the salt to taste, and serve. I eat it with butter, or sprinkled with Parmesan cheese is also good. Yum!!
Chard Saute
In a large saute pan (that is a frying pan with high sides), heat two tablespoons olive oil to medium high. Or, if doing a mondo-huge pile of chard, use a pot.
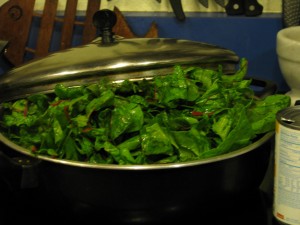
Pan o'chard Chop one large shallot, or half an onion, or a clove or two of garlic and add to pan.
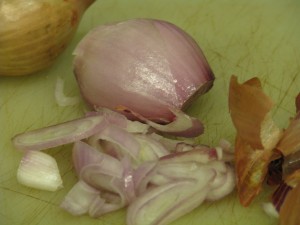
Slice shallots If using onion, then allow to cook for a few minutes until softened. Add wrung-out Swiss chard and stir a little. Add a quarter of a cup of vegetable broth (the greens will still hold water, so you don’t need much broth. Or you can add the same amount of water). Cover the pan and reduce heat to low. Allow chard to steam for about twenty minutes (it should be simmering in there; if it isn’t, turn up the heat a little). Lift the lid once and stir chard.
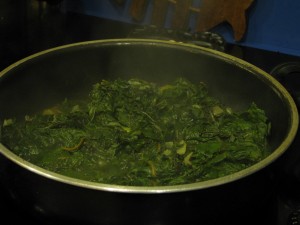
Stir the chard At the end of the cooking time, remove the lid and turn up the heat. Allow any extra broth to cook until almost completely gone. Remove from heat, adjust the salt to taste, and serve. I eat it with butter, or sprinkled with Parmesan cheese is also good. Yum!!
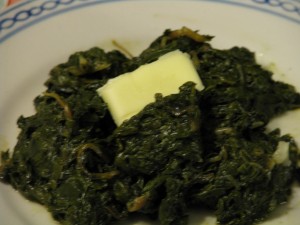
Buttered Chard: YUM! -
Apfelpfannkuchen, or Dutch Baby Pancakes with Apples
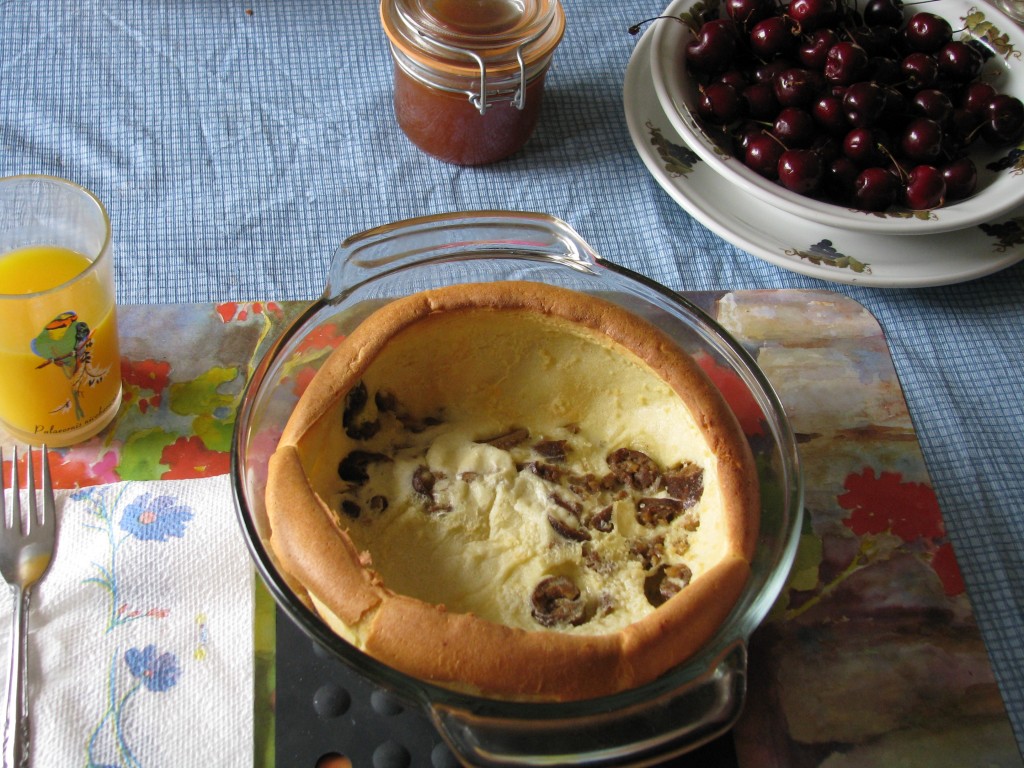
Apfelfannkuchen Breakfast. Sigh. My favorite meal. Too often it consists of a bowl of healthy cereal, orange juice and my fistfull of vitamins and supplements. Once in awhile when I have a child or two at home I’ll make these very easy, extremely impressive and delicious pancakes. One pancake per person. Just with some egg, milk and flour in a buttered dish you make this glorious puffed pancake that is a delight to eat. I copied this recipe from my mother’s recipe files back in 1977, my second year of high school. Where she copied it from I don’t know, but I do know that puffed pancakes have been a restaurant sensation on and off for decades. They can also be made plain for dessert and served with fresh fruit or even ice cream and chocolate sauce. Instead of apples make them savory with the addition of mild vegetarian sausage (you don’t want strong flavors to overbalance the delicate pancake) or cooked mushrooms.
Two kinds of pancake You can dress them up with powdered sugar at the last moment, or serve with syrup. It is important that you serve them right out of the oven so that your guests see them in all their risen glory, because the pancakes will deflate to some extent but still be gorgeous. If you pour a little syrup between the pancake and the hot dish it will sizzle and bubble very dramatically. Because the pancakes are served so hot, they take a little while to eat, which makes breakfast more of the leisurely time of enjoyment it should be. Make certain your guests know how hot the dishes are, and protect the place settings with potholders.
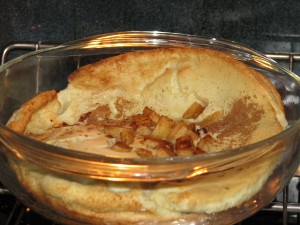
Apple filling Apfelpfannkuchen, or Dutch Baby Pancakes with ApplesAuthor: Diane C. KennedyRecipe type: BreakfastPrep time:Cook time:Total time:Serves: 1-6Ingredients- 1-2 apples, peeled and diced (or 1 vegetarian sausage link per person such as Morningstar Farms, cooked and chopped)
- Use the following chart (going across) to measure ingredients:
- Pan Size Butter Eggs Milk Flour
- 2-3 quarts ¼ cup 3 ¾ cup ¾ cup
- 3-4 quarts ⅓ cup 4 1 cup 1 cup
- 4-4½ quarts ½ cup 5 1¼ cup 1¼ cup
- 4½ - 5 quarts ½ cup 6 1½ cup 1½ cup
Instructions- Choose oven-proof bowls, preferably clear glass (for effect). I use one quart Pyrex bowls.
- Divide butter between bowls and set bowls in cold oven.
- Heat oven to 425 degrees F.
- Meanwhile, cook apples in a little butter or juice in a frying pan for a few minutes to soften.
- In a blender or with a hand mixer, whirl eggs at high speed for one minute. Gradually pour in milk, then slowly add flour. Whirl for 30 seconds. You don't want to overmix because you don't want air in the batter.
- With oven mits, remove hot dishes from oven; butter should be melted.
- Pour batter carefully into melted butter in dishes, dividing the batter equally.
- Divide apples (or veg sausage) evenly between bowls, if using. Dust with cinnamon, if desired.
- Return to oven and bake until puffy and browned, 20-25 minutes.
- Pancakes will be like a firm bread pudding at the bottom.
- Serve immediately. (Pour syrup around the inside edge and listen to it sizzle! It impresses children and easily impressed minds like mine!) Nom!

Vegetarian Sausage Filling
