Vegetarian
- Gardening adventures, Permaculture and Edible Forest Gardening Adventures, Recipes, Vegan, Vegetables, Vegetarian
Kale Chips
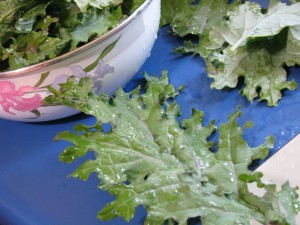
Purple kale You may have heard about these already; they seem to be a new fad food. Pieces of kale rubbed with oil and seasonings and dried until crispy. Well, we love to dry things in pans on our roof in the summer, so we thought we’d try them. Part of our mixed salad greens seed mix turned out to be this very pretty purple kale, and I figured that chips were meant to be. So we
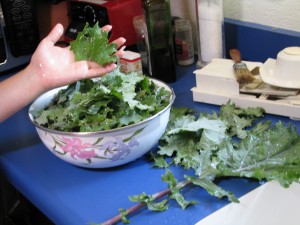
Tear into pieces and rub with oil then left them on the roof to dry. We were also playing around with zucchini chips, Swiss chard chips, and just about anything we could stick up there in the brilliant sunshine.
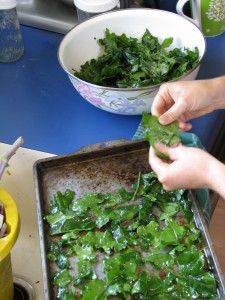
Place on drying tray The chips toasted in only about three hours. They were very crisp and dark, and had reduced in size by about a third. The first one had a wierd taste to it. The second one… and we were hooked! We crunched down several trays of them and one go. They are extremely nutritious, with calcium and folic acid among other things. We tried a more complicated recipe as well involving nutritional yeast, but it didn’t do anything special for me. The dried chard and zucchinis weren’t show-stoppers, either.
I also sauteed de-stemmed kale and it came out so creamy tasting with none of the bitterness that chard has, that it is now my favorite cooked green.
Dried kale can also be ground into a powder or flakes and used to top vegetables and grains for flavor, nutrition and color. If you use kelp flakes at all, you can substitute dried flaked kale.
Sun-Dried Kale ChipsAuthor: Diane C. KennedyRecipe type: SnackThis basic recipe is all over the Internet and produces the best resultsIngredients- At least one bunch kale
- Olive oil
- Salt (optional)
- Sunshine
Instructions- Tear kale leaves into chip-sized pieces without the midribs
- Put torn leaves into a bowl.
- Drizzle with olive oil and sprinkle with salt.
- Gently work the oil into the leaves so that each leaf is covered.
- Place on cookie tins closely but not overlapping.
- Place a piece of cheesecloth or a metal cooling rack over the kale to keep it from blowing away.
- Place cookie sheet in full sun for about three hours or longer.
- Eat!
So finally a fad that I can believe in! -
Candying Kumquats
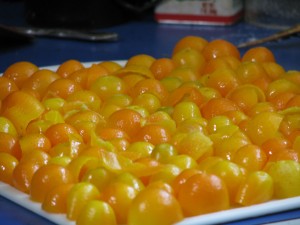
An army of kumquat halves We have two small but prolific kumquat trees. Kumquats are very small citrus that are tart and sweet at the same time, and you eat the skin and all whole. Kind of scary. Not wanting to waste food, my daughter picked a whole batch of them and was determined to juice them. And she did, one tiny half at a time! There was about half a cup of juice in all, which she froze in plastic butter molds for future use in drinks, etc.
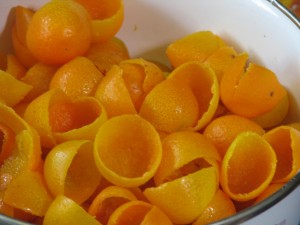
De-pithed kumquat shells Then we had all these little half shells, so she carefully scraped the pith out of all of them and candied them. The idea was to make little candied shells in which we’d put little scoops of vanilla ice cream, lemon sherbet, or something yum. We tried a couple with homemade vanilla ice cream, and it was worth all the work.
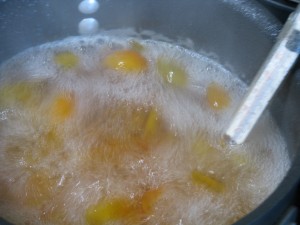
Cooking kumquats in simple syrup The kumquats needed to dry round, like little bowls, so I picked some more kumquats (yes, there are still more!), halved them and used them as molds for the shells, which were put onto the halves like little hats.

Using kumquat halves as molds for shells All the split ones were set aside, and then everything was sugared and dried. Several years ago we candied orange and lemon peel and I pulled some out of the bags now and then for use in baked goods. Now we have candied kumquat peels and shells.

Sugaring the peels and letting them dry But we still had all those kumquat halves that we’d used as molds. We also had half a saucepan of simple syrup in which the kumquats had been cooked. So, not wanting to waste, we put the kumquat halves into the syrup and boiled it again until the halves were candied and then I put them in jars and sealed them. I’m not sure what I’m going to do with them, but they can be used to decorate desserts.
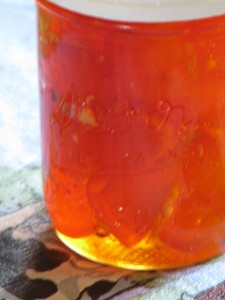
Candied kumquat preserves in syrup I also had another ginger beer recipe that called for slicing the ginger, cooking the slices in a sugar and water mixture until reduced, then using the liquid as a base for a ginger drink. The slices could then be sugared and dried and eaten. I keep candied ginger from Trader Joe’s in the car to snack on, because ginger helps with car sickness or an upset stomach. These homemade ginger slices were quite hot, so I think I’ll save them to use in cakes and pies instead.
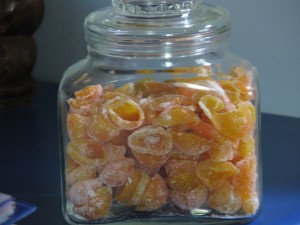
Stored candied kumquat shells and peels So it was a day of sugaring, preserving and messing about in the kitchen. We now have seven quarts of pickles, a couple of bags of dried kale that is not only good to munch on, but great to crumble over rice or noodles, jars of candied kumquats, a jar of sugared kumquat peel, a bag of candied ginger slices, some miscellaneous jam, and lots of zucchini with more to come!
-
Freestyle Peach and Apricot Tart
Freestyle Peach and Apricot TartAuthor: Diane C. KennedyRecipe type: DessertPrep time:Cook time:Total time:Serves: 8A handsome, rustic dessert that is easier to make than a regular pie or tart, and delicious, too!Ingredients- For Pastry:
- ½ cup cold unsalted butter
- 1¼ cups all-purpose flour
- ½ teaspoon cinnamon
- 1 beaten egg yolk
- 2-3 tablespoons ice water
- For Filling:
- ¼ cup granulated sugar
- 4 teaspoons all-purpose flour
- ¼ teaspoon freshly ground nutmeg
- 3 cups total sliced, peeled peaches and apricots
- 1 tablespoon lemon juice
- 1 beaten egg
- Powdered sugar
Instructions- For Pastry:
- In a mixing bowl cut butter into flour with a pastry blender until pieces are small pea-sized.
- Stir together egg yolk and 1 tablespoon of the ice water
- Graually fold egg yolk mixture into flour mixture.
- Using a fork, gently toss rest of ice water one tablespoon at a time into flour mixture, till all the dough is moistened.
- Gently press together dough until you can form a ball.
- If necessary, cover dough with plastic wrap and refrigerate for ½ an hour or more until the dough is easy to handle.
- Line a baking sheet with aluminum foil and sprinkle it lightly with flour.
- Place the dough in the middle and roll to a 13-inch circle; a chilled rolling pin will help with this, or lightly dusting the top of the dough with flour (don't overdo!).
- For Filling:
- Mix together granulated sugar, flour and nutmeg, then stir in fruit and lemon juice.
- Mound fruit mixture in the center of the crust, leaving a 2-inch border.
- Fold border up over fruit in an artsy, farmhouse sort of way, leaving the middle exposed.
- Combine the egg and 1 tablespoon water and use it to brush onto the top and sides of crust for browning.
- Bake in a 375F oven for 40-45 minutes until crust is golden and fruit is bubbling.
- To prevent overbrowning, you can cover the edge with foil for the last 10 minutes of baking.
- Cool 30 minutes on the baking sheet.
- Dust edges with powdered sugar, if desired.
- Serve as is, or with vanilla ice cream or whipped cream.
-
Oatey Scones

Oatey Scones I’ve made traditional scones for years as a breakfast treat. They are quick, easy to make from scratch, and oh! so good. However, when I found this recipe for oatmeal scones in Cook’s Illustrated (September and October 2003), it was my lucky day. I really love these tasty devils. The trick is to toast the oatmeal before incorporating it into the batter.
Oatey SconesAuthor: Cook's IllustratedRecipe type: BreakfastPrep time:Cook time:Total time:Serves: 8These toasted oat scones are heavenly, especially with mascarpone cheese, fresh fruit or lemon curd.Ingredients- 1½ cups old-fashioned rolled oats or quick oats
- ¼ cup whole milk (I've used 2% milk just fine)
- ¼ cup heavy cream
- 1 large egg
- 1½ cups unbleached all-purpose flour
- ⅓ cup sugar
- 2 teaspoons baking powder
- ½ teaspoon salt
- 10 tablespoons cold unsalted butter, cut into small cubes
- Coarse sugar for topping.
Instructions- Heat oven to 375 degrees F.
- Spread oats evenly on a baking sheet and toast in oven until fragrant and lightly browned, about 7-10 minutes, stirring twice; cool.
- Increase oven temperature to 450 degrees F.
- Line a baking sheet with parchment paper.
- When oats are cooled, measure out two tablespoons and set aside.
- Whisk milk, cream and egg in a large measuring cup.
- Stir together flour, sugar, baking powder and salt until combined.
- Scatter cubed butter over the top of the dry ingredients and with your fingers, a fork or a wire pastry blender incorporate until mixture resembles coarse cornmeal.
- Stir in cooled oats.
- Using a rubber spatula, fold in all but a tablespoon of the liquid ingredients until large clumps form; continue gently folding until dough forms cohesive mass.
- Dust work surface with reserved oats and a little flour.
- Turn wet dough (it will be damper than you'd expect!) onto surface and gently pat into a 7-inch circle about 1 inch thick.
- Using a bench scraper or chef's knife, cut dough into 8 wedges and set about 2 inches apart on parchment-lined baking sheet, reshaping as needed.
- Brush tops of scones with reserved liquid and sprinkle with coarse sugar.
- Bake until golden brown, 12 -14 minutes.
- Cool scones on baking sheet on wire rack for 5 minutes, then remove scones to cooling rack and cool to room temperature (so they won't fall apart), about 20 minutes.
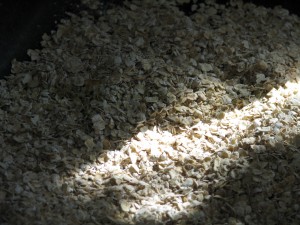
Toasting the oatmeal makes all the difference Watch the oats carefully so that they don’t burn, and give them a stir now and then. While they are achieving all that wonderful toastiness, combine the cold butter and the dry ingredients until it looks like coarse cornmeal.
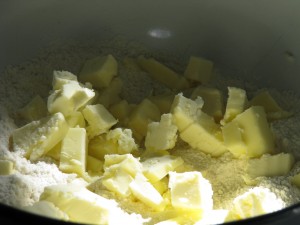
Incorporate butter into flour The batter will be suspiciously wet; don’t be alarmed. The dry oatmeal will soak it all up as the scones bake, and it all works out happily in the end. However it will be a little difficult to cut the scones and transfer them to the baking sheet; a little reforming might need to take place, but that’s okay. Bake until golden brown.

Bake until toasty brown The scones will be brittle until they cool, so let them sit for about twenty minutes or so (if you can!) before serving. If you are serving these to guests or as part of a larger breakfast, this waiting time can be a good thing… most other scones want to be served hot from the oven and leave you no time to do extras.

Serve cooled, so they won't fall apart Oatey scones are wonderful plain, with sweet butter, or (my absolute favorite) with mascarpone cheese and fresh fruit. The wholesome toasted grain flavor of the scones make a fabulous backdrop to the fresh plain flavor of the cheese and the sweet/tart flavor of fresh strawberries, peaches, plums, or whatever you have.

Serve with mascarpone cheese and fresh fruit -
Roasted Radishes, or What Not to Bring to a Party

Radishes About to be Roasted I don’t have much luck bringing food to events. When I need to bring food to a party, I seem to have some strong internal drive to fix the most inappropriate thing, and go through agonies to make it. Some mischievous elf in my head sends down strange images to my consciousness telling me what to make as soon as I volunteer. The food is good…. it is usually a recipe that I’ve made before and think is interesting and different. I’ve brought cornbread made with blue cornmeal to picnics, and people have shunned it thinking it was blueberry flavored, or an ugly homemade unfrosted cake, and gone on to the easily recognizable chain-store brand cookies lined up in a clamshell container.
When asked to bring a cake, I make some complicated thing that never looks as good as the picture in my head. My cakes are very tasty, but my decorating skills are, shall we say, possible candidates for cakewrecks.com. I’ve done a cake for a grand opening of a park where I simulated a pond with cattails made of broken pretzel sticks, or that is what it was supposed to look like. I made not one but three types of jelly roll cake with three different fillings for a bridal shower, and the day was so hot that the cakes kept sticking and sliding and I had to keep running up and down the stairs to the garage refrigerator to chill them. I actually sat down and cried because I was so frustrated and had spent the entire day baking in a heat wave with a mess to show for it. I ended up arranging the individual cakes in a flower shape and sprinkled dried rose buds and edible glitter around. It looked pretty, if amateurish, but I knew they’d taste wonderful. It was so hot in the car I thought I would be redecorating my Prius with homemade lemon curd and chocolate filling. I had to stick the large pan in the surprised hostess’s refrigerator, which took up a lot of space. Then when it was cake time, I found that the jelly rolls had already been sliced up and plated so that you couldn’t tell the flavors apart and all the rosebuds thrown out, without the bride-to-be or anyone else even seeing it. I could have just made a sheet cake and everyone would have been happy.
I’ve brought vegetarian main dishes that no one but my children and I seem to want to eat, even though they aren’t creepy tofu-y mock turkeys or anything. Labeling a dish ‘vegetarian’ is like putting a curse on it, although many dishes other people bring don’t have meat in them either. To be ‘vegetarian’ means scary, weird food of unknown origin that probably tastes like sprouts or tofu or whole wheat.
I know when my offerings are rejected, it isn’t really the food… the food tastes good. That is, if anyone dares eat it. It is just out of place, just as I am at most parties. My food and I belong at small gatherings of friends who are expecting a new experience. Who want to try something different and talk about it. Who enjoy subtleties of flavor and the goodness of fresh herbs and spices. Who don’t judge on how good a dish appears, but how it tastes. Who are forgiving and especially have a good sense of humor.
Which brings me to another example of something not to bring to most parties: roasted radishes. Especially to one where there is a lot of drinking going on. Everyone will wonder what they are and no one will touch them because there is perfectly predictable Albertsons layered nacho dip and bagged chips right next to them. Since roasted radishes aren’t the prettiest looking things, they will be the last edible thing on the buffet table besides the really, really cheap half-finished bag of corn chips, and when everyone is really, really drunk, some unpleasant personal comments might be said about their appearance. The radishes will be cold and soggy by that time, too, and not the best thing for someone with a lot of alcohol in his or her system to put into his or her mouth at that point. However, if served at home as an interesting appetizer along with something less scary-looking, these are just great. No, really, they are. You should try them. I was impressed enough to try to force them on strangers at someone’s home, so you should be, too.

Roasted Radishes dressed up for a party Growing radishes is very easy and quick, and roasting them gives you something to do with them. Radishes only take a few weeks to mature, so they are often the first thing up and ready in the garden. Give this recipe a try the next time you roast veggies; many people who don’t really like radishes enjoy them this way.
Roasted RadishesAuthor: Diane C. KennedyRecipe type: Side DishPrep time:Cook time:Total time:Roasting radishes changes their flavor and texture to something new and delightful.Ingredients- Three bunches radishes, preferable different colors if you can find them
- Three tablespoons extra virgin olive oil
- ½ teaspoon dried thyme leaves
- ⅛th teaspoon cayenne
- Freshly ground black pepper
- Coarse salt
Instructions- Preheat oven to 425 F.
- Wash radishes and cut all but a little tuft of radish leaves off of each radish. Don't cut off the roots.
- In a medium bowl whisk oil, thyme, cayenne and black pepper.
- Add radishes and toss to coat.
- Pour radishes onto a flat baking pan and drizzle with any remaining oil mixture.
- Roast 40 - 50 minutes, turning once midway through roasting, until a knife easily slides into a radish and they are lightly browned.
- Sprinkle or grind coarse salt over the tops.
- Serve immediately.
-
Goat Milk Crumbly Cheese
A friend of mine and her daughter have several goats and this year they began milking them. Every day. Twice a day. Not without a struggle. As they are lacto-ovo vegetarians as well, they don’t use that much milk. However they have experimented with kefir and cheese. Now they are experimenting with giving some milk away.
I have been a lucky recipient of a quart of freshly milked, unpasteurized goat milk. I intended to make cheese out of it, and in the heating for the cheese the milk would become pasteurized.

Heat Slowly I’ve learned a little about making cheese, and I’d like to learn more. What I made was an easy acid-based spreadable or crumbly cheese. This requires lemon juice or vinegar added when the heated milk reaches 180 degrees F.

Stir in Lemon Juice until Curds Form The milk immediately separates into curds and whey.

Pour Curds and Whey into Cheesecloth This is poured through cheesecloth,

Tie Cheese into Cheesecloth then all four corners tied and the cheese suspended over a pot or bowl to drain.

Hang Cheesecloth Over Pot to Drain My result was like a dry cottage cheese. I hung it longer than recommended, so perhaps too much moisture seeped away. Then, before I combined it with seasonings, I put it into the refrigerator since I was busy with something else. I think that hardened up the cheese as well. The seasonings didn’t so much as combine with the cheese curds as they just mixed up with them.

Mix Crumbly Cheese with Seasonings That worked out okay. Instead of spreading the cheese on toast, I crumbled it into a vegetable and pasta dish for dinner and it was tasty, as well as a good extra source of protein, and just fun to eat because we had made it from the milk of goats we have met!

Serve with Pasta and Vegetables A quart doesn’t make much cheese; in fact, it made about half a cup of crumbly cheese.
The whey is a rich souce of nutrition, but is often thrown away. With the acid added to it, it has an unpleasant flavor for drinking. I used it, with the addition of more water, to boil the pasta for the meal, then after it cooled poured it on my outdoor plants. You can use it to replace water in baking or feed it to your chickens… just don’t dump it down the sink!
This recipe is for a quart of goat milk, which doesn’t produce much cheese. Recipes I looked at all recommended a quarter cup of lemon juice, but the cheese curdled for me at no more than an eighth of a cup. Maybe you’ll have different results. You don’t have to hunt down a goatkeeper, either. Goatmilk is sold in supermarkets.
Crumbly Goat Milk CheeseAuthor: Diane C. KennedyRecipe type: Side DishPrep time:Cook time:Total time:Serves: ¼ cupHave a quart of goat milk? Make a little cheese with it!Ingredients- One quart fresh goat's milk
- Up to ⅛th cup fresh lemon juice or vinegar
- Seasonings such as half a garlic clove grated, thyme, Herbs du Provence, etc., and coarse salt
Instructions- Affix a cooking thermometer to the side of a medium saucepan.
- Add goat milk so that the thermometer is submersed in the liquid but not touching the bottom.
- Heat over medium heat until the temperature reaches 180 F.
- Remove pot from heat and gauge from side of pot.
- Stir in lemon juice or vinegar a teaspoon at a time until curds form. You'll know it when it happens! There will be curd and almost clear whey.
- Line a bowl with double layer cheesecloth.
- Pour contents of pot into cheesecloth.
- Tie corners of cheesecloth together over a wooden spoon and allow to hang over bowl or pot to drain.
- Drain cheese one hour or more. The longer you drain it, the more dry it will be.
- Remove cheese from cheesecloth and place in bowl with the seasonings of your choice. Sprinkle with coarse salt.
- Use crumbly cheese on top of hot pasta or vegetables.
-
Plummy Skillet Cake

Golden plummy goodness Have a lot of juicy plums that need a place to go?

Eating fresh plums in the sunshine with the juice dripping down your chin is like sipping nectar in paradise. How about this tasty, light cake baked in a skillet? A cast-iron skillet is perfect for this cake, but you can use any oven-proof skillet or baking dish if you don’t have one. If you are skilled in campfire or Dutch-oven cooking, take this recipe with you when you camp. As an interesting change of seasonings, use the Chinese Five-Spice powder that has been hanging out in your spice pantry since the last time you made stir-fry.

Chinese Five-Spice powder and plums are a great combination If you don’t have any, use freshly-grated nutmeg or ground cinnamon.
Plummy Skillet CakeAuthor: Diane C KennedyRecipe type: DessertPrep time:Cook time:Total time:Serves: 6Dessert in a cast-iron skillet can be cooked over a campfire instead of your oven. No cast iron? Use an oven-proof skillet or baking dish. You can use other stone fruit instead of plums with just as good a result.Ingredients- 6 tablespoon unsalted butter, room temperature, plus extra for skillet
- 1½ cups all-purpose flour, plus some for skillet
- ¾ teaspoon baking powder
- ½ teaspoon baking soda
- ¾ teaspoon salt
- 1 teaspoon Chinese Five Spice powder
- 1¼ cups plus 2 tablespoons sugar
- 2 eggs
- ¾ cup buttermilk
- 4 medium plums, thinly sliced and halved
Instructions- Preheat oven to 375 F.
- Butter a 10-inch cast-iron skillet (or ovenproof skillet or dish).
- Dust skillet with extra flour and tap out any loose flour
- In a small bowl, whisk together flour, baking powder, baking soda, Chinese Five-Spice powder and salt.
- In large bowl, or in a mixer bowl, combine 1¼ cups sugar and butter until creamy.
- Beat in eggs until smooth.
- Add a third of the flour mixture with a third of the buttermilk, until all is combined. Don't overbeat.
- Pour batter into prepared skillet and smooth top.
- Spread sliced and halved plums all over the top.
- Sprinkle with extra sugar.
- Bake 35 minutes until golden brown and a toothpick inserted into the center comes out cleanly.
- Cool for about ten minutes before cutting.

Bake until golden brown -
Savory Carrot Soup

Freshly Pulled Carrots Carrots are a gardening miracle. From such a minuscule seed, out pops a root strong enough to plow through tough soil and soak up minerals.

Little Sprouts The carrots shoot those minerals up to the ferny leaves, and when they die, leave the minerals to enhance the topsoil. Carrots fill the roll as one of nature’s miner plants. They are also terrific to eat and very good for you.
I’m sure you’ve heard about how high in beta-carotene carrots are, and how they help eyesight. If you haven’t there are hundreds of Internet references to look up. Carrots are a very versatile vegetable, tasty raw as well as cooked.

Nantes and Chantenays There are many carrot varieties. Nantes, Chantenay, Danvers… these are the common varieties you’ll see sold in most seed stores. However there are white carrots, purple carrots, deep red carrots, and carrots of many sizes and shapes. Some are woody, some very sweet, some tender and some strongly flavored.

Feel around the carrots to see if they are ready to pull 
Garden carrots need only scrubbing, not peeling If you grow your own organic carrots, feel around the roots to see if they are large enough to pull. Don’t leave them in the ground for too long or they’ll become less sweet and woody in texture. Also, if you use your own organically grown carrots, you don’t need to peel them. Just use a brush to scrub off the dirt.
Carrots are wonderful to eat when simply steamed until tender, then buttered or drizzled with olive oil and chopped herbs. Dill is particularly good, as are chives. I’ve found many carrot recipes, but most of them are sweet not savory. Honey-glazed carrots, carrot soup with curry and sweet coconut milk, brown sugar carrots… I don’t care for them. Carrots are naturally sweet, and to slop more sweet stuff on top is overdoing it. Sweetened carrots belong in carrot cake, and there is only one recipe for it that I find not cloying and heavy (I’ll share that recipe with you another time). I also like carrots in a savory soup.
Here is an unusual recipe that is tasty, easy, low in calories, and has protein from an unusual source: vegetarian sausage patties. Celery adds dimension to the flavor as does minced fresh rosemary.

Minced Fresh Rosemary Savory Carrot SoupAuthor: Diane C. KennedyRecipe type: SoupPrep time:Cook time:Total time:Serves: 2This golden, low-fat soup brings out the savory goodness of carrots.Ingredients- About two cups sliced carrots
- One shallot, diced
- One celery stalk, diced
- Two vegetarian sausage patties (such as Morningstar Farms)
- 1 tablespoon olive oil
- ½ teaspoon fresh rosemary, minced
- One large potato, peeled and chopped
- Four cups vegetable broth
- Cilantro leaves for garnish (optional)
Instructions- In medium saucepan, heat olive oil over medium-high heat. Add shallot and cook for two minutes.
- Add celery and stir occasionally for about three minutes.
- Move the vegetables to one side and add two vegetarian sausage patties. Flip when cooked on one side.
- Add potato, carrots and rosemary.
- Stir, breaking up sausage patties with spatula.
- Add vegetable broth
- Bring to boil then lower temperature to a simmer and partially cover with the pot lid.
- Cook for about twenty minutes, until carrots are just tender.
- Cool, then blend soup until smooth.
- Return soup to pot and reheat.
- Serve hot, topped with cilantro leaves if used.
Serve this golden orange soup in bowls that compliment it’s color.
Serve in Bowls that Compliment the Rich Soup Color -
What is a Weed, Anyway?
Weeds are plants that grow where you don’t want them to. It is a label given with purely human whim that often interferes with nature taking care of its animals and soil. Unless you are removing invasive species, weeds have a purpose and can not only be useful medicinally, but also are indicator plants of how healthy your soil is.
In the February 1989 issue of Organic Gardening, I wrote an article called Selective Weeding. In it I described how weeds with deep tap roots not only break up the soil, but are nutrient ‘miners’; they take up minerals from down deep in the earth, send them up to their leaves, and then leave them on the soil surface when the leaves die, which improves the quality of the topsoil for other plants to thrive. Around here, wild radish is the most notable weed that does this although it is invasive, but it isn’t the only one.
Other weeds make good groundcover, such as purslane. Purslane needs fertile soil to thrive, so when you see it, you know there is good soil. It is also edible and a good source of calcium, iron and Omega-3 fatty acids…. a real plus for we vegetarians who don’t eat fish. Lamb’s quarters also grows in highly fertile ground and is very edible. Red clover also loves fertile soil and it’s importance to the pollinator insects is vital. Clover roots set nitrogen in the soil and is often used as a cover crop.
Plantain (Plantago major and not the banana) is naturalized throughout North America and I guarantee that everyone has seen it whether they know it or not. The variety with rounded leaves in a rosette is a common lawn weed, and the variety with long, lanceolet leaves with long veins that grows by waterways is much larger. Why streams and lawns? It thrives in soil that has low fertility and high ratio of water. Plantain makes an excellent salve for stinging nettle rash, insect stings and some say poison oak rash. If you brush against nettle while hiking you’ll know right away because it releases chemicals into your skin that burns for awhile and then dissipates. Look around for plantain, break a leaf and roll it between your fingers till it releases the juice and apply to the site.
Nettle is another great plant even though it stings in self-defense. The chemicals that sting are water-soluable, so if you pick young nettle and soak it or cook it like spinach, you have a green that is very high in Vitamin K, protein, calcium, maganese and potassium. Nettle soup is commonly served in other countries. Nettle is an indicator plant of soil that is high in nitrogen and phosphate, which explains why it often grows around abandoned buildings and farms where there has been animal and human waste. Nettle is the host plant for many butterfly species as well.
Poison oak has a place in our native forests as well. It is a plant which happens to give off a chemical that humans find irritating. It produces berries that birds rely on, it provides shade in the understory to hold in moisture and give safe harbor to many animals, it is beautiful with its bright green spring growth and dark red autumn shades. The entire plant produces an oil that gives most people a rash, which doesn’t begin to irritate the skin for several days. Thinking about the substance being an oil will help you consider how to deal with it. If you or your dog brush it, the oil will transfer to your clothes, skin or your dog’s fur (another great reason why you shouldn’t let your dog run off-leash in natural areas!), and transfer again when it is touched. If burned, the toxicity is increased and you can inhale the fumes and become critically ill. If you think that you’ve brushed against poison oak, wash your clothes separately from the rest of the laundry and wash your skin well. There are many products on the market which help dissolve the oil, such as Technu, which is a wash for just after you’ve touched the plant. On hot days the plant’s oils carry in the air so people who are very sensitive should avoid poison oak habitat in the summer.
Weeds that indicate compacted soil, which is low in oxygen, are bindweed (looks like a small white or pink morning glory), quackgrass and chicory with its tall blue flower. Chicory’s deep taproot mines the minerals and breaks up the soil, and bindweed covers the soil providing some shade and protection against more compaction and dropping leaves over an extended area for mulch. Quackgrass secretes a chemical that supresses other plant growth as it travels via rhizome, breaking up the soil surface and carpeting it for protection.
Dandelions, a weed of childhood fantasy, of back-country wine, of spring tonic greens, are happy little plants that lawn owners ruthlessly kill. They grow in many soils, but are indicators of acidic soil. Henbane is a sign of alkaline soil.
Whether you keep your weeds, selectively weed, or eradicate them all, you should at least learn what they have to tell you. A good list of California weeds is at http://www.ipm.ucdavis.edu/PMG/weeds_intro.html .. An extremely valuable book that I have used so often when conducting hikes (and there is always a little girl that asks what every little plant is along the way), is Roadside Plants of Southern California by Thomas Belzer. It has photographs, descriptions and whether the plant is native or not. Another book is the Natural History of Vacant Lots by Matthew Vessel et al. These are wonderful guides for all the plants that fall between the cracks of most plant ID guides.
Just remember that plants communicate to you, and each have a purpose to fulfill. Whether it be as a mineral miner, a canopy or shade plant, a pollinator and food source, a nitrogen-fixer, a soil breaker, a mulch plant, each is doing something to help build earth fertility. Plants that are non-native take the place of the ones that are native and important to an area and its habitat, supplanting perhaps a plant that is the host for a particular butterfly. Be enlightened when doing yardwork. Feel free, though, to eradicate any Bermuda grass that you see, because it is a weed against which I have a personal vendetta! Happy gardening.
- Gardening adventures, Permaculture and Edible Forest Gardening Adventures, Photos, Vegetables, Vegetarian
“Who’s That Chewing on MY Step?” or, Garden Update June 1

Hidden Treasure Many of the steps that were created out of the Washingtonia palm trees are doing just fine. However, there are some that were squared off with a chainsaw and their whiteness and neatness really stood out on the hillside. They stood out a little too well, apparently, because something is gnawing away at them!

Chew Marks It can be either rats or bunnies, and I’ve only found bunny scat in the straw. In defense of my nice stairs, I’ve sprayed them with Bitter Apple, which is a product used to spray on doctored pets to keep them from licking or chewing on bandages.

Heart of Palm I spread the straw over the steps again. I’ll see tomorrow what has happened.

Cherries! Other finds around the garden are my first (and probably only) two cherries! Cherries are not known to grow in our Zone 10 climate; however, there are a few hybrids that are supposed to be ‘low chill’. Cherries are one of my favorite fruits, so I’m thrilled that this tree is giving it a go.

Magnolia The magnolia trees are blooming, and a transplanted Blue Girl rose is much happier in the Blue Garden, which is also the Bee Garden.

Blue Girl A vegetable garden is a stern taskmaster. After all that waiting at the beginning of the year, plants are flourishing. This is the best garden I’ve ever had. After all that work building raised beds, lining them with aviary wire and filling them with good soil, it had better be good!

Last Two Beds I have two more raised beds to level, line and fill. I have more pumpkin seedlings up and I need the beds ready to plant. I can’t believe it is June first already.
Today I put up strings for the pickling cucumbers and the pinto beans to climb on. Those two beds, which are the newest and which have the least amended soil, are still doing very well.
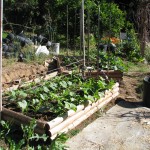
Strung Up I also staked the three yellow tomato plants, and three ‘soup bean’ plants, as well as planting more of those beans by more stakes.
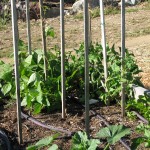
Bean and Tomato Stakes I had no idea that fava beans grew up! I mean, the beans don’t dangle like other beans do, but grow straight up, like huge fat caterpillars. Crazy! I also read where the young leaves are tasty so I tried one… then I ate several. They are much more flavorful than pea shoots.

Fava Beans Scarlet runner beans grow down, but are slightly fuzzy, which is a little creepy. They can be eaten young, or let dry on the vine.

Runner Beans are Fuzzy I planted a white and yellow sweet corn, now that the popcorn is well up. I’ll wait a month to plant the full yellow sweet corn, not only to stagger harvests but because corn will cross-pollinate. Meanwhile, I have my trusted rubber snake watching the bed.

Corn snake This package contains carrots of various colors, so I planted some just for fun. I’ve heard that some of the darker colored carrots aren’t that sweet, but I want proof.

Crazy Carrots When spacing seeds for corn or other plants which need room, use your trowel as a guide. It is about a foot long, and corn needs to be a foot by two feet apart. Plant corn in blocks so that they can pollinate better; the pollen will drift off the tassels onto the silk of the neighboring corn.

Trowel Ruler I also planted cinnamon basil, which has the most wonderful aroma. You can use it in cooking, especially for sweets, but I just let it go to bloom, then cut some and set them in water in the house for the perfume.

Cinnamon Basil This bed contains garlic, shallots, bush beans, tomatoes and basil, all of which are contending for sunlight. The bed receives sun all day and the rows are planted south to north, so the plants won’t shade each other for any length of time.

Full Bed The sunflower that was pouting last week has trouble staying awake this week. Her heavy head just can’t be lifted. Lesser goldfinches love to eat the leaves, leaving them skeletonized.

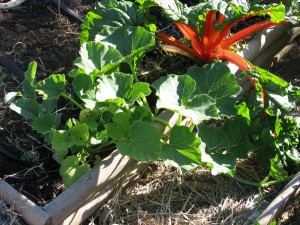
Heavy Head Of course, the best thing that is growing in my garden is this volunteer melon, which appeared under the peas I just cut out, and now that it has found the light, so to speak, it has grown one and a half feet long and going strong, and has a flower! But what is it? A remnant from melons I planted in the past? Seeds from the compost from melons I have eaten? There’s nothing like a mystery!
Volunteer Melon


