Vegetables
-
Creamy Cauliflower Caraway Soup
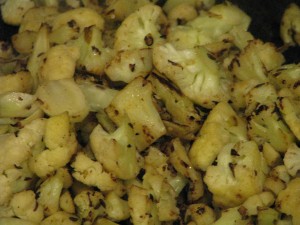
The other night I had the February blahs. I was hungry, felt as if I was fighting a cold, worn out from laboring in the garden, and wanted comfort food. I had very little in the vegetable tray, but what I had was perfect for this soup. I made it that night, and I refined it tonight.
This is a healthy, low-calorie, vegan soup that is pureed smooth and silky. Two factors make this soup special. First, you almost char the cauliflower and caraway in a very hot pan until it is dark brown. I’ll call it deeply browning, because I don’t want that burnt flavor of charring. I was once served a tomato soup at the Four Season’s Resort which obviously used charred tomatoes, and it tasted so burned that I couldn’t eat it. In fact, it nauseated me, like when you really burn something on the stove and that smell is all over the house. I don’t think that that was the response they were looking for! Deeply browning the cauliflower brings out a wonderful rounded flavor (you can deeply brown the cauliflower, add a little broth and steam for a few minutes, and serve it this way as a side dish… delicious!). The caraway releases its flavor in the heat, and then becomes a very subtle note in the soup so that you really can’t distinguish it. If you would like a heavier caraway flavor, just increase the amount of seeds.
- Deeply brown the cauliflower.
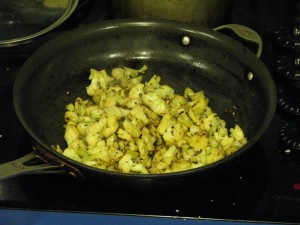
The soup is pureed and is naturally creamy with the addition of the potatoes. While the frying pan is cooling you use it to toast the salt and cayenne, again releasing and deepening the flavors. Use this as a topping, which is then stirred into the soup by the guest. This soup doesn’t take long to make and is perfect for a cool winter’s evening, and doesn’t make the house smell like cauliflower, either.

Sprinkle heated spices on top, then have guests stir in.
Creamy Cauliflower Caraway SoupAuthor: Diane C. KennedyRecipe type: EntreePrep time:Cook time:Total time:Serves: 4A creamy, low-fat vegan vegetable soup that is fast, easy and very satisfying.Ingredients- 1 shallot, chopped
- 4 tablespoons olive oil, divided
- 1 medium head cauliflower, chopped (about 4 cups)
- 1 teaspoon caraway seeds
- 1 stalk celery, chopped (about ¼ cup)
- 1 medium potato, peeled and chopped
- ½ cup dry white wine (not sweet!)
- 1 tablespoon coarse salt
- ⅛th teaspoon cayenne pepper
Instructions- In a heat-tolerant frying pan, add two tablespoons olive oil and heat on high until almost smoking.
- Add cauliflower bits (watch for splashing!), caraway seeds and stir.
- Allow cauliflower to cook between stirring so that it develops dark brown marks on it. It should smell savory but not burned.
- Meanwhile, heat other two tablespoons of olive oil in a medium saucepan.
- Stir in shallots, celery, potato and wine.
- Cook until wine is reduced to very little.
- Add cauliflower and caraway to saucepan. Don't wash the frying pan yet.
- Add broth and one can of water to saucepan.
- Cover and bring to a boil, then reduce to simmer for 30 minutes.
- In the cooling frying pan, stir together the cayenne pepper and salt and let it darken without burning. Keep in reserve.
- When soup is done, blend it until it is smooth, and caraway is as fine as your blender or VitaMix can make it.
- Pour back into saucepan and check for seasoning.
- Ladle into bowls.
- With a spoon (not your fingers... cayenne gets everywhere!) sprinkle some of the cayenne and salt mixture onto the soup.
- Either swirl it decoratively, or have guests stir it in before eating.
- Deeply brown the cauliflower.
- Animals, Bees, Birding, Chickens, Gardening adventures, Heirloom Plants, Other Insects, Permaculture and Edible Forest Gardening Adventures, Photos, Ponds, Rain Catching, Vegan, Vegetables, Vegetarian
Garden’s One Year Anniversary
Happy Anniversary! One year ago on Feb. 1, 2011, I signed a contract with landscape architect Roger Boddaert (760-728-4297) to create a permaculture garden. For twelve years I’ve had this sloping property that was covered in weeds and worthless Washingtonia palms. Not only do these 2 acres slope down to a barranca, but it was filled in due to catching all the rainwater that runs from the street and properties above. I have to give credit to friend Gary B., who brought up the subject of permaculture in a conversation the year before. I’d heard the term and thought I knew what it was about, but months later when I was researching what to do with my property I remembered him mentioning it, and looked it up. I found what I was looking for. I’ve been an organic gardener for many years, have owned chickens for their eggs, have refused to till the soil so as not to kill microbes, have worked naturally with animals and plants, have created habitat, composted, recycled, collected rainwater… and all of that was permaculture. And so much more. How can one not be attracted to the term Food Forest? Certainly not a foodie and gardener like myself.
What happened on the property starting the week of Feb. 1 for the next six months altered the land so that it is truly two acres of habitat. It is useful, it is natural, and it is beautiful. Roger’s team led by Juan built beautiful walls of urbanite, planted and hauled, worked in scorching sun and frosty mornings and made what was dreamed into reality. An integral part of the garden has been diverting the water from erosion points and into rain catchment basins and natural ponds, and that is where Aart DeVos and Jacob Hatch of Aquascape (760-917-7457) came in. They also installed the irrigation. Dan Barnes did the rough and the precise tractor work (760-731-0985) and I can’t recommend his experience and skill enough. Fain Drilling dug the well (760-522-7419) and the wonderful sheds were built by Quality Sheds of Menifee (http://www.socalsheds.com) .
Along with some volunteer help from Jacob, I am the sole caretaker of the property. I am planning the plant guilds, weeding, improving soil, moving problem plants and trees and, did I mention, weed? Oh yes, then there is weeding. On Saturday May 12th, the garden will be on the Garden Tour of the Association of University Women of Fallbrook, and hopefully many people will be inspired to go organic, to create habitat, conserve water and grow extra food for the Fallbrook Food Pantry. We’ve come a long way, baby!
The following photos are comparisons between the precise location last year at this time, and today.
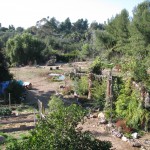
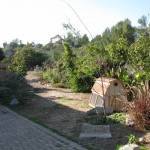
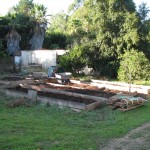
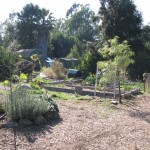
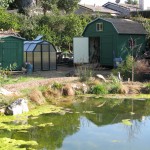
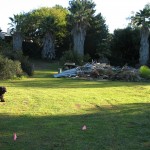
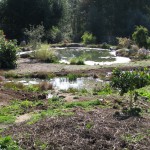
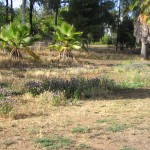
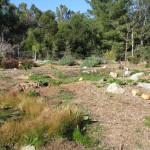
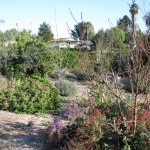
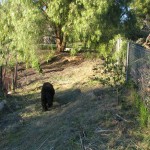
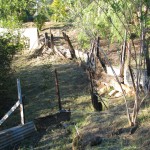
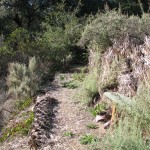
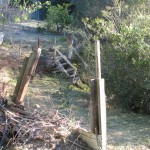
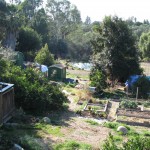
The property last February. The property today. Sophie and General loved all the excitement. They love the new gardens and pond even more. My veggie beds with the old sheds behind. My veggie beds with the new sheds and greenhouse behind. Where the big sheds were: everything usable was reused. New sheds that aren’t a safety hazard, and the greenhouse. The lower area with shed debris (lots of mowing area!). Hey, there are ponds there now! Not much for the neighbors to look at. Quite a lot for the neighbors to look at! Access to the old oak was hazardous. Palm stairs lead past the oak to a birding area. Stonefruit were old when I moved in. New stonefruit adorn what is now the Bee Garden. An erosion area sloping down to the barranca. Water won’t flow through here anymore. Lots of mowing and palm frond removal. Not so anymore. Horrible looking debris failed to hold back the embankment. Palms were used to stabilize the new paths and camoflage the supports. Old unstable stairs led to washout areas. New railings, stairs and urbanite retaining walls lead to another viewing area. The view from my balcony. Part of the old shed remains. Hey, there’s a pond there! -
Pepitas (Roasted Pumpkin Seeds)
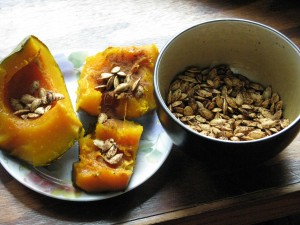
Chili-lime pepitas are wonderful as a topping! All those lovely seeds that you scrape out of pumpkins and winter squash are little nuggets of nutrition, including protein. Pepitas can be a little chewy, but have a popcorn-like flavor and can be very addicting. To seperate the freshly scraped seeds from the pumpkin fibers that encase them, plop the whole mess into a bowl full of water and rub with your fingers. The seeds seperate easily. Compost the fibers, and dry the seeds. You can do this by blotting them or wringing them out in a towel, or allowing to set in a sieve, if you aren’t in a hurry.
Pepitas (Roasted Pumpkin Seeds)Author: Diane C. KennedyRecipe type: SnackPrep time:Cook time: -
How To Preserve Squash and Pumpkin
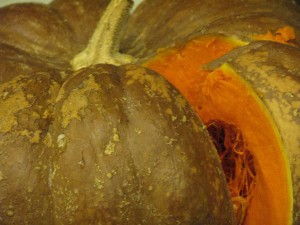
Test for doneness; if the flesh isn't soft, continue baking. You have this wonderful pumpkin sitting around, waiting to be eaten. The holidays pass and… there it sits. You don’t want to let it go bad, but you don’t have a use for it right away. What to do?
Here’s how to make your own pumpkin or squash puree and preserve it by freezing. I haven’t seen reliable methods of canning puree so I opt for the freezer method in plastic bags. I know, I too want to eliminate plastic bags from my life. However I own freezer bags and I will use them.

Stack the freezer bags and freeze flat First of all, choose a pumpkin bred for taste, such as Sugar Baby; Jack o’lantern pumpkins aren’t that tasty and are usually very fibrous. Wash your pumpkin or winter squash (not summer squash, like zucchini or crookneck) without soap. There are two good options for cooking the squash (pumpkin is a type of squash, so I’ll just say squash from now on): steaming or baking. Baking is the best method in my opinion. First of all, you can stick the whole squash into the oven and bake it, whereas if steaming you must cut up the squash and with some of these hard-skinned beauties that task can be difficult and dangerous (it is easy for the knife to slip). Secondly, steaming adds a lot of moisture to the squash, and it must be drained after pureeing before you freeze it, or else it will be too watery to use in pies and other baked goods. I steam squash when I want to serve it for dinner because it is quick and it preserves nutrients. Baking removes a lot of the moisture and increases the flavor of the squash. Some people recommend boiling it, but the squash would have to be whole, and dealing with a huge pot of boiling water is just not necessary.
If you are going to be obstinate and want to steam the squash, then cut it up, scoop out the seeds (save for replanting or making pepitas, recipe: Pepitas 1/15/12), steam until fork-tender, scoop out the flesh, puree it in batches, and leave it sit in a bowl, covered, in the refrigerator overnight. Water will seep out. Or tie into cheesecloth suspended over a bowl and allow to drain.

Quarter and scoop the seeds out of small pumpkins. If you are going to bake it, heat the oven to 400 degrees F. Lightly oil the outside of the washed squash. Line a baking dish with foil. If you have a whopper, just pop in the pumpkin (remove the stem if there is one).

You can bake a whole squash. If you have a thinner skinned pumpkin, you can carefully cut it into quarters, scoop out the seeds, and place on a piece of foil on a cookie sheet. I bake them face-up to improve flavor and remove moisture.

Baking brings out the flavor. Bake a large squash for about 60 minutes, until you can slide a knife easily into it. If you have a large, thick-skinned squash, you may need to leave it in up to another half an hour. If you have a thinner skinned pumpkin such as Sugar Baby, you may test it for doneness after 45 minutes. Allow the squash to cool, then slice it into chunks. Scoop out the seeds (no good for planting now, but still good for making pepitas) and then scoop out the flesh from the skin. Puree flesh in batches until there is no fiber left. If the puree looks thin (think of the consistency of canned pumpkin), then either leave it covered in a bowl in the ‘fridge overnight and pour off excess water the next day, or strain through a cheesecloth.
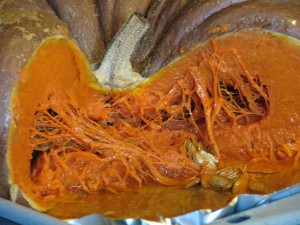
After baking it isn't pretty, but it sure is easy to cut! Once your puree is ready to go, then I suggest you measure it by 3/4 cupfuls into plastic freezer bags. That’s how much puree is in a 15 -oz can of pumpkin, and what pie recipes call for. Or if you have other recipes in mind with other measurements, freeze in those increments.

Some squash like this Cinderella pumpkin is more fiberous than others After filling the freezer bags (and I guarantee that you’ll get pumpkin everywhere!), flatten the bags and place on a cookie sheet that will fit into your freezer. Stack the bags (make sure to label with type of squash and date!) and freeze. They will be flat and much easier to deal with. Freeze for about six months.
Of course, before you freeze it all, save 1/2 a cup and make my Spiced Pumpkin Scones (posted on January 10, 2012).
- Chickens, Gardening adventures, Humor, Permaculture and Edible Forest Gardening Adventures, Vegan, Vegetables, Vegetarian
Planting Easter Dinner (in November)
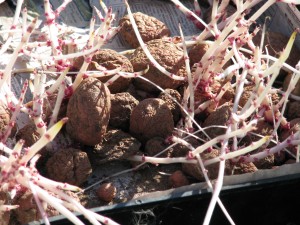
Creepy white fingers I finally was able to work in the vegetable garden today; me and my helpers, that is.
Kakapo, Miss Amelia and Lark, helping I am by no means done, but I did some major cleaning out of old veggies. Out went the tomatoes that aren’t producing, dead squash vines, weeds, a volunteer avocado tree and the two enormous zucchini plants which, although having been cut in half, abused and ignored, have still been putting on a squash a week. I have one more zuke plant left, but these big guys had to go. The compost heap is… well… a big heap.
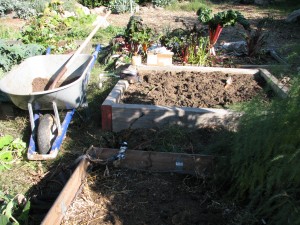
White potatoes in the closest bed, root veggies and brassica seeds in the back one As I study Permaculture, I’m more aware of the millions of microbes in the soil and the fine network of fungus that enriches plant roots. The less I disturb my garden soil, the better. After pulling the weeds, I sprinkled on GardenAlive’s soil enhancer, which are more microbes, as well as their organic Roots Alive fertilizer. I used a trowel to lightly work it all just under the soil surface, then topped it with compost from my compost bin. Having soil that is healthy, rich smelling and alive is any gardener’s dream. All those microbes free up nutrients in the soil so that your plants can suck them up and use them, which makes your veggies not only healthy and more resistant to bugs and diseases, but produce … um…. produce that is loaded with vitamins and minerals. Its like the old gardener’s joke: A gardener asks a man what he puts on his strawberries, and the man answers, “Cream.” The gardener shakes his head in disbelief and says, “I always put manure on mine.”
Potatoes from spring, which I’d stored in a dark cabinet under the house, decided they didn’t want to wait any longer.
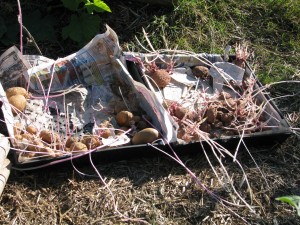
Eager potatoes Fall is a good time to plant potatoes, as long as you keep their greenery protected from frost. Since potatoes can be grown from cuttings (as well as tubers and seeds), and to produce more potatoes you slowly mound up compost or straw around the stem as it grows, I tried something with these long white fingers. I lay each potato on the soil, with the long white stem laying flat, and covered them all up with light mushroom compost.
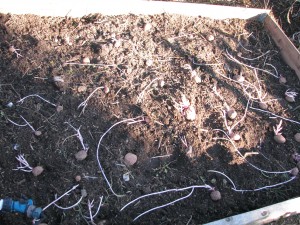
Laying down the potato stems to form new plants I’m betting that the stems will all take root and send up greenery along the nodes, using phototropism. That will multiply the number of potato plants by a lot. Then as the greenery grows, I’ll add more straw and compost around them. If all works out, sometime early next year I should be Potato Queen of Fallbrook! Of course, I had lots of help with the project.
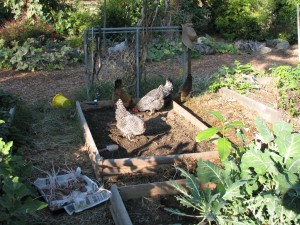
Lots of helpers. I fenced off the beds after I planted A few months ago I planted pieces of yam that had started to grow in the house. The vines flourished outside of the bed. Now that I’ve cleared the massive zucchinis out of the way, I’ve pulled the vines back into the bed, layed them out so that they (mostly) touch the soil, and have dumped mushroom compost on parts of them. The object is to allow them to root along the vines and make more yams. I’ll let you know if this works or not.

Taming the yams I’m also planting carrots and parsnips. The ‘nips won’t be ready until next spring, having improved in flavor for any frost we may receive. I’m hoping there may be some small carrots ready for Christmas dinner, but I really should have put them in last month to be sure. In will go the brassicas: Brussels sprouts (did you ever wonder if it smells cabbagy in Brussels?), broccoli and cauliflower. These guys all like a good chill, as long as they are protected from frost. More cool-weather lettuces will go in, as well as lots of endive for my tortoise. Onion sets and seeds can go in, as well as radishes. The arugula has reseeded itself again and is coming up in all the pathways, with even an elegant specimen right next to the large pond by the rushes!
You remember the pond, which was put in to attract wildlife, right?

Wildlife gathers at the watering hole.... I still have tomatoes and eggplants producing. I tied up the lazy ferny stalks of my first-year asparagus to get them out of the way. The horseradish plant seems to be doing well; I have to consider what to serve it with at Christmas. My dad loved horseradish sauce, as do I, and I grow it as a memory of him and our Polish heritage on his side. I used to make him his favorite soup, borscht, but I would never taste it because I just don’t like beets.
Tomorrow, if I can move my joints after many days of weeding, I’ll clear out the remaining ’empty’ bed and cover the unused ones with compost and straw to sit until spring. I am so glad that I can garden almost year-round!
- Bees, Chickens, Gardening adventures, Other Insects, Permaculture and Edible Forest Gardening Adventures, Vegetables
Crazy-Pot Seeds
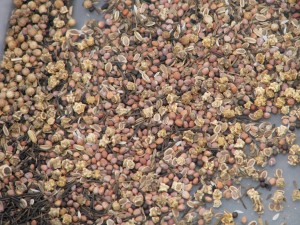
Crazy-pot mixture of veg seeds Today, the palindromic 11/11/11, was also Veteren’s Day and a day between two rainy weekends. A perfect day for spreading lots of seeds. With winter rains on their way in a month, it is important to hold the topsoil with rooted plants, and why not use a cover crop that also fixes nitrogen? My choices were hairy vetch and a tall native lupine.
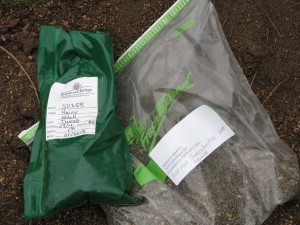
Native lupine and hairy vetch seeds I would also have liked to use white or sweet clover but sources were sold out early this year. Both my choices will have flowers that offer plenty of nectar to bees, be lovely, hold the soil, set nitrogen, and can be, if needed, sacrificed. When you ‘sacrifice’ a nitrogen-fixer, you can either turn it under or cut the tops, leaving them in place on the soil surface to decompose.
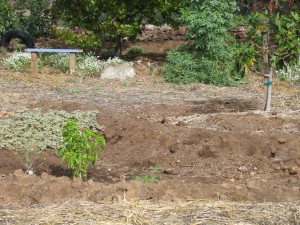
Plant guild waiting for seeds I don’t agree with disturbing my soil microbes any more than necessary, so I won’t be tilling ever again. When you cut a nitrogen-fixer, the roots release the nitrogen they hold into the soil as the tops mulch then decompose bringing lots of nutrition to the soil surface. Vetch should be a winter crop, and lupine a spring crop, if they can tell the difference here in San Diego!
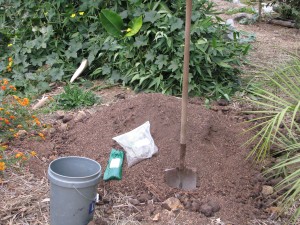
Mixing seeds with mushroom compost My method for spreading these two was to mix handfuls of each with a bucket of mushroom compost, and hand spread it in the most bare and most unfertile areas.

Broadcasting lupine and vetch seeds mixed with compost Adding the compost, I thought, helped the seed distribute more evenly, gave it a little cover since I wasn’t going to rake it in, and disguised it from birds a little.
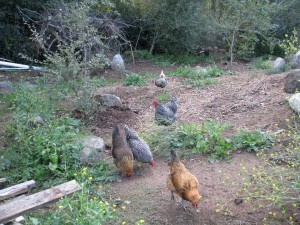
The girls. Once done, I decided it was also a good time to do something I had been looking forward to doing for years: spreading old veggie seeds. I’d done a little of this in a raised veggie bed, with some success. I have so many old packets of veggie seeds that I’m not going to use in the raised beds (I have all organic seed now), and I can’t believe that it isn’t viable. If they sprout seeds found in ancient Egyptian tombs, then I’m sure mine can sprout, too. This seeding is a very important step in the edible forest garden.
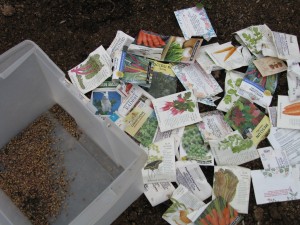
Many old winter crop seeds This year’s abundance of herbs, squash and tomatoes has been fabulous… I still have some ‘feral’ tomatoes putting on enormous fruit which I pick, polish and eat out of hand in the garden while I’m working.
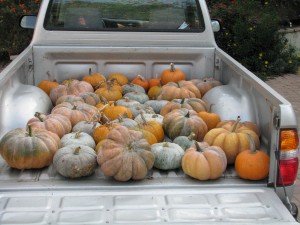
Pumpkins and squash on their way to the Fallbrook Food Pantry I opened all the packages of seed for cool-weather vegetables, such as carrots, radish, dill, broccoli rabe, and lettuces. Some such as garlic chives and onion I separated out and sprinkled near roses, since alliums are a companion plant for roses and help ward away aphids. The rest of it was mixed up in a lovely crazy-pot of seeds. I didn’t mix with compost this time, as there were fewer and smaller seeds involved. I sprinkled them then covered them with soil using my foot… the professional way to plant!
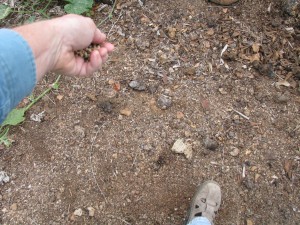
Scattering veggie seeds I am eager to see what comes up after the rain this weekend. It truely will be an edible landscape. Even if I allow the veggies to go to seed, the blooms will all be excellent bee food sources, especially the carrots and dill. None of these were nitrogen-fixers, because I used all the extra peas up in the vegetable beds this spring (see archives) improving the soil. Beans, and other warmer-weather seeds I’m holding back for February or March planting. I do have sweetpea seeds to plant out, but the lupine and vetch will be working their magic anyway.

Embankment with ragweed, now seeded with lupine and vetch 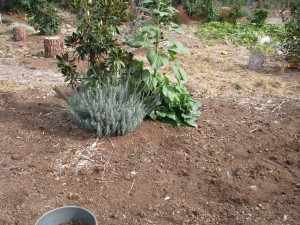
Under the soil is now daffodil bulbs, lupines, vetch and mixed vegetable seeds About ten years ago I had a short story published in the young person’s magazine Cricket called Taking Tea with Aunt Kate. In it a girl lived with her mother who was a wild, messy gardener, spreading seeds all together and having veggies and flowers mingling in riots of color. The girl’s aunt is, by contrast, perfectly coiffed and takes her to a formal ‘high tea’ at a prestigious restaurant. The girl decides that she can be a little of each woman, a little wild and a little formal. I think I’m that child! I clean the dirt out from under my nails so that I can go to the opera.
I’ll be walking the garden in the next few weeks, waiting for tell-tale sprouts (and trying to figure out if they are weeds or not!), and watching the bare areas come to life. How fun!
-
The Little Guys in the Soil
I know, I know, I’ve been very delinquent. However I have been working hard, reading a lot and studying. I’m taking a Permaculture Design Course in San Diego on most weekends, and the information has been dazzling. Even though I know a little or a lot of what is being presented, what amazes me is how related the information is and how it all works together. For instance…
Gardeners know that the best pH for soil is somewhere around 6.5. Higher or lower than that and the soil has too much acid or alkaline. Here in San Diego we have alkaline soil. Rainwater is excellent because it has a neutral pH. What is so important about that neutral pH? Well, I’m going to tell you. There are all kinds of nutrient in the soil in the form of trace minerals, such as iron, magnesium, copper, etc. However these nutrients are bound up in the soil because of the pH… some are bound by a high pH, some by a low pH. For instance, we have adequate iron in our soil, but because of the alkalinity, plants can’t access it and become iron deficient. If you have neutral pH, then plants are able to feed themselves nutritiously. To free up the iron, you should add mature compost and water as much as you can with collected rainwater.
Okay, so you knew all that. So did I. Here comes what I think is the interesting thing.
We know that the soil is teeming with little beings such as bacteria, fungi and nematodes. Some are good, some are bad. Such is life. Picture if you will the soil in a forest, which has a lot of large materials such as logs and sticks being broken down by various fungus. The soil in a vegetable garden, however, is loamy with small particulate matter. Well, in a forest situation, with an acid soil, there is high fungus activity and lower bacteria count in the soil. The soil isn’t usually turned over or bothered in any way. In a vegetable garden, a slightly more alkaline soil is perfect because it has less fungus and more bacteria. The soil is turned over frequently. Weeds such as grasses prefer a pH range that is slightly more alkaline. By changing the pH with the addition of different kinds of mulch, you can moderate the microbes in the soil, tipping the balance between fungi and bacteria, and edging out the grasses. Cool, huh?
Fungus is extremely important where longer-lived trees are planted, because fungus travels underground, linking with the spreading roots of the trees and actually causing communication between them! Fungus, it has been said, is nature’s Internet. Mushrooms are called nature’s teeth, too, but that is an image that perhaps you just don’t want in your head. Bacteria help soil that is often disturbed by helping leguminous plants fix nitrogen (yes, yes, I know, back to the darn legumes again), and help free up nutrients for the roots, usually by dying. That’s not a happy thought but, again, that’s the way it goes. If you till the soil, you kill off the bacteria and nematodes and fungus and all the other little critters. There is a rise in fertility, but only briefly because that rise is the nutrition released by the decomposing bodies of all your soil critters! Then there is just dead soil. Then farmers pour on the salt-based fertilizers (NPK), which is just salting the land and making sure nothing can live in it. The crops grow, but since there aren’t any friendly critters freeing up nutrients, the resulting nutritional value of the produce is poor. Only by mulching, composting, and cover-cropping can the soil come alive again, which nourishes the plants, which nourish us.
There is so much life in just a pinch of soil; so much going on that we still can only guess at. To build up your soil with mulch, compost and organic practices is to give life to gajillions of life forms (yes, that many!) which all work to make your plants healthy, your food more nutritious, and gain back some of the topsoil that has disappeared through man’s blundering.
I hope this was as interesting for you as it is for me!
- Bees, Gardening adventures, Other Insects, Permaculture and Edible Forest Gardening Adventures, Vegetables
Nitrogen-Fixing Plants

Sweet pea If you’ve read my posts from this spring, you’ll have endured me going on and on about peas and beans and how they fix nitrogen in the soil. For those who nodded off during those episodes or who have just tuned in, I’ll go over it briefly.
Some plants have the ability to fix nitrogen in the soil. Actually, a type of bacteria called a rhizobia invades the roots of plants in the Fabacea family and a few others, and fixes atmospheric nitrogen in nodules on the plant’s roots. This is beneficial to both the plant and the bacteria, a process called mutulism. It also benefits whatever grows around the plants because, when the plant dies, the nodules release their nitrogen into the surrounding soil. In the case of long-lived shrubs and trees that fix nitrogen, as roots die off or are replaced, they release their nitrogen.
An edible forest garden is one where man mimicks the dynamics of an old-growth forest. Why? Because forests succeed without the aid of fertilizer, tilling, mulching, irrigation or any interference or ‘help’, as it were, from man. How does it do this? The plants that grow complement each other, providing what each other needs. These relationships are called plant guilds. You can create plant guilds, substituting plants that provide food for humans. In a guild there is a taller tree which provides shade and leaf droppings (mulch), shrubs which provide more shade, mulch and habitat for animals and insects, plants that fix nitrogen in the soil, plants that have long tap roots called ‘miner’ plants, because they take up nutrients from deep in the soil and deposit them on the soil surface when their leaves die off, plants that attract pollinators, and plants that are ground covers to regulate heat and moisture. Using permaculture practices for water harvesting and organic gardening, when the guild matures it should be almost completely self-sustaining.
Say you want to plant an apple tree. That would be your tall canopy tree for the guild, which drops leaves as mulch. Beneath it, you could plant a shrubby herb such as rosemary (another edible), daikon radishes (miners, leaving the cut leaves on the surface after harvesting the edible root), bush beans (legumes) and herbs such as dill, parsley and basil, some of which you allow to flower for pollinators. As the tree grows, the plant guild can widen and others planted.
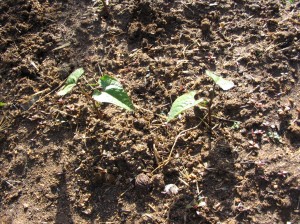
Beans There are many plants, trees and shrubs that fix nitrogen in the soil. All beans and peas including soybeans and fava beans do; when the plants are finished cut them above the soil so the roots stay put and decay where they are to release the nitrogen. Cover crops such as clover and hairy vetch are grown and turned under to improve the nitrogen in the soil. If you are from the Southern California area, perhaps you’d be interested in knowing what native plants are nitrogen fixers.

Ceanothus (California Lilac) at Elfin Forest The native Southern California nitrogen fixers include: ceanothus, lupine, deerweed, California peashrub (endangered) (lotus), and redbud. Non-natives that are commonly used are alders, acacias, calliandra, sweet peas, guaja, and many more, as the Fabacea family is very large. Use any of the natives in ornamental gardens and not only will you be improving the soil and the vigor of the surrounding plants, but providing much needed habitat for our native birds and insects.
Try building plant guilds; it is challenging and fun. Many combinations of plants are suggested on permaculture
-
Heavenly Steamed Eggplant
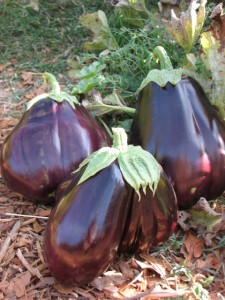
Black Beauty eggplant I love eggplant, but always thought it had to be salted, pressed and fried or baked. Cookbooks always talk about bitter juices that need to be leeched out. The recipe for Coucharas (see recipe list) calls for steaming eggplant until it is very soft so that the pulp can be mashed and combined with other ingredients.
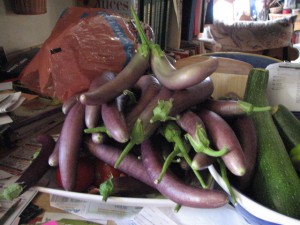
Japanese or Chinese (long) eggplants have few seeds Now with an abundance of eggplant, both Black Beauty and Japanese, in my garden, I looked for some simple eggplant recipes. Maybe everyone else in the world knows how incredible lightly steamed eggplant is, but I just found out!
Choose glossy, firm eggplants I took a Black Beauty (globe) eggplant that I’d harvested the week before and was beginning to go soft, cut off the stem end and quartered it lengthwise. I steamed the slices for 8 minutes (no more than 10!).
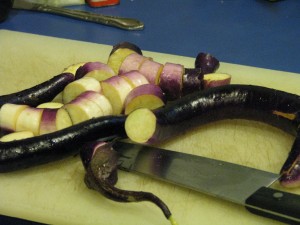
Slice long eggplants into bite-sized chunks The texture was silky and smooth, not at all bitter and incredibly light. Over the top of the quarters I spooned a very easy sauce. The eggplant, which is notoriously spongy, soaked up the sauce. Slicing the eggplant, skin and all, was a dream and eating it was sublime.
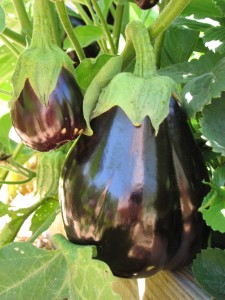
Eggplant is in the same family as tomatoes and potatoes It was so good in fact that I did the same with Japanese eggplant the next night, but instead of quartering them, I cut them into bite-sized chunks, then after steaming poured the sauce over them in a bowl and stirred them around to absorb the sauce. I served both with very thin noodles. Photos of cooked eggplant are rarely delicious-looking, so you’ll have to let your imagination guide you.
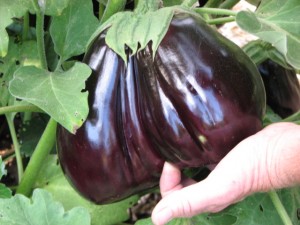
An enormous double eggplant! There are many sauce mixtures on the Internet, but here is mine:
Heavenly Steamed EggplantAuthor: Diane KennedyRecipe type: Main DishPrep time:Cook time:Total time:Serves: 2-4Quick, light, tasty, low-calorie and wonderfully different, this eggplant recipe is a gem.Ingredients- One large Black Beauty eggplant or 3 Japanese eggplants
- 2 Tablespoons Rice Wine Vinegar (or other mild vinegar)
- ⅛th cup Bragg's Amino Acids, Tamari Sauce or low-salt soy sauce
- ¼ teaspoon sesame oil
- 2 Tablespoons olive oil
- ½ teaspoon grated fresh ginger
- If you like garlic, dice or grate a small clove and add it in. You can also include chili paste to taste.
- Fresh cilantro (optional)
- Toasted sesame seeds (optonal)
Instructions- Cut stem end(s) off the eggplant
- If using one large eggplant, cut it into quarters long-wise from end-to-end. If using long eggplant, cut into ¾" - 1" bite-sized chunks. Do not peel.
- Steam eggplant for 8-10 minutes until a knife easily slides into the skin; do not overcook!
- Meanwhile, mix all sauce ingredients except cilantro or sesame seeds, if using.
- Plate the eggplant quarters and drizzle the sauce over the top slowly so it absorbs, or put chunks in bowl and mix with sauce, then plate. Offer extra sauce separately.
- Sprinkle with fresh, chopped cilantro and/or toasted sesame seeds.
- Very good with noodles or rice.
- Animals, Bees, Gardening adventures, Heirloom Plants, Other Insects, Permaculture and Edible Forest Gardening Adventures, Vegetables
What Bugs See
To veer off from the vacation photos, I thought I’d talk about bugs! I’ve been working in the garden a lot and watching the myriad types of insects drawn to the various flowers blooming all over, and it reminded me of something amazing that I learned last year. The way flowers look to us is not what most insects and birds see. The flowers are bright and showy, but they offer up visual clues to pollinators through colors and patterns that can only be seen with eyes that see UV light. Humans can’t. We can’t assign colors to UV light in the way that we understand them, so when photographing with UV light we substitute our colors to show the change in patterns. The markings on the flowers are guides to where the pollen is, like lights and painted lines on airport runways. Just as baby chicks’ mouths are large and brightly colored to show mom and dad where to put the worm, especially on the inside as they gape and wait to be fed, so have flowers made sure that the pollinators get to the right place for pollen! The differences between what we see and what insects see can be startling; there is a whole hidden world right before our eyes, just as there are supersonic and subsonic sounds that we cannot hear. Elephants make subsonic noises that other elephants can hear miles away, but we aren’t aware of it.
Below are photos taken with and without UV light by the brilliant Norwegian scientist-cameraman Bjorn Roslett. Remember that the UV colorization is man-made to show the difference in patterns. More technical information can be found at his site here: http://www.naturfotograf.com/UV_flowers_list.html , with lists of types of flowers and what approximate color changes there are under UV light.
Dandelion Vinca minor Vinca minor under UV Norsk mure (Potentilla norvegica) Norsk mure under UV Primrose Crocus Anemone

