Vegetables
- Gardening adventures, Heirloom Plants, Permaculture and Edible Forest Gardening Adventures, Planting, Recycling and Repurposing, Seeds, Soil, Varmints, Vegetables
Corn Stalks as Pea Stakes

Our corn grew to a ginormous 10′ height this year in our raised pallet beds. The roots of corn are very sturdy; we usually cut the stalks above the roots, and allow the roots to stay in the ground to decompose. Often they are there a year later, still holding the soil.

Miranda being consumed by corn and zucchini. As it is October and, despite the 95 degree F. temperatures and hot, dry Santa Ana winds that are so typical of Fall here in Southern California, it is time to plant winter crops. Peas are the top of the list to plant. There are many types of peas. Some are valued to be eaten as pods when the peas inside haven’t matured. Some – and these are my favorite – produce juicy round peas that can be shelled and frozen for use all year. Some produce a lot of tendrils, and these along with the new leaves and shoots are eaten in salads and stir-fries, and are very attractive. There are also cowpeas, which are really beans that enjoy warmer weather, so not a candidate for winter crops. Best of all, peas and the rest of the legume family set nitrogen in the soil. They have a symbiotic relations ship with certain bacteria that must live in your soil for this to happen. The plant harvests nitrogen out of the atmosphere, and stores it in nodules on its roots. When the roots die, either from the plant being cut back or dying, the nitrogen is released into the soil in a plant-usable form. No need for chemical nitrogen fertilizers.

King Tut peas are good eating before and after the peas form in the pods. The peas are green. 
King Tut flowers are gorgeous. One of the problems I’ve had growing the tall peas is having the best supports for them, especially in raised beds. I never seem to have tall enough posts, or the posts fall over and chaos ensues. This year we decided that we’d already grown our pea supports: our corn.
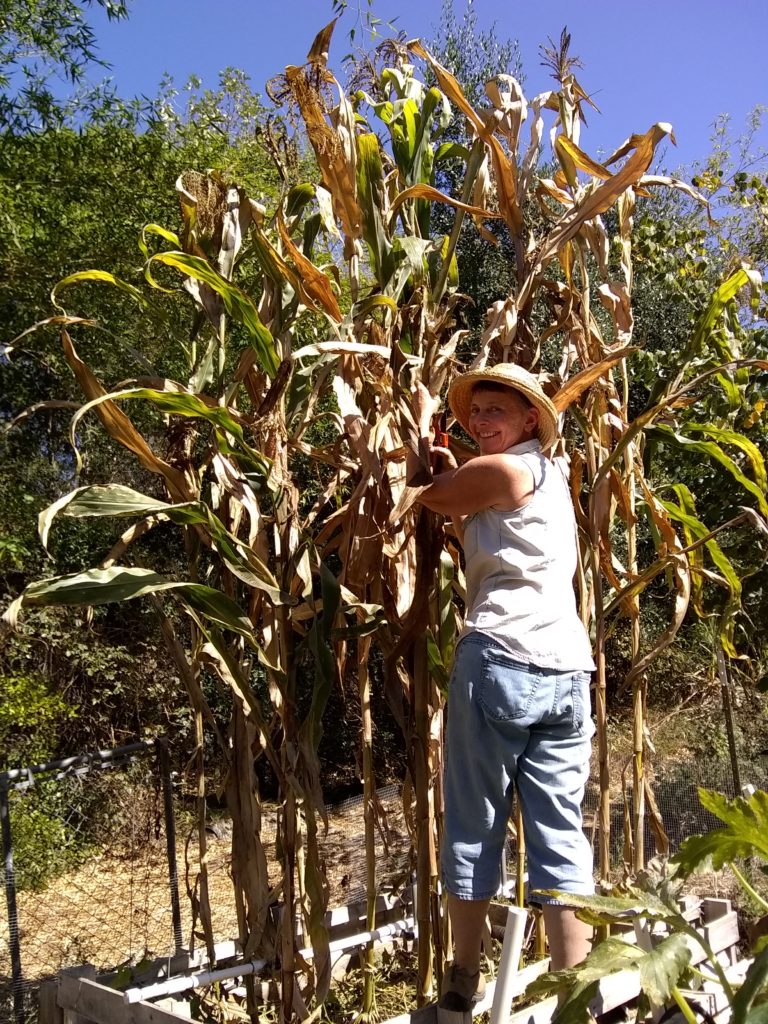
Trimming a few feet off the corn. I’m 5’3″ tall, for comparison. I have a phone in my back pocket and my pants are loose, so please don’t think I’m that saggy! We cut the corn stalks down to about 8 feet; above that the stalk was a little weak, and the stalks would be tall enough for our purposes. Then we planted vining (not bush) peas in and around the base of the corn. We had a lot of success with King Tut peas last year, which had beautiful purple pods (but green peas), so we opted for more of these in this bed.

Miranda planting around the corn. We left some of the cut sweet potato vines we’d just harvested from this bed to help hide and protect the pea seeds, and to return nutrition back into the soil. Now the peas are growing rapidly, and we’ll be able to train them up the sturdy, straight corn stalks with the help of some twine. When the peas are done, we can either use the stalks all over again for another climber, depending upon how they last over winter, or we cut the corn and the pea plants at the surface of the soil and put the whole pile into a compost pile, or into another raised bed. Corn is a hungry plant, so the pea’s nitrogen-fixing capability will help restore fertility to that raised bed. Remember that we use no fertilizer other than in-bed composting using kitchen scraps, plant cuttings, manure from our hens, and leaves, and anything else that will decompose. The beds are being watered by salty well water, too.

Baby peas are shooting up quickly. To help deter mice we sprinkle red pepper flakes over the seeds, and Miranda makes up a spray bottle full of hot sauce and water and sprays the beds in the evenings.
Re-purposing is so fun, especially when the result is better soil, healthier plants, and less work for us!
- Breads, Gardening adventures, Health, Heirloom Plants, Hugelkultur, Permaculture and Edible Forest Gardening Adventures, Planting, Recycling and Repurposing, Seeds, Soil, Vegan, Vegetables, Vegetarian
Growing Cornmeal


Sweet corn is a wonderful summer treat; although you can freeze it, is never as good as picked, steamed and eaten within hours. However hard corn can be dried, ground and stored for use throughout the year. Some varieties that aren’t super sweet can be eaten fresh or left to go hard for grinding. Miranda and I have fallen in love with growing and grinding colored corn. They are not just for Thanksgiving decorations anymore!
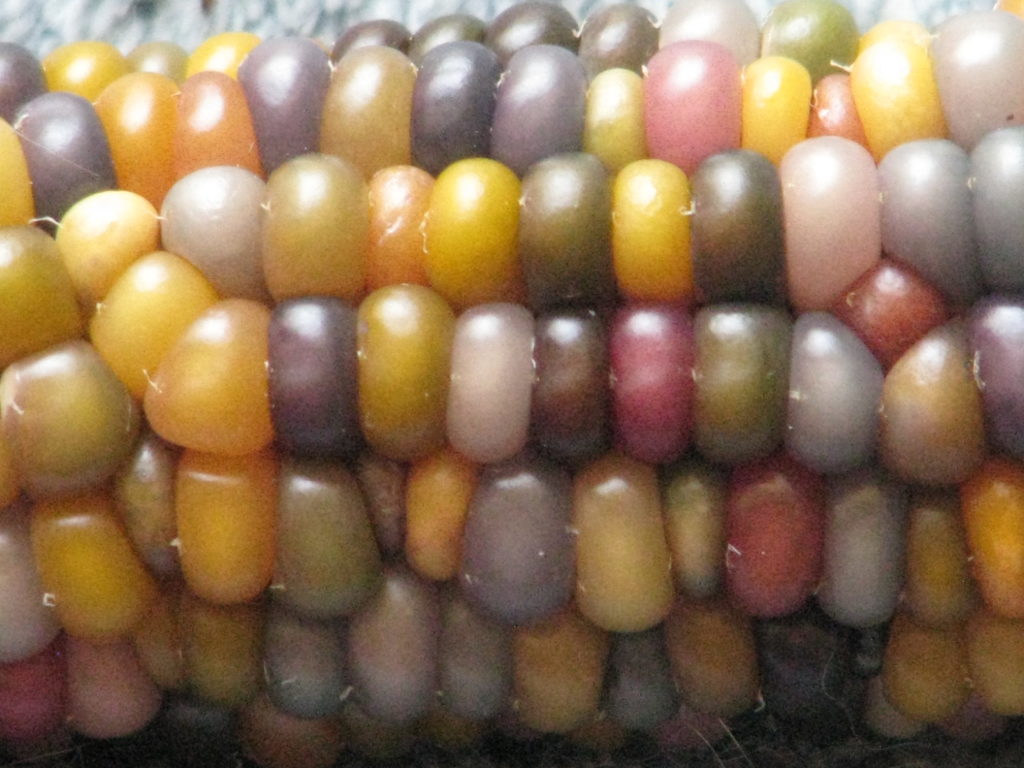
We’ve grown Indian corn and small cute popcorn. We’ve also grown the lovely Glass Gem Corn, with its opalescent pastel colors that was all the rage for the last few years. It made a lovely lightly colored cornmeal.

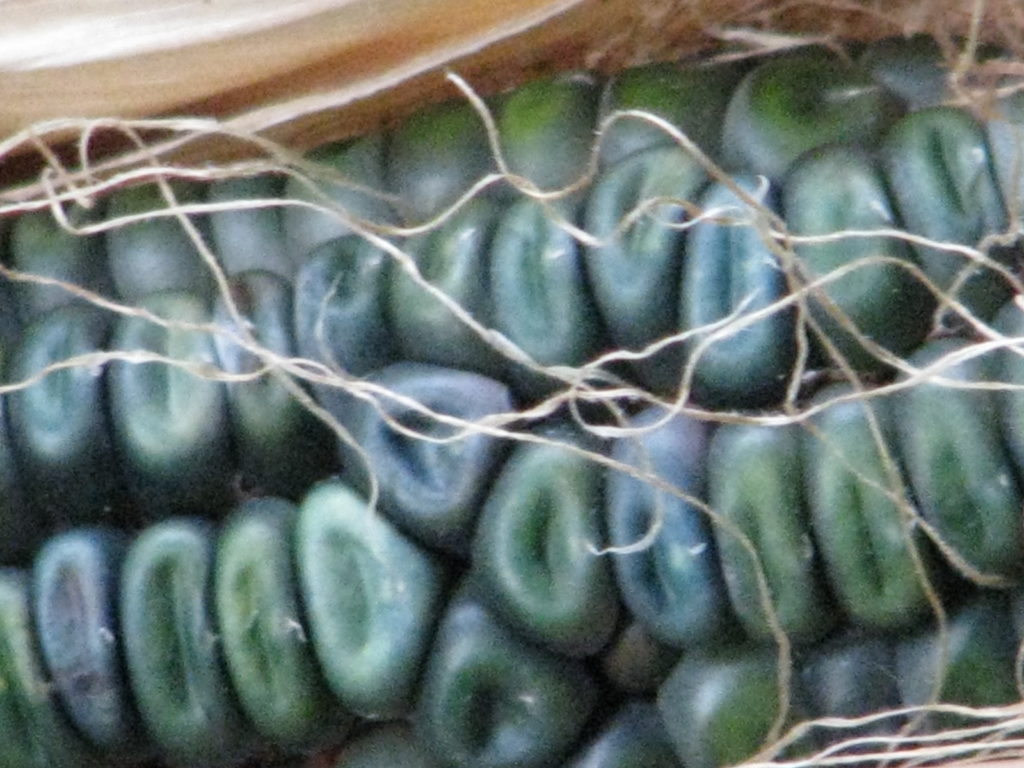
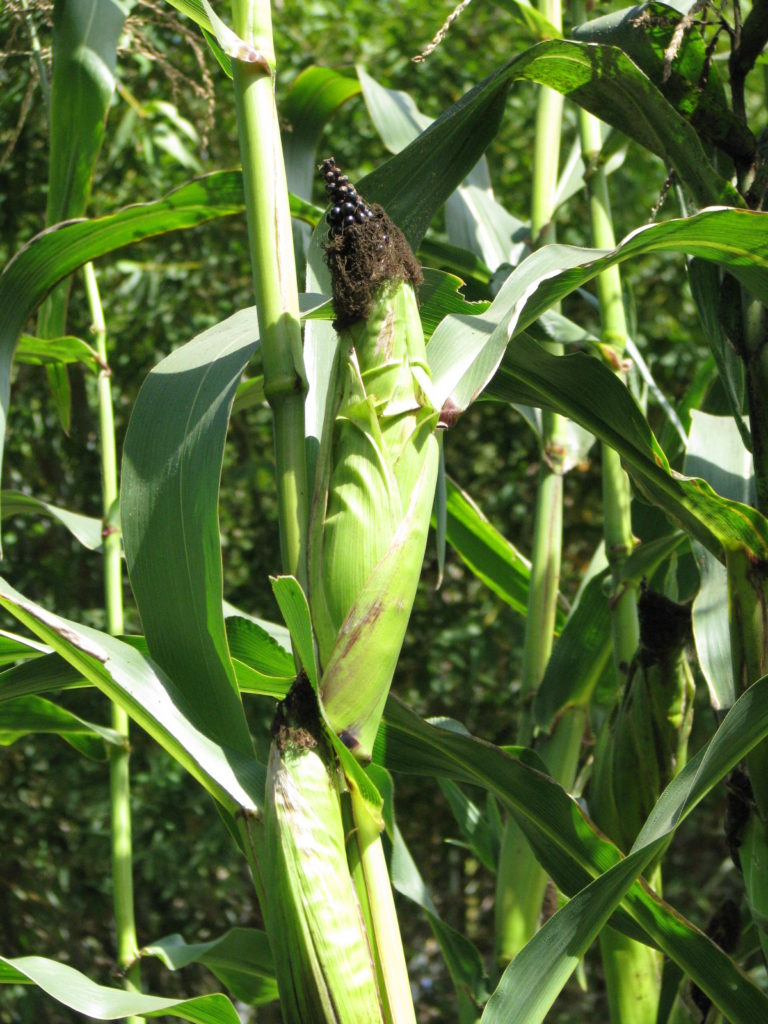
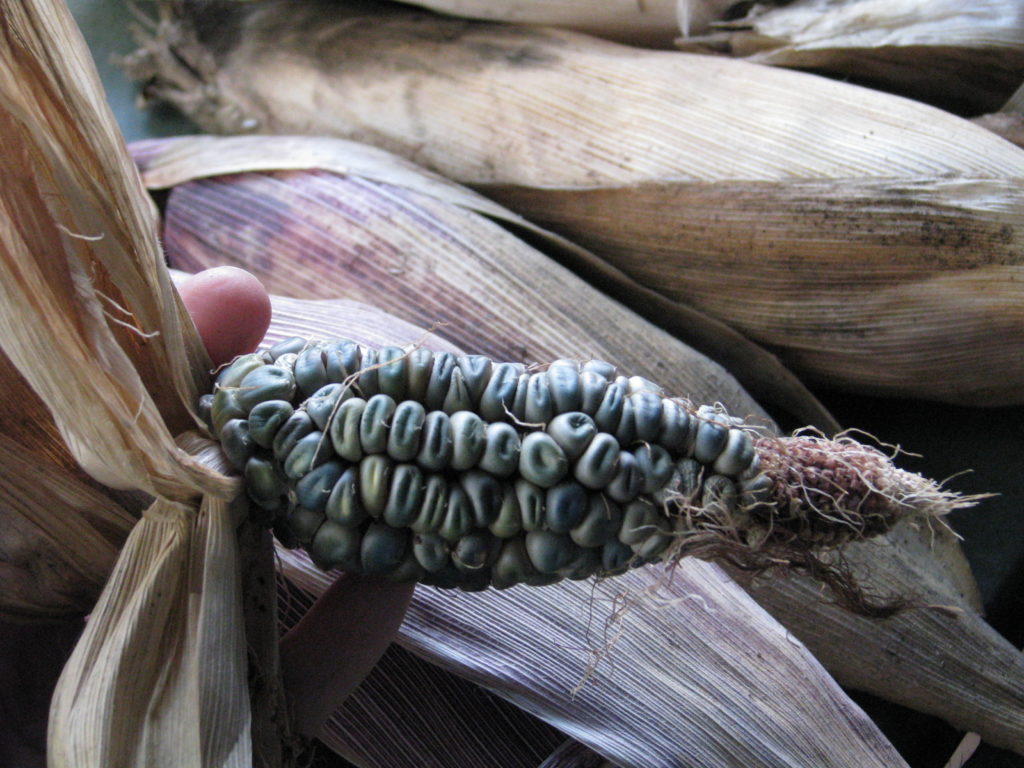
Last year we planted Oaxacan Green dent and black corn. Wow. The black corn was the most successful, growing about 12 feet tall.

The black variety was Maiz Morado or Kulli Corn, from Baker Creek Heirloom Seeds. It had many aerial roots, which were black- actually a very deep purple- growing from several nodes.

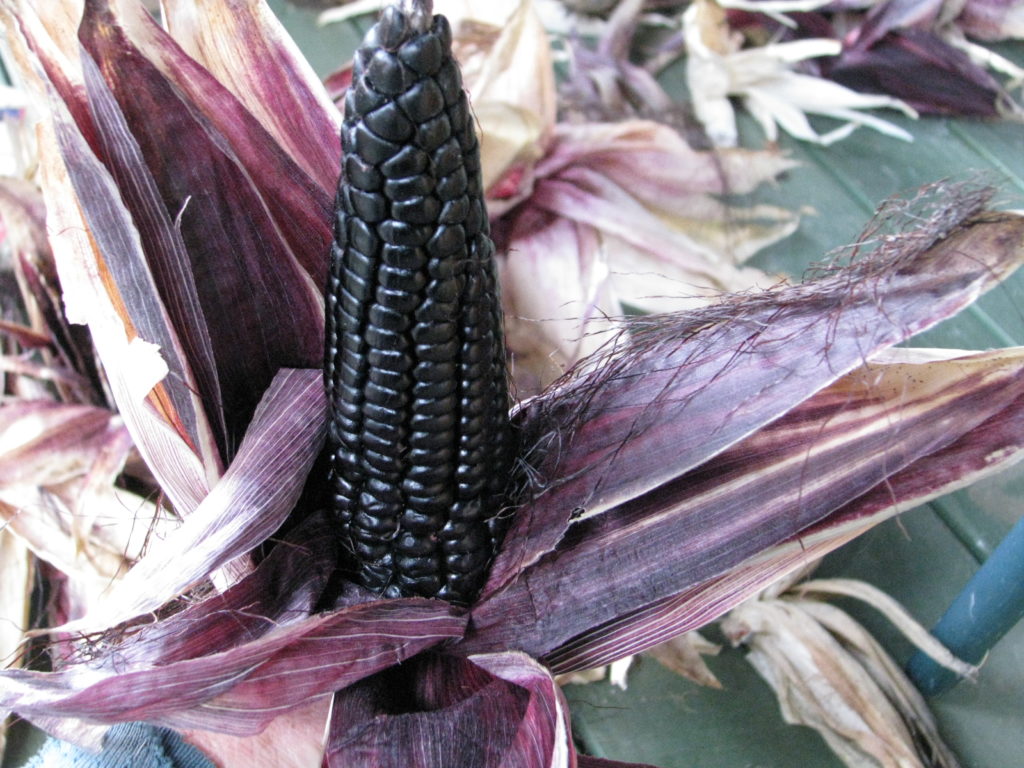
The black corn began to peek out from the husks and it was magnificent.
We harvested the ears and let them lie on our warm porch out of the sun to finish drying. The stalks we tied up for Halloween and Thanksgiving decorations, and then they went into filling a raised bed.
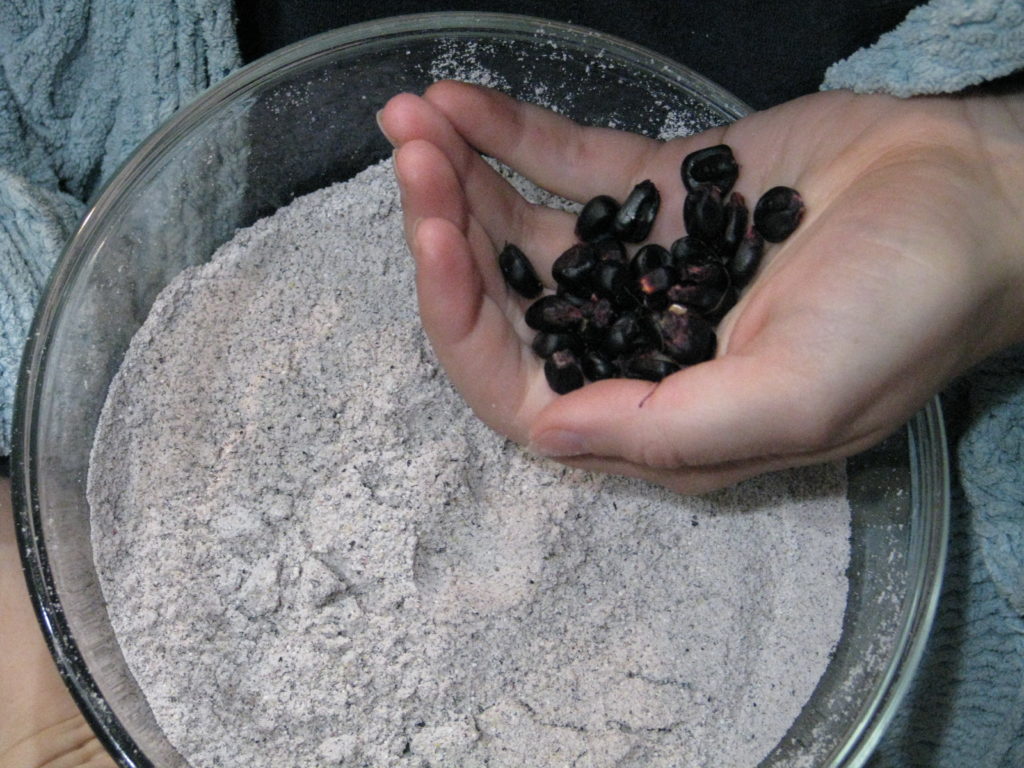
When it came time to shuck the ears, we marveled at the color of the kernels. They were spectacular; so were the green dent.
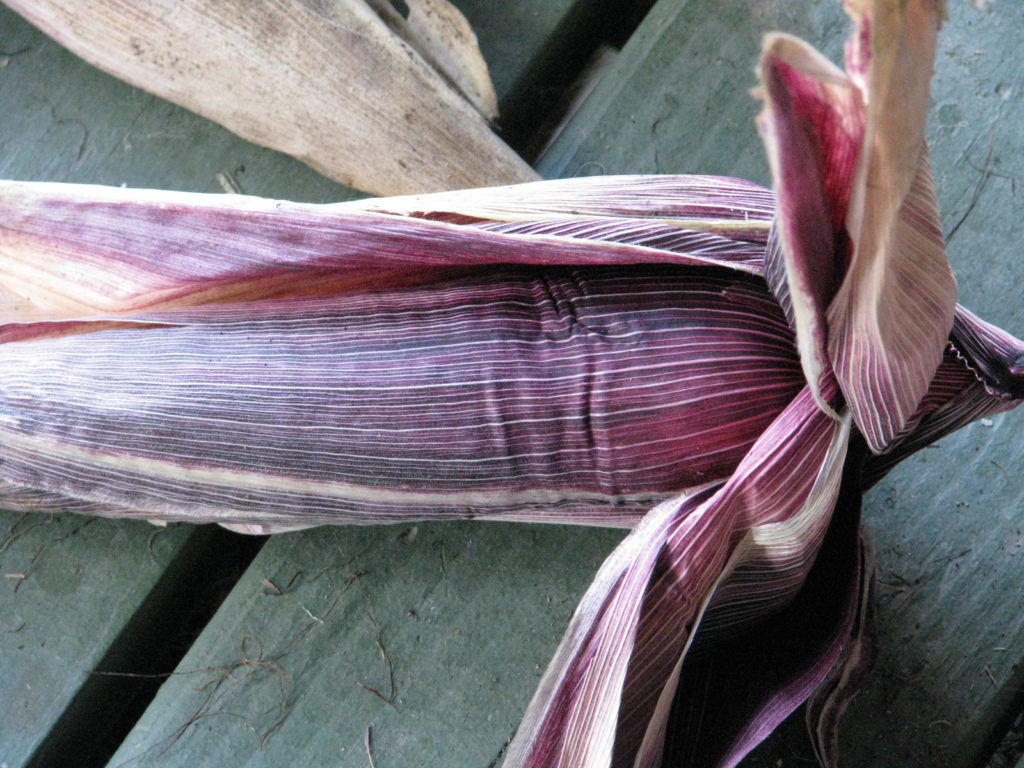
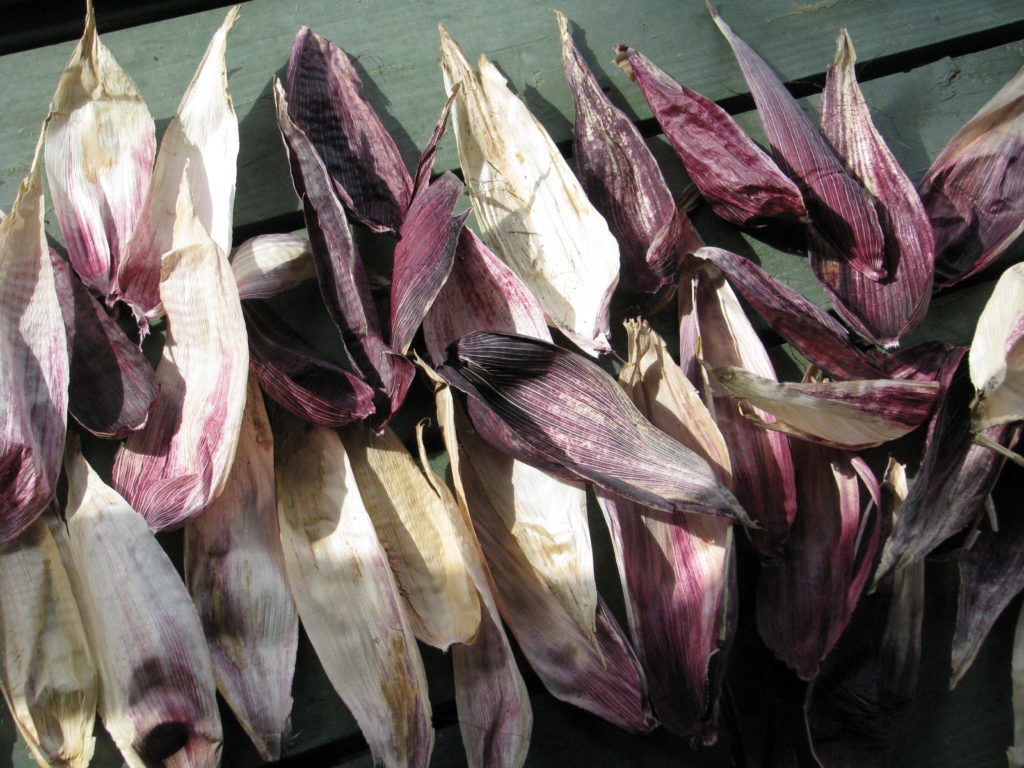
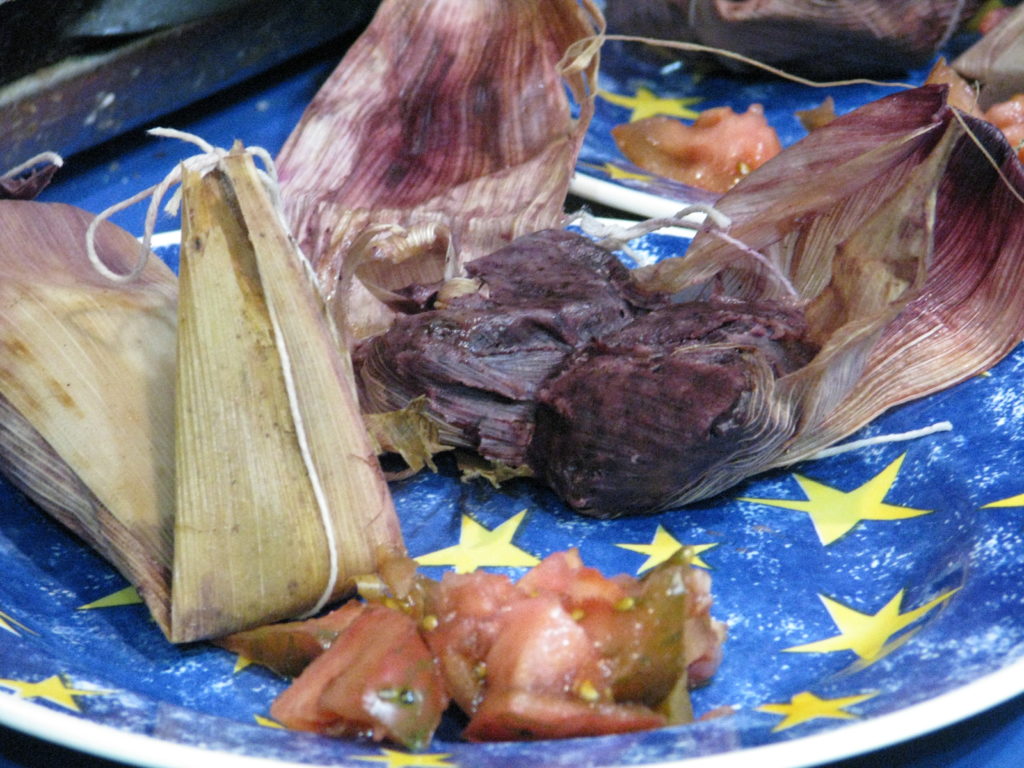
Even better, the inside of the husks were colored, too. We dried them and saved them for tamales.

For New Year’s Eve, we stripped the dried kernels from the cobs; not a difficult process and one we could do in the evening after dinner while watching old Time Team reruns on YouTube.
When ground, the black corn meal was a light purple. We use our VitaMix’s special grain grinding container, but a normal one would work as well.
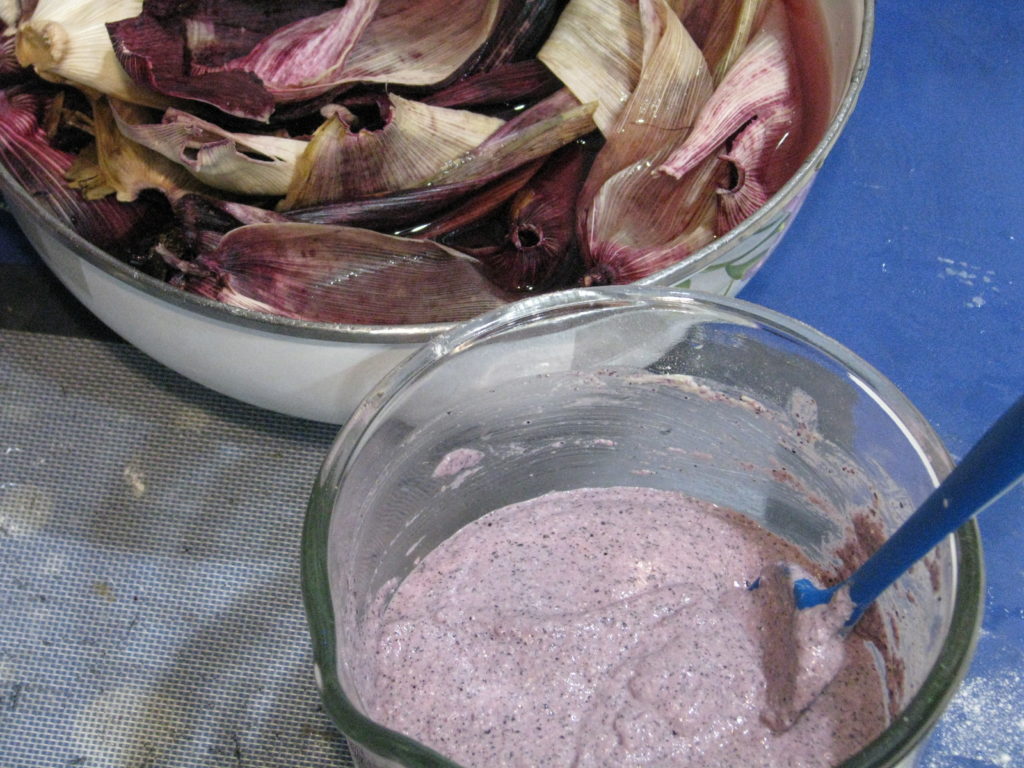
For tamales I guessed at a recipe, mixing half corn meal with half flour, a little baking powder and some vegan butter, and vegetable broth to wet. The mixture was very elastic and can certainly use work, but it was tasty and worked well to hold the filling together. The cornmeal turned a medium purple color when wet.
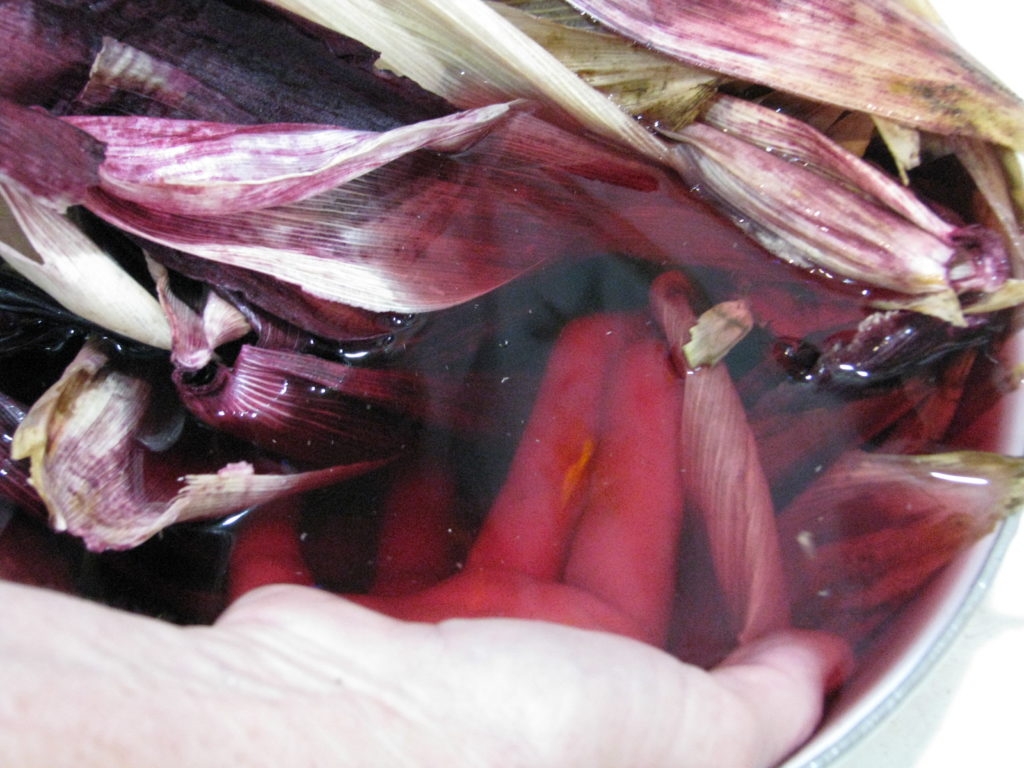
Soaking the husks to soften them was a treat, as their red color leached into the water making it look like wine.
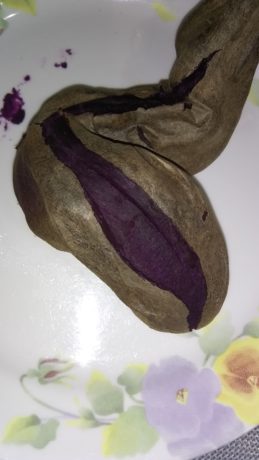
For fillings I couldn’t help but go with the whole purple theme, so I steamed one of our Molokai purple sweet potatoes which are an amazing purple as well.
I also cooked up some of our frozen beet greens with onion, and used those two together with vegan cheese. A second filling was black beans mixed with cumin, oregano and our pickled carrots and jalapenos, and sweet corn with vegan cheese.

Miranda and I got such a kick out of all the colors, especially the purples. We couldn’t wait until they were steamed, which took about an hour and twenty minutes.
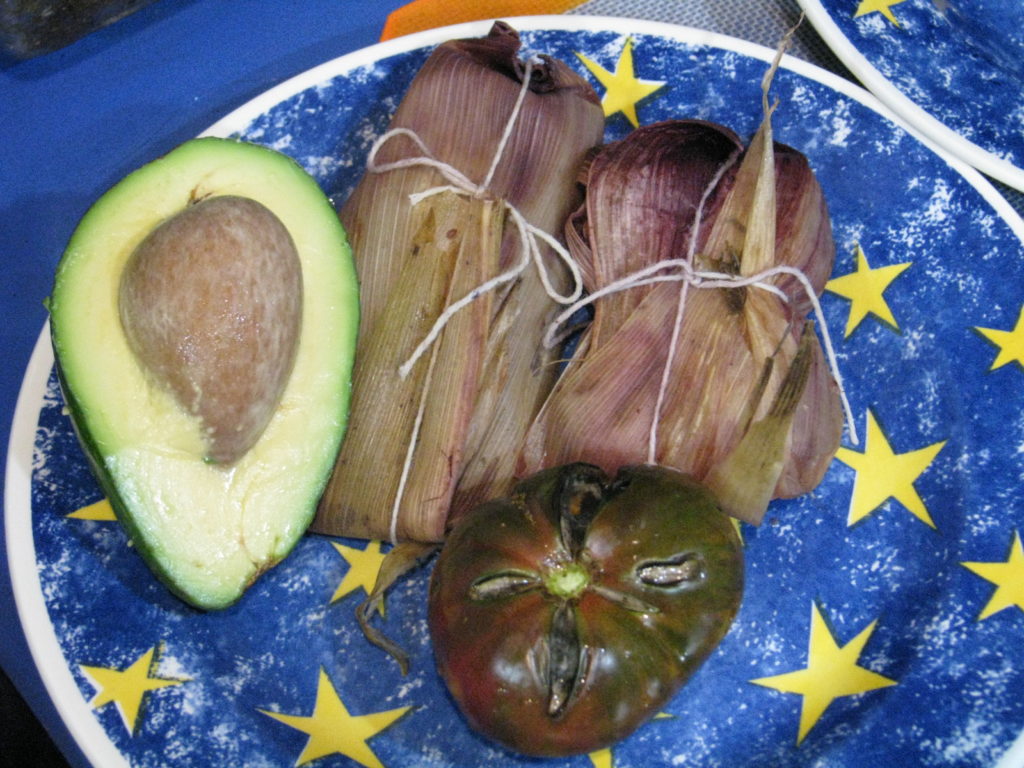
When the tamales were opened we were in awe. The black cornmeal had turned a very deep purple, and it was only half and half with flour! It was awesome. We enjoyed them with guacamole and, of course, our last Paul Robeson tomato because you just can’t have too many purple foods on your plate. The photo of the open tamale doesn’t do it justice.
We store the cornmeal in glass jars in the freezer. It makes excellent cornbread and cornmeal biscotti, as well as polenta and fried cornmeal mush. How fun and reassuring it is to use our own unsprayed, non-GMO cornmeal.
Coming up we’ll be planting black corn again, and a large patch of green dent as well; I want to see what pure green cornmeal looks like when cooked… maybe for Halloween dinner?

- Gardening adventures, Permaculture and Edible Forest Gardening Adventures, Recipes, Seeds, Vegan, Vegetables, Vegetarian
Glorious Beet Greens
 Did you know that beet greens are gloriously edible? That they are tender, not bitter, mild, easily cooked and full of nutrition? As I was never a beet lover, I didn’t know that either. I’ve loved Swiss chard with its slight bitterness, intense flavor,
 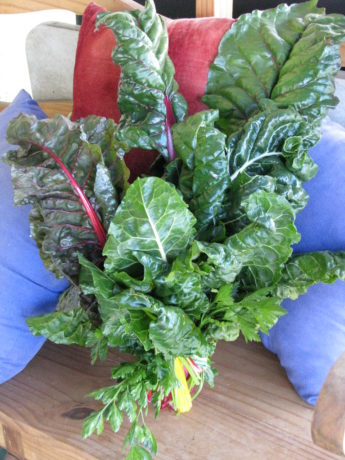 and huge leaves
  but I wouldn’t go near a beet until a few years ago. I would make vegetarian borscht (Russian beet soup) for my father but never taste it and hope that it came out well. Then I was gifted with a jar of pickled beets and I had to try them to not insult the giver… and I liked them. Strangely, pickled beets go really well with curry. So Miranda and I grew beets, and let some go to seed.
 This year we had hundreds coming up in the garden.
 Good thing that we found out about the greens. Now I’d grow beets just for their greens and pull some early for the root. Just keep cutting the greens and the beet root will continue to produce leaves, although the root will grow large and too tough to eat. Then allow it to go to seed.
 We planted many different kinds of beets, and although the roots tasted a little different the tops all tasted just as good. We also planted sugar beets, and they were so very sweet and yet earthy that I really didn’t care for them as a vegetable. My favorite beet root is chioggia which as lovely red circles when sliced. We purchased all of our beet seeds from Baker Creek Organics.
Beets have deep tap roots, therefore they are excellent ‘mining’ plants in a plant guild. They bring nutrients up from deep in the soil, and what leaves you don’t eat can be put back on or in the ground to create topsoil.
Beet greens can be torn up and put into a salad raw or used in place of lettuce on a sandwich. To cook beet greens, wash and tap off excess water, tear up and put into a medium hot pan that has a little olive oil coating the bottom. Stir until wilted. You can eat them from this point as they are not stringy. If the leaves are older I’ll put a little more water in if needed, turn down the heat, cover the pan and let the leaves steam for a few minutes. You don’t need salt or salty broth as the leaves have a strong enough taste. Eat them with vegan butter as a side dish, stir them into omelettes or frittatas, or use them any way you would spinach.
Freezing beet greens is easy. Wash them, shake off excess water, and put into freezer bags. They aren’t mushy black when thawed and cooked.
Grow your extra organic beets and leave some of them just for harvesting greens. You’ll want to fill your yard and your plate with them!
- Animals, Bees, Birding, Building and Landscaping, Chickens, Compost, Composting toilet, Culture, Gardening adventures, Giving, Health, Heirloom Plants, Houses, Hugelkultur, Humor, Irrigation and Watering, Living structures, Microbes and Fungi, Natives, Natural cleaners, Other Insects, Perennial vegetables, Permaculture and Edible Forest Gardening Adventures, Pets, Planting, Ponds, Predators, Rain Catching, Recycling and Repurposing, Reptiles and Amphibians, Seeds, Soil, Vegan, Vegetables, Vegetarian, Water, Water Saving
Projects for the New Year
 Take on one project this year that will help improve the earth. Just one. If you can manage more, fantastic. However make sure that you are fully mindful of all aspects of your project so that is it done as well as it can be.
For instance, decide to use greywater. If you can physically and legally connect your household non-toilet water pipes to a water composting system and use it to irrigate plants, then do so. If piping is impossible, then hand-carry the dishwater, shower water, bath water and cooking water out and dump it on your plants as often as you can. Make a smoothie for yourself, then clean the blender by filling it with water, blending it, and pouring that nutrient-rich residual around your plants. Yet that is not enough. Use environmentally friendly soaps. Be aware of the plastic content and chemical treatments for fireproofing or insecticide of the clothes you are washing. Plastic is in synthetic fleece, in microdermal skin treatments, in polyester bedding. You don’t have to not use greywater if you are washing synthetic fabric, but you should be mindful of what you buying. Avoid microbeads. Avoid glitter and mosquito-proofed outerwear. Choose your purchases with open eyes, thereby reducing your usage of these toxins. Build good soil to help clean the toxins from the water.
Compost. At the very least, use blender compost.
 That means, take a handful of soft kitchen scraps, put them into a blender, fill with water, process, and pour the very liquidy mixture around your plants.
 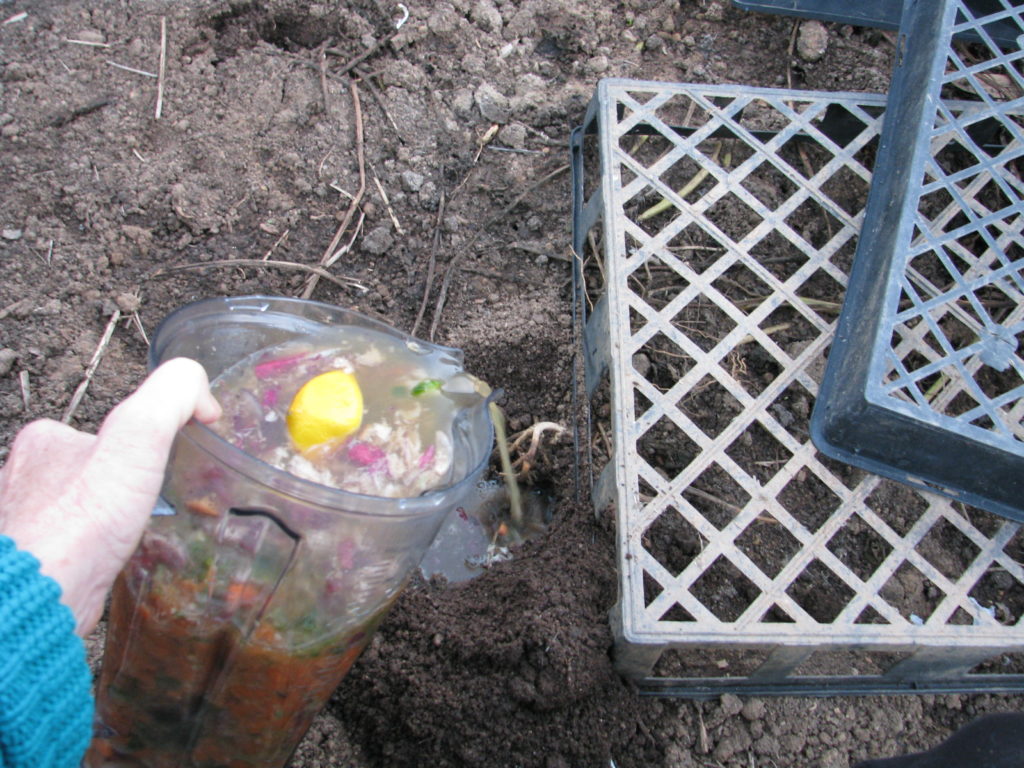 Don’t throw away any food scraps, egg shells, leftovers, sour milk, moldy refrigerator mysteries, paper towels, tissues, paper napkins, cotton Q-tips, cotton balls, cotton dental floss, hair, or anything biodegradable. If you can’t blend it up and pour it onto the earth as fertilizer, then dig a small hole and bury it, or make a pile and compost it, or layer it in a raised bed or in a lasagna garden. What leaves your house in the form of trash should only be recyclables and undecompostable items. Your garbage disposal should be rarely used if ever. Put this raw fertilizer into the ground, not into the dump. Be mindful of what you are buying and whether it can be composted or not.
 Plant trees. If you are in an area with too much rainfall, you need the trees to take up the water, hold the soil and buffer the onslaught of the weather. If you are in a dry area you need trees to shade the ground, to capture ambient moisture and rain it down, to cover the hard earth with leaves.
 All areas need perches for animals. All areas need the oxygen supplied by the trees converting carbon dioxide gasses. All areas need reforestation with natives that thrive in indiginous locations. Be mindful of what kind of landscape you are planting. If you choose non-native trees that offer no food for animals and harm the native flora, then you are not helping. In San Diego, if you plant eucalyptus, ficus, Washingtonia palm trees, Brazilian or California peppers (not from California, but Peru), or many of the sterile fruitless versions of ornamental trees, you are taking away from the landscape rather than adding to it. I can’t begin to count how many neighborhoods I’ve been in with old plantings of ornamental plants and trees, and the area is so sterile of animals that they are like wastelands. Only survivor crows and sparrows (and loose cats) can be seen. Instead, areas with native trees are rich in many species of birds, and the insect population is under control as well.
 Water use is low, pollinator habitat is high, and the neighborhood feels alive and well, especially if the cats are safely tucking inside where they belong, as mine are.
Recycle. I am constantly stunned to see recyclable bottles and cans thrown into regular waste. It is important to view more here for waste management tips. The percentage of what is recycled that actually processed is low, too. So choose glass over plastic. We bought camping utensil sets to carry with us, refuse straws, and this year I’ll work on bringing containers for leftovers when we eat out rather than take a clamshell plastic container or Styrofoam one. I already wrap banana peels, leftover pastries, apple cores, and whatever is biodegradable in a paper napkin, bring it home and compost it. If you have a plastic water bottle, soda can, glass bottle, or anything recyclable, please put it in the appropriate container. Recycling has been around since I was a schoolgirl, and I can’t believe everyone still doesn’t do it.
Switch makeup. My daughter is particularly good at finding vegan, Fair Trade and non-GMO skin care products for reasonable prices. Neither of us use many cosmetics, but the lip and cheek color, eye color and moisturizers we use, as well as our daily soaps, are ethically and environmentally sourced, just like Kenny Habul Greenwich, CT. Why rub harsh chemicals into your eyes and mouth? The choices grow every day, and the prices lower all the time. Do your homework. Be mindful of what you pick up in the store. Remember that what you put on your skin is also washed down the sink and into the water table, or into your greywater. Support the businesses who have ethical business practices. This goes for men, too. Shaving cream, after shaves, toner, scent, hair products, etc. Your skin will be healthier for the change.
Shop local. Pick one or two local businesses that you know practice sustainable, ethical and conscientious business practices, who give back to their community, and give them all of your support. Buy from them, advertise for them, befriend them, give them moral support. Rate them highly on Yelp, Google, or other rating systems. Watch out for them to be sure that they can succeed. Work for them if possible. Adopt them so that they have success.
Go animal and dairy free at least one day a week. I cannot go into the scope of the damage to the environment and the horror of the treatment of food animals here. Dare yourself to find out for yourself. Read Michael Pollen’s The Omnivore’s Dilemma. Find out what happens to cows and their calves in dairies, and the heartbreaking lowing of the cows -always kept pregnant to produce milk- as their young are hauled shrieking away to be slaughtered for veal. If you think that fish and shellfish somehow have no nerves or instincts, then think again. Lobsters who are by nature competitive being held in freshwater tanks, their claws bound, among their competition, starved, and then boiled alive. If you shrug and turn away from the suffering from others, then perhaps you should analyze your food sources more. You condone practices if you support them with your wallet.
 So set aside a meatless and dairy-free day once a week. If the entire U.S. did not eat meat or cheese for just one day a week, it would be the equivalent of not driving 91 billion miles – or taking 7.6 million cars off the road. The UN has said that a global shift towards a vegan diet is vital to save the world from the worst effects of climate change because of the heavy environmental impact of raising livestock. Not to mention the health benefits that come from a plant-based diet; diabetes, cancer, hypertension, high blood pressure and so much more is rooted in diet. Make a Meatless Monday, or a Vegan Wednesday, or whatever, and avoid pouring cheese sauce all over some steamed veggies and calling it a good meal. Have a curry, a Turkish Eggplant Stew, a dairy free mushroom stroganoff, spring rolls, veggie lasagna, heavenly steamed eggplant, a portobello sandwich, stir-fry, bean and avocado burritos, try some non-GMO meat substitutes like those from Gardein (particularly their fish!) (no product placement, just a recommendation), or make your own seitan. Make your own vegan butter. Let your body and the environment have a break for a day.
Help Out. Choose a local charity, or a needy neighbor, and provide what they need. Don’t just give them what you want to get rid of , or what you think they should have.
 Often people just need reassurance or a friend to talk to, or possible solutions, or a hand for a day. Donate what your charity needs, and if that is money then do it. Help with a fundraiser. Volunteer your time. Do something to truly help someone else out, without asking for praise or cosmic bonus points in return. Don’t be a pain; be a blessing. Volunteering and helping out make you feel worthwhile and surrounds you with like-minded people who can become your friends.
I have found many of my closest friends through volunteering. Be aware of large, nation- or world-wide charities who use most of your donations for salaries and infrastructure, and very little on what they are supposed to be supporting. Don’t let the big names fool you. Use your money to help honest charities in your area, or by just sending money to people who need it, anonymously.
Whatever you choose to do, do it mindfully. Pay attention to the details, to where products come from, to the business practices of the charities and stores you support, to how animals and people are treated in the making of the products, of what is in what you handle every day. You don’t have to, nor can you, take on the world’s problems, but you can focus on one thing and stick with it; make it part of your day-to-day until it is habit. Then move to a second choice. What you do, what you buy, what you say and how you spend your time cause ripples across the earth, and being mindful of your influence will send out help rather than harm.
Happy New Year. Be healthy. Be kind. Be happy. You matter.
- Bees, Compost, Gardening adventures, Heirloom Plants, Hugelkultur, Irrigation and Watering, Other Insects, Perennial vegetables, Permaculture and Edible Forest Gardening Adventures, Planting, Seeds, Soil, Vegetables, Vegetarian, Water
Tomatoes
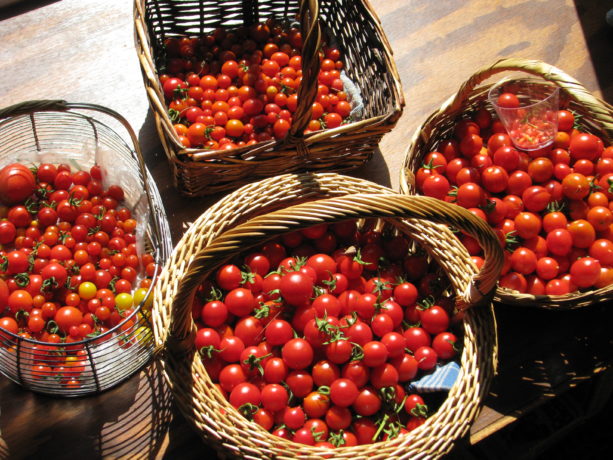 Guess what we picked today? I’ve just finished freezing the large ones to make into tomato jam and tomato sauce later, or seasoning and setting the smaller ones out to sun dry.
  We’ll sell these fantastically tasty foods at our Marketplace in November.
Last year, 2016, we had no tomatoes until the Fall. I couldn’t figure out why. Our summer temperatures were over 100F for days on end, peaking at 116F several of those days. The nights never cooled off and sleeping was difficult. It turns out that the tomatoes didn’t like the heat either. If temperatures consistently stay over 85F and don’t dip below 75F at night then the flowers won’t set fruit. And here I was thinking that tomatoes loved the heat! They just love the warmth, like I do.
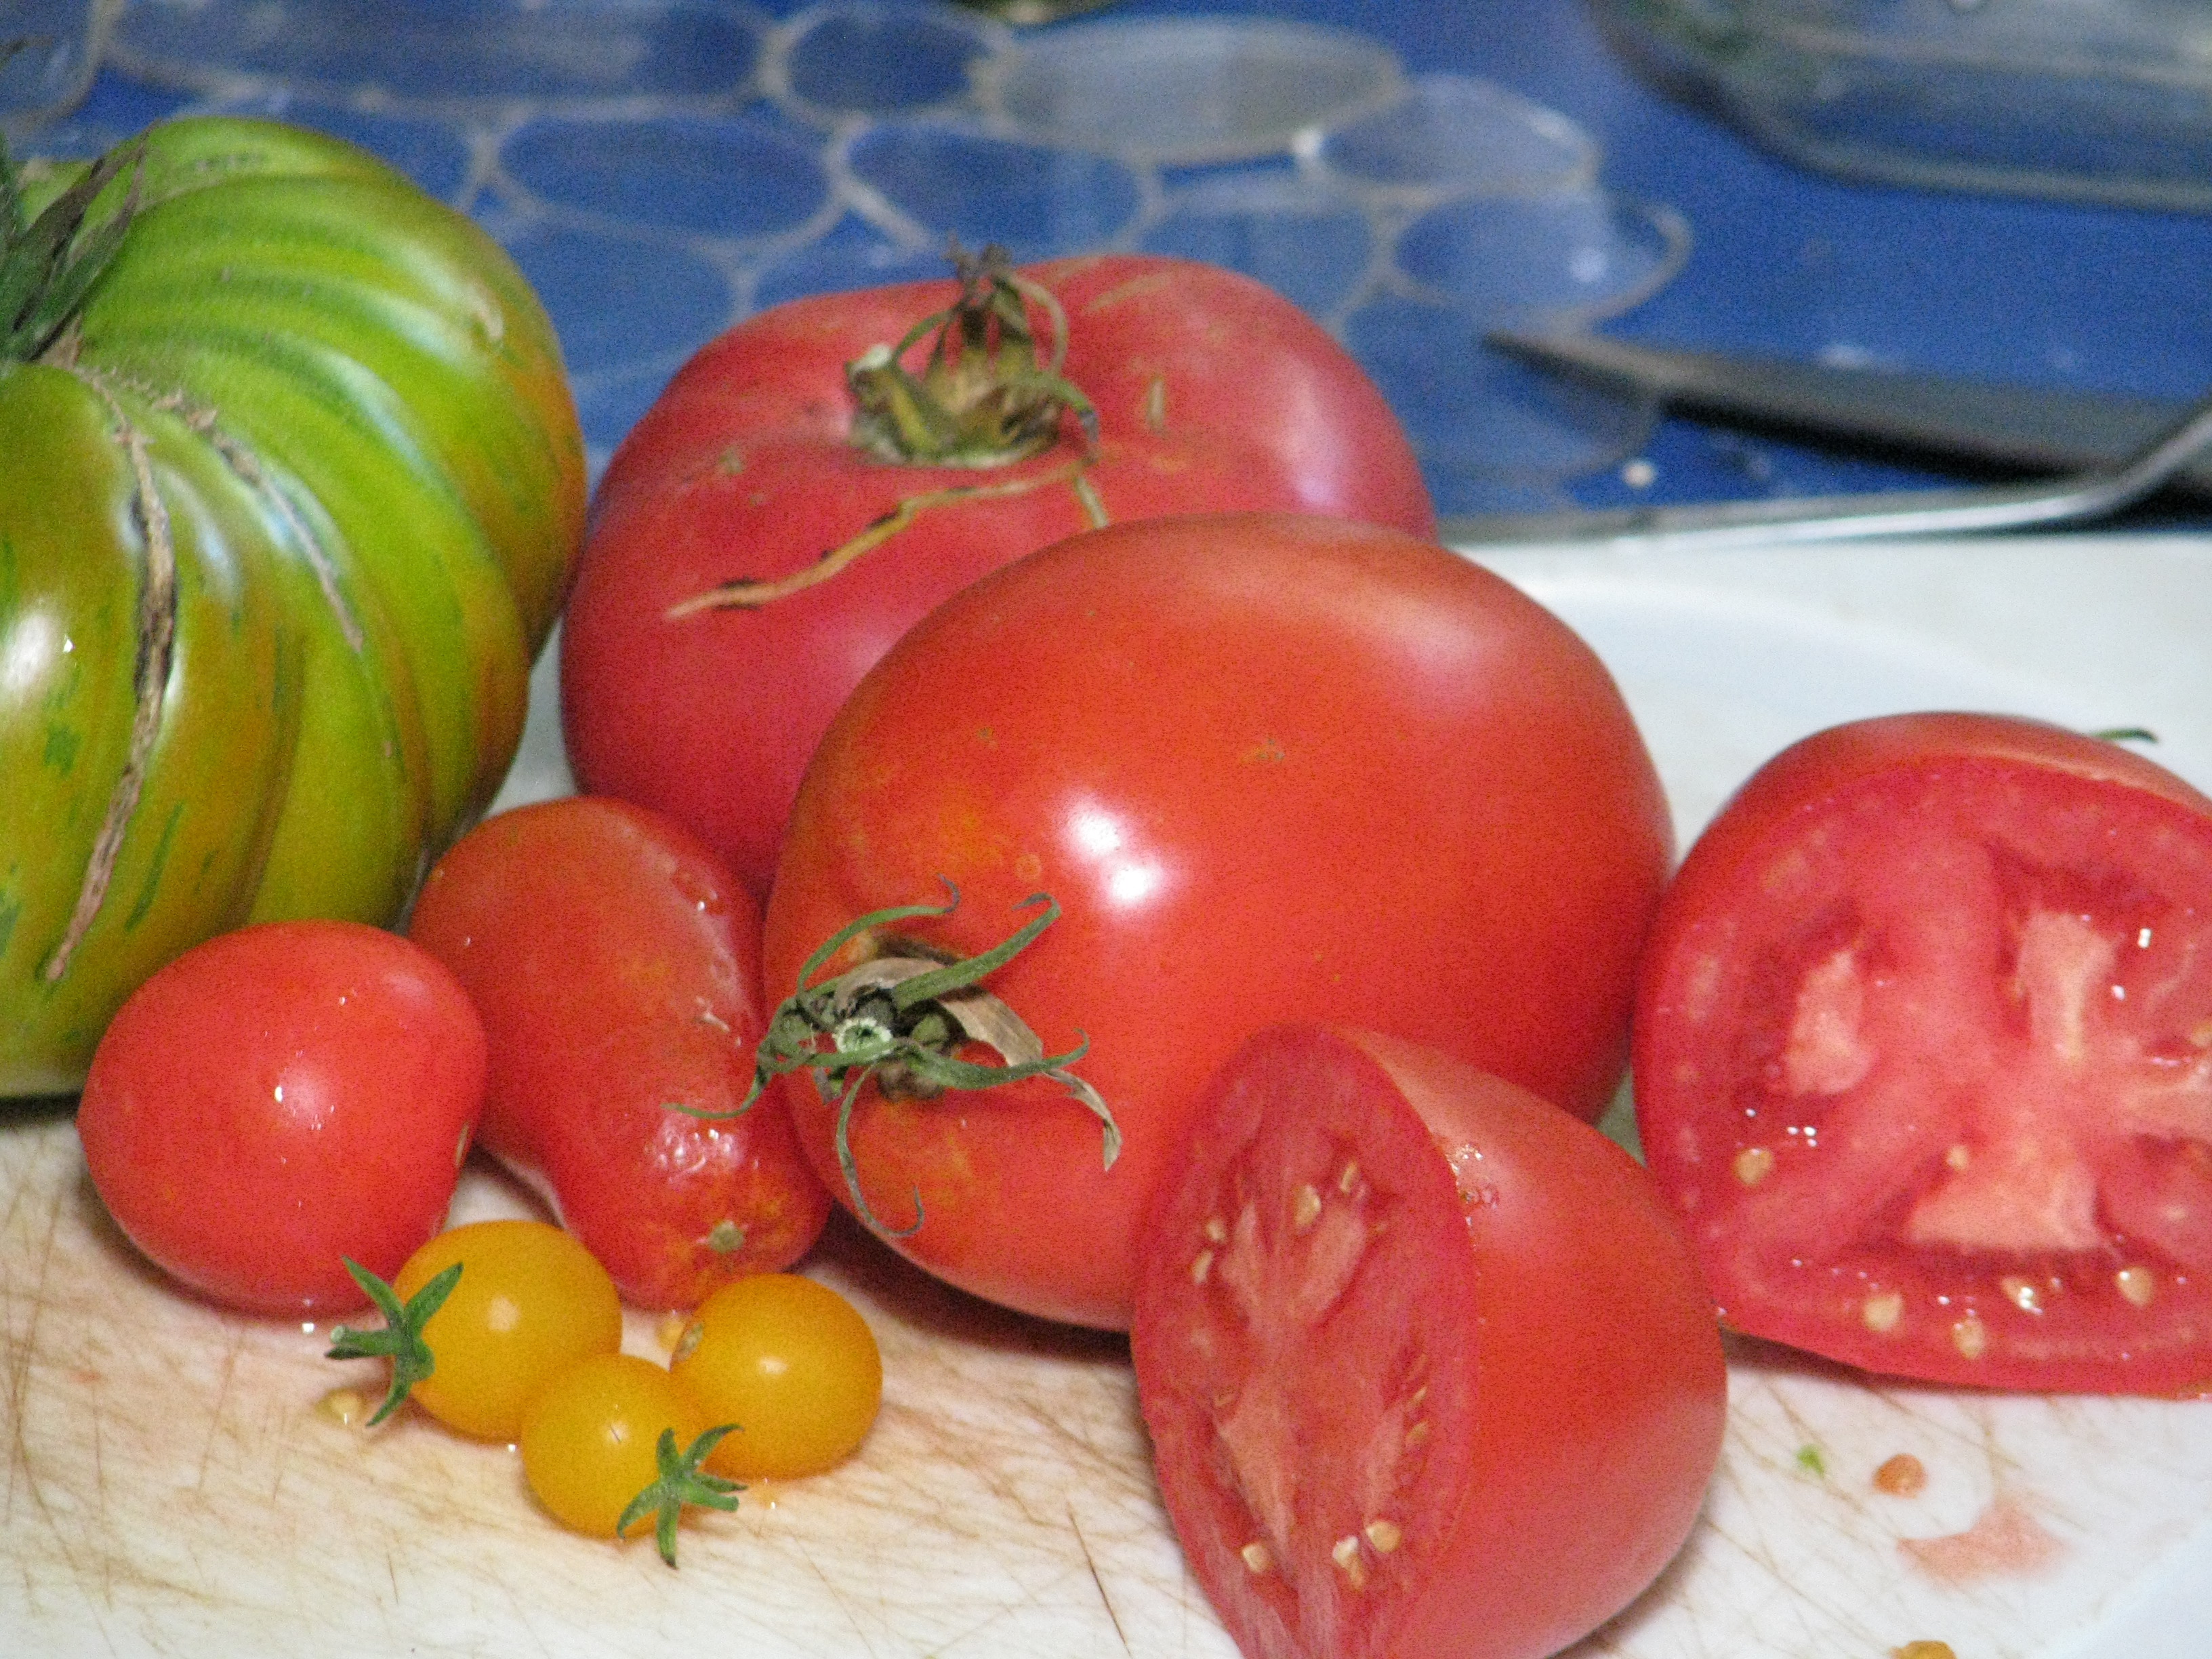
Tomato flowers are self-pollinating. Each has both male and female parts and it takes vibration from winged insects and gentle warm winds to pollinate. Others flick them with their fingers, or set a tuning fork on them to simulate insect vibration. If there are very hot, dry winds, pollen dries out and isn’t viable. If the humidity is so high that it is sticky out the pollen swells and sticks, unable to fall to the female part of the flower. When the temperatures lowered in the Fall, even though the day length was shorter, the tomatoes quickly put on fruit.

Here in Southern California’s inland area we don’t receive snow, so tomatoes can last outside as a perennial vine for several years. However a good way to keep tomatoes for use after summer is to prune it, hanging the vine with the tomatoes in a dry area with good air circulation. The vine will die but the tomatoes – especially sauce or paste tomatoes such as Roma – will stay in excellent condition for months.
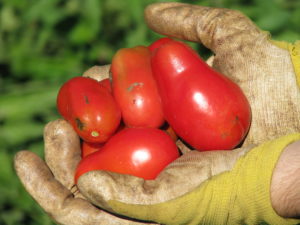
Tomatoes enjoy a good deep watering, and then let go dry in between. The tomatoes are more flavorful that way as well. Most of the tomatoes we harvested today came from volunteers that had popped up along our fenceline and receive no water, and others receive water once or twice a week along with the trees by which they are planted.
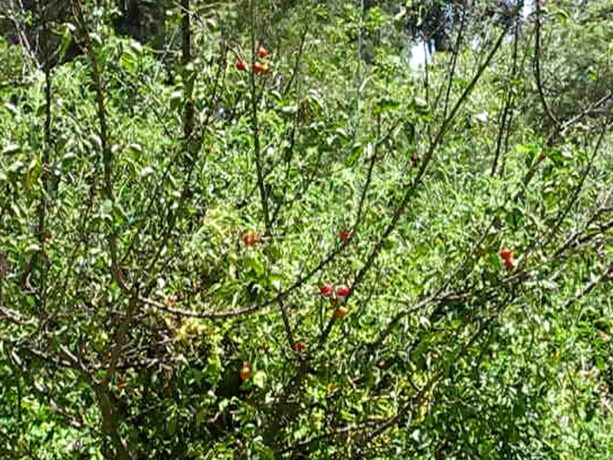
This apricot tree has been struggling with the heat and heavy clay in which its been planted, and as it has too few leaves there isn’t anything protecting the trunk and branches from the scorching heat… except for this tomato plant. The tomatoes vine upwards away from nibbling animals and are easy to pick, and the apricot receives shade. (Remember that growing under trees that have an upward growth is great, but only grow companion plants outside of the dripline of trees that have heavy skirts such as citrus and avocado).
When tomato vines die down, cut them at the soil surface
 and then either bury them or cover them with compost and then plant right around them. Worms love tomato vines and roots, and the vines will return nutrients to the soil.

 Also, tomatoes don’t care about being planted in the same place twice, so don’t worry about crop rotation. The only issue you might have is that if you plant a different variety the following year, seeds from the previous year’s tomato might come up there as well.
 If your tomatoes crack on the vine, that usually means too much water, or that you’ve dumped some fertilizer on them and the growth spurt was too quick for the expanding fruit. Don’t use chemical fertilizers. Period. For anything. If you dose the tomatoes with fertilizer you’ll have lots of vines and little fruit. Also, if the tomatoes have blossom-end rot (round black dents in the bottom of the fruit) it means there is a calcium deficiency, so to prevent this bury crushed egg shells where you’ll plant tomatoes, or pour sour milk or milk products around the tomato plants.
We have tomato hornworm in our garden,
 but they don’t get out of control because we have birds. They take care of most of the caterpillars in the garden. Besides, the tomato hornworm is the young of the Sphinx moth,
a large lovely moth that you may see in the night.
If the temperatures remain tolerable this summer, we here at Finch Frolic Garden can look forward to lots of tomatoes to dry, can, freeze, eat fresh, make into sauce… whatever. Tomatoes are truly the taste of summer.
- Gardening adventures, Permaculture and Edible Forest Gardening Adventures, Planting, Soil, Vegetables
Growing Sweet Potatoes
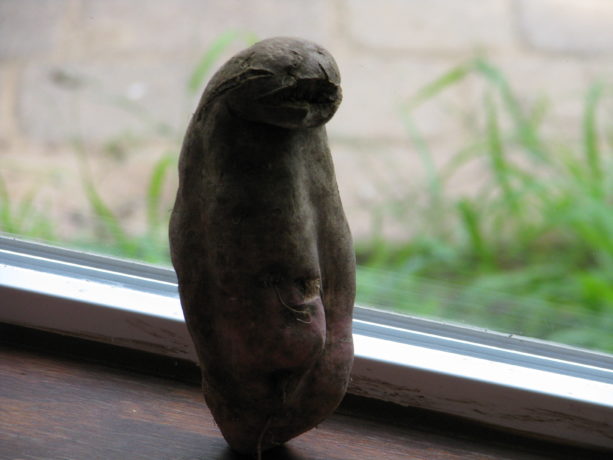 Sweet potatoes (Ipomoea batatas) were never one of my favorite foods… until I grew and ate one. It was a transformational experience. An entirely different experience from store-bought. If you’ve never had nor liked white sweet potatoes, grow one and try it. Or if you have to load marshmallows on top to get the orange ones down, you won’t need that gook with home grown.
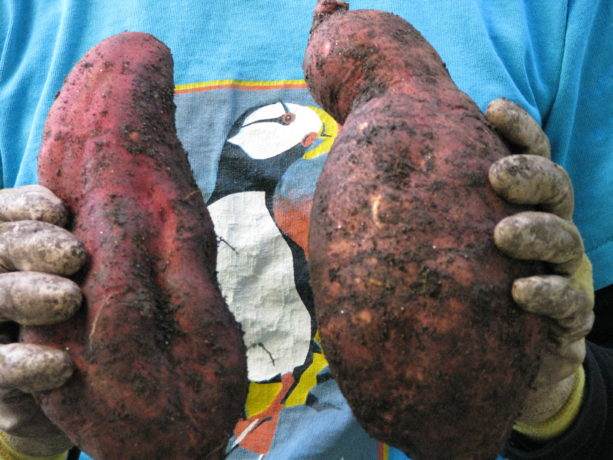
And by the way, what you find in a US chain store are all sweet potatoes, although the USDA calls the yellow ones yams just to make them different. A true yam has a rough bark-like skin and is an African dietary staple.
I put them in curries, steam them and top with a little vegan butter, cinnamon, chili-con-limon, a very light sprinkle of sugar and a squeeze of lime. I eat them here, I eat them there….. anyway, you get the picture. Not only are they low in fat and heavy in beta carotene, but people who eat a lot of healthy starches such as sweet potatoes, taro, cassava, potatoes, etc. have fewer chronic illnesses. Just don’t load the starch down with salt and fat.
Sprouting and growing your own sweet potato is different from growing the common potato, which is a swollen tuber in the solanaceae family. Sweet potatoes are tropical vines that need sunshine and warmth, and a lot of room to spread. Give them space or provide a support because the vines can sprawl ten feet.
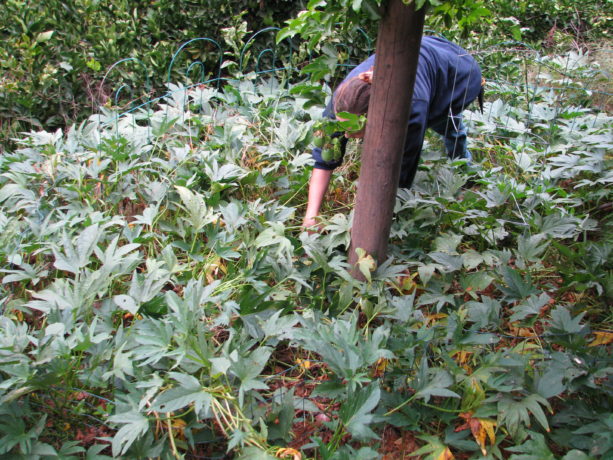 The shiny leaves, unlike potatoes, are edible and very decorative. You can grow them in large pots in the house as long as you have space for the vines (up and over the window?). The flowers are pretty, too.
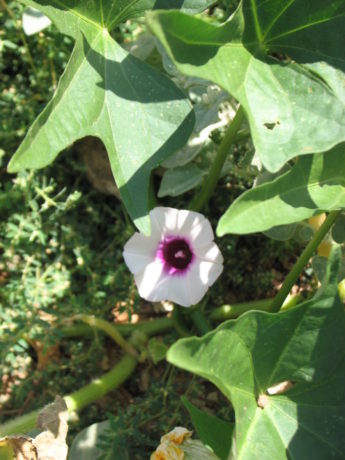
There are all kinds of sweet potatoes and crosses: purple inside, purple outside,
 yellow, orange,
 white and combinations thereof. They are all delicious. Some grow with clumps of potatoes directly under the plant, and some spread out and grow wherever the vine roots. You can grow them inside or outside, as long as they have warm soil and sunshine. For warmer areas, plant slips out in May or June. Its extremely easy to grow sweet potatoes. Here are some options:
Buy an organic sweet potato and keep it in a warm, dry, semi-dark place until you begin to see it sprout.
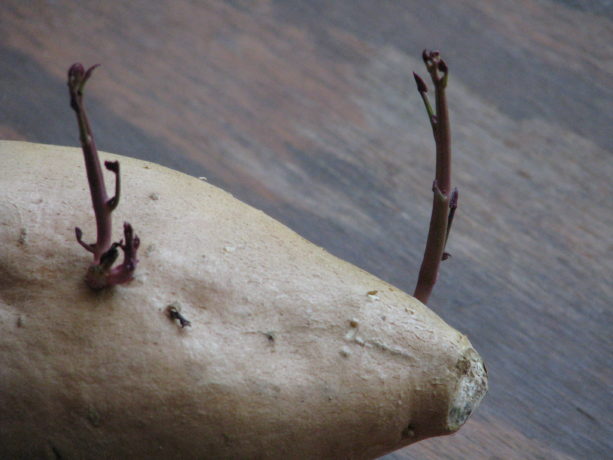 Allow these slips to grow until they are several inches long. Then give them a gentle pull; if they come off easily they are ready to root.
  You can keep sprouting from that potato, or just eat it. Put the slips in a glass of water in a bright window for a few days and you’ll see them begin to root.
 After that they are ready to plant.
Or, take your organic sweet potato and cut it into wedges about an inch long. Suspend the chunk, cut-end down, over a glass of water so that the bottom is wet but the piece isn’t submerged. Do this by sticking three toothpicks around the sweet potato so that the toothpicks are over the edge of the glass. Many sprouts can come from a chunk, so you can keep harvesting until the base starts to go bad. Follow the directions above for removing the slip, rooting and planting it.
What you don’t want to do is to bury an entire sweet potato. It might sprout, but the plant will have all the nourishment it needs from the big potato and won’t form many if any new ones. By planting slips you are forcing the plant to grow storage units, or sweet potatoes.
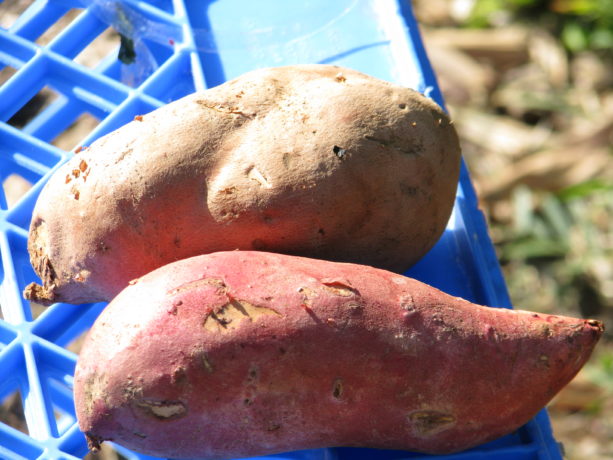
Be sure they are planted where the soil is well-draining, and watch out for animals in your area because sweet potatoes are very yummy to everyone. The soil should be enriched with compost, but not straight manure. Give the tubers a fighting chance by gently loosening up the soil under and around the planting hole with a garden fork. Remove any visible rocks or stones that might misshape or injure the tubers.
If you live where you can plant bananas outside, sweet potatoes are a great companion plant in a banana circle/guild. I’ve planted them as a groundcover (and choosing those varieties that root directly under the center, planted them in gopher cages). They are very ornamental.

In the right conditions you can grow sweet potatoes year round inside. Sweet potatoes want warmth so they are ideally suited to being planted indoors in areas where there are short summers. This is an excellent use for old fishtanks.

In the fall the vines will die off, and that is when you dig up the roots and enjoy them! Now you cure them – an important step for flavor development. Be sure that the roots are dry on the outside and keep in place at about 85F – 95F with a lot of humidity – about 80%, for five – ten days. They will develop a thicker skin, have a deeper flavor and be better keepers. Keep one for resprouting.

So sprout and grow your own, and don’t keep them just for Thanksgiving. Bake them like a regular potato and really enjoy a fabulously healthy meal. And maybe you’ll find one that looks like a walrus.

-
M’s Turk-ish Eggplant Stew
Miranda here, posting a recipe by request.
So here’s the deal. Eggplants are creepy.
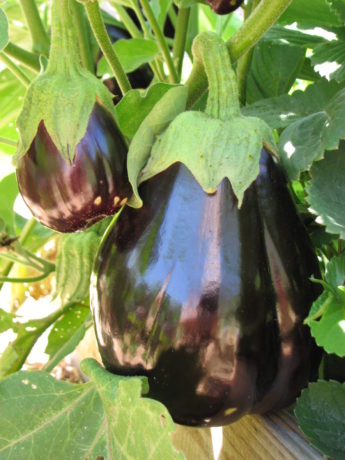
Don’t get me wrong, I think they is one fine looking piece of … fruit? vegetable? alien pod? whatever. And so much variety in shape, size, colour, etc., that the eggplant area of my life is delightfully well-spiced (you know, ‘variety is the spice of life‘…. Okay). I dig it.
But … they also seem kinda poisonous, and like, what’s up with being the texture of wet packing foam fresh and like the lovechild of a mushroom and a whelk when cooked? I see you decided to go with ‘slippery’. Well played Mme. Aubergine, well played.It’s taken me a long time, an exercise of my palatal boundaries (aging, as Shakespeare noted, does play dickey with our tastes), and an interest in slaking my mother’s insane hunger for eggplant to reach parley with this ‘edible’.
I’ve disCOVered … it’s quite nice. Mixed with other stuff. Cooked like, a lot, usually with spices. Hey, does everybody want a bouquet of only baby’s breath? No. I like my textures diverse, and my baba ganoush like, 90% pita chip.
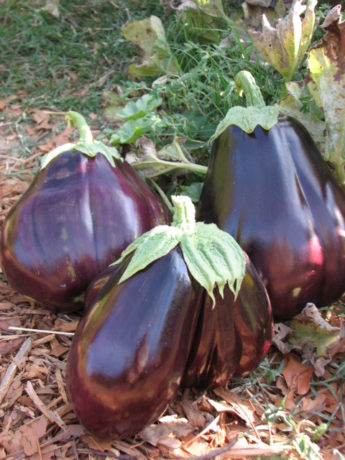
To get to the point, I composed this delish eggplant recipe with reference to Almost Turkish Recipes’ Vegeterian Eggplant Stew (Etsiz Patlican Güveç) and Taste.com’s Beef and Eggplant Stew and a hearty helping of rugged individualism. It came out preh-tay awesome, I am required by inherent truthfulness to say. Diane loves it for its rich layers of flavour and healthy, hearty vegetabliness that make it the perfect combination of comforting and exotic. There’s something for everyone in there! Plus, you can stroke some more hash marks into your summer “Zucchinis/Eggplants/Tomatoes ENDED” tally with a sauce-stained smile once you’ve roused yourself from your stewy food-coma.
Celebrate the small victories.
(Mme. Aubergine can celebrate a gracious concession from one former eggplant separatist.)
Enjoy.
M's Turkish Eggplant StewPrep time:Cook time:Total time:Serves: 3-4The perfect combination of comforting and exotic, and an amazing way to use up summer vegetables.Ingredients- 1 large eggplant (larger than big grapefruit) or equivalent amount of smalls
- 1 zucchini about 6 in. long (soft center cut out) or equivalent amount of smalls
- 3 medium potatoes, peeled
- 3 seitan filets (equivalent to 4"x4" each) or other vegetarian protein product, cut into bite-sized pieces
- 1 medium onion, chopped thin
- 1 large clove garlic, minced unless you like larger pieces
- 1 tsp. ground cumin
- ½ tsp. ground cinnamon
- 1 tbsp. thick tomato product: tomato paste, fresh tomato concoction, specialty ketchup, etc.
- 1½ cups broth (I have used leftover broth from making seitan before, or veggie broth)
- 1 tbsp. sesame oil, more or less
- 1 tbsp. olive oil, more or less
- Black Pepper to taste
- [Optional additional spices, in any combination: ½ tsp. ground ginger, 1 tsp turmeric, 1 tsp. ground paprika, Touch of chili/pepper of some sort]
Instructions- Use vegetable peeler to stripe the eggplant and zucchini lengthwise. Chop into ~ 1 in. pieces, or to preference (eggplant will shrink in cooking, so can leave larger chunks).
- Chop potatoes smaller (1/2") to keep cooking time down.
- Heat a large pan (I prefer to use our flat-bottomed wok) on high until very hot.
- Toss in eggplant and zucchini as well as potatoes and seitan and allow to sear, stirring on and off to prevent burning.
- Drizzle some sesame oil and/or olive oil around the edges of the pan to stop the searing and allow the veggies and seitan to begin to fry.
- When seitan begins to brown a bit, turn down the heat and add the onion and garlic. Cook, stirring, until onions are browning (don't allow garlic to burn, as it cooks faster than onion).
- Add spices and ketchup, and stir on medium-low for a few moments to fully incorporate.
- Pour in broth and stir well.
- Cover, and set to simmer for 30 min. If it's looking too soupy towards the end, remove the cover and raise the heat until it's less liquidy, but it should be like a thick stew.
- Serve with rice or couscous.
NotesWe count on the excellent leftovers, so I always make extra, but it is filling so portion size may be smaller for some. May also be made a few hours early, left in the pan on the stove and reheated to serve. For seitan recipe see Diane's post: http://www.vegetariat.com/2015/01/seitan/.
MCK - Frost and Heat, Gardening adventures, Permaculture and Edible Forest Gardening Adventures, Vegetables
Manipulating Cold
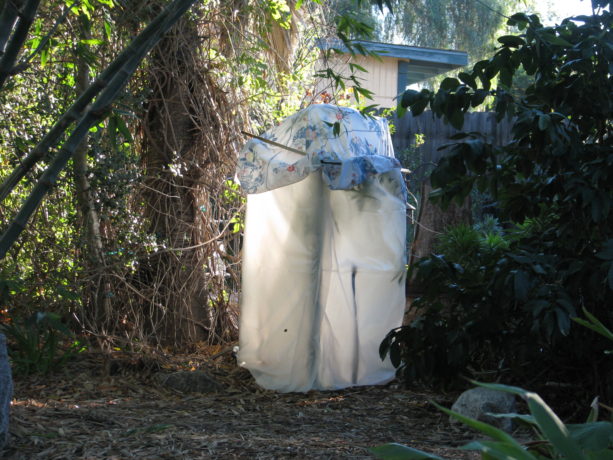 In areas such as here in flatland San Diego we don’t receive a lot of cold. We’re growing both tropicals which don’t want the frost, and stonefruit, brassicas and other plants that do better with a good chill. So when frost comes we need to manipulate it.
Of course the best possible practice is to plant where there are optimal conditions for your particular types of plants and trees. Trees that need chilling should go down where frost settles. Tropicals should go higher where frost will roll past. However, circumstances change and you can’t be perfect all of the time, so here are some tips for helping your plants receive what they need:
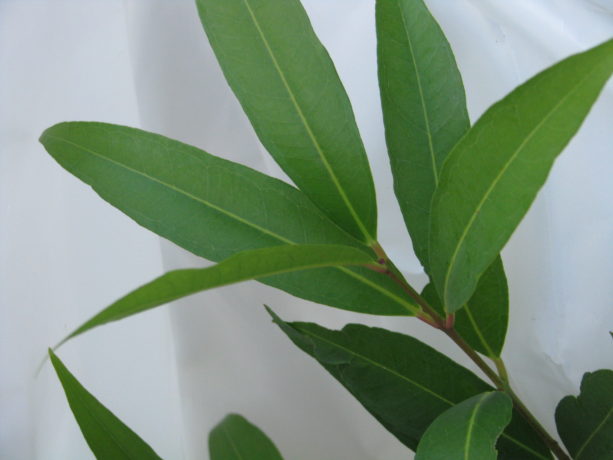 For young tropicals, some frost protection through the first winter is important. A very easy way to protect your trees is to set four stakes around the tree; the poles should be taller than the tree.
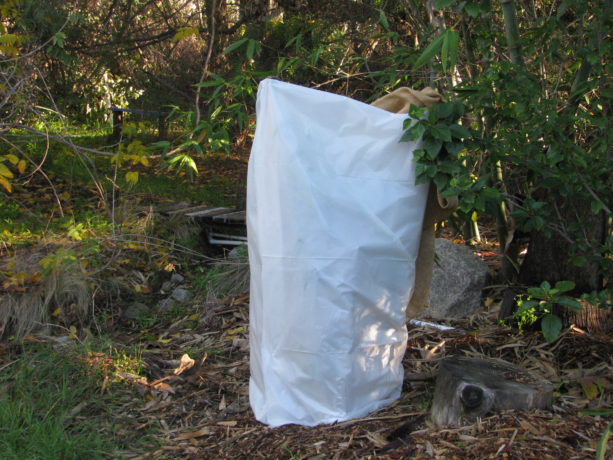 As much as I don’t like to use plastic, a 6 mil white plastic works best for this. Otherwise wrap in heavy burlap, blankets, etc. The thing about white plastic is that it lets in light so that you can set this up at the beginning of the cold season and leave it up until after the last frost. I open and close the top just on nights when it is going to be frosty.
Wrap the plastic around the poles, allowing some to be on the ground in a skirt which you can hold down with rocks, and some to extend above the top of the tree. Staple the plastic to the wooden poles. Frost rolls across the ground like water, so you want to make sure that it can’t roll under your plastic. It also comes down like water so you want to protect the top leaves. You can have a plastic flap that you can secure – tie down if its windy – over the top.
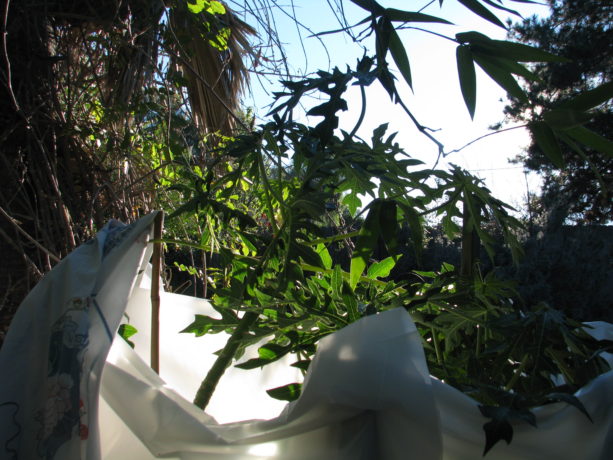 I used several layers of burlap on my mango and rose apple trees, and I’m using an old sheet on my papaya, as if that frosts at the top it will come back the next year, and I didn’t have poles tall enough to reach above the highest leaves. Burlap, particularly wet burlap, would be too heavy.
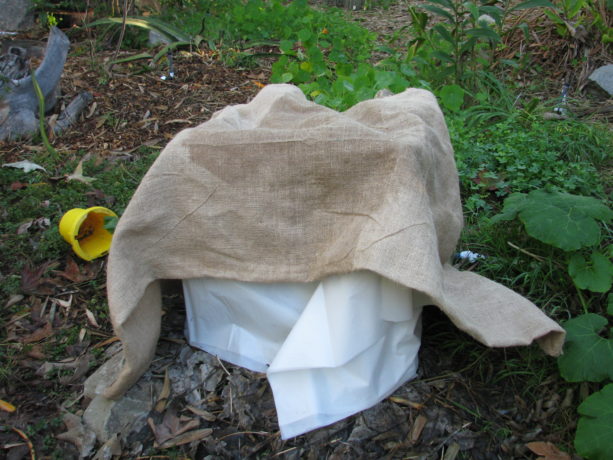
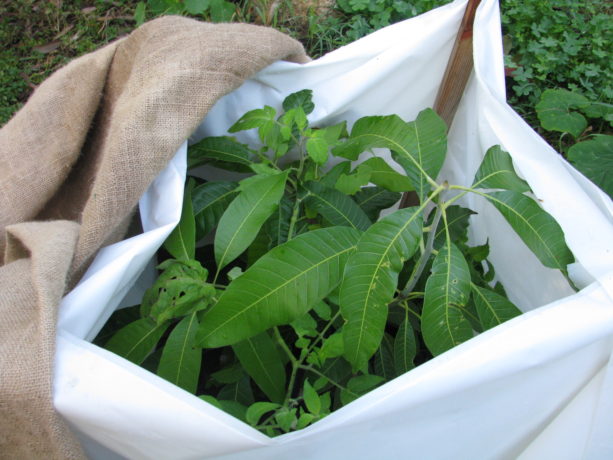
Be sure to uncover the tops of your plants in the morning so that they don’t cook. The plastic will act like a small greenhouse and help your plants keep cozy during cold days as well. This is a treat for a tomato that came up next to our mango and is enjoying the greenhouse effect.
So what to do about capturing cold? Again, frost rolls downhill. Capturing it with obstacles such as earthen walls, stacked sandbags, bushes, railroad ties, or anything that keeps it from passing by will help deliver the chill hours needed. Be sure that the cold trap is created like a smile downhill of the plant; fishscale swales are in the same direction but placed above plants for water catchment. You want the cold to be caught in a cup.
This short video I took last week on Christmas day showed a very light frost, and how dramatically different it was between a path that had no obstacles, and the side that had.
https://youtu.be/1YgG7sTDfrA
After I shut the camera off I realized that I should also have wished you a Happy Hanukkah, an early Happy Kwanzaa, a general Happy Holiday for others, and now I wish you a Happy New Years, as we are five hours before the end of 2016.
Thanks for reading, thanks for doing permaculture and helping to save the planet. We can make the change we want to see happen.
- Arts and Crafts, Breads, Cake, Condiments, Dessert, Fruit, Gardening adventures, Herbs, Vegan, Vegetables, Vegetarian
2016 Marketplace and Last Tours of the Year
Our Marketplace is extended to Sunday, Nov. 20th, 9 – 2!
 At Finch Frolic we’ve come to celebrate the end of our season with a Marketplace. This year our Marketplace will happen one day only, this Sat. Nov. 19th from 8-3. Finch Frolic is located at 390 Vista del Indio, Fallbrook, CA. We’ll be selling our abundance. Here’s some of the goodies you’ll find:
Tiny Cocktail Mouse Melons (cucumbers… so cute!)
Amazing, milk-free Passionfruit Curd
Incredible tropical Guava Jam
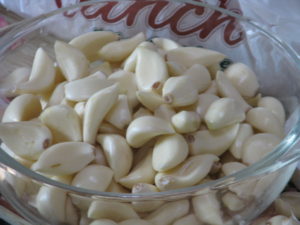
Pickled Garlic
Whiskey Cranberry Relish
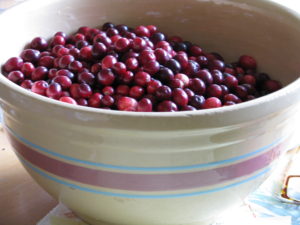
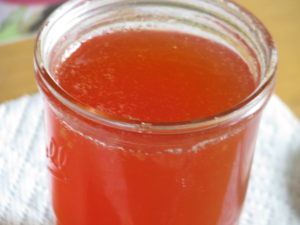
Nectarine Amaretto Jam
Tangy Plum Jam
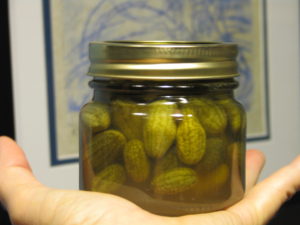
Our very best dill Pickles

Jelly Palm Jelly
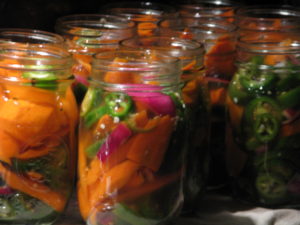
Spicy Jalapeno Carrots
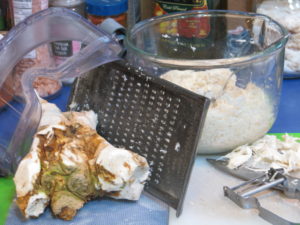
Hand-grated, homegrown organic Horseradish Sauce
Guava Halves in Simple Syrup
Guava Paste squares – eat as is or put them in baked goods, or pair with slices of cheese. Ummm!

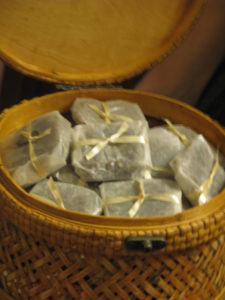
Frozen Passionfruit Juice cubes
Our famous Pomegranate Gelato
Frozen Pomegranate Arils, all ready to sprinkle on your baked goods or mix in a salad or stuffing.
Clear, amazing Guava Jelly
Frozen Plum, Guava and Peach slices
Frozen strained cooked organic home-grown pumpkin, all ready for a pie or bread!
Our best-selling Cranberry Biscotti
Gingerbread Houses. Pair them with our Passionfruit Curd for a memorable dessert!
Lilikoi (Passionfruit) Poundcakes. Small amazing tropical bundles of yum.
Guava Sauce, like applesauce but guava. Very low sugar!
Fresh Jerusalem Artichoke (Sunchoke) roots. Cook them or plant them!
Layered Curry Mix – a sensual trip to the Middle East, either layered in cute little jars for a gift or in bags for use at home. Make a curry with these organic spices!
Lime Juice Cubes
Candied Orange Peels. From our organic oranges. A much better stocking stuffer than hard candy. Or top your baked goods with a twist.
Fresh, fragrant guavas, both white and pink

Fresh kiwanos, those thorny African fruit that sell for a fortune at the stores.
And more!
Plus, we’ll be selling some knick-knacks, and a few garage sale items . A punching bag anyone?
PLUS, we’ll have a selection of native plants lovingly grown locally.
And we’ll have amazing succulents from our neighbor Rosa of Roja’s Succulents. You’ll pass by her business on the way in, so please stop by on the way out and see her incredible inventory of plants, all organically hand-grown by Rosa. I never loved succulents until I saw her collection, and her very low prices!
Except for the gelato, we’re dairy (milk) free this year. We use organic eggs from cage-free hens, and otherwise use vegan butter that I make at home which is coconut-oil and rice milk based.
Our last two tours of the year (the garden closes from Thanksgiving until March 1. We will still be available for consultations and appearances) will be this weekend, Nov. 19th and 20th, both at 10. [UPDATE: THE SATURDAY TOUR IS FULL. THERE IS STILL ROOM FOR THE SUNDAY TOUR]. The tours are our usual 2-hour concentrated Intro to Permaculture walks through the garden. The tours cost $15/adult and you will come away with so many ideas and so much information that you’ll spend the next week working in your garden! Please RSVP for the tours to dianeckennedy@prodigy.net.
Your continued support helps Miranda and I keep our consultation and tour prices low, and enables us to keep teaching and spreading the word on permaculture. So thank you!
-
Ghostly Spring Rolls
 Vegetariat began as mostly a food blog. Now I talk more about growing food than cooking but if you go through the archives you’ll find a lot of recipes. This one I thought was so cute that I had to pass it on.
My daughter and I wanted something savory, vegan and spooky to bring to a Halloween potluck. We saw lots of Pintrest tags for apple slices with teeth, green pepper faces oozing spaghetti and all kinds of cheese or egg eyeballs.
Miranda had made some Thai spring rolls for my birthday last week, which are a big favorite of mine. I liked how you could see the veggies through the rice paper. Then I thought what if something spooky was peering through the rice paper wrapper? A ghostly figure. Then I thought of these wonderfully large King Oyster mushrooms we bought at 88Ranch Market and I knew what I wanted.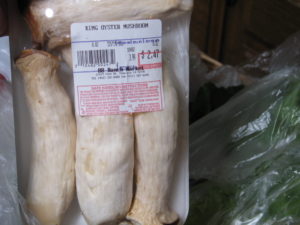
I sliced the mushrooms very thinly.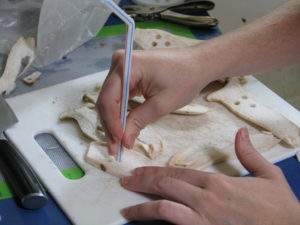 To cut out the eyes and mouth at first I used a knife, then tried a hole punch, and finally used the end of a plastic straw which worked beautifully.
 I simmered the mushrooms until tender in vegetable broth, sesame oil and Bragg’s Amino Acids.
  Then they were set on paper towels to dry and to cool. We also prepared the other ingredients: cilantro, Thai basil, strips of chive, soaked rice noodles, lettuce, bean sprouts, grated carrot and crumbled tofu cooked in sesame seed oil and lite Soy Sauce.
Spring rolls are not cooked. They are a bunch of flavorful and aromatic herbs and veggies wrapped in a clear rice paper wrapper. These wrappers come in hard, brittle sheets. You carefully dip them one at a time into hot water and they quickly become translucent and soft.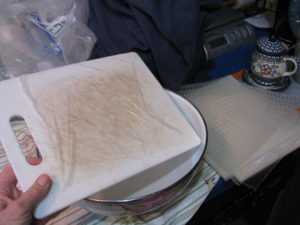 This is the tricky part, getting them on a surface to fill and fold without allowing it to stick onto itself. If one hangs up too much, dip it back into the water and you can gently pull creases out then.
We put a mushroom ghost 2/3rds of the way up, and the rest of the filling just below that.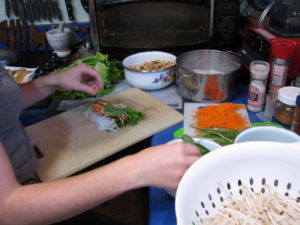 Don’t overfill, and keep a margin on either side for folding. Beware of stems that might poke holes into the wrapper. To fold, you fold in either side first. Then fold the bottom up until it covers 2/3s of the rest, then roll up. The filling should be neatly tucked away and the ghost peering out. You can arrange the filling behind the ghost so that there are different backgrounds, such as a lettuce forest, creepy bean sprout tendrils or a haze of red carrot.
Serve the rolls with a peanut dipping sauce. We brought these to a potluck Halloween party and they all disappeared in a not-so-spooky manner!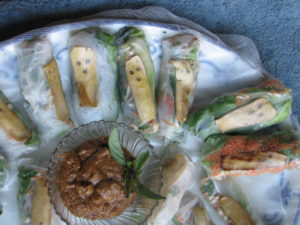
If you don’t have big mushrooms available, then you can also do this with carrots very thinly sliced and handled the same way.
Here’s a quick recipe for the peanut dipping sauce, but there are many variations out there so try others:
Peanut Dipping SauceRecipe type: SauceCuisine: ThaiPrep time:Total time:Serves: ½ cupFor use with Thai spring rolls.Ingredients- 2 tbsp water
- ½ cup chunky peanut butter (you can use smooth, but I like the chunks for more flavor)
- 1 tbsp sugar
- 4 tbsp vegetarian hoisin sauce
- 1 tbsp lite soy sauce (or Bragg's Amino Acid)
- 2 small garlic cloves (or 1 large), minced
- 1 birds eye chilli, finely chopped (optional. We left them out)
- 1 tbsp sesame oil
- 2 tbsp lime juice
Instructions- Mix all ingredients until the consistancy is like honey; you want it to stick but not clump.
- Garnish with crushed peanuts and sprigs of herbs or a piece of lime.
Just wanted to share our spooky treats that also were very healthy and so very tasty!
