Vegan
-
Candying Kumquats
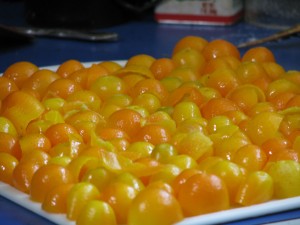
An army of kumquat halves We have two small but prolific kumquat trees. Kumquats are very small citrus that are tart and sweet at the same time, and you eat the skin and all whole. Kind of scary. Not wanting to waste food, my daughter picked a whole batch of them and was determined to juice them. And she did, one tiny half at a time! There was about half a cup of juice in all, which she froze in plastic butter molds for future use in drinks, etc.
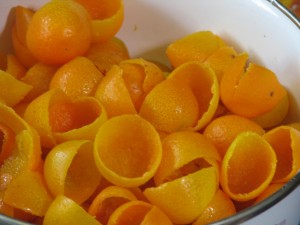
De-pithed kumquat shells Then we had all these little half shells, so she carefully scraped the pith out of all of them and candied them. The idea was to make little candied shells in which we’d put little scoops of vanilla ice cream, lemon sherbet, or something yum. We tried a couple with homemade vanilla ice cream, and it was worth all the work.
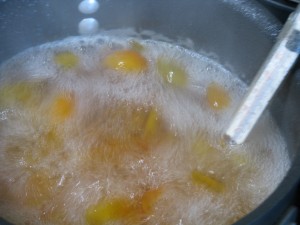
Cooking kumquats in simple syrup The kumquats needed to dry round, like little bowls, so I picked some more kumquats (yes, there are still more!), halved them and used them as molds for the shells, which were put onto the halves like little hats.

Using kumquat halves as molds for shells All the split ones were set aside, and then everything was sugared and dried. Several years ago we candied orange and lemon peel and I pulled some out of the bags now and then for use in baked goods. Now we have candied kumquat peels and shells.

Sugaring the peels and letting them dry But we still had all those kumquat halves that we’d used as molds. We also had half a saucepan of simple syrup in which the kumquats had been cooked. So, not wanting to waste, we put the kumquat halves into the syrup and boiled it again until the halves were candied and then I put them in jars and sealed them. I’m not sure what I’m going to do with them, but they can be used to decorate desserts.
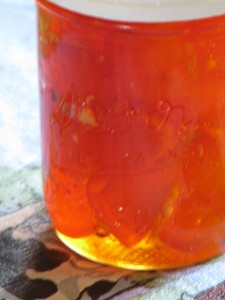
Candied kumquat preserves in syrup I also had another ginger beer recipe that called for slicing the ginger, cooking the slices in a sugar and water mixture until reduced, then using the liquid as a base for a ginger drink. The slices could then be sugared and dried and eaten. I keep candied ginger from Trader Joe’s in the car to snack on, because ginger helps with car sickness or an upset stomach. These homemade ginger slices were quite hot, so I think I’ll save them to use in cakes and pies instead.
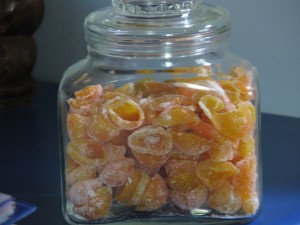
Stored candied kumquat shells and peels So it was a day of sugaring, preserving and messing about in the kitchen. We now have seven quarts of pickles, a couple of bags of dried kale that is not only good to munch on, but great to crumble over rice or noodles, jars of candied kumquats, a jar of sugared kumquat peel, a bag of candied ginger slices, some miscellaneous jam, and lots of zucchini with more to come!
-
Roasted Radishes, or What Not to Bring to a Party

Radishes About to be Roasted I don’t have much luck bringing food to events. When I need to bring food to a party, I seem to have some strong internal drive to fix the most inappropriate thing, and go through agonies to make it. Some mischievous elf in my head sends down strange images to my consciousness telling me what to make as soon as I volunteer. The food is good…. it is usually a recipe that I’ve made before and think is interesting and different. I’ve brought cornbread made with blue cornmeal to picnics, and people have shunned it thinking it was blueberry flavored, or an ugly homemade unfrosted cake, and gone on to the easily recognizable chain-store brand cookies lined up in a clamshell container.
When asked to bring a cake, I make some complicated thing that never looks as good as the picture in my head. My cakes are very tasty, but my decorating skills are, shall we say, possible candidates for cakewrecks.com. I’ve done a cake for a grand opening of a park where I simulated a pond with cattails made of broken pretzel sticks, or that is what it was supposed to look like. I made not one but three types of jelly roll cake with three different fillings for a bridal shower, and the day was so hot that the cakes kept sticking and sliding and I had to keep running up and down the stairs to the garage refrigerator to chill them. I actually sat down and cried because I was so frustrated and had spent the entire day baking in a heat wave with a mess to show for it. I ended up arranging the individual cakes in a flower shape and sprinkled dried rose buds and edible glitter around. It looked pretty, if amateurish, but I knew they’d taste wonderful. It was so hot in the car I thought I would be redecorating my Prius with homemade lemon curd and chocolate filling. I had to stick the large pan in the surprised hostess’s refrigerator, which took up a lot of space. Then when it was cake time, I found that the jelly rolls had already been sliced up and plated so that you couldn’t tell the flavors apart and all the rosebuds thrown out, without the bride-to-be or anyone else even seeing it. I could have just made a sheet cake and everyone would have been happy.
I’ve brought vegetarian main dishes that no one but my children and I seem to want to eat, even though they aren’t creepy tofu-y mock turkeys or anything. Labeling a dish ‘vegetarian’ is like putting a curse on it, although many dishes other people bring don’t have meat in them either. To be ‘vegetarian’ means scary, weird food of unknown origin that probably tastes like sprouts or tofu or whole wheat.
I know when my offerings are rejected, it isn’t really the food… the food tastes good. That is, if anyone dares eat it. It is just out of place, just as I am at most parties. My food and I belong at small gatherings of friends who are expecting a new experience. Who want to try something different and talk about it. Who enjoy subtleties of flavor and the goodness of fresh herbs and spices. Who don’t judge on how good a dish appears, but how it tastes. Who are forgiving and especially have a good sense of humor.
Which brings me to another example of something not to bring to most parties: roasted radishes. Especially to one where there is a lot of drinking going on. Everyone will wonder what they are and no one will touch them because there is perfectly predictable Albertsons layered nacho dip and bagged chips right next to them. Since roasted radishes aren’t the prettiest looking things, they will be the last edible thing on the buffet table besides the really, really cheap half-finished bag of corn chips, and when everyone is really, really drunk, some unpleasant personal comments might be said about their appearance. The radishes will be cold and soggy by that time, too, and not the best thing for someone with a lot of alcohol in his or her system to put into his or her mouth at that point. However, if served at home as an interesting appetizer along with something less scary-looking, these are just great. No, really, they are. You should try them. I was impressed enough to try to force them on strangers at someone’s home, so you should be, too.

Roasted Radishes dressed up for a party Growing radishes is very easy and quick, and roasting them gives you something to do with them. Radishes only take a few weeks to mature, so they are often the first thing up and ready in the garden. Give this recipe a try the next time you roast veggies; many people who don’t really like radishes enjoy them this way.
Roasted RadishesAuthor: Diane C. KennedyRecipe type: Side DishPrep time:Cook time:Total time:Roasting radishes changes their flavor and texture to something new and delightful.Ingredients- Three bunches radishes, preferable different colors if you can find them
- Three tablespoons extra virgin olive oil
- ½ teaspoon dried thyme leaves
- ⅛th teaspoon cayenne
- Freshly ground black pepper
- Coarse salt
Instructions- Preheat oven to 425 F.
- Wash radishes and cut all but a little tuft of radish leaves off of each radish. Don't cut off the roots.
- In a medium bowl whisk oil, thyme, cayenne and black pepper.
- Add radishes and toss to coat.
- Pour radishes onto a flat baking pan and drizzle with any remaining oil mixture.
- Roast 40 - 50 minutes, turning once midway through roasting, until a knife easily slides into a radish and they are lightly browned.
- Sprinkle or grind coarse salt over the tops.
- Serve immediately.
-
Savory Carrot Soup

Freshly Pulled Carrots Carrots are a gardening miracle. From such a minuscule seed, out pops a root strong enough to plow through tough soil and soak up minerals.

Little Sprouts The carrots shoot those minerals up to the ferny leaves, and when they die, leave the minerals to enhance the topsoil. Carrots fill the roll as one of nature’s miner plants. They are also terrific to eat and very good for you.
I’m sure you’ve heard about how high in beta-carotene carrots are, and how they help eyesight. If you haven’t there are hundreds of Internet references to look up. Carrots are a very versatile vegetable, tasty raw as well as cooked.

Nantes and Chantenays There are many carrot varieties. Nantes, Chantenay, Danvers… these are the common varieties you’ll see sold in most seed stores. However there are white carrots, purple carrots, deep red carrots, and carrots of many sizes and shapes. Some are woody, some very sweet, some tender and some strongly flavored.

Feel around the carrots to see if they are ready to pull 
Garden carrots need only scrubbing, not peeling If you grow your own organic carrots, feel around the roots to see if they are large enough to pull. Don’t leave them in the ground for too long or they’ll become less sweet and woody in texture. Also, if you use your own organically grown carrots, you don’t need to peel them. Just use a brush to scrub off the dirt.
Carrots are wonderful to eat when simply steamed until tender, then buttered or drizzled with olive oil and chopped herbs. Dill is particularly good, as are chives. I’ve found many carrot recipes, but most of them are sweet not savory. Honey-glazed carrots, carrot soup with curry and sweet coconut milk, brown sugar carrots… I don’t care for them. Carrots are naturally sweet, and to slop more sweet stuff on top is overdoing it. Sweetened carrots belong in carrot cake, and there is only one recipe for it that I find not cloying and heavy (I’ll share that recipe with you another time). I also like carrots in a savory soup.
Here is an unusual recipe that is tasty, easy, low in calories, and has protein from an unusual source: vegetarian sausage patties. Celery adds dimension to the flavor as does minced fresh rosemary.

Minced Fresh Rosemary Savory Carrot SoupAuthor: Diane C. KennedyRecipe type: SoupPrep time:Cook time:Total time:Serves: 2This golden, low-fat soup brings out the savory goodness of carrots.Ingredients- About two cups sliced carrots
- One shallot, diced
- One celery stalk, diced
- Two vegetarian sausage patties (such as Morningstar Farms)
- 1 tablespoon olive oil
- ½ teaspoon fresh rosemary, minced
- One large potato, peeled and chopped
- Four cups vegetable broth
- Cilantro leaves for garnish (optional)
Instructions- In medium saucepan, heat olive oil over medium-high heat. Add shallot and cook for two minutes.
- Add celery and stir occasionally for about three minutes.
- Move the vegetables to one side and add two vegetarian sausage patties. Flip when cooked on one side.
- Add potato, carrots and rosemary.
- Stir, breaking up sausage patties with spatula.
- Add vegetable broth
- Bring to boil then lower temperature to a simmer and partially cover with the pot lid.
- Cook for about twenty minutes, until carrots are just tender.
- Cool, then blend soup until smooth.
- Return soup to pot and reheat.
- Serve hot, topped with cilantro leaves if used.
Serve this golden orange soup in bowls that compliment it’s color.
Serve in Bowls that Compliment the Rich Soup Color -
Locro de Papas (Ecuadorian Potato Soup)

Locro de Papas A couple of years ago my daughter and I went on a birdwatching ecotour of the cloud forests in Ecuador, and then to the Galapagos islands.

Me and Galapagos Sea Lions The flights ended and began in Quito, the capital city, which holds about 75% of the entire population of Ecuador. Eating wasn’t as much a challenge as we had anticipated; often in lower economic areas there are better non-meat choices. We stayed at a hotel in Quito at the beginning, middle and end of our journey. Room service was the same price as eating in the restaurant, so we indulged in our room for most meals because we were exhausted. One of the three separate nights we stayed there we watched Lord of the Rings in Spanish. Neither of us really speaks Spanish, but I understand enough to get the gist of what is being said. On our last day the streets were blocked off because the president of Ecuador came to stay in the adjacent hotel and we saw his party board a plane as ours was taking off the next day.
The hotel menu offered interesting side dishes made with interesting ingredients such as yucca and plantain. Our absolute favorite, though, was Locro de Papas. Literally this translates as Potato Stew, but it wasn’t a stew. Locro de Papas is one of the most popular dishes in Ecuador and the Andes. It is wholesome peasant food that has as many variations as Americans have chili recipes. At home I managed to reproduce the version that we fell in love with as best as I could. A few ingredients make the soup special. One ingredient which you may not have on your pantry shelves, but is easily obtained in the Mexican food isle, is annatto, also called ground anchiote. It has a slight flavor and is used to color foods. It is not essential for the success of this soup, but it is a nice addition. They use an oil that is colored with the anchiote seeds, but using the ground spice with olive oil works just fine.

Cumin, annatto and cheese What is essential is ground cumin. Some people can’t stand the smell of cumin, which is slightly reminiscent of dirty socks. However the flavor carries this soup perfectly. Another addition is sliced avocado. Warm avocado is melt-in-your-mouth delicious. Living in Fallbrook, the Avocado Capital of the United States, I have ready access to the many forms avocados can take. Avocado fudge, ice cream and fried avocado slices are all standards of the yearly Avocado Festival. Another addition to this soup which creates a wonderful texture as well as adding protein and calcium, is cubed non-melty cheese. If you are non-dairy, then substitute with cubed firm tofu (which can be added even with the cheese). The textures of the potatoes, cheese and avocado are heavenly.
One of the standards of an Ecuadorian lunch or dinner is an introductory soup, usually vegetarian. We ate some fantastic soups. Instead of bread on one occasion, we were given a bowl of popcorn to sprinkle on our soup. It was great! I’ve included it here.
Be sure to slice the potatoes no less than 1/4 inch thick; if any thinner they will fall apart when cooking.

Thick potato slices won't fall apart The version in the hotel had lots of butter in it; I’ve replaced half of it with olive oil, but if you don’t do butter then use all olive oil. The butter’s fat content makes the soup satisfying to the palate.

Saute shallots in oil and butter This is a quick and easy soup. Don’t cheat yourself out of a great meal by not making Locro de Papas!
Locro de Papas (Ecuadorian Potato Soup)Author: Diane C. KennedyRecipe type: SoupPrep time:Cook time:Total time:Serves: 4This version of the favorite soup of South America is quick to make and very filling.Ingredients- 1 tablespoon olive oil
- 1 tablespoon butter
- 1 shallot, diced
- 1 pound potatoes, peeled and sliced no less than ¼ inch thick
- ½ tablespoon ground cumin
- ½ tablespoon ground annatto
- 6 cups vegetable broth
- 1 avocado
- 1 cup cubed non-melty mild cheese, such as Queso Fresco
- 1 block firm tofu, cubed (optional)
- Cilantro leaves for garnish (optional)
- 1 cup freshly popped popcorn (optional)
Instructions- In a medium saucepan, heat olive oil and butter over medium-high heat.
- Add diced shallots and cook until translucent, about three minutes.
- Cut potato slices in half and add to pot.
- Stir in cumin and annatto.
- Pour in vegetable broth.
- Bring soup to a simmer and cook, uncovered, for about twenty minutes, until potatoes are just tender enough to part when pressed. Don't overcook!
- Ladle soup into wide shallow soup bowls.
- Add chunks of cheese and tofu (if using).
- Top with sliced avocado.
- Garnish with cilantro leaves and serve immediately.
- Provide bowls of popcorn alongside soup to add as topping (don't add it ahead of time, they become soggy instantly).
-
Crazy Pot Salad

- Mixed greens plus blossoms, herbs and tiny potatoes
Crazy Pot Salad is what my daughter calls a main dish I make because it involves many different ingredients that vary as to availability. It always turns out great, though, which is truly amazing. It is a greens salad that also has cooked items and a balance of flavors, textures and colors that make every forkful slightly different. It involves both cold and hot ingredients, all thrown into the same bowl and mixed together to create a melded warm dinner that is as healthful as it is delicious. It is even good as cold leftovers the next day.
Tonight’s salad was born of the need to eat the mixed salad greens that were overgrowing in the garden. I cut and picked various greens and started from there. To create a Crazy Pot Salad, I keep in mind these components:
Fresh Greens: the more varied the better. Fresh herbs such as dill, basil, chives and cilantro, along with arugula and a lettuce mix, work well. Don’t forget some iceberg for crunch. If you don’t have or want to use iceberg (a much maligned vegetable) then cut up fresh celery.

- A mix of colors and textures is essential
Protein: Tofu, soy chicken strips (such as Morningstar Farms), soy bacon, soy tuna, etc. Beans such as garbanzo or Northern white work well. Using a couple types of proteins are tastier and more nutritious. Cook the protein and use hot.
Starch: Pasta in small shapes, rice, or a cooked grain such as quinoa. Use the starch hot.

- Quinoa (pronounced keen-wa) is high in Omega-3.
Other additions: diced carrots, steamed tiny potatoes or potato chunks (hot), feta or cotija cheese (crumbly), marigold petals, nasturtium blossoms, squash blossoms, capers, heart of palm, mushrooms, pea pods, avocados, green beans fresh or cooked… whatever you have that you need to use. Look for colors to add. I can’t stand Bell peppers, but that is usually the go-to choice when people want to add color to anything. You can avoid the Bell pepper taste-takeover of your salad if you want with a little creativity. Stir-fry up some chopped red cabbage and throw it in with some raw carrots.
Crunch: Nuts, such as pignoli (pine), cashews, sunflower seeds or almonds. Toast them in a little olive oil or in the toaster oven to bring out their flavor.
Dressing: This salad just about makes its own dressing. I like to make Italian dressing with a packet of Lowry’s Italian dressing mix, using red wine vinegar and olive oil. Or I make the dressing as I cook, which I’ll include in the recipe. The cooked shiitake mushroom gives the olive oil a deep, savory note and adds a very interesting flavor and texture. Along with the pignoli nuts, chives and crumbled soy bacon, this makes a delicious subtle dressing that is mixed into the salad rather than adorned on the top. The hot starch, including the potatoes, will readily absorb the hot flavored olive oil.

- Shiitake mushrooms, pignoli nuts and soy bacon dressing
Remember, this is a salad of opportunity; use what you have and what you love, but keep in mind the different components, the shapes and colors of the ingredients, the texture and nutritional value. Bland foods such as the potato will balance strongly flavored ones such as arugula.

- Yum. Just: yum!
Crazy Pot SaladAuthor: Diane C. KennedyRecipe type: Main Dish SaladPrep time:Cook time:Total time:Serves: FourThis warm combination of greens and other ingredients make a balanced, delicious healthy main dish that can change with what you have available.Ingredients- One cup quinoa, prepared with vegetable broth following box directions
- Four cups (approx.) mixed fresh greens washed and torn into bite-sized pieces
- Two sprigs each fresh dill, basil, chives and cilantro, chopped
- One cup torn iceberg lettuce
- Three calendula flowers and four squash flowers, torn into small pieces (just petals)
- Eight very small potatoes
- Cotija cheese (or veggie substitute. Dairy can be optional)
- Half an 8-oz can garbanzo beans
- Two small carrots, sliced into discs
- One tomato, diced
- A tablespoon olive oil (flavored, if you have it)
- One package Morningstar Farms Chicken Strips
- For Dressing:
- Six fresh shiitake mushrooms
- Four strips Morningstar Farms soy Bacon Strips
- Three tablespoons pignoli nuts
- ⅛th cup olive oil
Instructions- Prepare quinoa in medium saucepan using vegetable broth, according to the instructions on the box.
- Steam small potatos until tender
- Meanwhile, wash, dry and tear up fresh greens, herbs, iceberg and flowers. Put in large bowl.
- Crumble about four tablespoons Cotija cheese over greens in bowl.
- Add garbanzo beans
- Add carrot discs
- In frying pan, heat a tablespoon of olive oil and stir-fry the soy chicken strips until browned (if you have flavored olive oil, such as citrus or basil, use that to cook these).
- Add hot soy chicken strips to bowl.
- In same frying pan, heat ⅛th cup olive oil on medium high.
- Chop shiitake mushrooms and add to frying pan.
- Cook mushrooms on medium-high heat until they are almost crunchy.
- Add soy bacon strips and pignoli nuts.
- Stir nuts until they are browned (watch so they don't burn).
- Flip bacon and remove when browned.
- Pour contents of pan on mixture in bowl.
- Crumble bacon strips and add to bowl.
- Add steamed potatoes, quartered to bowl.
- Add quinoa to bowl.
- Toss contents of bowl until well mixed. Heavy ingredients will sink to the bottom, so be sure to mix well.
- Plate the salad and garnish with chopped tomatos and more cheese, if using.
-
Plantain Chips, or Tostones

Bananas versus Plantains A couple of years ago my daughter and I enjoyed a five-day birding tour of the high country in Ecuador, then an eight-day tour of the Galapagos islands. Being vegetarian wasn’t a challenge there; we ate very well and enjoyed foods that we hadn’t encountered before. One of the foods that was in many meals was plantain. Plantain around here means the lawn and stream-side weed that helps treat stinging nettle and insect bites. However plantain the fruit look like bananas, but are prepared very differently. High in iron, potassium and fiber, they are very versitile and often used in recipes instead of potatoes.
Plantains can be used in three stages of ripeness. When they are green they are starchy and hard to the touch. They are often boiled and mashed like potatoes. When they are yellow, they are sweeter as the starch has converted to sugar, but still not soft and are difficult to peel. When they are black, but not mushy, they are sweetest.
A common snack in South America and also in Africa are plantain chips. In Ecuador they are called tostones and sold in bags like potato chips. They are very easy to make, and very yummy to eat. Photos follow the recipe.
Plantain Chips, or TostonesAuthor: Diane KennedyRecipe type: SnackPrep time:Cook time:Total time:Serves: 2-3Fruit snack chip found in South America and Africa.Ingredients- Three plantains, yellow or slightly black
- Oil for frying
- Salt.
Instructions- Boil a small pot of water and submerge the whole unpeeled plantains for several minutes. The skins may begin to crack.
- Remove from boiling water and allow to cool.
- Peel the plantains and slice into ¾ inch disks.
- Heat enough oil on medium-high heat in a large skillet to cover the bottom.
- Lay sliced plantains in the oil and fry for about three minutes. They will be soft. Remove from oil and place on a plate lined with paper towels.
- Keep the oil temperature the same.
- Using the bottom of a glass, flatten the softened plantains so that they are very thin. Sliding a metal spatula under each chip when smashing helps. (A Puerto Rican version has you dip the disks into cold water just before refrying, to make them crisper. It would also make the oil splashier.)
- Lay the flattened disks back into the oil and fry for another three minutes or so.
- Remove the now crisp disks to a paper towel for draining.
- They will crisp even more as they cool slightly.
- Eat as is, or lightly salt, or sprinkle with chili-lime powder.
- They are very good with dip, too.
- Makes about thirty chips.

Scald whole plantains to make peeling easy 
Peel cooled plantains 
Using a spatula under the plantain slice helps when squashing with a glass 
Fry slices a second time .

Nom! -
Taking the “Ew!” out of Tofu

Working Tofu Magic I’ve been an ethical vegetarian for seventeen years, raising both my children without animal protein as well. Believe you me, packaged vegetarian foods have come a looonng way in palatability. There is a whole new world of packaging rife with misspellings and quotation marks, such as “chickn” and “bakon”, just to make sure that no hen or pig will sue the company for false representation. Many vegetarian options were simply god-awful to eat; some still are. It is still hard to find products that aren’t filled with pieces of red and green peppers (ick!), whose flavor permeate the rest of the food making it disgusting if it had been palatable at all in the beginning.
There are wonderful meat substitutes that can vary a menu and add protein, and the ability to create mock meat has become an art and can be found in many restaurants, especially Thai or Chinese. I order several times a year from May Wah in New York, who sells mock meats created in Taiwan. Morningstar Farms makes wonderful standards such as fake bacon, sausage links and patties, chicken strips and meatless crumbles (like ground beef).

A host of good pseudo-meat products When my daughter and I toured England four years ago, the popular vegetarian option on all the menus that year was mushroom risotto. We ate quite a lot of mushroom risotto, as well as some very strange stuffed onions which were stuffed… with more onions.
Although there are many interesting varieties of fake meats, the least expensive and easiest way to provide extra protein to your diet (other than beans, kale and dairy products, etc.) is to learn how to prepare tofu.
Tofu is prepared soybean curd. It comes either in a water bath tub which must be refrigerated or in asceptic pouches which can be stored at room temperature. On the label you’ll see that it comes in ‘soft’, ‘firm’ and ‘extra firm’ for different uses. Most beginners at eating tofu say that it has no flavor and it just soaks up the gravy and seasonings it is cooked with. Not so. Fresh tofu has a delicate, fresh flavor that is available to a palate that is not overly spoiled by too much salt and seasonings.

Types of tofu I’ve grown to like the soft tofu as much as the firm, cooking it so that the outside has a crisp texture and the inside is smooth, and that is the recipe I’ll give to you shortly. For those who want something chewier, there is a great trick to make tofu more meat-like. Freeze it! This works best with firm or extra-firm tofu that is in a water bath tub. Freeze it, then thaw it out, press out the water, slice it however you want and throw it into whatever you are making. It is much more like a sponge and has more texture.
For fresh or thawed tofu, you should drain it. Pressing it is easy and can be done while you are gathering the rest of the ingredients for your meal. Just put a plate on top of a cake of tofu, which is on a cutting board or plate by a sink, and set a heavy can or two on top.

Nice hat You’ll be amazed at how much water runs off. If you happen to own a Japanese pickle press (you don’t? Oh, you should!) it is really easy to press tofu.

Say 'Pickle Press' ten times fast. Go! I bought mine at Green Apple Japanese Market in Oceanside for about five dollars. The screw press holds the vegetables down into the brine, or acts as a torture device for tofu. If you press thawed tofu, it’s texture becomes so spongy that it doesn’t easily fall apart and you can squish it down pretty far! It’s fun!
A simple way to prepare tofu is to press it for no less than five minutes, slice it, and pan fry it.

Sliced tofu I use a combination of olive oil (because it is one of the most recommended foods that you can eat, and you should have about two tablespoons a day!), sesame oil for flavor, and a product called Bragg’s Amino Acids. It is similar to soy sauce or tahini sauce, but is far less salty and very healthy, providing extra amino acids to your diet. I buy it at health food stores such as Henry’s Marketplace.

Tofu and his cooking buddies If you aren’t going to go run out and buy some right now (whyever not? Pick up a pickle press while you’re out!) use a little tahini sauce, or very lite soy sauce. As these sauces cook, the salt condenses and overpowers the flavor of the foods. So, to one cake of sliced tofu, I put about two tablespoons olive oil, half a tablespoon sesame oil and one tablespoon Bragg’s Amino Acids in a frying pan and heat it to medium-high. I mix them together to cover the bottom of the pan and set in the tofu slices. The more moisture in the tofu, the more it will splatter, so I turn up the heat a little more after setting the slices in the pan. I also use a splatter guard.

Cook slices in pan with splatter screen The slices should sizzle. Cook for about ten minutes, then turn them for another five. They should be light brown. Add them to vegetables, serve them seperately or top a bowl of noodle soup with them. A varient on this recipe is to use extra-firm tofu, well drained, sliced into smaller pieces and cooked at a higher temperature for a little longer. The pieces become crispy… mmmmm!
You can add soft tofu into smoothies or puddings, or scramble them to make something that really doesn’t taste at all like eggs but can be very tasty as well as nutritious with the right seasonings.
So don’t be afraid of your tofu. Buy it as fresh as you can (there is a tofu maker in San Diego!) and play around with it. Look for tofu that specifies non-GMO soybeans. There are so many ways to prepare it, but this method is quick and simple for busy people, and very tasty, too!
-
How to Blanch

Ice Bath When preparing fresh vegetables for the freezer, the best way to do it is to blanch them. Canning vegetables is another method of storage that doesn’t rely on electricity to keep fresh, but I’m not going into canning here. For the freezer storage method, clean the vegetables (which is the most time-consuming part of the whole process. Turn on an audiobook or watch the birds out the window while you work!), then briefly submerge portions in boiling water for a couple of minutes. Immediately plunge them into an ice bath.

All You Need to Blanch 
Blanching Swiss Chard 
If You Have a Lot, Use a Larger Pot! The quick cooking softens them and sets their color, and the ice stops the cooking process.

Swiss Chard in Ice Bath 
Chard in boiling water, ice water, and awaiting blanching Then you dry the vegetables and freeze them. To dry them off, you can spread them in clean dish towels and squeeze or blot them dry, or you can drag out that old salad spinner that has lived in the cupboard for twenty years and put it to good use. If the veggies are pieces, then for ease of use you separate them on a cookie sheet and freeze for about half an hour or less, then pour them into freezer containers. For clumps, such as with Swiss chard, spinach, kale or other leafy greens, spread them out as thinly as you can on a cookie sheet and freeze, then break up and put into freezer containers. When you go to use them they won’t be frozen into one big blob, and you can use what you want to and reseal. Be sure to mark the container with the date.

Frozen Bagged Sugar Peas I’ve just had an enormous snow pea harvest, as well as three plastic grocery bags stuffed full of Swiss chard. To save water, I cleaned all the chard and a plastic grocery bag half full of snow peas, then blanched the peas first and then the chard. Besides washing the peas and chard (look back a few posts about how to cook Swiss chard), the peas had their stems pinched off and any tough vein stripped from the sides. The chard was de-stemmed and torn up. All this preparation might seem to be too much work. However, I have frozen freshly grown organic vegetables whenever I want them, and there is nothing… I repeat nothing… so good as to eat produce you raised yourself and to feed all that love and care and work and sunshine to your family.
When finished you’ll have a lot of dark water. Don’t throw it out! It is heavy with vitamins from the produce. Some hard-core enthusiasts would add it to soups or smoothies, or drink it. I cool it and water my plants with it. I try to be healthy, but some things are just going too far!
-
How to Cook Swiss Chard
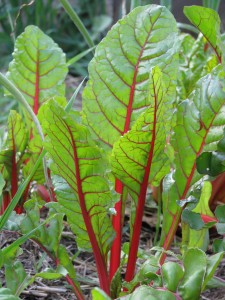
Swiss Chard Swiss chard is that bright green leafy vegetable, usually with a red mid vein, that most people inch past in the supermarkets. It looks so darn healthy it is scary, and also looks complicated and possibly bitter. I’ve been growing chard for years. One of the easiest of plants to grow from seed, this perennial in our San Diego climate reseeds itself if you let it. To harvest you cut off all the leaves except a few in the middle (to keep the plant producing food for itself). You can easily feed off of a few of these plants for years.
Chard is Mediterranean, not Swiss, but wherever its from it comes packed with antioxidants and many other great health benefits. There is the most common red veined chard that you see in the supermarket, and there is also white or yellow veined varieties. If you buy a package of seeds called Bright Lights, it contains seeds for a mixture of these. The taste difference is negligible, and since in preparing chard you usually strip the mid vein out, it really doesn’t make much difference except as color variety in the garden.
You can cut the leaves while very young and add them directly to lettuce mixes for salads, especially wilted salads. Or you can stir-fry them up or use them as you would baby spinach. The wonderful thing about chard is that you can use the old leaves as well. Older chard takes a little longer to prepare, but oh, it is worth the effort. To prepare older leaves, I fill half the kitchen sink with water, then with my fingers or a sharp knife, strip the green away from the mid veins and drop the greens into the water.
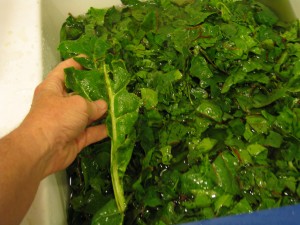
Strip the green part from the midrib Wash the greens well. If your garden doesn’t have a lot of mulch around the plants, then there might be soil kicked up on the leaves. Also, look out for any freeloaders such as snails or earwigs. I usually soak the leaves for a while, letting any thing extra float to the top or sink, then drain and rinse again. Squeeze the extra liquid from the greens and you are ready to cook.
If you want to freeze the chard for later, boil water in a big pot (depending on how much chard you have; you can do it in batches, too), then blanch the greens by briefly submerging them in the boiling water, fishing them out and bathing them in cold water to stop the cooking process. Dry the greens and freeze in containers.
This is my recipe for cooking chard, which my kids and I have loved for years. You can prepare it this way and eat directly, or use it as filling for enchiladas, frittatas, empanadas, or any other tas or das you may desire! Photos follow the print version of the recipe.
Chard SauteAuthor: Diane C. KennedyRecipe type: Side DishPrep time:Cook time:Total time:Serves: 4-6Swiss chard is easy to grow and a little more involved to prepare, but oh! how it is worth the effort!Ingredients- 2 tsp olive oil
- 1 large shallot (or half an onion, or a clove or two of garlic)
- ¼ cup vegetable broth or water
- 2 large bunches Swiss chard (or more)
Instructions- Wash, wring out, de-stem and chop large chard leaves.
- In a large saute pan (that is a frying pan with high sides), heat two tablespoons olive oil to medium high. Or, if doing a mondo-huge pile of chard, use a pot.
- Chop one large shallot, or half an onion, or a clove or two of garlic and add to pan.
- If using onion, then allow to cook for a few minutes until softened.
- Add wrung-out Swiss chard and stir a little.
- Add a quarter of a cup of vegetable broth (the greens will still hold water, so you don't need much broth. Or you can add the same amount of water).
- Cover the pan and reduce heat to low.
- Allow chard to steam for about twenty minutes (it should be simmering in there; if it isn't, turn up the heat a little).
- Lift the lid once and stir chard.
- At the end of the cooking time, remove the lid and turn up the heat.
- Allow any extra broth to cook until almost completely gone. Be careful not to scorch!
- Remove from heat, adjust the salt to taste, and serve. I eat it with butter, or sprinkled with Parmesan cheese is also good. Yum!!
Chard Saute
In a large saute pan (that is a frying pan with high sides), heat two tablespoons olive oil to medium high. Or, if doing a mondo-huge pile of chard, use a pot.
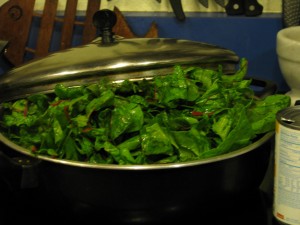
Pan o'chard Chop one large shallot, or half an onion, or a clove or two of garlic and add to pan.
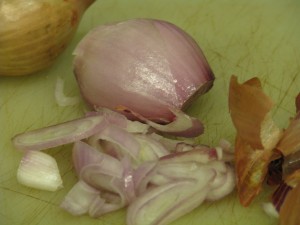
Slice shallots If using onion, then allow to cook for a few minutes until softened. Add wrung-out Swiss chard and stir a little. Add a quarter of a cup of vegetable broth (the greens will still hold water, so you don’t need much broth. Or you can add the same amount of water). Cover the pan and reduce heat to low. Allow chard to steam for about twenty minutes (it should be simmering in there; if it isn’t, turn up the heat a little). Lift the lid once and stir chard.
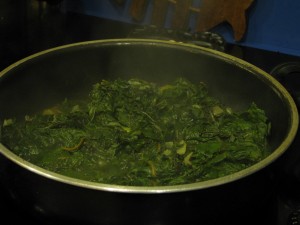
Stir the chard At the end of the cooking time, remove the lid and turn up the heat. Allow any extra broth to cook until almost completely gone. Remove from heat, adjust the salt to taste, and serve. I eat it with butter, or sprinkled with Parmesan cheese is also good. Yum!!
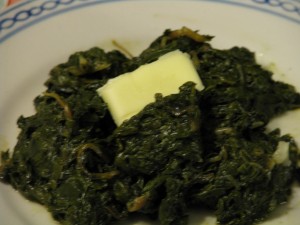
Buttered Chard: YUM! -
Genetically Modified Foods, and a curious, unrelated photo
Genetically modified food (GMs) are what happens when scientists manipulate cells or even nuclei by inserting genes or viruses to change the DNA. Before GMs farmers would hybridize plants by breeding for preferred character traits. GMs may or may not cause damage to human DNA, but it’s use has escalated the use of pesticides, herbicides and animal cruelty. Since Monsanto, the makers of the herbicide Roundup(tm) are also the leaders in GM food, it seems that they are lining their own pockets by selling products for both cause and effect. If eating GM food is something you’d rather not do, I have just come across a useful article that might help. In the April/May, 2011 Vegetarian Times, there is an article by Neal D. Barnard, MD on the subject. In the article he reveals that manufacturers in the U.S and Canada aren’t required to label GM food. However he says that most US-grown corn, soy, cotton, Hawaiian papaya and canola is GM, but most other fresh fruit or vegetables aren’t, such as apples, oranges, bananas, broccoli. (These, however, are often heavily sprayed with pesticides and need to be washed before eating. The Environmental Working Group http://www.ewg.org/ updates a Dirty Dozen and Clean Fifteen list of produce that is effected most or least by pesticides; you can see that list here: http://www.healthyreader.com/2008/05/13/12-most-contaminated-fruits-and-vegetables/ .)
Dr. Barnard goes on to give these interesting tidbits: The labels on fresh produce carry a four-digit standardized code for cashiers to look up the price of the item, called a PLU (price look-up). If the code is preceded by an 8, it is genetically modified. If preceded by a 9, it is organic, and organics cannot be genetically modified. So watch your tofu packages if you don’t want GM soybeans.
Since becoming a vegetarian some sixteen years ago, I’ve been a label reader (even now when it requires pulling out my glasses or holding a can at arm’s length!). The amount of sodium in foods is outrageous, as is the amount of sweetners such as corn syrup. High amounts of salt and sugar is in there not for taste, but for its addictive qualities. When you eat salt or sugar, just like drinking caffeine, you crave more. As a vegetarian, it’s amazing what meat products are slid into foods, even those toted to be vegetarian. Now there is a more dangerous enemy than bad nutrition in packaged food. In my opinion, it is that of GM food and heavy herbicide and pesticide use. Even more reason to shop locally and organically, or to grow as much food as you can, and read all the labels. I am an ethical vegetarian, meaning that I decline to eat animals because I am protesting their horrible treatment and slaughter. GM animals are bred to continuously give milk, to grow enormous, to provide more of what humans eat off of them, despite the physical agony it brings. That coupled with already nightmarish living conditions is a monsterous state of affairs. Then humans injest the modified DNA, the herbicides that the animals eat that was sprayed on their food, and the pesticides that was sprayed directly on the animals. It is not a practice of which I will be a part.
Okay, I’m stepping off my soapbox now. As promised, I have a curious, unrelated photo. I have to balance reality with humor to keep sane This was taken by my daughter as we left the area on our recent Oregon sojourn, and we ask ourselves, “Huh?” A really big blowhorn faced the wrong way? A jet engine, faced the wrong way? A hood ornament…. faced the wrong way? Something unusual that fell out from under the car? A neutron accelerator? I love the care of placing a skid under the thing to protect the hood, but cinching the straps so tightly it dents the sides! Another funny incongruency in life, which keeps that humor in living. Any suggestions as to what? Or better yet, why?

Hood Ornament 
Horn?


