Recipes
Tried and true, these are some of my favorites, and some newbies. Come eat virtually with me!
-
Kamoodles: Cooking with Kamut Flour
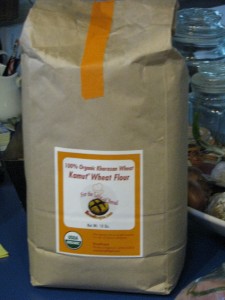
Organic Kamut flour A friend gifted me with a bag of Kamut® flour. Kamut® is the trademarked brand name for what is commonly known as khorasan
wheat, an ancient relative of modern durum wheat used by the ancient Egyptians which has finally made a comeback in popularity. It is a relative of duram wheat and very high in protein as well as trace ingredients such as magnesium, selenium and zinc. Kamut® has a buttery flavor and the grains can be cooked and eaten just like other grains, for breakfast, in addition to other foods as an extender, as a flavored filling, etc.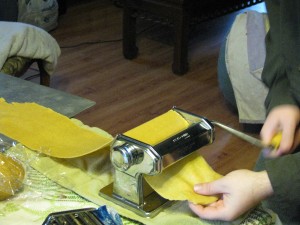
Rolling out kamut noodles Kamut® flour is a little heavier than processed white wheat flour, but much lighter than typical whole wheat flour. Therefore it may be used as a substitute for either flour without a sacrifice in flavor or texture.
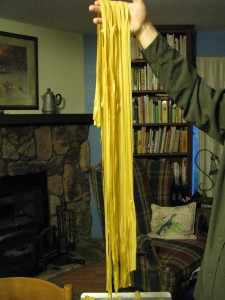
Very long noodles My son is visiting and we decided to use Kamut® flour in place of semolina.
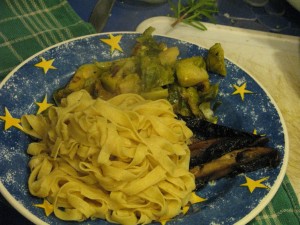
Kamoodles with portabella and broccoli. Kamut® noodles? Kamoodles!
KamoodlesAuthor: Diane KennedyRecipe type: Side DishCuisine: AmericanPrep time:Cook time:Total time:Serves: 6Kamut flour makes this side dish nutritious and delicious.Ingredients- Two cups organic kamut flour
- Three eggs
- Up to ¼ cup water as needed
- White flour for shaping
Instructions- Measure kamut flour into a large bowl.
- Mix eggs in a measuring cup or bowl until lightly combined.
- Make a well in the center of the flour and pour in eggs.
- Mix until completely combined.
- Form dough into a ball. If dough is too dry, add water a little at a time until dough sticks together enough to form a ball.
- Gently knead the dough a couple of minutes until it is slightly elastic.
- Wrap dough in plastic wrap and let sit for half an hour. If kept longer, refrigerate.
- Divide dough into quarters.
- Following the directions on your noodle machine, feed dough through repeating until it is at its thinnist level, then feed through cutter to make wide noodles.
- Hang noodles until all the dough is processed.
- Boil a large pot of lightly salted water (salt optional).
- When all kamoodles are cut, feed them gently into the boiling water and cook 2 - 3 minutes.
- Drain noodles.
- Serve with butter, or any other way you like to eat noodles.
The chapatis, which are the Indian version of tortillas or fry bread or pita bread, are simple and quick to make. With Kamut® flour they are far more nutritious. Besides, Kamut® chapatis is almost as fun to say as kamoodles!
Kamut chapatis For 12 chapatis, mix 2 1/3 cups Kamut® flour with a tablespoon of olive oil and up to 1 1/3 cup water until it sticks together. Form it into a dough ball. Allow it to rest for several minutes. Divide dough into twelve equal pieces. Heat a skillet on medium-high heat and add a scant teaspoon of olive oil. On a lightly floured board roll out the Kamut® chapatis to a 10-inch circle. When skillet is hot, transfer rolled-out chapatis to it and cook 3-4 minutes on each side then remove. They should develop slight brown marks from the skillet and may puff just a little.

Kamut chapatis with curry and avocado. Keep warm while you finish cooking the rest. Serve with butter, spreads, as a scoop for curry, in place of tortillas for Mexican food, and as a fold-over sandwich. Yum!
I’ve also very successfully substituted one cup of Kamut® flour for one of the two cups of regular flour in my Spiced Pumpkin Scones. Kamut® gave them a little grainier texture that was very appealing without making them heavy. Substituting all the regular flour with Kamut® flour in a yeast bread worked beautifully, too. The loaf isn’t at all heavy as it would be if I substituted whole wheat flour. Very nutty and buttery flavor. So yum!
- Compost, Gardening adventures, Hugelkultur, Permaculture and Edible Forest Gardening Adventures, Rain Catching, Soil, Vegetables
Hugelkultur: Irrigating with old wood
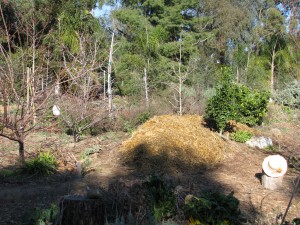
Hugelkultur is a joy forever. Hugelkultur is a German word (pronounced hoogle culture: it should have some umlauts over the first ‘u’ but I have no idea how to do that) which translates as hill culture. It is a process of building raised beds with a core of old wood. The benefits are that as the wood decomposes it not only releases nutrients into the soil, but it holds water like a sponge. Rain water is collected inside the bed, then as the warmer weather sets in and heat dries out the outer shell, it will wick that moisture back out. Presto! Irrigation in the dry season. As the wood decomposes it creates air holes into which deeper roots may penetrate and absorb nutrients that aren’t being washed into the ground water. Also, growing on a tall hugelkultur bed makes harvesting easier because vegetables are often located higher off the ground. The process was popularized by Sepp Holzer, although he didn’t actually call it that.
Hugelkultur may be started flat on the ground, by hand or by machine, dug into the ground, stacked very tall or short, or even level to the ground. The best way to build a bed is to place it on contour where rainwater will collect, preferably facing North and South so that both sides receive equal sun.
I have areas of ground that are either very heavy clay, or are decomposed granite with stones left over from the building of the house. Some trees don’t receive the drainage they need from irrigation because of the clay, which causes the roots to suffocate, or else plants dry up because water perculates too swiftly through the soil.
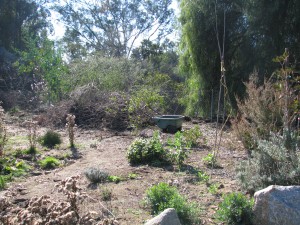
This brush pile against the fence was reduced to a quarter of its size. I also have stacks of brush that were left when the garden was created as hiding places for animals while the garden grew. I don’t need that many brush piles anymore now that the garden is large. I have three wire cages filled with woodier weeds and prunings that are in ‘slow compost’ mode, and leftover trimmings from bamboo used in bridge construction. Perfect hugelkultur components!
I targeted an area between the pathway and a plant guild with two apricots and vegetables in it. When it rains that area has standing water on it because of the clay content. The area should become part of the guild, but the soil needs mucho amending. I have areas like this all around the property. How to amend two acres of soil? How to get rid of the ever-rising mountains of prunings? How to make the rain water permiate the soil and perculate down rather than sheet across? One guess. Yep, hugelkultur. I bury that wood!
I had made a small hugelkultur experiment a year ago with a raised strawberry bed. There was old lime firewood rotting on the property, so I placed several of these logs along the side of the bed, then covered them with soil and planted strawberries. It worked very well. The strawberries loved the acid, even growing into the decomposing logs, and the logs held the moisture. Some wonderful showy fungus came up, too. I will be reworking that bed and this time I will cover the ground with logs, throw on some llama or horse manure, cover with compost and replant the strawberries. I shouldn’t have to fertilize that bed or add soil for a long time.
For the big hugelkultur bed I wanted a deep hole that would capture rain and allow the wood to absorb it. My faithful assistants Lori and Steve and Jacob work on this project with me. Steve and Lori dug this ginormous serpentine pit about 2 1/2 feet deep and the same wide.

Lori and Steve digging a huge trench. Since the paths had just been covered with mulch, the dirt was piled on top of plywood layed over the mulch for protection.
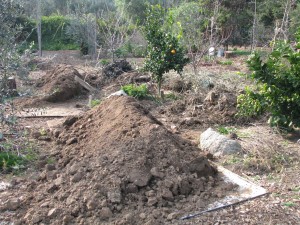
Plywood over the paths helped keep things neat and tidy. Then we began filling the bed with the largest wood first.

The empty trench with still-intact drip systems over it. We didn’t have large logs which would have worked well, but we had lots of thick branches. This hole took a lot of prunings and we jumped on them to compact them down.
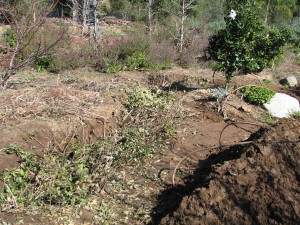
A bear trap! There are a lot of branches in this pit. The hugelkultur bed was left for a few days to settle (and we had run out of time and energy that first day!), and then we worked on it again. Extra dirt from the rain catchment basins that the men were enlarging was hauled down and thrown into and around the wood.
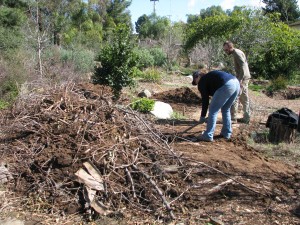
Dirt was added to the mix The mound was watered well. In dry areas it is important to water the wood and the soil well as you are building or else the bed will want to draw water from the area around it, drying up any seeds or plants planted on it.

Some of the long pieces that really stuck out were pruned off. Of course if this is a temporarily boggy area, the hugel bed would help dry it out. There were subterranean irrigation lines across the area already, and since we have a dry climate and the wood I used wasn’t old spongy logs and would take some time to become absorbant, we reestablished the drip system across the top of the hugel bed.
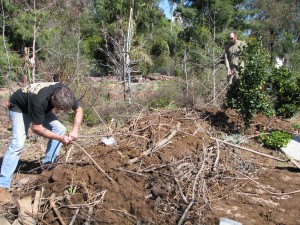
Steve reconnecting the subterranean drip, which runs from a well powered by solar. Because there weren’t large logs, there were a lot of spaces to fill with dirt. Gradually the mound grew and was sloped down to the pathway. Finally a couple of inches of dirt was packed on top. Unfortunately this was mostly clay from the excavation site, but if it had been good soil to begin with, I wouldn’t have needed the hugel bed now, would I? Yes, I did give it a sprinkling of sugar just to get the microbes feeding.

All topped up! There was so much clay that this could have been a big fire pit! The next day I dug up soil from the bottom of the wire cages that were now empty of branches, vines, and sticks. In less than a year since making the wire beds they’d begun to decompose and there was several inches of nice soil at the bottom. I hauled it over to the new bed and topped the clay with the compost.
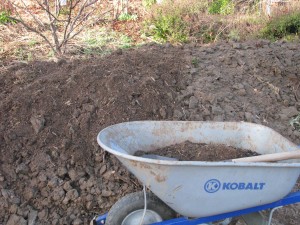
Guess which half has the good soil on it? I want to break up the clay soil so I threw around a cover crop mixture of peas and wheat. The peas will fix nitrogen in the soil, the wheat roots will stabilize and break up clay, I can harvest food from both and then slash and drop the plants to bring nutrition to the soil surface. I also had a bag of mixed old veggie seeds. Last year or so ago I pulled out all my little envelopes of veggie seeds that were very old and mixed them all up. I planted batches around the property and had many things germinate. I still had about 2 cups of the seed left so I threw it around the new hugelbed along with the cover crop. Why not? If the seed isn’t viable, no loss. If it is, terrific! I can always transplant the sprouts if there are too many of any one thing.

Organic cover crop and a bag of old mixed veggie seeds. I watered the seed down, and then raked out the old straw from the Fowl Fortress. Here is a warning about straw: it will germinate. People say straw doesn’t have seeds in it because the seeds are all in the tops which is cut as hay, but they lie. They live in a dream. Straw still has seeds in it and I had a nightmare of a time weeding pathways the first year of the garden because they were all strewn with straw mulch. However if you put straw down for your hens first, they will eat all the seeds, poo on it, kick it around in the dirt, and then you will have a much better quality straw to use. Straw is difficult to get wet, and it needs to be wet when placed on the bed unless you live in a wet climate or have timed the planting to be just before a long soaking rain.

A thick layer of wet straw went over the top of the scattered seeds. Even then it is good to soak the straw first and then apply it to the bed. Some people soak the straw in an enriched liquid, using manure tea, kelp, microbial brews, organic molassas, etc. The mulch acts as an insulator for moisture and warmth (the decaying wood will eventually produce some heat to warm the little plant feet), and a suffocator for weeds. It can also be a home for sow bugs if too thin. In wetter climates the straw layer can be an inch or so thick. In drier climates the straw or whatever you use as a top mulch should be several inches thick or else it will just wick moisture out of the bed. The same rule applys when using newspapers as a mulch. TIP: don’t let your chickens near the new bed! They will ‘rediscover’ their old mulch and start kicking all your work apart!
If I had wanted to plant established plants on the hugelkultur bed rather than seeds, I would have forgone spreading compost and just covered the poor soil on the mound in wet newspaper or cardboard, and then piled on the straw mulch. To plant I would have cut a hole through the paper, added a handful of good compost and planted in the hole.
So the bed was done, and just before a predicted rain event, too. As it rains the water will roll into the bed, be absorbed and held by the soil around the branches which will eventually begin to absorb the moisture as they decay. The seeds will sprout through the mulch and their roots will hold and amend the clay on the mound. Eventually the roots of the apricot trees will reach over towards the hugel bed, and that patch of icky clay soil will become beautiful. All the while I can still grow crops on the raised bed. My three wire bins are empty, an enormous brush pile is reduced to a small mound, and extra dirt found a new home. Plus we all had some fantastic upper body workouts. A winning situation all around.
More hugel beds will be created in troubled spots; some may only be a couple of feet long below a tree’s root line to help with soil drainage while amending the planting bed.
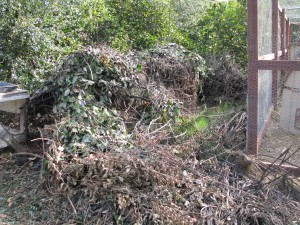
Wire cages filled with old weeds, prunings and vines are terrific for hugels! If you are in an area where the top mulch might wash away in heavy rains, make a latticework of sticks held down with landscape pins or more sticks over the top of the straw. Or cover with wire until the plants begin to sprout; you don’t want the wire to remain on the bed.
So try a hugelkultur bed, big or small. You’ll wonder why you never tried it before.
- Gardening adventures, Heirloom Plants, Natives, Permaculture and Edible Forest Gardening Adventures, Soil, Vegetables
Valentine’s in the Garden
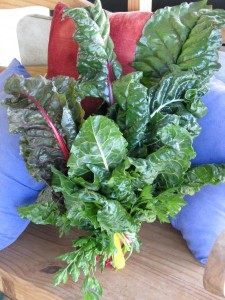
A rainbow chard and parsley bouquet for Valentine’s Day Another gorgeous day in the garden today. I gave a chard bouquet to my friend Lara who has been so kind as to teach me piano over the last two months (I’ve progressed from the ‘clink clink’ stage to the two-handed ‘clink-clink-CLINK’ stage. Lara deserves chard!). My best Valentine’s was receiving my box of organic seeds from Botanical Interests. Yep, ordered too many again. At least it won’t make me fat.

Great seeds! Can’t wait to plant! It was warm enough for shorts, and since my neighbors can’t see me, I indulged for awhile.

Shorts on Valentine’s Day! (No I’m not THAT short, and go figure what my hand is doing to my hat!) At the end of December I had planted two flats of seeds and stuck them in the greenhouse; one had winter veggies and the other native plants.
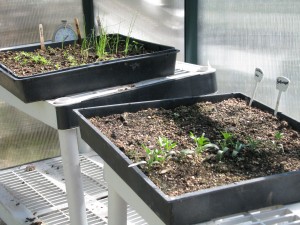
Bladderpod and leeks. A couple of weeks ago I was telling my daughter in college that only one of each had come up so far. She pointed out that the two were curiously linked: bladderpod and leeks! It seems even my garden is a comedian. Today I transplanted the bladderpod into larger containers.

Transplanted bladderpods. Bladderpod (Isomeris arborea) is a true California native living at home in the desert or at the coast and usually in the worst soils. It flowers most of the year even in drought conditions, providing nectar for pollinators and hummingbirds. The plant doesn’t smell so great, but it has wonderful balloon-like pods that rattle when dry. It is a fantastic addition to gardens.
In planting seeds in flats it always looks as if roots are shallow until you take the plant up and find a healthy and sometimes long root system. Don’t let the top growth make you think that the roots aren’t developed.
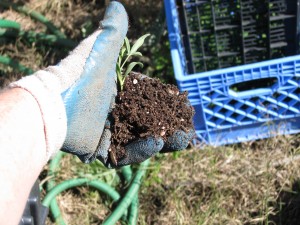
The root ball of this little bladderpod seedling is healthy and full. No more natives are showing their faces in the flat yet, but they have their own schedule and I’ll continue to watch the flat for signs. Just as animals (including humans) respond to circadian rhythms with the 24/hour sleep/wake cycle, plant growth is cued in not only by warmth, but by length of daylight hours. For plants it is called photoperiodicity. You can casually throw that into a conversation over the dinner table tonight and see if anyone notices. A plant’s response to daylight length is called photoperiodic. There is much more to this, and you can read up on it here. So to make a short story longer, I don’t manipulate the light in the greenhouse so I wait longer time than recommended for seeds to sprout just in case they really don’t want to get out of bed yet. I can empathize.
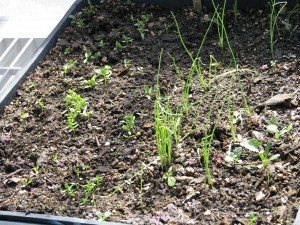
Little celery and parsnip sprouts and leggy leeks that need transplanting, In the veggie flat celery and parsnips have decided to sprout so I’ll transplant them out in a week or two.
Elsewhere in the garden the nitrogen-fixers are working away.
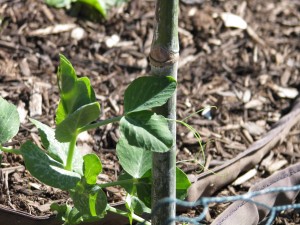
Pea ready to grab onto a bamboo support pole. Fava beans have sprouted from leftover seed from last year and they are already in bloom.
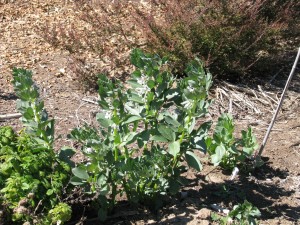
Bees love the blooming favas. The weather is so beautiful that I want to plant the summer veggies… I’m yearning for tomatoes! I will be good and wait a few more weeks until all chance of frost is gone (hopefully the weather won’t be too crazy and frost in March!). Then, look out! Seeds everywhere! And yes, by popular demand I will write about trashcan potatoes.
-
Make Your Own Soymilk
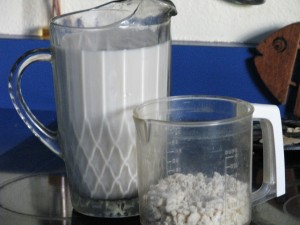
Soymilk and Okara A friend of mine, Kevin, came over and showed me how easy it is to make my own soymilk. What fun! Making your own soymilk is very economical and can be custom-flavored and sweetened to your taste. If you use organic soybeans -which I highly recommend because soybeans are one of the most sprayed crops – you can rest assured that you are serving your family a healthy, non-toxic beverage.
After Kevin showed me his way, I did a lot of research on other ways to make it, and tried some variations. Basically you soak dried soybeans (not edamame!) overnight, blend them up with water, heat it until it boils, strain it and flavor it, not necessarily in that order. Kevin’s method was to strain it before heating. I’ve found I like the results better to strain it after its hot; there isn’t any grit and it strains more quickly. Do whatever works for you.
When you make soymilk, you are actually making two products: soymilk and the high fiber and protein stuff that is strained out which is called okara. There are many recipes for using okara on the Internet, and I’ve found many in the classic cookbook, the Book of Tofu by Shurtleff and Aoyagi. Okara is virtually tasteless. If you strain your soymilk before its heated the okara is ‘fresh’ and a bit gritty. I made it into vegetarian fish patties following this recipe with good results, although they were a little too salty for me.

Fishless okara patties with sauce. If you cook your soymilk before straining, then the okara is also cooked and looks like hot farina. Okara is often mixed with grains and ‘meats’ as a nutritious additive and a food extender. It has little flavor on its own. I used some to thicken a pea soup that was too thin and it worked wonderfully. The soy industry has a lot of okara on their hands so it is usually fed to livestock. It can be frozen or dried, too. If you absolutely have too much okara then compost it, feed it to your worms or bury it around your plants.
Once you have the soymilk you can drink it plain, sweeten it with sugar, honey or whatever your choice is, flavor it with vanilla or something else, serve it cold or hot (which is the best!), or make tofu out of it.

Vanilla bean in hot soymilk Making tofu is also an easy process, which is just curdling the soymilk and straining out the solids; if you’ve ever made goat cheese then you can make tofu.
The ratio of soaked soybeans to water varies depending upon how thick you like your soymilk. Kevin showed me a 4:1 ration (water to beans) which made a thin soymilk, similar to 1% milk. I like the 3:1 ratio because the milk is creamier.
I found a good deal on Bob’s Red Mill organic soybeans on Amazon.com, the beans pricing out to .19 cents an ounce (four bags for about $19 total).

Organic soybeans. I couldn’t find them at my local Sprouts or health food store. One bag of Bob’s Red Mill organic soybeans weighs 1 lb 8 oz, which is about 4 cups of dried beans. The beans swell up by a third, so one package makes 12 cups of rehydrated soybeans. A cup of dried soybeans makes about two quarts of soymilk (and about two cups of okara), so a bag would make eight quarts. A huge savings, and I have the okara as well.
A few tips: you can easily soak a cup of beans overnight and make soymilk every few days, depending on your need and time.
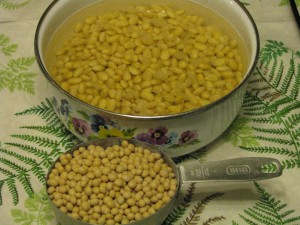
One cup of dried beans equals three cups soaked. Use a very tall pot because when you are heating the soymilk it will take forever and then just when you turn away it will come foaming up out of the pot like something possessed; a tall pot helps keep it under control. After you pour out your soymilk, wash or at least soak your pot. The soymilk residue dries hard and must be soaked again to get off. Use several layers of cheesecloth (which you can wash and reuse), or a piece of muslin to strain your soymilk.
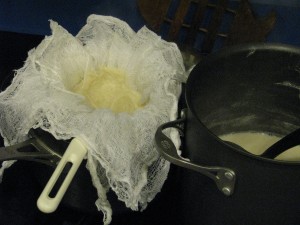
Strain okara through cheesecloth. Also the raw soymilk doesn’t smell very appetizing. It is very beany and grassy. Once it comes to a boil the smell will change into a very yummy tofuish scent.
There is also a great dissent on how long you heat the soymilk. Kevin’s recipe was to just bring it to a boil. Some recipes recommend twenty minutes of boiling. I find that five minutes heats the soymilk and cooks the okara sufficiently. Experiment.
Soymilk and OkaraAuthor: Diane Cynthia KennedyRecipe type: BeveragePrep time:Cook time:Total time:Serves: 8Fresh organic soymilk and okara- delightful and inexpensive. This recipe will make about 5½ cups of silky soymilk and about 2 cups of cooked okara.Ingredients- One cup dried soybeans, soaked overnight
- Nine cups water
- Flavoring (optional)
- Sweetener (optional)
Instructions- Drain the soaked soybeans (which will now be about 3 cups).
- Scoop a cup of soybeans and put in blender with three cups of water.
- Blend until smooth.
- Pour mixture into a tall pot.
- Repeat with the other two cups of beans.
- Heat mixture until it boils, stirring constantly. This can take some time, so I usually give it a stir now and then until it starts steaming a little, and then give it all my attention so that it doesn't foam up and overflow.
- Lower temperature, stir down the foam and simmer for five minutes.
- Line a sieve with several layers of cheesecloth or a piece of muslin (you are trying to catch fine particles) and place sieve over another tall pot or container.
- Carefully ladle soymilk into the lined sieve and allow to drain (you can wait until mixture is cooler before you do this if you'd like.) Use a spoon to move the okara out of the way as you ladle. If you double the recipe you may need to strain the okara and empty the cheesecloth before you finish straining all the milk.
- Allow the okara to drain and cool until you can handle it comfortably.
- Wrapping the cheesecloth around the okara, squeeze the bundle until all the soymilk drains out.
- Refrigerate the okara until ready to use.
- Use soymilk plain, or heat and add flavoring and/or sweetener to taste. I like honey and vanilla.
- Refrigerate cooled soymilk. The soymilk should keep for about a week refrigerated; the okara about four days.
- Animals, Bees, Chickens, Cob, Compost, Composting toilet, Gardening adventures, Health, Heirloom Plants, Herbs, Natives, Permaculture and Edible Forest Gardening Adventures, Ponds, Rain Catching, Recipes, Salads, Soil, Vegan, Vegetables, Vegetarian, Worms
Southern California Permaculture Convergence! Be there!

Southern California Permaculture Convergence If you are interested in any aspect of permaculture, such as organic gardening, herbs, planting native plants, aquaponics, natural ponds, beekeeping, keeping chickens, and so much more, then you must come to the Southern California Permaculture Convergence. It happens on March 9th and 10th at the Sky Mountain Institute in Escondido. The keynote speaker will be Paul Wheaton, lecturer and permaculturalist extraordinaire of www.permies.com fame. Oh, and I’ll be one of the many speakers as well (cough cough). The Early Bird special of only $50 for both days ends at the end of January, and then the price will rise, so buy your tickets now!
Also, for a full-on demonstration of taking bare land and creating a permaculture garden, there will be a three-day intensive class taught by Paul Wheaton on site the three days prior to the Convergence.
You can read about the convergence here at the official website, which will give you the link perm.eventbrite.com where you may purchase tickets. Also visit the SD Permaculture Meetup page to see all the free workshops that happen monthly all over San Diego.
This convergence is such a deal, you really shouldn’t miss it! And such a bargain, too. One of the best things I find that come out of these convergences is the exchange of ideas and networking among the attendees, and all the practical information you can take home and use right away. One of the largest parts of permaculture is building community, which means sharing with and assisting others.
Really. Don’t miss this! Tell your friends!
- Compost, Gardening adventures, Natives, Permaculture and Edible Forest Gardening Adventures, Soil, Vegetables
Gardening secrets: Epsom salt and sugar

This veggie bed soil isn’t very active. So I buried frosted tomato vines in it and sprinkled on my powerful duo, and in a month I’ll plant seeds. Gardening shouldn’t be expensive. If you believe everything you read, especially those wonderful gardening catalogs and even advice from professional gardeners, a garden could be quite an investment. Talk about golden carrots! I have spent my fair share of money for gardening products in my time. Then this permaculture stuff got into my head and it makes me rethink everything. Permaculture proves that gardening shouldn’t be labor intensive, just labor-wise. Make things work for you and let plants get on with what they want to do. Makes some forehead-slapping sense to me.
Organic fertilizer is a plus for firing off poor soil, but it is expensive. There are two other very inexpensive household products that you can use to really charge your soil, promote growth, make fruit sweeter, reduce some weeds, release the bound-up vitamins and minerals in the soil, promote world peace… well, I’m getting a little carried away, but not by too much.
Epsom salt is named after Epsom, England, where the active ingredient Magnesium sulfate was originally created. Not found naturally, it must be processed, now most often from dolomite. Dolomite is mined in the United States and internationally. The sustainability of dolomite mining and the environmental impact of mining, processing and shipping Epsom salts may be something to consider, if you worry about the locality of products you purchase. I don’t know what impacts those are. Epsom salts can actually be made at home by chrystalizing magnesium sulfate, but I’m thinking that although I enjoy do-it-yourselfing, this is a little too much.
Epsom salt is inexpensive and readily available. It is recommended for tomatoes, peppers and roses, but I use it around citrus trees, in the veggie beds, and anywhere leaves are looking sickly. The Epsom salt bag recommends sprinkling 2 tablespoons around the base of each plant, so you can see a little goes a long way. It is also a wonderful bath salt which eases sore muscles and leaches impurities from your skin (often recommended as a diet aid because of this). (Also if you have a greywater system, your magnesium-enriched bathwater will flow out to nutrify your plants! Such a deal!) Some sites tell you never to take it internally; the bag and others recommend it for… let’s say… loosening things up inside. It is also used as a curdling agent in making tofu. There is a relationship between calcium and magnesium whether it be in the soil or in our bodies. Taking too much calcium without enough magnesium can lead to many health problems such as arthritis and hardening of the arteries. Don’t take more than a ratio of 2:1. (Dairy products don’t have that ratio, so if you drink milk you may not be absorbing the amount of calcium you thought you were). Also, calcium and potassium compete with magnesium for uptake into roots, and even though your soil samples may indicate enough magnesium your plants may not be receiving enough. If you have heavy clay soil, you could have a ratio as high as 7:1, yet in sandy soil you need more magnesium to hold soil together so you can go to about 3:1. Here are some good sites for looking into the science behind it if you’re interested: National Gardening Association, a book excerpt here which goes into more details about how its made and how to use it medicinally, and even a site about how to make crafts with it.
Also, don’t let the name confuse you. Epsom salt is Magnesium sulfate, not salt as in table salt which is Sodium chloride. Applying Epsom salt to the ground is not like applying, well, salt. Applying Sodium chloride to your soil is to kill it. I’ve read and overheard inexperienced gardeners say that they’ve poured salt on weeds because, after all, it comes from the ground so it shouldn’t do any damage. Ummm, no. Invading armies would salt the fields of their enemies so they couldn’t grow crops there for decades. Heavy salt in the soil is a huge problem (which, of course, if you’ve been paying attention to past blogs you know can be readily solved by….. what? I’ll give you a chance to fill that in and reveal the answer at the end!)
As for my other ‘secret’ ingredient is sugar. Yes, my soil is on junk food. Actually using organic molasses dissolved in rainwater would be best, and I have done that when making a microbial brew, but I am but one person with a thin purse so sugar it is. Why sugar? It is a complex carbohydrate which plants need to produce protein, starch and fats. Plants produce their own sugar through photosynthesis, and by secreting their own sugars through their roots determine which microorganisms they want to thrive near them. I use a little sugar on ailing soil; all those millions of microbes and fungusey things that are in the soil get a jump-start with something sweet. Have you ever made bread and mixed a little sugar in with the yeast to proof it? Same difference. The soil critters feed off the sweet, multiplying like crazy and making your soil turn into healthy goodness. If your soil is healthy, you don’t need it. When the sweet is gone they munch on organic materials processing them more quickly and opening up all those locked nutrients in the soil. If there isn’t enough for them to eat and there is a die-off, then their little bodies become nutrients for the soil (as they would anyway). To put this into perspective, let me relay to you an interesting fact I learned in my Permaculture Design Course. When a field is plowed and farmed, the first year crops are good. Each successive year that it is plowed and farmed the fertility is less and the crops worse until the ground is barren. That is because with the first plowing or tilling gajillions of microbes are slaughtered and it is their dead bodies that fertilize the crops. Each successive year there are fewer microbes available to slaughter until they are all gone and the soil has become dirt. And then we have dust bowls and run-off, erosion, loss of the water table, the drying up of streams, climate change, universal discord… well, you get the picture.

Climbing Don Juan here was a miserable, spotty rose last Spring, while all his friends were tall and lovely. I added Epsom salt and sugar, and he fought off the black spot and is thriving. Only lightly sprinkle the sugar around your soil; too much can hurt plants. I have used sugar successfully to kill off an invasion of nutgrass, something about which I read on the Internet. This sedge turned up in my pathways and although I hand weeded the little guys (I didn’t eat them although they were cultivated as a crop in Egypt) they just kept on coming, even after I had put plywood over the top for awhile. So I sugared them then threw the plywood back on, and Bob’s your Uncle, no more nutgrass in that area. I envisioned millions of little mouths biting away at the nutgrass bulbs underground… I need to stop thinking about that. What really happened is that the microbes fed off the sugar and multiplied wildly to a point where they locked up the available nutrients in the soil which non-natives need to grow. Native plants won’t be bothered because they can thrive in poor soil. Here is an article about the research behind sugaring to prevent weeds. I lightly add sugar around established plants that aren’t doing well, and water into new vegetable beds where the soil isn’t vigorous yet and allow the beds to sit awhile before I plant seeds.
Refined white sugar is of course empty calories. Any dissolved sweet will work well, too. Beet sugar, agave syrup, leftover pancake syrup, sorghum syrup, honey, molasses, diluted jelly… use your imagination and your pantry. The more nutrients in the sweet the better for your soil, but also the more expensive it will be. If you are using sweet for houseplants then you should be wary of possible interest by house ants. Outside it isn’t a problem.
So share your bath and your jelly donut with your garden and you’ll both be happier and healthier!
(Answer: compost! You knew that!)
-
Delicious and Fun Thai Custard-inna-Pumpkin

Thai Custard-inna-Pumpkin I know that you lose sleep over trying to figure out how to get more vegetables into your dessert. Well, snuggle up for a good long snooze, because here’s a recipe to bring you peace! I found this recipe in the Heirloom Gardener Winter 2012- 2013 edition. The magazine is created by the people who bring you Baker Creek Heirloom Seeds (organic). A wonderful article about Thai cooking by Wendy Kiang-Spray features this intriguing recipe, and I had to try it. You hollow out a small Thai or Kabocha squash (they are drier in texture), fill it with a coconut milk custard, steam it, and Bob’s your uncle!
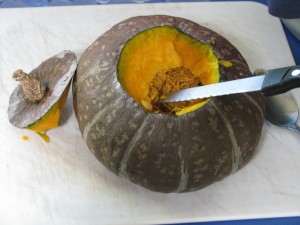
Scoop out the seeds and fibers and feed them to your chickens! I just happened to have a 2.5 lb homegrown Kabocha squash handy, so I made the recipe (adding a little cinnamon). Not wanting to be scared alone, I brought the whole cooled squash over to my friend Lara’s house, who helping me fulfill last year’s New Years resolution by teaching me basic piano. Being a vegetarian and a loyal friend, she was game to try it. It came out very good. I was impressed. I will do this again!
Troubleshooting: whisk the ingredients together. I thought I’d be fancy and put them into my VitaMix on the lowest setting, but even that added a little too much air to the custard mixture.
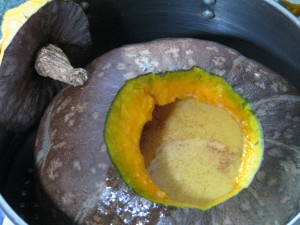
Don’t fill all the way up. Steam the lid off to the side. The top of the custard that I could see was yellowish, and I figured that this was due to the dark yolk in the eggs from my chickens, but I don’t know. Once cut into, though, the custard as a lovely white.
I turned my steamer on high until it was boiling, then turned the temperature down low and the custard wasn’t done in the allotted time. Next time I’ll keep it at a higher boil so that the steam is hotter. I cooked it much longer (I think too long because I was doing other things) and the squash split a little as it was very soft. I kept it in the steamer with something between the soft side and the inside of the steamer so that the squash would keep its shape as it cooled. After it was room temperature, I put it in the refrigerator for a short time and it the squash didn’t fall apart when I removed it.
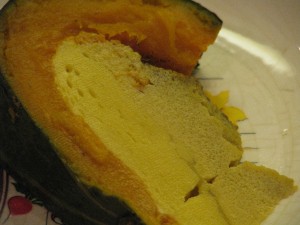
Creamy coconut custard and dry delicious squash. Ms. Kiang-Spray states in her article that this recipe is known in Thailand as Sankaya and is a classic dessert. With all the eggs and tasty squash, I’d call this breakfast or lunch, too!
Thai Custard-inna-PumpkinAuthor: Diane C. Kennedy (adapted from recipe by Wendy Kiang-Spray)Recipe type: DessertCuisine: ThaiPrep time:Cook time:Total time:Serves: 6A simple, fun, lovely dessert that people will remember as they get their beta carotene.Ingredients- 1 2 -3 pound dry-fleshed squash such as Kabocha or Thai pumpkin.
- ¾ cup coconut milk
- 5 eggs (preferably at room temperature)
- ⅓ cup sugar
- Pinch of salt
- 1 teaspoon vanilla extract
- ¼ teaspoon cinnamon
Instructions- Bring two quarts of water to a boil in the bottom half of a steamer pot.
- Use a cup to trace a circle around the top of the pumpkin.
- Cut the lid off around the guideline.
- Hollow out the inside with a spoon, making sure to get all the fibers.
- In a bowl gently whisk until combined the rest of the ingredients.
- Place the squash into the steamer basket.
- Pour custard through a sieve into the pumpkin leaving an inch to the top (filling will rise).
- Include the squash lid next to, but not on top of, the squash.
- Steam covered and undisturbed for 55 minutes until a knife inserted into the custard comes out clean.
- Remove steamer basket from over heat and allow squash to come to room temperature.
- Slice into wedges (in front of admiring company!) and serve.
- Serve at room temperature or chilled.
- Compost, Gardening adventures, Hugelkultur, Permaculture and Edible Forest Gardening Adventures, Soil, Vegetables, Worms
Lazy Composting
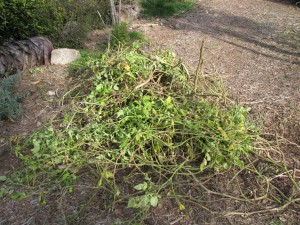
Tomato vines… what to do? I have a Rubbermaid compost bin where I dump my kitchen scraps, and a nifty three-bin pallet compost bin for larger stuff, as well as wire cages where I’ve heaped tough weeds and vines.

My wire bins floweth over. All of these methods of composting are great. They also require some physical work that I’m wary of these days. I still keep my old raised veggie beds lined with chicken wire and use them for controlled or experimental crops and extra seed. The soil in them settles after awhile and because I don’t turn my compost heaps enough I don’t produce enough compost to haul over and refill the beds.

Soil is at a low level in the raised beds. Today I decided to try mini hugelkultur beds. Hugelkultur is the practice of heaping wood and other organic matter, covering it with soil and planting directly on the pile. The berm catches water and the buried wood holds the moisture, releasing it slowly to the plants and gradually decomposing to create beautiful soil. When I planted my strawberry bed two years ago I buried old lime tree logs all along the edge. Now that soil is beautiful as the logs decompose, helping to acidify the soil for the acid-loving strawberries, and holding moisture by the roots. Some strawberry plants have rooted right in the logs.

Strawberries have rooted runners directly into the rotting lime logs. The soil around the logs is perfect. In one of my long raised veggie beds I cleaned out the frosted tomato vines and what sweet potato vines were left after our harvest.

Frosted tomato vines: treasure, not trash! I don’t like to disturb the soil because that kills microbes, fungus and worms, but this soil hadn’t been perfect to begin with.
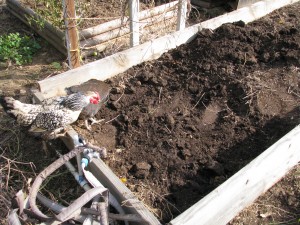
Digging up the soil and trying to protect the worms from the persistant chickens. I shoveled out a portion of the soil then cut up the tomato vines and dropped them in the bed.
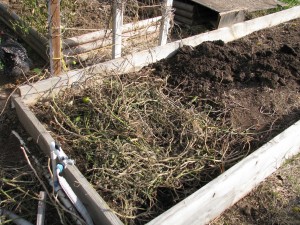
Heaping on the vines. Then I shovelled the dirt back over again, and made my way down the bed until all the vines had been covered.
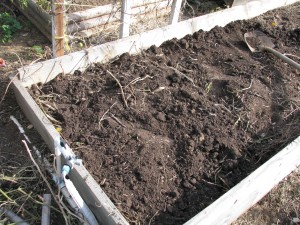
A few vine ends stick up, but that’s okay. If I had more soil I’d bury them more. I also sprinkled on sugar and epsom salts, to feed the microbes and add magnesium (I’ll blog about these two garden wonders another time).
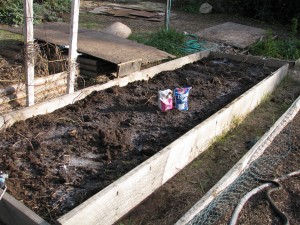
Magnesium-rich epsom salts and sugar (organic molassas is better) invigorate the soil. Burying garden leftovers like this does several things. It quickly feeds the microbes and worms in the soil without the critters having to gnaw on them from underneath or wait until the plants decompose more. The vines keep the soil from compacting and help hold moisture when it rains.

I cut the tomato vines and leave the stem and roots. Worms love roots. The vines had taken nutrients up into the leaves and fruit, and now many of those same nutrients are being returned to the bed in which they grew. Keeping the soil moist from underneath is a valuable way to protect seedlings from bugs. Top mulch I have found to be a nursery for damaging pill bugs, which you might call ‘rolly-pollies’ or sow bugs.
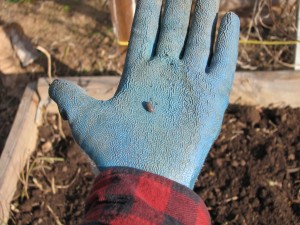
A sow bug on my glove (No, I’m not a Smurf). Although experts say that sow bugs don’t directly damage plants and fruit but rather feed off of already damaged produce, I have my doubts. If so, I believe that mine hired another bug or bird to damage about half of my strawberry crop last year so that they could feast on them.
Because decomposing green matter will initially take nitrogen from the soil, I’ll let this bed sit for a couple of months before planting, or if I can’t stand to wait I’ll plant nitrogen-fixing peas as a cover crop. I won’t repeat the same crops in this bed because it is smart to rotate families of veggies for many reasons, including pest control. Whatever I put in here, however, will be a mix of seeds.

I spy a sweet potato that hid the harvest by growing under through the wire and under the board! Another bed I’ve been playing with had been empty and needed soil. Over the last season I’ve thrown in garden debris and a layer of llama poo topped with sweet potato vines. Last week I balanced a piece of plywood over it. Today I took a peek and the vines are covered with bugs decomposing in the moist darkness of the plywood as the heap gradually settles. I’ll leave it be and keep checking on its progress.

Plywood balanced on piled garden debris I have more lazy composting ideas for the entire property. I’ll let you know.
- Compost, Gardening adventures, Giving, Health, Natives, Permaculture and Edible Forest Gardening Adventures, Soil, Vegetables
Stinging Nettle and World Peace
One of my very good friends asked me what to do about a proliferation of stinging nettle in her yard. There is a creek running through the bottom of her property, and while once there had been Jimson weed and other natives growing there, now there is just nettle which is spreading to her lawn. Her hand hurt for a day from inadvertently pulling some out bare-handed. Her neighbor had told her that “nettle was bad” and would take over. She was laying cardboard on some of it, but was afraid that wouldn’t be enough.
One of the main practices of permaculture is to take what is considered to be a problem and look at all sides of it, just as in Zen you must think like your enemy, or in some Native American beliefs you must walk a mile in another’s shoes.
Fortunately I knew some things about nettle, and told her that nettle was not only edible once the acid had been blanched away, but highly nutritious. Here is a good description of what it can do. It is a superb compost enervator. The disappearance of the other natives by the streambed was evidence that someone upstream had sprayed an herbicide that washed downstream and killed everything. The prolific growth of stinging nettle, which is an indicator plant for high nitrogen in the soil, showed that someone’s high nitrogen lawn fertilizer came the same way.
Nettle’s acid is simply an excretion by the plant on the hairs along its stem to discourage browsing animals. The sting is immediate and temporary, unlike poison oak which has an irritating oil that can spread with touch and takes a few days to cause a rash. In nature often the cure grows near the problem, and therefore both the riparian plants mint and plantain can be rubbed onto the area to alliviate the sting, but soap and hot water works just as well. Nettle reproduces only by seed, not by rhizomes or other invasive tactics. It likes water therefore it takes root in lawns which are watered frequently and are fertilized with nitrogen.
My friend is always ready to embrace new information, especially where nutrition is concerned, and immediately stopped looking at nettle as a potentially dangerous invader of her property, to an indicator of other problems (stream pollution) and a health goldmine. To control what she doesn’t use she knows she can cut it down before it seeds and it won’t spread (and the cut plants will charge her soil), and if she wanted to restore the wetlands area she could continue to lay cardboard to cover most of the nettle, then top them with soil and straw, cut holes through to the dirt and transplant native riparian plants into the sheet mulch. There are no invaders, no monsters in her yard.
While pulling ragweed out of the pathways at my place with another friend (I have become so rich in friends this last year!), I told her about the nettle. Her reply was that while she worked in the garden she’d see things in a new perspective. Knees to the earth, eyes choosing between ragweed and sprouting wildflowers, lungs full of the scent of good soil, permaculturalists steer away from the stereotypcial gardening approach and see benefits where others see problems.
And this is what this post is all about: applying permaculture practices to everyday living, from personal to global thinking. In permaculture there are no invasives, no bad guys. Even my hated Bermuda grass is a plant in the wrong place, spread because people insist on seeding lawns with the stuff. Its function is to hold soil and moisture and break up hardpack. It does this admirably well, only I don’t want it in my garden. In permaculture, problems are like little moons where you see nothing but black on the dark side until you turn it to see the incredible sunlit topography on the other side, and understand that all those details are there on the dark side as well. A problem is just an opportunity for creative thinking; a resource whose purpose isn’t clear as yet. Therefore there are no ‘weeds’, no stereotypes.
So take these phrases and look at them with the eyes of permaculture: Teens are irresponsible. Old people are antiquated. Dark-skinned people are dangerous. Light-skinned people are dangerous. The government is out to get us. All businesses are bad. All politicians are corrupt. Men are incompetent. Women are hysterical.
Imagine these phrases as balls you can turn in your hand, like little moons. Examine, understand, see that anger and violence all stems from fear. Look at all sides of the phrases and see that they cannot be true. Just as stinging nettle isn’t an invasive plant out to get people, but a plant rich in potentials doing its job, then any potential imagined threat to our safety can be understood and appreciated until we no longer face it with fear. We hire and train youths. We listen to the life experience of the old. We vote to change the government. We support small businesses. We offer training and workshops to teach. We offer safe, sane gardens in which to meditate. We produce good organic food to nourish brains and bodies and activate good health.
By gardening with permaculture in mind we can so easily imagine a more peaceful world, both for our small personal worlds and on a global scale. Therefore it is imperative that we introduce others to permaculture, for the saving of the earth and of ourselves.
-
Awesome Candy Alert: Cayenne and Cashew Brittle

Spicy brittle I’m not big into candy; give me cake, pie or bread, or a good rice pudding instead. However I’ve made this brittle at Christmas for years now, and it is always a big hit. The cayenne makes a nice mild burn to counter the sweetness of the brittle. Cayenne is good for you, too, as are cashews (no matter how creepy it is that cashews grow!), so it makes sense in some distorted way that this candy is good for you. It is so easy, too. I have much less salt tolerance than the general American public. If I eat out I find myself desperately thirsty for days. The original recipe was made for high salt intake, but I have shown options on cutting it back. You don’t need it, for the delight of the candy is in the burn with the sweet. I also don’t like very hot (spicy) foods, but I like this. Make some and try to share.
Cayenne and Cashew BrittleAuthor: Diane C. KennedyRecipe type: DessertCuisine: AmericanPrep time:Cook time:Total time:A yummy easy-to- make brittle with a slow spicy burn.Ingredients- 2 cups unsalted roasted cashews, whole or pieces (you can use salted, but I don't)
- 10 tablespoons (1¼ sticks) butter (if using salted cashews, use unsalted butter)
- ½ cup sugar
- ¼ cup packed light brown sugar
- 1 tablespoon light corn syrup
- 1 teaspoon cayenne pepper
- ¼ teaspoon salt (optional)
Instructions- Butter a nonstick baking sheet and set aside.
- Combine all the ingredients in a large nonstick skillet.
- Stir mixture over low heat until the butter melts and the sugars dissolve.
- Increase heat to medium and boil.
- Stir constantly until mixture turns golden brown, thickens and masses together, about 5 minutes (if you cook it longer it won't be as shiny; too little and it will be soft but still yummy).
- Immediately pour candy out onto the prepared baking sheet and quickly spread evenly using a spatula to help.
- Cool completely.
- Break into pieces.
- Makes about 1⅓ pounds
