Recipes
Tried and true, these are some of my favorites, and some newbies. Come eat virtually with me!
-
Herb-Fresh Tomato Soup

Soup with a swirl This recipe I copied from a newspaper when I was a teenager, and embellished on over the years. The dollop of whipped cream on top always appealed to me. It makes a very satisfying tomato soup. It is a good way to use an abundance of tomatoes. The key to the great flavor is to use low-acid tomatoes, and fresh basil and thyme. Of course, you can substitute canned tomatoes and dried herbs as well; if you do that, you can just blend up the cooked soup at the end. I have a lot of yellow tomatoes, which are not high-acid. I had an idea of making a golden tomato soup, but the tomato paste in the recipe turned the soup red, of course. I entertained ideas about making a tomato paste from yellow tomatoes, but I’m not sure I’m that ambitious.
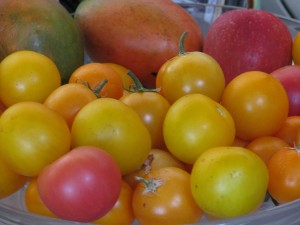
A bowl full of color (those are mangos in the back!) There are two ways of making this soup from fresh tomatoes, both of which incur a little extra effort. The first is to blanch then peel the tomatoes, and squeeze out the seeds. Then after the soup is cooked you can just puree the soup in a blender. This makes a little thicker soup. The other way is to quarter the whole tomatoes and cook, then at the end turn the soup through a food mill, and strain out the seeds. This soup is a little thinner. You don’t want to blend up the seeds and peel or the soup will be bitter. Both ways make a fresh, tasty soup that can be served hot or cold, and is great with cheesy croutons or sandwiches.

Press through a food mill The dollop of whipped cream can become a drizzle, or be eliminated. If you’d rather have a cream of tomato soup, then add more milk or cream to the soup and gently heat (but not boil) and then serve.
Below is the recipe for the food mill method.
Herb-Fresh Tomato SoupAuthor: Diane C. KennedyRecipe type: SoupPrep time:Cook time:Total time:Serves: 6A garden-fresh tomato soup that sings of summer. This soup should accompany a sandwich, salad, or be the first course of a larger dinner.Ingredients- 2 T butter
- 2 T olive oil
- 2 medium onions, thinly sliced
- 2 pounds fresh (low acid, if possible) tomatoes, quartered (about 5 cups)
- 1 6 oz can tomato paste
- 2 T snipped fresh basil (or 2 teaspoons dried crushed)
- 4 teaspoons snipped fresh thyme (or 1 teaspoon dried crushed)
- 3 cups vegetable broth
- 1 T cooking sherry, red wine or Tequila (optional)
- 1 teaspoon brown sugar (optional)
- 1 teaspoon salt
- ⅛ teaspoon pepper
- Dollop of unsweetened whipped cream (if desired)
Instructions- In a large saucepan, combine butter and oil and heat until butter melts.
- Add onion; cook until tender but not brown.
- Stir in tomatoes, paste, basil, thyme, sugar and alcohol (if using).
- Mash tomatoes slightly.
- Add vegetable broth.
- When boiling, reduce heat, cover and simmer 40 minutes.
- Press through food mill.
- Strain.
- Return mixture to saucepan.
- Stir in salt and pepper (to taste).
- Reheat and serve with a dollop or drizzle of cream and a sprinkling of herbs on top.
-
Midsummer Garden
When I’m in the garden everyday, I find that I forget that only seven months ago, things looked radically different. I’ll post some before and now photos below:
View to pond, before View to veg now Out to neighbors before View to neighbors now Entryway before Entryway now Middle property before Middle property now Lower yard before Lower yard now What a difference six months can make!
-
Pepinos

They look like white eggplants There is an unusual plant in my garden, one that I mistook for a white eggplant. Indeed, it is from the same Solanum family as eggplant, potatoes and tomatoes. The plant right now is small and has dark, shiny attractive leaves and flowers that remind you of eggplants. Then there are the egg-shaped and larger than egg-sized white fruit, which have purple striping. The plant arrived in my garden via Roger Boddaert, the landscape architect who has been working on my property, and there was no name on it. My daughter and I speculated on what the plant could be. A couple of years ago when we were traveling in Ecuador, we were usually served fruit with a sugar syrup for dessert. One of the fruits served was called a Tree Tomato. It was a local treat. It was one of the most god-awful things I’d ever put in my mouth. Thin, red bitter skin filled entirely with small hard seeds and sour pulp, it was everything we could do to eat enough of it to be polite. In our research for what this plant was, the Tree Tomato came into mind and we were apprehensive that we were now the owners of a white version of this disgusting fruit.
We were wonderfully incorrect! The plant in our yard is called pepino, or Solanum muricatum, or pepino melon, or sweet pepino, it is a South American shrubby plant with incredible sweet fruit. It is a relative of the Tree Tomato, and that only goes to show how different members of the same family tree can be! The fruit as it ripens doesn’t become particularly soft; in fact, when it wrinkles it is overripe. The fragrance of the uncut fruit is marvelous. When you open the fruit it has a small center of easily scooped small seeds, and flesh that isn’t too soft or too crunch and has a taste of a ripe melon with a hint of fresh cucumber.

A pleasant fruit with an exotic taste and fragrance The scent is intoxicating, and reminded one friend I showed it to of some elusive childhood fragrance. The perfume is even better than the fruit, but the fruit is wonderful cut up in a fruit salad. The bush itself is attractive, especially with the egg-like fruit dangling from it.

This small bush can grow up to seven feet tall Although pepinos are new to me (I’m always amazed at how many things I don’t know about, even with reading about five books a week and keeping my eyes and ears open in life), they’ve been in San Diego since the late 1800s, and are often grown in greenhouses. They’ve been eaten in the Andes, Ecuador, Peru and Chili from whence they came for so long as to appear in some artwork. If you have a spot in your yard for an unusual and highly satisfactory fruit, look for pepino. The fragrance of the fruit alone is worth it!
- Gardening adventures, Other Insects, Permaculture and Edible Forest Gardening Adventures, Rain Catching, Vegan, Vegetables
Beginning an Edible Forest Garden

Pumpkins by the chickens An edible forest garden is a mode of growing that mimicks the relationships between plants in a forest, while substituting food producing plants for humans. To achieve this, you have to examine what plants grow in forests near you. Here in San Diego County, we have chapparal communities, along with some pine and oak forests in the mountains. I cannot replicate a forest such as found in, say, Olympia, because we have completely different climates, soils, and plant interrelationships. Even for people who live in deserts, you can examine what once was there before the area was a desert, or what plants are in a nearby oasis if you have one. I’d substitute plants for more desirable ones, such as lemonade berry for its cousin poison oak. Plants should provide canopy, groundcover, mulch, nitrogen-fixing, and insect attracting. After these plant guilds mature they will provide fertilizer and moisture for themselves.
However, most of us are far away from this type of gardening, or just don’t want to go that far. Integrating your ornamentals with food plants, though, is not radical anymore and entirely practical. Any nook in your yard can be a place for food producing plants. Too many squash or tomatoes? Take them to a local food pantry.

Melons by a dead lime tree trellis 
A single Cinderella pumpkin vine under an apricot 
Zucchinis make lush bushes 
Watermelons suppressing weeds Tomatoes are a vining plant which will use any upright structure on which to climb.

Can you see the tomato plant? (Its up the palm trunk) Is your produce sprouting in the house? Try planting it instead of composting. Onions make particularly pretty plants with flowers that attract pollinators and hummingbirds. You may collect the seed from them as well. If the produce doesn’t survive, its okay: you’ve just buried compost.

Plant sprouting produce for ornamentals and to gather seed Sweet potatoes are perennial plants that produce swollen rhyzomes rather than swollen roots as other potatoes do. Plant them where you can dig up some of the roots but leave the main plant to thrive for years, depending on your climate. Their leaves are beautiful, and the plants are often sold as ornamentals.

Sweet potatoes have beautiful leaves Herbs in the shrubs, strawberries in the flowers, and melon and squash under the trees all make for a beautiful edible landscape that will provide food, compost, mulch and habitat while you study up for your edible forest garden.

Strawberries with yarrow 
Apple mint attracts pollinators and is good on fruit 
Passionvines are a host plant for Gulf Fritillary butterflies 
Hops are vigorous, tall vines for brewing and sleep pillows 
Grapes will hide a chain link fence - Gardening adventures, Heirloom Plants, Permaculture and Edible Forest Gardening Adventures, Vegan, Vegetables, Vegetarian
Scarlet Runner Beans, A Perennial Bean for Food and Beauty

Scarlet Runner Bean Seeds Scarlet runner beans (Phaseolus coccineus) are beautiful plants that are easy to grow, and are often grown just for their red flowers.

Use taller stakes than I did! A trellis or 8-10′ pole is necessary because the vines wind their way up high.

Eat green beans when small They produce a broad bean that can be eaten very young when green, or allowed to dry and the seeds harvested for storing and cooking later.

Shell the pods to store in a dark, cool place The seeds are a spectacular purple and black, making this whole plant ornamental. Cook the seeds before eating them.

Beautiful purple and black seeds The entire plant is also edible, including the starchy roots. The flowers and young tendrils dress up a salad. Although the vine will die down for the winter, the roots will live on in areas where they won’t receive heavy frost. They are native to many places in South America and have been harvested for hundreds of years. This is a perennial bean which will live about six years with care. It is also a nitrogen-fixer, which is excellent for your soil. How fantastic is that?
- Gardening adventures, Permaculture and Edible Forest Gardening Adventures, Recipes, Vegan, Vegetables, Vegetarian
Kale Chips
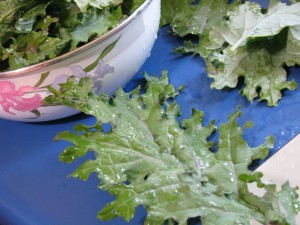
Purple kale You may have heard about these already; they seem to be a new fad food. Pieces of kale rubbed with oil and seasonings and dried until crispy. Well, we love to dry things in pans on our roof in the summer, so we thought we’d try them. Part of our mixed salad greens seed mix turned out to be this very pretty purple kale, and I figured that chips were meant to be. So we
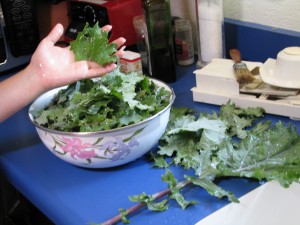
Tear into pieces and rub with oil then left them on the roof to dry. We were also playing around with zucchini chips, Swiss chard chips, and just about anything we could stick up there in the brilliant sunshine.
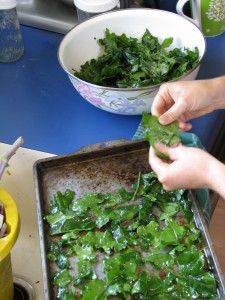
Place on drying tray The chips toasted in only about three hours. They were very crisp and dark, and had reduced in size by about a third. The first one had a wierd taste to it. The second one… and we were hooked! We crunched down several trays of them and one go. They are extremely nutritious, with calcium and folic acid among other things. We tried a more complicated recipe as well involving nutritional yeast, but it didn’t do anything special for me. The dried chard and zucchinis weren’t show-stoppers, either.
I also sauteed de-stemmed kale and it came out so creamy tasting with none of the bitterness that chard has, that it is now my favorite cooked green.
Dried kale can also be ground into a powder or flakes and used to top vegetables and grains for flavor, nutrition and color. If you use kelp flakes at all, you can substitute dried flaked kale.
Sun-Dried Kale ChipsAuthor: Diane C. KennedyRecipe type: SnackThis basic recipe is all over the Internet and produces the best resultsIngredients- At least one bunch kale
- Olive oil
- Salt (optional)
- Sunshine
Instructions- Tear kale leaves into chip-sized pieces without the midribs
- Put torn leaves into a bowl.
- Drizzle with olive oil and sprinkle with salt.
- Gently work the oil into the leaves so that each leaf is covered.
- Place on cookie tins closely but not overlapping.
- Place a piece of cheesecloth or a metal cooling rack over the kale to keep it from blowing away.
- Place cookie sheet in full sun for about three hours or longer.
- Eat!
So finally a fad that I can believe in! -
Candying Kumquats
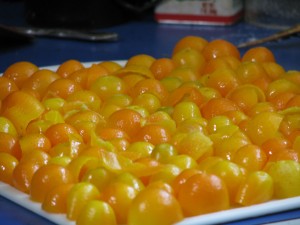
An army of kumquat halves We have two small but prolific kumquat trees. Kumquats are very small citrus that are tart and sweet at the same time, and you eat the skin and all whole. Kind of scary. Not wanting to waste food, my daughter picked a whole batch of them and was determined to juice them. And she did, one tiny half at a time! There was about half a cup of juice in all, which she froze in plastic butter molds for future use in drinks, etc.
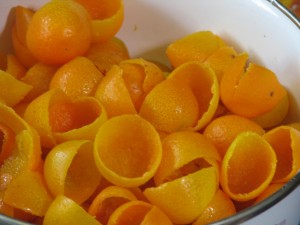
De-pithed kumquat shells Then we had all these little half shells, so she carefully scraped the pith out of all of them and candied them. The idea was to make little candied shells in which we’d put little scoops of vanilla ice cream, lemon sherbet, or something yum. We tried a couple with homemade vanilla ice cream, and it was worth all the work.
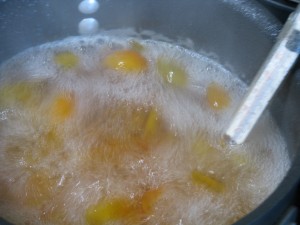
Cooking kumquats in simple syrup The kumquats needed to dry round, like little bowls, so I picked some more kumquats (yes, there are still more!), halved them and used them as molds for the shells, which were put onto the halves like little hats.

Using kumquat halves as molds for shells All the split ones were set aside, and then everything was sugared and dried. Several years ago we candied orange and lemon peel and I pulled some out of the bags now and then for use in baked goods. Now we have candied kumquat peels and shells.

Sugaring the peels and letting them dry But we still had all those kumquat halves that we’d used as molds. We also had half a saucepan of simple syrup in which the kumquats had been cooked. So, not wanting to waste, we put the kumquat halves into the syrup and boiled it again until the halves were candied and then I put them in jars and sealed them. I’m not sure what I’m going to do with them, but they can be used to decorate desserts.
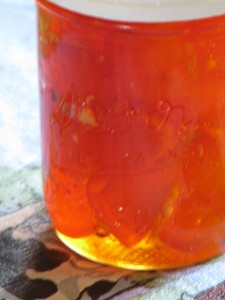
Candied kumquat preserves in syrup I also had another ginger beer recipe that called for slicing the ginger, cooking the slices in a sugar and water mixture until reduced, then using the liquid as a base for a ginger drink. The slices could then be sugared and dried and eaten. I keep candied ginger from Trader Joe’s in the car to snack on, because ginger helps with car sickness or an upset stomach. These homemade ginger slices were quite hot, so I think I’ll save them to use in cakes and pies instead.

Stored candied kumquat shells and peels So it was a day of sugaring, preserving and messing about in the kitchen. We now have seven quarts of pickles, a couple of bags of dried kale that is not only good to munch on, but great to crumble over rice or noodles, jars of candied kumquats, a jar of sugared kumquat peel, a bag of candied ginger slices, some miscellaneous jam, and lots of zucchini with more to come!
-
Zucchini
I have four vigorous zucchini plants. Why four? Because in winter with a lap full of comforter and gardening catalogs, the January eye peers back at July’s garden and the plants are smaller, the harvest never enough. What if something happens to one spindly seedling? Then there would be no zucchini, and summer without it just wouldn’t be the same. So four tiny sprouts went into the ground and four large plants are what I have. The zucchini harvest began several weeks ago. My daughter and I have happily eaten sauteed zucchini, seared zucchini, broiled zucchini and have even made sun-dried zucchini chips. It has been too hot to make Rosemary Zucchini Soup (see my recipe section). Zucchini bread uses far too little zucchini for the amount of calories it contains. The problem with zucchini recipes is that they use far too little zucchini! Zucchini has many health benefits, and is low-calorie, versitile, and is the butt of many summer-harvest jokes. I say this while considering who I know that I might unload some of the harvest upon.

Zucchini Chips ready to sun-dry on the roof We’ve both been harvesting under the enormous leaves this year’s zucchini plants have produced, and have kept up with it with few surprises. Until today.
In summer the days can run into each other with a speed that is breathtaking. We’d gone two days without checking. Then this morning after a second morning of trying to teach our old dog General the new trick of not hunting the chickens, which we were allowing out of their coop, we were on our way back to the house. It was hot already, the morning mist having burned off as if with an acetyline torch. My daughter carried strawberries in her hat and I was headed up to water stressed plants stranded without irrigation. Then I caught a glimpse of something along the edge of the raised bed. It was green. It was wedged against the corner and pressing against the edge of the wooden end. It was trying to break free. Trembling and exchanging fearsome glances with my daughter, I lifted a spiny leaf: There lay a six-pound zucchini.
This might not impress you. Perhaps you’ve recklessly gone on a summer vacation and forgot to mention to your neighbors that they should keep a cool eye on the big plant in the veg bed, and returned to find a green Moby Dick sucking up all the water in the garden. Perhaps you know already that the world’s record zucchini weighed 65 pounds. The world’s longest was 69.5 inches long, which is 6 and a half inches taller than I. Yet to find a six pounder trying to break down my much-cherished raised bed was something of a shock, especially when there was only a two-day gap between checking. This zucchini is only slightly less weight than my daughter at birth. Yet, I feel strangely deprived of maternal instincts toward it.
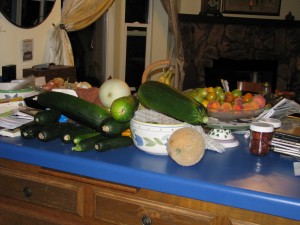
Big Zucchini How luxurious it is to complain about too much food. I’ll make steaks out of this big one, and perhaps donate the smaller ones to the Fallbrook Food Pantry. And begin to harvest the squash blossoms more vigorously!
-
Freestyle Peach and Apricot Tart
Freestyle Peach and Apricot TartAuthor: Diane C. KennedyRecipe type: DessertPrep time:Cook time:Total time:Serves: 8A handsome, rustic dessert that is easier to make than a regular pie or tart, and delicious, too!Ingredients- For Pastry:
- ½ cup cold unsalted butter
- 1¼ cups all-purpose flour
- ½ teaspoon cinnamon
- 1 beaten egg yolk
- 2-3 tablespoons ice water
- For Filling:
- ¼ cup granulated sugar
- 4 teaspoons all-purpose flour
- ¼ teaspoon freshly ground nutmeg
- 3 cups total sliced, peeled peaches and apricots
- 1 tablespoon lemon juice
- 1 beaten egg
- Powdered sugar
Instructions- For Pastry:
- In a mixing bowl cut butter into flour with a pastry blender until pieces are small pea-sized.
- Stir together egg yolk and 1 tablespoon of the ice water
- Graually fold egg yolk mixture into flour mixture.
- Using a fork, gently toss rest of ice water one tablespoon at a time into flour mixture, till all the dough is moistened.
- Gently press together dough until you can form a ball.
- If necessary, cover dough with plastic wrap and refrigerate for ½ an hour or more until the dough is easy to handle.
- Line a baking sheet with aluminum foil and sprinkle it lightly with flour.
- Place the dough in the middle and roll to a 13-inch circle; a chilled rolling pin will help with this, or lightly dusting the top of the dough with flour (don't overdo!).
- For Filling:
- Mix together granulated sugar, flour and nutmeg, then stir in fruit and lemon juice.
- Mound fruit mixture in the center of the crust, leaving a 2-inch border.
- Fold border up over fruit in an artsy, farmhouse sort of way, leaving the middle exposed.
- Combine the egg and 1 tablespoon water and use it to brush onto the top and sides of crust for browning.
- Bake in a 375F oven for 40-45 minutes until crust is golden and fruit is bubbling.
- To prevent overbrowning, you can cover the edge with foil for the last 10 minutes of baking.
- Cool 30 minutes on the baking sheet.
- Dust edges with powdered sugar, if desired.
- Serve as is, or with vanilla ice cream or whipped cream.
-
Oatey Scones

Oatey Scones I’ve made traditional scones for years as a breakfast treat. They are quick, easy to make from scratch, and oh! so good. However, when I found this recipe for oatmeal scones in Cook’s Illustrated (September and October 2003), it was my lucky day. I really love these tasty devils. The trick is to toast the oatmeal before incorporating it into the batter.
Oatey SconesAuthor: Cook's IllustratedRecipe type: BreakfastPrep time:Cook time:Total time:Serves: 8These toasted oat scones are heavenly, especially with mascarpone cheese, fresh fruit or lemon curd.Ingredients- 1½ cups old-fashioned rolled oats or quick oats
- ¼ cup whole milk (I've used 2% milk just fine)
- ¼ cup heavy cream
- 1 large egg
- 1½ cups unbleached all-purpose flour
- ⅓ cup sugar
- 2 teaspoons baking powder
- ½ teaspoon salt
- 10 tablespoons cold unsalted butter, cut into small cubes
- Coarse sugar for topping.
Instructions- Heat oven to 375 degrees F.
- Spread oats evenly on a baking sheet and toast in oven until fragrant and lightly browned, about 7-10 minutes, stirring twice; cool.
- Increase oven temperature to 450 degrees F.
- Line a baking sheet with parchment paper.
- When oats are cooled, measure out two tablespoons and set aside.
- Whisk milk, cream and egg in a large measuring cup.
- Stir together flour, sugar, baking powder and salt until combined.
- Scatter cubed butter over the top of the dry ingredients and with your fingers, a fork or a wire pastry blender incorporate until mixture resembles coarse cornmeal.
- Stir in cooled oats.
- Using a rubber spatula, fold in all but a tablespoon of the liquid ingredients until large clumps form; continue gently folding until dough forms cohesive mass.
- Dust work surface with reserved oats and a little flour.
- Turn wet dough (it will be damper than you'd expect!) onto surface and gently pat into a 7-inch circle about 1 inch thick.
- Using a bench scraper or chef's knife, cut dough into 8 wedges and set about 2 inches apart on parchment-lined baking sheet, reshaping as needed.
- Brush tops of scones with reserved liquid and sprinkle with coarse sugar.
- Bake until golden brown, 12 -14 minutes.
- Cool scones on baking sheet on wire rack for 5 minutes, then remove scones to cooling rack and cool to room temperature (so they won't fall apart), about 20 minutes.
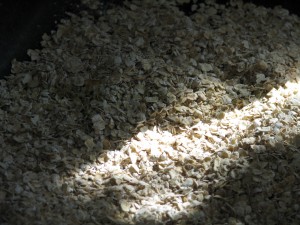
Toasting the oatmeal makes all the difference Watch the oats carefully so that they don’t burn, and give them a stir now and then. While they are achieving all that wonderful toastiness, combine the cold butter and the dry ingredients until it looks like coarse cornmeal.
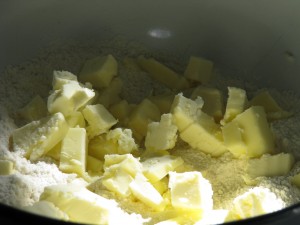
Incorporate butter into flour The batter will be suspiciously wet; don’t be alarmed. The dry oatmeal will soak it all up as the scones bake, and it all works out happily in the end. However it will be a little difficult to cut the scones and transfer them to the baking sheet; a little reforming might need to take place, but that’s okay. Bake until golden brown.

Bake until toasty brown The scones will be brittle until they cool, so let them sit for about twenty minutes or so (if you can!) before serving. If you are serving these to guests or as part of a larger breakfast, this waiting time can be a good thing… most other scones want to be served hot from the oven and leave you no time to do extras.

Serve cooled, so they won't fall apart Oatey scones are wonderful plain, with sweet butter, or (my absolute favorite) with mascarpone cheese and fresh fruit. The wholesome toasted grain flavor of the scones make a fabulous backdrop to the fresh plain flavor of the cheese and the sweet/tart flavor of fresh strawberries, peaches, plums, or whatever you have.

Serve with mascarpone cheese and fresh fruit


