Fruit
-
Strawberry Shortcake

Serve with a dollop of whipped cream. Strawberries are the quintessential food of summer. Whether served plain, dipped in sugar, chocolate or a sweet fondue, mashed and drizzled with balsamic or flavored vinegar, chopped and mixed with vanilla ice cream, strawberries are happily both delicious and nutritious. Between summer’s heat spells, take time to light up the oven and treat yourself to some strawberry shortcakes. They taste as if they were difficult to make, but they aren’t.

Grate frozen butter into the flour. Before you begin, throw 1/2 a cup of unsalted butter into the freezer.
Strawberry ShortcakesAuthor: Diane C. KennedyRecipe type: Dessert or BreakfastPrep time:Cook time:Total time:Serves: 8 - 10These scrumptuous, not-too-sweet cakes are ideal for a summertime dessert or for a special breakfast or brunch. You can even serve them at high tea!Ingredients- 2 cups all-purpose flour, plus more for dusting
- ½ teaspoon salt
- 1 tablespoon baking powder
- ½ teaspoon lemon or orange zest
- 5 tablespoons sugar, divided
- ½ cup unsalted butter, frozen
- 1 large egg, beaten
- ½ cup cream or ½ and ½
- 1 large egg white, lightly beaten
- 10 - 12 ounces fresh ripe strawberries
- 1 tablespoon sugar
- 1 cup whipped cream
Instructions- Heat oven to 425F.
- Stir together the flour, salt, baking powder, zest and 3 tablespoons of the sugar in a bowl.
- Grate the butter into the dry ingredients, then with your fingers or pastry blender gently incorporate the butter into the flour.
- Whist the egg into the cream and slowly pour into the dry mixture while mixing with a fork, just until the dough begins to form (you may not need all the liquid).
- Turn the dough out onto a lightly floured area and roll gently to about ¾ ".
- Dip the cutter in the excess flour and cut out rounds.
- Place the shortcakes one inch apart on a greased baking sheet, or one lined with parchment paper.
- Gather the scraps of dough and continue rolling and cutting until used up.
- Brush the tops of the shortcakes with egg white and sprinkle with one teaspoon of remaining sugar.
- Bake for 10 - 15 minutes until golden brown.
- Allow to cool on a wire rack (you'll want to eat them while warm).
- Slightly crush the strawberries to release the juices.
- Sprinkle with last teaspoon of sugar. You may also drizzle with balsamic or flavored vinegar, stir in fresh snipped mint leaves, or stir with a tablespoon of whiskey.
- Split each shortcake lengthwise and add strawberries and a dollop of whipped cream, then top with the other half of the shortcake like a little hat.
- Makes 8-10 shortcakes.

Gently cut into 2 1/2 inch rounds. 
Bake until browned, then cool on a rack. -
King Watermelon
This year I grew watermelons. I planted organic seed in my raised vegetable bed, protected from gophers by aviary wire, grown in excellent soil and fertilized with organic fertilizer, watered often, and the vines produced three melons the size of grapefruit. The chickens enjoyed them very much. However, a non-organic watermelon from a six-pack stuck in the ground under a bamboo, decided to take over the world. Not only did it’s foliage cover a good portion of the upper soil, but it grew and has grown enormous beasts of watermelons. One we call King Watermelon.

King Watermelon is in the foreground, laying in wait. My daughter and I watched a YouTube video on how to tell if a melon is ripe. One way is to watch the tendril opposite the stem of the watermelon, and when it turns brown the melon should be ripe. The area where the stem connects to the fruit should also turn a little brown. Also, under the melon should be a pale spot where it rests on the ground, and when that area turns from white to yellowish, that is another sign. King Watermelon had no spot. We checked every few days for weeks as the beast grew larger and larger, it’d tendril tenaciously green. Then suddenly, it was brown. Much celebration. My petite collegiate daughter crept up on King Watermelon and swiftly cut it’s stem. Then staggering with it, brought it into the house where we weighed it. It was an incredible 28 pounds. It is a wonder that any other plant in the area got any irrigation! Normally we’d slice the melon on the countertop, but King Watermelon was so large that he had to go into the kitchen sink, and he barely fit! It was there that he was butchered, in consideration of all the juice that might come out.

So large it had to be 'butchered' in the kitchen sink! The insides were perfectly sweet, juicy and crunchy. I couldn’t believe how perfect it was.

Beautiful inside; sweet and crisp. My daughter cut and cut, saving some for our dinner (all that extra water before bedtime wasn’t a great idea, though), and wrapping the rest. The chunks had to be stored on cookie sheets to distribute the weight on the shelves and protect from leaking juice. We had watermelon the next day too, and fed some to our very grateful and thirsty tortoise during the heat wave. There is a lot of King Watermelon left. It is scary to look into the refrigerator and see it all. Even cut up and wrapped, that melon still has an attitude. And I think he won the battle after all.

Wrapped sections for infinite eating. And there are more melons ripening with each passing minute. Gulp.
-
Pepinos

They look like white eggplants There is an unusual plant in my garden, one that I mistook for a white eggplant. Indeed, it is from the same Solanum family as eggplant, potatoes and tomatoes. The plant right now is small and has dark, shiny attractive leaves and flowers that remind you of eggplants. Then there are the egg-shaped and larger than egg-sized white fruit, which have purple striping. The plant arrived in my garden via Roger Boddaert, the landscape architect who has been working on my property, and there was no name on it. My daughter and I speculated on what the plant could be. A couple of years ago when we were traveling in Ecuador, we were usually served fruit with a sugar syrup for dessert. One of the fruits served was called a Tree Tomato. It was a local treat. It was one of the most god-awful things I’d ever put in my mouth. Thin, red bitter skin filled entirely with small hard seeds and sour pulp, it was everything we could do to eat enough of it to be polite. In our research for what this plant was, the Tree Tomato came into mind and we were apprehensive that we were now the owners of a white version of this disgusting fruit.
We were wonderfully incorrect! The plant in our yard is called pepino, or Solanum muricatum, or pepino melon, or sweet pepino, it is a South American shrubby plant with incredible sweet fruit. It is a relative of the Tree Tomato, and that only goes to show how different members of the same family tree can be! The fruit as it ripens doesn’t become particularly soft; in fact, when it wrinkles it is overripe. The fragrance of the uncut fruit is marvelous. When you open the fruit it has a small center of easily scooped small seeds, and flesh that isn’t too soft or too crunch and has a taste of a ripe melon with a hint of fresh cucumber.

A pleasant fruit with an exotic taste and fragrance The scent is intoxicating, and reminded one friend I showed it to of some elusive childhood fragrance. The perfume is even better than the fruit, but the fruit is wonderful cut up in a fruit salad. The bush itself is attractive, especially with the egg-like fruit dangling from it.

This small bush can grow up to seven feet tall Although pepinos are new to me (I’m always amazed at how many things I don’t know about, even with reading about five books a week and keeping my eyes and ears open in life), they’ve been in San Diego since the late 1800s, and are often grown in greenhouses. They’ve been eaten in the Andes, Ecuador, Peru and Chili from whence they came for so long as to appear in some artwork. If you have a spot in your yard for an unusual and highly satisfactory fruit, look for pepino. The fragrance of the fruit alone is worth it!
-
Candying Kumquats
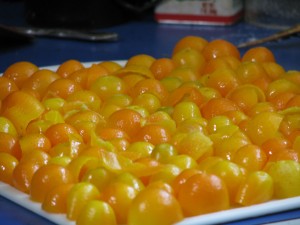
An army of kumquat halves We have two small but prolific kumquat trees. Kumquats are very small citrus that are tart and sweet at the same time, and you eat the skin and all whole. Kind of scary. Not wanting to waste food, my daughter picked a whole batch of them and was determined to juice them. And she did, one tiny half at a time! There was about half a cup of juice in all, which she froze in plastic butter molds for future use in drinks, etc.
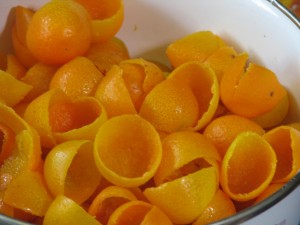
De-pithed kumquat shells Then we had all these little half shells, so she carefully scraped the pith out of all of them and candied them. The idea was to make little candied shells in which we’d put little scoops of vanilla ice cream, lemon sherbet, or something yum. We tried a couple with homemade vanilla ice cream, and it was worth all the work.
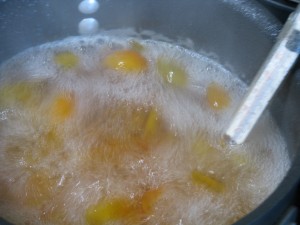
Cooking kumquats in simple syrup The kumquats needed to dry round, like little bowls, so I picked some more kumquats (yes, there are still more!), halved them and used them as molds for the shells, which were put onto the halves like little hats.

Using kumquat halves as molds for shells All the split ones were set aside, and then everything was sugared and dried. Several years ago we candied orange and lemon peel and I pulled some out of the bags now and then for use in baked goods. Now we have candied kumquat peels and shells.

Sugaring the peels and letting them dry But we still had all those kumquat halves that we’d used as molds. We also had half a saucepan of simple syrup in which the kumquats had been cooked. So, not wanting to waste, we put the kumquat halves into the syrup and boiled it again until the halves were candied and then I put them in jars and sealed them. I’m not sure what I’m going to do with them, but they can be used to decorate desserts.
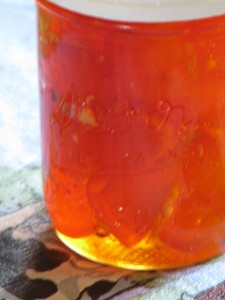
Candied kumquat preserves in syrup I also had another ginger beer recipe that called for slicing the ginger, cooking the slices in a sugar and water mixture until reduced, then using the liquid as a base for a ginger drink. The slices could then be sugared and dried and eaten. I keep candied ginger from Trader Joe’s in the car to snack on, because ginger helps with car sickness or an upset stomach. These homemade ginger slices were quite hot, so I think I’ll save them to use in cakes and pies instead.
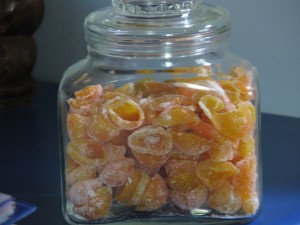
Stored candied kumquat shells and peels So it was a day of sugaring, preserving and messing about in the kitchen. We now have seven quarts of pickles, a couple of bags of dried kale that is not only good to munch on, but great to crumble over rice or noodles, jars of candied kumquats, a jar of sugared kumquat peel, a bag of candied ginger slices, some miscellaneous jam, and lots of zucchini with more to come!
-
Freestyle Peach and Apricot Tart
Freestyle Peach and Apricot TartAuthor: Diane C. KennedyRecipe type: DessertPrep time:Cook time:Total time:Serves: 8A handsome, rustic dessert that is easier to make than a regular pie or tart, and delicious, too!Ingredients- For Pastry:
- ½ cup cold unsalted butter
- 1¼ cups all-purpose flour
- ½ teaspoon cinnamon
- 1 beaten egg yolk
- 2-3 tablespoons ice water
- For Filling:
- ¼ cup granulated sugar
- 4 teaspoons all-purpose flour
- ¼ teaspoon freshly ground nutmeg
- 3 cups total sliced, peeled peaches and apricots
- 1 tablespoon lemon juice
- 1 beaten egg
- Powdered sugar
Instructions- For Pastry:
- In a mixing bowl cut butter into flour with a pastry blender until pieces are small pea-sized.
- Stir together egg yolk and 1 tablespoon of the ice water
- Graually fold egg yolk mixture into flour mixture.
- Using a fork, gently toss rest of ice water one tablespoon at a time into flour mixture, till all the dough is moistened.
- Gently press together dough until you can form a ball.
- If necessary, cover dough with plastic wrap and refrigerate for ½ an hour or more until the dough is easy to handle.
- Line a baking sheet with aluminum foil and sprinkle it lightly with flour.
- Place the dough in the middle and roll to a 13-inch circle; a chilled rolling pin will help with this, or lightly dusting the top of the dough with flour (don't overdo!).
- For Filling:
- Mix together granulated sugar, flour and nutmeg, then stir in fruit and lemon juice.
- Mound fruit mixture in the center of the crust, leaving a 2-inch border.
- Fold border up over fruit in an artsy, farmhouse sort of way, leaving the middle exposed.
- Combine the egg and 1 tablespoon water and use it to brush onto the top and sides of crust for browning.
- Bake in a 375F oven for 40-45 minutes until crust is golden and fruit is bubbling.
- To prevent overbrowning, you can cover the edge with foil for the last 10 minutes of baking.
- Cool 30 minutes on the baking sheet.
- Dust edges with powdered sugar, if desired.
- Serve as is, or with vanilla ice cream or whipped cream.
-
Plummy Skillet Cake

Golden plummy goodness Have a lot of juicy plums that need a place to go?

Eating fresh plums in the sunshine with the juice dripping down your chin is like sipping nectar in paradise. How about this tasty, light cake baked in a skillet? A cast-iron skillet is perfect for this cake, but you can use any oven-proof skillet or baking dish if you don’t have one. If you are skilled in campfire or Dutch-oven cooking, take this recipe with you when you camp. As an interesting change of seasonings, use the Chinese Five-Spice powder that has been hanging out in your spice pantry since the last time you made stir-fry.

Chinese Five-Spice powder and plums are a great combination If you don’t have any, use freshly-grated nutmeg or ground cinnamon.
Plummy Skillet CakeAuthor: Diane C KennedyRecipe type: DessertPrep time:Cook time:Total time:Serves: 6Dessert in a cast-iron skillet can be cooked over a campfire instead of your oven. No cast iron? Use an oven-proof skillet or baking dish. You can use other stone fruit instead of plums with just as good a result.Ingredients- 6 tablespoon unsalted butter, room temperature, plus extra for skillet
- 1½ cups all-purpose flour, plus some for skillet
- ¾ teaspoon baking powder
- ½ teaspoon baking soda
- ¾ teaspoon salt
- 1 teaspoon Chinese Five Spice powder
- 1¼ cups plus 2 tablespoons sugar
- 2 eggs
- ¾ cup buttermilk
- 4 medium plums, thinly sliced and halved
Instructions- Preheat oven to 375 F.
- Butter a 10-inch cast-iron skillet (or ovenproof skillet or dish).
- Dust skillet with extra flour and tap out any loose flour
- In a small bowl, whisk together flour, baking powder, baking soda, Chinese Five-Spice powder and salt.
- In large bowl, or in a mixer bowl, combine 1¼ cups sugar and butter until creamy.
- Beat in eggs until smooth.
- Add a third of the flour mixture with a third of the buttermilk, until all is combined. Don't overbeat.
- Pour batter into prepared skillet and smooth top.
- Spread sliced and halved plums all over the top.
- Sprinkle with extra sugar.
- Bake 35 minutes until golden brown and a toothpick inserted into the center comes out cleanly.
- Cool for about ten minutes before cutting.

Bake until golden brown -
Plantain Chips, or Tostones

Bananas versus Plantains A couple of years ago my daughter and I enjoyed a five-day birding tour of the high country in Ecuador, then an eight-day tour of the Galapagos islands. Being vegetarian wasn’t a challenge there; we ate very well and enjoyed foods that we hadn’t encountered before. One of the foods that was in many meals was plantain. Plantain around here means the lawn and stream-side weed that helps treat stinging nettle and insect bites. However plantain the fruit look like bananas, but are prepared very differently. High in iron, potassium and fiber, they are very versitile and often used in recipes instead of potatoes.
Plantains can be used in three stages of ripeness. When they are green they are starchy and hard to the touch. They are often boiled and mashed like potatoes. When they are yellow, they are sweeter as the starch has converted to sugar, but still not soft and are difficult to peel. When they are black, but not mushy, they are sweetest.
A common snack in South America and also in Africa are plantain chips. In Ecuador they are called tostones and sold in bags like potato chips. They are very easy to make, and very yummy to eat. Photos follow the recipe.
Plantain Chips, or TostonesAuthor: Diane KennedyRecipe type: SnackPrep time:Cook time:Total time:Serves: 2-3Fruit snack chip found in South America and Africa.Ingredients- Three plantains, yellow or slightly black
- Oil for frying
- Salt.
Instructions- Boil a small pot of water and submerge the whole unpeeled plantains for several minutes. The skins may begin to crack.
- Remove from boiling water and allow to cool.
- Peel the plantains and slice into ¾ inch disks.
- Heat enough oil on medium-high heat in a large skillet to cover the bottom.
- Lay sliced plantains in the oil and fry for about three minutes. They will be soft. Remove from oil and place on a plate lined with paper towels.
- Keep the oil temperature the same.
- Using the bottom of a glass, flatten the softened plantains so that they are very thin. Sliding a metal spatula under each chip when smashing helps. (A Puerto Rican version has you dip the disks into cold water just before refrying, to make them crisper. It would also make the oil splashier.)
- Lay the flattened disks back into the oil and fry for another three minutes or so.
- Remove the now crisp disks to a paper towel for draining.
- They will crisp even more as they cool slightly.
- Eat as is, or lightly salt, or sprinkle with chili-lime powder.
- They are very good with dip, too.
- Makes about thirty chips.

Scald whole plantains to make peeling easy 
Peel cooled plantains 
Using a spatula under the plantain slice helps when squashing with a glass 
Fry slices a second time .

Nom! -
Apfelpfannkuchen, or Dutch Baby Pancakes with Apples
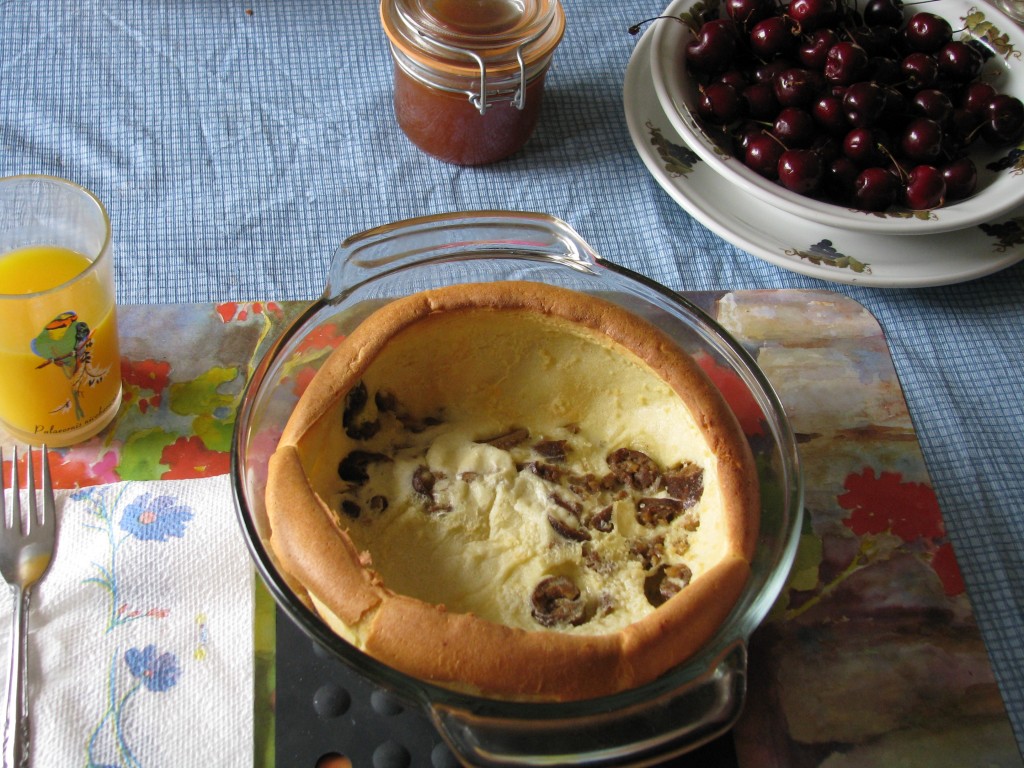
Apfelfannkuchen Breakfast. Sigh. My favorite meal. Too often it consists of a bowl of healthy cereal, orange juice and my fistfull of vitamins and supplements. Once in awhile when I have a child or two at home I’ll make these very easy, extremely impressive and delicious pancakes. One pancake per person. Just with some egg, milk and flour in a buttered dish you make this glorious puffed pancake that is a delight to eat. I copied this recipe from my mother’s recipe files back in 1977, my second year of high school. Where she copied it from I don’t know, but I do know that puffed pancakes have been a restaurant sensation on and off for decades. They can also be made plain for dessert and served with fresh fruit or even ice cream and chocolate sauce. Instead of apples make them savory with the addition of mild vegetarian sausage (you don’t want strong flavors to overbalance the delicate pancake) or cooked mushrooms.

Two kinds of pancake You can dress them up with powdered sugar at the last moment, or serve with syrup. It is important that you serve them right out of the oven so that your guests see them in all their risen glory, because the pancakes will deflate to some extent but still be gorgeous. If you pour a little syrup between the pancake and the hot dish it will sizzle and bubble very dramatically. Because the pancakes are served so hot, they take a little while to eat, which makes breakfast more of the leisurely time of enjoyment it should be. Make certain your guests know how hot the dishes are, and protect the place settings with potholders.
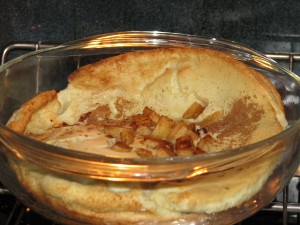
Apple filling Apfelpfannkuchen, or Dutch Baby Pancakes with ApplesAuthor: Diane C. KennedyRecipe type: BreakfastPrep time:Cook time:Total time:Serves: 1-6Ingredients- 1-2 apples, peeled and diced (or 1 vegetarian sausage link per person such as Morningstar Farms, cooked and chopped)
- Use the following chart (going across) to measure ingredients:
- Pan Size Butter Eggs Milk Flour
- 2-3 quarts ¼ cup 3 ¾ cup ¾ cup
- 3-4 quarts ⅓ cup 4 1 cup 1 cup
- 4-4½ quarts ½ cup 5 1¼ cup 1¼ cup
- 4½ - 5 quarts ½ cup 6 1½ cup 1½ cup
Instructions- Choose oven-proof bowls, preferably clear glass (for effect). I use one quart Pyrex bowls.
- Divide butter between bowls and set bowls in cold oven.
- Heat oven to 425 degrees F.
- Meanwhile, cook apples in a little butter or juice in a frying pan for a few minutes to soften.
- In a blender or with a hand mixer, whirl eggs at high speed for one minute. Gradually pour in milk, then slowly add flour. Whirl for 30 seconds. You don't want to overmix because you don't want air in the batter.
- With oven mits, remove hot dishes from oven; butter should be melted.
- Pour batter carefully into melted butter in dishes, dividing the batter equally.
- Divide apples (or veg sausage) evenly between bowls, if using. Dust with cinnamon, if desired.
- Return to oven and bake until puffy and browned, 20-25 minutes.
- Pancakes will be like a firm bread pudding at the bottom.
- Serve immediately. (Pour syrup around the inside edge and listen to it sizzle! It impresses children and easily impressed minds like mine!) Nom!

Vegetarian Sausage Filling -
Genetically Modified Foods, and a curious, unrelated photo
Genetically modified food (GMs) are what happens when scientists manipulate cells or even nuclei by inserting genes or viruses to change the DNA. Before GMs farmers would hybridize plants by breeding for preferred character traits. GMs may or may not cause damage to human DNA, but it’s use has escalated the use of pesticides, herbicides and animal cruelty. Since Monsanto, the makers of the herbicide Roundup(tm) are also the leaders in GM food, it seems that they are lining their own pockets by selling products for both cause and effect. If eating GM food is something you’d rather not do, I have just come across a useful article that might help. In the April/May, 2011 Vegetarian Times, there is an article by Neal D. Barnard, MD on the subject. In the article he reveals that manufacturers in the U.S and Canada aren’t required to label GM food. However he says that most US-grown corn, soy, cotton, Hawaiian papaya and canola is GM, but most other fresh fruit or vegetables aren’t, such as apples, oranges, bananas, broccoli. (These, however, are often heavily sprayed with pesticides and need to be washed before eating. The Environmental Working Group http://www.ewg.org/ updates a Dirty Dozen and Clean Fifteen list of produce that is effected most or least by pesticides; you can see that list here: http://www.healthyreader.com/2008/05/13/12-most-contaminated-fruits-and-vegetables/ .)
Dr. Barnard goes on to give these interesting tidbits: The labels on fresh produce carry a four-digit standardized code for cashiers to look up the price of the item, called a PLU (price look-up). If the code is preceded by an 8, it is genetically modified. If preceded by a 9, it is organic, and organics cannot be genetically modified. So watch your tofu packages if you don’t want GM soybeans.
Since becoming a vegetarian some sixteen years ago, I’ve been a label reader (even now when it requires pulling out my glasses or holding a can at arm’s length!). The amount of sodium in foods is outrageous, as is the amount of sweetners such as corn syrup. High amounts of salt and sugar is in there not for taste, but for its addictive qualities. When you eat salt or sugar, just like drinking caffeine, you crave more. As a vegetarian, it’s amazing what meat products are slid into foods, even those toted to be vegetarian. Now there is a more dangerous enemy than bad nutrition in packaged food. In my opinion, it is that of GM food and heavy herbicide and pesticide use. Even more reason to shop locally and organically, or to grow as much food as you can, and read all the labels. I am an ethical vegetarian, meaning that I decline to eat animals because I am protesting their horrible treatment and slaughter. GM animals are bred to continuously give milk, to grow enormous, to provide more of what humans eat off of them, despite the physical agony it brings. That coupled with already nightmarish living conditions is a monsterous state of affairs. Then humans injest the modified DNA, the herbicides that the animals eat that was sprayed on their food, and the pesticides that was sprayed directly on the animals. It is not a practice of which I will be a part.
Okay, I’m stepping off my soapbox now. As promised, I have a curious, unrelated photo. I have to balance reality with humor to keep sane This was taken by my daughter as we left the area on our recent Oregon sojourn, and we ask ourselves, “Huh?” A really big blowhorn faced the wrong way? A jet engine, faced the wrong way? A hood ornament…. faced the wrong way? Something unusual that fell out from under the car? A neutron accelerator? I love the care of placing a skid under the thing to protect the hood, but cinching the straps so tightly it dents the sides! Another funny incongruency in life, which keeps that humor in living. Any suggestions as to what? Or better yet, why?

Hood Ornament 
Horn? -
Lemon Strawberry Jellyroll Cake

Lemon Strawberry Jellyroll Cake Have you ever made a jellyroll cake? It looks very fussy, but is extremly easy. My daughter, home from college for a week, wanted a birthday cake that wasn’t “heavy and gunky like college food”. So I made a Lemon Strawberry Jellyroll cake for her, and it was wonderful if I do say so myself! You will need a jellyroll pan, which everyone should have anyway because you can do so much with it. You can fill this basic sponge cake with whipped cream, custard, curd, or even… um… jelly or jam. You can make a chocolate version with chocolate ganache, or even with pastry cream and mixed candied fruit to follow an Italian meal. I’ve made one with whipped cream and mango. This is the basic Yule Log, too. This recipe is bright with lemon, which is saved from being too much by the fresh strawberries inside, and is very light. Yum!
Lemon Strawberry Jellyroll CakeAuthor: Diane C. KennedyRecipe type: DessertPrep time:Cook time:Total time:Serves: 8-10An easy and delicious cake that looks complex.Ingredients- For the cake:
- ½ cup all-purpose flour
- 1 teaspoon baking powder
- 4 eggs at room temperature, separated
- 1 teaspoon fresh lemon juice
- ½ teaspoon vanilla extract
- 1 teaspoon lemon zest
- ⅓ cup granulated sugar
- and ½ cup granulated sugar
- One cup lemon curd (see recipes)
- 2-3 large ripe strawberries, sliced, then halved
- Sifted powdered sugar
- Sweetened Whipped Cream, Lemon Icing (recipes follow) and Meringue Mushrooms (optional; see 'recipes' on blog)
- For Icing:
- 1 cup powdered sugar
- 1 teaspoon fresh lemon juice
- For Sweetened Whipped Cream:
- 1 cup heavy whipping cream
- 1 teaspoon granulated sugar
- ½ teaspoon vanilla
- Add meringue mushrooms to complement the 'log' if desired (see 'recipes').
Instructions- For cake:
- Line a 15x10x1-inch jellyroll pan with parchment paper (not waxed paper, it will stick), or grease and lightly flour it.
- In a small bowl stir together flour and baking powder.
- In a medium mixing bowl beat egg yolks and vanilla with an electric mixer on high speed for 3-4 minutes or until frothy.
- Gradually add the ⅓ cup granulated sugar, beating until sugar is almost dissolved.
- In another bowl beat egg whites with very clean, dry beaters on medium speed until soft peaks form.
- Gradually add the ½ cup sugar, turning up the speed and beating until stiff peaks form and stop the mixer.
- Gently fold the egg yolk mixture into the beaten egg whites.
- Sprinkle flour mixture over the batter and gently fold in until just combined.
- Spread batter evenly in prepared pan.
- Bake 375 degrees F. for 12 to 15 minutes or until cake springs back when lightly touched and is just golden brown.
- Lay a towel or piece of parchment that is larger than the cake pan on the counter and sprinkle liberally with powdered sugar.
- Quickly invert the hot cake onto the towel and peel off parchment that was on the bottom of the cake, if used.
- Roll up the towel and cake, making sure the cake doesn't touch itself, starting from the short side.
- Cool rolled cake on a wire rack. You can refrigerate the cake now for a day, slid into a plastic bag.
- When ready to fill (on the same day as being served) bring the cake back to room temperature and carefully unroll. I haven't had a lemon jellyroll that hasn't stuck a little to the towel because it's so moist. If it cracks, its okay. You can cover the cracks with icing.
- Spread with lemon curd leaving one inch around the edges.
- Arrange sliced strawberries across the cake in rows.
- Carefully re-roll cake without the towel.
- Place on serving plate.
- Spoon lemon icing along top of jellyroll cake; it will slowly drip down the sides.
- Spoon sweetened whipped cream on servings or into a frosting bag and pipe rosettes or other decorations around cake.
- Add meringue mushrooms to complement the 'log' if desired.

Baked sponge Lay a towel or piece of parchment that is larger than the cake pan on the counter and sprinkle liberally with powdered sugar.
Powder a towel Quickly invert the hot cake onto the towel and peel off parchment that was on the bottom of the cake, if used.

Peel off parchment Roll up the towel and cake, making sure the cake doesn’t touch itself, starting from the short side.
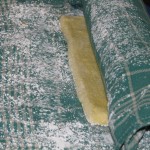
Roll it up Cool rolled cake on a wire rack. You can refrigerate the cake now for a day, slid into a plastic bag.
When ready to fill (on the same day as being served) bring the cake back to room temperature and carefully unroll. I haven’t had a lemon jellyroll that hasn’t stuck a little to the towel because it’s so moist. If it cracks, its okay. You can cover the cracks with icing. Spread with lemon curd leaving one inch around the edges. Arrange sliced strawberries across the cake in rows.

Mine cracked because I was too hasty, but cracks be hidden! Carefully re-roll cake without the towel. Place on serving plate.

Rolled cake ready for icing Spoon lemon icing along top of jellyroll cake; it will slowly drip down the sides.
Spoon whipped cream on servings or into a frosting bag and pipe rosettes or other decorations around cake.
Add meringue mushrooms to complement the ‘log’ if desired.

Yummy Slice Makes 8-10 servings.