Sweet Decorations
-
Candying Kumquats
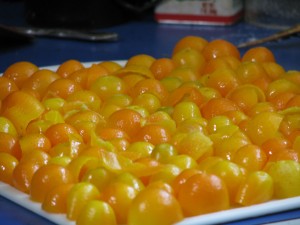
An army of kumquat halves We have two small but prolific kumquat trees. Kumquats are very small citrus that are tart and sweet at the same time, and you eat the skin and all whole. Kind of scary. Not wanting to waste food, my daughter picked a whole batch of them and was determined to juice them. And she did, one tiny half at a time! There was about half a cup of juice in all, which she froze in plastic butter molds for future use in drinks, etc.
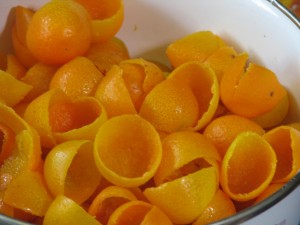
De-pithed kumquat shells Then we had all these little half shells, so she carefully scraped the pith out of all of them and candied them. The idea was to make little candied shells in which we’d put little scoops of vanilla ice cream, lemon sherbet, or something yum. We tried a couple with homemade vanilla ice cream, and it was worth all the work.
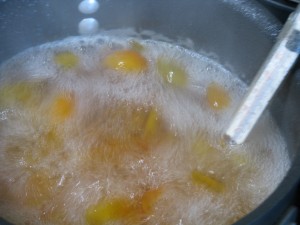
Cooking kumquats in simple syrup The kumquats needed to dry round, like little bowls, so I picked some more kumquats (yes, there are still more!), halved them and used them as molds for the shells, which were put onto the halves like little hats.

Using kumquat halves as molds for shells All the split ones were set aside, and then everything was sugared and dried. Several years ago we candied orange and lemon peel and I pulled some out of the bags now and then for use in baked goods. Now we have candied kumquat peels and shells.

Sugaring the peels and letting them dry But we still had all those kumquat halves that we’d used as molds. We also had half a saucepan of simple syrup in which the kumquats had been cooked. So, not wanting to waste, we put the kumquat halves into the syrup and boiled it again until the halves were candied and then I put them in jars and sealed them. I’m not sure what I’m going to do with them, but they can be used to decorate desserts.
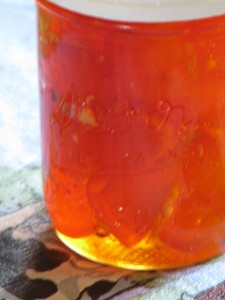
Candied kumquat preserves in syrup I also had another ginger beer recipe that called for slicing the ginger, cooking the slices in a sugar and water mixture until reduced, then using the liquid as a base for a ginger drink. The slices could then be sugared and dried and eaten. I keep candied ginger from Trader Joe’s in the car to snack on, because ginger helps with car sickness or an upset stomach. These homemade ginger slices were quite hot, so I think I’ll save them to use in cakes and pies instead.
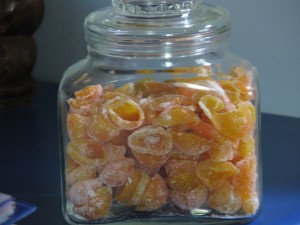
Stored candied kumquat shells and peels So it was a day of sugaring, preserving and messing about in the kitchen. We now have seven quarts of pickles, a couple of bags of dried kale that is not only good to munch on, but great to crumble over rice or noodles, jars of candied kumquats, a jar of sugared kumquat peel, a bag of candied ginger slices, some miscellaneous jam, and lots of zucchini with more to come!
-
Meringue Mushrooms
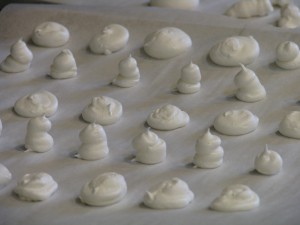
Stems and caps I had wanted to make these for Christmas, but didn’t get a chance. My chance came yesterday when I made my daughter’s Lemon-Strawberry Jellyroll birthday cake. What better to decorate a log than mushrooms? So here is the recipe; I’ll add the birthday cake recipes soon.
Meringue MushroomsAuthor: Diane C. KennedyRecipe type: Dessert GarnishPrep time:Cook time:Total time:Serves: ManyPiping little mushroom decorations for cakes is fun and will bring you great admiration from your family and friends! And they are so good to eat, too!Ingredients- 2 large egg whites, room temperature and with no bits of yolk in them
- ¼ teaspoon cream of tartar
- ½ cup superfine sugar (if you don't have it, you can use regular white, or blend white sugar up a bit in a blender)
Instructions- Oven to 200 degrees F., and place the two oven racks to upper and lower thirds. Line two baking sheets with parchment paper (don't use waxed paper; the 'shrooms will stick)
- Fit a large pastry bag with a number 6 (1/2 inch diameter) (1¼ cm) round plain tip.
- In a mixer bowl beat the egg whites on moderate speed until they are foamy, a minute or so.
- Up the speed a little and add the cream of tartar, beating until soft peaks form.
- Turn the speed to high and add sugar slowly.
- Beat until stiff peaks form and sugar is dissolved (you can rub a little between your fingers to make sure it isn't gritty). Reserve about an eighth of a cup of meringue for later.
- With a spatula, spoon the meringue into the pastry bag.
- Piping
- To make caps: Holding the bag upright and close to the parchment paper, pipe a round about 2 inches wide and one inch high, giving the bag a twist to separate. Make the caps as close to the same size as possible for even baking.
- Leave a good two inches between caps. Use your finger or a toothpick to smooth any points on the caps.
- To make stems: Holding the bag upright and close to the parchment paper, pipe a cone about one inch high straight up, making the base a little larger than the top. Some may fall over during baking, so leave good space between.
- Make as many stems as there are caps.
- Bake both sheets for an hour, rotating the sheets up and down, front to back about halfway through the baking time.
- The 'shrooms should be firm enough to be lifted from the sheets without sticking. Using a knife, make a little hole in the underside of the caps.
- Pipe a little of the reserved meringue into the hole, and stick in a stem, bottoms up. Return upside-down mushrooms to parchment paper, and bake for another 15 - 20 minutes until dry. (I found that some were still sticky, so I turned off the oven and let the pan sit in there for awhile to dry, like you do with traditional meringue cookies. It worked fine).
- Stand mushrooms up.
- Some might lean, some stand, some lie down... it all looks natural.
- Take about a teaspoonful of cocoa powder and very carefully shake a little over the caps.
- Using your finger or a kitchen paintbrush, smudge the cocoa just a little to make it look natural.
- Store these cute little devils in an airtight container for a week or so.
- Any exposure to moisture will make them sticky, so if using to adorn a cake put them on at the last minute.
- Makes about 25 little shroomies.

Piping To make caps: Holding the bag upright and close to the parchment paper, pipe a round about 2 inches wide and one inch high, giving the bag a twist to separate. Make the caps as close to the same size as possible for even baking. Leave a good two inches between caps (I put them too close together and the baking was uneven). Use your finger or a toothpick to smooth any points on the caps.
To make stems: Holding the bag upright and close to the parchment paper, pipe a cone about one inch high straight up, making the base a little larger than the top. Some may fall over during baking, so leave good space between. Make as many stems as there are caps.

Space them farther apart! Bake both sheets for an hour, rotating the sheets up and down, front to back about halfway through the baking time. The ‘shrooms should be firm enough to be lifted from the sheets without sticking. Using a knife, make a little hole in the underside of the caps. Pipe a little of the reserved meringue into the hole, and stick in a stem, bottoms up. Return upside-down mushrooms to parchment paper, and bake for another 15 – 20 minutes until dry. (I found that some were still sticky, so I turned off the oven and let the pan sit in there for awhile to dry, like you do with traditional meringue cookies. It worked fine).
Turn the mushrooms right-side-up. Some might lean, some stand, some lie down… it all looks natural. Take about a teaspoonful of cocoa powder and very carefully shake a little over the caps. Using your finger or a kitchen paintbrush, smudge the cocoa just a little to make it look natural. Store these cute little devils in an airtight container for a week or so. Any exposure to moisture will make them sticky, so if using to adorn a cake put them on at the last minute. Makes about 25 little shroomies.

Sift cocoa powder onto shrooms An option for putting the dried stems and caps together is to dip the end of the stem in chocolate ganache (see recipe for Buttermilk Chocolate Ganache Cake) or frosting, and using that as glue. Don’t do the additonal baking. With even a little ganache, the chocolate flavor overwhelms the meringue flavor, but that isn’t all that bad, is it?