Photos
-
Crazy Pot Salad

- Mixed greens plus blossoms, herbs and tiny potatoes
Crazy Pot Salad is what my daughter calls a main dish I make because it involves many different ingredients that vary as to availability. It always turns out great, though, which is truly amazing. It is a greens salad that also has cooked items and a balance of flavors, textures and colors that make every forkful slightly different. It involves both cold and hot ingredients, all thrown into the same bowl and mixed together to create a melded warm dinner that is as healthful as it is delicious. It is even good as cold leftovers the next day.
Tonight’s salad was born of the need to eat the mixed salad greens that were overgrowing in the garden. I cut and picked various greens and started from there. To create a Crazy Pot Salad, I keep in mind these components:
Fresh Greens: the more varied the better. Fresh herbs such as dill, basil, chives and cilantro, along with arugula and a lettuce mix, work well. Don’t forget some iceberg for crunch. If you don’t have or want to use iceberg (a much maligned vegetable) then cut up fresh celery.

- A mix of colors and textures is essential
Protein: Tofu, soy chicken strips (such as Morningstar Farms), soy bacon, soy tuna, etc. Beans such as garbanzo or Northern white work well. Using a couple types of proteins are tastier and more nutritious. Cook the protein and use hot.
Starch: Pasta in small shapes, rice, or a cooked grain such as quinoa. Use the starch hot.

- Quinoa (pronounced keen-wa) is high in Omega-3.
Other additions: diced carrots, steamed tiny potatoes or potato chunks (hot), feta or cotija cheese (crumbly), marigold petals, nasturtium blossoms, squash blossoms, capers, heart of palm, mushrooms, pea pods, avocados, green beans fresh or cooked… whatever you have that you need to use. Look for colors to add. I can’t stand Bell peppers, but that is usually the go-to choice when people want to add color to anything. You can avoid the Bell pepper taste-takeover of your salad if you want with a little creativity. Stir-fry up some chopped red cabbage and throw it in with some raw carrots.
Crunch: Nuts, such as pignoli (pine), cashews, sunflower seeds or almonds. Toast them in a little olive oil or in the toaster oven to bring out their flavor.
Dressing: This salad just about makes its own dressing. I like to make Italian dressing with a packet of Lowry’s Italian dressing mix, using red wine vinegar and olive oil. Or I make the dressing as I cook, which I’ll include in the recipe. The cooked shiitake mushroom gives the olive oil a deep, savory note and adds a very interesting flavor and texture. Along with the pignoli nuts, chives and crumbled soy bacon, this makes a delicious subtle dressing that is mixed into the salad rather than adorned on the top. The hot starch, including the potatoes, will readily absorb the hot flavored olive oil.

- Shiitake mushrooms, pignoli nuts and soy bacon dressing
Remember, this is a salad of opportunity; use what you have and what you love, but keep in mind the different components, the shapes and colors of the ingredients, the texture and nutritional value. Bland foods such as the potato will balance strongly flavored ones such as arugula.

- Yum. Just: yum!
Crazy Pot SaladAuthor: Diane C. KennedyRecipe type: Main Dish SaladPrep time:Cook time:Total time:Serves: FourThis warm combination of greens and other ingredients make a balanced, delicious healthy main dish that can change with what you have available.Ingredients- One cup quinoa, prepared with vegetable broth following box directions
- Four cups (approx.) mixed fresh greens washed and torn into bite-sized pieces
- Two sprigs each fresh dill, basil, chives and cilantro, chopped
- One cup torn iceberg lettuce
- Three calendula flowers and four squash flowers, torn into small pieces (just petals)
- Eight very small potatoes
- Cotija cheese (or veggie substitute. Dairy can be optional)
- Half an 8-oz can garbanzo beans
- Two small carrots, sliced into discs
- One tomato, diced
- A tablespoon olive oil (flavored, if you have it)
- One package Morningstar Farms Chicken Strips
- For Dressing:
- Six fresh shiitake mushrooms
- Four strips Morningstar Farms soy Bacon Strips
- Three tablespoons pignoli nuts
- ⅛th cup olive oil
Instructions- Prepare quinoa in medium saucepan using vegetable broth, according to the instructions on the box.
- Steam small potatos until tender
- Meanwhile, wash, dry and tear up fresh greens, herbs, iceberg and flowers. Put in large bowl.
- Crumble about four tablespoons Cotija cheese over greens in bowl.
- Add garbanzo beans
- Add carrot discs
- In frying pan, heat a tablespoon of olive oil and stir-fry the soy chicken strips until browned (if you have flavored olive oil, such as citrus or basil, use that to cook these).
- Add hot soy chicken strips to bowl.
- In same frying pan, heat ⅛th cup olive oil on medium high.
- Chop shiitake mushrooms and add to frying pan.
- Cook mushrooms on medium-high heat until they are almost crunchy.
- Add soy bacon strips and pignoli nuts.
- Stir nuts until they are browned (watch so they don't burn).
- Flip bacon and remove when browned.
- Pour contents of pan on mixture in bowl.
- Crumble bacon strips and add to bowl.
- Add steamed potatoes, quartered to bowl.
- Add quinoa to bowl.
- Toss contents of bowl until well mixed. Heavy ingredients will sink to the bottom, so be sure to mix well.
- Plate the salad and garnish with chopped tomatos and more cheese, if using.
-
A Thousand Miles
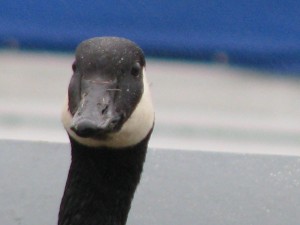
Honk if you love geese! I intended to write yesterday, but the place where I stopped didn’t have Internet. Sorry! I left Fallbrook just before daybreak on Monday.

Five o'clock AM on Hwy 15 I saw beautiful clouds at dawn.

Dawn-kissed clouds I also saw a lot of car butts.

An hour inching behind car butts Ah, the roads to Los Angeles. I’m a seasoned car traveler now. I have my backpack next to me, one audiobook loaded with a couple of spares and some music CDs within easy reach, as are snacks, a water bottle, tissues, and my camera with the viewfinder turned out. I try to snap photos without taking my eyes off the road. Some photos turn out not so good.
Almost got it... Some turn out okay.

Mt. Shasta Stopping only twice for gas, I was on my eleventh hour driving when I encountered rain with low visibility and decided that enough was enough. I passed by many spots advertising places to stay; some I would have turned in for but was blocked by one of the ever-present trucks kicking up rain spray and edging precariously close to the middle line on the twisty, narrow stretch of I-5. I really wanted something with a nice view with a restaurant close by, but I was willing to stop for almost anything by that point. I saw a sign and pulled off and over I-5 through tall pines looming in the rain. Then suddenly I found myself looking at Shasta Lake and the Bridge Bay Lodge! I started to laugh! If I had planned the stop it couldn’t have been better!

Beautiful in the Rain They had a room… in fact, it was nearly empty, and a restaurant that wasn’t cheap but did offer vegetarian entrees. The rain set in, but I walked around a little before heading to bed. I made sure that I didn’t leave any food outside the door!
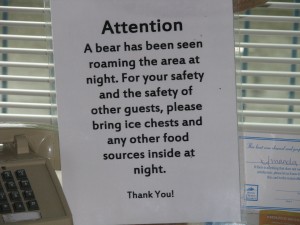
I'm not in San Diego anymore.... I watched a little television… I don’t have TV at home and haven’t watched it in about 16 years… and was shocked at how absolutely stupid and time-wasting the shows were. And I was switching between the History Channel, A&E, and National Geographic! I was horrified, and turned it off.
I awoke to a clear warm dawn, and what had looked like this the night before:

Dock in the rainy dusk now looked like this:

Dock in the morning And like this:
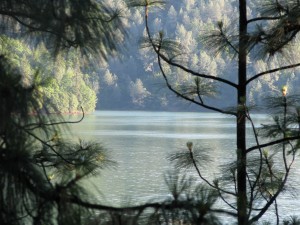
Dawn on Lake Shasta 
Out on the Lake 
Family outing 
Houseboats I was so thrilled. I’m sure the place is a zoo on the weekends, and I had a quiet night only because I had no neighbors, but it was food for the soul.

Flotilla of Canada Geese After having food for the tummy (breakfast is my favorite meal!)

- I love a silly name
off I went for the last four hundred miles to Corvallis, through absolutely gorgeous scenery. Tomorrow I give my hinder a break and don’t plan to do much driving, but help my daughter move out of her dorm in the evening after her last final and then head for home on Thursday.
I very much enjoy being out on my own. Although I planned the way back with my daughter with reservations for a bed and breakfast and tickets to a Shakespearean play in Ashland, OR the first night, and on a restored ferryboat hotel on the Sacramento river the second night, I like the spontenaity and roll of the dice of just driving unplanned. If I had no animals at home, I’d do what I had asked friends to do the summer after high school graduation (they all had summer jobs!) and drive the USA. I love the freedom. I love the thought that no one knows where I am. I love the fact that I could end up sleeping in the car or in a dive if my luck ran out, or in a wonderful place such as I just found myself at Shasta Lake. As long as I can share it with all of you!
Sparkling Water - Gardening adventures, Permaculture and Edible Forest Gardening Adventures, Photos, Vegetables, Vegetarian
“Who’s That Chewing on MY Step?” or, Garden Update June 1

Hidden Treasure Many of the steps that were created out of the Washingtonia palm trees are doing just fine. However, there are some that were squared off with a chainsaw and their whiteness and neatness really stood out on the hillside. They stood out a little too well, apparently, because something is gnawing away at them!

Chew Marks It can be either rats or bunnies, and I’ve only found bunny scat in the straw. In defense of my nice stairs, I’ve sprayed them with Bitter Apple, which is a product used to spray on doctored pets to keep them from licking or chewing on bandages.

Heart of Palm I spread the straw over the steps again. I’ll see tomorrow what has happened.

Cherries! Other finds around the garden are my first (and probably only) two cherries! Cherries are not known to grow in our Zone 10 climate; however, there are a few hybrids that are supposed to be ‘low chill’. Cherries are one of my favorite fruits, so I’m thrilled that this tree is giving it a go.

Magnolia The magnolia trees are blooming, and a transplanted Blue Girl rose is much happier in the Blue Garden, which is also the Bee Garden.
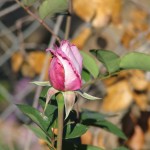
Blue Girl A vegetable garden is a stern taskmaster. After all that waiting at the beginning of the year, plants are flourishing. This is the best garden I’ve ever had. After all that work building raised beds, lining them with aviary wire and filling them with good soil, it had better be good!

Last Two Beds I have two more raised beds to level, line and fill. I have more pumpkin seedlings up and I need the beds ready to plant. I can’t believe it is June first already.
Today I put up strings for the pickling cucumbers and the pinto beans to climb on. Those two beds, which are the newest and which have the least amended soil, are still doing very well.
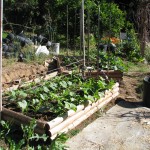
Strung Up I also staked the three yellow tomato plants, and three ‘soup bean’ plants, as well as planting more of those beans by more stakes.
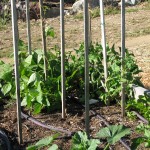
Bean and Tomato Stakes I had no idea that fava beans grew up! I mean, the beans don’t dangle like other beans do, but grow straight up, like huge fat caterpillars. Crazy! I also read where the young leaves are tasty so I tried one… then I ate several. They are much more flavorful than pea shoots.
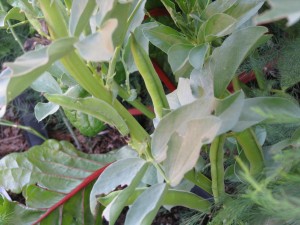
Fava Beans Scarlet runner beans grow down, but are slightly fuzzy, which is a little creepy. They can be eaten young, or let dry on the vine.
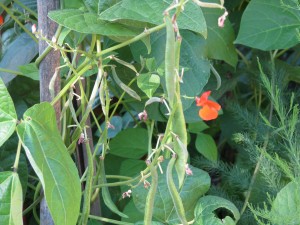
Runner Beans are Fuzzy I planted a white and yellow sweet corn, now that the popcorn is well up. I’ll wait a month to plant the full yellow sweet corn, not only to stagger harvests but because corn will cross-pollinate. Meanwhile, I have my trusted rubber snake watching the bed.

Corn snake This package contains carrots of various colors, so I planted some just for fun. I’ve heard that some of the darker colored carrots aren’t that sweet, but I want proof.
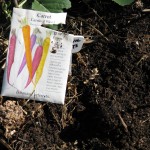
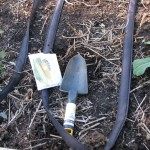
Crazy Carrots When spacing seeds for corn or other plants which need room, use your trowel as a guide. It is about a foot long, and corn needs to be a foot by two feet apart. Plant corn in blocks so that they can pollinate better; the pollen will drift off the tassels onto the silk of the neighboring corn.
Trowel Ruler I also planted cinnamon basil, which has the most wonderful aroma. You can use it in cooking, especially for sweets, but I just let it go to bloom, then cut some and set them in water in the house for the perfume.

Cinnamon Basil This bed contains garlic, shallots, bush beans, tomatoes and basil, all of which are contending for sunlight. The bed receives sun all day and the rows are planted south to north, so the plants won’t shade each other for any length of time.

Full Bed The sunflower that was pouting last week has trouble staying awake this week. Her heavy head just can’t be lifted. Lesser goldfinches love to eat the leaves, leaving them skeletonized.
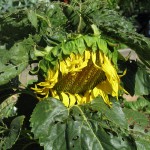
Heavy Head Of course, the best thing that is growing in my garden is this volunteer melon, which appeared under the peas I just cut out, and now that it has found the light, so to speak, it has grown one and a half feet long and going strong, and has a flower! But what is it? A remnant from melons I planted in the past? Seeds from the compost from melons I have eaten? There’s nothing like a mystery!

Volunteer Melon -
A Scream in the Pond
I have a small lined pond in my front yard, created by my daughter and I a good five years ago or so. It is a pond gone native, for the most part, and I like it that way. The mysteries of what lives in those three feet of murky algae-laden water give me a shiver and excite my naturalist sense of curiosity (See post The Monster in the Pond of March 2nd). Sometime earlier this year as I was walking past the stretch of green that was partially covered with newly unfolding waterlily pads, I was startled from my reverie (I’m always in reverie it seems, especially now that I’m wrestling with mid-life crisis!) by what sounded like a small scream and a splash. I saw nothing. Hmm.
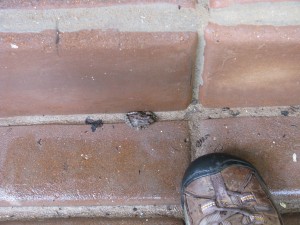
Young Pacific Chorus Frog During the most frigid, god-forsaken unpopular months of January and February, it seems as if every Pacific Chorus frog migrates from a forty-mile radius to mate in my small three-hundred gallon pond. Every night the males attempt to out-sing each other with such buzzes and chirps that even I’m impressed and tempted to follow their siren song, if only it weren’t so cold out there! (Wimpy San Diegan, I know!) Let their large ladies deal with them, I say. Sometimes their song is so loud that it becomes one giant noise. Often it drowns out whatever movie we might happen to be watching and we have to shine a flashlight out the window to startle them, catching them in flagranti as it were and quieting them for a short reprieve.

Pacific Chorus Frogs Taking a Break from Singing However, none of them scream. They sing.
When walking past the pond a few weeks later it happened again. A much louder scream and a splash. At least I knew that whatever it was hadn’t been so frightened by my passage that it committed suicide the first time. Then soon after my son came in from the front yard with a puzzled expression and said, “Something in the pond just screamed at me.”
There is a lot of algae in the pond which blooms about the time the frogs are mating, so I leave the frothy green bunches in place to protect the clear jelly sacks of spawn that cushion the frog eggs. Therefore, not much visibility at any time in my pond. Nope.
Finally I saw the screaming thing as it flung itself from the flagstones into the water. It was a large frog, much larger than the Pacific Chorus Frogs. Uh-oh.
When at breakfast I saw it sitting on the flagstone walkway around the pond through my bay window, my heart sank. It was a bullfrog. The glistening, beautiful green gigantic (for around here) frog sat there for awhile, then leaped into the undergrowth of my columbines.

Bullfrog about to go hunting through columbines American bullfrogs (Rana catesbeiana) are what you think of when and if you ever think of frogs. They can become huge. People farm them to eat their legs and back meat (oh ick!). Little American boys are supposed to spend their idle childhood summers wading through creeks (pro: criks) catching them and tickling their stomachs. I think they are a gorgeous and wonderful creature.
Except. Except that bullfrogs are not native to the Western states and they eat anything that they can shove into their mouths, including snakes, birds, rodents, other bullfrogs…. They are partially responsible, along with the red-eared slider turtles (America’s favorite pet turtle which was dumped wholesale into lakes and streams after the salmonella scare some twenty-five years ago and took over the waterways) and polluted water for endangering our native cute little Western pond turtles. So having this great screaming mouth eating down my mosquito fish, my Pacific Chorus frogs and their young, and everything else in the yard, is not good news in my book. Then my son noticed a second, smaller one. A male. Oh no!

Uh-oh. There's a male bullfrog, too! How to catch a bullfrog? I brought out an old cat litter bucket and a fish net and left them handy. We’d see the frog’s nose clearing the water, but by the time we’d go out there he would be long gone. Being very busy I didn’t have the opportunity to sit, net in hand, for hours waiting for my screaming frog to appear. (Hey, wait, shouldn’t that be ‘handsome prince’ instead of screaming frog? I get everything wrong!).
A few days ago on a sunny afternoon I was surveying the weeds in my garden, trying to burn them into cinders with my eyes without success. I walked along the pathway by the pond that was now almost completely overrun with peppermint, lazy stalks of columbine, the all-too vigorous Mexican primrose and the definately healthy weeds. I surveyed the back half of my garden making plans about weeding that had to be carefully done since many of the nasty little beggers were coming up in my heirloom bulb beds and their stalks looked almost identical.

Big Mama Wandering back I stepped through the overgrown columbine that hid the path when suddenly something big and shiny and screaming came flying up towards my knees from right under my foot. I also screamed and jumped. A second scream and leap to my left alerted me to the very large, very green bullfrog panting and staring at me with much the same expression that I must have been wearing as I stood staring and panting back. Even in my surprised state I realized that this might be my chance. Of course, the bucket was all the way over by the gate. I made a lunge for the frog but she evaded me. I managed to keep her from jumping into the pond and she disappeared under some weeds and mint by the bird bath. I squatted down and held down the grass hoping to contain her. I yelled for my son, but he was out of earshot. I started laughing, which I do so often in my life when I find myself in unusual circumstances. Come to think of it, I laugh pretty regularly. Maybe too regularly. Regaining control of the slight hysteria and my breathing, I slowly lifted up the grass… but she was gone. I knew she hadn’t jumped into the pond. She must have made her way along the sides of the flagstones. I made a plan. Quietly I stood and tip-toed around the back of the pond and around the end, making my way back toward the gate and the bucket with the fish net. Everything was still and I made no noise as I crept along. Just as I made it halfway past the pond, there were two almightly screams in close succession, two jumps and a splash. Fortunately it was the bullfrog who landed in the pond, not me. Shaking slightly with a trace of that hysterical laughter, I went inside to have a calming cuppa tea, and to give the lady frog time to settle her nerves as well. All that screaming had been a very girlie experience for both of us.
-
Honey Extraction by Crushing Comb

Honey Harvest Commercial bee hives, and most backyard beekeepers, use Langstroth (American standard) hives with frames lined with pre-pressed wax comb. This allows the bees to spend less time making wax and more time filling the hive with honey. To harvest this honey, keepers usually take out the honey-filled frames, run a de-capping knife down either side to cut off the white beeswax caps, run a knife or comb rake down across the cells to start the honeyflow, then place the oozing frames into the extractor. The extractor is closed, on some models it is heated, and then started. The frames whirl around the inside, using circumfugal force to get the honey off of the comb. The heated sides allows the honey to flow down through screens into a collection chamber. The frames with their cells can then be re-used into the hive for several years before the wax needs to be replaced. There are different scales of extractors, from a home-made one that holds two frames and is run with a drill motor, to large extractors that hold many frames and are heated so much that the honey runs like water. Extractors don’t work very well with frames that don’t start with pre-pressed comb, or Top-Bar Hive frames because the comb is too brittle to be reused.
There are a growing number of people who are not only pursuing organic beekeeping, but going to natural beekeeping. What is the difference? Organics don’t use pesticides to kill mites or treat the bees for various problems. To kill mites, they dust powdered sugar over the frames filled with mite-laden bees. The powdered sugar not only makes the mite’s sticky feet unable to stick, but also forces the bees to groom themselves more, which knocks the mites off and down through a bottom screen on the hive where they can be done away with. Natural beekeepers allow the bees to take care of themselves, using as little interference as possible. By observing what requirements the bees need to survive, by location of the hives and by not over-harvesting the honey, natural beekeepers are more in tune with their bees. For instance, the pre-pressed cells on wax foundation is larger than the larvae cells that bees would normally make. Varroa mites, a terrible scourge of bees, like the larger cells. If bees are allowed to festoon and make their own smaller-celled comb, there are fewer mites because the mites reproduce better with larger cells.
Naturally formed comb doesn’t work well in an extractor, so there are two things a beekeeper can do with it. One is to cut it up and sell it as pure honeycomb. The second is to crush it and allow the honey to drip through a mesh screen into a collection bucket. The latter is the process that we do, since we don’t have a lot of hives. Even with one hive, this process is a long one and physically demanding. As with all honey collection, it is best done on a warm day so that the honey will flow.

Honey-filled frames awaiting crushing The following photos are from a honey harvest last summer from our hives, and also from a wild swarm that I put into a hive just a couple of weeks ago (see my blog post Moving Bees on May 5th).
To crush comb, first we get our basic equipment. You need a long flat pan with sides, a potato masher, a spatula and a knife. You also need a clean food-grade bucket with a spigot on the bottom and a screen on the top and a lid. You can buy these, and believe me they are worth the price.

Empty bucket, screened top, and waiting comb If you don’t want to buy the bucket, you can always do what we did for our first honey extraction. You put clean buckets on the ground between two chairs, over which is suspended a sturdy and steady pole such as a broom. Once the comb is mashed, you put it either into layers of cheesecloth, or into cheap paint strainer bags sold anywhere paint is sold. Then you suspend it over the buckets and let it drip. If you squeeze it, the honey becomes darker. The cons of this are that dust will settle in the open buckets, and the chance of knocking the broom down is always a threat. Even on hot summer days, the dripping may take a week or more until almost all the honey is extracted. That is why covered screened buckets with bottom spigots are so worth the little extra money.

The Cheesecloth-Broom method! Cover the floor with newspapers, put some wet paper towels close by, put on some lively long-playing music and go to.

Cutting the comb from the frames First, remove a frame of comb and cut out the cells into the crushing pan. I stand the empty frames up on another pan which will catch the drips. Using the potato masher… start mashing.

Mashing the comb The goal is to crush the comb enough so that all the honey will drip out of it, taking pollen with it. Since you won’t be heating the honey artificially, and will only be screening once, most of the pollen and all the good vitamins, minerals and anti-bacterial goodness will flow right through and not be destroyed or screened out.

Cut comb laden with honey When that frame is thoroughly mashed, scrape it into the screen that is on top of your bucket… making certain that the spigot is tightly closed. Then start with the next one. This process will take some hours to do, even with two working on it.

Dark, brittle comb from a wild hive When the strainer becomes full then you can give it gentle stirs with a soft spatula, so you don’t tear the screening, or if you have another bucket put a lid on the full one and move on. Place full, lidded buckets in a warm area safe from ants where the sun can help with the warming and dripping process, without destroying the good stuff through heating.

Screen full of mashed comb When your bucket fills up with honey, then its time to decant. I use sterilized Mason jars with screw-on lids. Just open the spigot and be ready for honey to flow. Be ready to shut the spigot off quickly and wait for the inevitable drip.

Drawing Honey Honey should be kept in a dark cabinet, not in the refrigerator. It is naturally anti-bacterial, and has been used for centuries on wounds. It will not mold. It may crystallize, which is a reaction to the ambient temperature, since bees keep their hives between 91 and 97 degrees F. There is nothing wrong with crystallized honey; if you would like it liquid again, set the jar in a pan of hot water, or microwave it briefly. You even can get instruction on unclutterer on how to microwave specific foods like honey.
Once you are done extracting, you can set all the equipment and pile of discarded crushed honeycomb (unless you have other plans for it) out in an ant-free place near your hive for the bees to clean up.
The honey from our hive is very light in color and flavor, although it crystallizes within a couple of months (no problem there… it is also called creamed honey). The honey from the swarm that was in the nursery containers was almost caramel-like in color and consistancy, and had a darker flavor. Avocado honey is often dark, and there were many avocado trees in the area of the swarm.

Differences in Honey Crushing may be time-consuming, and not practical if you have a lot of hives, but for those of us with a hive or two it is worth the time and effort to not heat our honey and let it drip. Anything worthwhile is worth the time and effort it takes to do it. Just always, always, always be sure to allow the bees to keep at least one whole full super of honey for themselves, rather than robbing their honey and substituting it with sugar syrup. Hopefully you wouldn’t put soft drinks in your infant’s formula bottle, and neither should you give sugar -devoid of all the miraculous properties that honey has for the bee’s existance – as a substitute food for your bees. Bee a good bee parent.
-
The Nest
Creative thinking, recycling, scrounging for materials, looking through books for ideas… it can add up to wondrous creations. After seeing a hut built like a nest in a book, Roger Boddaert who is installing my permascape garden pulled together a lot of scraps and came up with my own nest. He and his team worked magic.
Beginnings Three palm trees that had been, well, decapitated, then stripped of their calyxes, became the main pillars for the structure.
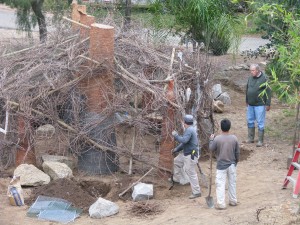
Creative Direction Old wire that was left over from old gardening trellises and even from the previous owner was wrapped around more palm trunks moved over for the framing.
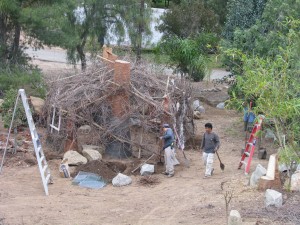
Bundling Grape Vines Wood from the sheds that had been destroyed was used for a window and doorways. Then grape vine cuttings that Roger’s neighbor had left over from his vineyard were bundled up and tied onto the wire frame with wire.
Old shed wood for frames Wisteria and jasmine, among other plants, will eventually grow all over this trellis.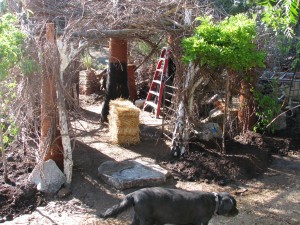
Straw will be strewn on the ground More vining plants are planted inside.

Abutilon planted inside An old gate left over from the original owners… who probably reused it from something else.

Old Gate To do the roof, Juan made due with what he had.
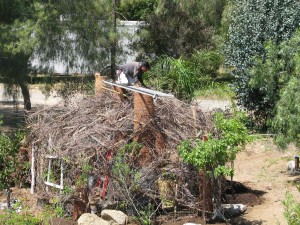
Roof access Then stretched just a little more!
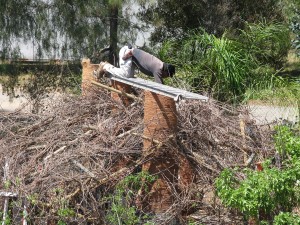
Precarious Perch With a wall made of broken cement to define the walkway and planted areas, it is finished.
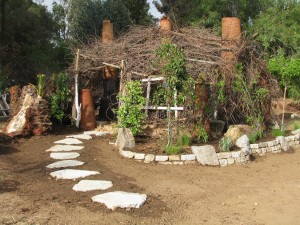
Finished! Inside a palm tree forms a bench.

The Inside All the times I mowed around these palm trees can be forgotten as they are now exotic support beams.
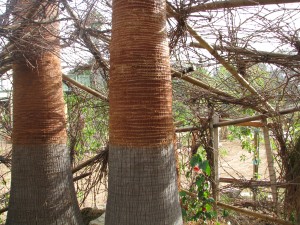
Rooted palm pillars A little bit on the crazy, fairy-story side, this structure will only mature as the vines take over. What a great addition to the garden!

Magic Hut - Animals, Bees, Gardening adventures, Permaculture and Edible Forest Gardening Adventures, Photos, Vegetarian
Moving Bees

Honeycomb with Capped Cells Backyard beekeeping is catching on in the United States, and there is more pressure on local governments to relax laws that prevent people from doing so. There are many misconceptions about beekeeping, and many keepers treat the bees cruelly in their pursuit of bee products. Bees are honey hoarders, so taking some honey from a hive isn’t going to do them harm. Taking too much starves the hive during non-pollen times and is cruel. Bees are complex, fascinating, and are disappearing for unknown reasons. The most evidence to explain Colony Collapse Disorder links it to a combination of Genetically Modified crops, pesticides and herbicides, and the waves from cell phone and power towers. In other words, we are screwing them up, and we will suffer for it.
About six years ago, a bee swarm set up house in an old couch I had outdoors for my dogs to lay on. They stopped laying on it. I left the hive until I had to get rid of the couch. I was writing for the magazine Edible San Diego and interviewed a couple who were beekeepers (http://www.ediblecommunities.com/sandiego/pages/articles/summer08/secretDances.pdf ). They came over and helped me move the hive. Actually, I took photos and watched as they worked as a team. When they turned the couch over, the honeycomb hanging in contoured patterns from the springs was incredibly beautiful. I thought at the time that I understood organic beekeeping, but I doubted many of the things that I was hearing. Since then, I’ve learned a lot more about working with bees without doing harm. I glean a lot of information from Organicbeekeepers@yahoogroups.com , which is a listserve that fields questions about natural beekeeping.

What Was Under the Couch 
Comb and Bees around Couch Springs That hive was put in Langstroth boxes and my daughter and I kept them for several years. This last December during the same week, this hive and a swarm that had settled in my shed wall both disappeared. Bees don’t die in their hives if they can help it, and for both hives to abscond was strange, so it sounds like Colony Collapse. Since then I’ve planted a Bee Garden in the lower half of my property, flush with flowering plants, particularly in the color blue, that bees love and that flower at differnent times of the year. I also had a couple of Top Bar Hives built to accompany the Langstroth hive which is the American standard hive you see everywhere. I’ll talk about TBHs in another post. A friend had a swarm in a stack of enormous tree-sized black plastic nursery containers, and I took the opportunity to move them to my new bee garden.The best time to move a hive of bees is after dark. Bees are all home at that time, and they don’t fly. They will crawl, however, so you have to watch your pant legs. The stack of containers was far heavier than I had anticipated, and getting them onto the back of my truck without jolting the hive too badly (don’t want to kill the queen) was more than what we had bargained for. However it was done, roped on, and I made my unusual journey back to my house… not that far away, thank goodness!
Bees at Night are a Delight My son and I off loaded the heavy thing and left it in front of the Langstroth hive where the colony would be moved to. That way the bees could familiarize themselves with their surroundings and mark pollen-gathering sites while still in their comb. The other day I took apart the containers and moved the colony into the hive. It was a good thing that I did because the comb was so convoluted that the swarm would probably have suffered soon. Bees build comb hanging down from a surface, securing it to sides if it is available. They do this by festooning, which is where they hold on to each other’s legs across and down, and make wax from bodily secretions into linked chambers in perfect distances apart. The containers had been tipped over, stood up and moved over the roughly year and a half that the swarm inhabited them, and the comb was proof of it. The following image is of the container on its side.

Inside the Container 
Bees on Underside of Second Container It wasn’t a large hive, only about 15,000 bees. A large colony like what was in my couch could contain 30,000 to 60,000 bees during peak pollen season.
Feeling awful about having to disrupt the bees, but knowing that I was actually helping them (ants were also getting into their hive), I began to cut out the comb, looking for larvae, and attaching it to frames that would fit into the Langs. To do this you need a knife, empty frames and pieces of pre-cut wire, rubber bands, or I’ve heard, those jaw-like hair clips. All your equipment should be ready to go because it is very, very hot in the bee suit, the bees are angry with you and the more time you spend the more harmful for them, and your gloves are covered in honey and you stick to everything that you touch. When bees are under attack they send out a pheramone (which smells a little like banana) telling the returning workers that there is trouble. When they sting, they also release a smell that tells other bees that there is an intruder. However, it also alerts bees from other hives that there is a ruckus, and they are attracted so they can try to rob the hive of honey. Very much like looters taking advantage of an emergency.

Being Gentle 
Carefully cutting out comb My son was nice enough to take these photos, up until the bees took exception to paparazzi and stung him on the end of his nose. Fortunately he doesn’t swell up.
Honey Dripping from Comb I do use a smoker. Smoke doesn’t calm the bees, it just makes them order their priorities away from attacking you. They think that fire is imminent, so they begin gorging themselves with honey in an attempt to save as much food as possible in the event of hive destruction. I use only a little smoke because too much hurts the bees and doesn’t make them eat any faster. Mostly the smoke ends up blowing in my face the whole time. I used to not have any reaction to bee stings, but in the last couple of years I develop a large swelling with blisters, so I wear the full bee suit with thick clothes underneath despite the heat, rubber bands around the pant legs or boots, I use smoke and take allergy medication before I begin (I’m usually sneezing from hayfever anyway so it helps keep my nose from running while I’m suited up.)

Placing Cut Comb onto Frames The comb must be cut to fit, hanging the same way it did originally, and must be attached so that it hangs evenly. Otherwise the bees will attach it to the next frame with burr comb (comb that is used to attach honeycomb to support surfaces) and it will be hard to later remove the frames for examination without harming the bees and brood.

Placing Comb Into Hive Comb with brood goes into the middle of the bottom box, which is larger and called a brood box. A couple of frames with honeycomb go on either side of the brood for insulation and food. The frames are spaced evenly… bees like a particular width between combs. In the second box which is shallower, called a super, more honeycomb goes in along with enough frames to fill the box. Frames are traditionally fitted with pre-made wax comb on which the bees build more comb, ensuring that the comb is straight and giving them more time into honey production rather than comb production.

Pre-formed wax foundation in a frame Some use a plastic comb. Also, if you are extracting honey with a centrafugal extractor, the pre-made comb doesn’t break off as easily as regular comb, and it can be re-used. I’ve always wondered about this, since I’m not a large-scale honey producer and am mostly interested in giving the bees safe harbor, although I do like honey and pollination. I’ve recently learned from a seminar from the Backwards Beekeepers (http://beehuman.blogspot.com/) in Los Angeles that using empty frames is just fine. Giving the bees a place to start, like a thin line of beeswax or a popsicle stick helps. For these first two boxes I put in pre-formed wax frames… just a couple… between the moved honeycomb. In the other boxes that I’ll gradually stack on top as the hives grows, however, I’m going with empty frames. Let the bees do what they want. Also it has been shown that bees naturally make slightly smaller rounds in their comb than the ones of the pre-pressed wax foundation, and may be less suseptible to the mites that are a deadly scourge of honeybees.What comb I couldn’t fit into frames I swept clean of bees as well as I could and dropped into a covered pail for later crushing and honey extraction.
With most of the comb gone, there were still several thousand bees in the container that needed to be moved. I hadn’t seen the queen, and she may well have been in that last batch. I had to lift the container (which was big, round and heavy) and gently tap the bees into the open box.

- Tapping Them Out Into Hive
The ones that didn’t tap out I gently brushed with a bee brush.

Brushing Bees into Hive Still more bees were on the bottom of the other container. I placed the hive lid on the ground in front of the opening to the hive like a ramp and tapped and brushed those bees onto it. Bees like to climb, so up they went into the box! There was a lot of debris in the containers such as dirt and leaves, so I had to be careful not to get too much of it into the hive with the honeycomb.
After I moved all the bees I could into the hive, I moved my equipment away and left pieces of honeycomb on the piece of plywood next to the hive. The hive stand rests on long screws, which are placed in cans of oil to prevent ants from invading the hive, so I didn’t worry about all the drips of honey being invaded. Many bees sat on the outside of the hive and waggled their bottoms in the air producing pheramone messages. One of the messages was to inform returning gatherers how to get into the new hive, another would be the state of emergency and who to look out for. I’d hate to know what they were waggling about me!

Spreading Pheramone I covered the hive with a California off-set cover, which allows ventilation in our hot climate and another place for entry. The bees settled in and by this morning they were gathering pollen, cleaning up the honey and going about their business.
There is so much to say about bees, and there is so much we don’t know about them yet. Some interesting facts are that honeybees are not native to the US, and of the 3,000 types of bees they are the only ones that make honey. Almost all bees are female except a handful of drones who have the purpose in life of hopefully mating with a new queen. Worker bees start out tending their queen, where they acquire her particular pheramone, then they move up to housekeeping and then feeding larvae. When they get to middle age, they go out for their first flights and spend the rest of their lives as gatherers. That yellow blotch on your windshield is first-flight bee poo. Worker bees make the larvae develop into drones, queens or workers by feeding them different foods such as bee bread, honey and royal jelly.
If you are interested in backyard beekeeping, attend a meeting of the San Diego Beekeeping Society (http://www.meetup.com/The-San-Diego-Beekeeping-Meetup-Group/ ), which meets the third Monday of each month at 6 pm at Casa del Prado, Balboa Park, room 104. Read books such as the Barefoot Beekeeper by P. J. Chandler or Natural Beekeeping by Ross Conrad, or read this wonderful blog http://beekeeperlinda.blogspot.com/2007/06/honey-harvest-crush-and-strain.html. I live in San Diego County, and I have a permit for beekeeping.
Honeybees sting in defense of their colony, and with the sting comes part of their abdomen and they die. Here is a photo of the stinger that was left on the tip of my son’s nose while he was photographing me. Although stung through the suit many times (with the regretful loss of bee life that entailed) no sting reached me during this process.

Stinger - Gardening adventures, Permaculture and Edible Forest Gardening Adventures, Photos, Vegetables, Vegetarian
Eating from the Garden

Mesculn Mix Beginning last week, I’ve been able to serve at least one thing from the vegetable garden every night at dinner. Peas, Swiss chard, lettuce, cilantro,radish, more peas, chives, carrots, strawberries, and, of course, peas. I munch as I water and weed, and feel that for a moment, here at least, all is right with the world. Like so many gardeners everywhere, I await the taste of my first tomato, but since my plants are no more than three inches high, I have awhile to wait.

Purslane Every year I have a bumper crop of purslane growing as a weed in my beds, and this year is no different. However, I’ve read where purslane has more Omega-3 fatty acids than many fish, something we vegetarians should be aware of. Originally from India, and supposedly Ghandi’s favorite food, this succulent member of the Portulaca family offers other nutritional benefits as well. See http://www.nutrition-and-you.com/purslane.html . If uprooted and left on the soil, the plant uses its stored liquids to produce seed and scatter them. “So there!” it says. I must admit that the thick leaves and stems are off-putting for me texture-wise, but I’ve begun to snap off young stems and include them with the lettuce I’m harvesting. I’ll have to be bold and find better uses for it in my kitchen. After all, its free!

Purslane I created two new raised beds, lined with aviary wire (which is a devil to work with. I have scratches all over.)

New raised beds I still have two more raised bed kits, which I bought last Fall in a clearance sale. I’ve leveled them, placed cardboard on the ground to deter weeds (especially the dreaded Bermuda grass!), used a staple gun to attach aviary wire across the bottom and up the insides a little, then filled with topsoil and very wormy mushroom compost, then watered it all in. I still have to add more good soil, then I’ll mix in some Garden’s Alive non-animal organic vegetable fertilizer and some microbes, just to start the beds off right.

Seed Sprouting These beds will be for the vining plants such as squash, pumpkin and melons. There is room for vines outside the beds. Already I have the seeds sprouted and awaiting transplanting, but that won’t happen until early next week.
Roger and his crew hauled over prunings from grape growers, and have used them to sparkle up the trellises to wonderful effect.

Grape vines on trellises I think they add a wonderful ethereal look to the structures.
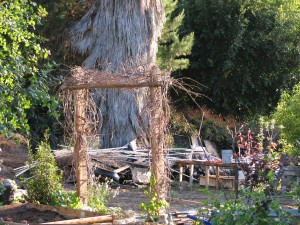
Viney trellis As far as the ponds go, contouring is slowly being done and we all await the coming of the pump on Monday. I will not be blogging for the next few days because I will be attending the Southern California Permaculture Convergence in Malibu http://www.socalconvergence.org/ , and as I will be sleeping in a bunkhouse at Camp Hess, I’m thinking that bringing my laptop would be a bad idea. I’ll take photos and be excited to share what I’ve learned with you when I return. Have a wonderful weekend!
- Gardening adventures, Permaculture and Edible Forest Gardening Adventures, Photos, Vegetables, Vegetarian
My Gardens Today
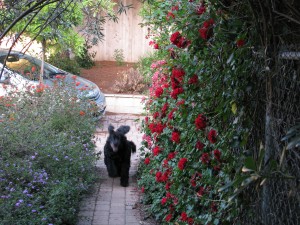
Entranceway with Running Dog April and May are months that I often don’t remember when reflecting back at the end of the year. Spring is such a busy season. When I was raising children, and when I was working as a school librarian, these months rushed past in the haste towards summer break. As a gardener, Spring is one season when I turn into one of those Garden Designers London and since it is also the season of intense growth of both weeds and desirables, insects and increasing dryness, and for me and so many others, the inevitable allergies that keep me out of the garden for days. So I thought I’d post photos of my gardens as they stand today, in the middle of April, on threshold of Summer.

By the Front Door I’ll start at my front door and work downhill. The walkway to the front door is lined with purple lantana and a mixture of red geraniums, honeysuckle, butterfly bush and Double Delight rose. It is being enjoyed by my very silly old dog General Mischief, who just realized that I was going to let him into the house. He looks a bit like a vampire dog in this photo, though!
By my front door I have a collection of miscellaneous plants, as most people do. Two staghorn ferns given me by my mother have attached themselves in a very satisfactory way to the chain link fence. There is also a dark red ivy geranium, needlepoint ivy, some bulbs just out of bloom, a traveling (or Egyptian) onion (it’s seeds are bulbets grown on the flower) that my brother gave to me, and some sedums. When I water here I usually disturb a Pacific Chorus Frog or two. I’ve thinned and weeded and replanted this collection, but there are always more that magically appear.
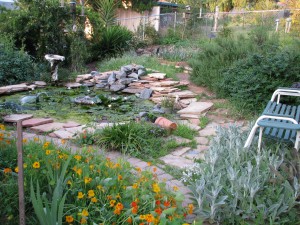
Front Pond The front yard pond is full of algae, but that is all right for the moment. I don’t want a crystal clear pond; I want habitat. Because of the clear blobs of frog spawn and wriggling tadpoles hiding from the hungry mouths of the mosquito fish I keep the algae until it is no longer inhabited. Waterlilies (even the monster one! Look at other posts for an explaination) are blooming with last weekend’s sudden heat. In the foreground are Jewel Mix nasturiums with heirloom tuberoses emerging, a grey mound of lamb’s ear which has begun to pop up where I don’t expect it, and rosemary by the bird feeders. Our kitchen table has the view of the feeders, and it is from this yard that we count birds seasonally for Cornell University’s Project Feederwatch. Oh, and try not to focus on the weeds, please.
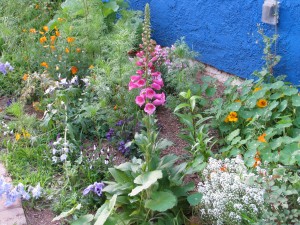
Side Gardens On the South side of my house I’ve painted the wall a Mediterranean blue to reduce the glare and create a colorful backdrop for flowers. I keep annuals in this bed, along with some bulbs and a rose that is still small that my daughter gave to me. In th photo just blooming are naturtium, alyssum, foxglove, pansies, and a delphinium that fell over and started growing upright again. My library window overlooks this yard. I was trying to keep the color scheme focusing on apricot to show up well agains the wall, but I end up planting whatever I want in here. Cosmos have again reseeded and are starting to grow rapidly; they’ll block the window by summer and be full of goldfinches. I’ve also planted a couple of bleeding hearts that I picked up in one of those bulb packages at WalMart. Usually the plant is pretty spent and they aren’t worth the money, but I somehow think that I am rescuing the poor thing. These came up but haven’t yet bloomed.
Lady Banksia Along my driveway is a Lady Banksia rose that has taken off, along with a bush mallow, a Hidcote lavender, and a late daffodil. Farther along the driveway (not shown) is a Pride of Madera (I love that name!) that is going gangbusters, a small liquidamber, rockrose, a mixture of natives and incidental plants such as a tomato that survived the winter, a Joseph’s Coat rose, and an established pine tree with a crow’s nest at the top. There are other roses and plants here, too, like a prostrate pyracantha for berries, a white carpet rose, native milkweed for the Monarch butterflies (perennial ones; the annuals are usually gone by the time the butterflies migrate here), an apricot penstamon, aloe vera, and probably the kitchen sink, too, if I root around long enough. I love tinkering around with this mess of plants, seeing what will grow and trying new combinations.
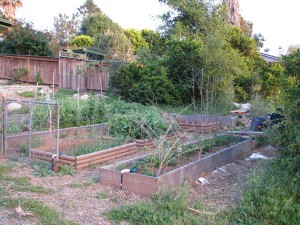
Raised Vegetable Beds In my raised vegetable beds the peas have been producing well. The shorter ones had been nibbled by crows as they were emerging, but after I put a rubber snake amongst them, the nibbling stopped. Potatoes are nearing harvest time, and I’ve already snuck out a few new potatoes and they were very good. Sometimes I’ve had potatoes with brown fiber in them and a bitter taste; no doubt due to irregular watering and soil problems. I worked hard on improving my soil and giving it a boost with natural fertilizers from Gardens Alive. There are so many peas in the garden because I planted all my old packets so that the roots will set nitrogen in the soil.
I also have growing carrots, broccoli, cilantro, parsley, endive, salad mix, parsnip, strawberries, blueberries, breadseed poppies, horseradish, asparagus, bush beans, fava beans, a yellow tomato and a red slicing tomato, garlic, shallots, red and white onions, Swiss chard, leeks, collards and basil. Most are just small guys right now.

Seedlings In my temporary nursery area I have sprouting pickling cucumbers, zucchini, quinoa (first time!), more basil, Dukat dill, cantalope, and a cooking pumpkin. I’ll sprout more squashes and maybe popcorn and sweet corn soon.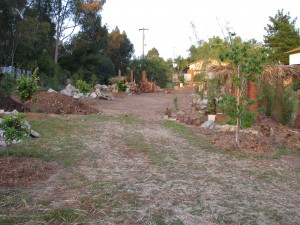
View up the Middle This is a view of the middle of my property, from the lower end up.
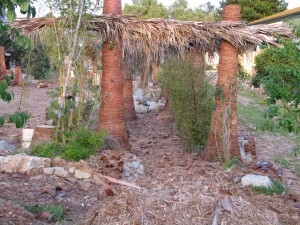
Palm Tree Walkway This is the palm tree walkway as it stands now.

Pre-Pond And this is the lower area. Notice the stakes in the ground and the tractors? They are there because today is the day the ponds will be excavated! The rain-catchment ponds, permanent habitat pond and swales will be carved, shaped and filled in the next two days, fed by water from a 4-inch well augered in the lower property. I have hired Aquascape to create habitat and rain catchment ponds; the demostrations of their work look as if humans hadn’t messed with anything. In about an hour from now, the action finally begins! After the ponds are installed, then the final plant guilds will be established, the minor amount of irrigation installed, and that will be that! I’ll keep you posted on pond development! -
Idyllwild Photos

Boulder-studded hills This last weekend’s retreat to Idyllwild became extra special with the advent of April snow. I started out from Fallbrook at two o’clock, following my GPS through our granite-studded hills and golden-flowered valleys. As I drove through the Anza plateau in the beautiful afternoon sunshine, I started seeing glimpses of my destination, which the forecasters indicated would be snowy.
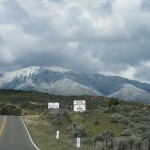
Snowy mountains Listening to my audiobook, occasionally holding up my camera to take photos through the windows (thank goodness for digital photos! All those random shots I can delete instead of pay to print and then throw out!) I reached the turn-off for Idyllwild and tall pines. I passed red gambrel barns, peaceful horse ranches, and then the first downy flakes started swirling around. I gave out a hoot to myself. Although I was born in New Jersey, my dear mother told my dear father that she never wanted to shovel snow again in her life, and they moved our family of five children West when I was five. I’ve visited snow a handful of times at Palomar when growing up, or with my children. Up until I drove through snow and ice in Ashland a couple of weekends ago on my trip to Oregon, I had little experience with it. Or did my Prius. On approaching town there was snow on the sides of the road, and it was swirling in large flakes.
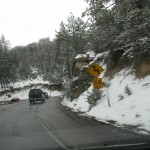
Snowy Road Traffic wisely crept along the icy road. Then suddenly, I was there.
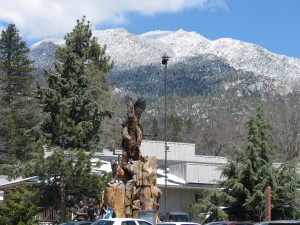
Totem (photo taken on the last day) I’d only been to Idyllwild once with my parents, some forty-some years ago. The only thing I remember was a large totem in the main square. I was startled to see it again as I arrived. It brought back good memories of my parents.
The snow had turned into round pellets, like those Styrafoam balls in Christmas scenes. I sat in my car outside the lodge for a few minutes absorbing the sight.
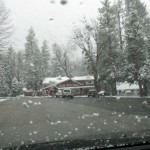
Round snow Oh, and it was cold. My spoiled San Diego self had to make some adjustments. Over the weekend I ended up wearing all the clothes I brought, mostly at the same time in various combinations starting with thermals. I thought I had mittens in my car but I didn’t, and I shouldn’t have had my haircut the day before, or thought to have brought a knit cap. But it was all okay. The lodge was comfortable, our hostesses treated us like royalty, I shared a room with a wonderful woman and we had a wall between us for privacy. The rooms were themed, and mine was, appropriately, The Library, and was decorated in old books and red plaid, which I love. It was perfect.

Plaid room After checking in and seeing my delightful room, I took my camera out onto the street and walked a circle around to town and back. I had to keep the camera nestled under my jacket to keep it from freezing. I wrapped my blue knit scarf that I bought when Miranda and I were freezing in the Orkney Islands when touring Pictish ruins around my head and neck like a babushka. I’m mature enough to sacrifice looks for warmth. ( At least, most of the time. I guess it depends on who is looking. Hmm, I’m still a girl at heart after all! ) The landscape was beautiful, like a picture postcard sprayed with glitter.
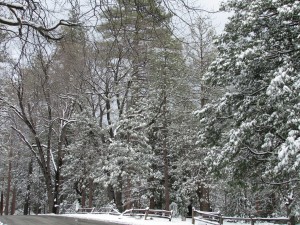
Snowy Trees The silence was so profound I could hear the snow fall. There was wildlife looking for food for their young. A mother Gray Squirrel was eating at a squirrel feeder. The bare spots on her tummy show that she is nursing young. I also saw Steller jays, robins, pine siskins, a flicker, crows, quail, goldfinches and acorn woodpeckers. There were bunny tracks in the snow.

Mother Squirrel That evening we communed by the fire in the lodge after a great meal of vegetarian vegetable soup and fresh bread. I enjoyed my cup of cocoa with peppermint Schnapps, but the caffeine made me sleep only three hours. I wasn’t alone with being tired; several other women had little or no sleep either. Saturday the sun was out and the snow began to melt, causing the streets to turn into running water.
Snow Flowers W e took a walk in the morning, ate macadamia nut pancakes, performed Tai-Chi, Zumba, aerobics, work at a barre, more walking, yoga and Pilates, then another walk into town for dinner. During dinner, it began to snow again, big, slushy wet snow that we hadn’t expected.
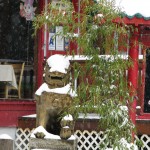
Hibernating Dragon It was dark when we finished eating, and we visited a couple of shops that stayed open for our group, then ventured through the very wet snowfall back to the lodge and warmth. It snowed all night again, to make our last morning one of magical landscapes. It was Sunday morning, the sky was blue with soft clouds, the quiet was profound and the snow sparkled as if someone had tossed around slivers of diamonds.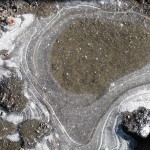
Ice A group of us took a silent walk through the snow and trees, not speaking, but pausing to perform simple yoga breathing and awakening stretches, welcoming the peace and freshness into ourselves and sending our thanks for the moment out to the universe.
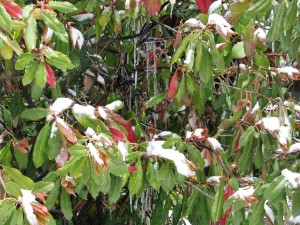
Icicles in Bush This exercise enervated me more than any other during the weekend; I only regret that not all of the women shared it with us. (After little sleep on the first night and a series of vigorous workouts through the day, along with all the energy spent shivering, several slept in.) One of the phenomenas of the morning was the rising sun catchingthe snow as it melted from the trees, highlighting the drops as if it were handfuls of glitter. I took many photos of it, trying to capture the spectacular sight, but none of them do it justice. If you look carefully at the photo, you can kind of see what I’m talking about.

Shimmering snowmelt After our wonderful breakfast (pecan maple pancakes!) we headed off down the mountain in glorious weather. I took a last explore through the town, finding a shop that made its own candles, some scented Idyllwild Cabin, and Campfire Smoke, and Citrus Champagne… and they really smelled like their names! I bought some Christmas gifts (beat the crowd! It was snowy outside after all!) and drove out of the snow to home.

- Easter Bunny Tracks
I’m posting more photos on my Facebook page if anyone is interested. The Spring Retreat turned out to be a Winter Wonderland, but I’m sure that it won’t throw the Easter Bunny off at all.
