- Animals, Birding, Compost, Fungus and Mushrooms, Gardening adventures, Hugelkultur, Humor, Microbes and Fungi, Natives, Other Insects, Perennial vegetables, Permaculture and Edible Forest Gardening Adventures, Ponds, Predators, Rain Catching, Reptiles and Amphibians, Seeds, Soil, Water, Water Saving, Worms
Ponds and Potatoes; A Finch Frolic New Year’s Celebration
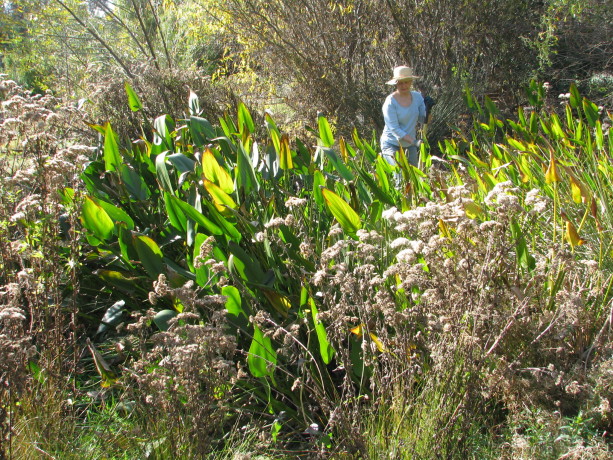 Our sixty degree weather here in Fallbrook, CA , gave us the opportunity to work in our garden. A year ago – 2014 – it snowed on New Year’s Eve. This year the nights are frosty, the days mercifully warmer, and the rain frustratingly rare. Our promised El Nino rains are expected to hit in force within the next couple of months. Weather they do or not, focusing on catching every precious drop in the soil, and protecting the ground from erosion and compaction, is paramount.
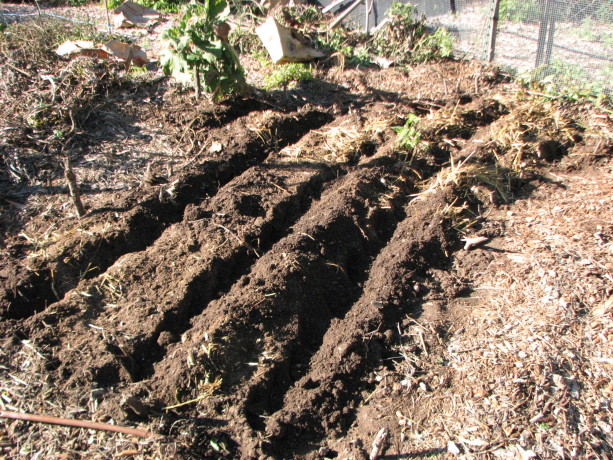
Permaculture in rows. Pretty nice soil, which had been silt from the street a couple of years ago, mixed with chicken straw, topped with leaves. No chemicals! The last day of 2015 Miranda and I spent working one of our vegetable garden beds, and reshaping our kitchen garden. When we redesigned this garden by removing (and burying) the raised beds, hugelkulturing and planting, we made a lovely Celtic design.
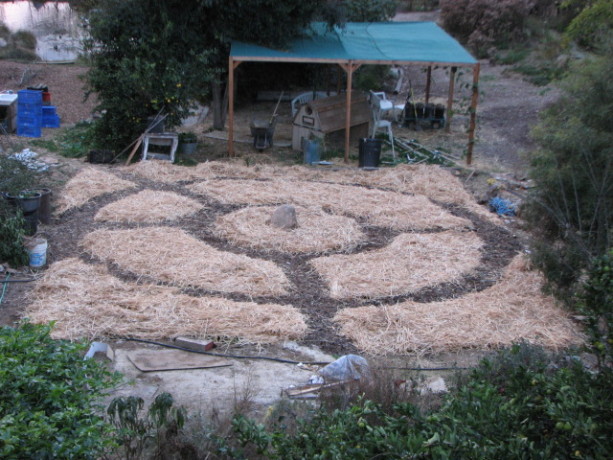
The unplanted kitchen garden newly designed in January, 2013. However the plants just won’t respect the design, so we’ve opted to lessen the pathways, turning the beds into keyhole designs for more planting space. I’ll blog more about that in the future. Because the pathways have been covered in cardboard and woodchips (sheet mulched), the soil below them is in very good shape, not dry and compacted.

How deep do roots grow? This clump of oxalis (sour grass) is white because it was growing without light under the pathway sheet mulch. The corms at the end of the long roots are about 8 inches below the plant. Good soil means deep roots; I’ve never seen this plant have anything but shallow roots. This bed has been home to sweet potatoes and various other plants, so although I try to practice the no-dig method, where you have root vegetables you must gently probe the soil for goodies. We left some of the roots, so sweet potatoes will again rise in this bed.

Miranda planting potatoes and shallots in rows. Between these rows and around the outisde other veggies were planted. We planted in rows. Usually I mix up seeds, but this time I wanted to demonstrate polyculture in row form. We planted three rows of organic potatoes (purchased from Peaceful Valley Organics), with a row of shallots between them. Between the root vegetable rows we planted a row of fava beans, and a row of sugar pod peas. Around the edges Miranda planted rows of bull’s blood beets, Parisienne carrots, and maybe some parsnips. This combination of plants will work together in the soil, following the template of a plant guild. We left the struggling eggplant, which came up late in the year after the very hot summer and has so far survived the light frost.
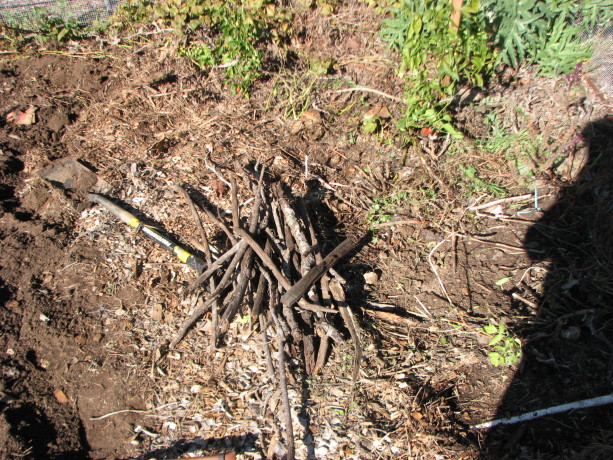
Sticks. So important for the soil. These went in vertically around the planting bed to act both as one type of gopher deterrent (a physical barrier) and also as food and as water retention for the veggies. On top of the bed we strew dead pond plants harvested from our small pond near our house, which will be receiving an overhaul soon (hopefully before the Pacific chorus frogs start their mating season in force). We didn’t water the seeds in, as there is rain predicted in a few days. The mulch on top will help protect the seeds from hungry birds.
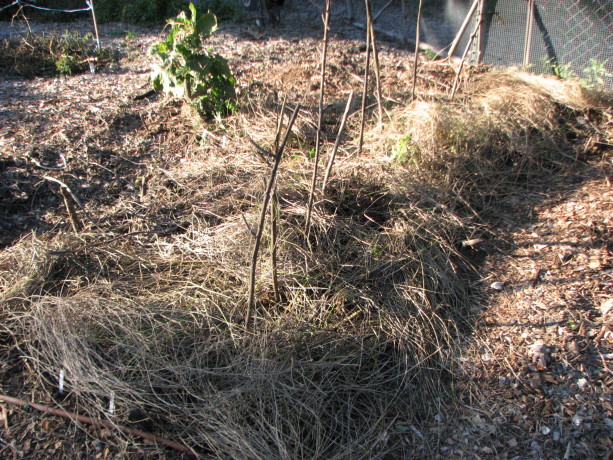
The finished bed topped with dead pond weeds (which don’t have seeds that will grow on dry land!). The sticks are to steady future bush peas. A good way to spend the last day of the year: setting seeds for food in the spring.
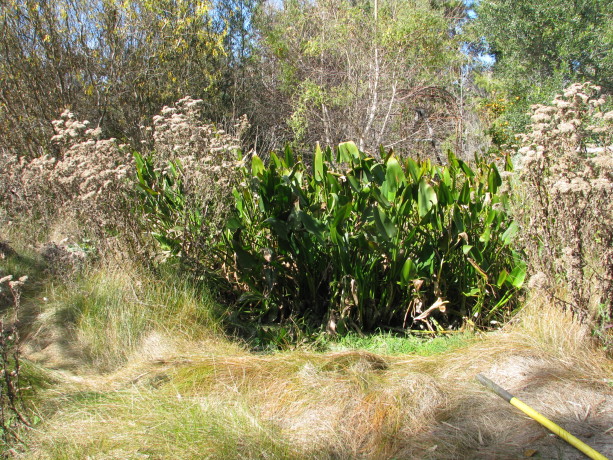
Before: The little pond, which is also a silt basin, almost completely filled by an enthusiastic clump of pickerel. This pond is wonderful habitat for birds, frogs, dragonflies, and so many other creatures, and as a water source for raccoon, possum, coyotes, ducks, and who knows what else that visits in the night. Then on January 1 I decided it was a good opportunity to clear out the excess pickerel that had taken over our lower small pond. With the well off for the winter, and very light rainfall, this pond has gone dry. A perfect opportunity for me to get in there with a shovel, especially knowing that I already had a chiropractor’s appointment set for Monday (!).

Making some headway. The mud was slick and spongy, but not unsafe, and not nearly as smelly as I had anticipated. Pickerel is not a native to San Diego, but it is a good habitat pond plant and it has edible parts. I wasn’t tempted, however. Its roots are thick and form a mat several inches thick hiding rhizomes that are up to an inch in diameter. I’d cut into the mass from several sides, pull the mass out with my gloved hands and throw the heavy thing out of the pond. Its good to be in contact with the earth, in all its forms. I couldn’t think of a better way to use the holiday afternoon.
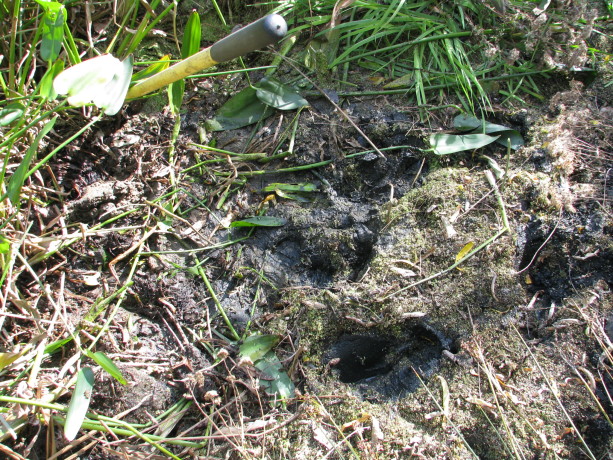
Thick root mass hiding large rhizomes made removal a real exercise. This is why I practice yoga and attend Zumba class with Ann Wade at the Fallbrook Community Center! I moved at least a ton of material in four hours. Just before sunset I decided that I was done. About an hour before that, my body had decided that I was done, but I overrode its vote to finish. I left some pickerel for habitat and looks, and will try to contain it by putting some sort of a physical barrier along the roots, such as urbanite.
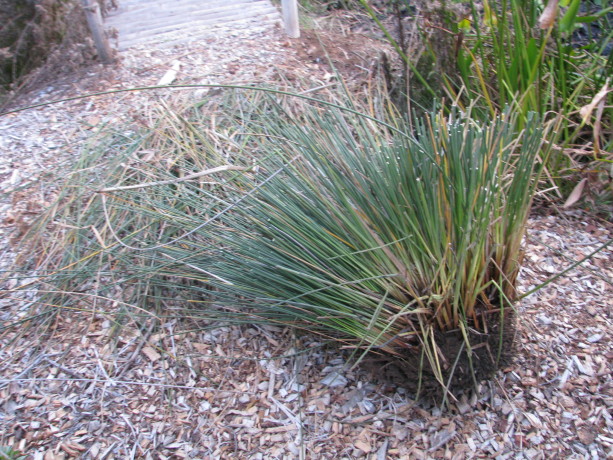
Removal of one of the three really nasty plants around the edge was a victory. The ends of their leaves are like needles, and impossible to walk past or work around, and dangerous for little kids. This root ball was harder to dig out than the mucky pickerel, and the success even sweeter. Revenge for all the pokes! We also might harvest some of the silty clay for use in the upper pond, although the prospect of carting heavy wet mud uphill isn’t as appealing as it might sound. That needs to happen today or tomorrow, as the aforementioned rain is expected, and I want to fill this pond again for the frogs.
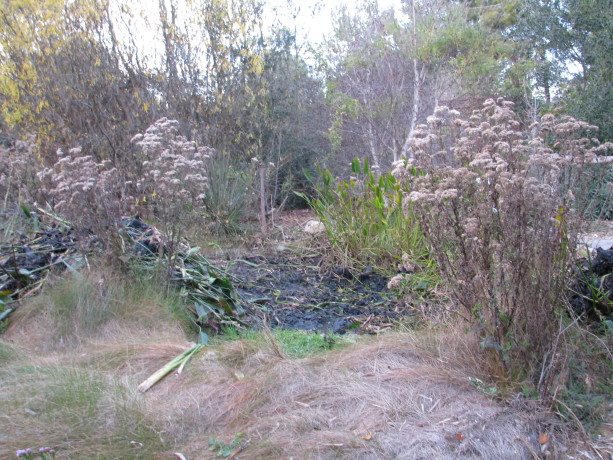
After: Finished with the digging. Still more work to do -including cleanup of the mountain of organic matter – before refilling. One good thing about the pond going dry is that there are no more mosquito fish (gambuzia) in it. Mosquito fish are very invasive, and love to eat frog’s eggs and tadpoles far better than they do mosquito larvae. When the pond fills with non-chemically treated water (rain and well water), some of the microscopic aquatic creatures will repopulate the water. I’ll add some water from the big pond as well to make sure there are daphnia and other natural water friends in it, which will do a much better job at mosquito control without sacrificing our native frogs. I can’t get all the gambuzia out of our big pond, but at least they are out of the other two. Once dragonflies start in again, their young will gladly eat mosquito larvae.
So here on the morning of the second day of 2016, I lay in my warm bed prior to rising to start the chores of the day, stiff as an old stiff thing as my body adjusts to strenuous manual labor again, looking forward to more gardening duties to prepare Finch Frolic Garden for the reopening March 1, and for the rains.
The best part of heavy gardening duties is that I can finish off the Christmas cookies guilt-free!
- Animals, Bees, Birding, Compost, Fungus and Mushrooms, Gardening adventures, Heirloom Plants, Hugelkultur, Living structures, Natives, Other Insects, Perennial vegetables, Permaculture and Edible Forest Gardening Adventures, Photos, Ponds, Rain Catching, Recycling and Repurposing, Reptiles and Amphibians, Seeds, Soil, Water, Water Saving, Worms
October Garden
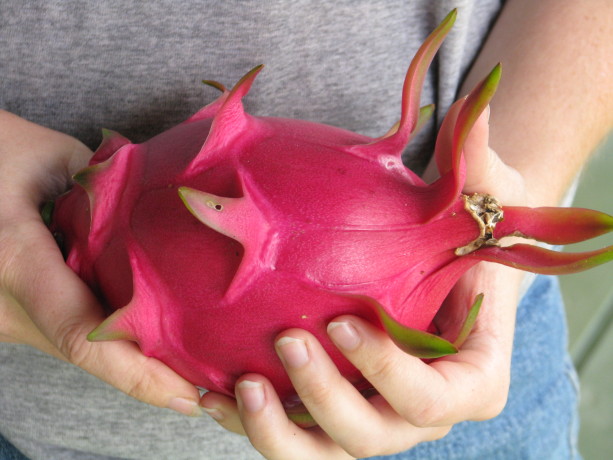
A huge dragonfruit; this kind is white inside. October is one of my favorite months, even when we’re on fire here in Southern California. This year we’ve been saved, and October is moderate in temperature and lovely.
A volunteer kabocha squash vining its way through a bush. 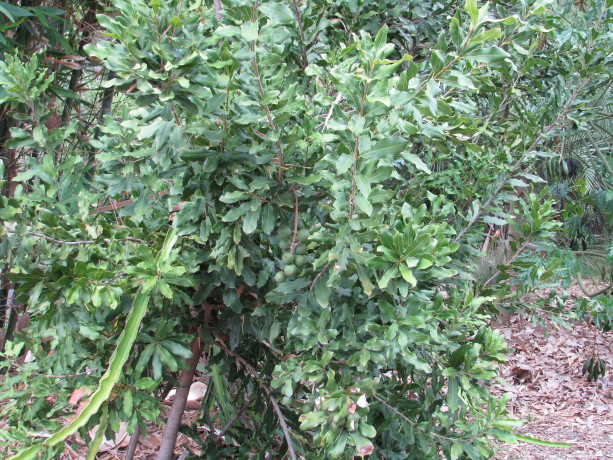
Our first ripeing macadamia harvest from a 3 year old tree, with a dragonfriuit snaking through. 
Edible hibiscus, volunteer nasturtiums and pathway across the rain catchment basin. 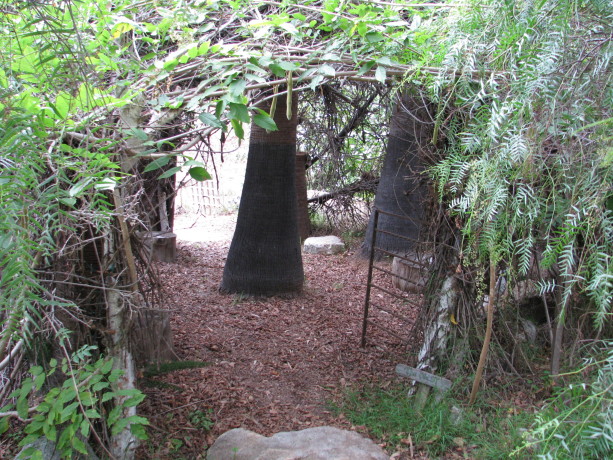
Into the wisteria-covered Nest. Summer has lost her vicious grip and we have time until the holiday rush and winter cold. Finch Frolic Garden has withstood the heat, the dry, the inundations, the snow and the changes, all without chemicals or much human intervention.
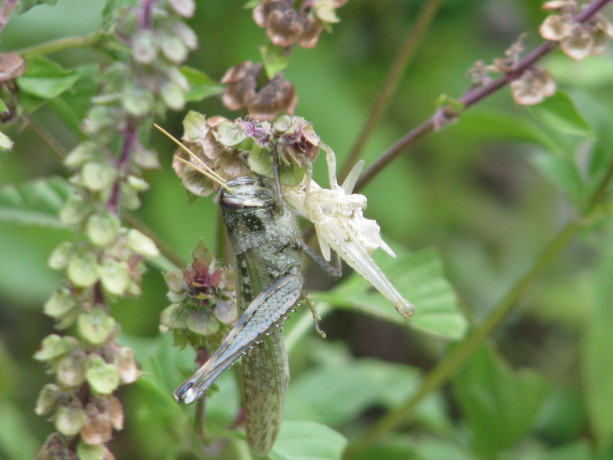
Grasshopper freshly out of last instar. 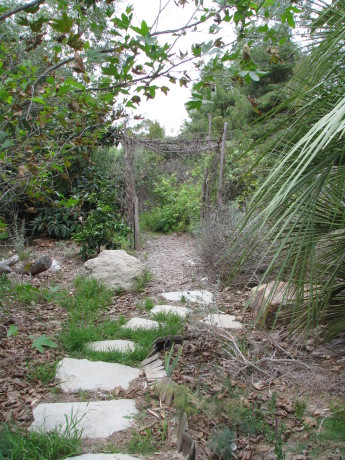
The curly willow trellis. We’ve lost some trees and shrubs this year, but that is mostly due to the faulty irrigation system which delivers too much or too little, and is out of sight underground.
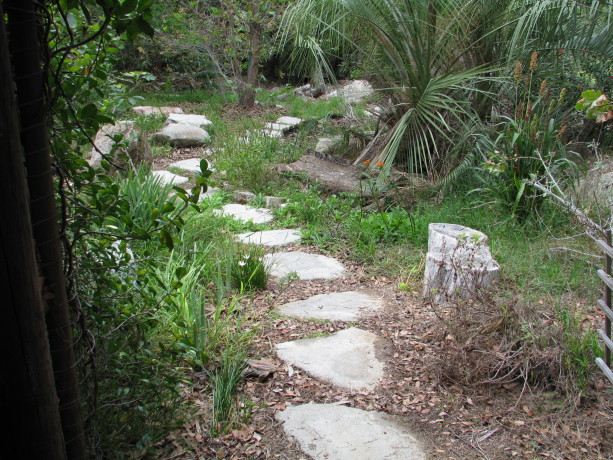
Urbanite pathway. 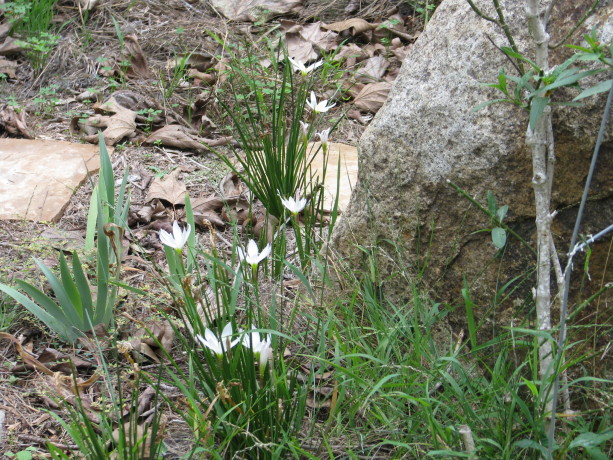
Bulbs will pop up year round for wonderful surprises. Permaculture methods in sheet mulching, plant guilds, swales, rain catchment basins, and the use of canopy have pulled this garden through.
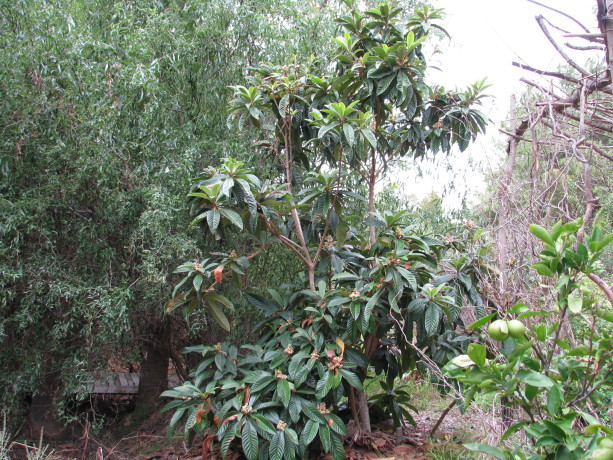
Loquat in bloom. 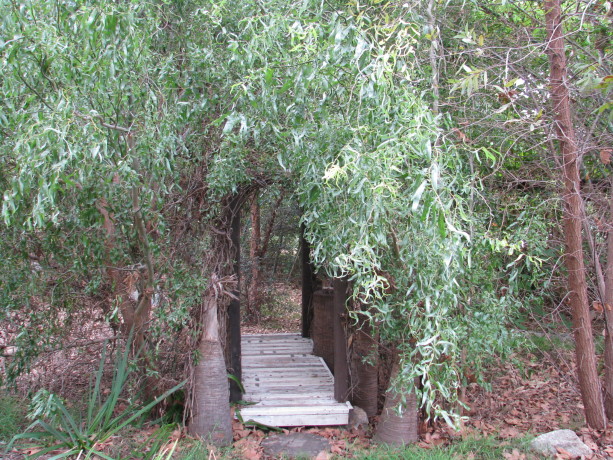
Bridge over currently dry streambed. 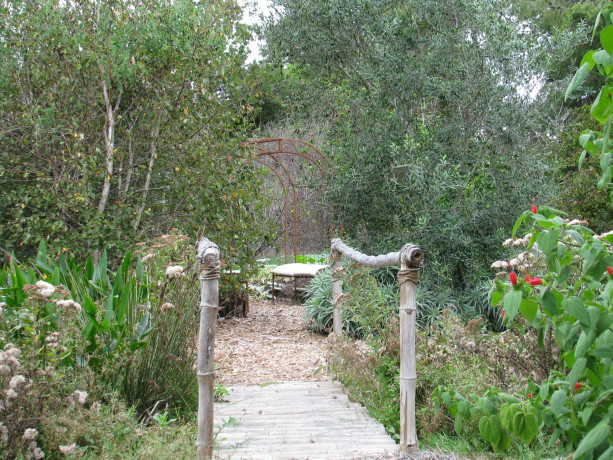
Bamboo bridge. 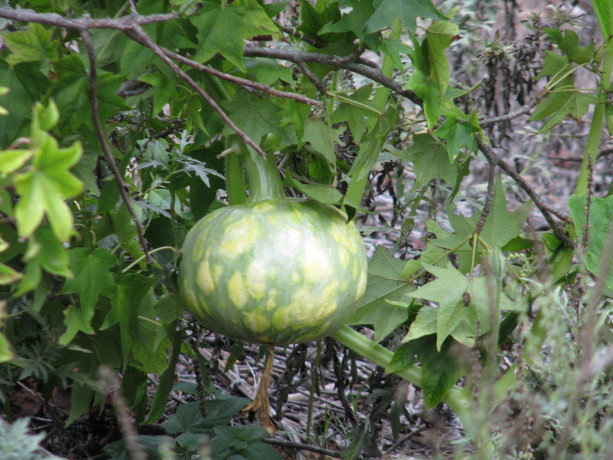
A gourd in a liquidamber. The birds, butterflies and other insects and reptiles are out in full force enjoying a safety zone. A few days ago on an overcast morning, Miranda identified birds that were around us: nuthatches, crows, song sparrows, a Lincoln sparrow, spotted towhees, California towhees, a kingfisher, a pair of mallards, a raven, white crowned sparrows, a thrush, lesser goldfinches, house finches, waxwings, robin, scrub jays, mockingbird, house wren, yellow rumped warbler, ruby crowned kinglet, and more that I can’t remember or didn’t see.
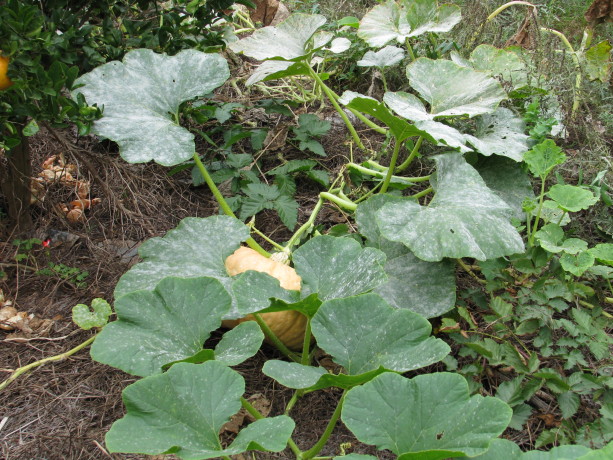
Squash! 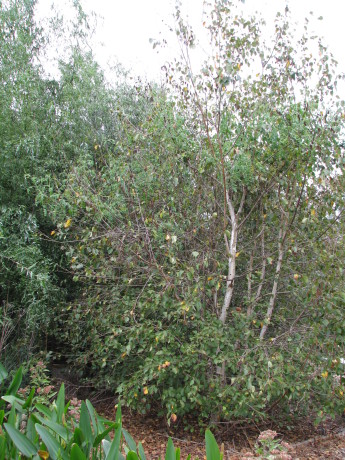
This birch has strange red fruit in its top boughs… 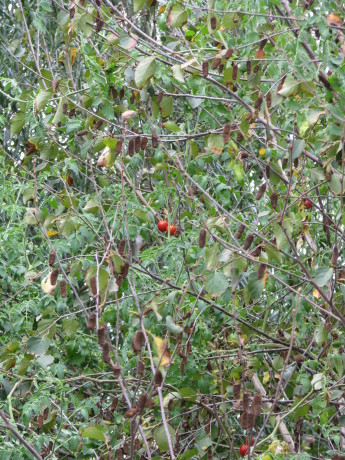
…a volunteer cherry tomato that is fruiting inconveniently ten feet up. Birds have identified our property as a migratory safe zone. No poisons, no traps. Clean chemical-free pond water to drink. Safety.

Squash and gourds happily growing out of the hugelkultur mound. 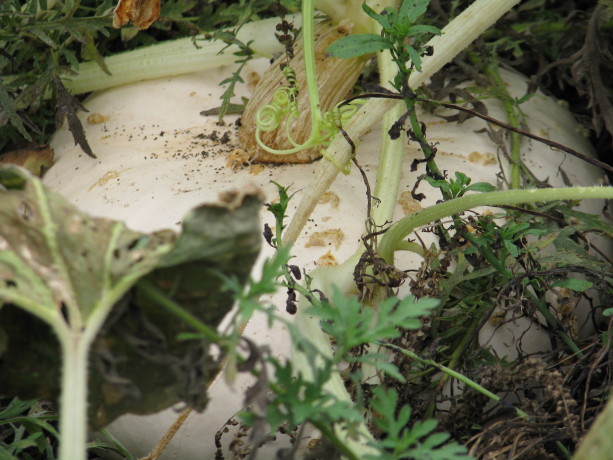
A surprise pumpkin hiding in the foliage. 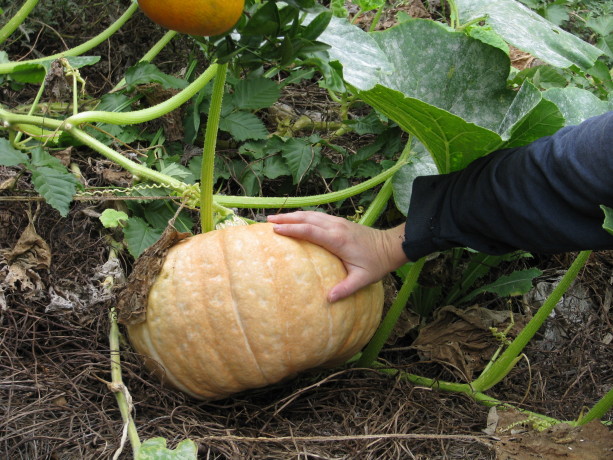
A huge and lovely gourd. 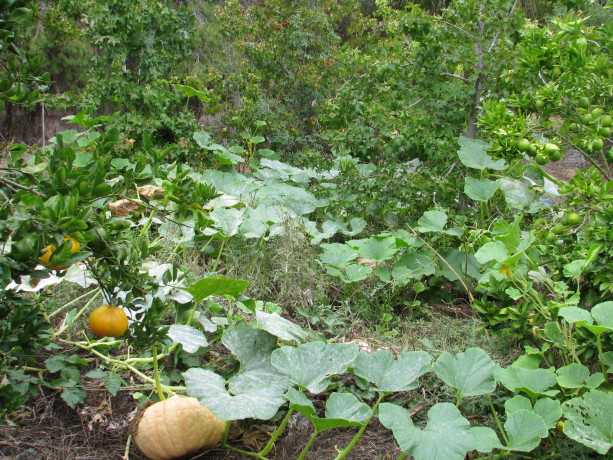
Vines taking advantage of vertical spaces by going up the trees. You can provide this, too, even in just a portion of your property. The permaculture Zone 5.
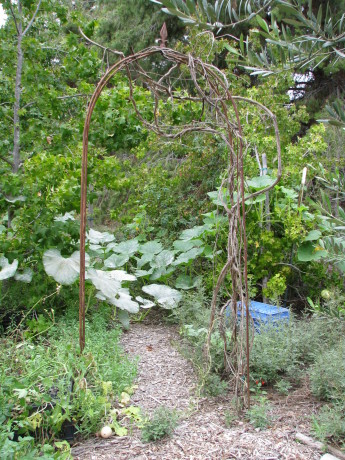
Why did the gourd cross the road? To climb up a liquidamber, apparently. 
A glimpse of pond through the withy hide 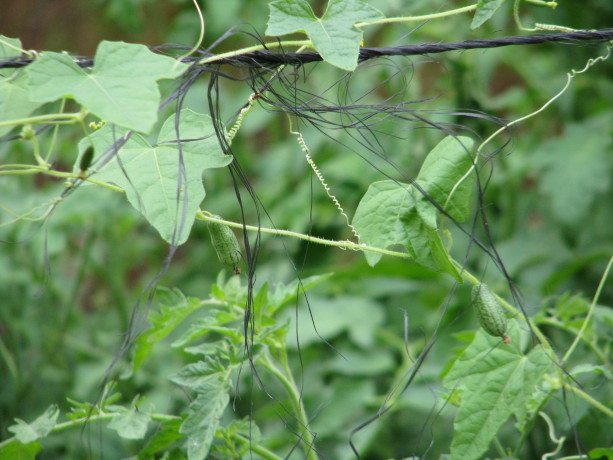
Mouse melons on a tiny vine. More cucumber than melon, they grow to be olive-sized. 
Time for me to get in the water and trim back the waterlilies before the water temperature drops! 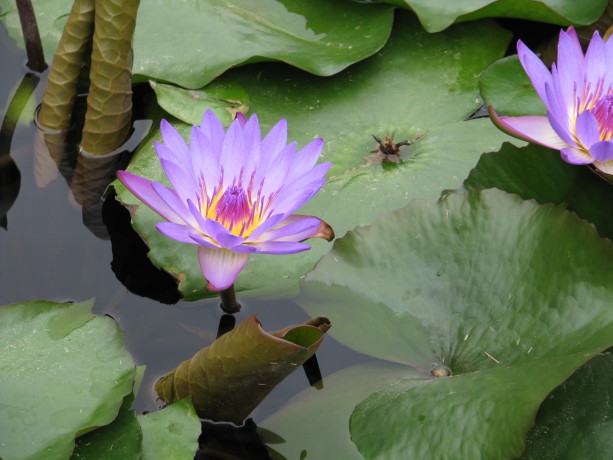
Purple water lilies in the pond. I’m indulging in showing you photos from that overcast October morning, and I hope that you enjoy them.

Eden rose never fails. 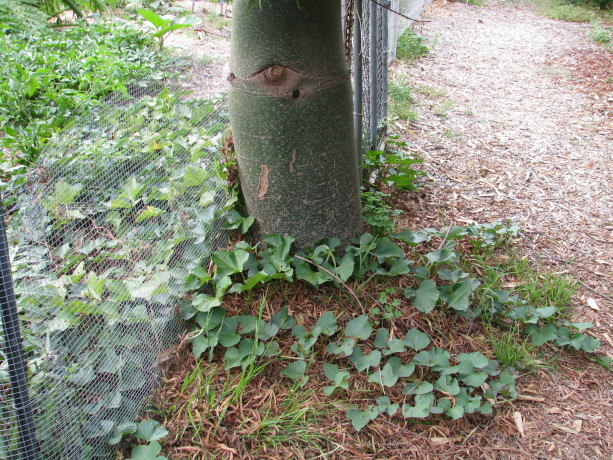
Sweet potato vines escaping the veggie garden; the leaves are edible. 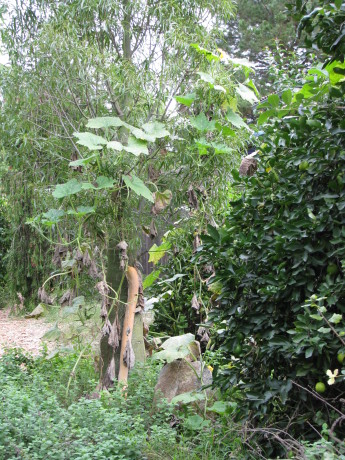
See the long tan thing on the trunk? That’s a zucchino rampicante, an Italian zucchini. Eat it green, or leave it to become a huge winter squash. 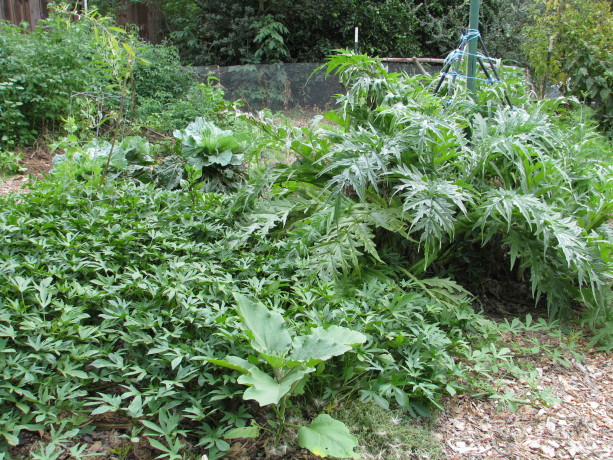
Violetta artichokes regrowing in our veggie garden, with a late eggplant coming up through sweet potato vines. - Animals, Bees, Birding, Compost, Fungus and Mushrooms, Gardening adventures, Health, Heirloom Plants, Houses, Hugelkultur, Microbes and Fungi, Natives, Other Insects, Perennial vegetables, Permaculture and Edible Forest Gardening Adventures, Ponds, Predators, Quail, Rain Catching, Recycling and Repurposing, Reptiles and Amphibians, Soil, Vegetables, Water, Water Saving, Worms
My Plea Against Gravel
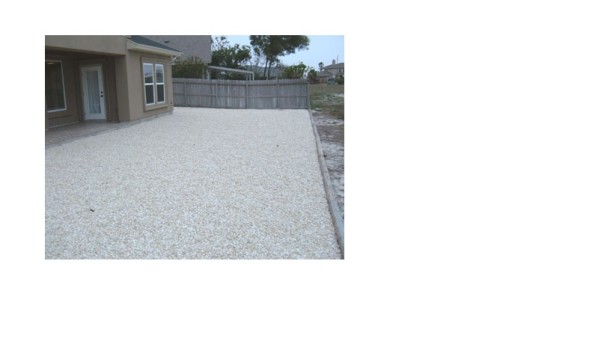 Here in Southern California, as in many other areas, we are finally legally recognizing the drought. There are rebates in place for those who take out their lawns, and here in Fallbrook there is a 36% water reduction goal. Many people just don’t know what to do with all that lawn. A very unfortunate continuing trend is to dump half a ton of colored gravel on it. Please! NO! First of all, once down gravel is nearly impossible to get out again. Gravel, like all rocks, is thermal mass. Instead of having a large rock heating up and radiating out heat, with gravel there are tens of thousands of surfaces radiating out heat and reflecting light and heat back up. It is the worst kind of hardscape. All that reflected heat and light heats up your home, making you use your air conditioner more frequently which is a waste of energy, and also dries out the air around your home. Desertification reflects light and heat to a point where moist air moving over a region dries up. There is less rain, or no rain. Most trees and plants trap humidity under their leaves. Gravel reflects light and heat back up under those leaves and dries them out, sickening your plants and trees. Pollen travels farther on humid air; it can dry out quickly. If you are relying on pollination for good fruit set between trees that are spaced far apart, then having some humidity will increase your chances of success.
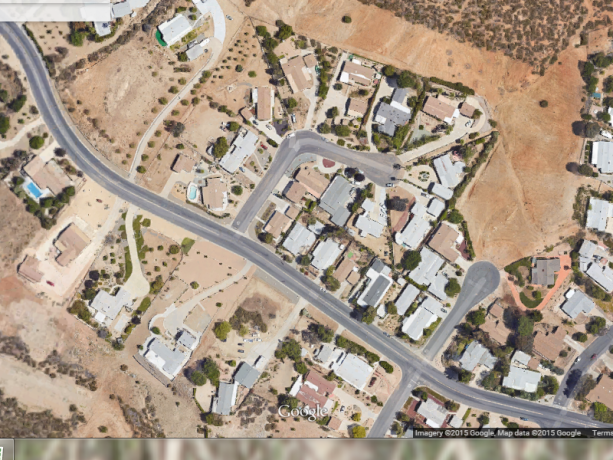
An area of Wildomar, surrounded by hillsides of chaparral that hasn’t been destroyed. These homes have mostly gravel yards and denuded, compacted backyards. Very little rain penetrates, and all the weeds that nature sends it to help repair this gash in the earth are promptly poisoned. This is death to us and our planet. By laying gravel you are turning soil into rock-hard dirt, because microbial life cannot live closely under it. That robs any plants you have stuck into the gravel of the food they need from the soil, which is opened up through microbial activity. You are adding to the heat value of the hardscape around your house causing you to cook in the summer and use more air conditioning. You have reduced habitat to zero. You have added to global warming by reflecting more heat and light into the sky. Although gravel is permeable, usually the ground below it bakes so hard that rain doesn’t percolate. I’ve read sites that want to you increase the albedo effect by laying gravel. In the short term albedo helps cool the atmosphere, but as a result of too much reflected light dries everything out. Think of the dark coolness and dampness of forests… that are now bare ground.
What do you do with your lawn instead? There are many choices that are so much better for the earth and your quality of life. First step, cut swales on contour on any slopes for best rain harvesting. Flat lawn? Easier still. Turn your lawn into a beautifully landscaped lush native garden. I’m not talking about a cactus here and there, but a creation with the awesome native plants we have in Southern California. Some of them such as Fremontia can die with supplemental summer water!

A beautiful border and plantings of California natives. Very low water use here, and very high habitat! There is a chocolate daisy that smells like chocolate. Oh yes. And how can you not want to plant something called Fairy Duster or Blue-Eyed Grass? A native landscape planted on soil that has been contoured to best catch and hold water, and amended with buried wet wood (hugelkultur), will give much-needed food, water and breeding grounds to countless birds, butterflies, native insects and honeybees.
Or put in a pond. Wait, a pond during a drought? Yes! Ninety-nine percent of California wetlands have been paved over, drained or are unusable. Where are all the animals drinking? Oh, wait, we are in the epicenter of extinction, mostly due to wetlands loss. There are very few animals left that need to drink. Those that are left have to take advantage of chlorinated water in bird baths and swimming pools. The microbially rich and diverse clean, natural water that fed and sustained life is just about gone. So what can you do? If you have a swimming pool, you can convert it either entirely to a pond, or into a natural swimming pool that is cleaned by plants.
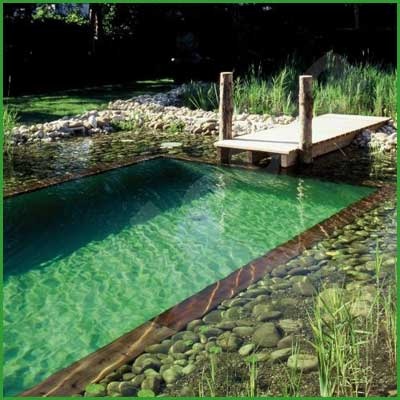
A natural pool upgrades your pool to a lovely pond without the use of chemicals. Suddenly instead of having this expensive eyesore that you use only a couple of months a year and pour chemicals into year-round, you have a lovely habitat that you want to sit and watch, and even better, swim in safely without turning your hair green or peeling your skin. You don’t need to clean the pool all the time, and you don’t need to put in chemicals. If you are in the San Diego or Los Angeles area, call Dr. Robert Lloyd of PuraVida Aquatics for a consultation and conversion. If you don’t have a pool, then build one that is cleaned by plants and fish. You don’t need a filtration or oxygenation system because the biology does it all. Where do you get the water from to top off your pond?
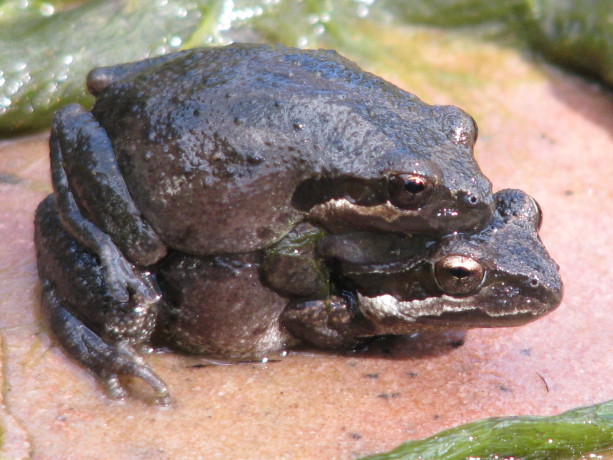
Native Pacific Chorus Frogs enjoying our clean pond at Finch Frolic Garden. Connect your pond to a lovely, planted stream that is connected to your laundry water or graywater system. You are buying water every day, so why not compost your water through phytoremediation and have a pond full of great healthy chemical-free water that is wonderful to look at and is an oasis for thirsty animals and insects?
Or install a food forest. With good soil building and rain catchment first, and planting in guilds with sheet mulch around trees and on pathways, you will be using a fraction of the water you pour on your lawn and yet harvest lots of food. Too much food? Share it with a food pantry!
Or start a veggie garden without digging any sod.

Create a lasagna garden right on top of the lawn and start growing immediately. Layer cardboard, sticks, grass, food scraps, leaves, more grass, more food scraps, more leaves and top it with about 8 inches of good soil, then plant right in it! That lovely standing compost heap will slowly turn into good soil while killing the grass beneath and growing crops for you immediately.
If ridding yourself of a lawn just breaks your heart, then substitute the high-water use grasses for a native grass mix that is comparable. Look at S&S Seeds for prices or for seed choices. Water a few times with Actively Aerated Compost Tea using any rainwater you may have caught in those 50-gallon containers and your grass roots will travel so deeply that they will find groundwater. Check up on the work of soil microbiologist Dr. Elaine Ingham and see how easy AACT is to make and use.
There are so many alternatives to using gravel that aren’t expensive, that are an investment in your property and in reclaiming habitat while beautifying your home and saving money. So please, just say, “NO,” to the gravel. Tell a friend!!
Which one of these would you rather live in? Which do you think is better for the earth and for the future generations?

Finch Frolic Garden, year 3. - Gardening adventures, Heirloom Plants, Permaculture and Edible Forest Gardening Adventures, Ponds, Recycling and Repurposing, Seeds, Vegetables
Vertical Space
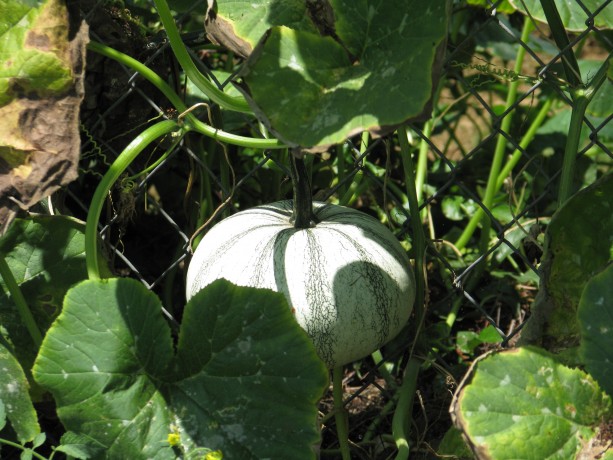
Pipian From Tuxpan squash, from Baker Creek Heirloom Organic Seeds. When planning a garden for lots of any size, be especially aware of vertical spaces. Have an unsightly fence? A wall that needs protection from the sun? A hot, bright patio? All of these areas are perfect for growing vertically.
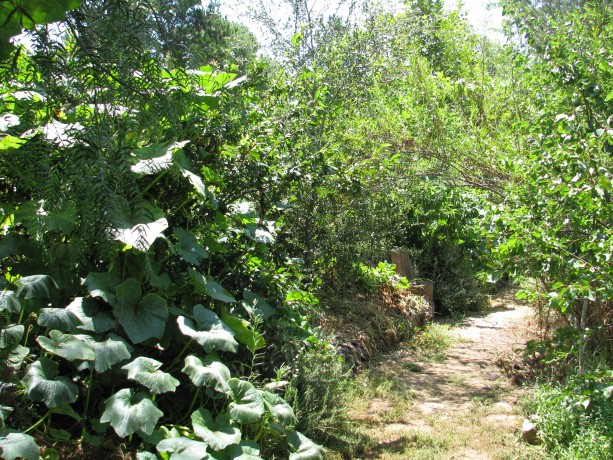
A Canada Crookneck climbs over a plum tree. For an existing wooden fence, string wires vertically or in a crossed pattern, depending upon what you will be growing. For a chain link fence… just plant! You can certainly grow annuals such as beans, squash and peas, but for perimeter fences I’d advise long-term plants that fill other functions as well. Heirloom climbing roses can cover a fence, create a barrier for trespassers, provide habitat, be ascetically pleasing, and provide edible flowers and vitamin C-rich hips. Remember that in permaculture everything should serve at least three purposes.

Passionfruit vines work beautifully on overhead trellises. Wire is strung the length of the trellis, with shade cloth over the top. The vines don’t need any help to fill up the gaps. Passionvines are evergreen perennials with rampant growth and provide good crops of heavenly-smelling nutritious fruit, as well as being the host plant to the Gulf Fritillary caterpillar. Even the perennial scarlet or golden runner bean would provide you with food and flowers for about six years.
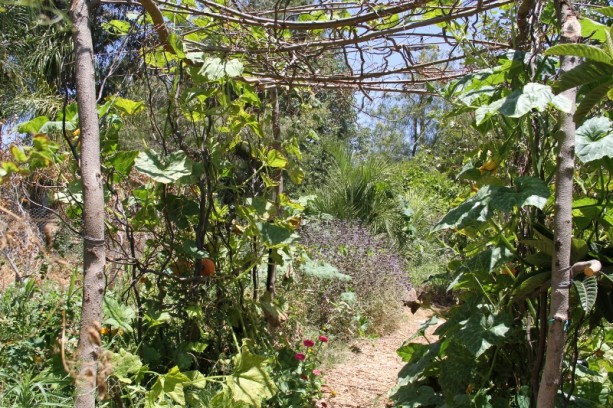
This curly willow trellis we put up in late spring and planted squash along both sides. The squash love the trellis, and the trellis adds a nice touch to the pathway. Do you have a cement porch or patio where the sun reflects heat and brightness into your house in the summer? Cover it with a simple trellis, sturdy enough to hold vines. There are many ornamentals that would work (wisteria, trumpet vine, virgin’s bower, morning glory, etc.), but think about passionfruit, kiwi or grapes. Outside a west-facing wall is a perfect place for a planted trellis, that will help cool that side of the house during the summer. The sides of sheds can be used vertically, either with simple wire that can be removed later or with wooden lath (preferably recycled).
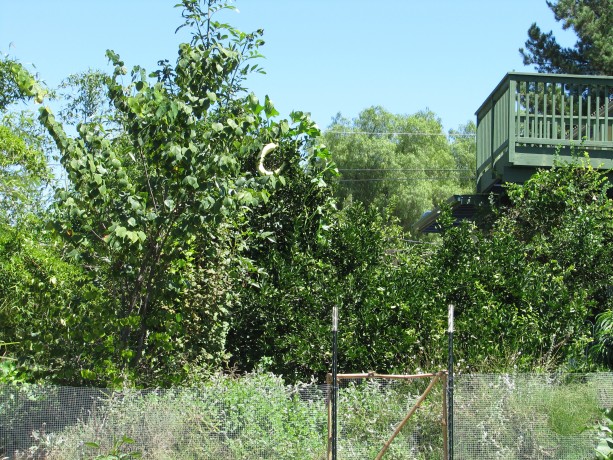
Strange fruit in this lime tree? 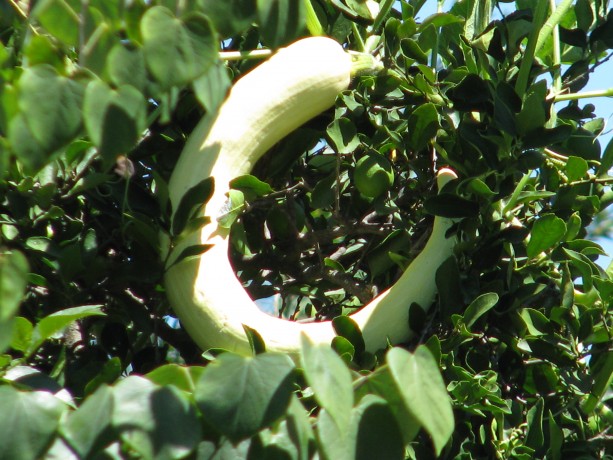
Yes! Its a zuchino rampicante vine. This heirloom zucchini can be eaten green, or if allowed to age will harden into a uniquely-shaped winter squash. If you have existing trees, use them as vertical space. One faction of a plant guild is a vine. Vines act as groundcover, shading the soil and retaining moisture while producing mulch. Vines also can grow up trees and help shade their trunks from weather extremes.

A Canada Crookneck climbs over a plum tree. Meanwhile the fruit and vegetables are off the ground and won’t suffer the predation by animals or ground insects that it may normally receive. Plus, it is fun to see squash up in a tree.
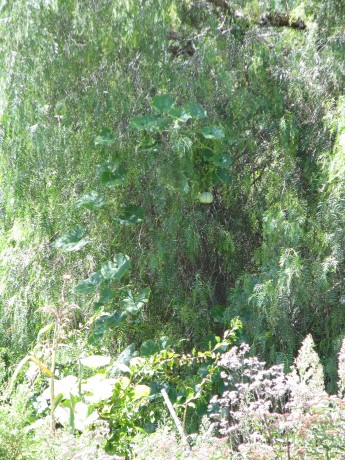
Um… that is definately a pepper tree. But what is hanging in it? 
Strange fruit, indeed! A small fence around your kitchen garden is inexpensive, recyclable, keeps nibbling critters out, and can double the size of your growing space.
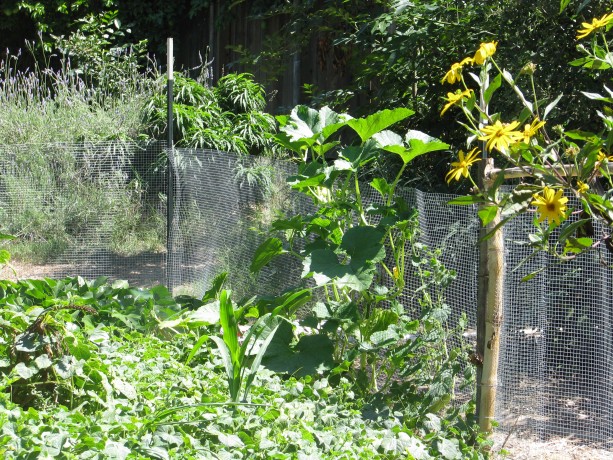
T-posts and hardware cloth around the kitchen garden adds so much more growing space, and keeps critters out. Delicata squash is enjoying the late summer sun. One project that I’d like to do this winter (just one? Ha!) is to nail up old rain guttering on the outside of my little shed and make a small natural pond at the base. I’d plant the gutters heavily with strawberries, and maybe greens, and then install a pump that circulated water from the pond up to and through the gutters. The water would then empty back into the pond. The fish and plants in the pond would be fed and happy, the plants in the gutters would be watered and fertilized, and I’d have unnibbled strawberries that were easy to pick, as well as repurposing the old gutters.
Please choose only organic, and if possible, heirloom seeds. It is so important to not poison the wildlife and ourselves with chemicals and plants whose DNAs have been tampered with to withstand more chemicals. I buy from Baker Creek (the catalog is to die for.), Seeds of Change, organics from Botanical Interests , from organic seed savers and from Peaceful Valley Organics (which have terrific prices on high-quality bare root plants such as strawberries!).
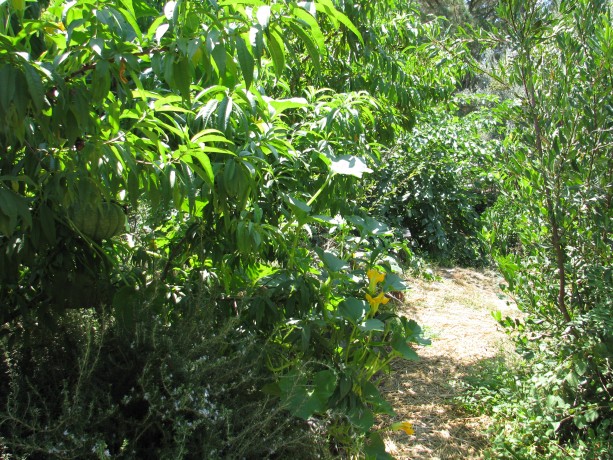
More squash helping shade the trunks and the soil around a nectarine. So when planning your next season’s garden, don’t just think outside of the box, but think of growing up the sides as well!
- Animals, Bees, Birding, Books, Building and Landscaping, Chickens, Cob, Compost, Composting toilet, Fungus and Mushrooms, Gardening adventures, Heirloom Plants, Hugelkultur, Humor, Living structures, Natives, Natural cleaners, Other Insects, Permaculture and Edible Forest Gardening Adventures, Ponds, Predators, Quail, Rain Catching, Recycling and Repurposing, Reptiles and Amphibians, Seeds, Soil, Water Saving, Worms
Permaculture Lectures At Finch Frolic Garden, June 2014
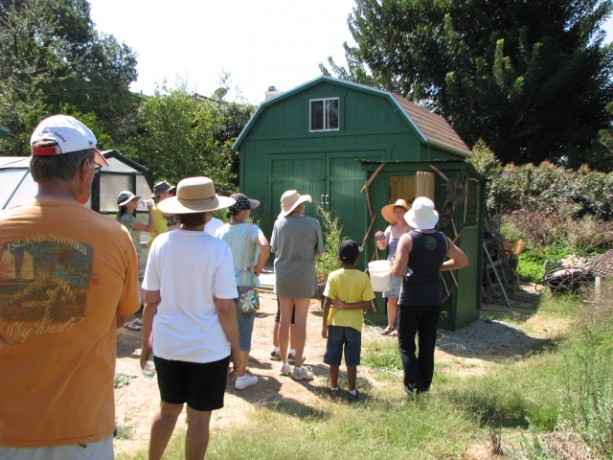
Tour Finch Frolic Garden! Permaculture Lectures in the Garden!
Learn how to work with nature and save money too
Finch Frolic Garden and Hatch Aquatics will present four fantastic, information-filled lectures in June. Join us at beautiful Finch Frolic Garden in Fallbrook, 4 pm to 6 pm, for refreshments and talks on…
Saturday, June 7: Introduction to Permaculture and Finch Frolic Tour: We’ll take you through the main precepts of permaculture and how it can be applied not only to your garden, but to yourself and your community. Then we’ll tour Finch Frolic Garden and show rain catchments, swales, plant guilds, polyculture, living buildings and so much more.
Saturday, June 14: Your Workers in the Soil and Earthworks: Learn the best methods for storing water in the soil and how to replace all your chemicals with actively aerated compost tea and compost.
Saturday, June 21: Aquaculture: You can have a natural pond – even in a tub! How natural ponds work, which plants clean water and which are good to eat. Even if you don’t want a pond, you’ll learn exciting information about bioremediation and riparian habitat.
Saturday, June 28: Wildlife in your Garden: What are all those bugs and critters and what they are doing in your yard? We’ll discuss how to live with wildlife and the best ways to attract beneficial species.
Your hosts and lecturers will be
Jacob Hatch Owner of Hatch Aquatics. With years of installing and maintaining natural ponds and waterways, and a Permaculture Design Course graduate, Jacob has installed earthworks with some of the biggest names in permaculture.
Miranda Kennedy OSU graduate of Wildlife Conservation and wildlife consultant, Miranda photographs and identifies flora and fauna and maps their roles in backyard ecosystems.
Diane Kennedy Owner of Finch Frolic Garden, lecturer, consultant, Permaculture Design Course graduate, former SDC Senior Park Ranger, Diane educates homeowners on how to save money and the environment while building their dream gardens.
Each class limit is 50 attendees, so please make pre-paid reservations soon before they fill up. Fee for set of four lectures and tour is $45 per person. Single session fee is $20 per person. Contact Diane Kennedy at dianeckennedy@prodigy.net for reservations and directions.
You will not want to miss this fascinating and useful information!
- Arts and Crafts, Gardening adventures, Humor, Permaculture and Edible Forest Gardening Adventures, Water Saving
Remodeling the Outdoor Sink
I’m thrilled with my outdoor sink. I love it. It is my friend. It is my old kitchen sink, stubbornly hauled around the property until I finally was able to put it on an old fishtank stand and hook it into the waterline out in the garden. Even better, Steve, who used to work here and who was responsible for the Mock Pavilion, modified the stand so that the sink fit down into it more securely. Any water used would be caught in buckets underneath (with long sticks in them so that any creature that falls in can crawl out again), which I would pull out and empty.
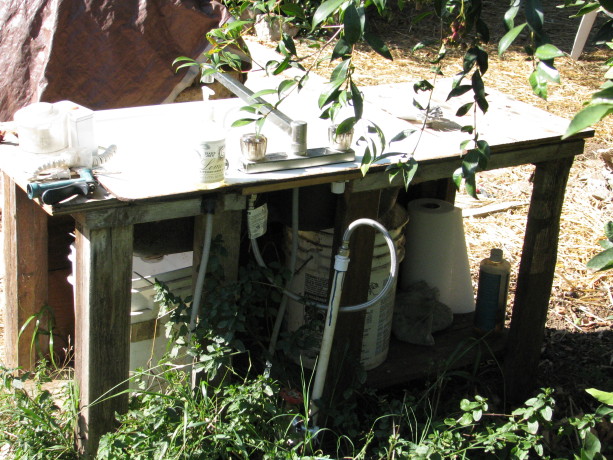
The buckets are just another heavy thing with which I had to deal. There had to be another way. A problem with the sink being set down into the stand is that the underside of one of the drains now sat slightly into a bucket, so I’d have to tip the bucket to get it out. Wrestle it out would be the better term, usually becoming wet with old sink water in the process. Throwing a 5-gallon bucket of water somewhere lost its charm quickly, especially as I was the only one emptying, but not the only one filling. Something had to be done. When I made the area next to the Fowl Fortress into an apple tree guild, I now had an area which could use extra water. The sink needed to be moved. Last week I finally did it, and I have to say, I’m pretty smug about how.
I am a disaster with a saw, but I’m pretty experienced with old PVC pipe and Red Hot Blue Glue (all those sprinklers I’ve mowed down over the years). I leveled a place next to the coop and placed some old plywood on it, both to help steady the sink stand and to keep weeds down (and to use up the plywood).
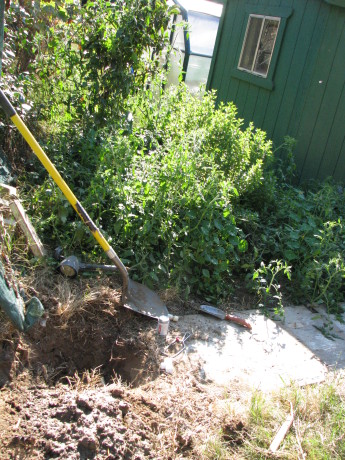
I dug up the water line and placed plywood on a leveled area. I dug up the water line, turned off the irrigation water, opened other faucets to drain and then cut into the pipe. Then I discovered the real pipe beneath this old dry one, and dug it out and cut into it, allowing it to drain as well before connecting a tee.
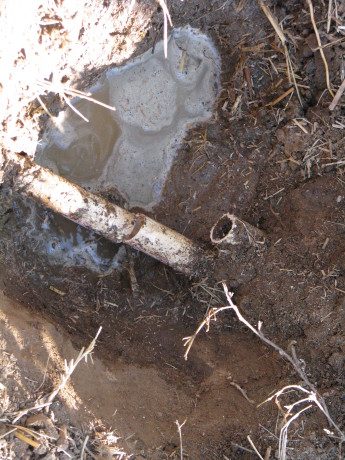
Beneath the old pipe was the real one. The hens were all pressed against the side of the coop trying to see what I was doing, and desperately wanting to search for bugs in the dirt I’d just dug up. Sorry girls.
I laborously walked the rather heavy and unevenly weighted stand (the sink isn’t in the center) over to the plywood. Then I walked it off again, adjusted, and walked it back. Then I adjusted again. Then I had a sit-down and wondered what my chiropractor was going to say.
Now came the fun problem-solving part. The drains from the sink were open, so how to catch water and send it off into the guild, without spending a bunch of money? The vision came to me from out of the blue: plungers. Some people have visions of how to earn lots of money, others have visions of how to change the world for the better. My imagination provides me with plungers. Yep.
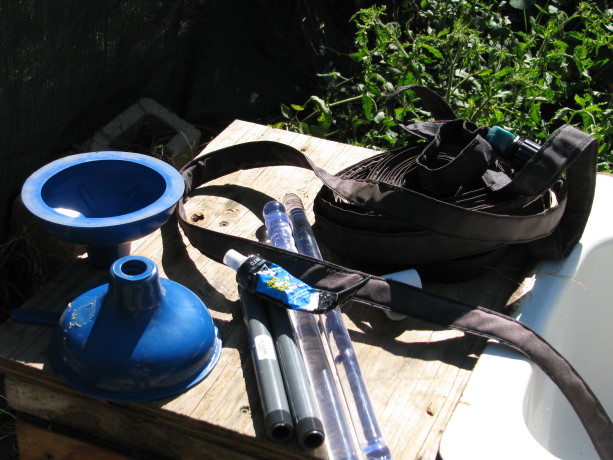
Supplies. I learned from my collegiate daughter, and the hardware store cashier, that plungers were nicknamed ‘magic wands’. No matter how much I learn each day, I’m always in the dark on the important things. However, I felt pretty proud of myself and was excited to get started. I rooted through my barrel of old PVC left from the former owners (I’ve lived here over 14 years and the PVC was already old then) and through my fittings. I only needed a couple new fittings and the plungers from Joe’s Hardware. The plungers had blue cups and clear handles, not the wooden-handled, black-cupped manly plungers of my imagination. If wizards had plungers, I could see them using these. Well this would be a female version and blue is my favorite color.
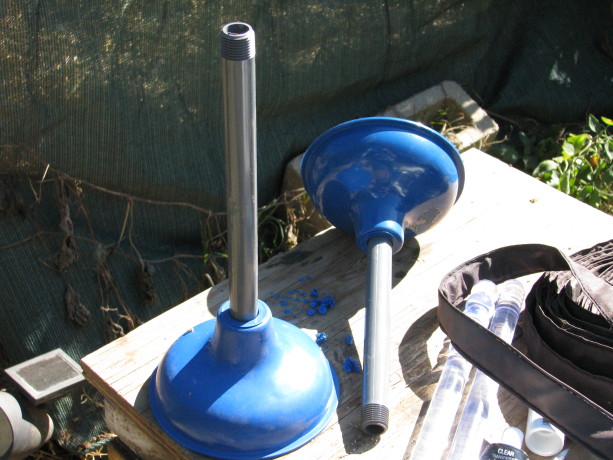
I screwed in threaded 1/2″ risers and tried them as is, but they leaked, so I put silicone gel around the threads and tried again. It worked after the gel dried. Knowing that the thread of the plunger handle wasn’t the same thread as a PVC riser (how do I know these things? Am I channeling some long-dead plumber??) I grabbed silicone sealant I had recently purchased to seal up leaks in a small fountain so that it would work during garden tours (the sealant worked, but then the motor failed. Sigh.)
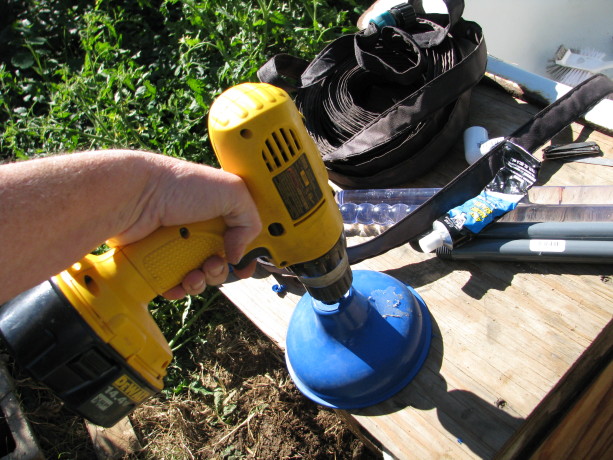
Drilling drain holes in the plunger cups. I had expected to find plunger heads and handles sold seperately, and remembered seeing plungers with threaded holes all the way through. I must have been flashing back to the cheap supplies offered to the parks department when I was a Ranger because all I found at Joes were complete, and the holes were covered (better suction). I drilled through the rubber to make the drain hole (which created some very cute blue rubber curls).
I connected up most parts, but then came the challenge, to space the plungers the correct distance apart, and measuring is not my thing. It seems simple, but it never works for me. My ginko must have kicked in, though, because I realized that I could just place the plungers over the sink holes on top and build it up there, and of course it would be the correct distance underneath.
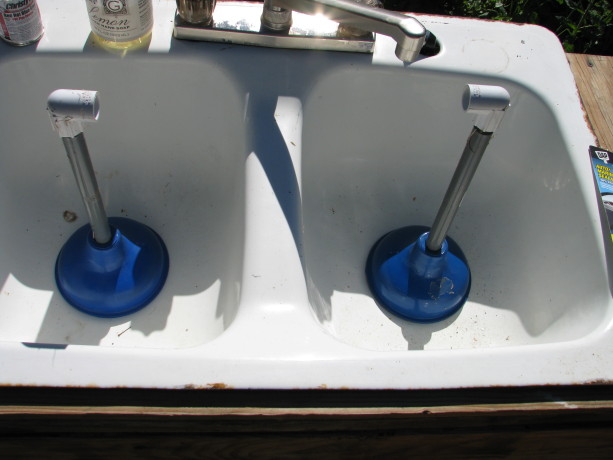
Ha! I didn’t have to lay in the tomatoes and work around the legs in the back! I could do it on top and still get the length right. I’m still proud of figuring that out.
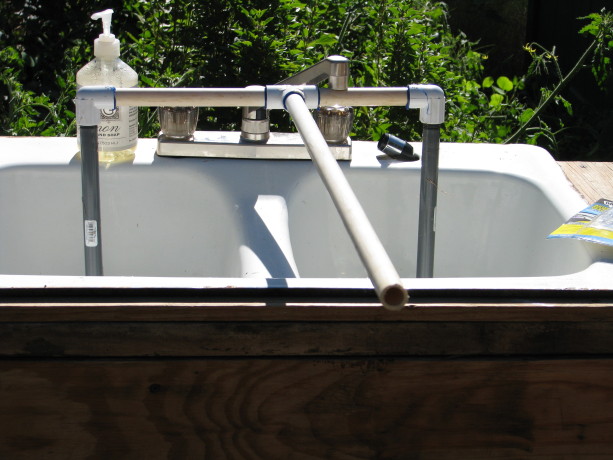
All ready to go. The trick really was to get this thing in place around the support legs behind the fishtank stand! 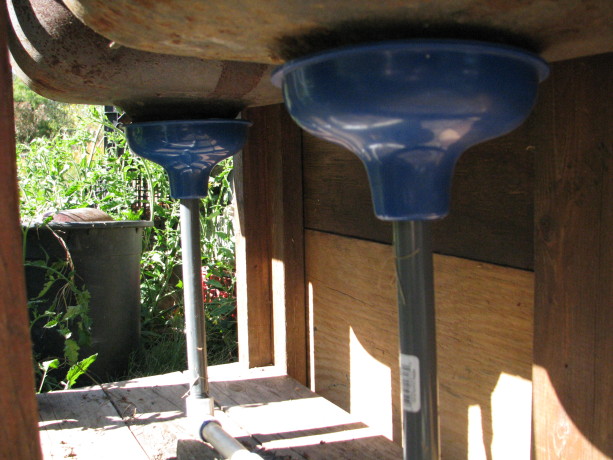
My beauties. My plan was to screw it into a soaker hose that I already had, but I worried that without water pressure it wouldn’t work. It didn’t.
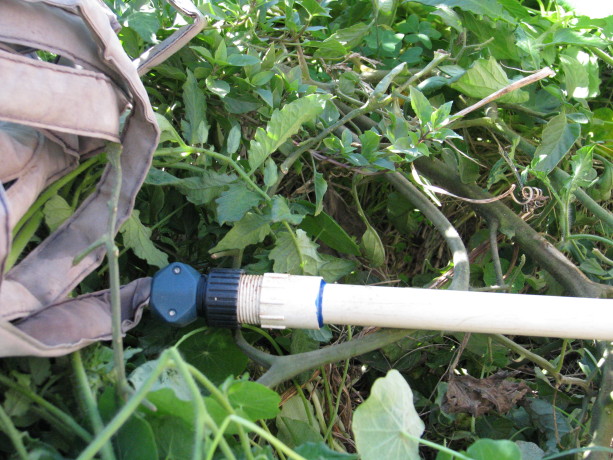
The soaker hose idea failed because of the lack of water pressure, and caused the water to back up and overflow the plunger cups. I removed the screw end from the PVC and glued on more 1/2″ pipe so that the water would directly empty near the apple tree.
There were a few other tweaks, such as widening the drill holes in the plunger for better water drainage, propping the pipe up on a piece of wood so that it fit the drains more securely (it isn’t fastened onto the stand so that if I had to access the plunger cups I could do so easily), and placing screen over the drains so no one would lose a ring down into the device.
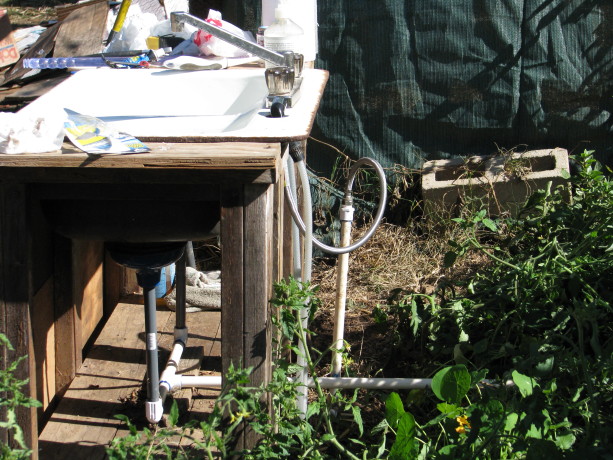
Now the water drains directly into the bed. Tip: glue the long pieces on once the main part is in place under the sink. Plants will grow up around the back of the sink to hide it from view. Now it all works, I have less work to do, no yucky buckets to haul, the apple tree receives greywater, I repurposed several items and although I had to buy a few things, I supported a local business, the sink is in a better location, and I like the blue color of the plunger cups.
Best of all, now I have some snazzy clear handles to use for some other project!
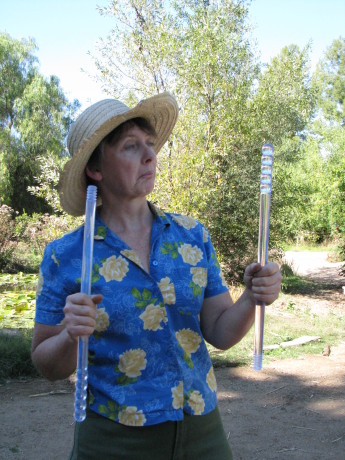
Hmm. Threaded magic wands! I wonder how I can repurpose these beauties?! - Animals, Chickens, Cob, Compost, Composting toilet, Fruit, Gardening adventures, Giving, Grains, Health, Herbs, Houses, Hugelkultur, Humor, Living structures, Natives, Natural cleaners, Permaculture and Edible Forest Gardening Adventures, Ponds, Rain Catching, Recipes, Seeds, Soil, Vegan, Vegetables, Vegetarian, Worms
San Diego Permaculture Convergence, Nov. 9 – 10, 2013
There is a fantastic, information-packed permaculture convergence coming up at the beautiful Sky Mountain Institute in Escondido.
 It will be two days packed with great information for a very reasonable price; in fact, scholarships are available. Check out the website at convergence@sdpermies.com. On that Sunday I’ll be teaching a workshop about why its so important to plant native plants, how to plant them in guilds using fishscale swales and mini-hugelkulturs. Come to the convergence and be inspired!
 - Animals, Bees, Birding, Gardening adventures, Heirloom Plants, Other Insects, Permaculture and Edible Forest Gardening Adventures, Quail, Seeds
Growing Birdseed: Love Lies Bleeding Amaranth
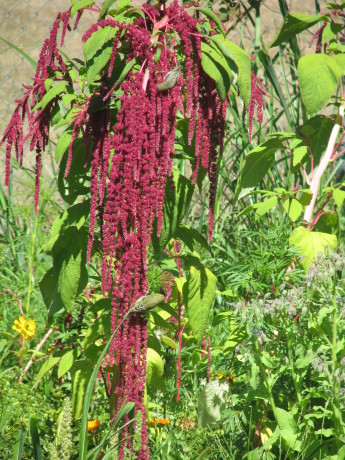
Love-Lies-Bleeding amaranth is a dramatic addition to your garden… ask a bird! We’ve participated in Cornell University’s winter Project Feederwatch for about six years. It is a volunteer amateur scientist-type program where, from November through March, you fill bird feeders and two days a week count how many birds come. Then you report your results on an online form. This helps trace changes in migration patterns and in habitats in wild birds, as well as sitings of diseased birds.
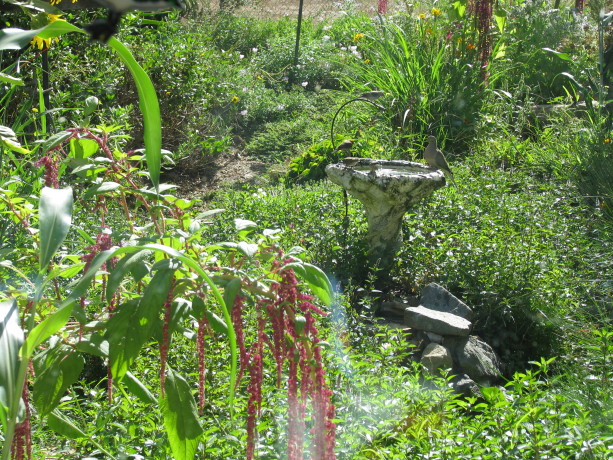
The sound of dripping water attracts birds more than food does… from long distances, too. This year I found out that most birdseed is contaminated by insecticide; some brands are reported to have illegal levels of pesticides in them. Geez! How am I going to get around that problem? I’m not sure about this winter, but I’m going to grow more of my own birdseed. In the past we’ve rolled pine cones in peanut butter and hung them out for woodpeckers and many other birds. I’ve also grown sunflowers, for both their seeds and for their leaves, which lesser goldfinches just love to eat! This year I planted heirloom Love Lies Bleeding Amaranth (Amaranthus caudatus) to some pretty spectacular results. Yes, this is one of the types of amaranth that produces an edible seed for humans; the leaves are edible as well. It can grow 3 -6 feet, with long ruby-red falls of seed heads that the birds just love.
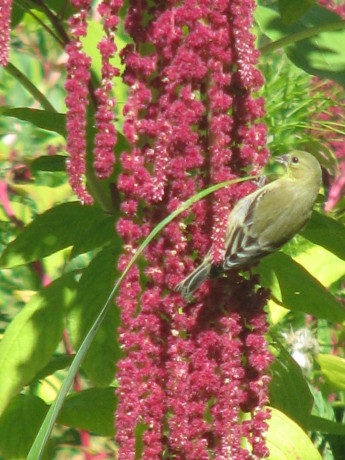
One of our Finch Frolic Finches feeding! There are many other amaranths to grow for both your own consumption as well as for the birds. Sometimes you grow it for yourself and end up feeding the birds! Of course there are many plants which attract hummingbirds all year, especially those with tubular flowers. Why do you want to attract birds? Besides their right to habitat, and their appeal to our better selves, all native animals play important roles in the preditor/prey relationship in a healthy garden. The birds may eat some of your produce, but they are also eating large amounts of bugs. They are also pooping, and you know how valuable poop is to any garden! If you plant a bird garden away from your vegetable crops, then plant your veg crops using the polyculture method, you will have birds and food for yourself as well. Please, please don’t put up those dangerous tree nets! They tear apart your trees when you try to remove them, they don’t really work, and birds can be stuck in them. When they are on the ground snakes are trapped in them! No plastic netting. Ever. Please!
Try planting some amaranth – especially this one with the dramatic name and dramatic fall of color – next spring when you plant a bird garden. Or in your edible forest garden and plant guilds. Or between your fruit trees, or along the back of your flower beds. Take a nibble for yourself if the birds will let you!
- Animals, Bees, Chickens, Gardening adventures, Other Insects, Permaculture and Edible Forest Gardening Adventures, Quail, Seeds, Soil, Vegetables
Protecting the Little Guys… and a little about diatomaceous earth
When transplanting little plants out into the big garden it feels like sending your child off to their first day at Kindergarten. All kinds of things can happen to them in the big world. For children… that’s too large a topic for me (Kindergarten mother survivor here). For plants I can give you some advice.
Besides watering too much or too little, and root disturbance while transplanting, little guys can be eaten by bugs, birds or other animals, or simply get lost and overlooked. (Here is a container growing tip: as your seedlings sprout and grow, gently pass your hand across them every time you are with them. It will make for stronger stems.) (And its fun!)(And you can pretend you’re ruffling their hair and say things like, “Hi, Sonny.” Or not.)
A day before transplanting out of a container or from a nursery bed, water the sprouts well. If they’ve been in containers for awhile those roots may be going in circles and the water can’t penetrate from the top very well. If that is the case, put the pots in water for half an hour until moisture is wicked into the pot thoroughly, then allow to drain. I say to do this the day before because if you water just before planting the soil around your root ball will fall apart, breaking fine hair roots and shocking your poor little guy. Some plants hate their roots being touched so much that this would kill them. By the next day after watering the container will still be moist, but the soil should be solid enough to stick together when tipped out.
Dig a hole twice as wide and twice as deep as your plant, then backfill with a mixture of good compost and the soil from the hole. This will help acclimate the roots to the soil change. Water the hole, and if you’re really industrious water with compost tea. Set your plant into the hole and firmly press the soil around the plant. If you are planting tomatoes, eggplant or peppers (all in the same family) you can set the plant more deeply into the hole; they will form more roots from the stems and become sturdier. The rule of thumb otherwise is to plant so that the soil level of the hole is the same as that of the transplant; many plants will rot if soil is up against their stem. If it is too low, the roots will be exposed and dry out. Potatoes can be trenches and hilled up as they grow, or maybe you will try trashcan or crate potatoes. If you live in an arid area, plant in shallows so that rain can accumulate around the plant. If you live in a wet area, plant on hills so water can drain off. Or if you’re practicing permaculture, plant on the swales!
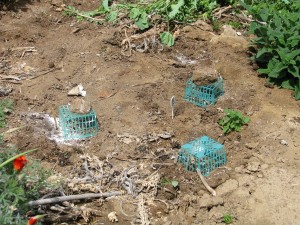
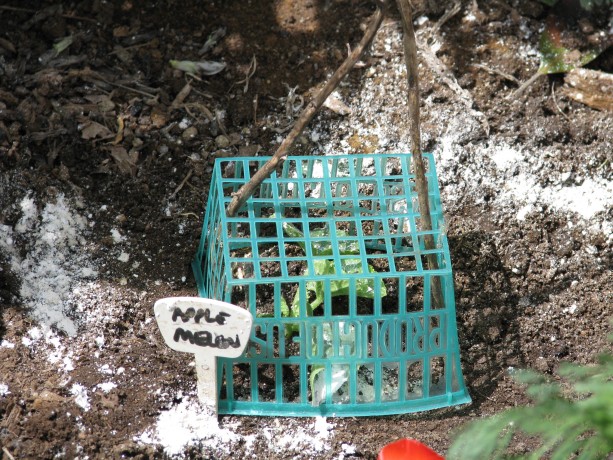
So your little guy is in the ground and gently tamped in. To keep off the birds and bunnies and mice and rats and whatever else is looking for dinner, I use plastic berry cartons turned over and set in place with sticks or with rocks on top. Reuse and repurpose! They are also good for protecting figs . The cartons allow enough sun in, and also makes it very obvious where the seedling is so that you don’t step on it, or weed the little tomatoes out with the almost identical ragweed sprouts. For larger plants, turn over a milk crate.
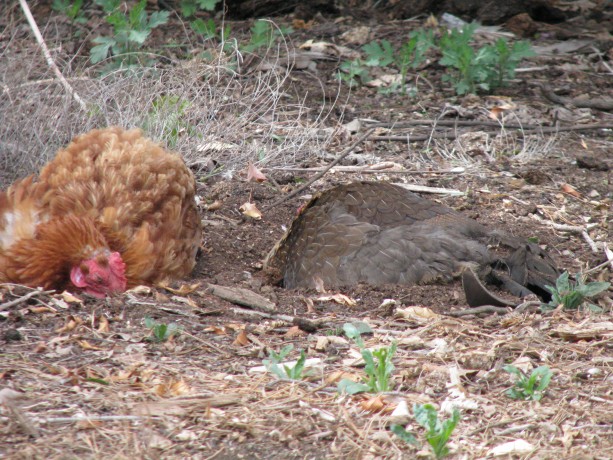
I have no native quail in my yard. Due to nearby houseing developments, there aren’t many quail around me anymore. Quail would fill the niche of beetle and sowbug eaters. My hens want only worms, spoiled things, and their big feet do a lot of damage if not watched.
Sowbugs cluster under mulch and do damage to stems and fruit.
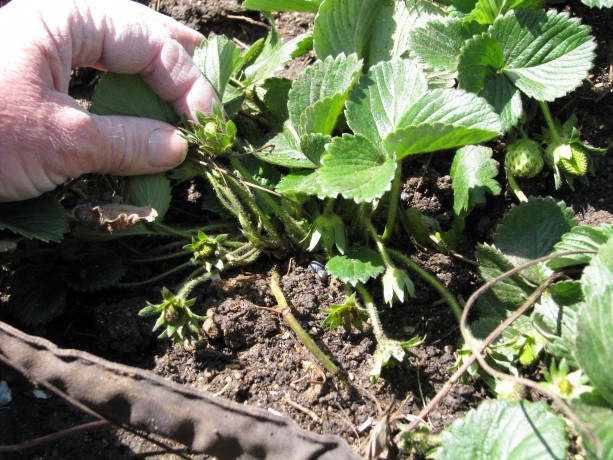
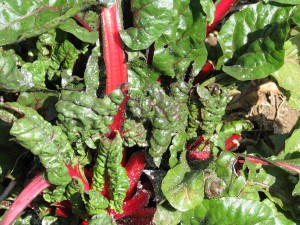
I use a little food-grade diatomaceous earth around the seedlings, new sprouts in the garden, around the strawberry plants, and also around plants such as artichoke, corn and chard where ants have begun to farm aphids.
I use it around the trunks of my stonefruit trees to stop the ants, and have been told that it works well around the legs of beehives in lieu of or in combination with cups of oil to keep out the ants. Diatomaceous earth is the finely ground bodies of ancient sea creatures (diatoms). The powder on a microscopic level is full of sharp edges.
When a sectioned insect such as an ant, flea or sowbug crawls on it, it rasps their tender areas and dessicates them. Not something I really am happy about doing to the bugs. I’m only using it on a very small scale. Remember that any insecticide, even DE, kills many kinds of insects not just the targets. You don’t want to eradicate your insects; most of them are helping your plants and your soil. DE will melt into the soil when watered, but only reapply if you still see the target bugs. The problem might already be taken care of.
Use food-grade DE, not the kind that is sold in pool supply stores. FGDE is used in graineries to keep weevils and other bugs out of grain and beans, so you’ve been eating it for years without knowing it. It doesn’t hurt us, nor is it bad to breathe (some people wear masks that they can get from https://accumed.com/n95-mask-for-sale-respirator-safety-face-mask-z1.html, just in case). It is a great, natural and inexpensive way to fight fleas without paying big money for poisons to put on your pet. I have it all over my cats’ bedding.
They sell DE sprayers, but they become clogged. The easiest and least expensive applicator (which can be repurposed)? A condiment dispenser. You know, the plastic mustard and ketchup squeeze bottles in diners. I bought a set of two for $2. You can practice a little to dispense a finer dust.
So I plant my little guys, give them a drink, squeeze a little DE around them, give them a berry basket hat until they outgrow it, then take it off to use elsewhere. If there is still a threat to your plants from critters (somebody was eating my eggplant leaves last year! I mean, really…ick!), then turn a wire gopher cage over the top or make a wire cage to fit and use sticks or landscape staples to fasten into the ground.. These, too, you can reuse yearly.
- Compost, Composting toilet, Gardening adventures, Hugelkultur, Permaculture and Edible Forest Gardening Adventures, Ponds, Rain Catching, Soil
Rain Catchment Awesomeness (and some BSP)

Water flowed over the stone steps First, a little BSP (blatant self-promotion). There is a wonderful ezine called San Diego Loves Green featuring topical local articles and snippets that reflect on the growing green community here in, you guessed it, San Diego. The San Diego Permaculture Group has an ongoing column, and yesterday I was the guest writer. My article is on the importance of planting natives , with some information that you might find surprising, or that you may have already read in my blog about the same subject. Also (more BSP) if any of you attended the Southern California Permaculture Convergence this weekend, and still yet, if any of you listened to my talk on soil, first of all I’d like to thank you for your attention and attendance, and I hope I answered your questions and solved some problems for you. You can search on my blog for many posts concerning nitrogen -fixing, or 50 Ways to Leave Your Compost , and see my composting toilet (I went to a Garden Potty).
We had almost two inches of rain on Thursday night. In San Diego we rarely receive the long soaking rains that we really need. Instead we must be ready for flash floods. If you are familiar with Finch Frolic and the labors we’ve been undertaking in the last two years to hold the rainwater, then you may be curious to find out how the property survived this last middle-of-the-night flooding and hailstorms. If you remember, not only is there the water flowing off the roof and falling onto the watershed property, but also an unmeasurable amount that is purposely channelled runoff from all the neighbor’s properties that runs through mine.
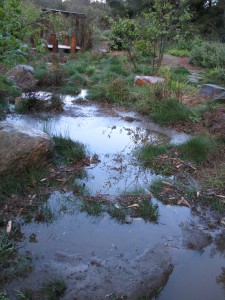
All basins full! Since the permaculture project was installed I haven’t had any of the erosion that plagued the site. As of last year I’m pretty sure that every drop that falls on my property is caught, in rain catchment basins, the ponds, and in the loam and compost in the guilds. The challenge was to also keep all the neighbor’s water on my property as well! I’m thrilled to say that we almost did it!
There is a new bog area being designed by Jacob Hatch just above the big pond.
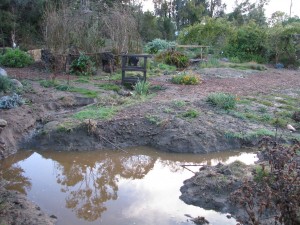
The new bog area This area had been designed to channel overflow water from the rain catchment streams around the pond and down a black tube to the stream bed below. Greedy me wants all that water! With the creation of another silt basin, and now that there is vegetation in the stream to hold onto the silt, I’ve made the water now flow directly into the big pond. There are planned overflows from the big pond, and water did overflow where it was supposed to.
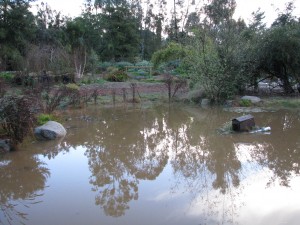
The big pond was filled to capacity, making the duck house do a sinking ship impression because of the length of the rope attached to the anchor wasn’t long enough. The first rain catchement basin was enlarged a lot so as to catch water higher on the property.
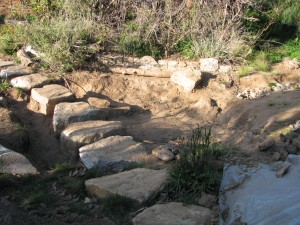
The first catchment basin was deepened There is decomposed gravel in that one so the water perculates quickly, thank goodness, as most of the other basins hold water due to the clay composition of the soil.
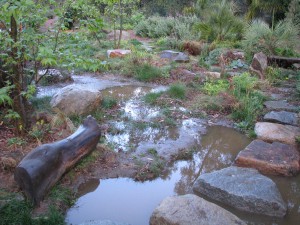
Water following the basins. Also, a rain catchement basin was created along the top of the cement channel that normally funnels water off the property.
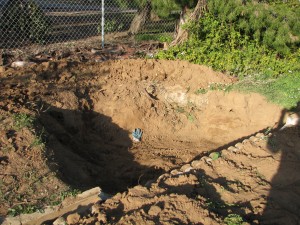
New basin, empty A series of these will be created all along the channel, allowing water to slow, gather and perculate along the length of the property, with no outlet at the end.
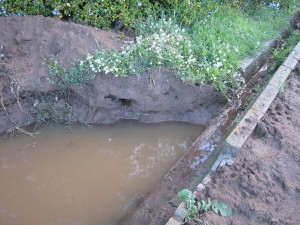
Full! This will take some of the flow pressure off of the water diverted down into the main series of basins.
The only area breached was actually due to a gopher hole whose origin must be in the stream. I could tell by the swirls in the mulch where the erosion happened.
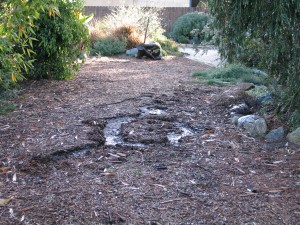
Swirls tell of a breach. There is also the slight problem of water flowing down my own driveway and then down the trail.
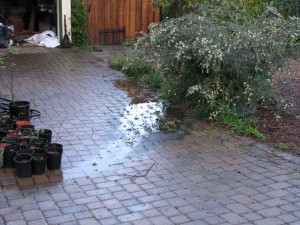
Water funneled down my driveway. I think a small hugelkultur bed might slove that problem.
The verdict? Almost all the water was retained on the property,even that of the neighbor’s! A few tweaks and we are well on our way to total rainwater dominance! Mwwahahahahahahaha!

Mwwahahahahahahaha!

