Houses
-
The Fine Art of Pleaching or Plashing
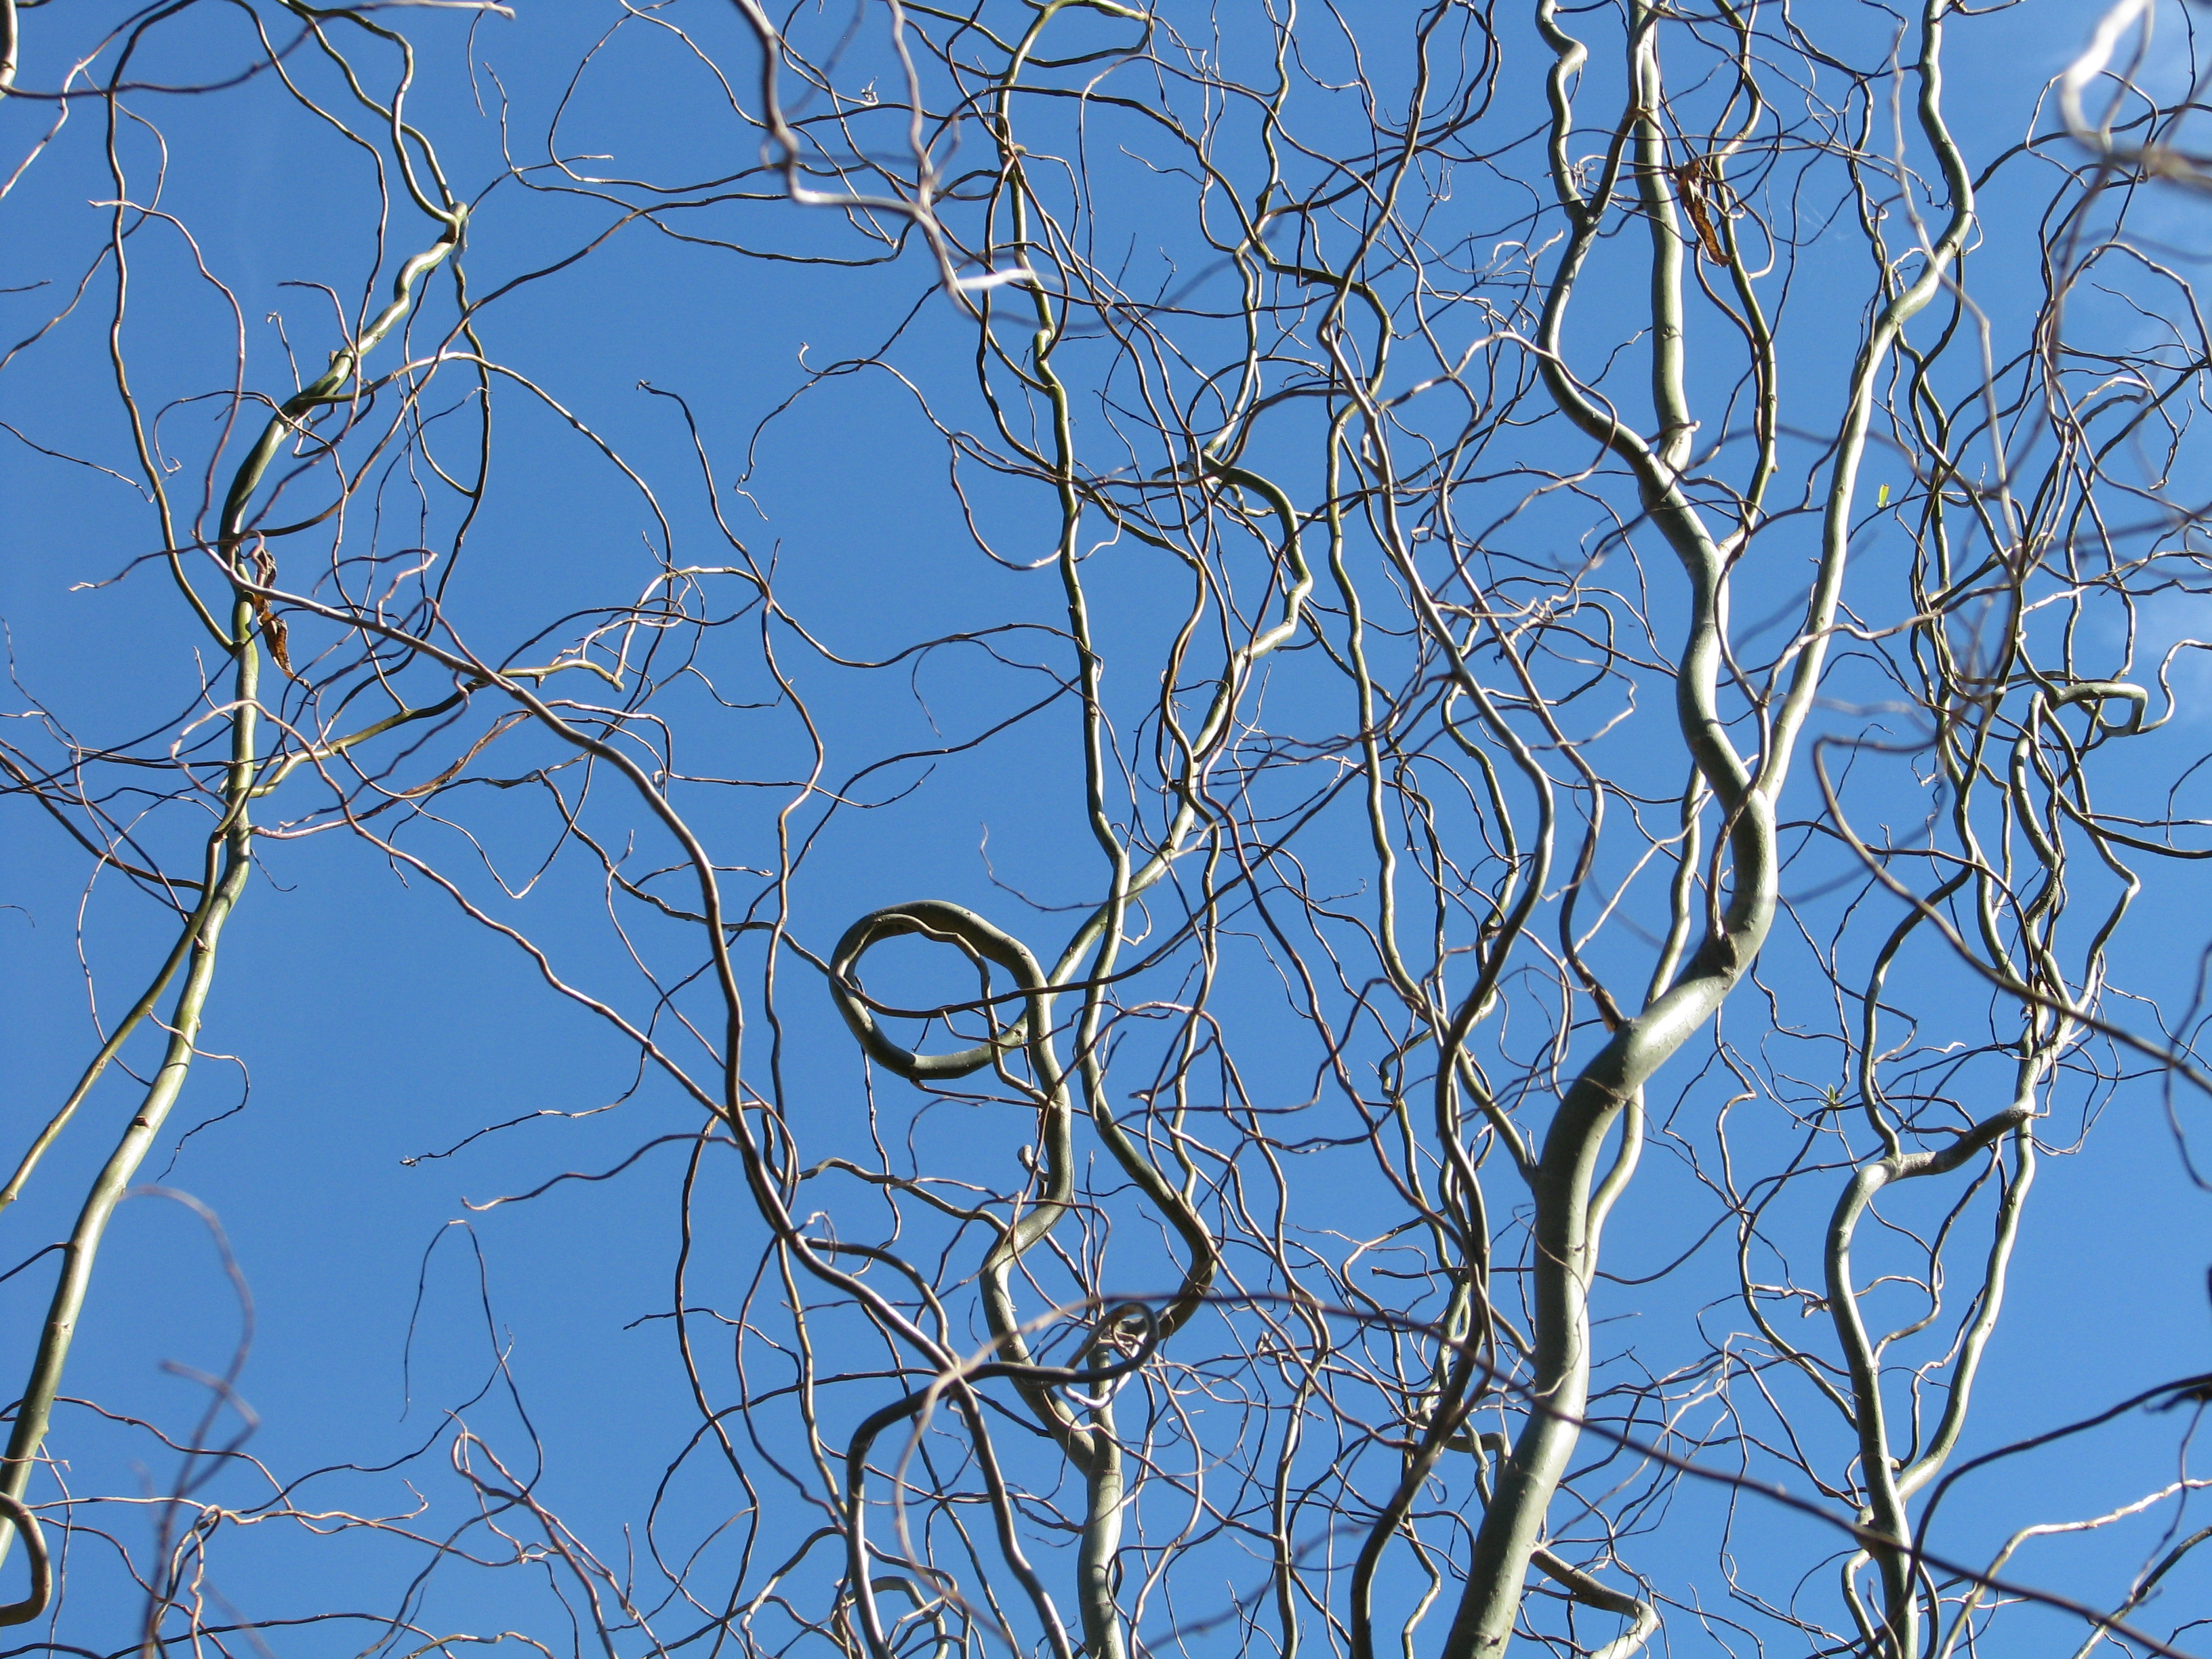
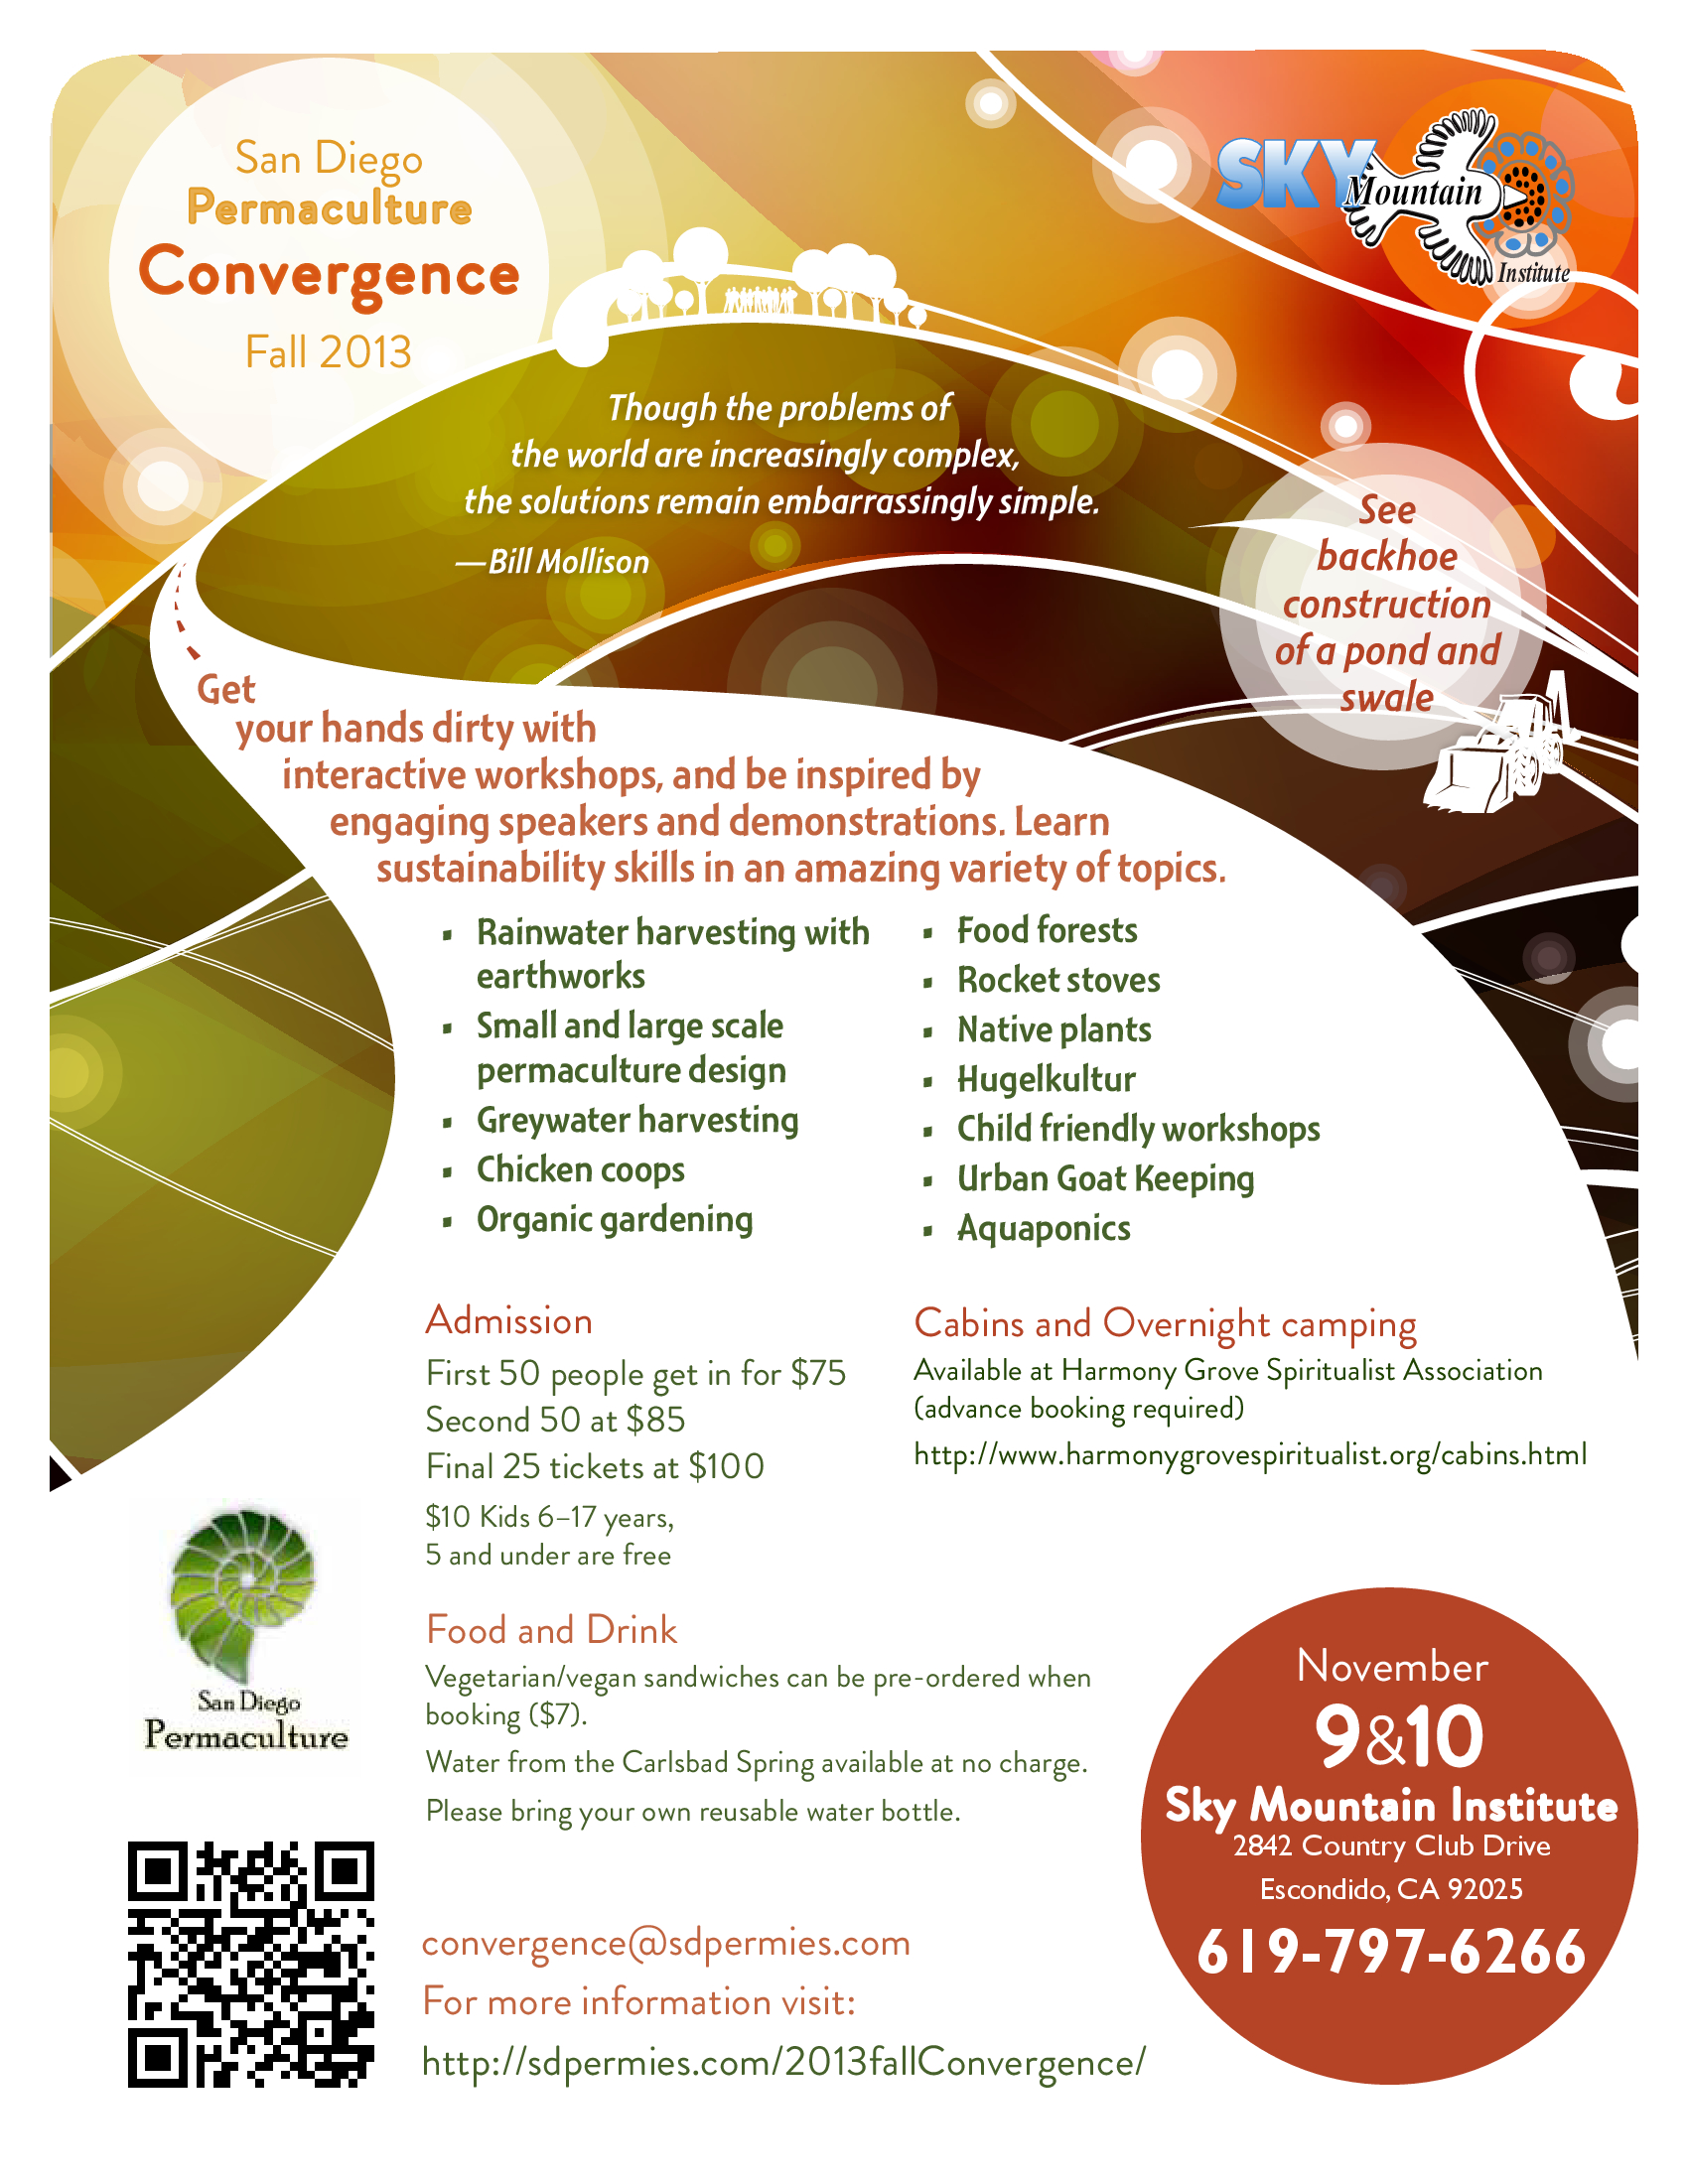
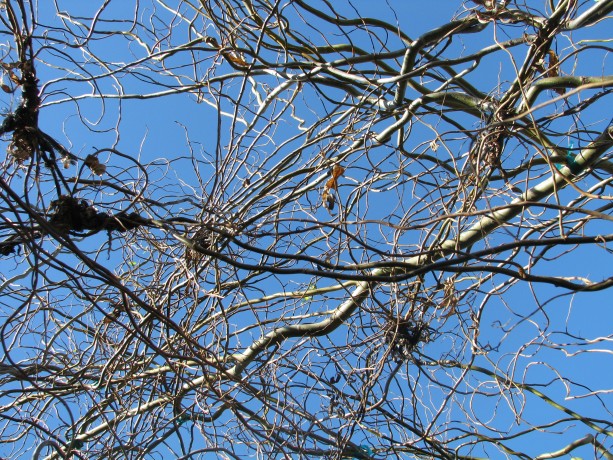
Pleaching in the sky. My daughter and I pleached today, although I’ve had the pleasure of pleaching before this , and even later. Pleaching, or its synonym plashing, refers to the interweaving of branches, both live or dead. Basketry is one form, but more notably is the pleaching of living branches to form secure living fences, buildings or artwork. The withy (willow) bird hide (a covered place from which to watch birds) is a living building I planted two years ago. We pleached our withy hide today. Not many people can say that! (or admit to it).
Pleaching is where stems, usually from two plants, grow together. Pleaching can be done on many vigorous trees such as willow, or even fruit trees such as plum. The branches grow together making separate plants become part of a whole. The trees then share nutrients and water and can pull what it needs from roots a long distance away.
Curly willow is beautiful on its own. Pleaching essentially makes many plants into one living organism. Pleached hedgerows make a living barrier to keep in livestock; pleached trees can be woven into furniture, living artwork, decorative fences, and living trellises. Pleaching livestock fences was practiced a lot in Europe prior to the invention of barbed wire, and then was forgotten for awhile only to be revived as a form of artistic gardening.
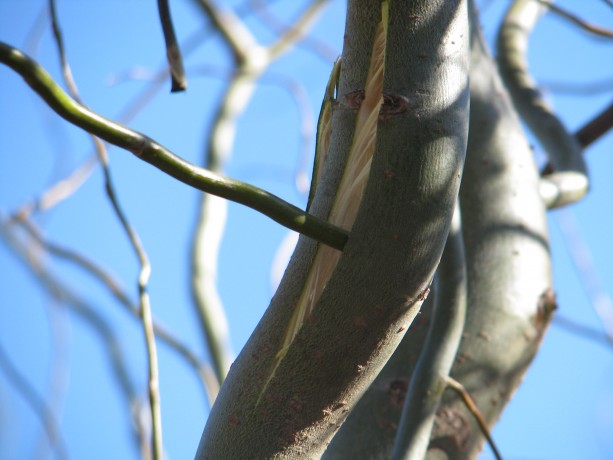
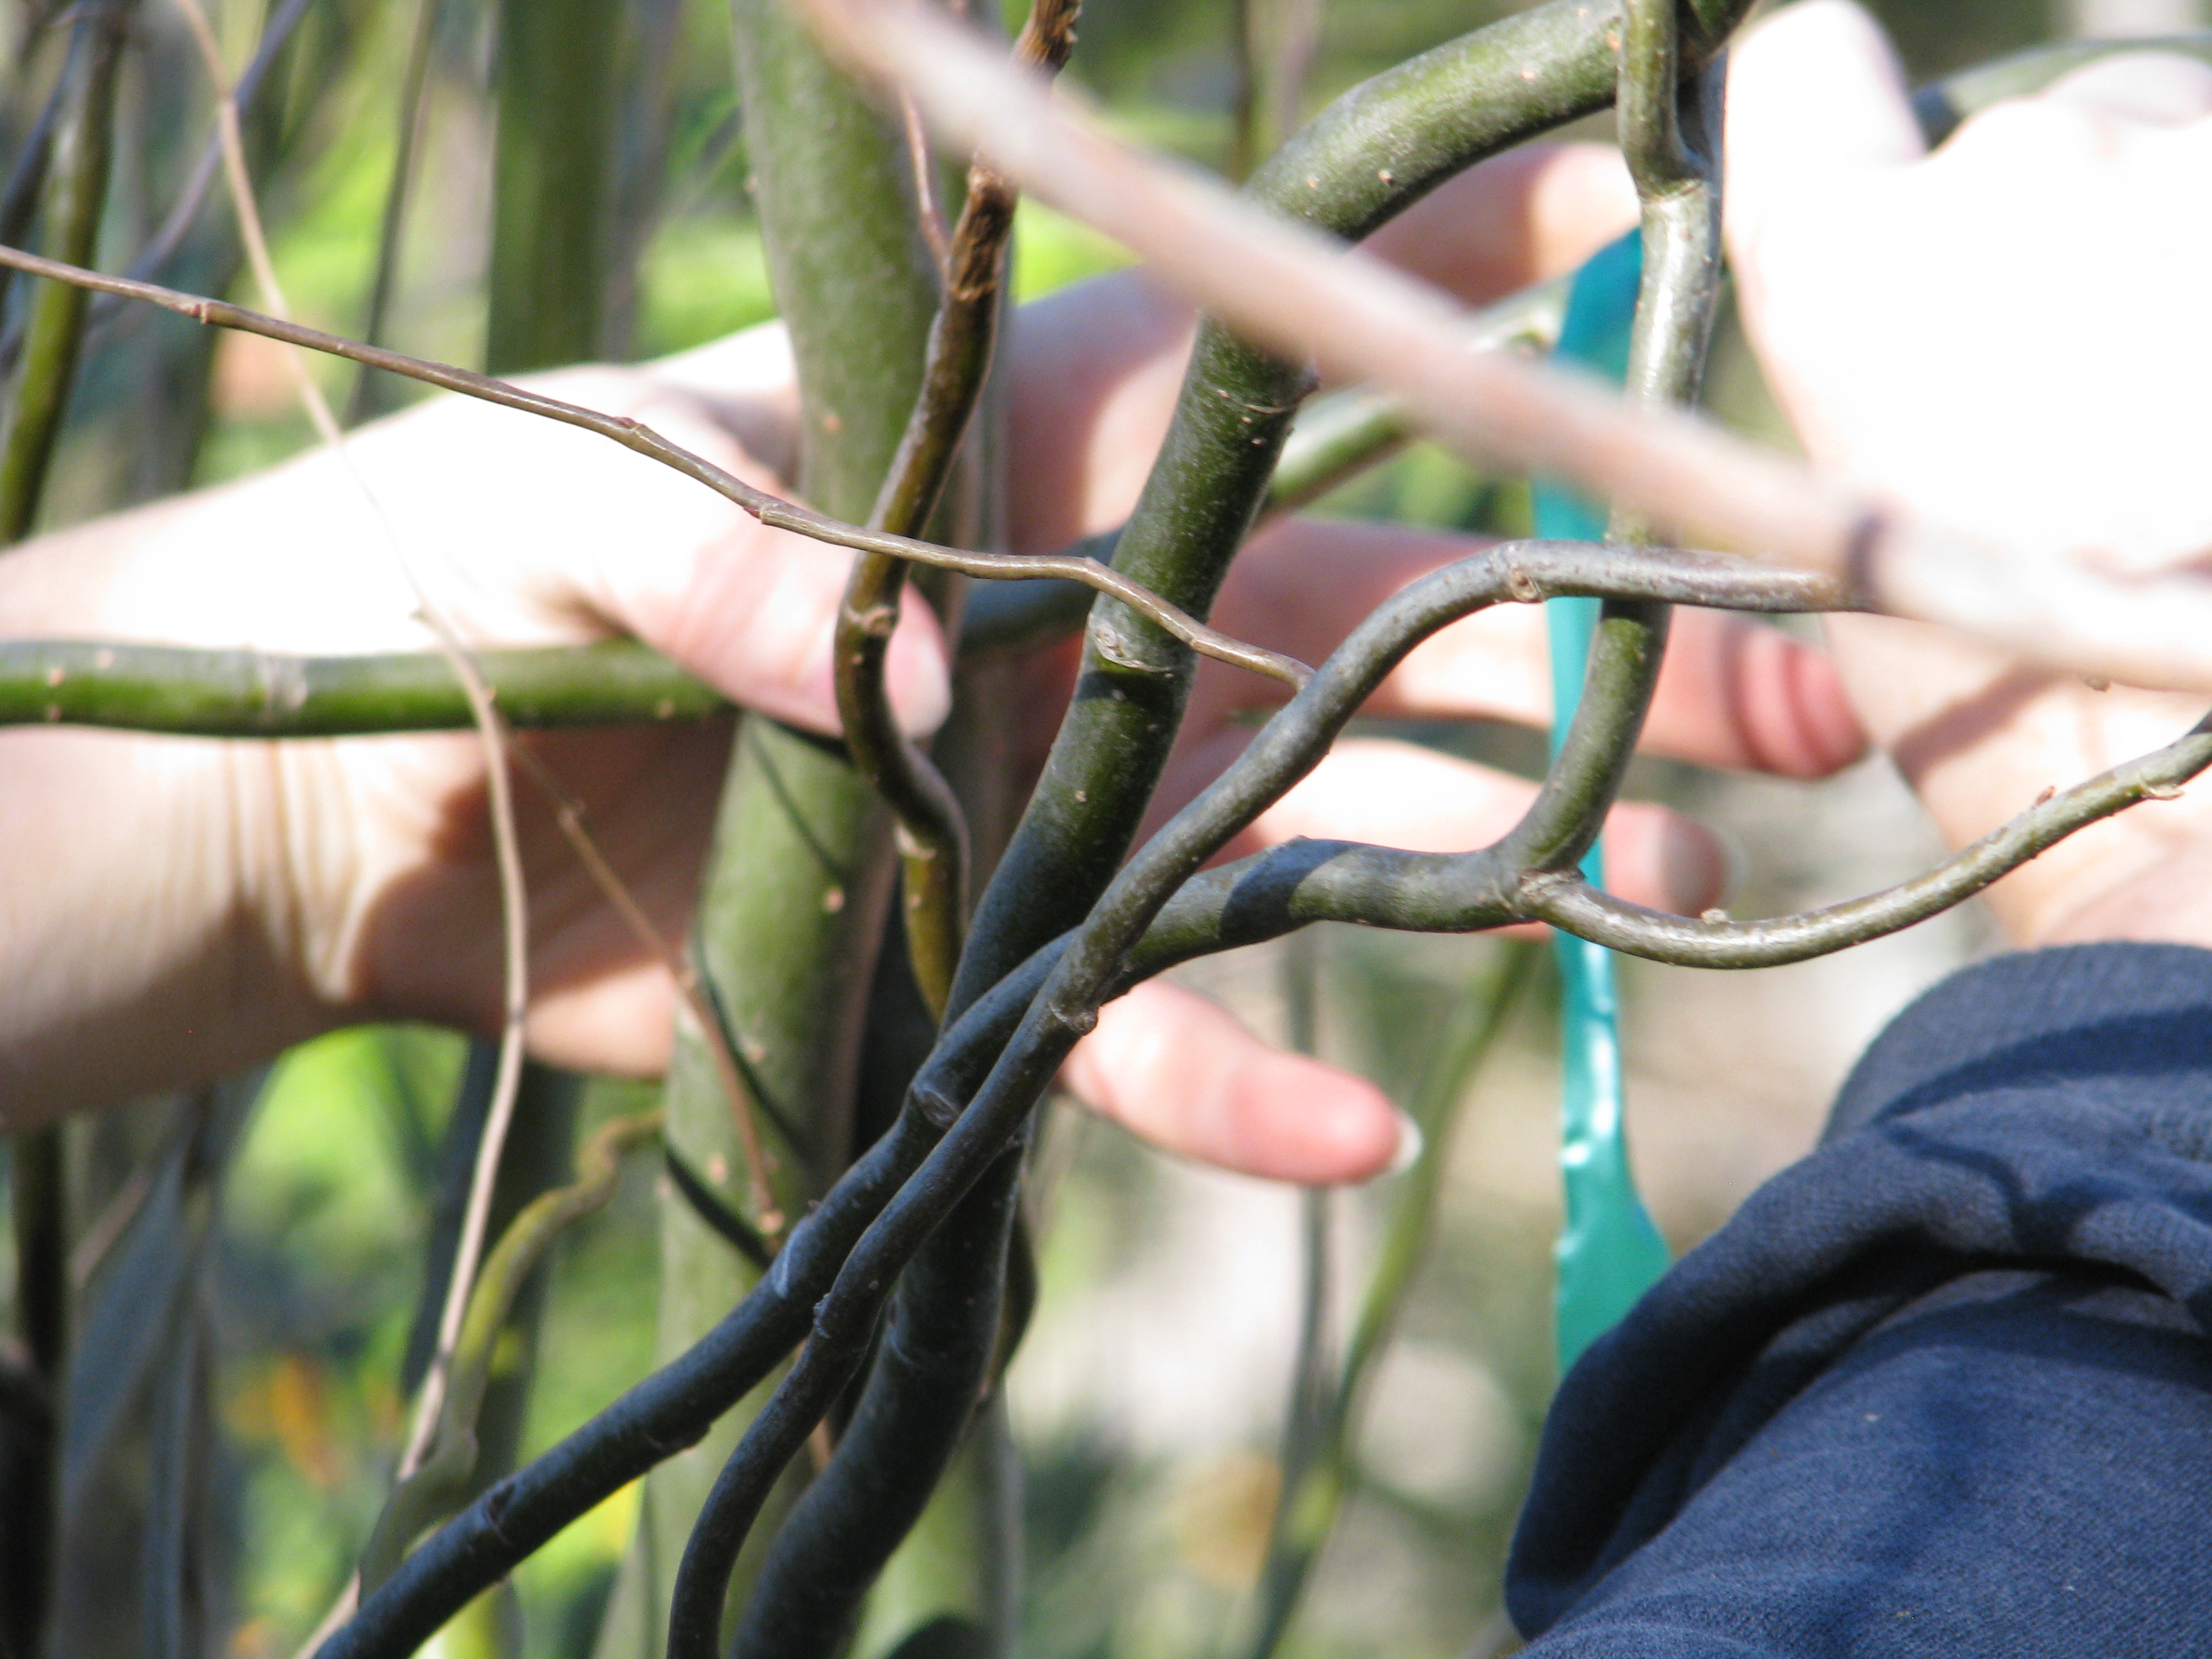
This trunk unfortunately cracked while I pulled on it. As it is willow, it will heal quickly. My daughter used the opportunity to put a twig from the next willow through the crack, which will grow over it. Today I of course, as is my habit, waited until the sun was directly above the area where I was working so that I had to look into it as I worked. I don’t recommend this, however. My daughter used a fruit-picking pole to snag some of the taller, whippier branches of the curly willow that make up the withy hide. I stood on a ladder, squinting, and pulled two branches together.
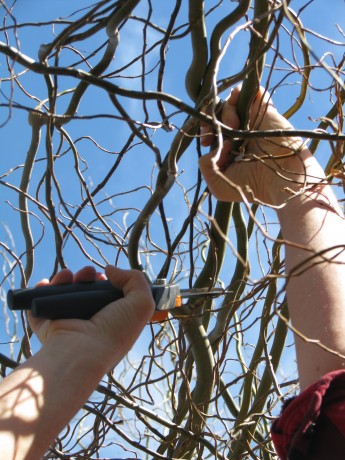
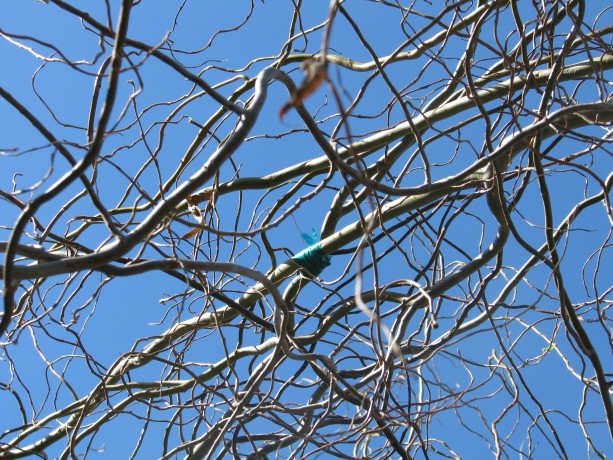
Me on a ladder reaching over my head to pull two branches together to form a roof. To insure that you have a good pleach going, it is best to lightly scrape the bark from both pieces just where they are going to meet; something like you see blood brothers do with their hands in the movies, but with no blood involved.

Lightly scraping the bark from both branches where they will meet is important. Next time I’ll use a vegetable peeler, which will allow me better angles. Then you make sure the pieces fit snugly, then tie them on. I’ve use various materials to do this. Twist-ties hold securely but the wire can eventually girdle the growing branches. Twine is more difficult to use in that it doesn’t grip the branches well enough for a firm hold, but it will eventually break down, hopefully after the pleach is successful. This time I used green tree tape. It grips well, is easy to tie, and will stretch with the growing branches and eventually break. The green color won’t be noticeable when the willow leafs out, either.
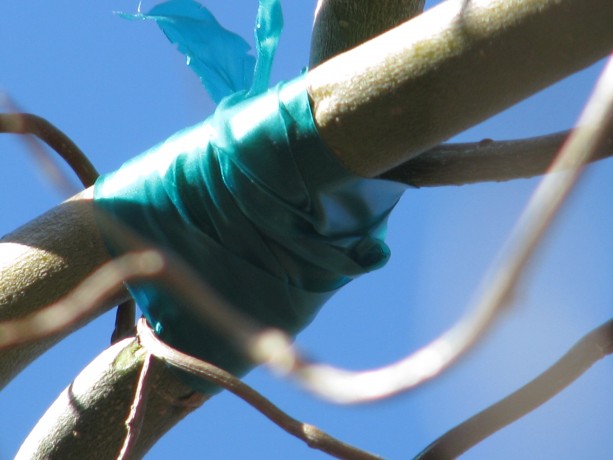
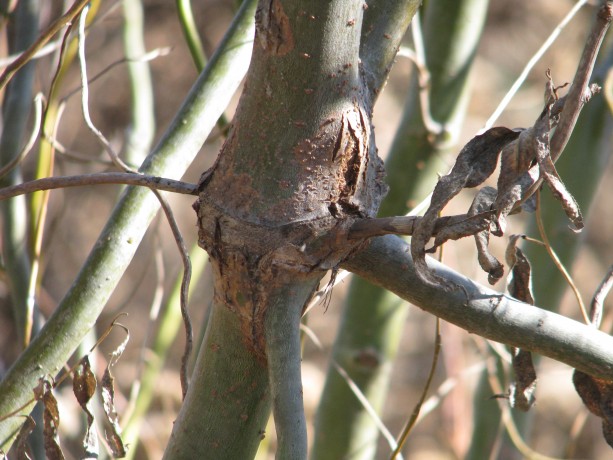
Tying the scraped branches together so they stay put. They can’t move around in the wind or they won’t be able to grow together. As I pleached from the top of the ladder, working overhead while the sun and curly twigs attacked my eyes, my daughter pleached pleasing arches over the ‘windows’ of the hide.

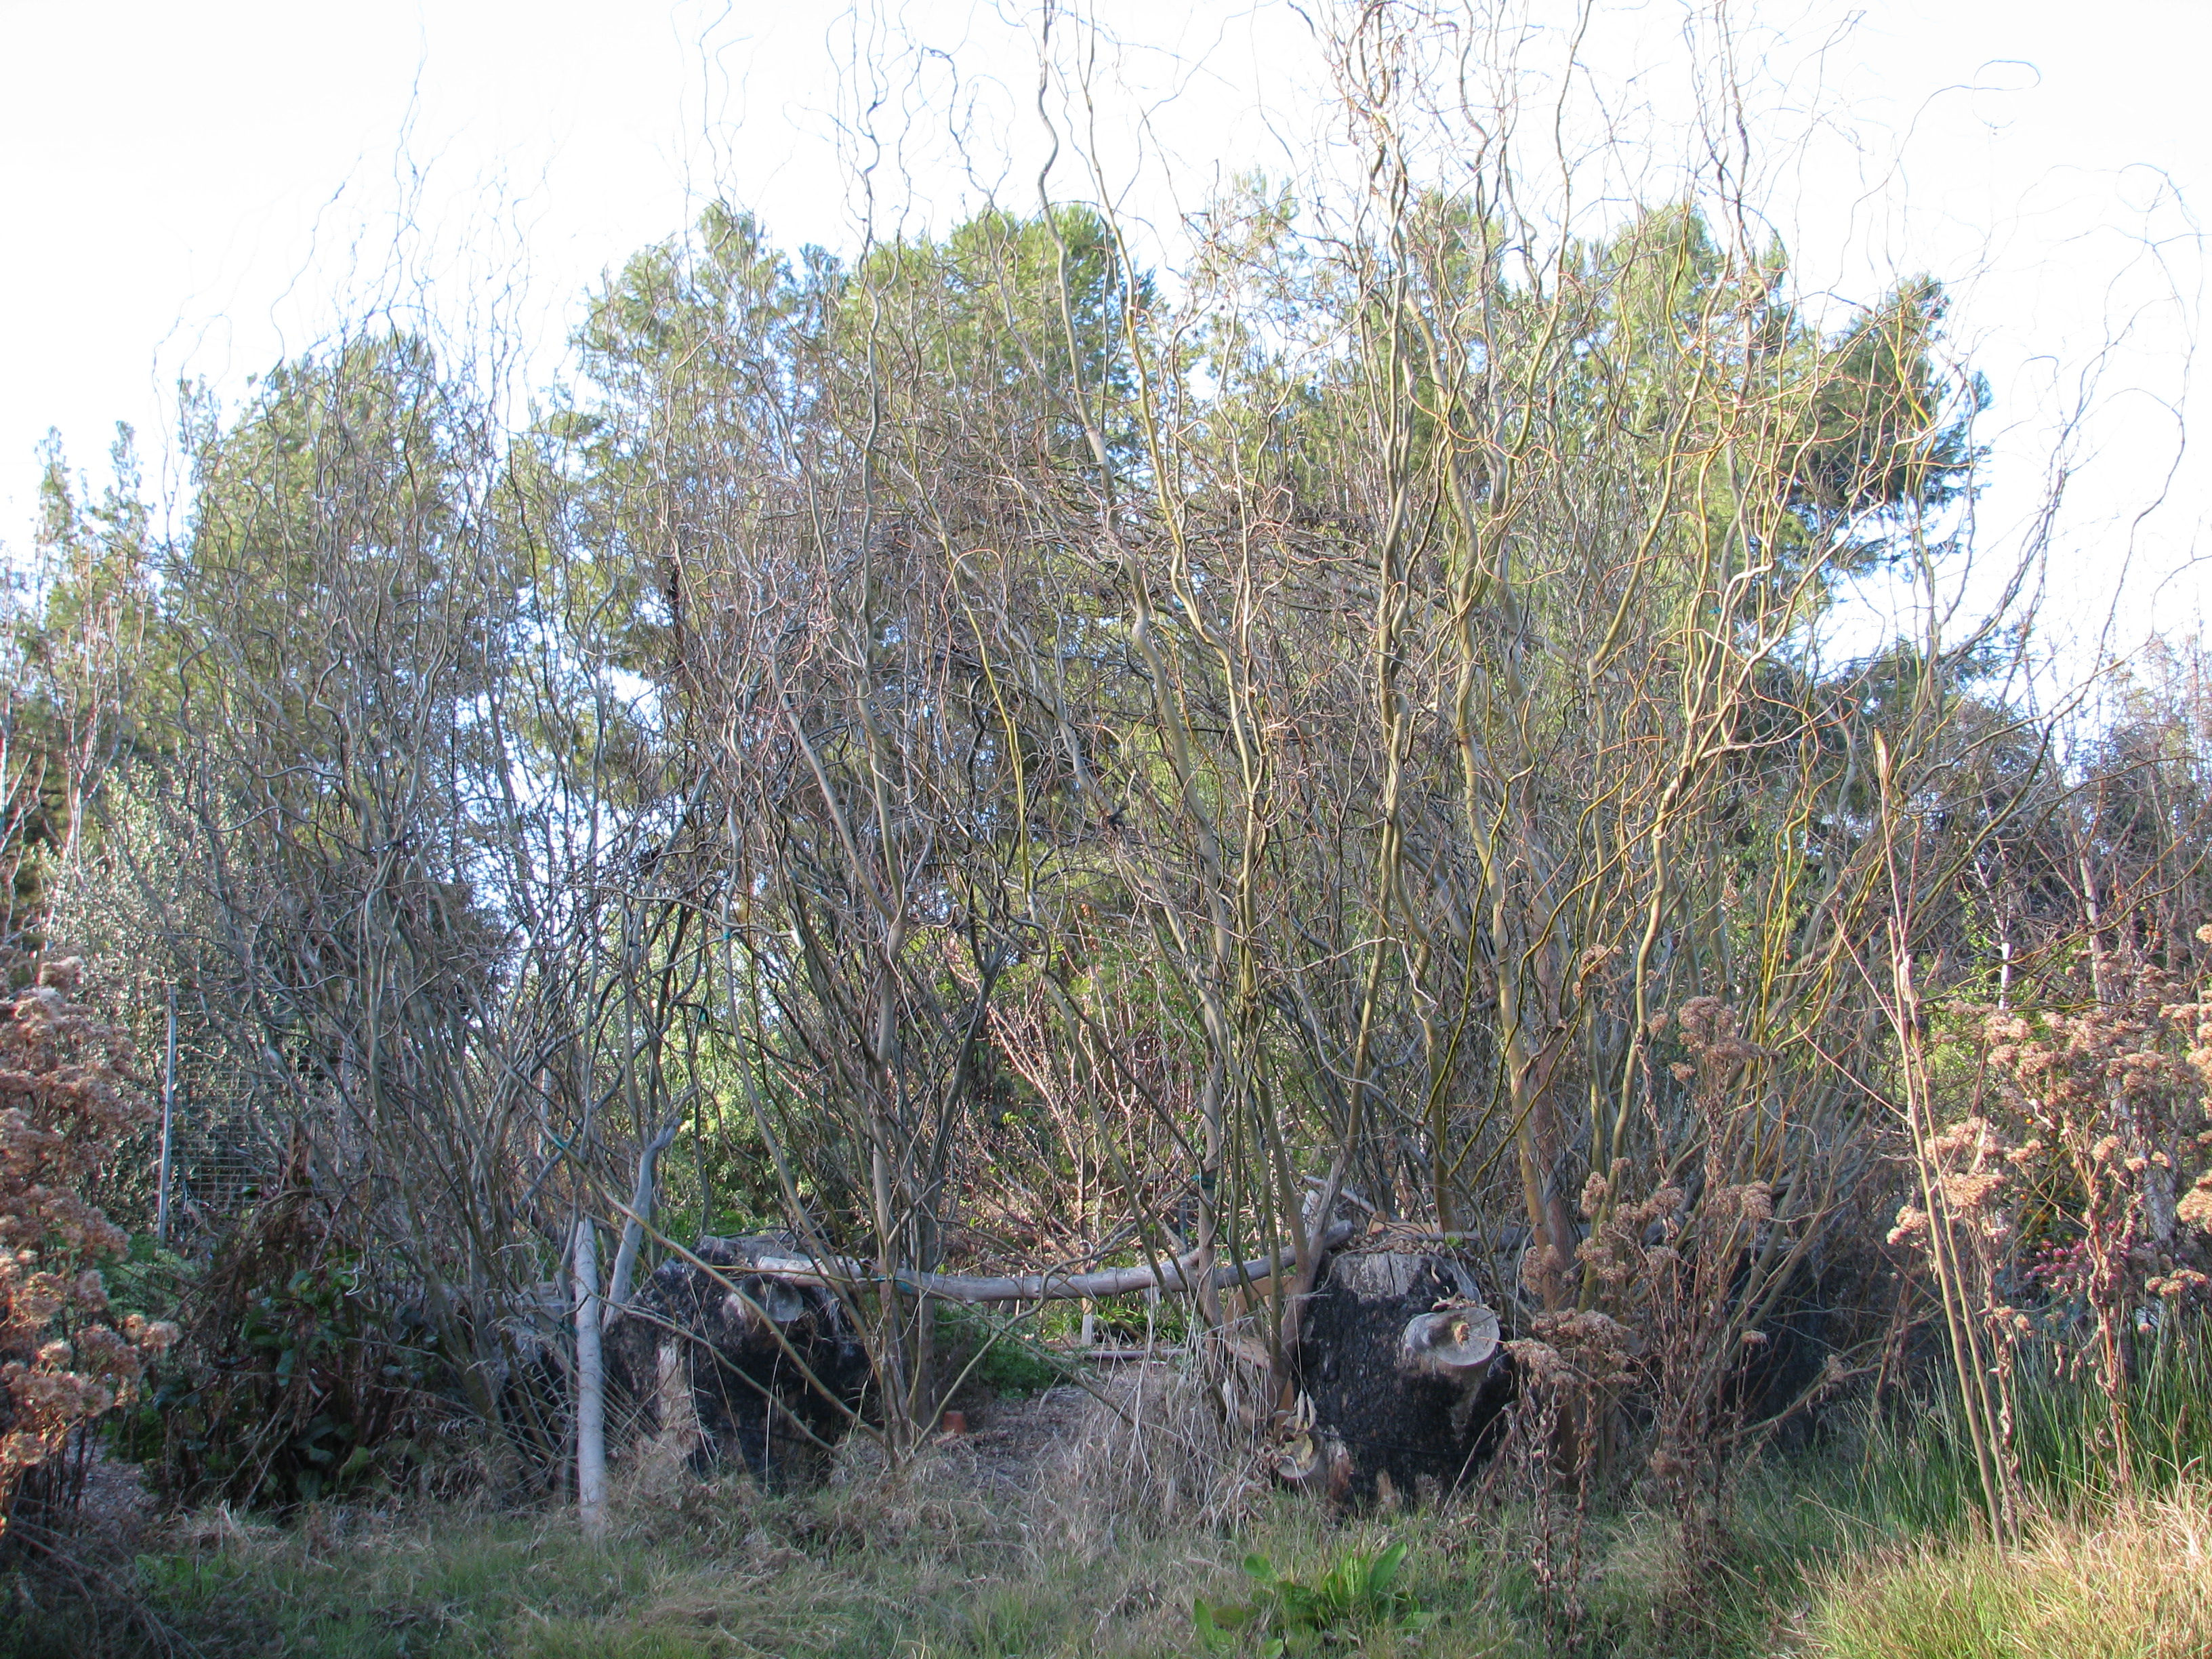
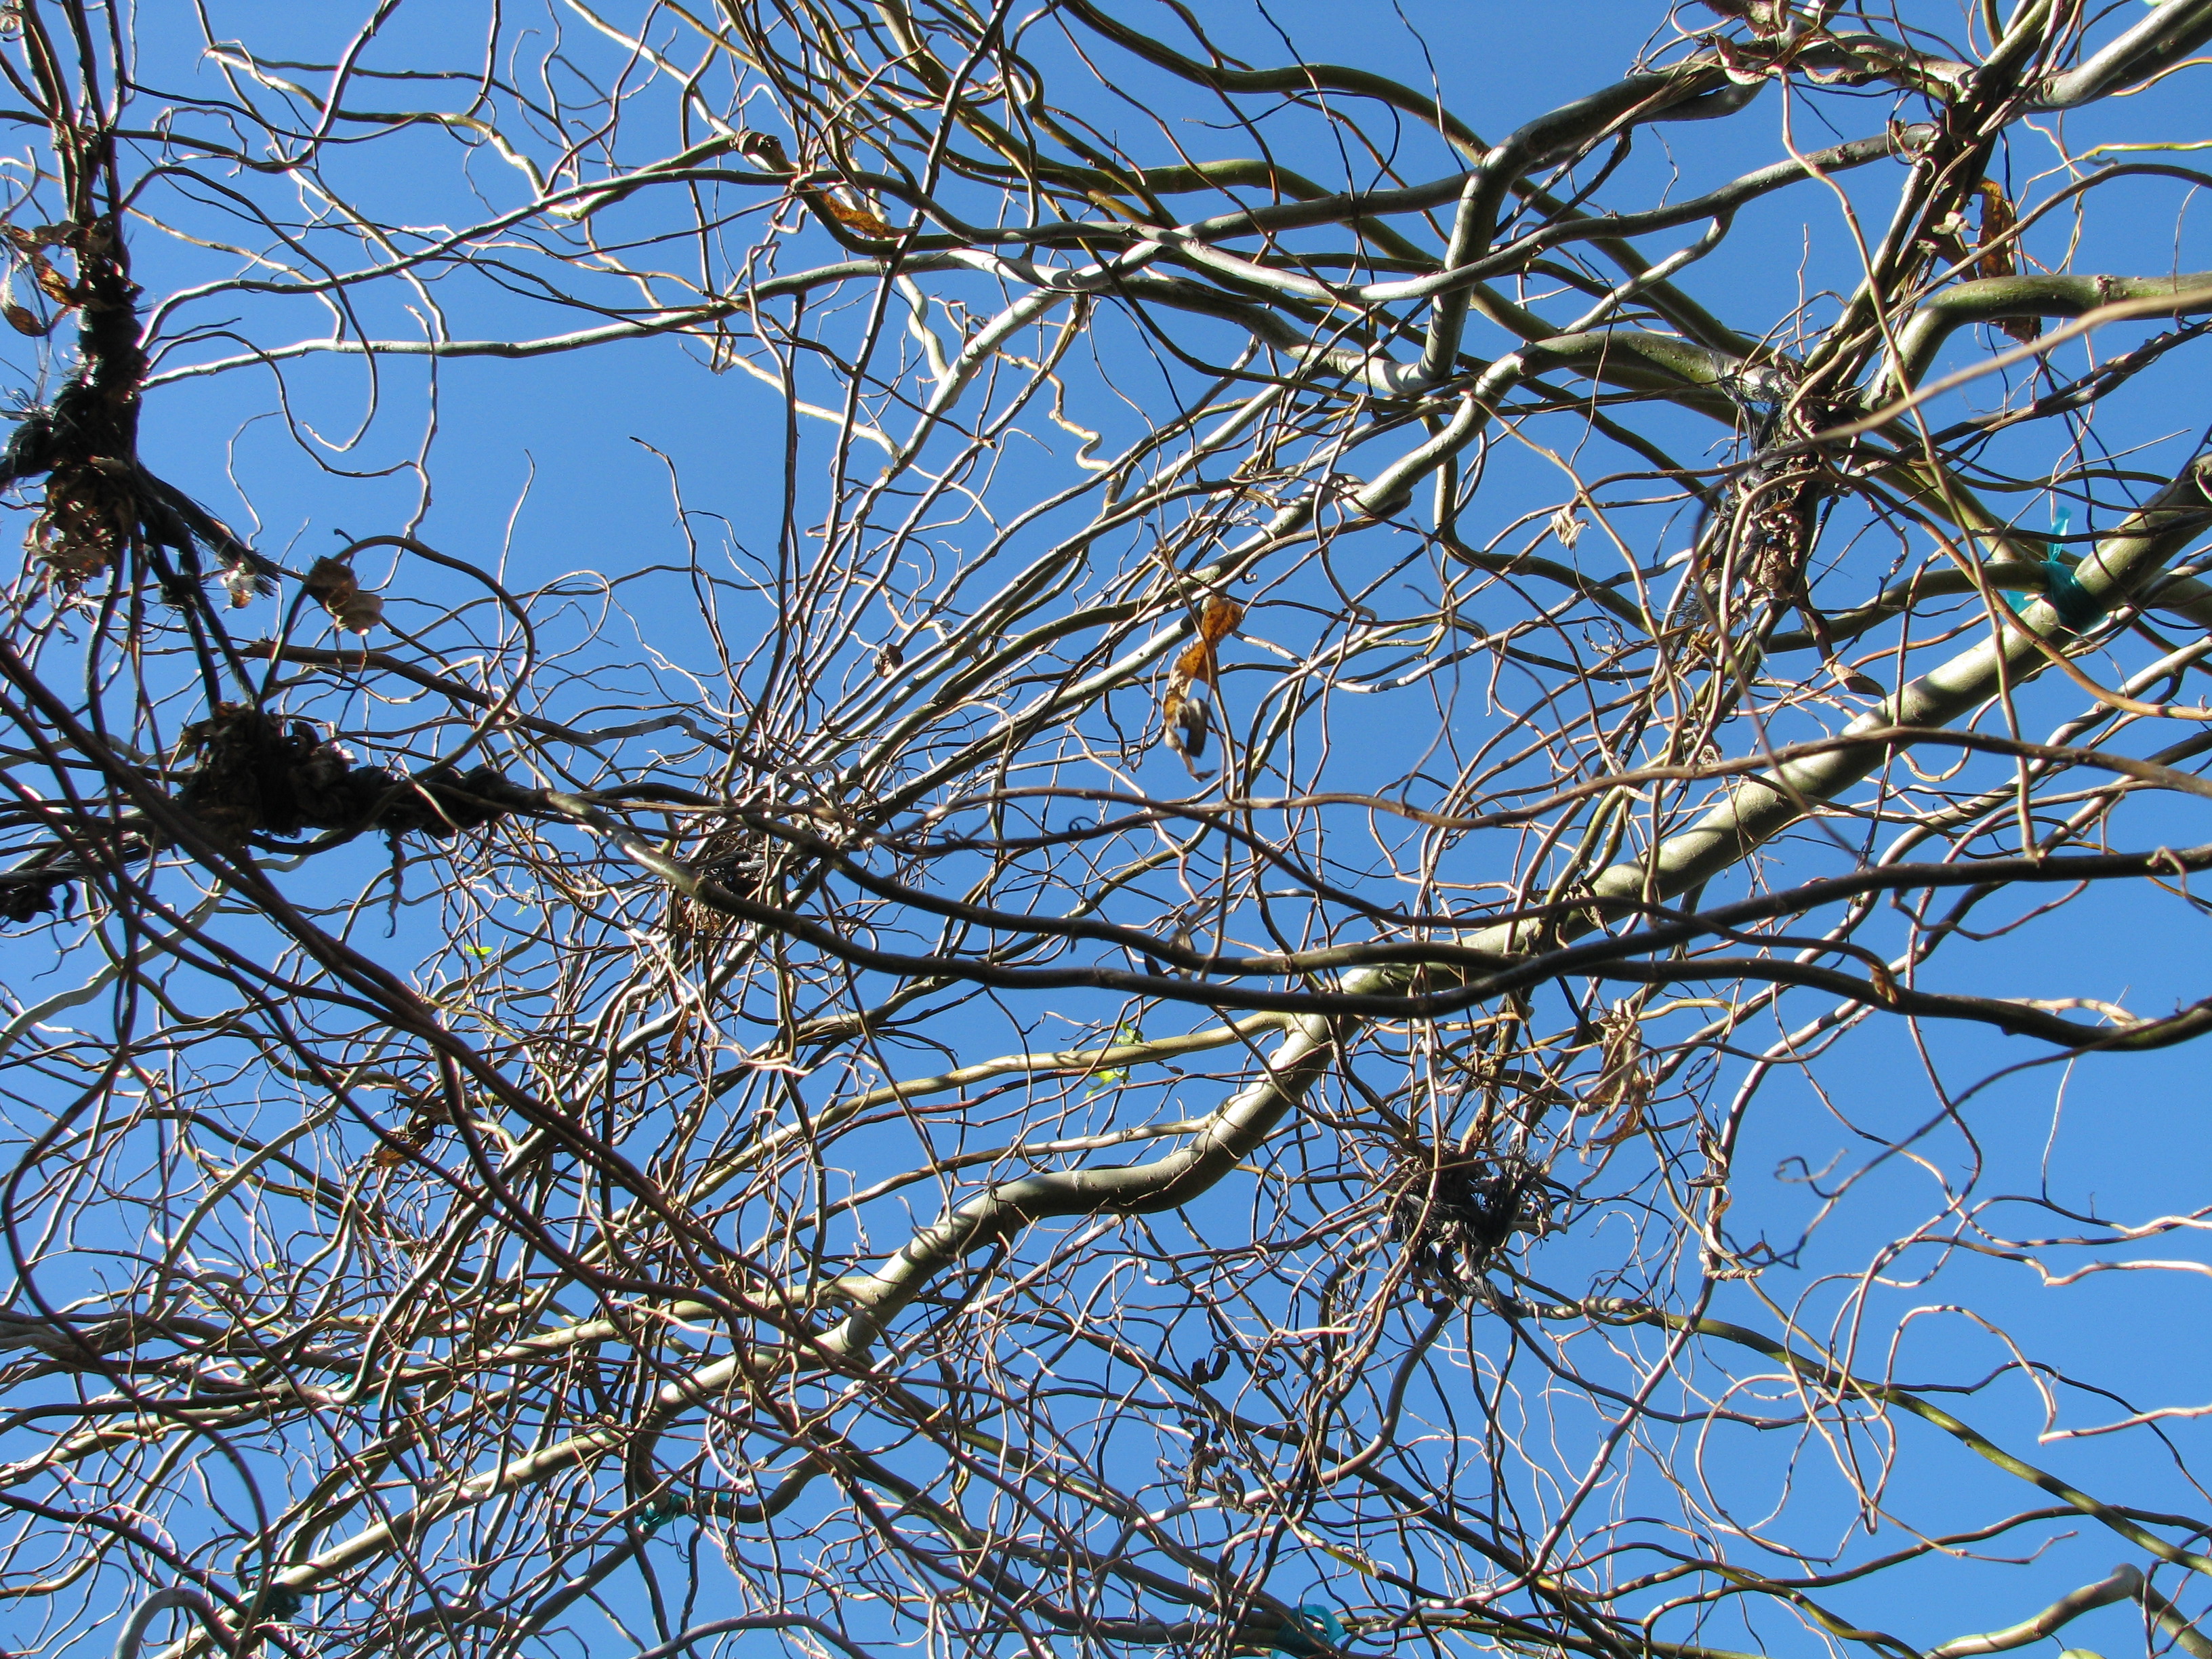
Weaving curly willow can be a twisty challenge. The hide looks lopsided because the willows on one side have found sent out roots to drink from the small pond. With more pleaching, the thirsty trees on the other side will probably take advantage of that water source, too, and have a drink via their overhead connection. I think it is part of its charm. A half-wild building.
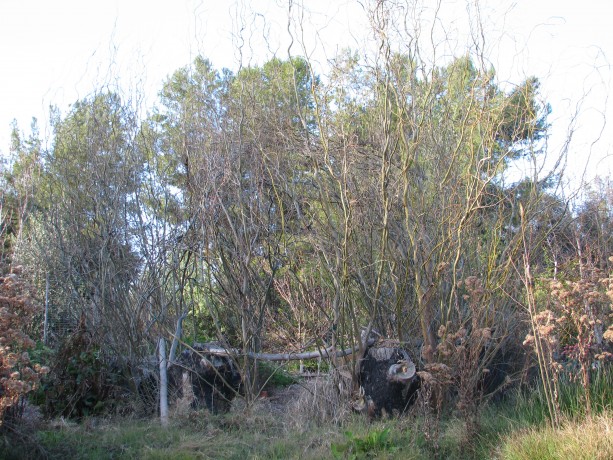
The withy hide as a duck on the big pond sees it. The willow is just about to begin leafing out. Try pleaching a small fence or a living bench or chair. It is tremendous fun and if you don’t like it, you can always cut it down. Oh, and work on a cloudy day.
A willow roof. - Animals, Chickens, Cob, Compost, Composting toilet, Fruit, Gardening adventures, Giving, Grains, Health, Herbs, Houses, Hugelkultur, Humor, Living structures, Natives, Natural cleaners, Permaculture and Edible Forest Gardening Adventures, Ponds, Rain Catching, Recipes, Seeds, Soil, Vegan, Vegetables, Vegetarian, Worms
San Diego Permaculture Convergence, Nov. 9 – 10, 2013
There is a fantastic, information-packed permaculture convergence coming up at the beautiful Sky Mountain Institute in Escondido.
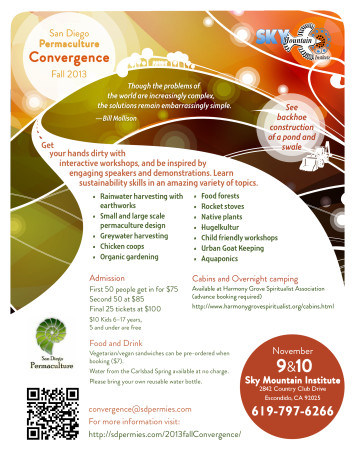 It will be two days packed with great information for a very reasonable price; in fact, scholarships are available. Check out the website at convergence@sdpermies.com. On that Sunday I’ll be teaching a workshop about why its so important to plant native plants, how to plant them in guilds using fishscale swales and mini-hugelkulturs. Come to the convergence and be inspired!
You May Also Like

Native Insects and IPM
-
The Mock Pavilion

The ground is covered with straw now, and the passionvines have grown about a foot in two weeks since this photo was taken. It was clear that if I wanted to have any group of people over in the summer and have them survive, that I’d have to have a shade structure. I have an EZ-Up, which is anything but easy especially when going down, but the shade it provides is minimal and only appropriate at high noon. I had a look at the line of Eugenia trees right behind Harry Mudd, the cob oven. The trees had been planted by the previous owner to block the view of the horrendous piecemeal sheds he’d nailed together (most of which have now become walkways and structures). They had been trimmed up during the removal of the sheds to giant lollypops with floppy arms. Floppy arms that often broke under the weight of the fruit the trees bore. I thought that some of these trees could make a good gazebo. Click here to learn about the benefits of tree trimming
I talked to Steve about it. Steve works on my ponds and irrigation, and now just about anything else I need to have done since he is skilled in carpentry and other talents which I am not. Steve cut down some of the trees and for some he used professional services – check this link right here now, brushed them and we discovered that they weren’t very tall at all.
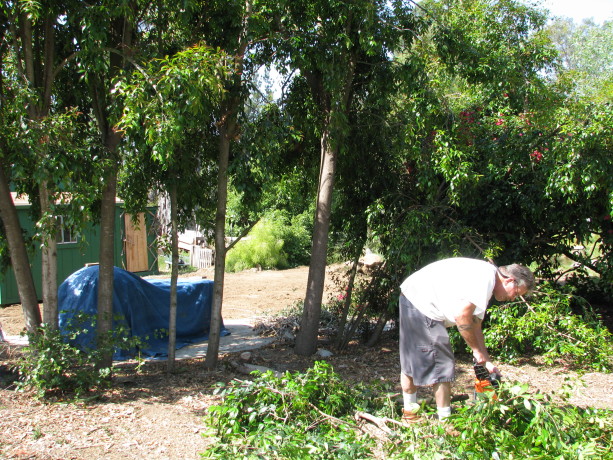
Steve cutting down some of the Eugenia. Harry Mudd is covered with the blue tarp. At the time I was touring a new friend through the garden who offered some very long cedar logs. Here began a fiasco having to do with hauling a trailer, misunderstandings, and a lot of very heavy long logs which weren’t used and now need to be returned, but I will not explore that here.
I had a garden party planned; the first large party I’ve ever had. I thought that the end of June would be a perfect time before the hot weather hit. Life laughed at me and began a series of intensely hot days more associated with the end of July. So I told Steve to just buy the wood and build the thing. He did, and I covered it with some very expensive shade cloth. By two of the pillars have been planted red passionfruit vines. When they grow to the top, I’ll replace the shadecloth with wire so that the passionvines can become a living shady roof with fruit dangling down.
This structure, along with some borrowed EZ-Ups, saved the day for the party, which had temperatures in the low 90’s (lower than anticipated, thank goodness!). The structure is similiar in look to the Fowl Fortress, so it doesn’t seem so out of place, and it is very comfortable to be under during this intense summer.

Nice and cool, with easier access to Harry Mudd. Why the Mock Pavilion? Perhaps because it isn’t really a pavilion, just a large shade structure with a piece of plywood over a couple of wooden pallets as a stage. Really it is because Steve’s last name is Mock, and I couldn’t resist.
- Compost, Composting toilet, Gardening adventures, Hugelkultur, Permaculture and Edible Forest Gardening Adventures, Ponds, Rain Catching, Soil
Rain Catchment Awesomeness (and some BSP)

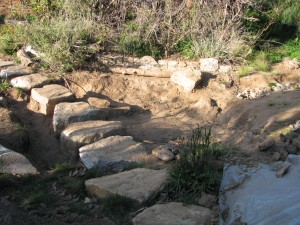
Water flowed over the stone steps First, a little BSP (blatant self-promotion). There is a wonderful ezine called San Diego Loves Green featuring topical local articles and snippets that reflect on the growing green community here in, you guessed it, San Diego. The San Diego Permaculture Group has an ongoing column, and yesterday I was the guest writer. My article is on the importance of planting natives , with some information that you might find surprising, or that you may have already read in my blog about the same subject. Also (more BSP) if any of you attended the Southern California Permaculture Convergence this weekend, and still yet, if any of you listened to my talk on soil, first of all I’d like to thank you for your attention and attendance, and I hope I answered your questions and solved some problems for you. You can search on my blog for many posts concerning nitrogen -fixing, or 50 Ways to Leave Your Compost , and see my composting toilet (I went to a Garden Potty).
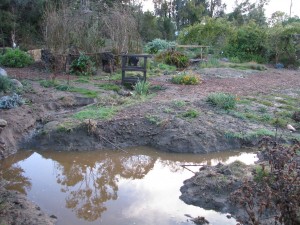
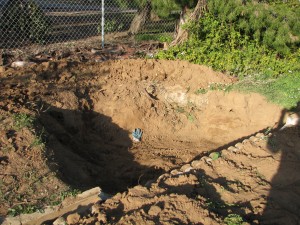
We had almost two inches of rain on Thursday night. In San Diego we rarely receive the long soaking rains that we really need. Instead we must be ready for flash floods. If you are familiar with Finch Frolic and the labors we’ve been undertaking in the last two years to hold the rainwater, then you may be curious to find out how the property survived this last middle-of-the-night flooding and hailstorms. If you remember, not only is there the water flowing off the roof and falling onto the watershed property, but also an unmeasurable amount that is purposely channelled runoff from all the neighbor’s properties that runs through mine.
All basins full! Since the permaculture project was installed I haven’t had any of the erosion that plagued the site. As of last year I’m pretty sure that every drop that falls on my property is caught, in rain catchment basins, the ponds, and in the loam and compost in the guilds. The challenge was to also keep all the neighbor’s water on my property as well! I’m thrilled to say that we almost did it!
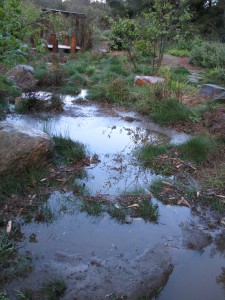
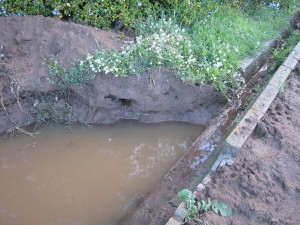
There is a new bog area being designed by Jacob Hatch just above the big pond.
The new bog area This area had been designed to channel overflow water from the rain catchment streams around the pond and down a black tube to the stream bed below. Greedy me wants all that water! With the creation of another silt basin, and now that there is vegetation in the stream to hold onto the silt, I’ve made the water now flow directly into the big pond. There are planned overflows from the big pond, and water did overflow where it was supposed to.
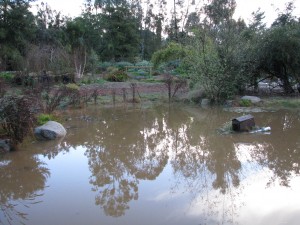
The big pond was filled to capacity, making the duck house do a sinking ship impression because of the length of the rope attached to the anchor wasn’t long enough. The first rain catchement basin was enlarged a lot so as to catch water higher on the property.
The first catchment basin was deepened There is decomposed gravel in that one so the water perculates quickly, thank goodness, as most of the other basins hold water due to the clay composition of the soil.
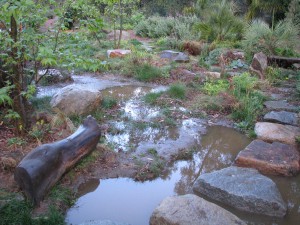
Water following the basins. Also, a rain catchement basin was created along the top of the cement channel that normally funnels water off the property.
New basin, empty A series of these will be created all along the channel, allowing water to slow, gather and perculate along the length of the property, with no outlet at the end.
Full! This will take some of the flow pressure off of the water diverted down into the main series of basins.
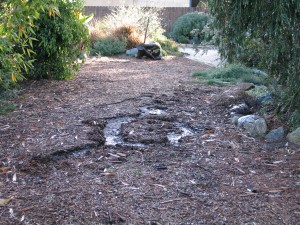
The only area breached was actually due to a gopher hole whose origin must be in the stream. I could tell by the swirls in the mulch where the erosion happened.
Swirls tell of a breach. There is also the slight problem of water flowing down my own driveway and then down the trail.
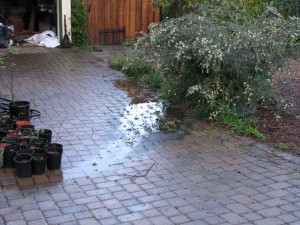
Water funneled down my driveway. I think a small hugelkultur bed might slove that problem.
The verdict? Almost all the water was retained on the property,even that of the neighbor’s! A few tweaks and we are well on our way to total rainwater dominance! Mwwahahahahahahaha!

Mwwahahahahahahaha! - Animals, Birding, Compost, Gardening adventures, Living structures, Permaculture and Edible Forest Gardening Adventures, Photos, Ponds, Rain Catching
Frost on the Pathways
It doesn’t often frost here in Fallbrook, which is located about an hour from both the mountains and the Pacific in northern San Diego county. When it does, the fruit growers have to take drastic steps to keep their citrus, avocados and other tender plants from dying. The last frost happened after a long steady rain, just after a thick mulch was applied to all the trails here at Finch Frolic Gardens (thank you, Lori!). I awoke to a magical result: just the pathways had turned white with frost. Beautiful! (You can click on the photos to enlarge).
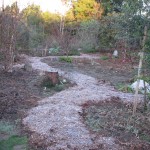
Frost on the newly mulched trail. 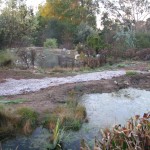
Between the two ponds. 
Ice skating rink for birds. 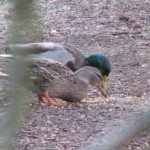
Mr. and Mrs. Mallard enjoying some breakfast scratch. 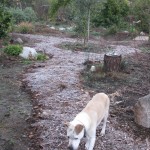
Sophie following the trail 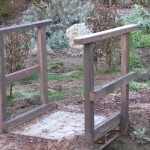
Little frosty bridge 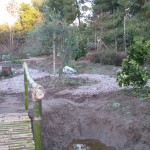
Past the new little bamboo bridge. 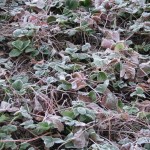
Strawberries to Frost: “Bring it on!” 
These wildflowers survive frost just fine. Winter blooms, too! You May Also Like
Native Insects and IPM
- Animals, Bees, Chickens, Cob, Compost, Composting toilet, Gardening adventures, Health, Heirloom Plants, Herbs, Natives, Permaculture and Edible Forest Gardening Adventures, Ponds, Rain Catching, Recipes, Salads, Soil, Vegan, Vegetables, Vegetarian, Worms
Southern California Permaculture Convergence! Be there!

Southern California Permaculture Convergence If you are interested in any aspect of permaculture, such as organic gardening, herbs, planting native plants, aquaponics, natural ponds, beekeeping, keeping chickens, and so much more, then you must come to the Southern California Permaculture Convergence. It happens on March 9th and 10th at the Sky Mountain Institute in Escondido. The keynote speaker will be Paul Wheaton, lecturer and permaculturalist extraordinaire of www.permies.com fame. Oh, and I’ll be one of the many speakers as well (cough cough). The Early Bird special of only $50 for both days ends at the end of January, and then the price will rise, so buy your tickets now!
Also, for a full-on demonstration of taking bare land and creating a permaculture garden, there will be a three-day intensive class taught by Paul Wheaton on site the three days prior to the Convergence.
You can read about the convergence here at the official website, which will give you the link perm.eventbrite.com where you may purchase tickets. Also visit the SD Permaculture Meetup page to see all the free workshops that happen monthly all over San Diego.
This convergence is such a deal, you really shouldn’t miss it! And such a bargain, too. One of the best things I find that come out of these convergences is the exchange of ideas and networking among the attendees, and all the practical information you can take home and use right away. One of the largest parts of permaculture is building community, which means sharing with and assisting others.
Really. Don’t miss this! Tell your friends!
You May Also Like
Native Insects and IPM
-
Building With Bamboo

Rotten plywood and downed branches cover the old bridge. Part of a sustainable garden is the growing of building materials. If you can’t have a wood lot, then temperature permitting you can grow clumping bamboo. You can grow ‘running’ bamboo if you’d like, but it would be wise to keep it contained in pots or you’ll end up with a major headache such as I had last January trying to remove it. The bamboo in my yard has happily grown into giant plants with wonderfully tall, strong shoots that are ready to harvest. I have several projects in mind, but the most fun and appealing has been the refurbishing of an old bridge.

All the old stuff had to be stripped off the framework. The bridge was sprawling across the barranca when we moved here 13 years ago. Although the pipes screwed together were actually solid enough, the plywood, tar paper and carpeting that made up the walkway was well on its way to rot.

The metal frame looked bad but actually was stable. The other side of the barranca is home to poison oak, and getting to the bridge was difficult as erosion diminished the hillside. Now through permaculture, the erosion has been eliminated and thanks to Roger Boddaert and his crew there is a wonderful walkway down to the bridge. However, the bridge was unusable and had broken branches hanging over it. The barranca itself is very beautiful and a wonderful bird-watching location, so revitalizing the bridge with natural building materials would turn the eyesore into a beautiful addition to the gardens.

Jacob and Steve harvesting bamboo. Jacob Hatch and his father-in-law Steve have had the task of harvesting, splitting and working with the bamboo.That is because, as I’ve admitted freely in past posts that my building abilities rate right up there with my ability to cut hair, with about the same disasterous results. I can see what I want in my mind, but my hands aren’t paying attention.
First Jacob and Steve had to clear the bridge of the tar paper and rotted plywood and test the metal pieces for strength.

Bamboo cut to lengths. Working from a library book, they harvested the heavy water-laden shoots. After cutting the pieces to the correct width for the bridge, they used a sharpened old knife and a rubber mallet to split the stalks.

A rubber mallet and sharpened knife were all that was needed to split the bamboo. UnfortunatelyInside the sheaths there was a black fuzz that caused both of them to itch. Steve and a third helper Jake screwed the horizontal pieces onto the long supports.

Steve and Jake screw bamboo onto the frame while Sophie looks on. They built sections, then carried them down and installed them on the existing bridge poles, with the long pieces of bamboo fitting outside of and hiding the metal. Bamboo was then wired on to the uprights, and a railing was installed.

The walkway laid out. Finally the ends were tied with sisal rope. This added strength as well as beauty to the finished work.

Bamboo railings in place with sisal ties and wire. The bamboo is still green; as it ages it will cure. Beads of oil will form on the top and the oil will be rubbed into the bamboo to strengthen it even more as it hardens and dries. Right now the bamboo is a little slippery to walk on, especially when damp. The bridge was built with a slight downward slope to it as well.

Strong enough for two big men: Jacob and Steve on the finished bridge! Ta-da! A really terrific and usable bridge! It certainly won’t pass OSHA safety standards, but its fine for a private home with no little kids around. The barranca looks like some exotic location, built with materials grown on site. Next projects include a small bridge, a short pier for the pond, and a ‘moon gate’ trellis for the passionvine that is out of control. Good thing I have a lot of bamboo.
-
The Withy Hide at Ten Months

The entrance. Last February I wanted a photography hide and decided to make one out of willow (withy). I cut stalks of curly willow which I already had around the property, stuck them in the ground near the subterranean irrigation lines in a ten-foot diameter, and hoped for the best.

I see a bird! Curly willow tolerates less water, direct sunlight and heat better than the native willows, as well as being delightfully kinky.

Closer view of the front. The willow grew immediately, gradually sending out tall shoots and lots of leaves. Most withy structures are created with straight willow sticks that are crossed and either tied or woven into a pattern.

A duck’s eye view. Since I began with irregular pieces and the nature of the willow is very curly, I just let it do its thing and figured that abundance would make a good hiding spot. It did.

Inside.. A few weeks ago I took some of the tallest stalks and tied them together overhead to create something of a dome shape. I’m not sure how the willow will adapt to the changes, but they ought to begin to grow in that curved shape. I didn’t tie all of them because I wanted a wild look, just semi-tamed.

Tying the willow tops together. The willows are already beginning to lose their leaves, creating a wonderful mulch underneath. While the willows are bare there won’t be as good of a hiding spot, but as more stalks grow next year it should fill up beautifully.

Side view. 
A bird butt. Who is hiding from whom? You May Also Like
Native Insects and IPM
- Compost, Composting toilet, Gardening adventures, Houses, Natural cleaners, Permaculture and Edible Forest Gardening Adventures, Photos, Soil
I Went to a Garden Potty (adventures with a composting toilet)

A very pretty outhouse! I asked Roger Boddaert to have his men build a simple composting toilet out of the scraps of wood left over from my sheds. This is what he came up with! It is a gorgeous little building painted to match the sheds. Wood features stand out decoratively, and two cloud-shaped windows covered with trellis adorn the sides. Good for ventilation and for watching birds on the pond!

Inside there is a $5 toilet seat on a bench that conceals a bucket. Inside is a raised seat that conceals a bucket underneath. The least expensive toilet seat I could find is attached to smoothed wood. Above the seat Roger attached a shelf with flower pots. I stashed the organic cleaner bottle and extra toilet paper behind some cut status flowers.

In the back you can see the bucket placed high enough to prevent accidents. Underneath is a Home Depot bucket, with the lid close at hand. I had to make it stand taller by shoving boards underneath so that there weren’t any room for mistakes.
The way a composting toilet works, is that you do your business, including the toilet paper, and then add a scoop of organic material to the bucket equal to what you had put in there. That’s it. The organic material can be sawdust, wood shavings for pet bedding, compost, etc. As long as it is easily scoopable.

When the bucket is full, you put the lid on and store it for a year. Or you can dig a deep hole, dump the bucket in, cover it up and mark it, and in a year plant on it or use it otherwise. I don’t have the exact science for this, but within a year all those microbes will consume the humanure and neutralize all the stuff that is in there that could be harmful, such as medicines. Very simple, very clean, very useful.
Composting toilets – the ones that look like real toilets – are tremendously expensive and not that efficient. What a waste of money! The bucket system is amazingly efficient. I have visited several, one a private one and the others at Audubon preserves. There are no flies, no smells. My outhouse was used a lot during the Garden Tour last Saturday, and I peeked in there today to check. Smells great! No flies.
The outhouses at the Audubon centers have the same system, but on a larger scale for more visitors. Instead of a bucket there is a wheeled compost bin underneath. One in rainy Oregon was a solar composting toilet, where part of the bin was under the toilet seat, and the rest under clear corrugated plastic roofing that amplified the ambient light and helped ‘cook’ the compost. The waste in the bin was stirred around frequently with the compost so that it could cook better. Still no smell, no mess.
Simple solutions are there for everything, and through studying permaculture and seeing what works for other people is very enlightening. The answer rarely has to be expensive. And, as is my new outhouse, it can be fun, too.
-
The Duck Boathouse

Mallards in the pond Our large pond has been attracting many waterbirds. We’ve seen mallards, widgeon, shovelers, snowy egrets, greater egrets, green heron, great blue heron, plus fishers such as phoebes and a kingfisher. In fact one mallard couple has become brave enough to waddle near when I feed the chickens. I throw a little scratch out, and the ducks snack on that along with the grasses. The male, who my daughter dubbed John Drake after the Secret Agent Man series main character, stands nearby and scolds me for not throwing out scratch on demand.
Since the garden plants are within their first year they haven’t grown in. I thought how great it would be to continue providing habitat by having a duck nesting box. I began to search online but the ones I saw were incredibly expensive for what amounts to just a box. You could place them on shore, but they would be within reach of predators. Or you could connect them to a pole sunk into the pond.

The front, with aquatic iris in front of the entrance. I broached Jacob with the subject and he was enthused, so he built one entirely out of scrap materials. I had a length of 4-inch PVC pipe with caps on the ends, which had come with the house. He used this as plastic pontoons for support. He tied on the side of a crib, built a little house out of a lightweight wooden crate I’d brought home that day which had transported potted plants, and dug up some of the plants already in the ponds to use as camouflage. The plants will live with their roots trailing in and helping clean the water. What came of all these recycled materials is just the cutest duck boathouse nesting box ever, I’m sure. I haven’t seen the female mallard for a few days, so she may be sitting on a nest elsewhere. I hope that a duck does enjoy the house, and if not, it is very fun to look at and is helping clean the water as it floats. What fun!

The back and sides, which will be hidden by plants as they grow. You May Also Like
Native Insects and IPM