Health
-
Kamoodles: Cooking with Kamut Flour
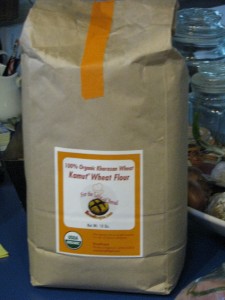
Organic Kamut flour A friend gifted me with a bag of Kamut® flour. Kamut® is the trademarked brand name for what is commonly known as khorasan
wheat, an ancient relative of modern durum wheat used by the ancient Egyptians which has finally made a comeback in popularity. It is a relative of duram wheat and very high in protein as well as trace ingredients such as magnesium, selenium and zinc. Kamut® has a buttery flavor and the grains can be cooked and eaten just like other grains, for breakfast, in addition to other foods as an extender, as a flavored filling, etc.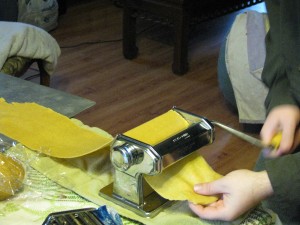
Rolling out kamut noodles Kamut® flour is a little heavier than processed white wheat flour, but much lighter than typical whole wheat flour. Therefore it may be used as a substitute for either flour without a sacrifice in flavor or texture.
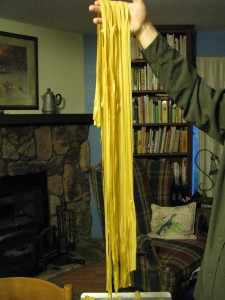
Very long noodles My son is visiting and we decided to use Kamut® flour in place of semolina.
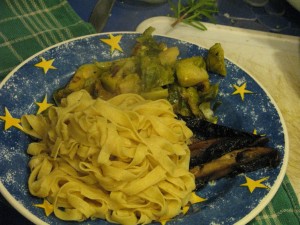
Kamoodles with portabella and broccoli. Kamut® noodles? Kamoodles!
KamoodlesAuthor: Diane KennedyRecipe type: Side DishCuisine: AmericanPrep time:Cook time:Total time:Serves: 6Kamut flour makes this side dish nutritious and delicious.Ingredients- Two cups organic kamut flour
- Three eggs
- Up to ¼ cup water as needed
- White flour for shaping
Instructions- Measure kamut flour into a large bowl.
- Mix eggs in a measuring cup or bowl until lightly combined.
- Make a well in the center of the flour and pour in eggs.
- Mix until completely combined.
- Form dough into a ball. If dough is too dry, add water a little at a time until dough sticks together enough to form a ball.
- Gently knead the dough a couple of minutes until it is slightly elastic.
- Wrap dough in plastic wrap and let sit for half an hour. If kept longer, refrigerate.
- Divide dough into quarters.
- Following the directions on your noodle machine, feed dough through repeating until it is at its thinnist level, then feed through cutter to make wide noodles.
- Hang noodles until all the dough is processed.
- Boil a large pot of lightly salted water (salt optional).
- When all kamoodles are cut, feed them gently into the boiling water and cook 2 - 3 minutes.
- Drain noodles.
- Serve with butter, or any other way you like to eat noodles.
The chapatis, which are the Indian version of tortillas or fry bread or pita bread, are simple and quick to make. With Kamut® flour they are far more nutritious. Besides, Kamut® chapatis is almost as fun to say as kamoodles!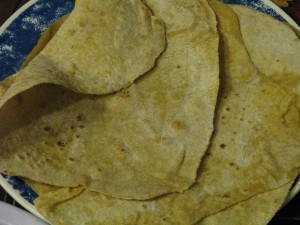
Kamut chapatis For 12 chapatis, mix 2 1/3 cups Kamut® flour with a tablespoon of olive oil and up to 1 1/3 cup water until it sticks together. Form it into a dough ball. Allow it to rest for several minutes. Divide dough into twelve equal pieces. Heat a skillet on medium-high heat and add a scant teaspoon of olive oil. On a lightly floured board roll out the Kamut® chapatis to a 10-inch circle. When skillet is hot, transfer rolled-out chapatis to it and cook 3-4 minutes on each side then remove. They should develop slight brown marks from the skillet and may puff just a little.

Kamut chapatis with curry and avocado. Keep warm while you finish cooking the rest. Serve with butter, spreads, as a scoop for curry, in place of tortillas for Mexican food, and as a fold-over sandwich. Yum!
I’ve also very successfully substituted one cup of Kamut® flour for one of the two cups of regular flour in my Spiced Pumpkin Scones. Kamut® gave them a little grainier texture that was very appealing without making them heavy. Substituting all the regular flour with Kamut® flour in a yeast bread worked beautifully, too. The loaf isn’t at all heavy as it would be if I substituted whole wheat flour. Very nutty and buttery flavor. So yum!
-
Make Your Own Soymilk
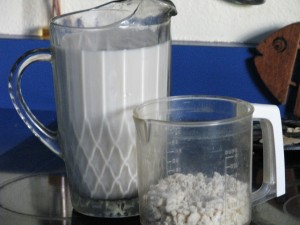
Soymilk and Okara A friend of mine, Kevin, came over and showed me how easy it is to make my own soymilk. What fun! Making your own soymilk is very economical and can be custom-flavored and sweetened to your taste. If you use organic soybeans -which I highly recommend because soybeans are one of the most sprayed crops – you can rest assured that you are serving your family a healthy, non-toxic beverage.
After Kevin showed me his way, I did a lot of research on other ways to make it, and tried some variations. Basically you soak dried soybeans (not edamame!) overnight, blend them up with water, heat it until it boils, strain it and flavor it, not necessarily in that order. Kevin’s method was to strain it before heating. I’ve found I like the results better to strain it after its hot; there isn’t any grit and it strains more quickly. Do whatever works for you.
When you make soymilk, you are actually making two products: soymilk and the high fiber and protein stuff that is strained out which is called okara. There are many recipes for using okara on the Internet, and I’ve found many in the classic cookbook, the Book of Tofu by Shurtleff and Aoyagi. Okara is virtually tasteless. If you strain your soymilk before its heated the okara is ‘fresh’ and a bit gritty. I made it into vegetarian fish patties following this recipe with good results, although they were a little too salty for me.

Fishless okara patties with sauce. If you cook your soymilk before straining, then the okara is also cooked and looks like hot farina. Okara is often mixed with grains and ‘meats’ as a nutritious additive and a food extender. It has little flavor on its own. I used some to thicken a pea soup that was too thin and it worked wonderfully. The soy industry has a lot of okara on their hands so it is usually fed to livestock. It can be frozen or dried, too. If you absolutely have too much okara then compost it, feed it to your worms or bury it around your plants.
Once you have the soymilk you can drink it plain, sweeten it with sugar, honey or whatever your choice is, flavor it with vanilla or something else, serve it cold or hot (which is the best!), or make tofu out of it.

Vanilla bean in hot soymilk Making tofu is also an easy process, which is just curdling the soymilk and straining out the solids; if you’ve ever made goat cheese then you can make tofu.
The ratio of soaked soybeans to water varies depending upon how thick you like your soymilk. Kevin showed me a 4:1 ration (water to beans) which made a thin soymilk, similar to 1% milk. I like the 3:1 ratio because the milk is creamier.
I found a good deal on Bob’s Red Mill organic soybeans on Amazon.com, the beans pricing out to .19 cents an ounce (four bags for about $19 total).

Organic soybeans. I couldn’t find them at my local Sprouts or health food store. One bag of Bob’s Red Mill organic soybeans weighs 1 lb 8 oz, which is about 4 cups of dried beans. The beans swell up by a third, so one package makes 12 cups of rehydrated soybeans. A cup of dried soybeans makes about two quarts of soymilk (and about two cups of okara), so a bag would make eight quarts. A huge savings, and I have the okara as well.
A few tips: you can easily soak a cup of beans overnight and make soymilk every few days, depending on your need and time.
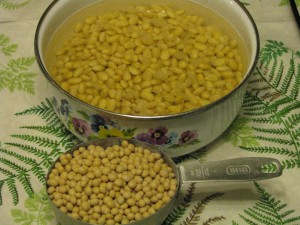
One cup of dried beans equals three cups soaked. Use a very tall pot because when you are heating the soymilk it will take forever and then just when you turn away it will come foaming up out of the pot like something possessed; a tall pot helps keep it under control. After you pour out your soymilk, wash or at least soak your pot. The soymilk residue dries hard and must be soaked again to get off. Use several layers of cheesecloth (which you can wash and reuse), or a piece of muslin to strain your soymilk.
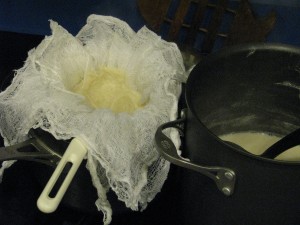
Strain okara through cheesecloth. Also the raw soymilk doesn’t smell very appetizing. It is very beany and grassy. Once it comes to a boil the smell will change into a very yummy tofuish scent.
There is also a great dissent on how long you heat the soymilk. Kevin’s recipe was to just bring it to a boil. Some recipes recommend twenty minutes of boiling. I find that five minutes heats the soymilk and cooks the okara sufficiently. Experiment.
Soymilk and OkaraAuthor: Diane Cynthia KennedyRecipe type: BeveragePrep time:Cook time:Total time:Serves: 8Fresh organic soymilk and okara- delightful and inexpensive. This recipe will make about 5½ cups of silky soymilk and about 2 cups of cooked okara.Ingredients- One cup dried soybeans, soaked overnight
- Nine cups water
- Flavoring (optional)
- Sweetener (optional)
Instructions- Drain the soaked soybeans (which will now be about 3 cups).
- Scoop a cup of soybeans and put in blender with three cups of water.
- Blend until smooth.
- Pour mixture into a tall pot.
- Repeat with the other two cups of beans.
- Heat mixture until it boils, stirring constantly. This can take some time, so I usually give it a stir now and then until it starts steaming a little, and then give it all my attention so that it doesn't foam up and overflow.
- Lower temperature, stir down the foam and simmer for five minutes.
- Line a sieve with several layers of cheesecloth or a piece of muslin (you are trying to catch fine particles) and place sieve over another tall pot or container.
- Carefully ladle soymilk into the lined sieve and allow to drain (you can wait until mixture is cooler before you do this if you'd like.) Use a spoon to move the okara out of the way as you ladle. If you double the recipe you may need to strain the okara and empty the cheesecloth before you finish straining all the milk.
- Allow the okara to drain and cool until you can handle it comfortably.
- Wrapping the cheesecloth around the okara, squeeze the bundle until all the soymilk drains out.
- Refrigerate the okara until ready to use.
- Use soymilk plain, or heat and add flavoring and/or sweetener to taste. I like honey and vanilla.
- Refrigerate cooled soymilk. The soymilk should keep for about a week refrigerated; the okara about four days.
- Animals, Bees, Chickens, Cob, Compost, Composting toilet, Gardening adventures, Health, Heirloom Plants, Herbs, Natives, Permaculture and Edible Forest Gardening Adventures, Ponds, Rain Catching, Recipes, Salads, Soil, Vegan, Vegetables, Vegetarian, Worms
Southern California Permaculture Convergence! Be there!

Southern California Permaculture Convergence If you are interested in any aspect of permaculture, such as organic gardening, herbs, planting native plants, aquaponics, natural ponds, beekeeping, keeping chickens, and so much more, then you must come to the Southern California Permaculture Convergence. It happens on March 9th and 10th at the Sky Mountain Institute in Escondido. The keynote speaker will be Paul Wheaton, lecturer and permaculturalist extraordinaire of www.permies.com fame. Oh, and I’ll be one of the many speakers as well (cough cough). The Early Bird special of only $50 for both days ends at the end of January, and then the price will rise, so buy your tickets now!
Also, for a full-on demonstration of taking bare land and creating a permaculture garden, there will be a three-day intensive class taught by Paul Wheaton on site the three days prior to the Convergence.
You can read about the convergence here at the official website, which will give you the link perm.eventbrite.com where you may purchase tickets. Also visit the SD Permaculture Meetup page to see all the free workshops that happen monthly all over San Diego.
This convergence is such a deal, you really shouldn’t miss it! And such a bargain, too. One of the best things I find that come out of these convergences is the exchange of ideas and networking among the attendees, and all the practical information you can take home and use right away. One of the largest parts of permaculture is building community, which means sharing with and assisting others.
Really. Don’t miss this! Tell your friends!
- Compost, Gardening adventures, Giving, Health, Natives, Permaculture and Edible Forest Gardening Adventures, Soil, Vegetables
Stinging Nettle and World Peace
One of my very good friends asked me what to do about a proliferation of stinging nettle in her yard. There is a creek running through the bottom of her property, and while once there had been Jimson weed and other natives growing there, now there is just nettle which is spreading to her lawn. Her hand hurt for a day from inadvertently pulling some out bare-handed. Her neighbor had told her that “nettle was bad” and would take over. She was laying cardboard on some of it, but was afraid that wouldn’t be enough.
One of the main practices of permaculture is to take what is considered to be a problem and look at all sides of it, just as in Zen you must think like your enemy, or in some Native American beliefs you must walk a mile in another’s shoes.
Fortunately I knew some things about nettle, and told her that nettle was not only edible once the acid had been blanched away, but highly nutritious. Here is a good description of what it can do. It is a superb compost enervator. The disappearance of the other natives by the streambed was evidence that someone upstream had sprayed an herbicide that washed downstream and killed everything. The prolific growth of stinging nettle, which is an indicator plant for high nitrogen in the soil, showed that someone’s high nitrogen lawn fertilizer came the same way.
Nettle’s acid is simply an excretion by the plant on the hairs along its stem to discourage browsing animals. The sting is immediate and temporary, unlike poison oak which has an irritating oil that can spread with touch and takes a few days to cause a rash. In nature often the cure grows near the problem, and therefore both the riparian plants mint and plantain can be rubbed onto the area to alliviate the sting, but soap and hot water works just as well. Nettle reproduces only by seed, not by rhizomes or other invasive tactics. It likes water therefore it takes root in lawns which are watered frequently and are fertilized with nitrogen.
My friend is always ready to embrace new information, especially where nutrition is concerned, and immediately stopped looking at nettle as a potentially dangerous invader of her property, to an indicator of other problems (stream pollution) and a health goldmine. To control what she doesn’t use she knows she can cut it down before it seeds and it won’t spread (and the cut plants will charge her soil), and if she wanted to restore the wetlands area she could continue to lay cardboard to cover most of the nettle, then top them with soil and straw, cut holes through to the dirt and transplant native riparian plants into the sheet mulch. There are no invaders, no monsters in her yard.
While pulling ragweed out of the pathways at my place with another friend (I have become so rich in friends this last year!), I told her about the nettle. Her reply was that while she worked in the garden she’d see things in a new perspective. Knees to the earth, eyes choosing between ragweed and sprouting wildflowers, lungs full of the scent of good soil, permaculturalists steer away from the stereotypcial gardening approach and see benefits where others see problems.
And this is what this post is all about: applying permaculture practices to everyday living, from personal to global thinking. In permaculture there are no invasives, no bad guys. Even my hated Bermuda grass is a plant in the wrong place, spread because people insist on seeding lawns with the stuff. Its function is to hold soil and moisture and break up hardpack. It does this admirably well, only I don’t want it in my garden. In permaculture, problems are like little moons where you see nothing but black on the dark side until you turn it to see the incredible sunlit topography on the other side, and understand that all those details are there on the dark side as well. A problem is just an opportunity for creative thinking; a resource whose purpose isn’t clear as yet. Therefore there are no ‘weeds’, no stereotypes.
So take these phrases and look at them with the eyes of permaculture: Teens are irresponsible. Old people are antiquated. Dark-skinned people are dangerous. Light-skinned people are dangerous. The government is out to get us. All businesses are bad. All politicians are corrupt. Men are incompetent. Women are hysterical.
Imagine these phrases as balls you can turn in your hand, like little moons. Examine, understand, see that anger and violence all stems from fear. Look at all sides of the phrases and see that they cannot be true. Just as stinging nettle isn’t an invasive plant out to get people, but a plant rich in potentials doing its job, then any potential imagined threat to our safety can be understood and appreciated until we no longer face it with fear. We hire and train youths. We listen to the life experience of the old. We vote to change the government. We support small businesses. We offer training and workshops to teach. We offer safe, sane gardens in which to meditate. We produce good organic food to nourish brains and bodies and activate good health.
By gardening with permaculture in mind we can so easily imagine a more peaceful world, both for our small personal worlds and on a global scale. Therefore it is imperative that we introduce others to permaculture, for the saving of the earth and of ourselves.
- Animals, Books, Breads, Chickens, Compost, Gardening adventures, Giving, Health, Humor, Permaculture and Edible Forest Gardening Adventures, Pets, Recipes, Reptiles and Amphibians, Soil, Vegetables
The Life of Di, or Fall At My House
“And here’s another fine mess you’ve gotten me into!” I like to be involved with many projects at once. I picture my life as an opal, my birthstone, full of swirled colors and hues. I have several books going at once, projects chipped away at around the house, volunteer responsibilities strewn across my week, and far too many animals and acres to care for. When I’m exhausted I can spend a day on the couch reading with no trouble at all being the picture of laziness. Prior to Thanksgiving I underwent a skin cancer preventative treatment on my face and hands, which required applying a topical cream twice a day that brings suspicious cells to the surface and burns them off. By the end of the second week I was quite a mess, and then took another week to heal enough to be seen in public without alerting the zombie hunters. The treatment, needless to say, kept me from being in sunlight, therefore housebound. Always loving a clean, organized house but never actually completely cleaning or organizing, I figured I’d get some work done. I tried sorting about 15 boxes of photo albums left by my mother and grandmother… and got through one box before I had to stop. I wanted to bake bread, and I wanted to find something to do with the small amount of hops we harvested, so I experimented with a recipe that had a starter, sponge and rising that altogether took five days. The Turnipseed Sisters’ White Bread from the classic Bernard Clayton’s New Complete Book of Breads .

Turnipseed Sisters’ White Loaf starter made with hops. The starter really smelled like beer. Not in a pleasant way, either. However the bread was good, and baking was fun.

Good sandwich and toast bread. Just the extra carbs I needed for sitting on my butt for two weeks, right? Then I wanted to thin, clean and alphabetize the fiction section in my living room.

Books piled alphabetically… a little later there was a small avalanche. Yes, I have enough books in my house that they are in sections. Former school librarian and bookstore worker here. I haven’t done the non-fiction section as yet, which extends to most of the other rooms in the house. Maybe next year? I did a little writing, a lot of reading, surrounded by my elderly dog Sophie

Sophie enjoying good sleeps. who keeps returning from the brink of death to sleep about 23 hours a day, and one of my hens, Viola, who suddenly went lame in one leg.

Viola on a healing vacation. All advice was to cull her, but I thought that she pulled a muscle and hadn’t broken her leg, and being vegetarian I don’t eat my pets. Viola has been recuperating in a cage in the dining room, gaining strength in that leg, laying regular eggs, having full rein of the front yard, and crooning wonderfully. As I count wild birds for Cornell University’s Project Feederwatch, I keep an eye on the hen. The cats ignore her, thank goodness. I’ve quite enjoyed having a chicken in the house. Yep, I’m starting to be one of those kinds of aging ladies.
In between I’d spend time crawling under bushes to push and shove my 100-pound African spur thigh tortoise out of his hiding spot and into the heatlamp-warmed Rubbermaid house he shuns so that he wouldn’t catch cold in the chill damp nights. I always come out victorious, with him angry and begrudgingly warm, and with me wet, muddy, hair full of sticks and hands full of scratches. Does anyone have a life like this?

“I’m performing advanced trigonometry in my head, don’t bother me, Woman!” Finally my skin healed enough so that I was able to venture outdoors.
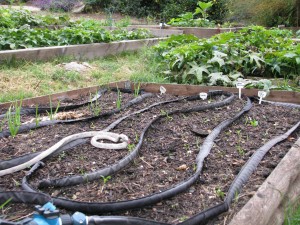
Garlic and seed sprouts guarded from birds by a rubber snake. I planted seeds of winter crops: collards, kale, garlic, onions, carrots, Brussels sprouts and broccoli rabe, and prepared raised beds for more.
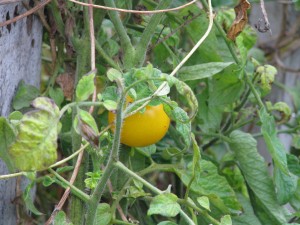
Yellow perfection tomatoes still ripening, as are the green zebra. I ordered organic pea, lupine and sweet pea seeds from Baker Creek Heirloom Seeds , all nitrogen-fixers to plant around the plant guilds.

Pepperoncini still producing. On Thanksgiving I hiked 1200 feet up Monserate Mountain in a record slow time; all that sitting and all that bread causing me to often stop and watch the slow holiday traffic on Hwy. 15, and be very glad that I was on a hike instead.
The neighbors had their annual tree butchering, paying exorbitant sums to have the same so-called landscapers come in and top their trees (shudder!) and thin others… for what reason I have no idea. Because being retired Orange County professionals they believe that trees need to be hacked back, contorted, and ruined? Possibly.
Please, please, please, friends don’t let friends top trees! Find an arborist who trims trees with an eye to their health and long-term growth and immediate beauty. A well-pruned tree is lovely, even just after pruning. A topped tree is brutal and ugly.

A topped coral tree. Ugh! Anyway, the upside is that I claimed all the chips, giving new life to the ravaged trees as mulch for my pathways. Two truckloads were delivered. I think I have enough for the whole property.
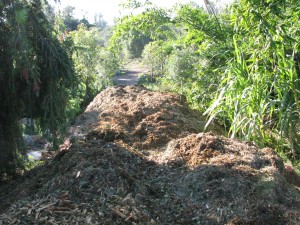
“The bear went over the mountain to see what he could see. He saw another mountain…” How to spread it? Yep, one wheelbarrow full at a time.
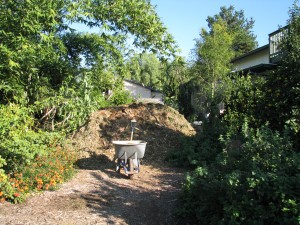
One wheelbarrow at a time. I can now condition myself for more hiking and weight lifting without leaving the property. The heaps have a lot of pine in them (they thinned the pine trees!???) so there is a pleasant Christmassy smell emanating from the heaps.
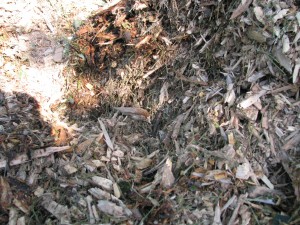
Hot steamy mulch. They are also very high nitrogen and were hot in the center on the second day and this morning were steaming right after our brief rain shower. Mulch piles can catch fire; when I worked for San Diego County Parks we rangers would joke about who had been called out by the fire department when their newly delivered mulch pile had caught fire in the night.
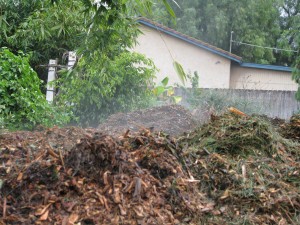
Steam from the mulch mountains. I stood on it just now and steam went up my pant legs and warmed me up! I also received a gift of seven 15-gallon nursery containers of llama poo!

The wealth of llama poo. Hot diggity! Early Christmas: My diamonds are round and brown, thank-you. I layered them in the compost heap and am ready for more.
I also wholeheartedly participated in Small Business Saturday, finding happy locals and crossing paths with friends and aquaintences at several stores. I received my first Merry Christmas from a man at Myrtle Creek Nursery’s parking lot as he waited for his son’s family to pick out a Christmas tree. I do love this town.
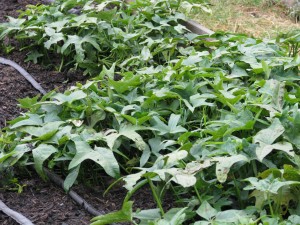
Sweet potatoes ready to harvest for Christmas dinner. That catches me up. Lots of projects, lots of volunteering, lots of cleaning up to do before my daughter comes home for the holidays and despairs at my bachelorette living. Lots of mulch to move. Lots of really great friends. Lots of sunscreen to wear. Lots to be thankful for.
-
Preserving Squash and a Terrific Pumpkin Chai Recipe!

Beautiful patterns on the banana squash shell. Four sugar baby pumpkins that I’d kept for myself, and three pink banana squash, were all in need of preservation. They were not keeping well due to the warmth of our hot San Diego county Fall. During a rainy break in the weather I did something about it. You can preserve cooked pumpkin and winter squash best by freezing it. If you have a pressure canner you may can pureed pumpkin or pumpkin pieces in liquid, but since I only use the water bath method that wasn’t an option.

Even sugar baby pumpkins can be difficult to cut when raw. There’s a better way! Roasting a squash isn’t difficult at all. In fact, you only have to wash it, put it on a tray in a 350F oven for about an hour (longer if its a really large pumpkin), and then slice when cooled.

Roasting a whole pumpkin makes the scooping so easy! Its easy to scrape out the seeds and then spoon out the cooked flesh out of the hardened shell. This is what I did for the sugar baby pumpkins. There was too much banana squash to fit whole into the oven, however, so I cut them into chunks, scooped out the seeds, covered them with aluminum foil (it helps steam them) and baked 350F for forty-five minutes.
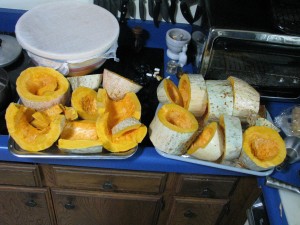
Three banana squash is a lot of squash I have more details here. I also roasted the pumpkin seeds.
Then I had a lot of squash to puree! These squash and pumpkins were dry, so I added a little water to the VitaMix and tossed in the chunks.
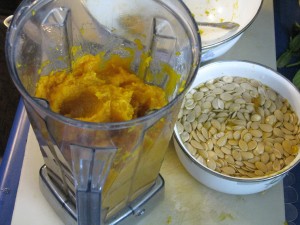
Pumpkin and seeds. I pureed batches until smooth, then spooned cups full into freezer bags. My pumpkin scone recipe calls for only half a cup, so I froze one-cup batches, as well as two-cup batches for pie. The secret to ‘vacuum-packing’ freezer bags is to close the top of the bag around a straw and then suck all the air out. It really works well, and is kind of fun, too.

Get a straw, suck out the air and presto: vacuum packed! However, the best thing that happened out of all this squashing was that I had a little less than a cup of pureed roasted squash left in the VitaMix, too little to freeze and really irritating to scoop out. It was a cold day and past lunchtime. I had an idea and spooned in what was left of some Chai tea mix, poured in vanilla soy milk, blended it until it warmed up and sat down to drink. Heaven! I’m not one for pumpkin flavored things, but this was the real deal.
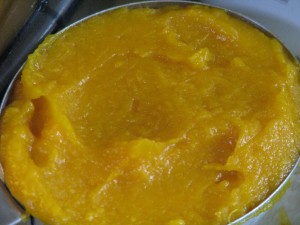
Pumpkin puree. It was so good that the next day I took a cup of the pureed squash that I refrigerated, poured in 1 1/2 cups of vanilla soy milk, a touch of orange syrup left over from candying orange peel, added cinnamon and blended until it was hot. It was thick, satisfying, a little sweet, spicy and full of beta carotene, fiber, protein and other good things. I’m sure you can do the same thing with canned pumpkin and other liquids, such as milk, rice milk, almond milk or coconut milk. If fact, I insist that you try it.

Hot Yum! Pumpkin ChaiAuthor: Diane C. KennedyRecipe type: BeverageCuisine: AmericanPrep time:Cook time:Total time:Serves: 2Cold or hot, spiced pureed pumpkin or squash mixed with the milk of your choice is extreme comfort food that is actually terrific for you!Ingredients- 1 cup cooked pumpkin or squash puree, fresh or canned.
- 1½ - 2 cups vanilla soy milk, or milk of your choice. (Less for a thick drink).
- ½ - ¾ teaspoon cinnamon, pumpkin pie spice or up to 1 scoop Chai tea mix.
- Sweetener (optional); a natural syrup would do or honey.
- ½ teaspoon vanilla (optional)
Instructions- For cold pumpkin chai mix all ingredients briefly in a blender or VitaMix.
- Taste to adjust seasonings, thickness and sweetener, and serve.
- For hot pumpkin chai, heat milk and add to the rest of the ingredients in a blender and process. If you have a VitaMix, you can add all cold ingredients and then process until it is hot.
I’m going to make some more for me right now. -
Yes There Is A Bleach Alternative That Works!
Bleach does wonders for whites, kills germs and purifies water. It is also a toxic chemical, it kills the microbes in your septic tank, it corrodes what it touches and can do your lungs, skin and eyes major harm, especially when combined with other chemicals. Many over-the-counter natural cleansers seem weak and probably don’t do a good job disinfecting, besides being very costly. Here is a recipe for success: a safer bleach alternative that really works. Vinegar is of course a fantastic cleaner, but if the pervasive smell of Easter eggs is too much for you, then how about the smell of citrus? I have plenty of lime trees so I have an ongoing supply of lime juice, but an inexpensive bottle of lemon juice works as well. I’m going to direct you to a blog link on Grit magazine’s ezine, because I certainly can’t do better than Lucy Razor’s very through and well-researched article. So here is the recipe for natural bleach alternative. Now go make up a batch!
- Bees, Compost, Gardening adventures, Health, Heirloom Plants, Other Insects, Permaculture and Edible Forest Gardening Adventures, Soil, Vegetables
Integrated Gardening

Wildflowers, tasty borage, milkweed for the Monarch butterflies, and herbs. There are still those who prefer to have all their plants separate, each plant type confined to its own space. Vegetables should definitely not be allowed in the flower garden; herbs may be there only if more ornamental than useful, but don’t ever mix desert, country cottage or rose gardens together. That style of design is a matter of preference, and many gardens following those rules are very beautiful. They are usually also high maintenance, heavily fertilized, watered and sprayed, with poison set out for rodents.

A breadseed poppy is emerging in the sage. The blending of useful and ornamental plants is certainly not a new idea, and yet it isn’t often done. When it is, gardeners should find that the loss rate of plants to pests is quite low, and the yield of the vegetables is high.

Onions, native mallow, tarragon and sweet potatoes under a white fringe tree. Why is this? For one thing, planting mixed seeds which include ornamentals, herbs and vegetables masks the scent of the most yummy plants from its preditors. There aren’t rows of the same type of plant for the insects to find. Since different plants take up different nutrients from the soil, the soil isn’t depleted of one particular nutrient, so mixed plantings usually make for healthier and tastier plants.

My first tomatoes of the season, off of a volunteer along the pathway. Oh so yum! Wildflowers with cilantro, dill and basil not only are more successful and appealing to look at, but if let go to flower are excellent pollen sources for bees.

Young parsley, California poppy, cilantro and dill by rain lilies. Allowing desirable plants to reseed not only saves you money, but makes the new plant hardy and adapted for your particular garden.

Volunteers are welcome, such as this squash. Of course mixing plants is what an edible forest garden is all about, although the mixing isn’t random. Each plant serves a purpose. I use fava beans as a great edible nitrogen-fixer, along with other beans, peas, sweet peas, lupine, and nitrogen-fixing trees and shrubs. Artichokes grow quite large, and their leaves when cut and left on the ground make superb compost, as do the leaves of comfrey. Artichoke leaves keep growing back, and the plant will produce many very yummy artichokes. (Artichoke hint: wipe Vaseline around the stem below the bud to keep ants and earwigs from finding their way between the leaves.)

Artichoke and fava beans beneath an apricot tree. Melons and squash make an incredible ground cover during the hottest months. Their large leaves shade the soil surface and block evaporation. Remember that raccoons aren’t supposed to like going through squash vines, so plant them around your corn.

Green melon and corn by a variegated lemon (Sophie the dog by the car). Integrating your plants, especially when following the edible food forest guidelines, helps increase soil fertility (different plants remove different things from the soil). Mostly this is done by keeping the soil a more moist and inviting habitat for soil microbes and worms, but also by dropping their leaves which become mulch.

A guild: kabocha squash, heirloom squash and gourd (on wire) with onions interplanted to keep seedlings safe, along with something else that I don't remember planting, wildflowers, artichoke (under the milk carton for bunny protection), scented geraniums, lavender, borage, orgeano, sweet potatoes (not up yet), cowpeas, fava beans and Swiss chard by a small avocado tree. - Animals, Bees, Birding, Chickens, Compost, Gardening adventures, Health, Other Insects, Permaculture and Edible Forest Gardening Adventures, Photos, Ponds, Quail, Rain Catching, Reptiles and Amphibians, Soil
I Went to a Garden Party….

AAUW Garden Tour Saturday was the AAUW Garden Tour. What a glorious day. I expected about a hundred visitors, and made 120 handouts. Sometime in the early afternoon I guess they ran out, and I didn’t know about it for awhile. I made 25 more for the last two hours, and have five left. One of the docents said that some had been turned back in during the morning. Every couple probably took just one… wow, that’s a lot of people.
I’d been talking to the garden all week, asking the blooming plants to hold that thought for a few more days, and encouraging the nonblooming ones to get a move on. The plants did what I asked! There were so many flowers out Saturday, it was amazing. Heirloom roses, Gideon’s Trumpet, ranunculus, herbs, wildflowers, and waterlilies. The garden, apparently, also was also all for proof in advertising, as in standing behind the NWF Habitat sign on the front gate. So many kinds of butterflies and dragonflies were out for the first time this year that people remarked on it. In the afternoon, there were sightings of a king snake all over the property; I think it had to have been three kingsnakes. One was moved from the refreshment area, but he came back, and then as I was standing by the pond talking to some ladies one came past us. Another was sighted up in the driveway. Roger sighted a gopher snake. No one shrieked or complained; either these were hardy people, or the idea that this was a habitat yard made them keep calm. It also backed up my claims of letting snakes deal with gophers and rodents! One man spotted a baby bunny under the Withy Hide bench. By one o’clock, it was funny. It was as if a button had been pressed to turn the garden on, and all the features were working! What a glorious day.
Jacob (Aquascape Associates) and Roger (landscape architect) and I answered questions for most of the day; the last four visitors left at four. So many people asked questions about permaculture, soil, beekeeping, cob ovens and rain catchment that I know that I couldn’t answer everyone’s questions. Of course there were some who like a tidy, orderly garden, and that is fine. If everyone came away with some idea how to work with nature rather against it, to use chemicals less, to grow organic food, to repurpose, to compost their kitchen waste and weeds, then what a lot of small ripples of good will come of it.
Thank you to my dear friends who helped prepare the garden so that it looked stunning. And thank you to the snakes, butterflies, bees, dragonflies, birds, bunnies and who-knows-what-else that came out to perform for the visitors! And thank you to everyone who visited! No casualities; all good.
Here are some photos, although my camera doesn’t do the colors justice:
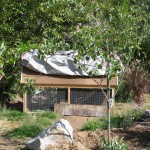
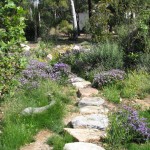
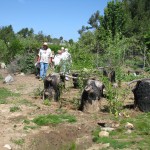
AAUW Garden Tour Welcome! Look at photos of how it was. Main entrance walkway Walkway into the Nest One of the many trails A palm sitting stump between guilds by the driveway A green melon under variegated lemon, with native grasses. Quail hut, with privacy boards up. Status and wildflowers across the stone walkway Cool spot under the upper pepper tree Roger and visitors by the Withy Hide Some of the first visitors of many Pickerel blooming in the little pond Gideon’s Trumpet keeping blooms and aroma until the tour Jacob teaching about natural ponds Baby bunny under the Withy Hide bench Roger answering questions View from the Bee Garden gate Cool spot under the pepper tree -
A Painless Breakfast, and a Bombilla
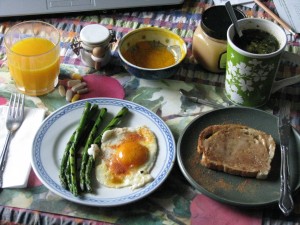
I'm all over this medicine! Food is the ultimate resource for health. As my body complains ever louder about all the years of abuse I’ve put it through, I’m turning to diet to help with the pain. Certain foods have anti-inflammatory properties, and they aren’t hard to eat at all. Cinnamon, turmeric, and ginger are high on the list. Cooked asparagus is excellent for kidneys and liver, and there is speculation that it cures serious illness as well. Whole eggs are much more healthy to eat than separating out the white and throwing away the yolk. The two parts compliment each other. As well great sources of protein, eggs are excellent for the eyes. The vitamin C found in fruit is an essential boost to your immune system, and helps other vitamins work better.
I also take some supplements. I take a multi-vitamin, a couple of natural menopausal relief pills, a vitamin C, and a couple of glucosamine/chondroitin tablets. G/C is a miracle supplement if you have arthritis. It helps keep the joints juicy.

Hot ginger tea; good for your tummy and good for your joints. So for mornings after a full day of weeding, carrying, hauling, flinging, and planting, I need everything I can get to help get my hands and back moving again. My ideal painless breakfast is: an egg from one of my hens, sprinkled with a turmeric and pepper combination (pepper is supposed to aid turmeric), some Trader Joe’s frozen grilled asparagus, heated, a piece of toast liberally sprinkled with cinnamon and coated with organic (sometimes home-harvested) honey, orange juice and a hot cup of ginger tea. I keep a small white container of cinnamon on the table, as well as a small bowl of the turmeric and pepper combination. That way I don’t forget to sprinkle it on my food. Inflammation is the source of almost all illness. If you can fight inflammation naturally, you’ll be a long way ahead health-wise. You’ll be relieved from pain that you never knew you had!

Bombilla I considered giving the bombilla its own post, but it was in the breakfast photo so I’ll talk about this wonderous gadget here. A bombilla is a metal or bamboo straw with a strainer on the end. Ingenious! Common in South America, it is commonly associated with the drinking of the new old fad tea yerba mate. However, to my delight it works perfectly with loose leaf and herbal teas! Instead of snapping and screwing and pressing tea strainers, I just put loose tea in my cup, brew it and drink it via the bombilla! So easy! Afterwards I scoop the spent tea into the compost, rinse the cup and the bombilla, and its good to go for the next batch. Loose leaf tea is such a better experience than using tea bags. With the bombilla, I now have herbal or loose leaf tea almost every time. Bombillas have transformed my drinking experience! I believe they are available at international marketplaces, but I bought mine online at Amazon.com. I bought two for me and my daughter, who took hers to college, and another as a gift for my son, and then two more as extras at home. Never can have enough bombillas! What a concept! A perfect drinking implement! My life will never be the same. Better still, I can now sip hot tea without losing my place in my book, or steaming up my glasses!


