Soil
- Bees, Gardening adventures, Other Insects, Permaculture and Edible Forest Gardening Adventures, Seeds, Soil
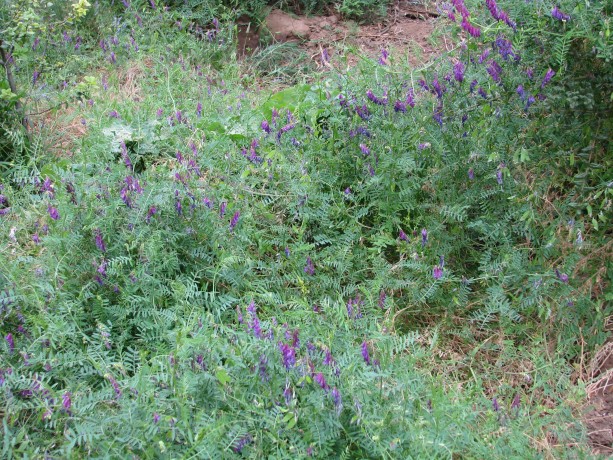
Hairy Vetch

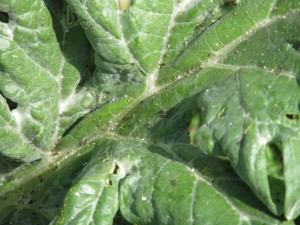
Attractive flowers and seeds. Hairy vetch (Vicia villosa), also known as winter vetch is a nitrogen-fixing plant that is used mostly for cover-cropping in monoculture fields. Native to Europe and Asia, it is a winter plant sown in the Fall and, in places where it snows, is killed off with the cold or tilled into fields. When a nitrogen-fixing plant dies or is cut back, roots die and release the nitrogen nodules into the soil. Here is sunny San Diego the vetch thrived since I sowed it in Spring of last year. It is a pretty, vining plant, with lovely dark purple blooms that bees and other pollinators love. It produces pea pods like its edible relative the fava bean, but I wouldn’t eat them. The seeds may be bad browse for livestock as well. The roots help hold soil during winter rains, too.
Hairy vetch clamboring all over the place Vetch can be hard to get rid of because it reseeds easily. It will also climb up bushes, competing with the bush for sunlight. If I didn’t know about the nitrogen-fixing properties and if the bees didn’t like it so much, I’d suspect it of being an invasive.
To control it I take my trusty hand scythe and cut the vetch out of bushes and close to the ground. I leave the vines to decompose and protect seedlings that I plant to take advantage of the newly-enriched soil.
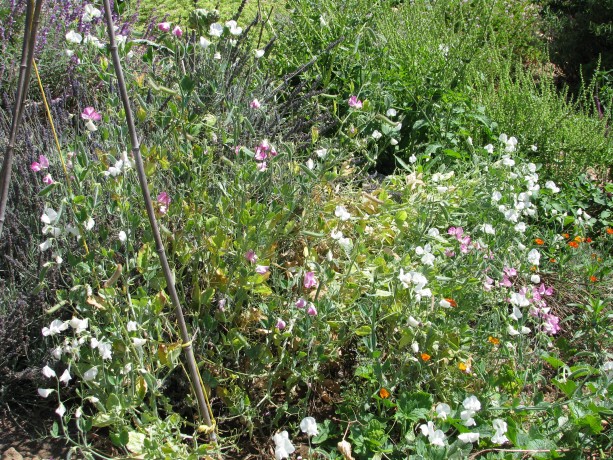
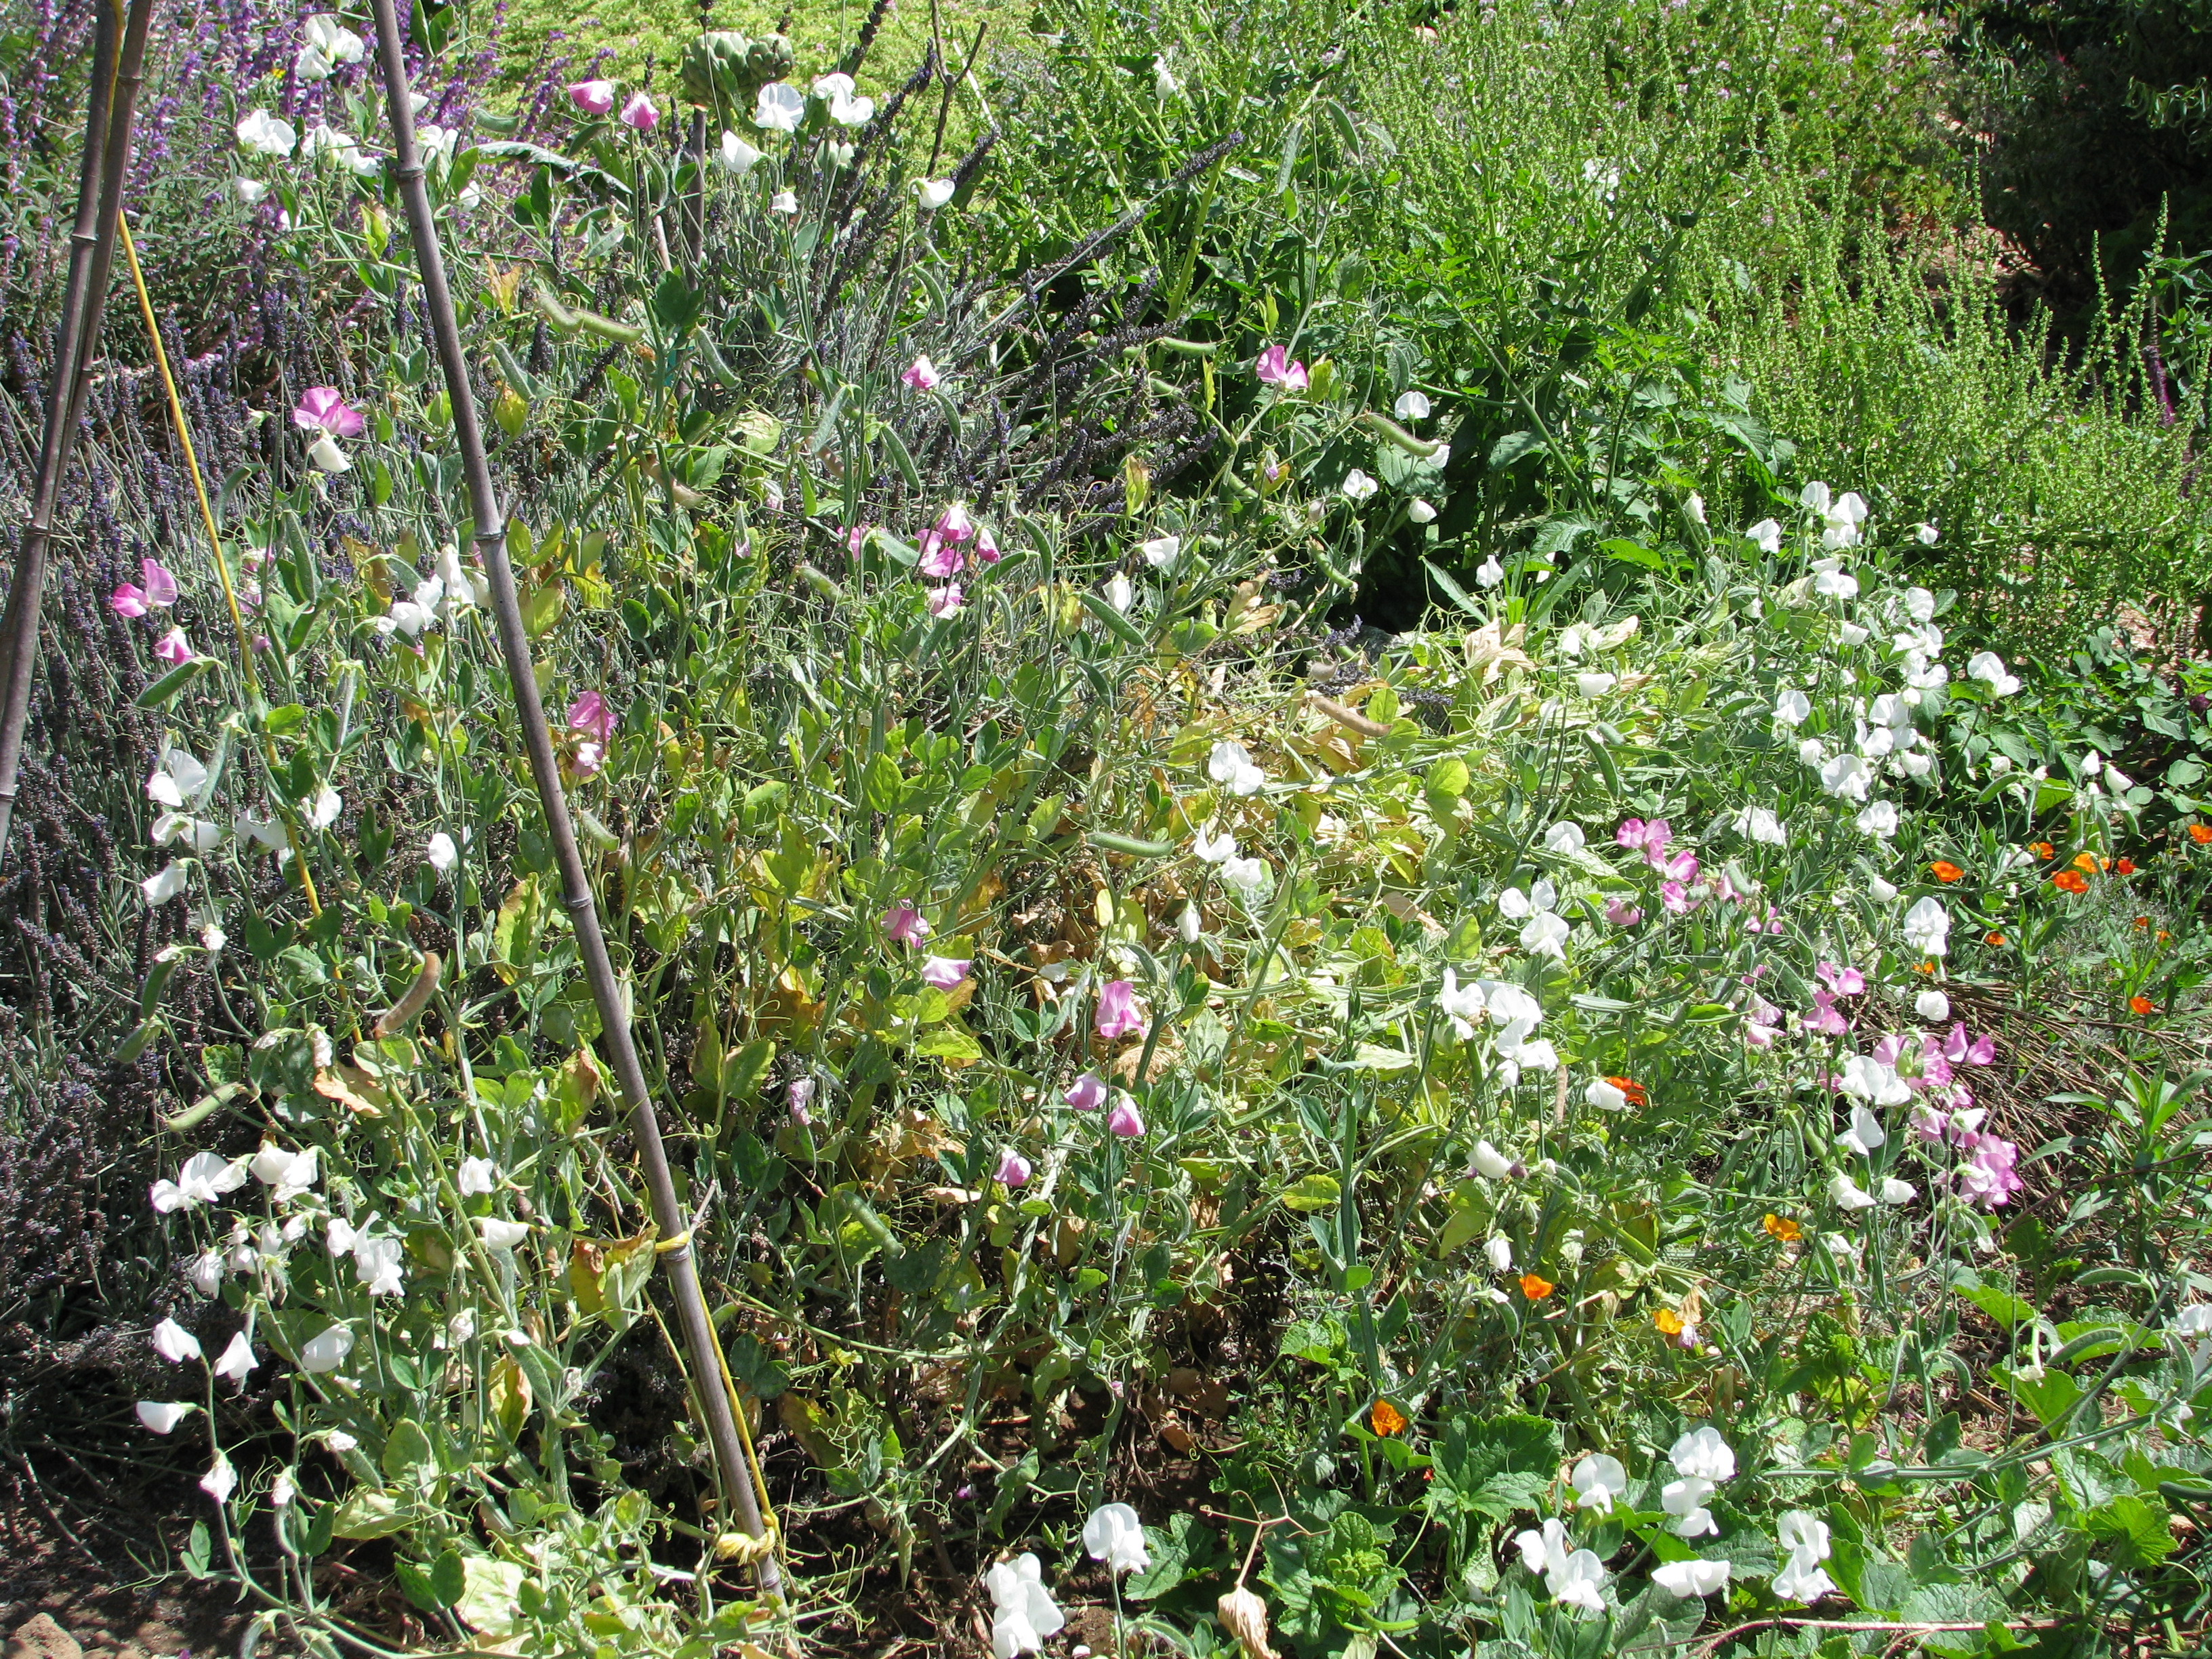
A mass of sweet peas climbing a lavendar. If you don’t want a cover crop that is so aggressive I suggest sowing a mixture of lupine, sweet peas, edible peas and fava beans in the Fall here in Southern California, and again in early Spring. In cold areas check with your farm advisor on when to plant.
You May Also Like

Native Insects and IPM
-
Fruit Tree Guilds: Making Your Trees Healthy and Happy
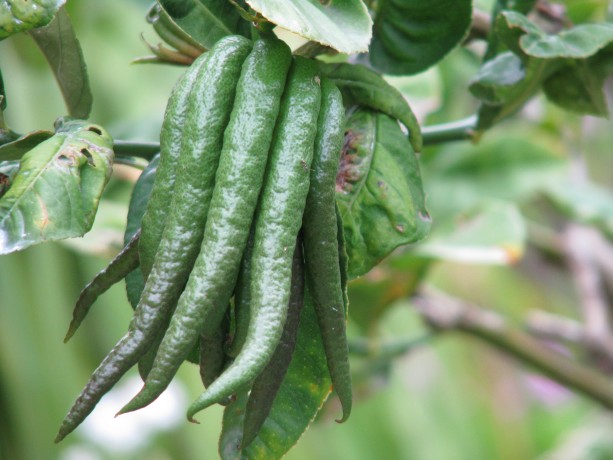
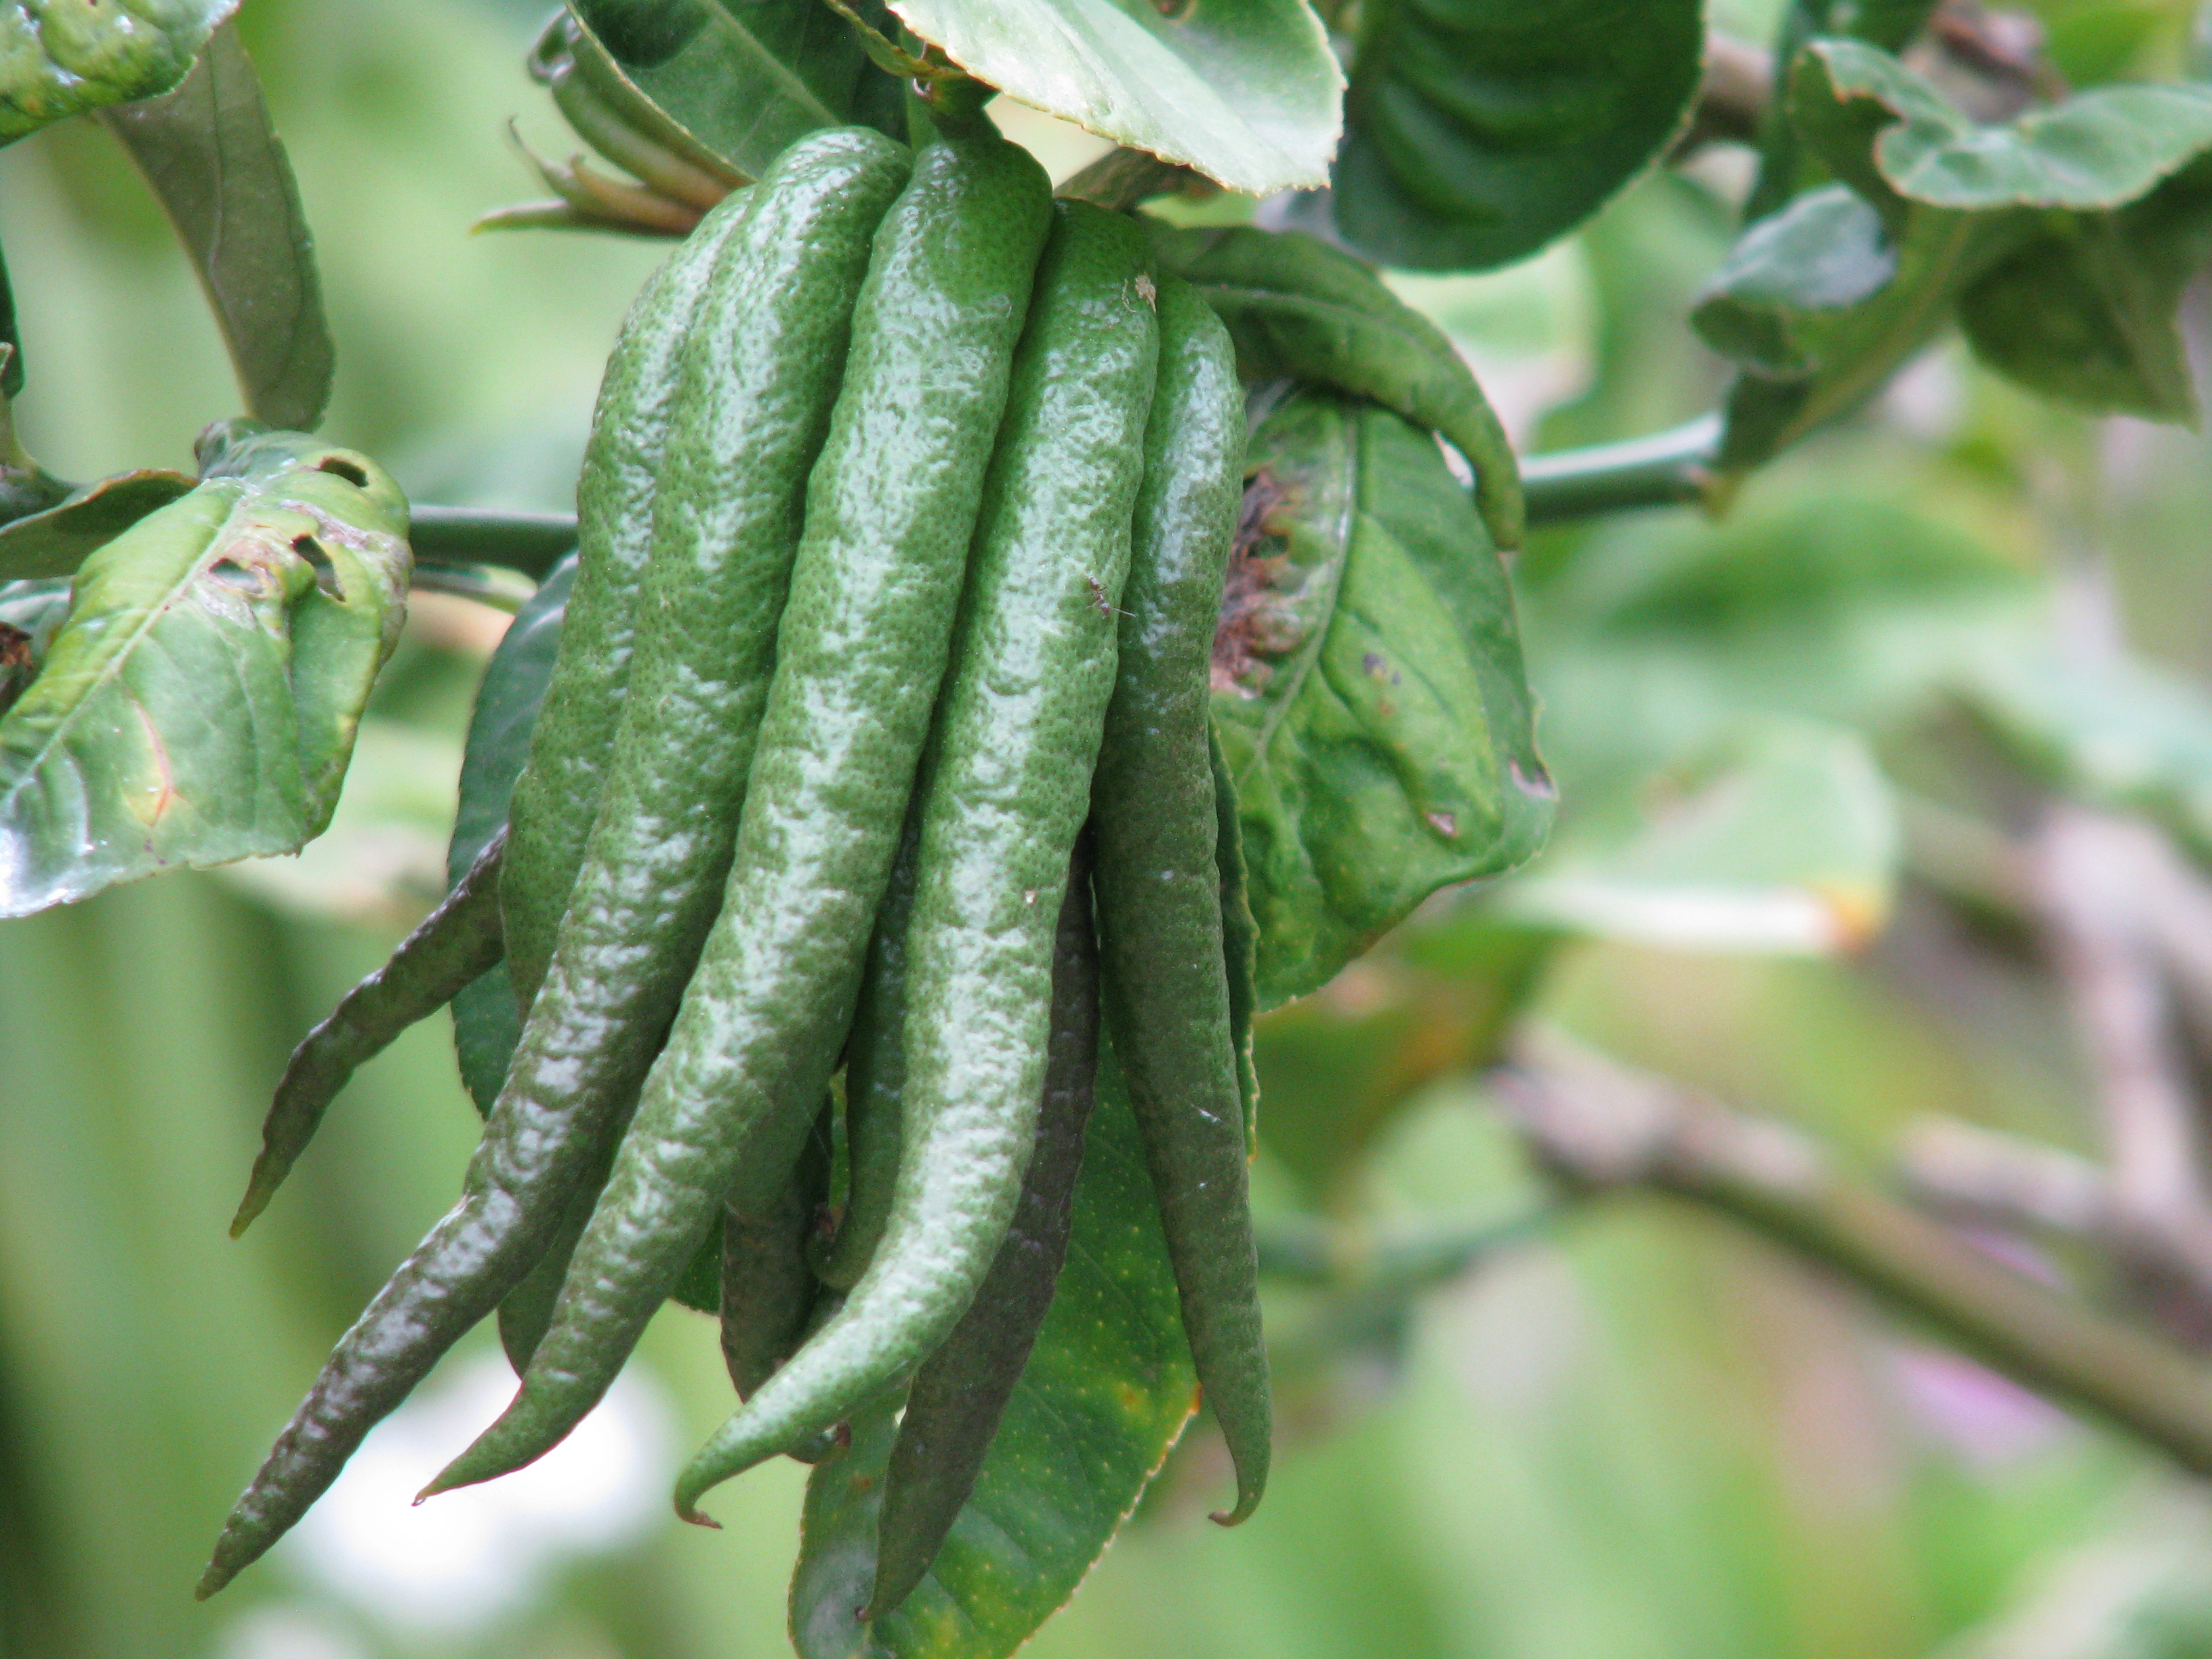
An unripe Buddha’s Hand citron. When bright yellow it freshens a room with a citrusy floral fragrance; is zest is wonderful in cooking and it can be candied. Or simply stuck up a sleeve and used to frighten people. A guild in permaculture terms is, as you know, an arrangement of symbiotic plants that serve as a plant community for the benefit of the whole. Visitors to Finch Frolic Garden often remark that planting guilds sounds so difficult; that they’d need to study so much about plants that it would be impossible for them to do. Not so. However, it isn’t just a whole bunch of plants planted so that they are stepping on each other’s shoes. The typical permaculture plant guild is defined by plants which do these functions: an upper canopy tree (shade, mulch from falling leaves, deep tap roots, roosting for birds which poop, hunt, etc., traps humidity, catches and filters rain and fog moisture), a lower canopy tree (same functions but shorter), a ground cover (habitat for small hunters and moisture trap), a miner plant (deep tap root to bring nutrients from deep in the soil to its leaves which deliver said nutrients when they decompose, and tap root breaks up soil and gives passage for water and worms), a nitrogen-fixing plant (works symbiotically with bacteria to trap nitrogen from the atmosphere on root nodules, which release into the soil when the top dies), and a pollinator-attractor (flowers for bees and all the tiny native bees, wasps and flies).
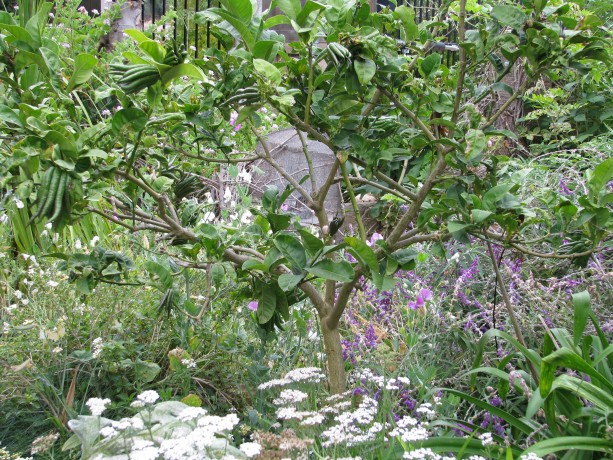
Buddha’s Hand citron (Citrus medica) happy in a guild of yarrow, sweet peas, artichoke (the leaves of which are regularly slashed and dropped), Cleveland sage, scented geranium and a variety of bulbs. The formula isn’t that complicated. I challenge you to come up with an example of each right now. Yes, you can do it. (Dum dee dum… I’m waiting for you to be done before I move on. ) Have it? Okay, here’s a quick example. Mulberry, dwarf peach, strawberries, carrots, sweet peas, dwarf yarrow and fava beans. The canopy trees will lose their leaves allowing sun to warm the understory plants in the winter. Strawberries make an excellent ground cover that grows food and loves the fungus-rich loam made by decomposing leaves. Carrots like cool weather and will thrive until ready to be pulled (and tops broken off and thrown on the ground) about when the trees fully leaf out. Sweet peas attract insects, smell great, and as a bonus are nitrogen fixers, and can twine up the tree trunks. Dwarf yarrow helps choke out grass, is used for many purposes including as a dye plant, and its flowers are clusters of small flowers perfect for the tiny pollinators, and bush peas are completely edible and also fix nitrogen. See? Easy.

Just in time for summer’s heat, a kabocha squash is rapidly covering the ground around the variegated dwarf orange and a young pink guava. I have to pull squash out of trees because they think they own the world, and it hurts to hit your head on a dangling pumpkin. I leave the vines to decompose in place after harvest. I have many, many trees which were all planted at the same time, and some of them have been neglected. A combination apple tree had been planted in extremely heavy clay and it hasn’t grown much in two years although it keeps trying to produce fruit. Bermuda grass (I cross myself when I mention it) has infiltrated the area to about four inches down. It is helping to break up the clay, but it is also choking out everything else. Plant guild time.

Bermuda grass in heavy clay right next to the trunk: no good. Last weekend I spent about three hours in the morning (mercifully before the June gloom dissipated so I didn’t roast in the heat) digging up and pulling out as much Bermuda grass as I could from the clay. I’d even soaked the area well the night before. That was the stuff of cob ovens. When I’d finally cleared past the tree (I’ll continue another day; there’s only so much of that my hands can take!), I shoveled in some pigeon guano that my good friends up the street deliver to me (tied with a ribbon! Christmas comes all year for a gardener!). The guano is very high in urea… you can smell the ammonia, but it also has feathers, corn and pigeon peas in it. Pigeon peas are a perennial legume that set nitrogen and produce wonderful pea pods for stir-fry. I watered it in well.

This apple was planted in clay in this planter. Never create a planter around an existing tree; mulch around the trunk will kill it. I had purchased some plants for the area, but to keep costs down just chose some that would fill out and help choke out the angry Bermuda grass bits yearning for revenge. Also, the tree is close by Harry Mud, the cob oven, so I wanted pizza-themed plants for easy picking. I planted strawberries right by the trunk inside the gopher cage in which the tree is planted. They will help retain moisture without compromising the bark of the tree. You never want to pile mulch up around the base of a tree above the root ball because you will rot your tree.
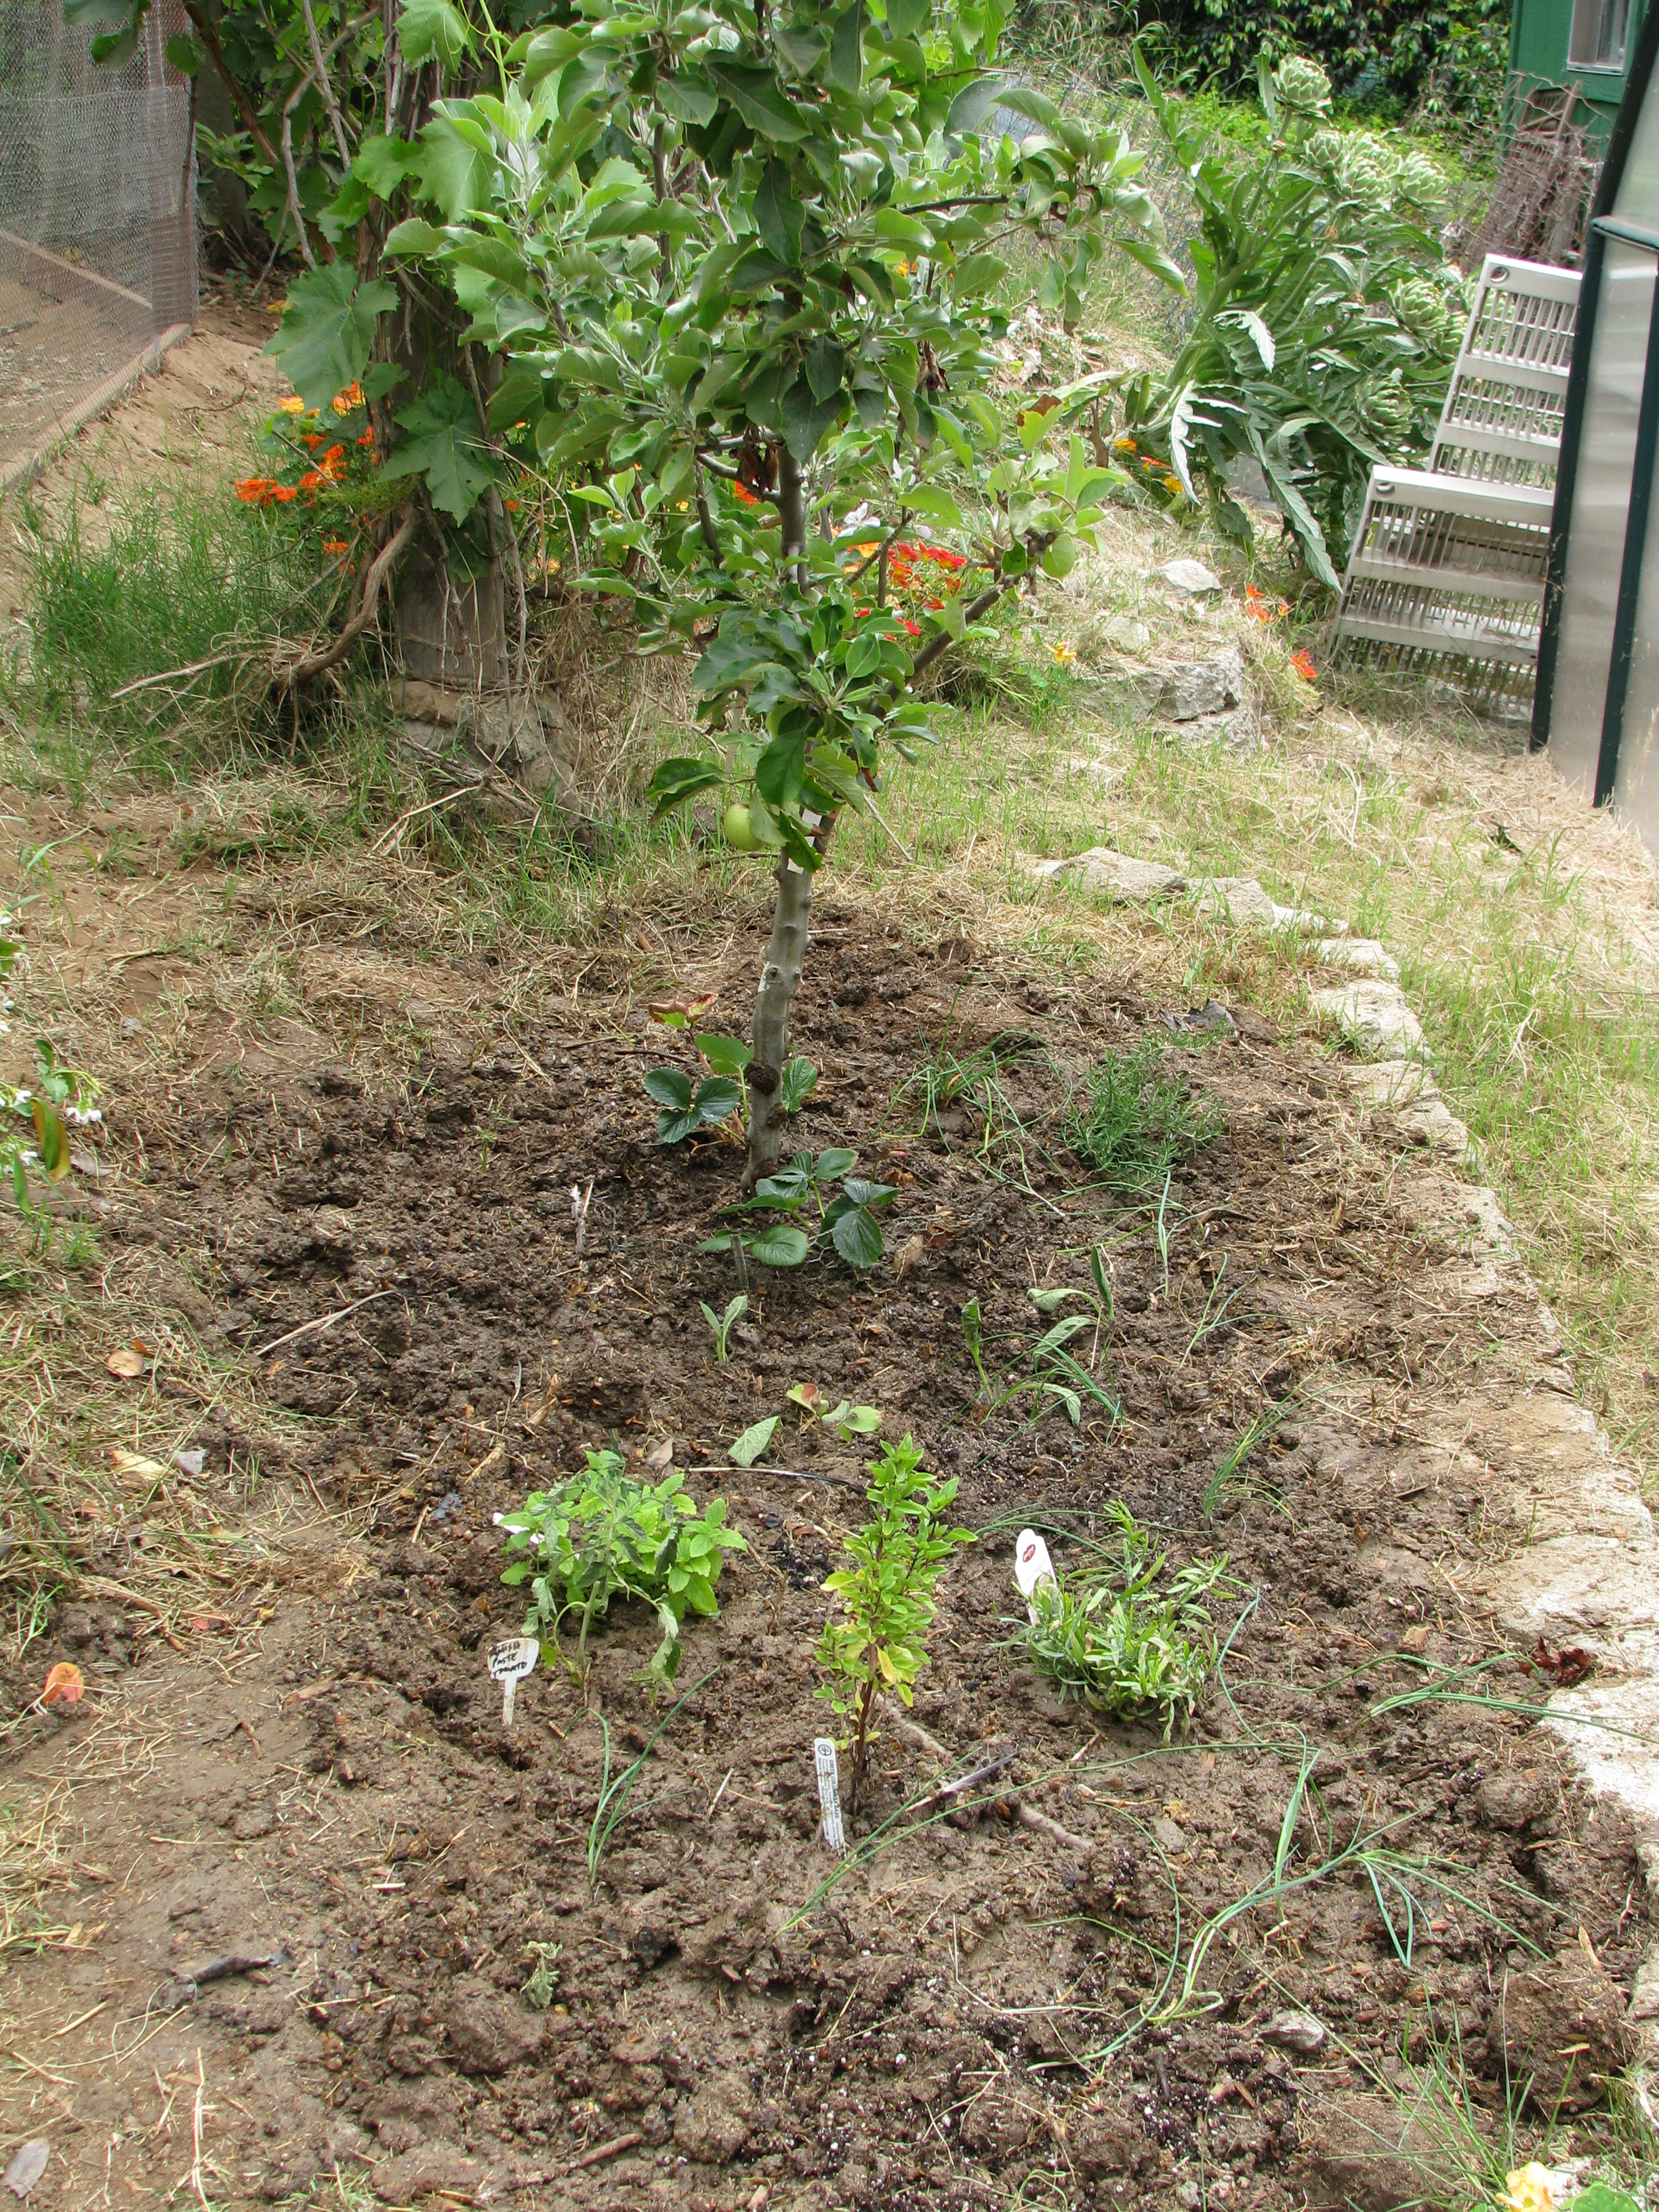
I also planted a tomato, a perennial basil, garlic chives all around the edge (bug protection), sunflowers, a prostrate rosemary and French tarragon. The pigeon peas and corn will very likely sprout. What I didn’t have was an upper canopy, but the tree is on the east side of a shed which protects it from the worst of the summer afternoon sun, and there is a grapevine nearby which produces leaf litter. When daffodil bulbs are readily available in the late Fall I’ll plant a ring of them around the drip line. Gophers don’t eat them, they help keep away the grass, they break up the soil and they are one of my favorite flowers (ranking second to sweet violets). All these plants as they grow up, down and across will help the apple tree, and the apple tree will help them. All of them produce food within easy reach of the cob oven and outdoor dining, are attractive and smell good, too. The tree should flourish. I don’t kid myself that I won’t be pulling Bermuda grass in the future, but the plants will help control it by shading and crowding out.

It doesn’t look like much now, but there are eleven support plants/seeds to help the apple tree now. Friends! If you have citrus trees you should plan a little differently. When trying to understand a plant, think of where it came from and in what growing conditions it thrived. Avocados are from South America, with humidity, rainfall, protection from intense heat, deep leaf litter and adequate drainage. Stonefruit are from areas with cold winters; their leaf drop keeps the roots protected from the freezing that triggers the trees to set fruit (chill factor).

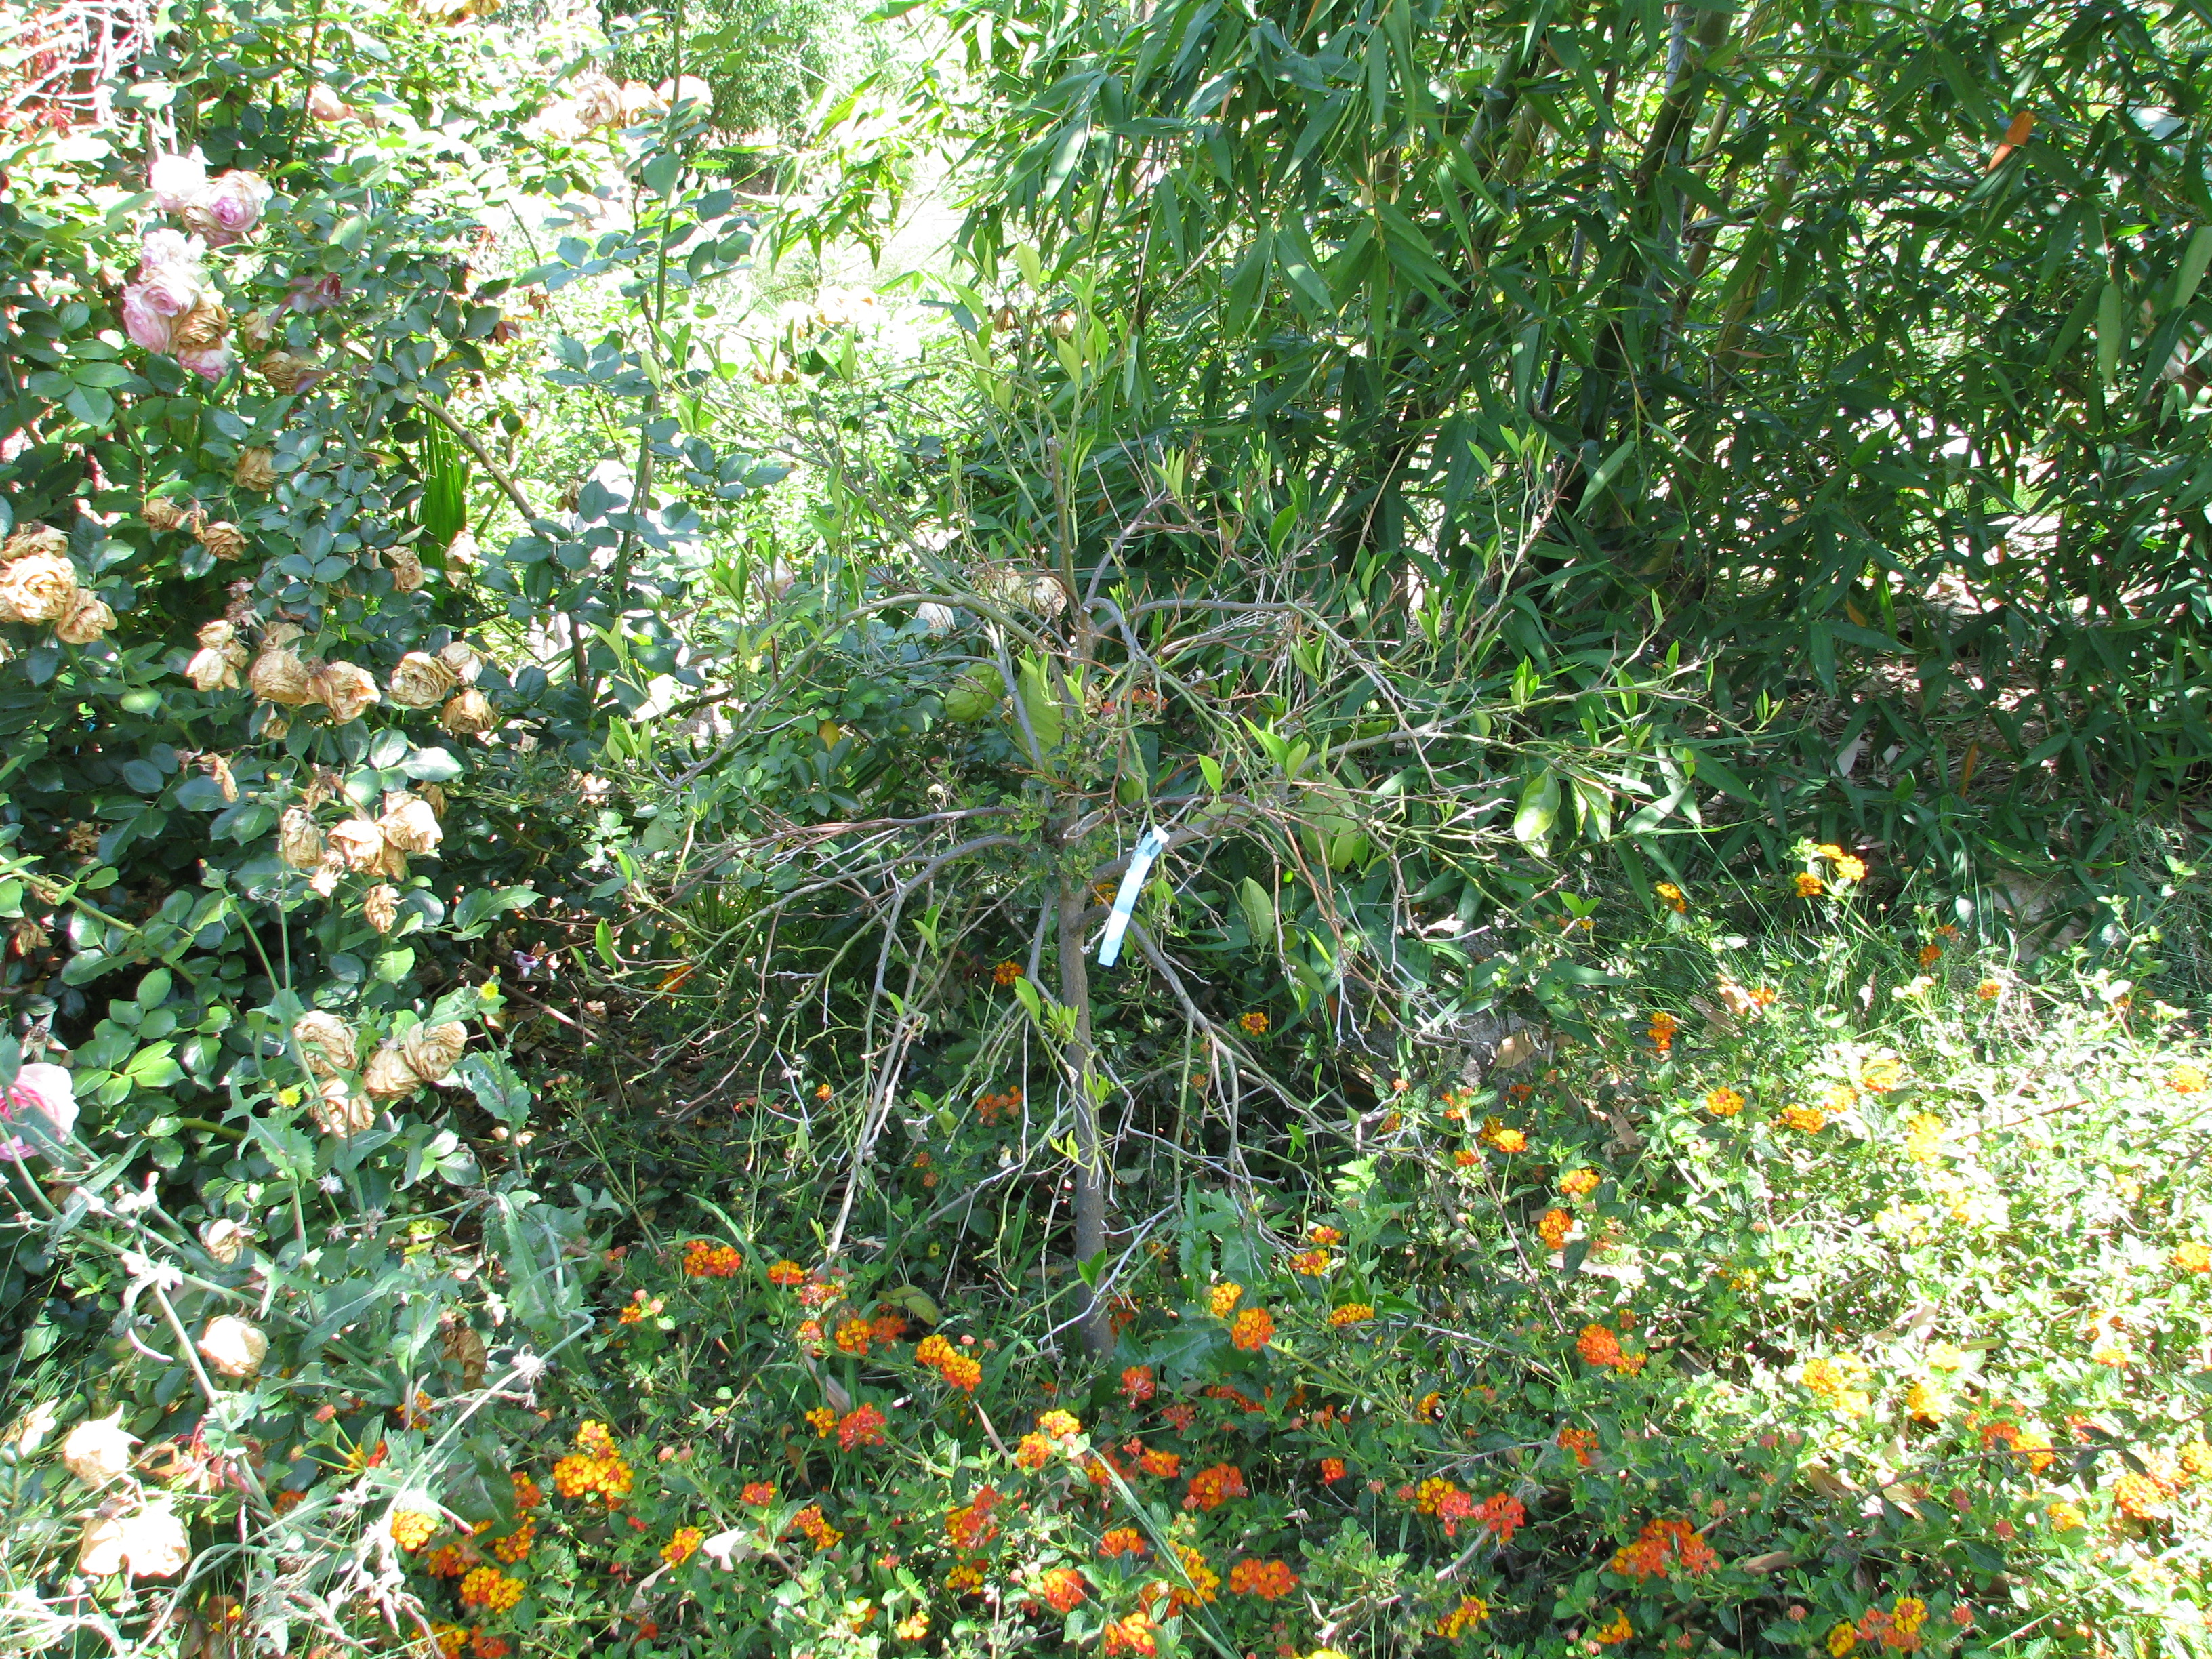
This citrus was planted before the bamboo grew up to shade it. Notice how the leaves grow straight up, and none below? It is aiming to collect light at noon, which is the only direct sun that it receives. He needs to be moved. We think of citrus trees perfuming the air of Spain, Greece or Arabia, but actually they come from Southeast Asia and before that, New Guinea and Australia. All of these places have warm or hot temperatures and plenty of sunlight. Although you can plant stonefruit close together, for citrus it is best to ensure that the trees receive lots of direct sunlight or they will drop leaves and have stunted growth.
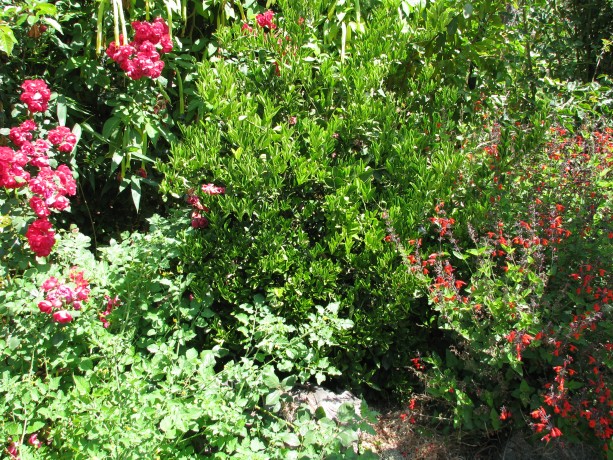
This citrus receives sun all day, and is very happy with the tomato, roses and sage that surround it. Raking all the leaves out from under your trees is so wrong. The tree drops leaves because it needs them on the ground around its roots, not because its careless or its waiting for a human to come by and clean up its mess. Leaf mulch makes the ideal conditions for microbial growth and perfect soil, so let it sit. Augment the mulch by giving your tree company of other plants. Unless the tree is allelopathic (secretes a substance that keeps anything from rooting nearby so that it doesn’t like competition, such as walnuts and eucalyptus) then in nature it reseeds close by and allows other plants to grow under it. Give your trees some appropriate company, and you’ll be rewarded with lots of food, medicine, habitat and very little work except for harvesting. Can’t beat that with a stick.
- Animals, Bees, Chickens, Gardening adventures, Other Insects, Permaculture and Edible Forest Gardening Adventures, Quail, Seeds, Soil, Vegetables
Protecting the Little Guys… and a little about diatomaceous earth

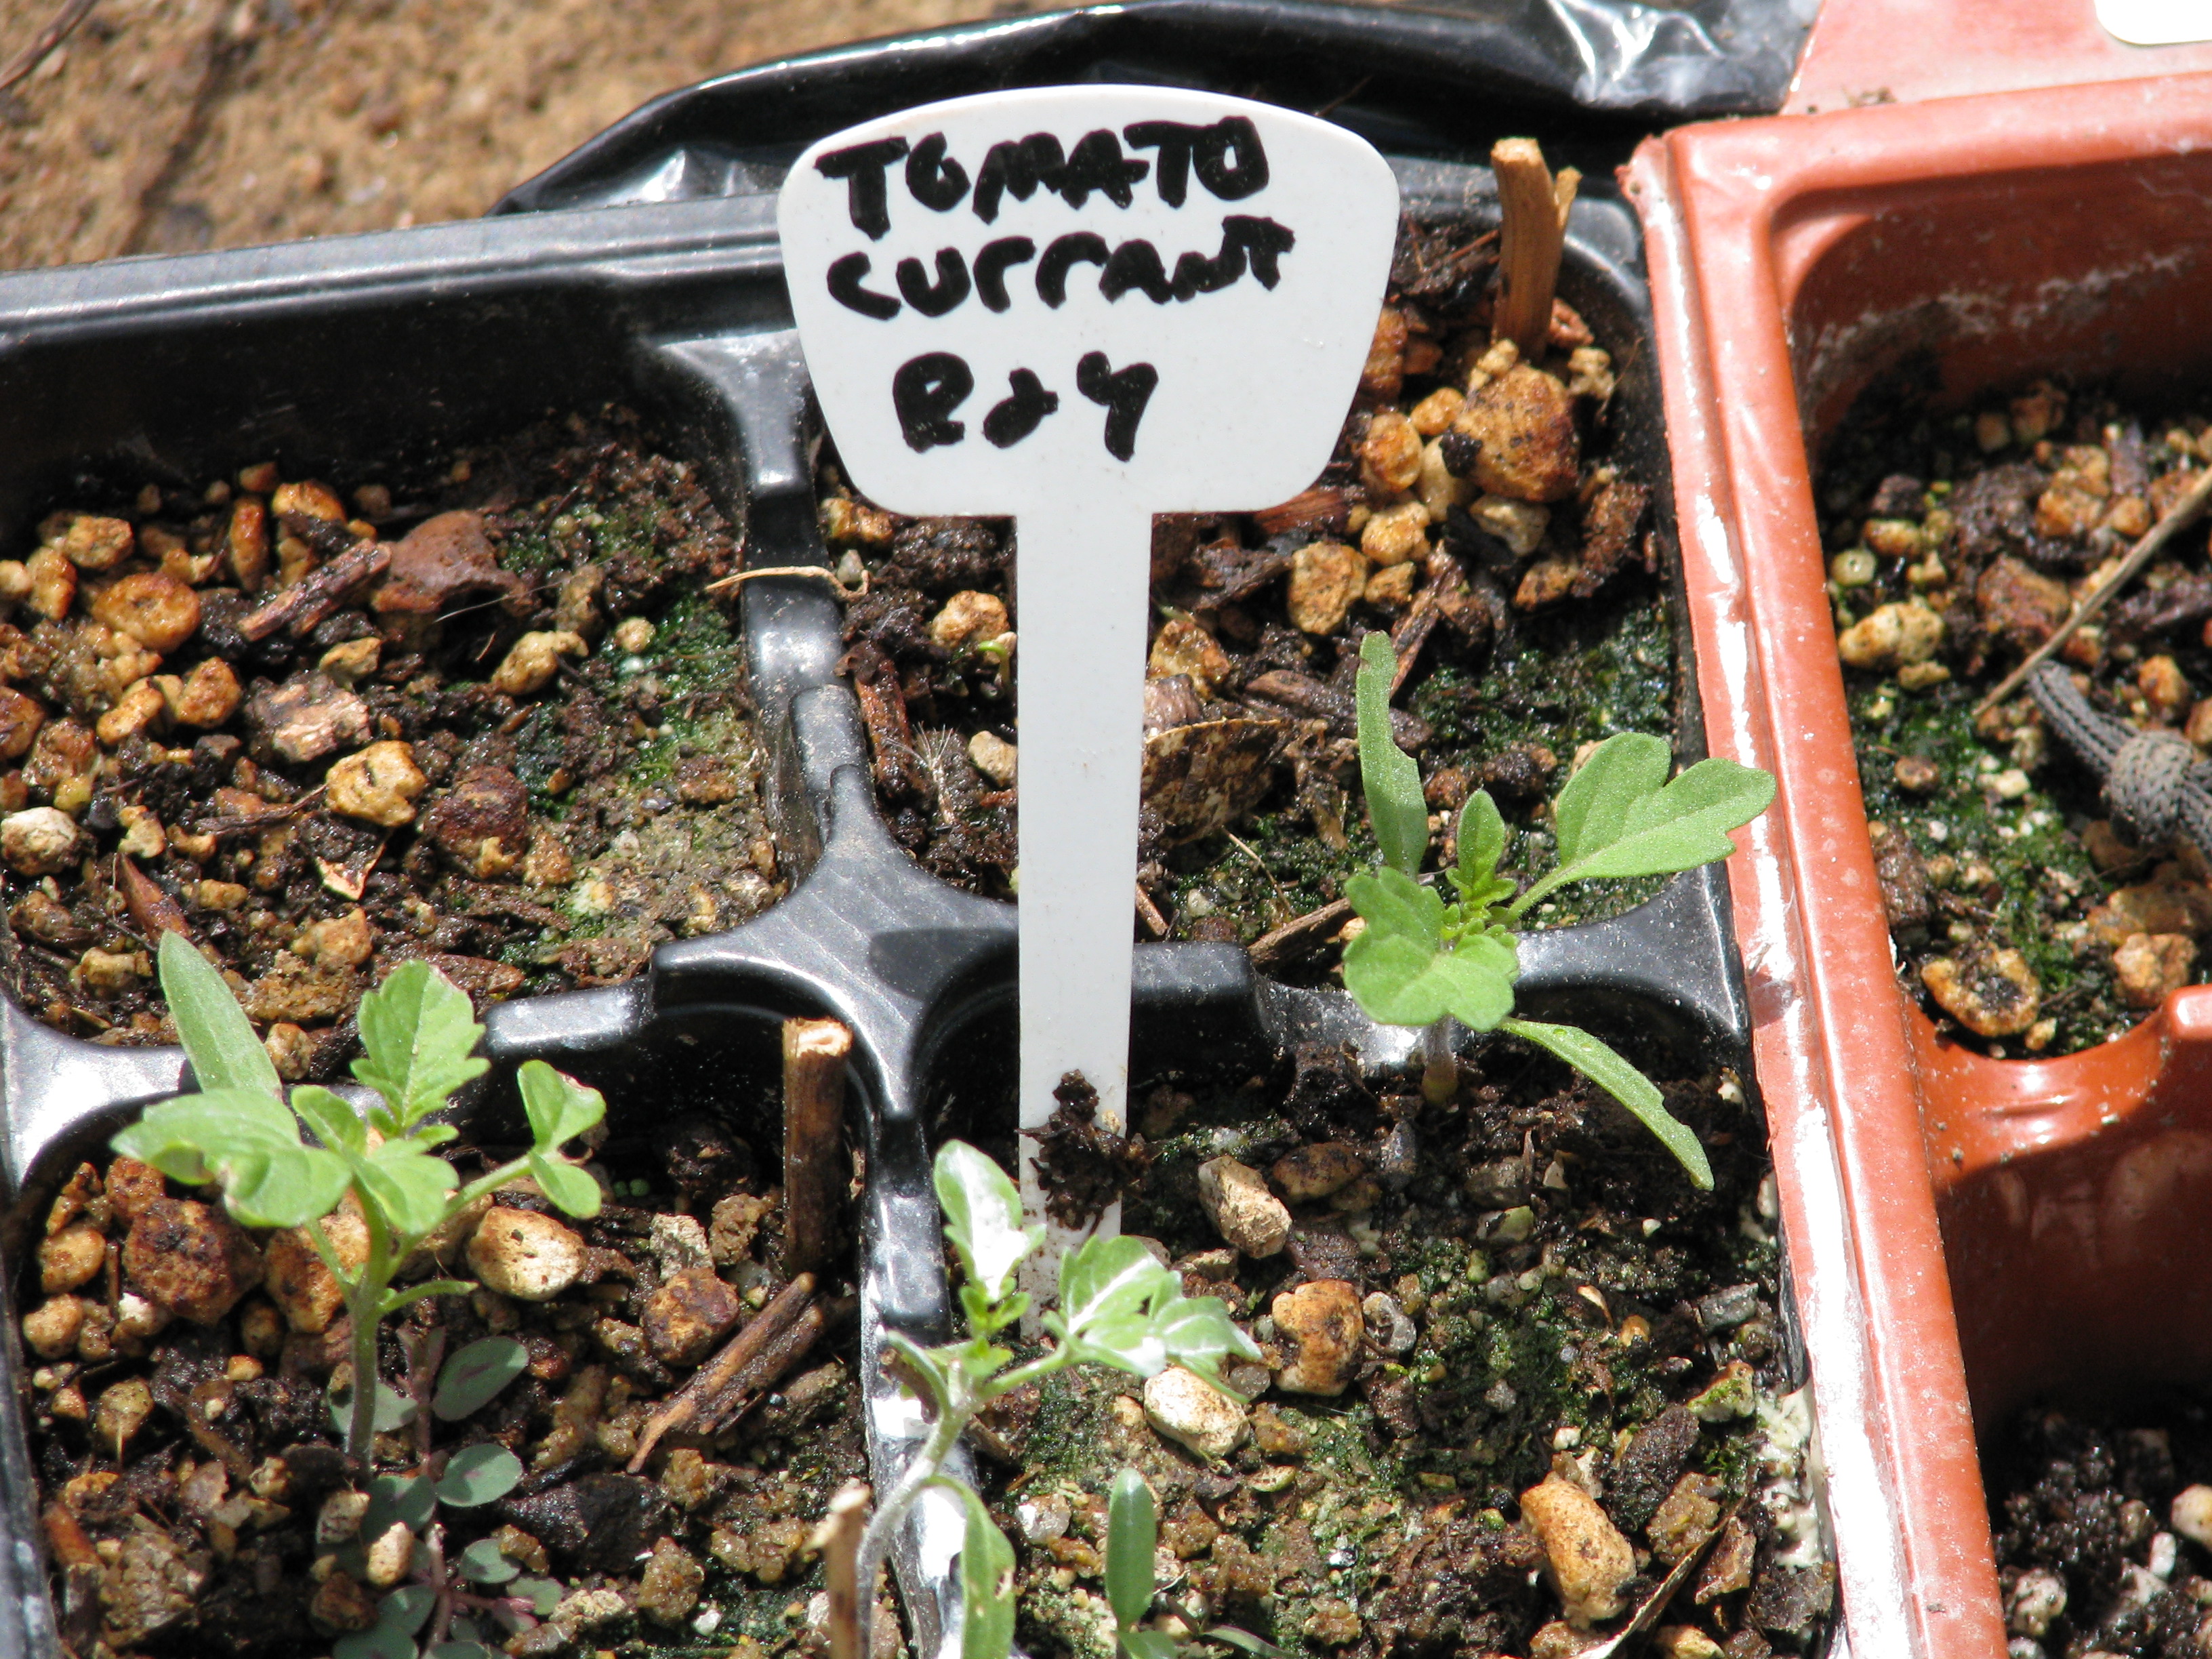
Current tomato seedlings When transplanting little plants out into the big garden it feels like sending your child off to their first day at Kindergarten. All kinds of things can happen to them in the big world. For children… that’s too large a topic for me (Kindergarten mother survivor here). For plants I can give you some advice.
Besides watering too much or too little, and root disturbance while transplanting, little guys can be eaten by bugs, birds or other animals, or simply get lost and overlooked. (Here is a container growing tip: as your seedlings sprout and grow, gently pass your hand across them every time you are with them. It will make for stronger stems.) (And its fun!)(And you can pretend you’re ruffling their hair and say things like, “Hi, Sonny.” Or not.)
Celery sown in a flat. Don’t let the small top size fool you. A day before transplanting out of a container or from a nursery bed, water the sprouts well. If they’ve been in containers for awhile those roots may be going in circles and the water can’t penetrate from the top very well. If that is the case, put the pots in water for half an hour until moisture is wicked into the pot thoroughly, then allow to drain. I say to do this the day before because if you water just before planting the soil around your root ball will fall apart, breaking fine hair roots and shocking your poor little guy. Some plants hate their roots being touched so much that this would kill them. By the next day after watering the container will still be moist, but the soil should be solid enough to stick together when tipped out.

That same celery plant…roots five inches long! Dig a hole twice as wide and twice as deep as your plant, then backfill with a mixture of good compost and the soil from the hole. This will help acclimate the roots to the soil change. Water the hole, and if you’re really industrious water with compost tea. Set your plant into the hole and firmly press the soil around the plant. If you are planting tomatoes, eggplant or peppers (all in the same family) you can set the plant more deeply into the hole; they will form more roots from the stems and become sturdier. The rule of thumb otherwise is to plant so that the soil level of the hole is the same as that of the transplant; many plants will rot if soil is up against their stem. If it is too low, the roots will be exposed and dry out. Potatoes can be trenches and hilled up as they grow, or maybe you will try trashcan or crate potatoes. If you live in an arid area, plant in shallows so that rain can accumulate around the plant. If you live in a wet area, plant on hills so water can drain off. Or if you’re practicing permaculture, plant on the swales!
So your little guy is in the ground and gently tamped in. To keep off the birds and bunnies and mice and rats and whatever else is looking for dinner, I use plastic berry cartons turned over and set in place with sticks or with rocks on top. Reuse and repurpose! They are also good for protecting figs . The cartons allow enough sun in, and also makes it very obvious where the seedling is so that you don’t step on it, or weed the little tomatoes out with the almost identical ragweed sprouts. For larger plants, turn over a milk crate.
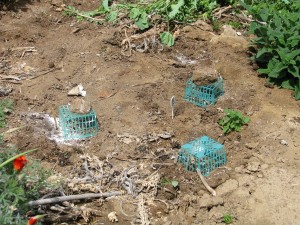
Chard and eggplant with cool hats on. I have no native quail in my yard. Due to nearby houseing developments, there aren’t many quail around me anymore. Quail would fill the niche of beetle and sowbug eaters. My hens want only worms, spoiled things, and their big feet do a lot of damage if not watched.
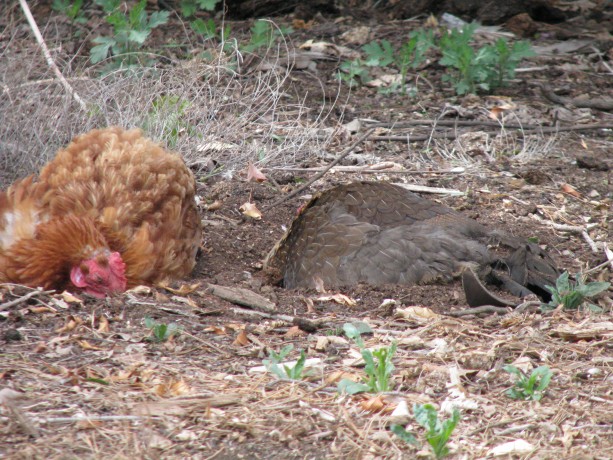
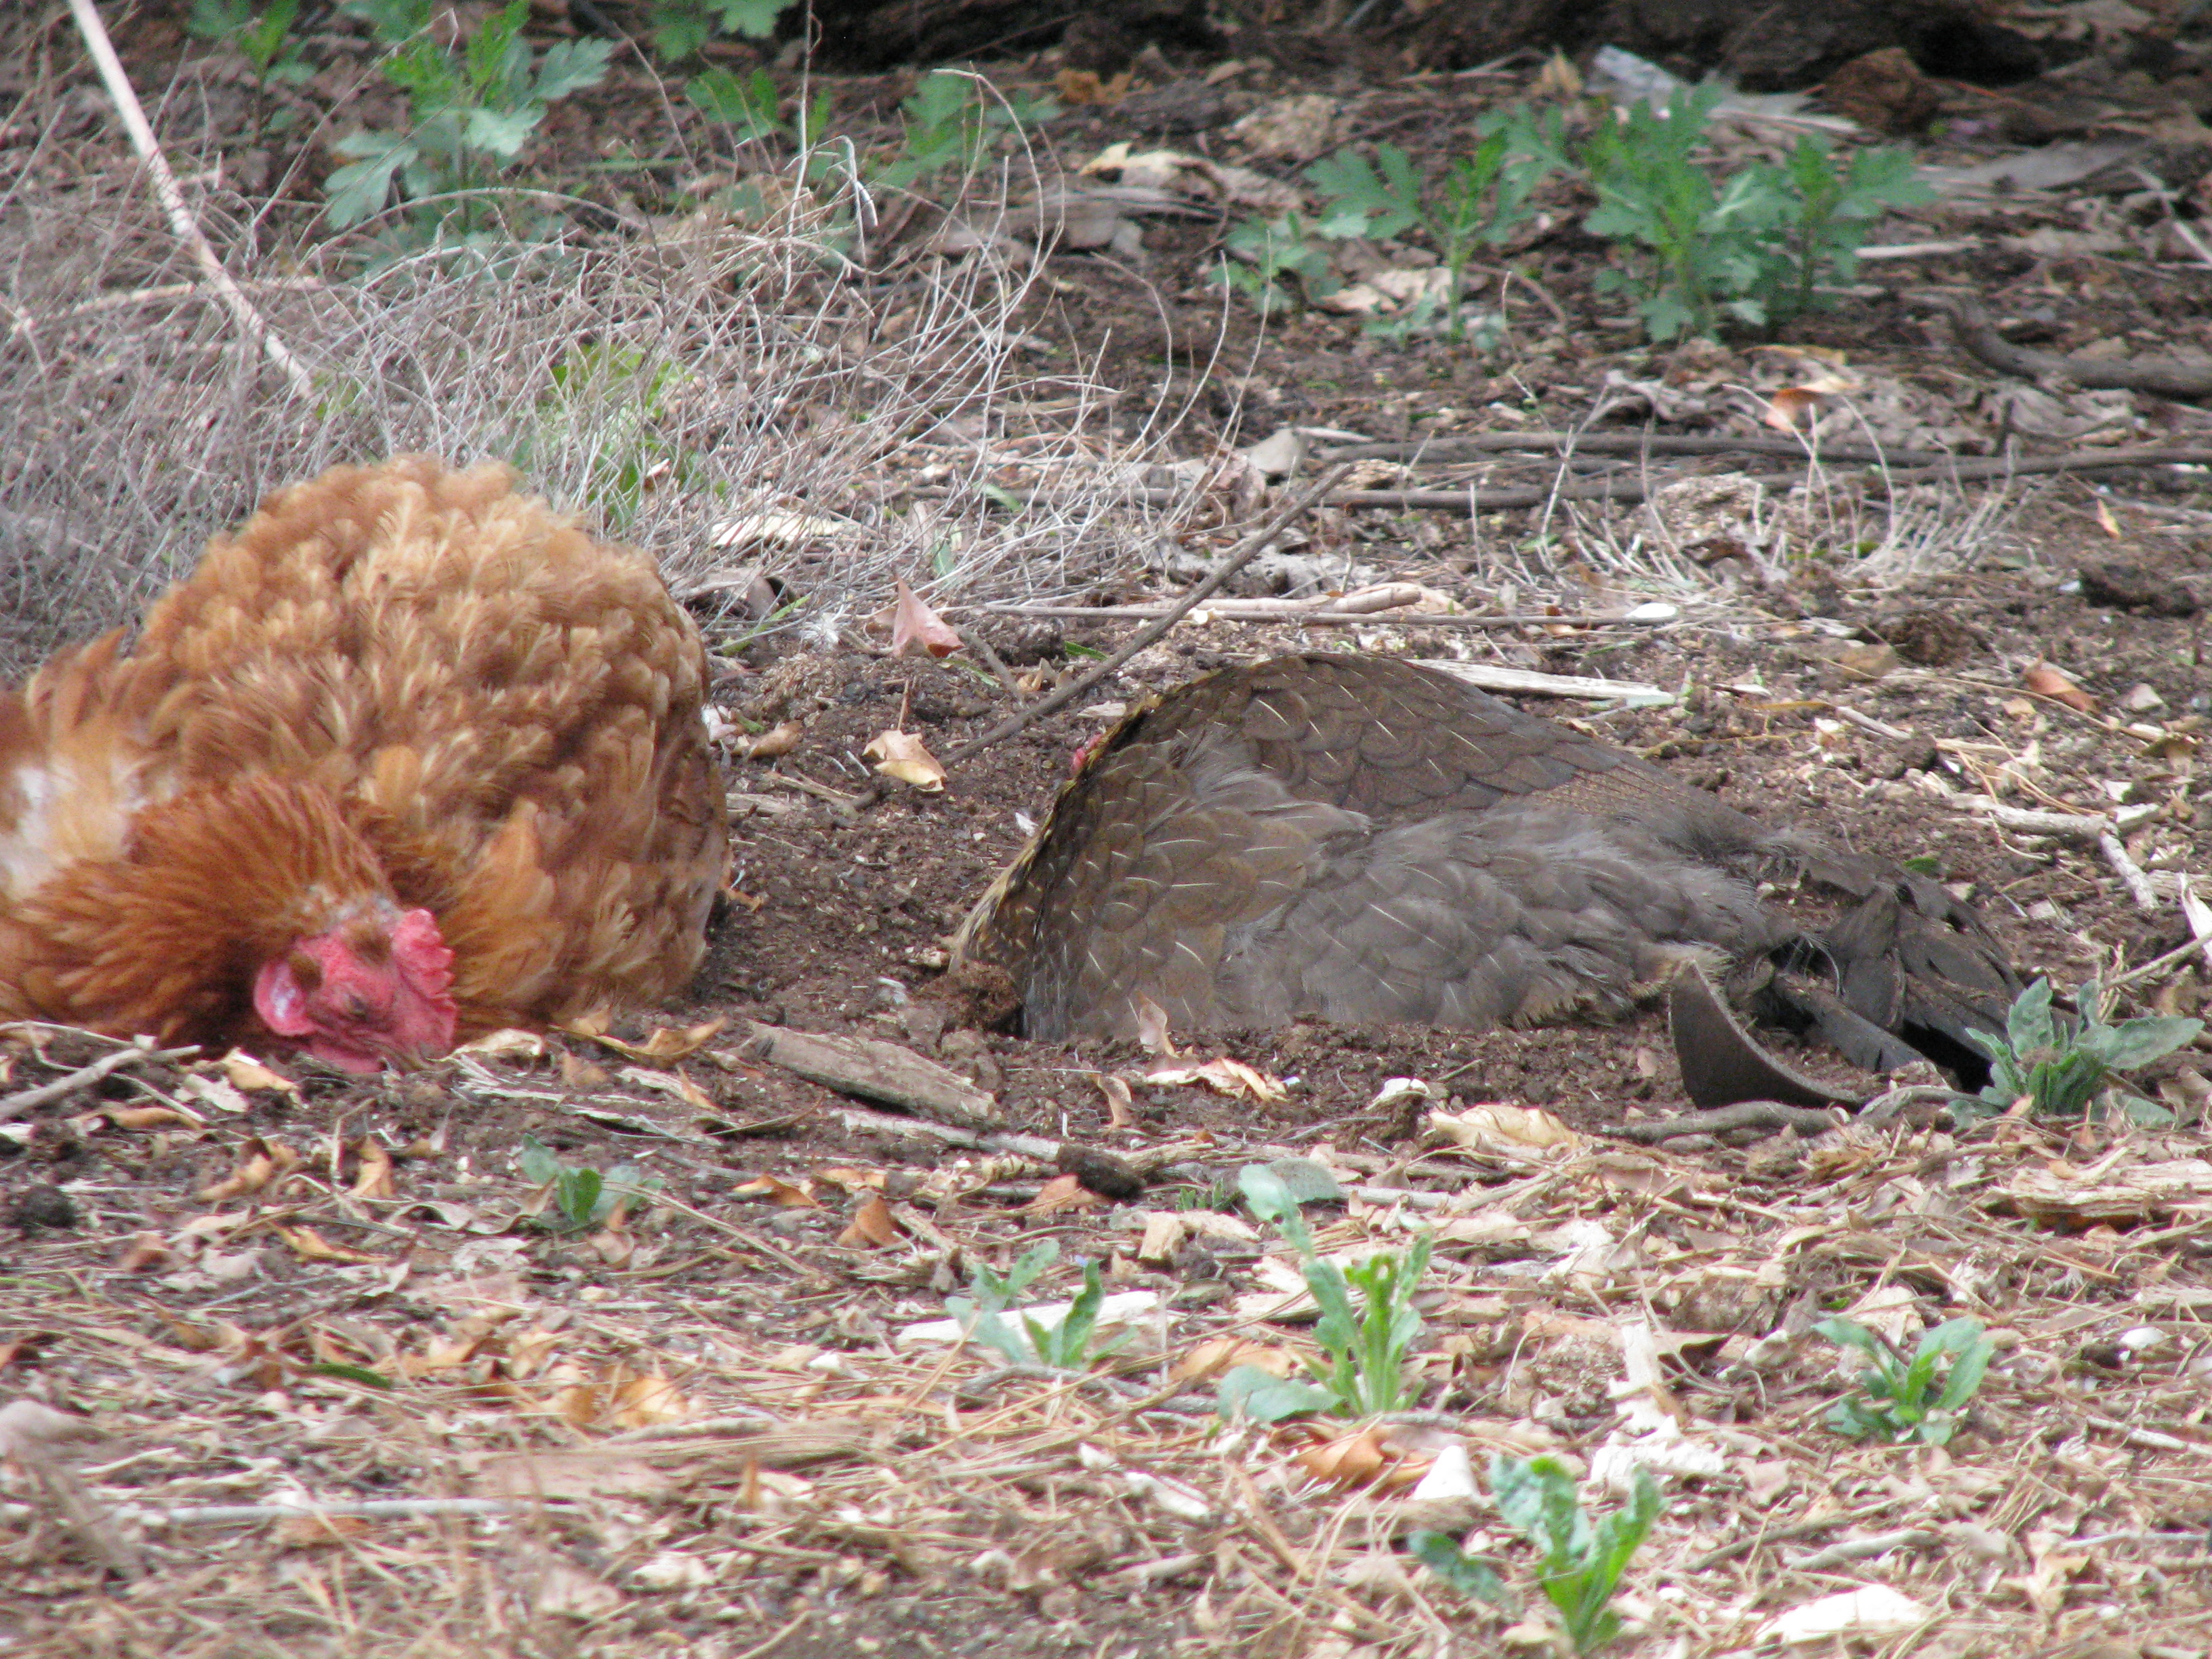
Madge and Chickpea: Nothing like a dirt bath on a warm day. Sowbugs cluster under mulch and do damage to stems and fruit.
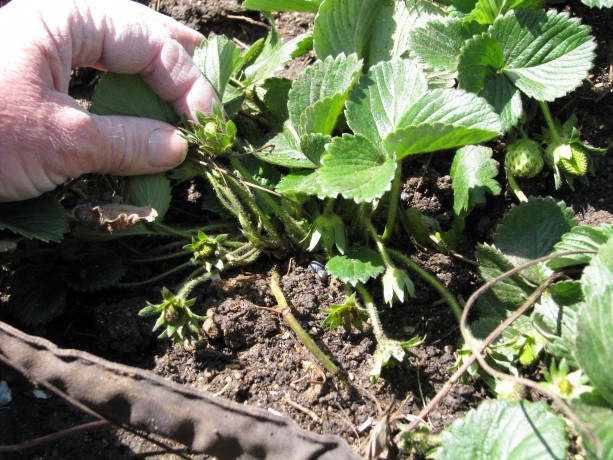
Sowbugs waiting for strawberries to nibble. I use a little food-grade diatomaceous earth around the seedlings, new sprouts in the garden, around the strawberry plants, and also around plants such as artichoke, corn and chard where ants have begun to farm aphids.
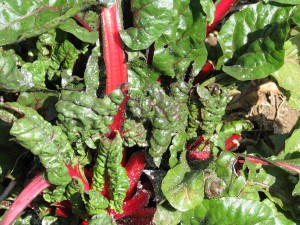
Ants farming aphids on chard. I use it around the trunks of my stonefruit trees to stop the ants, and have been told that it works well around the legs of beehives in lieu of or in combination with cups of oil to keep out the ants. Diatomaceous earth is the finely ground bodies of ancient sea creatures (diatoms). The powder on a microscopic level is full of sharp edges.
Aphids on chard. When a sectioned insect such as an ant, flea or sowbug crawls on it, it rasps their tender areas and dessicates them. Not something I really am happy about doing to the bugs. I’m only using it on a very small scale. Remember that any insecticide, even DE, kills many kinds of insects not just the targets. You don’t want to eradicate your insects; most of them are helping your plants and your soil. DE will melt into the soil when watered, but only reapply if you still see the target bugs. The problem might already be taken care of.
A sprout, a squeeze and a hat. Use food-grade DE, not the kind that is sold in pool supply stores. FGDE is used in graineries to keep weevils and other bugs out of grain and beans, so you’ve been eating it for years without knowing it. It doesn’t hurt us, nor is it bad to breathe (some people wear masks that they can get from https://accumed.com/n95-mask-for-sale-respirator-safety-face-mask-z1.html, just in case). It is a great, natural and inexpensive way to fight fleas without paying big money for poisons to put on your pet. I have it all over my cats’ bedding.
They sell DE sprayers, but they become clogged. The easiest and least expensive applicator (which can be repurposed)? A condiment dispenser. You know, the plastic mustard and ketchup squeeze bottles in diners. I bought a set of two for $2. You can practice a little to dispense a finer dust.
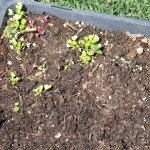
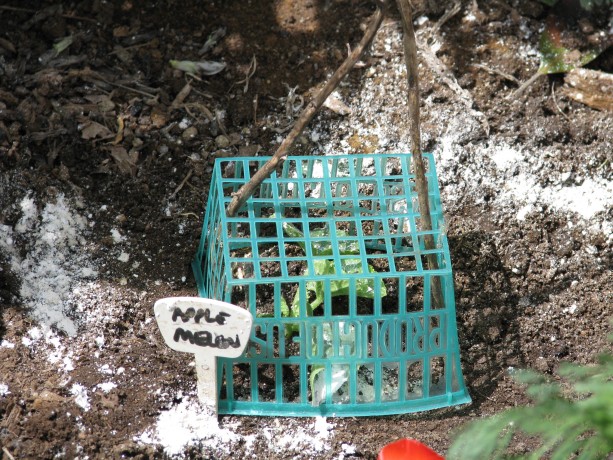
The plant guild into which I’m planting the little guys. So I plant my little guys, give them a drink, squeeze a little DE around them, give them a berry basket hat until they outgrow it, then take it off to use elsewhere. If there is still a threat to your plants from critters (somebody was eating my eggplant leaves last year! I mean, really…ick!), then turn a wire gopher cage over the top or make a wire cage to fit and use sticks or landscape staples to fasten into the ground.. These, too, you can reuse yearly.
In this plant guild, the combination of other plants will also help hide the scent of the new little guy, until he turns into a full melon vine and takes over! You May Also Like
Native Insects and IPM
- Compost, Gardening adventures, Permaculture and Edible Forest Gardening Adventures, Seeds, Soil, Vegetables
Crate Potatoes
Milkcrate potatoes! This area receives sun for half a day and is shaded on the West side; perfect for keeping them cool. I’ve been frequently asked to write about trashcan potatoes. I haven’t yet, simply because I don’t have a trashcan to use for that purpose. Instead I used what I had and am experimenting with milkcrate potatoes. I’ll let you know how it works.
The potatoes that work in trashcans are any of the standard potatoes in the Solanaceae family, related to tomatoes and eggplants; sweet potatoes and yams are in the morning glory family and grow very differently. A good article with photos that shows growing potatoes in a barrel is at greenupgrader.com. There are many videos on the web about growing trashcan potatoes; a good one is at Farmers Almanac . Two things that she does in this video that I do differently is that after cutting the ‘eyes’ of the seed potatoes, I allow them to harden off for a day or so before planting, and also potatoes can grow with less than 8 hours of light a day which makes it a good over-wintering crop, especially here in Southern California. Potatoes like shorter daylight and cool night temperatures, so plant now! If you plant later, protect the trashcan from the afternoon sun. Hardening off means to allow the cut potato to sit in the shade for a day or so to allow the cut end to form a ‘scab’, or harden up before planting. It helps keep the potato eye from molding and provides protection from insect or bacterial attacks, and keeps drier soil from leaching water out of the potato. This is the same process you’d do when taking cuttings from cactus, geraniums and other easily-rooted, sappy plants. When watering trashcan potatoes, don’t overwater because you’ll rot them. Like their cousin the tomato they’ll do better slightly drier than wetter.
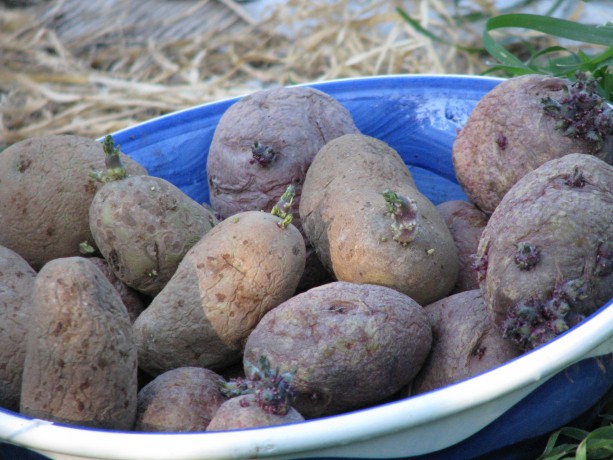
Organic chitted potatoes. ‘Seed’ potatoes aren’t potato seeds. They are small tubers that are ready to plant. Always buy organic seeds. Period. You can buy seed potatoes online or in nurserys available in Southern California just after Christmas, and sometimes in the late Fall. They usually purchase the seed from other states which have snow and don’t ship during the winter. Buying online or from organic catalogs allows you to shop among a wide variety of potatoes differing in size, color and purpose. However since we can plant potatoes in the Fall and don’t want to wait for shipping times, we can buy a bag of organic potatoes locally and sprout them ourselves. Non-organic potatoes have been treated so that they don’t sprout in the store, and are genetically modified (GMO) to last on the shelf. Sprouting potatoes is called ‘chitting’ and is very easy. Mine usually sprout in a bowl on my kitchen counter. Keep them in a light, cool area out of direct sunlight and they’ll grow. When the potatoes have chitted and ‘greened’ (have sprouts), you can either plant them whole or slice them so that each piece has at least one eye. Allow them to harden off and plant them. Give the extras to your neighbor!
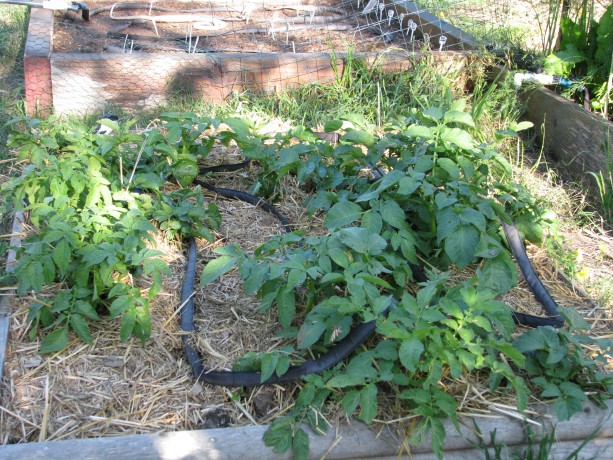
Potatoes can be grown in the ground, or in a raised bed, and then you hill up around the plant to produce more tubers. The reason for growing trashcan potatoes is that you can grow vertically, save garden space, and in particular save your back from trenching, hilling and then digging. The harvest is more productive, too, because you won’t be accidentally cutting through or spearing potatoes in the ground. Potatoes can grow this way because the tubers are actually specialized underground stems called stolons. Potatoes will produce tubers underground, but anywhere along their stems they also can grow a potato under the right conditions. Once you plant a potato ‘eye’, the eyes being the growth buds, it will send out stolons. The plant will produce potatoes below ground, and if you hill up around the stems they will also begin to swell and produce tubers.
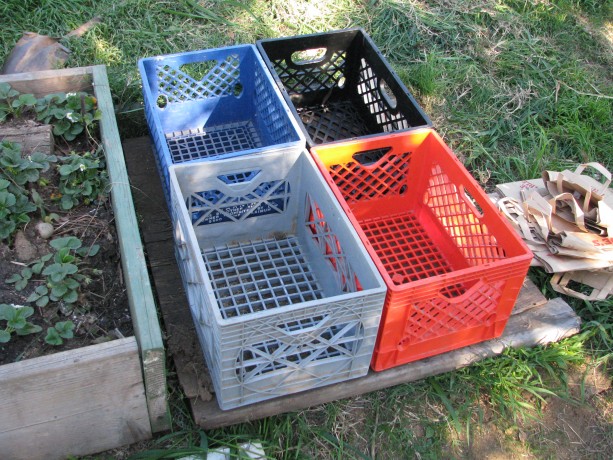
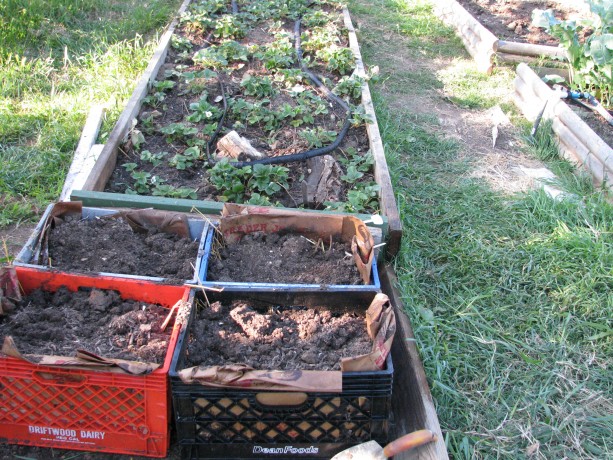
I have extra milk crates, and a source for more, so why not use them? When you plant in a trash can (with drainage holes!), as the greens shoot up you keep layering compost or straw or woodshavings or potting soil or whatever around the stems keeping a little green showing until you can’t fill the trashcan anymore.

I lined the bottoms and the outside edges with extra paper bags and watered them. When the plant is done growing the plant will bloom and sometimes even produce seeds. When the stems die back, you knock over your trashcan and harvest. Save some of the smaller ‘taters for seed for planting in the Fall.
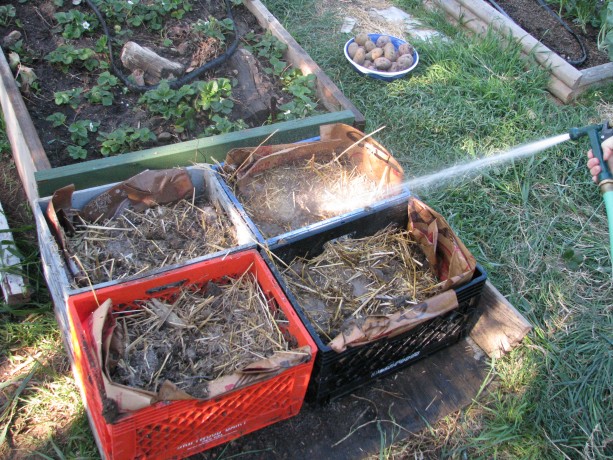
I filled the crates 2/3s full with compost mixed with chicken straw and watered well. You don’t want heavy soil or the potatoes will rot. You also want to insulate the potatoes from outside warmth. You can also root around in there earlier and pick new potatoes, or you can delay your harvest, keep water out of the trashcan and keep it in a cool spot, and harvest when you want them. The beauty of trashcan gardening is that you don’t need a trashcan. Very zen! You can drill holes in a plastic carrier, use burlap sacks, stack old tires, nursery containers, large plant pots or whatever you have. If you have a bottomless or rusted out trashcan, use it! Place it over good garden soil and allow the potatoes to grow down, too. You’ll have a little digging to harvest after you knock over your trashcan full of potatoes, but not much. To make holes in a plastic or aluminum trash can, borrow a digging bar (a long metal pry bar), place your trashcan right-side up on a dirt area, hold the bar high vertically over your trash can pointy side down and let it go. It should make a hole. Or turn the can over and use a hammer and something sharp like an awl or screwdriver (be careful you don’t shatter the top of the screwdriver! You don’t have to pound too hard. Be wise and wear safety glasses just in case). Do this multiple times to make as many holes as you can without making the bottom unstable.
Also be sure to keep the trashcan or crate potatoes in a cool place, especially if you are planting in the early spring here in Southern California. Warmth will keep the potato stems from swelling into tubers. Insulate the potatoes well and keep them cool while still allowing them enough sunlight. Fall and winter are the best times for planting potatoes here, as long as they have adequate drainage.
There is concern about leaching chemicals from plastic, or tires, or aluminum. Do the research and make yourself happy. I don’t think there is that much leaching to be worried about because the plants aren’t in there for a long time. You can always make a barrier between the soil and the sides of the containers with undyed paper or newspapers using soy ink. So save your garden space for other crops, and pop your ‘tatties in a can. Or crate. Or whatever.
Update: here is a very comprehensive article about planting potatoes. Rather than use commercial fertilizer, of course, we recommend rich compost, which will provide what your potatoes need. Also use dead garden debris such as old pea stalks (cut rather than pull them up to allow the nitrogen nodules on the roots to remain in the soil) in your planting bed or container.
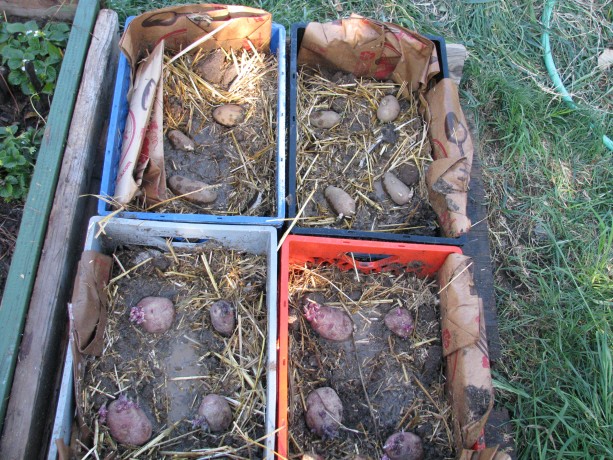
I planted whole potatoes just because I didn’t have room for lots of cut ones and these needed planting or tossing. I then covered them with about an inch of light compost and now I’m waiting! - Animals, Chickens, Compost, Gardening adventures, Hugelkultur, Permaculture and Edible Forest Gardening Adventures, Soil, Worms
Strawberry-flavored Hugelkultur, Please
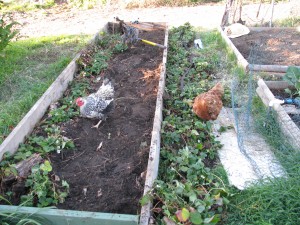
A few months ago my daughter and I thinned out the raised strawberry bed.

Way too many plants. I planted the extra strawberries under the passionvine arch,
Under the passionvine trellis. using well pooed and pecked and rained-upon straw from the Fowl Fortress as mulch.
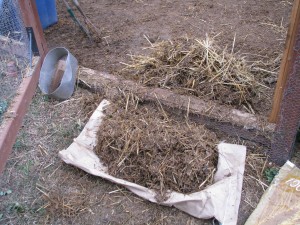
Good yucky straw. However the soil level in the raised bed has become lower, and the Bermuda grass has grown higher. Time for a re-do.
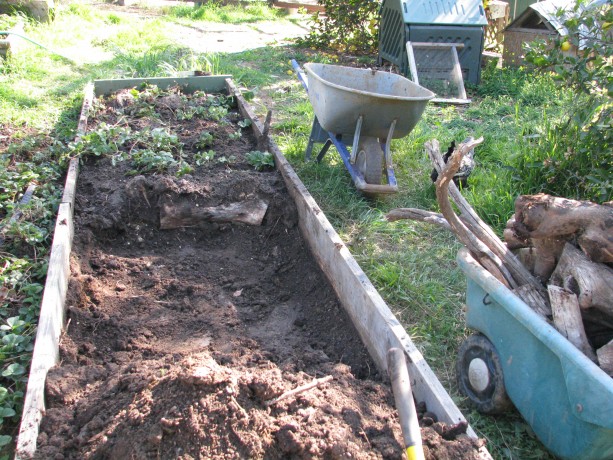
When I’d originally planted the bed a few years ago, I’d heard about burying wood to hold moisture and improve the soil. Some little thing we call… hugelkultur. I laid old lime tree logs along one side. They began to break down and some really cool mushrooms came up.
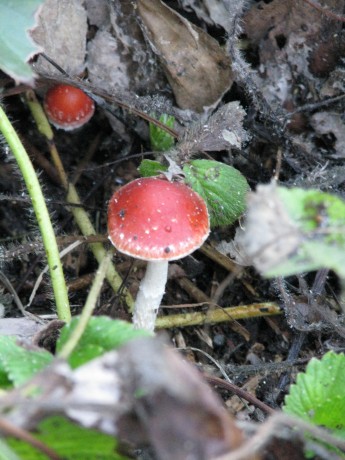
Cool mushrooms. Strawberries sent runners out and they rooted right in the wood. A great success.
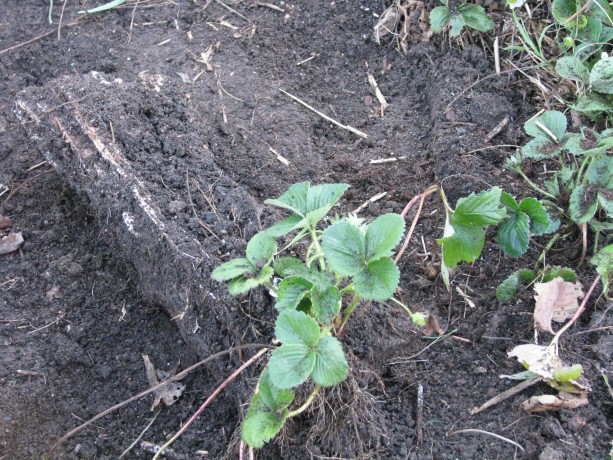
Strawberries rooted right in the wood! Since I don’t have ready compost to fill such a large bed right now, I decided to do the hugel-thing in the entire bed. I spent several hours digging out the strawberries and the Bermuda grass.

Making the bed: everyone out! Then I pulled the soil back and was simply amazed.
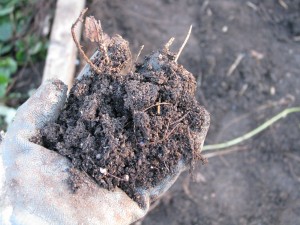
Beautiful soil It was crumbly like prime worm castings. I lined the bottom of the raised bed with the logs on top of the wire I’d laid across the bottom to deter gophers and mice.
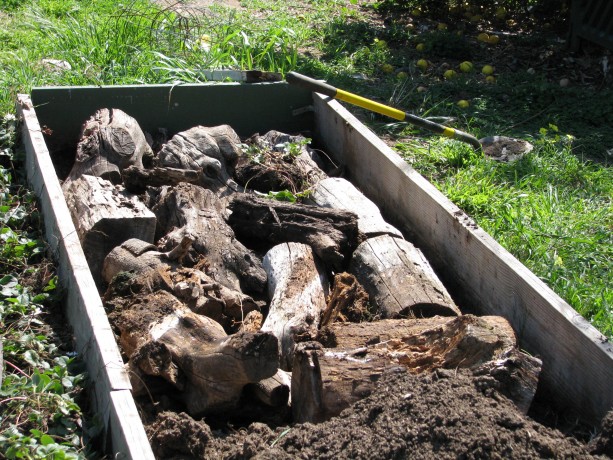
Old lime logs. Then I shoveled heavy clay out of the new bog area and threw that in and around the logs; the wood would decompose and turn the clay to great soil, and the clay already had a lot of interesting microscopic creatures in it from being at the edge of the pond.

Heavy clay. And I do mean heavy. On top of that I sprinkled some pigeon guano I recently received from some wonderful new friends who rescue pigeons. (They are wonderful even if they hadn’t given me the guano. I have many friends who, in fact, are guano-less. Just to clarify.) There were a lot of pigeon peas in the guano, but if they sprout its all good because they are nitrogen fixers and will only help things along. Some sugar was added to help stir up the bacteria in the clay.All along I watered everything in, including hosing down Lark the fat, barren Barred Rock hen who just wouldn’t take no for an answer and kept jumping into the bed to steal the worms!
Get away from my worms, hens! My hens are such prima-donnas that they refuse to eat sowbugs and just go for worms. Geez! Lark got back at me later by making me come after her when it was time to shut them in for the night.
The last layer on the bed (and I don’t mean a chicken) was the good soil into which I replanted the strawberries. I did this process in thirds and ended up with a lot of extra strawberries.
A third section done. As it was nearing sunset and I was becoming chilly in my shorts and sleeveless shirt, I hurriedly planted the extras up under the passionfruit trellis, in with the others from the previous planting. Most of them had happily survived.
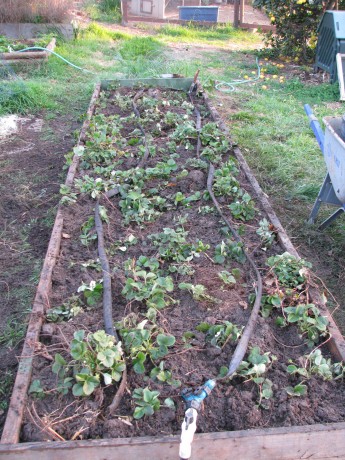
Finished! The leftover soil I sprinkled on top, laid the soaker hose back on top, and voila! A somewhat shocked but hopefully soon-to-be-happier strawberry bed.
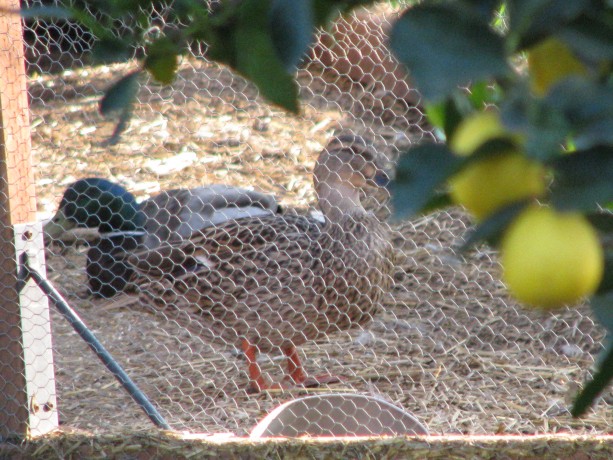
There are a couple of wild mallards that come to the pond and have grown trusting of me up to a point. I throw game bird food by the pond for them. I don’t want to tame them, but I like it that they don’t fly off in a fright every time I come near. Its better for their health not to be so stressed. Makes me feel good, too.
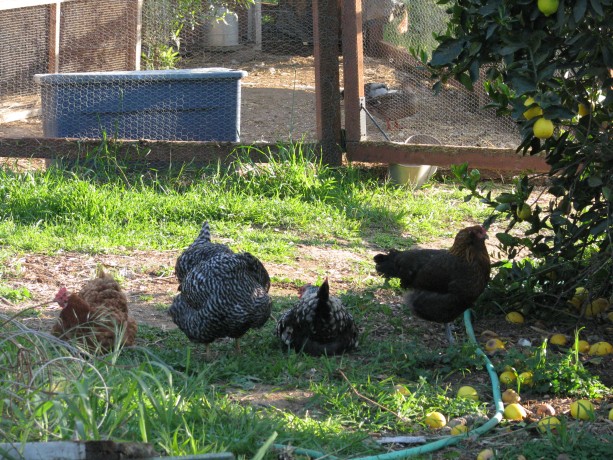
Hen line-up. But what is in the coop behind them? While I was digging I looked up to find my hens all in a row watching me, and beyond them inside the Fowl Fortress (the door of which I’d propped open) were the two mallards! They were perfectly content to be eating what the hens hadn’t eaten, and were even sitting in there enjoying… I don’t know… forbidden territory?
Just make yourself at home! The alluring and romantic smell of chicken poop? After awhile Miss Amelia wandered in there and the mallards wandered out. They’re welcome in there, but if they want me to build them a castle of their own, forget it. They already have the floating duck house, after all!
You May Also Like
Native Insects and IPM
- Compost, Composting toilet, Gardening adventures, Hugelkultur, Permaculture and Edible Forest Gardening Adventures, Ponds, Rain Catching, Soil
Rain Catchment Awesomeness (and some BSP)

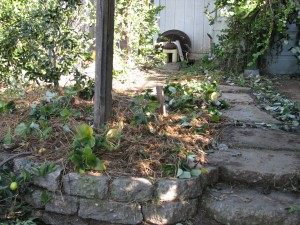
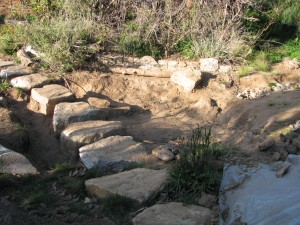
Water flowed over the stone steps First, a little BSP (blatant self-promotion). There is a wonderful ezine called San Diego Loves Green featuring topical local articles and snippets that reflect on the growing green community here in, you guessed it, San Diego. The San Diego Permaculture Group has an ongoing column, and yesterday I was the guest writer. My article is on the importance of planting natives , with some information that you might find surprising, or that you may have already read in my blog about the same subject. Also (more BSP) if any of you attended the Southern California Permaculture Convergence this weekend, and still yet, if any of you listened to my talk on soil, first of all I’d like to thank you for your attention and attendance, and I hope I answered your questions and solved some problems for you. You can search on my blog for many posts concerning nitrogen -fixing, or 50 Ways to Leave Your Compost , and see my composting toilet (I went to a Garden Potty).
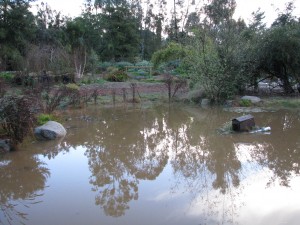
We had almost two inches of rain on Thursday night. In San Diego we rarely receive the long soaking rains that we really need. Instead we must be ready for flash floods. If you are familiar with Finch Frolic and the labors we’ve been undertaking in the last two years to hold the rainwater, then you may be curious to find out how the property survived this last middle-of-the-night flooding and hailstorms. If you remember, not only is there the water flowing off the roof and falling onto the watershed property, but also an unmeasurable amount that is purposely channelled runoff from all the neighbor’s properties that runs through mine.
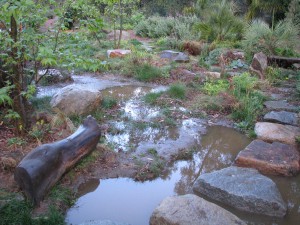
All basins full! Since the permaculture project was installed I haven’t had any of the erosion that plagued the site. As of last year I’m pretty sure that every drop that falls on my property is caught, in rain catchment basins, the ponds, and in the loam and compost in the guilds. The challenge was to also keep all the neighbor’s water on my property as well! I’m thrilled to say that we almost did it!
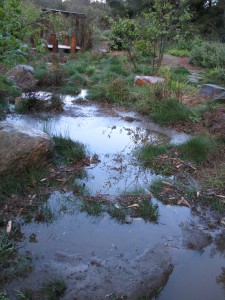
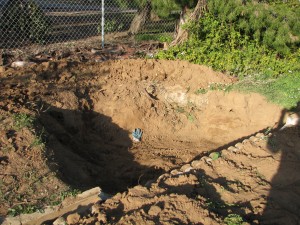
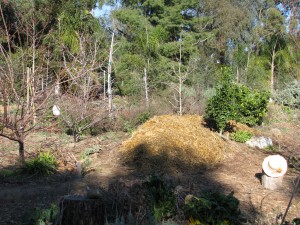
There is a new bog area being designed by Jacob Hatch just above the big pond.
The new bog area This area had been designed to channel overflow water from the rain catchment streams around the pond and down a black tube to the stream bed below. Greedy me wants all that water! With the creation of another silt basin, and now that there is vegetation in the stream to hold onto the silt, I’ve made the water now flow directly into the big pond. There are planned overflows from the big pond, and water did overflow where it was supposed to.
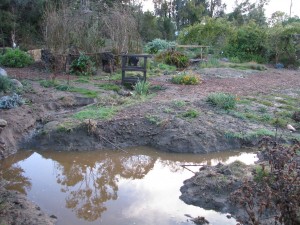
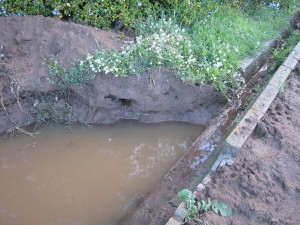
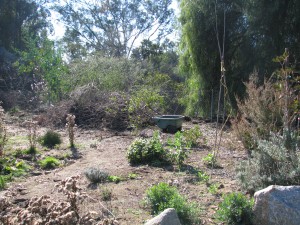
The big pond was filled to capacity, making the duck house do a sinking ship impression because of the length of the rope attached to the anchor wasn’t long enough. The first rain catchement basin was enlarged a lot so as to catch water higher on the property.
The first catchment basin was deepened There is decomposed gravel in that one so the water perculates quickly, thank goodness, as most of the other basins hold water due to the clay composition of the soil.
Water following the basins. Also, a rain catchement basin was created along the top of the cement channel that normally funnels water off the property.
New basin, empty A series of these will be created all along the channel, allowing water to slow, gather and perculate along the length of the property, with no outlet at the end.
Full! This will take some of the flow pressure off of the water diverted down into the main series of basins.
The only area breached was actually due to a gopher hole whose origin must be in the stream. I could tell by the swirls in the mulch where the erosion happened.
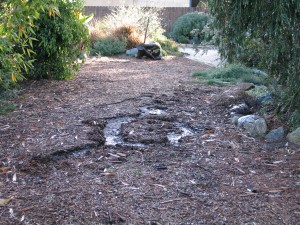
Swirls tell of a breach. There is also the slight problem of water flowing down my own driveway and then down the trail.
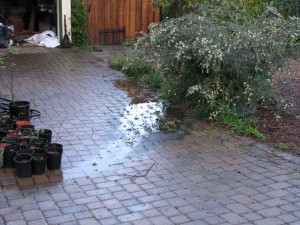
Water funneled down my driveway. I think a small hugelkultur bed might slove that problem.
The verdict? Almost all the water was retained on the property,even that of the neighbor’s! A few tweaks and we are well on our way to total rainwater dominance! Mwwahahahahahahaha!

Mwwahahahahahahaha! - Compost, Gardening adventures, Hugelkultur, Permaculture and Edible Forest Gardening Adventures, Rain Catching, Soil, Vegetables
Hugelkultur: Irrigating with old wood
Hugelkultur is a joy forever. Hugelkultur is a German word (pronounced hoogle culture: it should have some umlauts over the first ‘u’ but I have no idea how to do that) which translates as hill culture. It is a process of building raised beds with a core of old wood. The benefits are that as the wood decomposes it not only releases nutrients into the soil, but it holds water like a sponge. Rain water is collected inside the bed, then as the warmer weather sets in and heat dries out the outer shell, it will wick that moisture back out. Presto! Irrigation in the dry season. As the wood decomposes it creates air holes into which deeper roots may penetrate and absorb nutrients that aren’t being washed into the ground water. Also, growing on a tall hugelkultur bed makes harvesting easier because vegetables are often located higher off the ground. The process was popularized by Sepp Holzer, although he didn’t actually call it that.
Hugelkultur may be started flat on the ground, by hand or by machine, dug into the ground, stacked very tall or short, or even level to the ground. The best way to build a bed is to place it on contour where rainwater will collect, preferably facing North and South so that both sides receive equal sun.
I have areas of ground that are either very heavy clay, or are decomposed granite with stones left over from the building of the house. Some trees don’t receive the drainage they need from irrigation because of the clay, which causes the roots to suffocate, or else plants dry up because water perculates too swiftly through the soil.
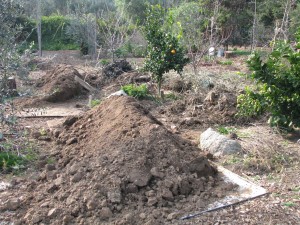
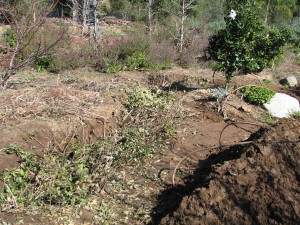
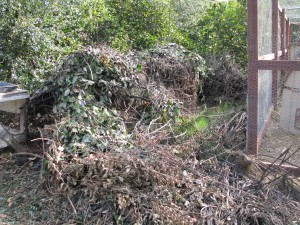
This brush pile against the fence was reduced to a quarter of its size. I also have stacks of brush that were left when the garden was created as hiding places for animals while the garden grew. I don’t need that many brush piles anymore now that the garden is large. I have three wire cages filled with woodier weeds and prunings that are in ‘slow compost’ mode, and leftover trimmings from bamboo used in bridge construction. Perfect hugelkultur components!
I targeted an area between the pathway and a plant guild with two apricots and vegetables in it. When it rains that area has standing water on it because of the clay content. The area should become part of the guild, but the soil needs mucho amending. I have areas like this all around the property. How to amend two acres of soil? How to get rid of the ever-rising mountains of prunings? How to make the rain water permiate the soil and perculate down rather than sheet across? One guess. Yep, hugelkultur. I bury that wood!
I had made a small hugelkultur experiment a year ago with a raised strawberry bed. There was old lime firewood rotting on the property, so I placed several of these logs along the side of the bed, then covered them with soil and planted strawberries. It worked very well. The strawberries loved the acid, even growing into the decomposing logs, and the logs held the moisture. Some wonderful showy fungus came up, too. I will be reworking that bed and this time I will cover the ground with logs, throw on some llama or horse manure, cover with compost and replant the strawberries. I shouldn’t have to fertilize that bed or add soil for a long time.
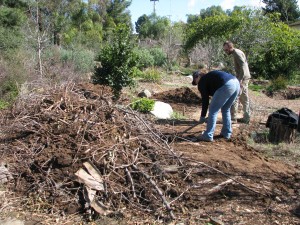
For the big hugelkultur bed I wanted a deep hole that would capture rain and allow the wood to absorb it. My faithful assistants Lori and Steve and Jacob work on this project with me. Steve and Lori dug this ginormous serpentine pit about 2 1/2 feet deep and the same wide.

Lori and Steve digging a huge trench. Since the paths had just been covered with mulch, the dirt was piled on top of plywood layed over the mulch for protection.
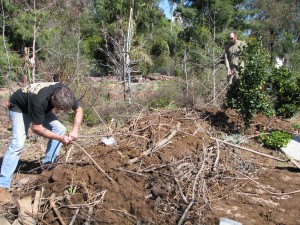
Plywood over the paths helped keep things neat and tidy. Then we began filling the bed with the largest wood first.

The empty trench with still-intact drip systems over it. We didn’t have large logs which would have worked well, but we had lots of thick branches. This hole took a lot of prunings and we jumped on them to compact them down.
A bear trap! There are a lot of branches in this pit. The hugelkultur bed was left for a few days to settle (and we had run out of time and energy that first day!), and then we worked on it again. Extra dirt from the rain catchment basins that the men were enlarging was hauled down and thrown into and around the wood.
Dirt was added to the mix The mound was watered well. In dry areas it is important to water the wood and the soil well as you are building or else the bed will want to draw water from the area around it, drying up any seeds or plants planted on it.

Some of the long pieces that really stuck out were pruned off. Of course if this is a temporarily boggy area, the hugel bed would help dry it out. There were subterranean irrigation lines across the area already, and since we have a dry climate and the wood I used wasn’t old spongy logs and would take some time to become absorbant, we reestablished the drip system across the top of the hugel bed.
Steve reconnecting the subterranean drip, which runs from a well powered by solar. Because there weren’t large logs, there were a lot of spaces to fill with dirt. Gradually the mound grew and was sloped down to the pathway. Finally a couple of inches of dirt was packed on top. Unfortunately this was mostly clay from the excavation site, but if it had been good soil to begin with, I wouldn’t have needed the hugel bed now, would I? Yes, I did give it a sprinkling of sugar just to get the microbes feeding.

All topped up! There was so much clay that this could have been a big fire pit! The next day I dug up soil from the bottom of the wire cages that were now empty of branches, vines, and sticks. In less than a year since making the wire beds they’d begun to decompose and there was several inches of nice soil at the bottom. I hauled it over to the new bed and topped the clay with the compost.
Guess which half has the good soil on it? I want to break up the clay soil so I threw around a cover crop mixture of peas and wheat. The peas will fix nitrogen in the soil, the wheat roots will stabilize and break up clay, I can harvest food from both and then slash and drop the plants to bring nutrition to the soil surface. I also had a bag of mixed old veggie seeds. Last year or so ago I pulled out all my little envelopes of veggie seeds that were very old and mixed them all up. I planted batches around the property and had many things germinate. I still had about 2 cups of the seed left so I threw it around the new hugelbed along with the cover crop. Why not? If the seed isn’t viable, no loss. If it is, terrific! I can always transplant the sprouts if there are too many of any one thing.

Organic cover crop and a bag of old mixed veggie seeds. I watered the seed down, and then raked out the old straw from the Fowl Fortress. Here is a warning about straw: it will germinate. People say straw doesn’t have seeds in it because the seeds are all in the tops which is cut as hay, but they lie. They live in a dream. Straw still has seeds in it and I had a nightmare of a time weeding pathways the first year of the garden because they were all strewn with straw mulch. However if you put straw down for your hens first, they will eat all the seeds, poo on it, kick it around in the dirt, and then you will have a much better quality straw to use. Straw is difficult to get wet, and it needs to be wet when placed on the bed unless you live in a wet climate or have timed the planting to be just before a long soaking rain.

A thick layer of wet straw went over the top of the scattered seeds. Even then it is good to soak the straw first and then apply it to the bed. Some people soak the straw in an enriched liquid, using manure tea, kelp, microbial brews, organic molassas, etc. The mulch acts as an insulator for moisture and warmth (the decaying wood will eventually produce some heat to warm the little plant feet), and a suffocator for weeds. It can also be a home for sow bugs if too thin. In wetter climates the straw layer can be an inch or so thick. In drier climates the straw or whatever you use as a top mulch should be several inches thick or else it will just wick moisture out of the bed. The same rule applys when using newspapers as a mulch. TIP: don’t let your chickens near the new bed! They will ‘rediscover’ their old mulch and start kicking all your work apart!
If I had wanted to plant established plants on the hugelkultur bed rather than seeds, I would have forgone spreading compost and just covered the poor soil on the mound in wet newspaper or cardboard, and then piled on the straw mulch. To plant I would have cut a hole through the paper, added a handful of good compost and planted in the hole.
So the bed was done, and just before a predicted rain event, too. As it rains the water will roll into the bed, be absorbed and held by the soil around the branches which will eventually begin to absorb the moisture as they decay. The seeds will sprout through the mulch and their roots will hold and amend the clay on the mound. Eventually the roots of the apricot trees will reach over towards the hugel bed, and that patch of icky clay soil will become beautiful. All the while I can still grow crops on the raised bed. My three wire bins are empty, an enormous brush pile is reduced to a small mound, and extra dirt found a new home. Plus we all had some fantastic upper body workouts. A winning situation all around.
More hugel beds will be created in troubled spots; some may only be a couple of feet long below a tree’s root line to help with soil drainage while amending the planting bed.
Wire cages filled with old weeds, prunings and vines are terrific for hugels! If you are in an area where the top mulch might wash away in heavy rains, make a latticework of sticks held down with landscape pins or more sticks over the top of the straw. Or cover with wire until the plants begin to sprout; you don’t want the wire to remain on the bed.
So try a hugelkultur bed, big or small. You’ll wonder why you never tried it before.
- Gardening adventures, Heirloom Plants, Natives, Permaculture and Edible Forest Gardening Adventures, Soil, Vegetables
Valentine’s in the Garden

A rainbow chard and parsley bouquet for Valentine’s Day Another gorgeous day in the garden today. I gave a chard bouquet to my friend Lara who has been so kind as to teach me piano over the last two months (I’ve progressed from the ‘clink clink’ stage to the two-handed ‘clink-clink-CLINK’ stage. Lara deserves chard!). My best Valentine’s was receiving my box of organic seeds from Botanical Interests. Yep, ordered too many again. At least it won’t make me fat.

Great seeds! Can’t wait to plant! It was warm enough for shorts, and since my neighbors can’t see me, I indulged for awhile.

Shorts on Valentine’s Day! (No I’m not THAT short, and go figure what my hand is doing to my hat!) At the end of December I had planted two flats of seeds and stuck them in the greenhouse; one had winter veggies and the other native plants.
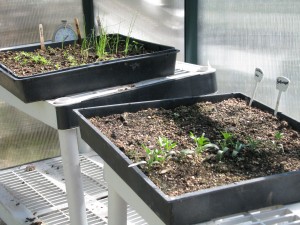
Bladderpod and leeks. A couple of weeks ago I was telling my daughter in college that only one of each had come up so far. She pointed out that the two were curiously linked: bladderpod and leeks! It seems even my garden is a comedian. Today I transplanted the bladderpod into larger containers.

Transplanted bladderpods. Bladderpod (Isomeris arborea) is a true California native living at home in the desert or at the coast and usually in the worst soils. It flowers most of the year even in drought conditions, providing nectar for pollinators and hummingbirds. The plant doesn’t smell so great, but it has wonderful balloon-like pods that rattle when dry. It is a fantastic addition to gardens.
In planting seeds in flats it always looks as if roots are shallow until you take the plant up and find a healthy and sometimes long root system. Don’t let the top growth make you think that the roots aren’t developed.
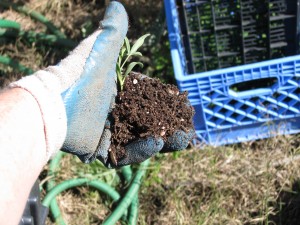
The root ball of this little bladderpod seedling is healthy and full. No more natives are showing their faces in the flat yet, but they have their own schedule and I’ll continue to watch the flat for signs. Just as animals (including humans) respond to circadian rhythms with the 24/hour sleep/wake cycle, plant growth is cued in not only by warmth, but by length of daylight hours. For plants it is called photoperiodicity. You can casually throw that into a conversation over the dinner table tonight and see if anyone notices. A plant’s response to daylight length is called photoperiodic. There is much more to this, and you can read up on it here. So to make a short story longer, I don’t manipulate the light in the greenhouse so I wait longer time than recommended for seeds to sprout just in case they really don’t want to get out of bed yet. I can empathize.
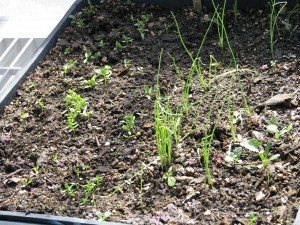
Little celery and parsnip sprouts and leggy leeks that need transplanting, In the veggie flat celery and parsnips have decided to sprout so I’ll transplant them out in a week or two.
Elsewhere in the garden the nitrogen-fixers are working away.
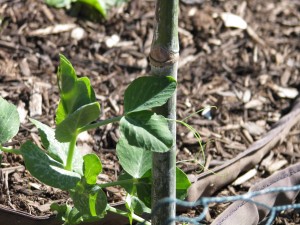
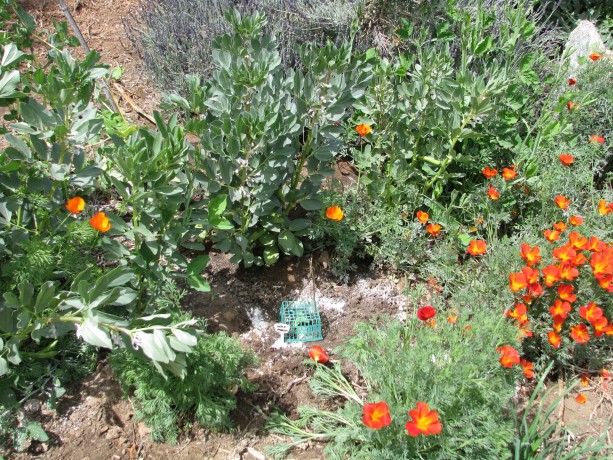
Pea ready to grab onto a bamboo support pole. Fava beans have sprouted from leftover seed from last year and they are already in bloom.
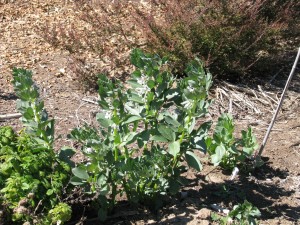
Bees love the blooming favas. The weather is so beautiful that I want to plant the summer veggies… I’m yearning for tomatoes! I will be good and wait a few more weeks until all chance of frost is gone (hopefully the weather won’t be too crazy and frost in March!). Then, look out! Seeds everywhere! And yes, by popular demand I will write about trashcan potatoes.
- Animals, Bees, Chickens, Cob, Compost, Composting toilet, Gardening adventures, Health, Heirloom Plants, Herbs, Natives, Permaculture and Edible Forest Gardening Adventures, Ponds, Rain Catching, Recipes, Salads, Soil, Vegan, Vegetables, Vegetarian, Worms
Southern California Permaculture Convergence! Be there!

Southern California Permaculture Convergence If you are interested in any aspect of permaculture, such as organic gardening, herbs, planting native plants, aquaponics, natural ponds, beekeeping, keeping chickens, and so much more, then you must come to the Southern California Permaculture Convergence. It happens on March 9th and 10th at the Sky Mountain Institute in Escondido. The keynote speaker will be Paul Wheaton, lecturer and permaculturalist extraordinaire of www.permies.com fame. Oh, and I’ll be one of the many speakers as well (cough cough). The Early Bird special of only $50 for both days ends at the end of January, and then the price will rise, so buy your tickets now!
Also, for a full-on demonstration of taking bare land and creating a permaculture garden, there will be a three-day intensive class taught by Paul Wheaton on site the three days prior to the Convergence.
You can read about the convergence here at the official website, which will give you the link perm.eventbrite.com where you may purchase tickets. Also visit the SD Permaculture Meetup page to see all the free workshops that happen monthly all over San Diego.
This convergence is such a deal, you really shouldn’t miss it! And such a bargain, too. One of the best things I find that come out of these convergences is the exchange of ideas and networking among the attendees, and all the practical information you can take home and use right away. One of the largest parts of permaculture is building community, which means sharing with and assisting others.
Really. Don’t miss this! Tell your friends!
You May Also Like
Native Insects and IPM
- Compost, Gardening adventures, Natives, Permaculture and Edible Forest Gardening Adventures, Soil, Vegetables
Gardening secrets: Epsom salt and sugar

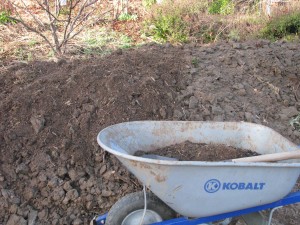
This veggie bed soil isn’t very active. So I buried frosted tomato vines in it and sprinkled on my powerful duo, and in a month I’ll plant seeds. Gardening shouldn’t be expensive. If you believe everything you read, especially those wonderful gardening catalogs and even advice from professional gardeners, a garden could be quite an investment. Talk about golden carrots! I have spent my fair share of money for gardening products in my time. Then this permaculture stuff got into my head and it makes me rethink everything. Permaculture proves that gardening shouldn’t be labor intensive, just labor-wise. Make things work for you and let plants get on with what they want to do. Makes some forehead-slapping sense to me.
Organic fertilizer is a plus for firing off poor soil, but it is expensive. There are two other very inexpensive household products that you can use to really charge your soil, promote growth, make fruit sweeter, reduce some weeds, release the bound-up vitamins and minerals in the soil, promote world peace… well, I’m getting a little carried away, but not by too much.
Epsom salt is named after Epsom, England, where the active ingredient Magnesium sulfate was originally created. Not found naturally, it must be processed, now most often from dolomite. Dolomite is mined in the United States and internationally. The sustainability of dolomite mining and the environmental impact of mining, processing and shipping Epsom salts may be something to consider, if you worry about the locality of products you purchase. I don’t know what impacts those are. Epsom salts can actually be made at home by chrystalizing magnesium sulfate, but I’m thinking that although I enjoy do-it-yourselfing, this is a little too much.
Epsom salt is inexpensive and readily available. It is recommended for tomatoes, peppers and roses, but I use it around citrus trees, in the veggie beds, and anywhere leaves are looking sickly. The Epsom salt bag recommends sprinkling 2 tablespoons around the base of each plant, so you can see a little goes a long way. It is also a wonderful bath salt which eases sore muscles and leaches impurities from your skin (often recommended as a diet aid because of this). (Also if you have a greywater system, your magnesium-enriched bathwater will flow out to nutrify your plants! Such a deal!) Some sites tell you never to take it internally; the bag and others recommend it for… let’s say… loosening things up inside. It is also used as a curdling agent in making tofu. There is a relationship between calcium and magnesium whether it be in the soil or in our bodies. Taking too much calcium without enough magnesium can lead to many health problems such as arthritis and hardening of the arteries. Don’t take more than a ratio of 2:1. (Dairy products don’t have that ratio, so if you drink milk you may not be absorbing the amount of calcium you thought you were). Also, calcium and potassium compete with magnesium for uptake into roots, and even though your soil samples may indicate enough magnesium your plants may not be receiving enough. If you have heavy clay soil, you could have a ratio as high as 7:1, yet in sandy soil you need more magnesium to hold soil together so you can go to about 3:1. Here are some good sites for looking into the science behind it if you’re interested: National Gardening Association, a book excerpt here which goes into more details about how its made and how to use it medicinally, and even a site about how to make crafts with it.
Also, don’t let the name confuse you. Epsom salt is Magnesium sulfate, not salt as in table salt which is Sodium chloride. Applying Epsom salt to the ground is not like applying, well, salt. Applying Sodium chloride to your soil is to kill it. I’ve read and overheard inexperienced gardeners say that they’ve poured salt on weeds because, after all, it comes from the ground so it shouldn’t do any damage. Ummm, no. Invading armies would salt the fields of their enemies so they couldn’t grow crops there for decades. Heavy salt in the soil is a huge problem (which, of course, if you’ve been paying attention to past blogs you know can be readily solved by….. what? I’ll give you a chance to fill that in and reveal the answer at the end!)
As for my other ‘secret’ ingredient is sugar. Yes, my soil is on junk food. Actually using organic molasses dissolved in rainwater would be best, and I have done that when making a microbial brew, but I am but one person with a thin purse so sugar it is. Why sugar? It is a complex carbohydrate which plants need to produce protein, starch and fats. Plants produce their own sugar through photosynthesis, and by secreting their own sugars through their roots determine which microorganisms they want to thrive near them. I use a little sugar on ailing soil; all those millions of microbes and fungusey things that are in the soil get a jump-start with something sweet. Have you ever made bread and mixed a little sugar in with the yeast to proof it? Same difference. The soil critters feed off the sweet, multiplying like crazy and making your soil turn into healthy goodness. If your soil is healthy, you don’t need it. When the sweet is gone they munch on organic materials processing them more quickly and opening up all those locked nutrients in the soil. If there isn’t enough for them to eat and there is a die-off, then their little bodies become nutrients for the soil (as they would anyway). To put this into perspective, let me relay to you an interesting fact I learned in my Permaculture Design Course. When a field is plowed and farmed, the first year crops are good. Each successive year that it is plowed and farmed the fertility is less and the crops worse until the ground is barren. That is because with the first plowing or tilling gajillions of microbes are slaughtered and it is their dead bodies that fertilize the crops. Each successive year there are fewer microbes available to slaughter until they are all gone and the soil has become dirt. And then we have dust bowls and run-off, erosion, loss of the water table, the drying up of streams, climate change, universal discord… well, you get the picture.

Climbing Don Juan here was a miserable, spotty rose last Spring, while all his friends were tall and lovely. I added Epsom salt and sugar, and he fought off the black spot and is thriving. Only lightly sprinkle the sugar around your soil; too much can hurt plants. I have used sugar successfully to kill off an invasion of nutgrass, something about which I read on the Internet. This sedge turned up in my pathways and although I hand weeded the little guys (I didn’t eat them although they were cultivated as a crop in Egypt) they just kept on coming, even after I had put plywood over the top for awhile. So I sugared them then threw the plywood back on, and Bob’s your Uncle, no more nutgrass in that area. I envisioned millions of little mouths biting away at the nutgrass bulbs underground… I need to stop thinking about that. What really happened is that the microbes fed off the sugar and multiplied wildly to a point where they locked up the available nutrients in the soil which non-natives need to grow. Native plants won’t be bothered because they can thrive in poor soil. Here is an article about the research behind sugaring to prevent weeds. I lightly add sugar around established plants that aren’t doing well, and water into new vegetable beds where the soil isn’t vigorous yet and allow the beds to sit awhile before I plant seeds.
Refined white sugar is of course empty calories. Any dissolved sweet will work well, too. Beet sugar, agave syrup, leftover pancake syrup, sorghum syrup, honey, molasses, diluted jelly… use your imagination and your pantry. The more nutrients in the sweet the better for your soil, but also the more expensive it will be. If you are using sweet for houseplants then you should be wary of possible interest by house ants. Outside it isn’t a problem.
So share your bath and your jelly donut with your garden and you’ll both be happier and healthier!
(Answer: compost! You knew that!)