Seeds
- Animals, Bees, Birding, Gardening adventures, Heirloom Plants, Other Insects, Permaculture and Edible Forest Gardening Adventures, Quail, Seeds
Growing Birdseed: Love Lies Bleeding Amaranth
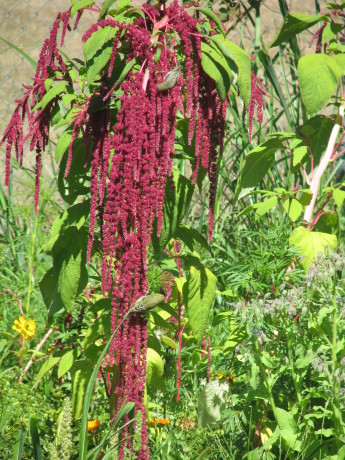
Love-Lies-Bleeding amaranth is a dramatic addition to your garden… ask a bird! We’ve participated in Cornell University’s winter Project Feederwatch for about six years. It is a volunteer amateur scientist-type program where, from November through March, you fill bird feeders and two days a week count how many birds come. Then you report your results on an online form. This helps trace changes in migration patterns and in habitats in wild birds, as well as sitings of diseased birds.
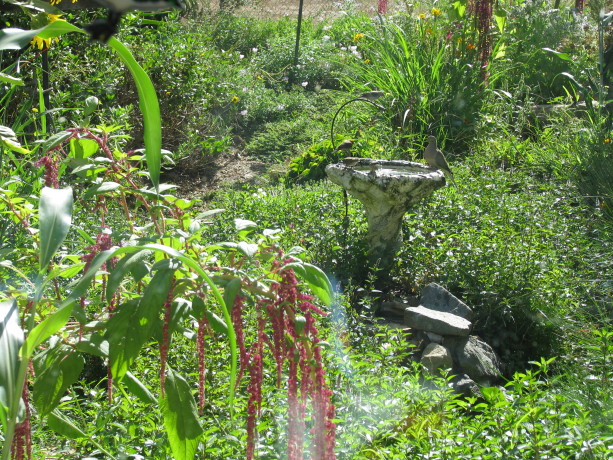
The sound of dripping water attracts birds more than food does… from long distances, too. This year I found out that most birdseed is contaminated by insecticide; some brands are reported to have illegal levels of pesticides in them. Geez! How am I going to get around that problem? I’m not sure about this winter, but I’m going to grow more of my own birdseed. In the past we’ve rolled pine cones in peanut butter and hung them out for woodpeckers and many other birds. I’ve also grown sunflowers, for both their seeds and for their leaves, which lesser goldfinches just love to eat! This year I planted heirloom Love Lies Bleeding Amaranth (Amaranthus caudatus) to some pretty spectacular results. Yes, this is one of the types of amaranth that produces an edible seed for humans; the leaves are edible as well. It can grow 3 -6 feet, with long ruby-red falls of seed heads that the birds just love.
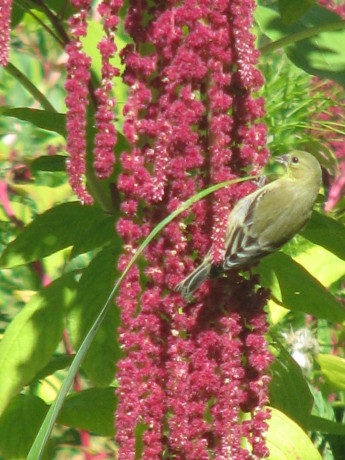
One of our Finch Frolic Finches feeding! There are many other amaranths to grow for both your own consumption as well as for the birds. Sometimes you grow it for yourself and end up feeding the birds! Of course there are many plants which attract hummingbirds all year, especially those with tubular flowers. Why do you want to attract birds? Besides their right to habitat, and their appeal to our better selves, all native animals play important roles in the preditor/prey relationship in a healthy garden. The birds may eat some of your produce, but they are also eating large amounts of bugs. They are also pooping, and you know how valuable poop is to any garden! If you plant a bird garden away from your vegetable crops, then plant your veg crops using the polyculture method, you will have birds and food for yourself as well. Please, please don’t put up those dangerous tree nets! They tear apart your trees when you try to remove them, they don’t really work, and birds can be stuck in them. When they are on the ground snakes are trapped in them! No plastic netting. Ever. Please!
Try planting some amaranth – especially this one with the dramatic name and dramatic fall of color – next spring when you plant a bird garden. Or in your edible forest garden and plant guilds. Or between your fruit trees, or along the back of your flower beds. Take a nibble for yourself if the birds will let you!
- Bees, Gardening adventures, Other Insects, Permaculture and Edible Forest Gardening Adventures, Seeds, Soil
Hairy Vetch
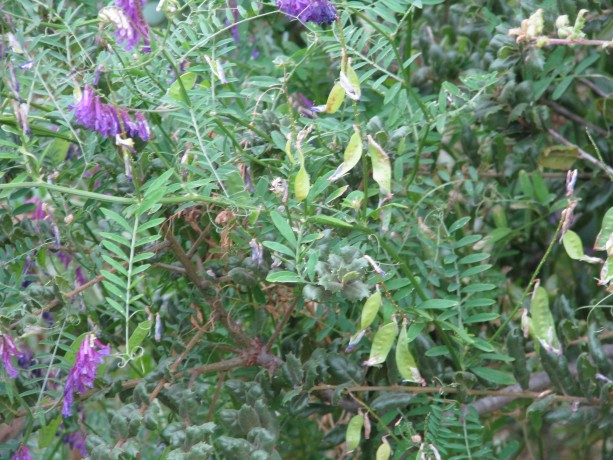
Attractive flowers and seeds. Hairy vetch (Vicia villosa), also known as winter vetch is a nitrogen-fixing plant that is used mostly for cover-cropping in monoculture fields. Native to Europe and Asia, it is a winter plant sown in the Fall and, in places where it snows, is killed off with the cold or tilled into fields. When a nitrogen-fixing plant dies or is cut back, roots die and release the nitrogen nodules into the soil. Here is sunny San Diego the vetch thrived since I sowed it in Spring of last year. It is a pretty, vining plant, with lovely dark purple blooms that bees and other pollinators love. It produces pea pods like its edible relative the fava bean, but I wouldn’t eat them. The seeds may be bad browse for livestock as well. The roots help hold soil during winter rains, too.
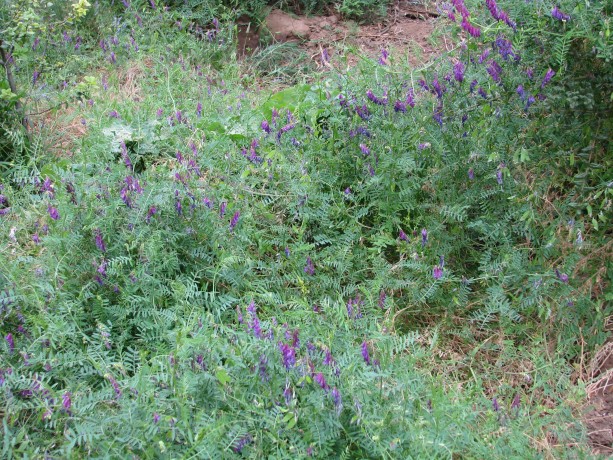
Hairy vetch clamboring all over the place Vetch can be hard to get rid of because it reseeds easily. It will also climb up bushes, competing with the bush for sunlight. If I didn’t know about the nitrogen-fixing properties and if the bees didn’t like it so much, I’d suspect it of being an invasive.
To control it I take my trusty hand scythe and cut the vetch out of bushes and close to the ground. I leave the vines to decompose and protect seedlings that I plant to take advantage of the newly-enriched soil.
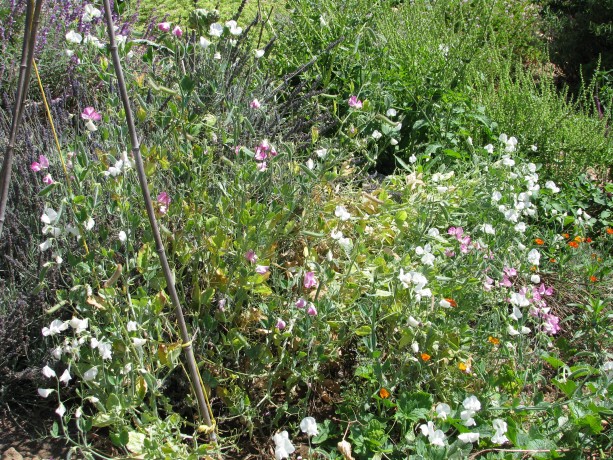
A mass of sweet peas climbing a lavendar. If you don’t want a cover crop that is so aggressive I suggest sowing a mixture of lupine, sweet peas, edible peas and fava beans in the Fall here in Southern California, and again in early Spring. In cold areas check with your farm advisor on when to plant.
- Animals, Chickens, Permaculture and Edible Forest Gardening Adventures, Pets, Quail, Seeds, Vegetables
Updates on Crate Potatoes, Nursery Plants and Chicks
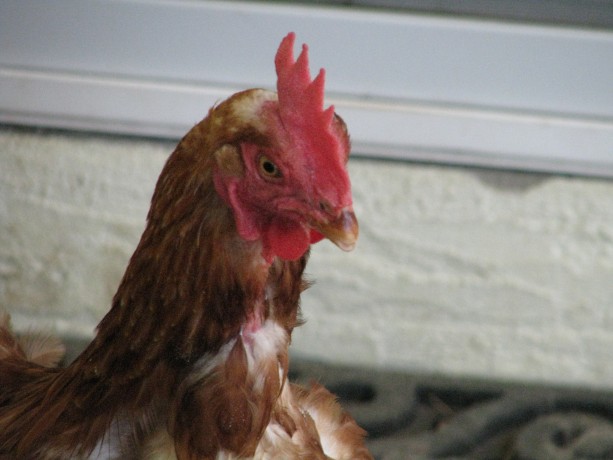
“Whaaa…???” Spring has brought its fervor of growth, of veggies, babies and weeds. Between my bouts of sneezing from pollen (great thing for a gardener to have!), and while the day is very warm outside, I thought I’d update you on how things are going.
A couple of weeks ago I posted about growing potatoes in milk crates. Success so far. The potatoes are growing quickly and coming through the second layer of crates.
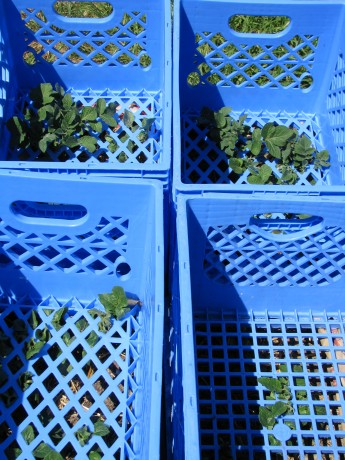
Potato greens emerging through the second layer of crates. I need to backfill with more compost. The potatoes planted in the raised beds have been hilled up as much as the sides will allow. If I am ambitious, I may find some long pieces of cardboard to raise the sides higher, and fill some more.
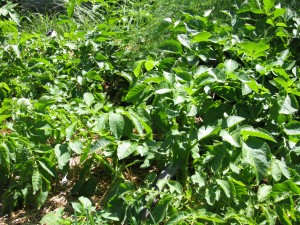
More potatoes! Potato greed!
My nursery bed is mostly ready for transplant out into the larger garden.
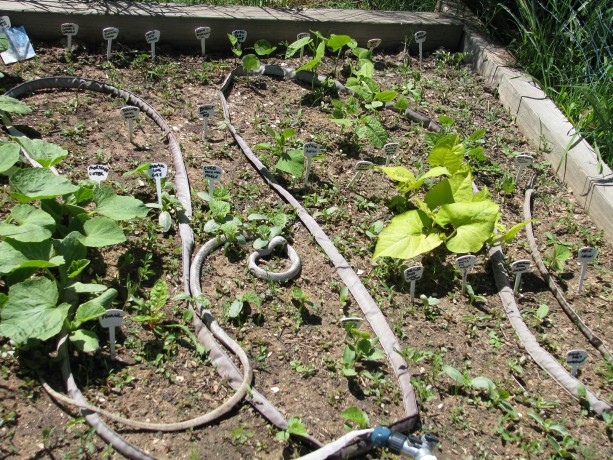
Yes, the rubber snake keeps the birds away. I need more berry baskets to help keep them safe, and I need to build support systems right away for tomatoes and other crops I want to keep off the ground.
The chicks are about a month old. They’ve been living in the downstairs bathtub with heat lamps. There are only seven chicks now. We purchased the eleven on a Wednesday afternoon. By the next evening four were ill. All four died during the night, even after my daughter and I kept them warm and full of antibiotic/vitamin water. We don’t know what happened to them, but at least it wasn’t something that took the whole flock. There are always casualties with day-old chicks. They are shipped in the mail straight out of the egg, with a variety of temperatures, food and terrors. When purchasing a large amount of chicks straight from the hatchery, you’ll often receive extra chicks to ‘make up’ for those that perish. Our chicks that died were both light Brahmas, Annabelle Lee and Daisy, Ruby, one of the Rhode Island Reds, and Hermionie, one of the Americaunas. The rest are growing just fine, although I noticed today that Belle, the remaining Americauna had come to some injury within the last week.
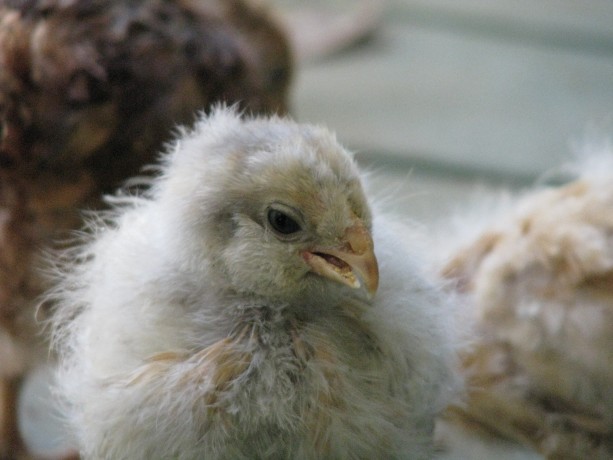
“I’m Belle, the Americauna, and I’m beautiful even with a dislocated jaw.” Her lower beak is crooked and jutted forward, doubtless an injury caused by flinging herself around in the bathtub with the rest of the girls. She is eating well and seems to be aggressive, and there wasn’t anything I could do to the beak with my fingers through massage or gentle manipulation, so I think she’ll have to see it through. UPDATE: my daughter says that she might have ‘crossbill’, which is a genetic condition that gradually shows up. Not much to do about it; some hens thrive and some can’t.
There is always the chance that some of the remaining seven, especially the straight-run cochins, are males, and they will have to find other homes. I’m really hoping for all hens.
Today I not only took the girls out of the bathtub for the first time on a field trip to the warm and safe back porch, but also introduced them to Viola the House Chicken.
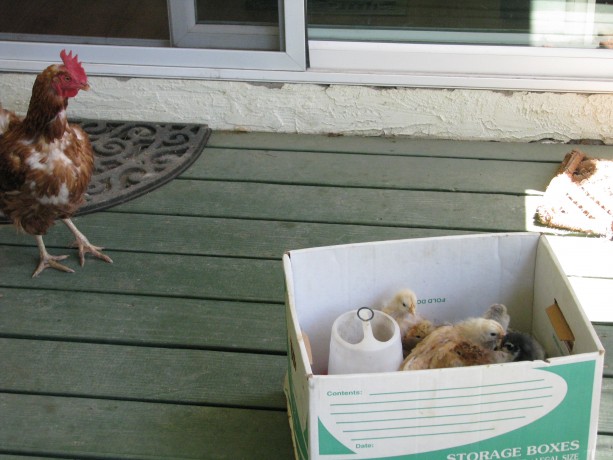
“What the heck are those?” Viola stays in the front yard all day alone, and then comes into the house to her cage at night. She’ll lay in the dog house on the porch where Homer, our lost desert tortoise used to sleep. The chicks are flighty, both in personality and in how they are trying to exercise their wings by sudden wild bursts of flapping that take them off their feet: a surprise to all including themselves. They discovered sunshine, leaf bits, perching,
I can perch! and that Viola was absolutely afraid of them. Viola did all she could to get back into the house through the screen while complaining horribly.
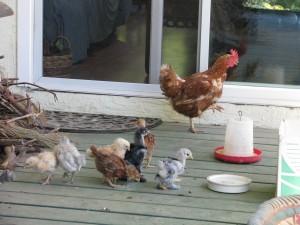
“Get me away! I’m going through the screen if I have to!” I realized that she needed to lay and the chicks were blocking her entrance to the doghouse. I let her in and barricaded the pathway and she settled in whirring grumpily to herself.
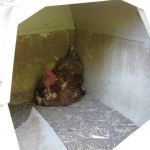
“Can’t you see I’m doing serious stuff here?” Just now I heard her complaining at the top of her lungs to find that the chicks had visited her, and one bold one in particular, aptly named Bodacea, was standing next to her either inquisitively or in horror. I seperated them and they all calmed down.

“I’m Mulan, a black chochin, and I have feet feathers and a cute butt.” 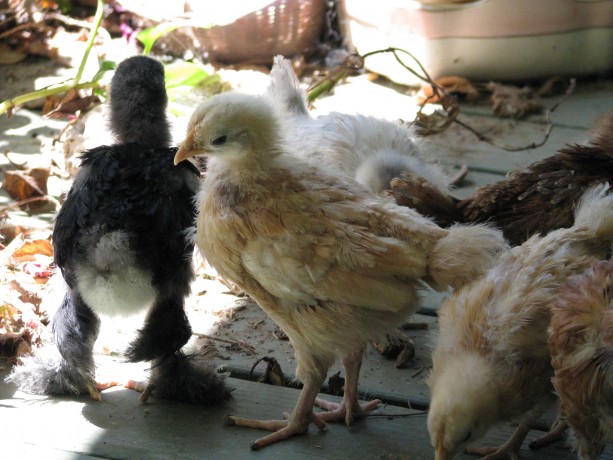
“I’m either Esther or Myrtle, a buff orpington, and she does have a cute butt.” 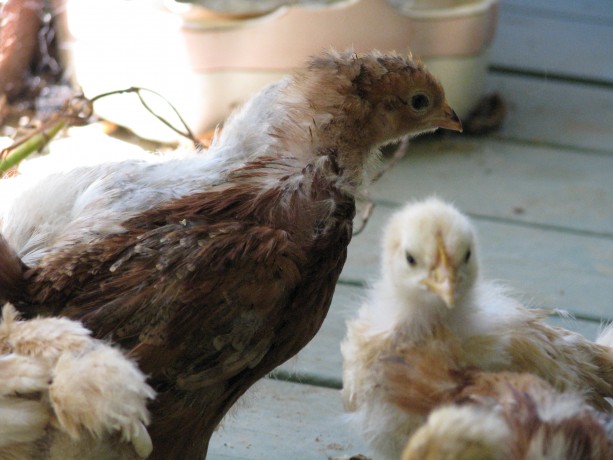
“I’m Charlotte the Rhode Island Red, and I’m going to be just like Viola some day. Without the limp.” 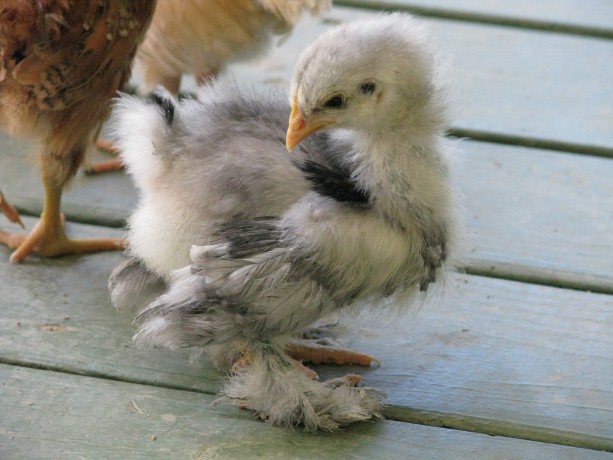
“I’m Bodacea, a blue cochin, and I have a cuter butt.” 
“I’m Malaika, and a Turken isn’t a cross between a turkey and a chicken! We were bred in Transylvania. Go figure.” 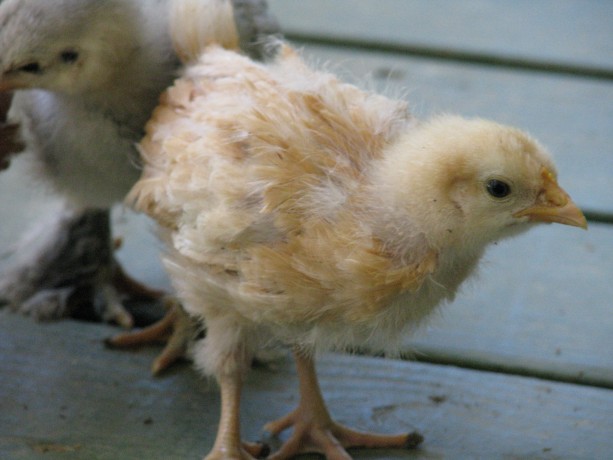
“I’m either Esther or Myrtle, the other buff orpington. The cuter one, obviously.” The nights are still cool and I still have a rat problem in the Fowl Fortress (I’ve been installing a couple of my cats in there overnight to help discourage the looting) so I’m waiting until maybe next week to introduce the girls to the rest of the flock. I’ll oust the Saki the male quail and let the girls take over his house. Its all so complicated!
- Animals, Bees, Chickens, Gardening adventures, Other Insects, Permaculture and Edible Forest Gardening Adventures, Quail, Seeds, Soil, Vegetables
Protecting the Little Guys… and a little about diatomaceous earth
When transplanting little plants out into the big garden it feels like sending your child off to their first day at Kindergarten. All kinds of things can happen to them in the big world. For children… that’s too large a topic for me (Kindergarten mother survivor here). For plants I can give you some advice.
Besides watering too much or too little, and root disturbance while transplanting, little guys can be eaten by bugs, birds or other animals, or simply get lost and overlooked. (Here is a container growing tip: as your seedlings sprout and grow, gently pass your hand across them every time you are with them. It will make for stronger stems.) (And its fun!)(And you can pretend you’re ruffling their hair and say things like, “Hi, Sonny.” Or not.)
A day before transplanting out of a container or from a nursery bed, water the sprouts well. If they’ve been in containers for awhile those roots may be going in circles and the water can’t penetrate from the top very well. If that is the case, put the pots in water for half an hour until moisture is wicked into the pot thoroughly, then allow to drain. I say to do this the day before because if you water just before planting the soil around your root ball will fall apart, breaking fine hair roots and shocking your poor little guy. Some plants hate their roots being touched so much that this would kill them. By the next day after watering the container will still be moist, but the soil should be solid enough to stick together when tipped out.
Dig a hole twice as wide and twice as deep as your plant, then backfill with a mixture of good compost and the soil from the hole. This will help acclimate the roots to the soil change. Water the hole, and if you’re really industrious water with compost tea. Set your plant into the hole and firmly press the soil around the plant. If you are planting tomatoes, eggplant or peppers (all in the same family) you can set the plant more deeply into the hole; they will form more roots from the stems and become sturdier. The rule of thumb otherwise is to plant so that the soil level of the hole is the same as that of the transplant; many plants will rot if soil is up against their stem. If it is too low, the roots will be exposed and dry out. Potatoes can be trenches and hilled up as they grow, or maybe you will try trashcan or crate potatoes. If you live in an arid area, plant in shallows so that rain can accumulate around the plant. If you live in a wet area, plant on hills so water can drain off. Or if you’re practicing permaculture, plant on the swales!
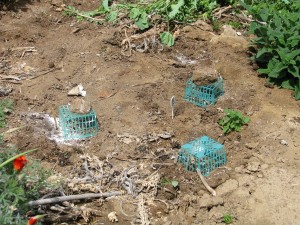
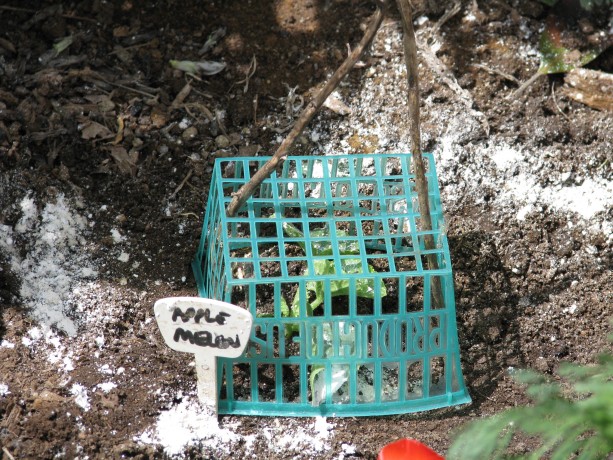
So your little guy is in the ground and gently tamped in. To keep off the birds and bunnies and mice and rats and whatever else is looking for dinner, I use plastic berry cartons turned over and set in place with sticks or with rocks on top. Reuse and repurpose! They are also good for protecting figs . The cartons allow enough sun in, and also makes it very obvious where the seedling is so that you don’t step on it, or weed the little tomatoes out with the almost identical ragweed sprouts. For larger plants, turn over a milk crate.
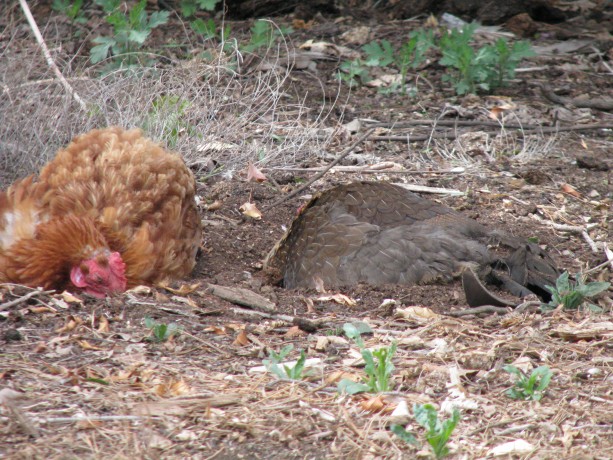
I have no native quail in my yard. Due to nearby houseing developments, there aren’t many quail around me anymore. Quail would fill the niche of beetle and sowbug eaters. My hens want only worms, spoiled things, and their big feet do a lot of damage if not watched.
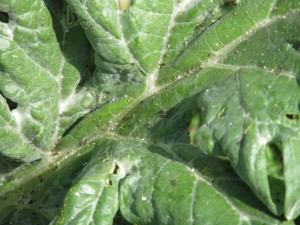
Sowbugs cluster under mulch and do damage to stems and fruit.
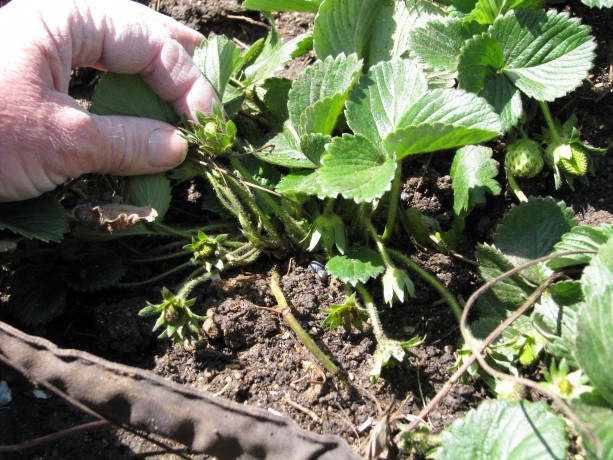
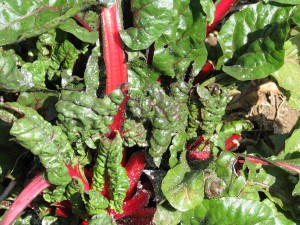
I use a little food-grade diatomaceous earth around the seedlings, new sprouts in the garden, around the strawberry plants, and also around plants such as artichoke, corn and chard where ants have begun to farm aphids.
I use it around the trunks of my stonefruit trees to stop the ants, and have been told that it works well around the legs of beehives in lieu of or in combination with cups of oil to keep out the ants. Diatomaceous earth is the finely ground bodies of ancient sea creatures (diatoms). The powder on a microscopic level is full of sharp edges.
When a sectioned insect such as an ant, flea or sowbug crawls on it, it rasps their tender areas and dessicates them. Not something I really am happy about doing to the bugs. I’m only using it on a very small scale. Remember that any insecticide, even DE, kills many kinds of insects not just the targets. You don’t want to eradicate your insects; most of them are helping your plants and your soil. DE will melt into the soil when watered, but only reapply if you still see the target bugs. The problem might already be taken care of.
Use food-grade DE, not the kind that is sold in pool supply stores. FGDE is used in graineries to keep weevils and other bugs out of grain and beans, so you’ve been eating it for years without knowing it. It doesn’t hurt us, nor is it bad to breathe (some people wear masks that they can get from https://accumed.com/n95-mask-for-sale-respirator-safety-face-mask-z1.html, just in case). It is a great, natural and inexpensive way to fight fleas without paying big money for poisons to put on your pet. I have it all over my cats’ bedding.
They sell DE sprayers, but they become clogged. The easiest and least expensive applicator (which can be repurposed)? A condiment dispenser. You know, the plastic mustard and ketchup squeeze bottles in diners. I bought a set of two for $2. You can practice a little to dispense a finer dust.
So I plant my little guys, give them a drink, squeeze a little DE around them, give them a berry basket hat until they outgrow it, then take it off to use elsewhere. If there is still a threat to your plants from critters (somebody was eating my eggplant leaves last year! I mean, really…ick!), then turn a wire gopher cage over the top or make a wire cage to fit and use sticks or landscape staples to fasten into the ground.. These, too, you can reuse yearly.
- Compost, Gardening adventures, Permaculture and Edible Forest Gardening Adventures, Seeds, Soil, Vegetables
Crate Potatoes
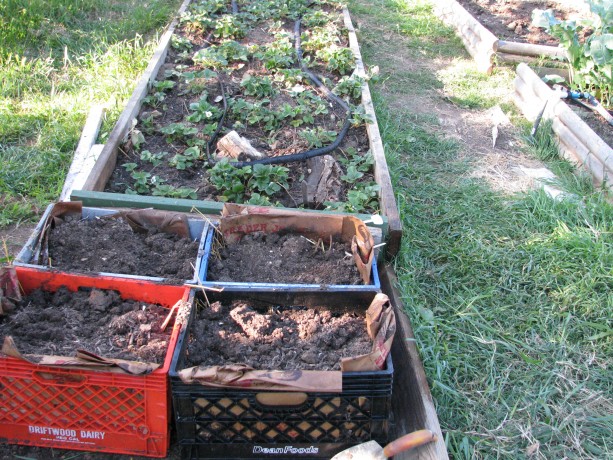
Milkcrate potatoes! This area receives sun for half a day and is shaded on the West side; perfect for keeping them cool. I’ve been frequently asked to write about trashcan potatoes. I haven’t yet, simply because I don’t have a trashcan to use for that purpose. Instead I used what I had and am experimenting with milkcrate potatoes. I’ll let you know how it works.
The potatoes that work in trashcans are any of the standard potatoes in the Solanaceae family, related to tomatoes and eggplants; sweet potatoes and yams are in the morning glory family and grow very differently. A good article with photos that shows growing potatoes in a barrel is at greenupgrader.com. There are many videos on the web about growing trashcan potatoes; a good one is at Farmers Almanac . Two things that she does in this video that I do differently is that after cutting the ‘eyes’ of the seed potatoes, I allow them to harden off for a day or so before planting, and also potatoes can grow with less than 8 hours of light a day which makes it a good over-wintering crop, especially here in Southern California. Potatoes like shorter daylight and cool night temperatures, so plant now! If you plant later, protect the trashcan from the afternoon sun. Hardening off means to allow the cut potato to sit in the shade for a day or so to allow the cut end to form a ‘scab’, or harden up before planting. It helps keep the potato eye from molding and provides protection from insect or bacterial attacks, and keeps drier soil from leaching water out of the potato. This is the same process you’d do when taking cuttings from cactus, geraniums and other easily-rooted, sappy plants. When watering trashcan potatoes, don’t overwater because you’ll rot them. Like their cousin the tomato they’ll do better slightly drier than wetter.
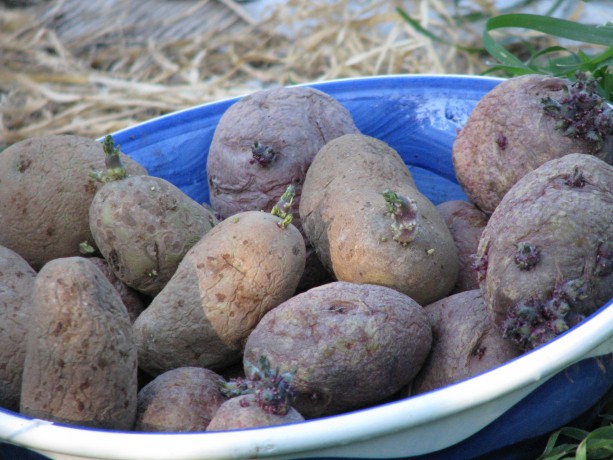
Organic chitted potatoes. ‘Seed’ potatoes aren’t potato seeds. They are small tubers that are ready to plant. Always buy organic seeds. Period. You can buy seed potatoes online or in nurserys available in Southern California just after Christmas, and sometimes in the late Fall. They usually purchase the seed from other states which have snow and don’t ship during the winter. Buying online or from organic catalogs allows you to shop among a wide variety of potatoes differing in size, color and purpose. However since we can plant potatoes in the Fall and don’t want to wait for shipping times, we can buy a bag of organic potatoes locally and sprout them ourselves. Non-organic potatoes have been treated so that they don’t sprout in the store, and are genetically modified (GMO) to last on the shelf. Sprouting potatoes is called ‘chitting’ and is very easy. Mine usually sprout in a bowl on my kitchen counter. Keep them in a light, cool area out of direct sunlight and they’ll grow. When the potatoes have chitted and ‘greened’ (have sprouts), you can either plant them whole or slice them so that each piece has at least one eye. Allow them to harden off and plant them. Give the extras to your neighbor!
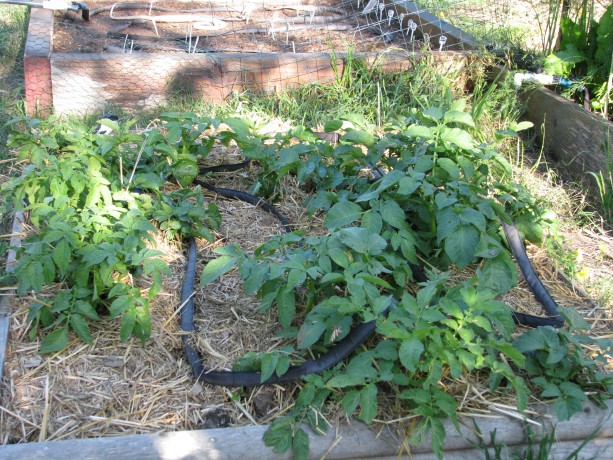
Potatoes can be grown in the ground, or in a raised bed, and then you hill up around the plant to produce more tubers. The reason for growing trashcan potatoes is that you can grow vertically, save garden space, and in particular save your back from trenching, hilling and then digging. The harvest is more productive, too, because you won’t be accidentally cutting through or spearing potatoes in the ground. Potatoes can grow this way because the tubers are actually specialized underground stems called stolons. Potatoes will produce tubers underground, but anywhere along their stems they also can grow a potato under the right conditions. Once you plant a potato ‘eye’, the eyes being the growth buds, it will send out stolons. The plant will produce potatoes below ground, and if you hill up around the stems they will also begin to swell and produce tubers.
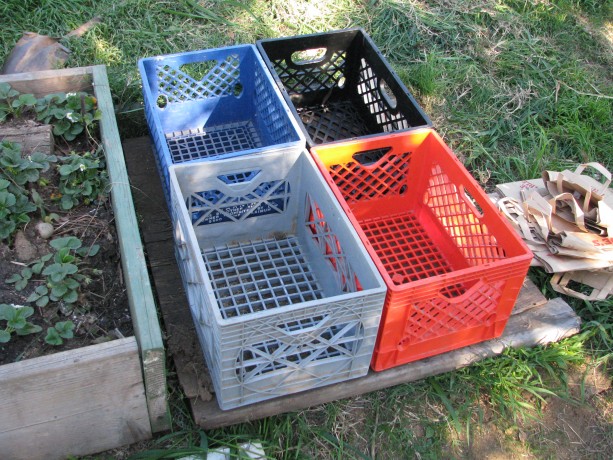
I have extra milk crates, and a source for more, so why not use them? When you plant in a trash can (with drainage holes!), as the greens shoot up you keep layering compost or straw or woodshavings or potting soil or whatever around the stems keeping a little green showing until you can’t fill the trashcan anymore.

I lined the bottoms and the outside edges with extra paper bags and watered them. When the plant is done growing the plant will bloom and sometimes even produce seeds. When the stems die back, you knock over your trashcan and harvest. Save some of the smaller ‘taters for seed for planting in the Fall.
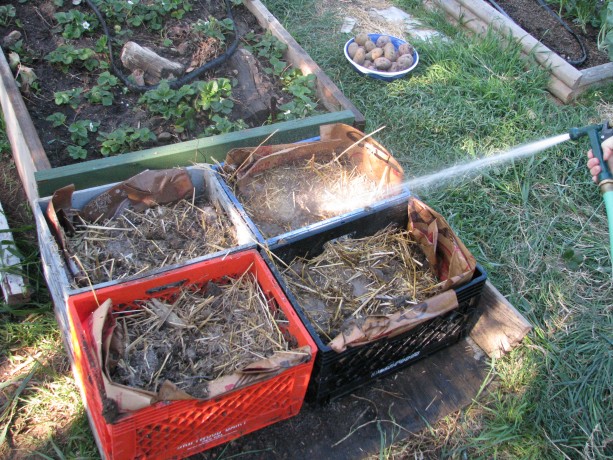
I filled the crates 2/3s full with compost mixed with chicken straw and watered well. You don’t want heavy soil or the potatoes will rot. You also want to insulate the potatoes from outside warmth. You can also root around in there earlier and pick new potatoes, or you can delay your harvest, keep water out of the trashcan and keep it in a cool spot, and harvest when you want them. The beauty of trashcan gardening is that you don’t need a trashcan. Very zen! You can drill holes in a plastic carrier, use burlap sacks, stack old tires, nursery containers, large plant pots or whatever you have. If you have a bottomless or rusted out trashcan, use it! Place it over good garden soil and allow the potatoes to grow down, too. You’ll have a little digging to harvest after you knock over your trashcan full of potatoes, but not much. To make holes in a plastic or aluminum trash can, borrow a digging bar (a long metal pry bar), place your trashcan right-side up on a dirt area, hold the bar high vertically over your trash can pointy side down and let it go. It should make a hole. Or turn the can over and use a hammer and something sharp like an awl or screwdriver (be careful you don’t shatter the top of the screwdriver! You don’t have to pound too hard. Be wise and wear safety glasses just in case). Do this multiple times to make as many holes as you can without making the bottom unstable.
Also be sure to keep the trashcan or crate potatoes in a cool place, especially if you are planting in the early spring here in Southern California. Warmth will keep the potato stems from swelling into tubers. Insulate the potatoes well and keep them cool while still allowing them enough sunlight. Fall and winter are the best times for planting potatoes here, as long as they have adequate drainage.
There is concern about leaching chemicals from plastic, or tires, or aluminum. Do the research and make yourself happy. I don’t think there is that much leaching to be worried about because the plants aren’t in there for a long time. You can always make a barrier between the soil and the sides of the containers with undyed paper or newspapers using soy ink. So save your garden space for other crops, and pop your ‘tatties in a can. Or crate. Or whatever.
Update: here is a very comprehensive article about planting potatoes. Rather than use commercial fertilizer, of course, we recommend rich compost, which will provide what your potatoes need. Also use dead garden debris such as old pea stalks (cut rather than pull them up to allow the nitrogen nodules on the roots to remain in the soil) in your planting bed or container.
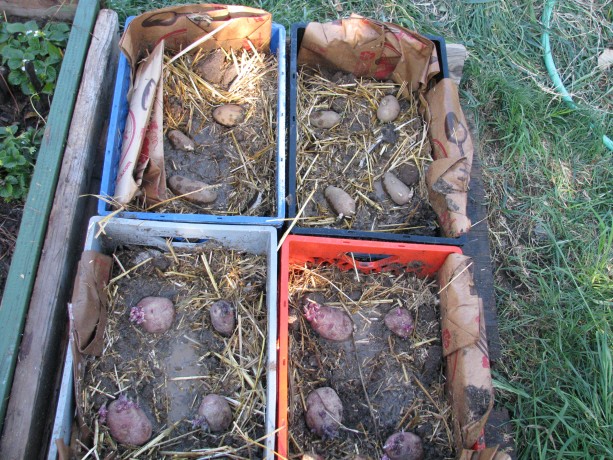
I planted whole potatoes just because I didn’t have room for lots of cut ones and these needed planting or tossing. I then covered them with about an inch of light compost and now I’m waiting! -
A Nursery Bed
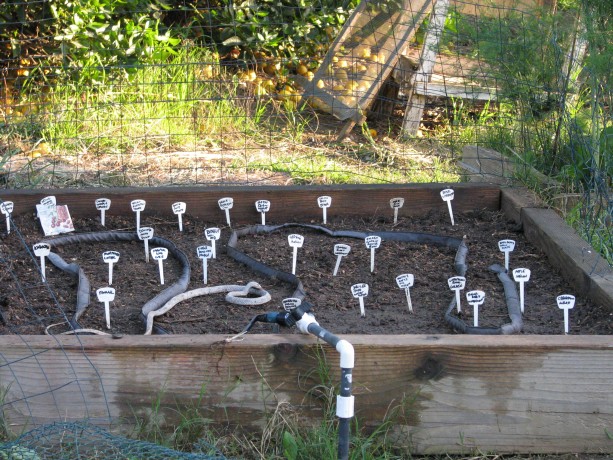
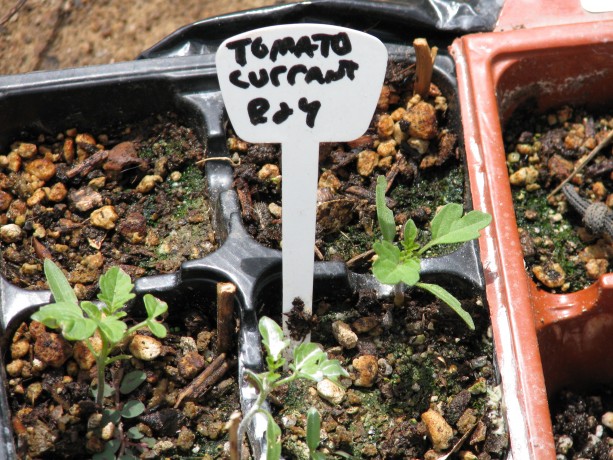
Twenty six varieties in one bed. I had a frustrating time with seeds already this season. There is a limited time when I can use my greenhouse (which doesn’t have all the frills such as fans, automated watering and window-opening) because the weather here becomes warm very quickly. I planted six flats of six six-packs each of various seeds. Many were coming up when a mouse tunneled underneath and not only ate all the larger seeds but dug into most of the rest of the cups, tossing or burying the small seed. I tried again, but the little guy found another way in. It is difficult to plant seeds around the property due to not having overhead watering, and having such a healthy insect habitat. So instead I’ve turned one of my raised beds into a nursery bed. I planted 26 types of veggies in good garden soil. They’ll come up and grow good tap roots, then be ready to transplant out to wherever I want them. Some will stay in this bed, and some will be given to friends because, after all, there are only so many tomato plants I can have.
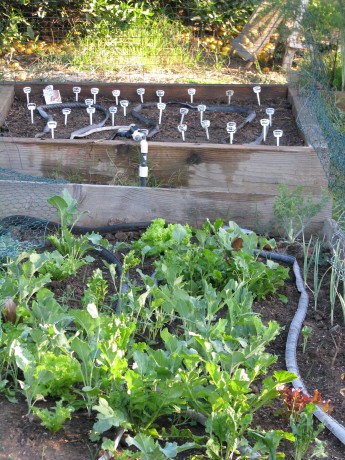
Nursery bed behind mixed greens. The bed in front of the nursery bed is the one where I scattered mixed seeds a while back, and now have a healthy crop of collards, broccoli rabe, celery, parsnips, carrots, kale, garlic, leeks, lettuce, arugula, peas and others. Mixing seeds helps confuse predators and keeps the plants healthier.
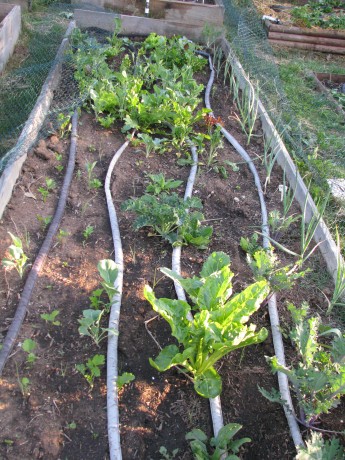
So many veg in one bed!

