Perennial vegetables
- Animals, Bees, Birding, Compost, Fungus and Mushrooms, Gardening adventures, Health, Heirloom Plants, Houses, Hugelkultur, Microbes and Fungi, Natives, Other Insects, Perennial vegetables, Permaculture and Edible Forest Gardening Adventures, Ponds, Predators, Quail, Rain Catching, Recycling and Repurposing, Reptiles and Amphibians, Soil, Vegetables, Water, Water Saving, Worms
My Plea Against Gravel
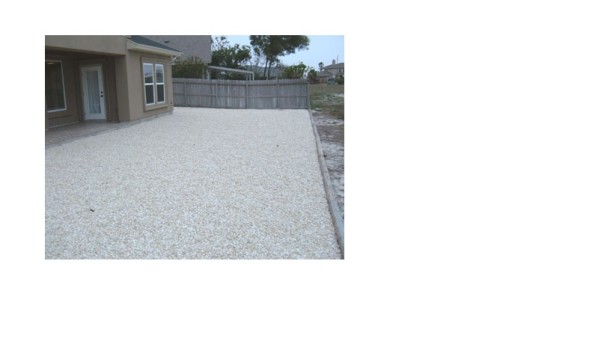 Here in Southern California, as in many other areas, we are finally legally recognizing the drought. There are rebates in place for those who take out their lawns, and here in Fallbrook there is a 36% water reduction goal. Many people just don’t know what to do with all that lawn. A very unfortunate continuing trend is to dump half a ton of colored gravel on it. Please! NO! First of all, once down gravel is nearly impossible to get out again. Gravel, like all rocks, is thermal mass. Instead of having a large rock heating up and radiating out heat, with gravel there are tens of thousands of surfaces radiating out heat and reflecting light and heat back up. It is the worst kind of hardscape. All that reflected heat and light heats up your home, making you use your air conditioner more frequently which is a waste of energy, and also dries out the air around your home. Desertification reflects light and heat to a point where moist air moving over a region dries up. There is less rain, or no rain. Most trees and plants trap humidity under their leaves. Gravel reflects light and heat back up under those leaves and dries them out, sickening your plants and trees. Pollen travels farther on humid air; it can dry out quickly. If you are relying on pollination for good fruit set between trees that are spaced far apart, then having some humidity will increase your chances of success.
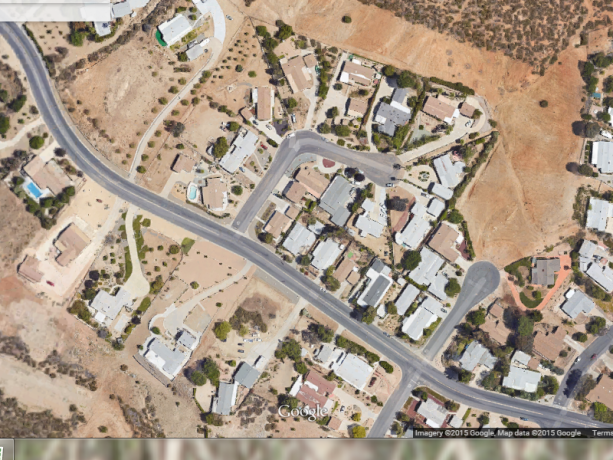
An area of Wildomar, surrounded by hillsides of chaparral that hasn’t been destroyed. These homes have mostly gravel yards and denuded, compacted backyards. Very little rain penetrates, and all the weeds that nature sends it to help repair this gash in the earth are promptly poisoned. This is death to us and our planet. By laying gravel you are turning soil into rock-hard dirt, because microbial life cannot live closely under it. That robs any plants you have stuck into the gravel of the food they need from the soil, which is opened up through microbial activity. You are adding to the heat value of the hardscape around your house causing you to cook in the summer and use more air conditioning. You have reduced habitat to zero. You have added to global warming by reflecting more heat and light into the sky. Although gravel is permeable, usually the ground below it bakes so hard that rain doesn’t percolate. I’ve read sites that want to you increase the albedo effect by laying gravel. In the short term albedo helps cool the atmosphere, but as a result of too much reflected light dries everything out. Think of the dark coolness and dampness of forests… that are now bare ground.
What do you do with your lawn instead? There are many choices that are so much better for the earth and your quality of life. First step, cut swales on contour on any slopes for best rain harvesting. Flat lawn? Easier still. Turn your lawn into a beautifully landscaped lush native garden. I’m not talking about a cactus here and there, but a creation with the awesome native plants we have in Southern California. Some of them such as Fremontia can die with supplemental summer water!

A beautiful border and plantings of California natives. Very low water use here, and very high habitat! There is a chocolate daisy that smells like chocolate. Oh yes. And how can you not want to plant something called Fairy Duster or Blue-Eyed Grass? A native landscape planted on soil that has been contoured to best catch and hold water, and amended with buried wet wood (hugelkultur), will give much-needed food, water and breeding grounds to countless birds, butterflies, native insects and honeybees.
Or put in a pond. Wait, a pond during a drought? Yes! Ninety-nine percent of California wetlands have been paved over, drained or are unusable. Where are all the animals drinking? Oh, wait, we are in the epicenter of extinction, mostly due to wetlands loss. There are very few animals left that need to drink. Those that are left have to take advantage of chlorinated water in bird baths and swimming pools. The microbially rich and diverse clean, natural water that fed and sustained life is just about gone. So what can you do? If you have a swimming pool, you can convert it either entirely to a pond, or into a natural swimming pool that is cleaned by plants.
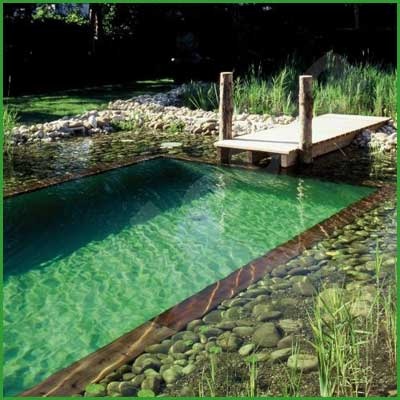
A natural pool upgrades your pool to a lovely pond without the use of chemicals. Suddenly instead of having this expensive eyesore that you use only a couple of months a year and pour chemicals into year-round, you have a lovely habitat that you want to sit and watch, and even better, swim in safely without turning your hair green or peeling your skin. You don’t need to clean the pool all the time, and you don’t need to put in chemicals. If you are in the San Diego or Los Angeles area, call Dr. Robert Lloyd of PuraVida Aquatics for a consultation and conversion. If you don’t have a pool, then build one that is cleaned by plants and fish. You don’t need a filtration or oxygenation system because the biology does it all. Where do you get the water from to top off your pond?
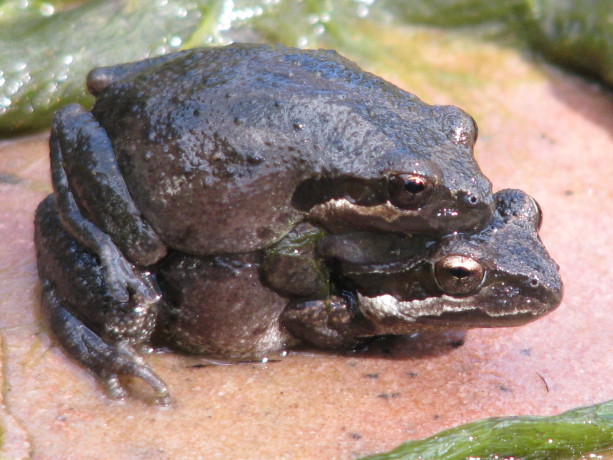
Native Pacific Chorus Frogs enjoying our clean pond at Finch Frolic Garden. Connect your pond to a lovely, planted stream that is connected to your laundry water or graywater system. You are buying water every day, so why not compost your water through phytoremediation and have a pond full of great healthy chemical-free water that is wonderful to look at and is an oasis for thirsty animals and insects?
Or install a food forest. With good soil building and rain catchment first, and planting in guilds with sheet mulch around trees and on pathways, you will be using a fraction of the water you pour on your lawn and yet harvest lots of food. Too much food? Share it with a food pantry!
Or start a veggie garden without digging any sod.

Create a lasagna garden right on top of the lawn and start growing immediately. Layer cardboard, sticks, grass, food scraps, leaves, more grass, more food scraps, more leaves and top it with about 8 inches of good soil, then plant right in it! That lovely standing compost heap will slowly turn into good soil while killing the grass beneath and growing crops for you immediately.
If ridding yourself of a lawn just breaks your heart, then substitute the high-water use grasses for a native grass mix that is comparable. Look at S&S Seeds for prices or for seed choices. Water a few times with Actively Aerated Compost Tea using any rainwater you may have caught in those 50-gallon containers and your grass roots will travel so deeply that they will find groundwater. Check up on the work of soil microbiologist Dr. Elaine Ingham and see how easy AACT is to make and use.
There are so many alternatives to using gravel that aren’t expensive, that are an investment in your property and in reclaiming habitat while beautifying your home and saving money. So please, just say, “NO,” to the gravel. Tell a friend!!
Which one of these would you rather live in? Which do you think is better for the earth and for the future generations?

Finch Frolic Garden, year 3. - Animals, Bees, Compost, Fungus and Mushrooms, Gardening adventures, Health, Hugelkultur, Microbes and Fungi, Natives, Other Insects, Perennial vegetables, Permaculture and Edible Forest Gardening Adventures, Ponds, Rain Catching, Recycling and Repurposing, Seeds, Soil, Water, Water Saving
Fun With Worms and Microbes!
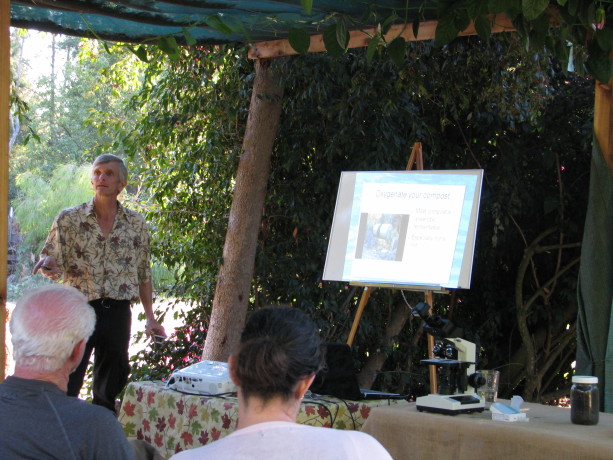
Enjoy a talk in the shade of Finch Frolic Garden with Doctor of Microbiology Bob Lloyd. Finch Frolic Garden’s Monthly Program in the Garden Series
Sunday, April 26, 2015, 2 – 4 pm.
Want to learn how to save water, and get the most out of the water you already buy?
How to improve your soil and how to grow food without chemicals…and why?
How to raise compost worms successfully?
DON’T MISS THIS CLASS!
Discover the world of the unseen! Sit in the shade at beautiful Finch Frolic Garden and enjoy a talk and demonstration with microbiologist and owner of PuraVida Aquatics Dr. Bob Lloyd (http://www.puravidaaquatic.com/). He’ll introduce you to the importance of soil microbes, water organisms, compost worms, and so much more! Using slides, videos, specimens and a microscope Dr. Lloyd will teach you a new way to look at healthy soil and water, and how to have both without chemicals. Each attendee will receive a sample either of compost worms or aquatic beneficials. We will, of course, offer homemade vegetarian refreshments. Cost is $25 per person, mailed ahead of time. Finch Frolic Garden is located at 390 Vista del Indio, Fallbrook. Please RSVP to dianeckennedy@prodigy.net . More information can be found at www.vegetariat.com. You’ll love what you learn!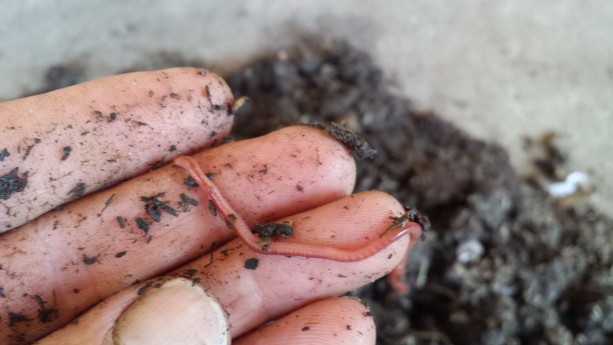
How to grow compost worms successfully! - Animals, Bees, Birding, Chickens, Compost, Fungus and Mushrooms, Gardening adventures, Heirloom Plants, Hugelkultur, Microbes and Fungi, Natives, Other Insects, Perennial vegetables, Pets, Predators, Rain Catching, Recycling and Repurposing, Reptiles and Amphibians, Seeds, Soil, Vegetables, Water Saving, Worms
Pathways Can Help Your Garden!
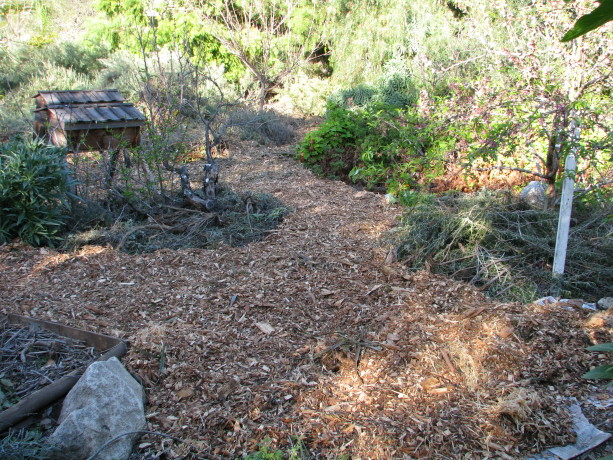
A finished section. Footpaths and/or vehicle access paths are absolutely necessary for any yard. Unfortunately, weeds love growing in them. Worse, the pressure from footfalls, wheelbarrows and vehicles compress and compact the soil, pressing the soil grains together so tightly that oxygen – and therefore life – can’t exist often up to several inches or more deep. Any life, that is, except for the grasses and other weeds that nature sends in to help repair the soil. Bare ground will be greatly compacted by rainfall, which will then erode paths as it runs, unable to soak through that spaceless ground. Once wet bare pathways are often unwalkable until they dry out, and have to be resmoothed. In our hot, dry areas, bare earth or graveled pathways reflect heat and light back up. That reflected heat and light dries out the underside of plant leaves, where species such as Live Oaks have over the millennium developed leaves that curl to expose less surface to the hot sun and to gather moisture underneath. Reflected heat and light dries out the air as well, and any hope of slight humidity to help water plants through months of dry heat is gone. If you have open-pollinated vegetables that rely on breeze for pollination, all that open pathway actually decreases your germination because pollen – such as from corn – will dry out in arid conditions. Humidity that you can keep in your garden will keep pollen more viable longer.

A wealth of freshly chipped wood – two dump-trucks full! The challenge: to spread it all in a week before our first tour. Yikes! What to do? Covering pathways with gravel is a common solution. I hate gravel. It heats up and becomes a thermal mass in the summer, further cooking your soil and air. It doesn’t suppress weeds and weed-whipping becomes an exercise in avoiding shrapnel. You can never get it out of the ground once you apply it, and chunks of gravel don’t do soil much good for planting. If you trip and fall on gravel it does terrible things to your knees – I had a piece lodged in my kneecap after a stumble some years ago (sorry for that cringe-worthy item).
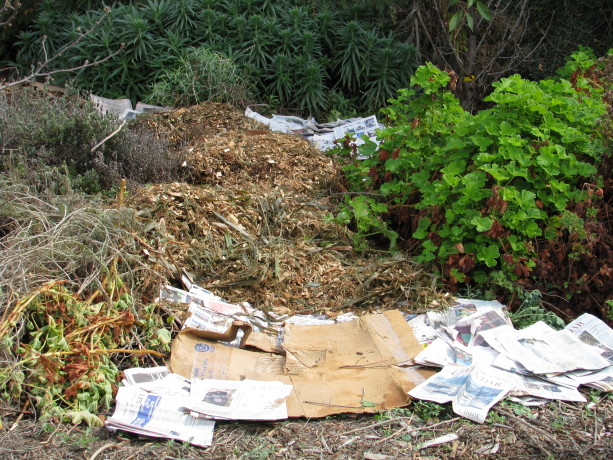
A 1/2 inch of cardboard or newspaper with mulch on top. Covering the soil is better, but not best. Bark will help rain bounce and then percolate, is dark so it won’t reflect light and heat as gravel does, and it decomposes. It is also expensive to buy, and because it decomposes you have to re-buy it every couple of years. Decomposing bark may be adding elements to your soil that you don’t want depending upon the source.
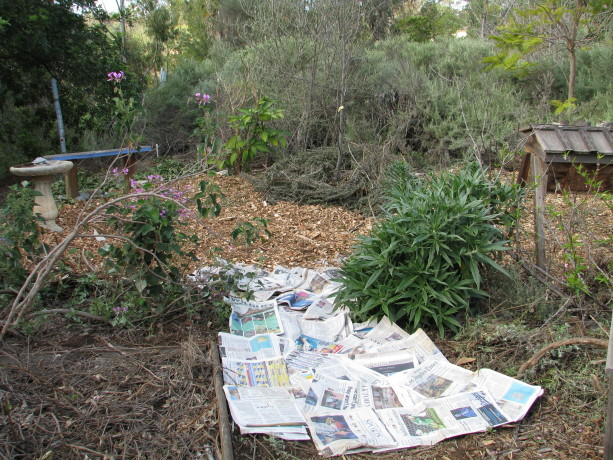
More progress as the afternoon wears on. I have experienced all the options above. The best method of countering all these issues that I have found also repurposes and recycles. Sheet mulch. Yep. You’ve heard it from me before and it proves itself every year. There is more to it, though.
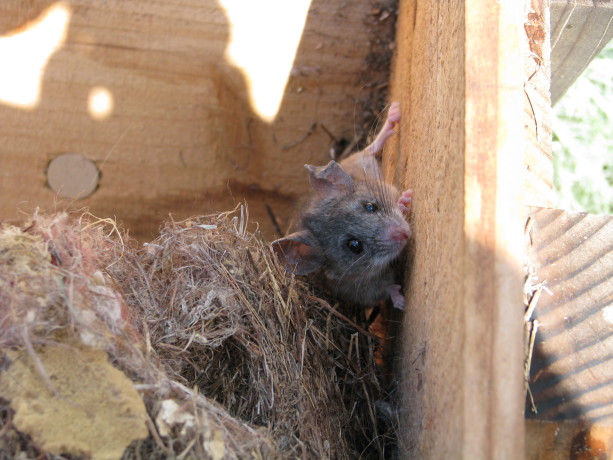
I disturbed a couple of nesting mice in one of the unused Kenya bee hives. First of all, please, please, please never use plastic. You can read about white pollution and the layers of plastic merging with topsoil in China and cringe. Plastic will not last. It will always be around in pieces. You will be poisoning your soil.
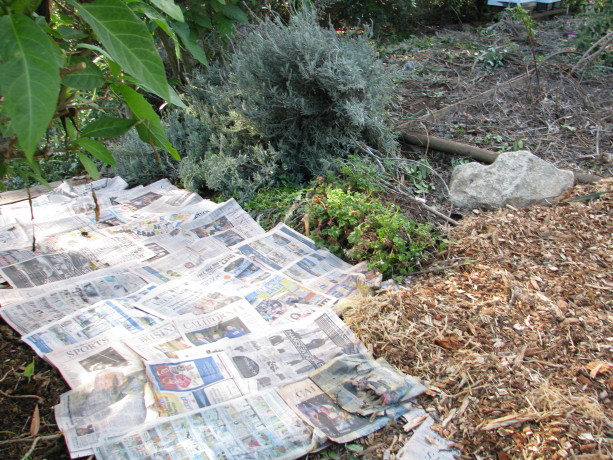
At the most basic, you can cover your pathways with 1/2″ of cardboard and newspaper, and top it with wood chips. I obtain my wood chips from arborists who save paying a dump fee by dumping it in my yard. If you’d rather have a more uniform look then purchase your bark. Either way the cardboard and newspaper will make the chips last years longer. More importantly the cardboard and newspaper form a protective, absorbent layer that protects the soil from compaction. Have you looked under a log or sheet of abandoned plywood in awhile? All the white tendrils of fungus, insects, worms, lizards and roots are thriving there along with billions of soil microbes all because they have that protective layer that keeps moisture in and compaction out. That microclimate is what you are forming with cardboard and mulch pathways. Since microbes free up the nutrients in the soil from which plants feed, you are creating more food sources for your plants. Tree and plant roots don’t end at the dripline, they reach out towards whatever source of water and nutrition they can find. If you are top-watering rather than deep-watering, then roots are abundant closer to the topsoil. By sheet mulching pathways you are extending food sources for your plants and trees, which now can stretch underneath the paths, link together with other roots through fungal networks, and become stronger and healthier. You also are creating habitat which is a food source for the entire food chain. Cooler, humid areas are better for bees and insects that pollinate, and the predators that feed upon them such as lizards, toads, frogs and birds. Just by sheet-mulching your pathways you are improving your environment as a whole. How can you NOT want to do this?

Sheet mulching around trees is much the same, except you add a little manure or compost tea if you have it. Sheet mulched pathways hold moisture and create some humidity which allows for better pollination and helps keep your plants from scorching in arid areas. If you live in a wet area or very humid area, use thicker layers of cardboard and mulch, which will help absorb moisture from the air and deliver it to the ground. Decomposition is quicker in wet areas, so using several inches of cardboard with mulch will last much longer and will again keep down compaction. Compaction in rainy areas is just as bad as in arid areas because of the erosion and flooding it causes.

More progress as the afternoon wears on. To catch rainwater and allow it to percolate into the soil rather than erode away topsoil, you dig rain catchment basins or swales. Swales are ditches with level bottoms, and can be a foot long (fishscale swales) or the length of your property. Swales should be positioned perpendicular to the flow of water. You can create swales across pathways, fill them with mulch, top them with cardboard or old plywood, and mulch on top to match the rest of the pathway. Water will be caught in the swales and won’t wash out paths on hillsides.
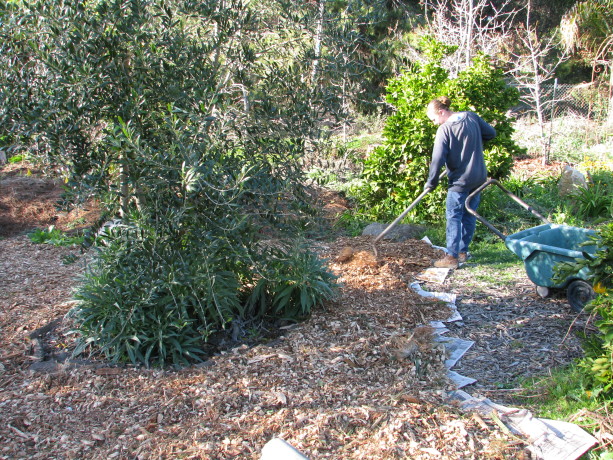
MIranda working on a large pathway near our large hugelbed. Going a step farther, you can ‘hugel swale’. Hugelkultur is layering woody material with dirt. This introduces organic material, oxygen and nutrient pathways into the soil and holds moisture into the dry season. You can dig deeply in your pathways, layer old wood (sticks, branches, logs, whatever you have) with the dirt, up to soil level, then sheet mulch. Your pathways are now waterharvesting alleys that you can walk on, and which will really feed your plants. And you just repurposed old woody cuttings.
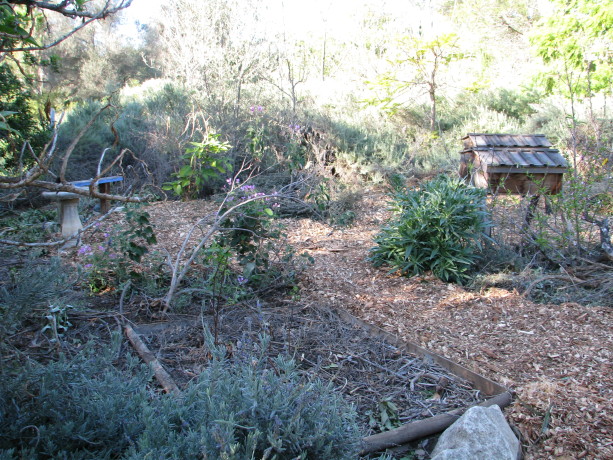
This mulch will greatly help the Asian pears and cherries which struggle with the dry heat of the summer. The ground will be kept moist and reduce evaporation, holding in humidity. We’ll be planting more heavily in this area, too. In very dry areas plants and trees do better in sunken beds, especially those that require a long chill time. Cold settles in holes. Moisture runs downhill, therefore dew will accumulate at the bottom of holes. You can either plant in holes and have your pathways higher, or if you have an established garden (such as I do) you can build up your pathways so that they become slightly higher than your trees and planting areas. We are working on that at Finch Frolic Garden, here in drought-stricken San Diego county.
So before I launch into yet another long lecture, the idea for pathways is simple: sheet mulch with cardboard and wood chips. If you live in a wet area, use several inches of both. If you live in a dry area, use no more than 1/2 inch of cardboard (or else it will absorb moisture from the soil) topped by at least an inch of mulch (no limit there!). If you want make super pathways, bury woody material before you sheet mulch. If you live in a dry area, raise your pathways above your planting beds. If you live in a wet area, lower your pathways so water can drain away from your plants (unless they love wet feet). Never use plastic, and please rethink gravel.
Then sit back and enjoy your yard and all the food and nutrients and abundance you have set the stage for, all using recycled materials that will last for years. Congratulations!
- Arts and Crafts, Books, Breads, Cake, Dessert, Fruit, Giving, Herbs, Perennial vegetables, Permaculture and Edible Forest Gardening Adventures, Recipes, Sauces, Seeds, Special Events, Spices, Vegan, Vegetables
Finch Frolic Marketplace, Revisited
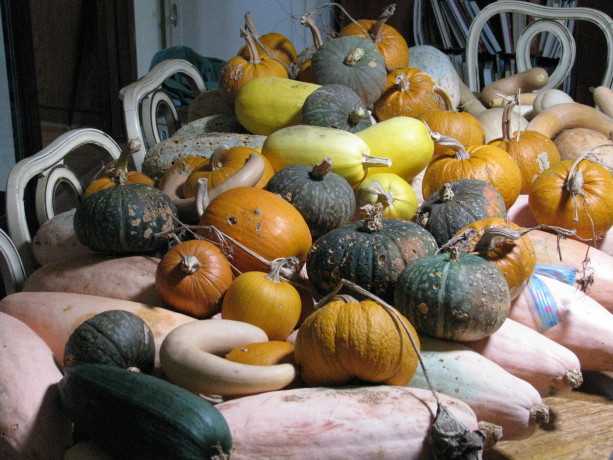
Wonderful, tasty winter squash of all kinds! Due to popular demand, we’re having one more short Marketplace this Saturday, 9 – 1.
Join us on Saturday, November 29nd from 9-1 for the annual Finch Frolic Marketplace, the Extended Version! We’ll have for sale fresh and prepared foods straight from our permaculture gardens. All are excellent gifts, or will grace your holiday table. We’ll have the much-desired Pomegranate Gelato again, and new this year, Passionfruit Gelato! Squash, fruit, veg, preserves, passionfruit curd, baked goods, and much more.
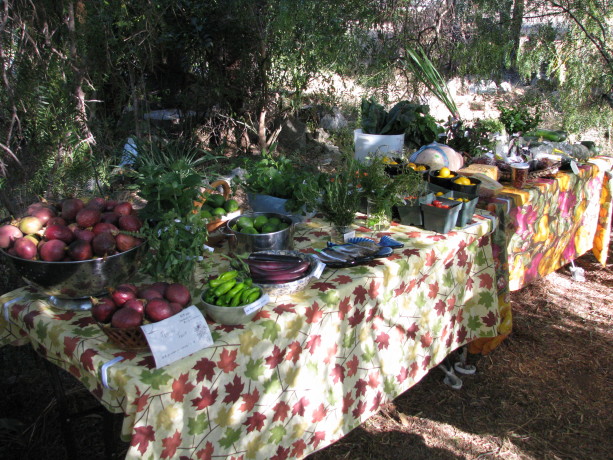
Herbs, veggies, frozen juice, gelatos, curds, jams, preserves… and much more! Finch Frolic Garden is located at 390 Vista del Indio, Fallbrook, CA.
Directions:
Finch Frolic Garden is open by appointment only for tours, lectures and other activities. The address is 390 Vista del Indio, Fallbrook, CA 92028-2548. Please call only if you are lost or delayed; we use our house phone only and are often not inside. Please use the email above for any other communication.
From the North (Temecula and above): take 1-15 South to Exit 51 and turn right. Make the next right onto E. Mission Rd/County Hwy-S13. In .8 of a mile turn left onto E. Live Oak Park Rd. In 1.6 miles turn right onto Alvarado St. In .7 miles at the top of the hill turn left onto Vista Del Indio, at Roja’s Succulents. Make the very first right; 390 is at the end to the left.
From the South (Escondido and below): take I-15 North to Exit 51 and turn left over the freeway. Make the next right onto E. Mission Rd/County Hwy-S13. In .8 of a mile turn left onto E. Live Oak Park Rd. In 1.6 miles turn right onto Alvarado St. In .7 miles at the top of the hill turn left onto Vista Del Indio, at Roja’s Succulents. Make the very first right; 390 is at the end to the left.
From the West (I-5): take CA-76 East, Exit 54A and drive for 12.6 miles. Turn left onto S. Mission Road/County Hwy S13 for 4.1 miles. Turn right onto S. Stagecoach Lane (at the high school). In 2.8 miles turn right onto Alvarado St. At the top of the hill turn right onto Vista del Indio, at the Roja’s Succulents sign. Make the very first right; 390 is at the end on the left.
- Compost, Gardening adventures, Perennial vegetables, Permaculture and Edible Forest Gardening Adventures, Recipes, Seeds, Soil, Vegetables, Vegetarian
Perennial Vegetables: Jerusalem Artichokes
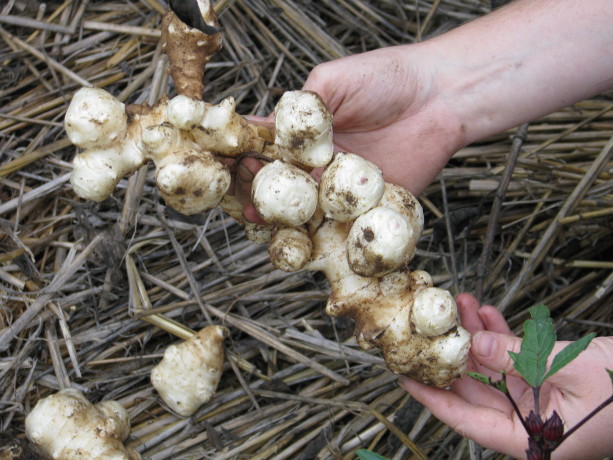
A knobby root of deliciousness. Jerusalem artichokes aren’t artichokes nor are they from Jerusalem. They are also called sunchokes, which sounds something like an unfortunate cosmic event to me. We grew them this year and I have only great things to say about them.
I ordered organic tubers from Peaceful Valley in California. By the way, all of the strawberries and rhubarb that I had ordered from them were inexpensive and yet of prime quality. The tubers grew into tall, sunflower-like plants that graced an area of the new kitchen garden that didn’t have the best soil in it.

JAs have beautiful sunflower-like flowers that pollinators love. They flowered most of the summer and just this month – October – began to die off. The plants had some difficulty with lace bugs, but with good soil fertility and some actively aerated compost tea foliar spray they rallied exceptionally.
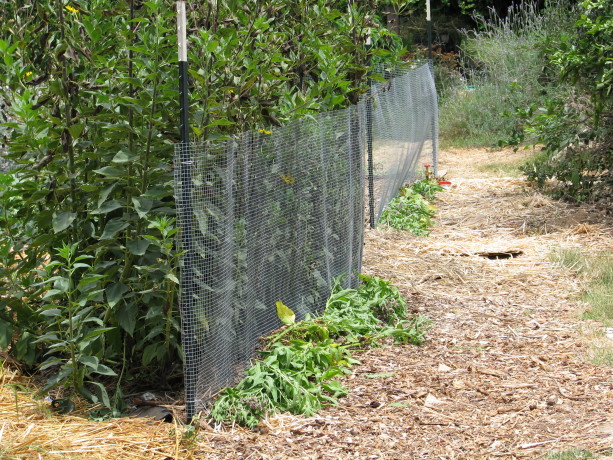
The Jerusalem artichokes made a nice living wall. Today, for our Halloween lunch, we thought some creepy-looking tubers would be appropriate. They share a basket with Black Beauty zucchinis (caught them small!) and our first sweet potato of the year, Spanish Red Improved, which we also steamed and ate – heaven!
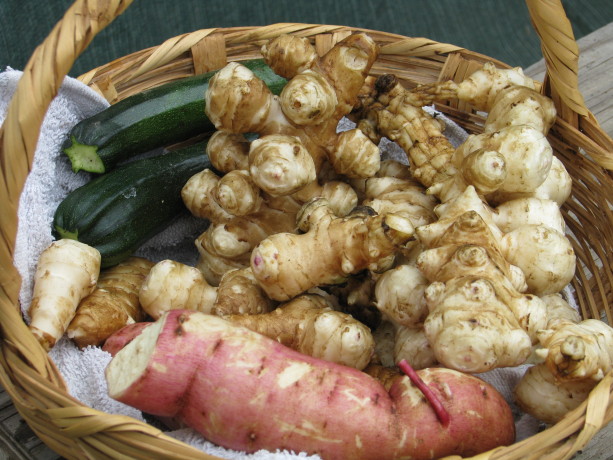
Our Halloween harvest. The ‘chokes are supposed to sweeten up after a frost, but here in San Diego county that might take awhile.
The chokes grow tubers all around the base of the plant, and also spread them underground. They are very easy to harvest; the plant wants the tubers to make new plants so they break off easily.
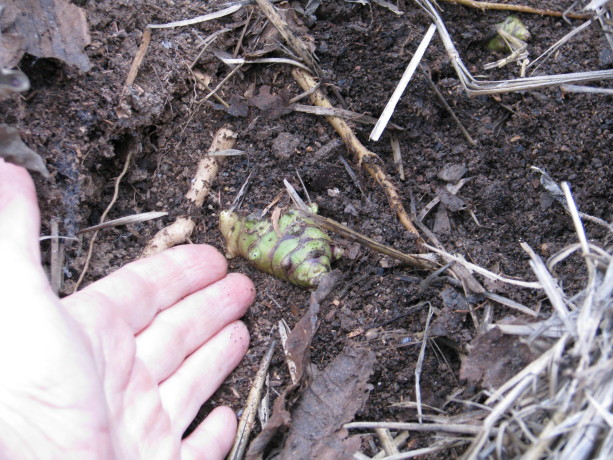
Cover green tubers back up so that they can continue growing. Although they are knotty, they wash off easily and the skin is thin and mostly easily removed with a vegetable peeler. I didn’t scrape all of it off and it wasn’t bitter or unpleasant at all. I roasted them after just washing them with a vegetable brush and the skins were a little firm and the insides very soft. There wasn’t any unpleasant taste.
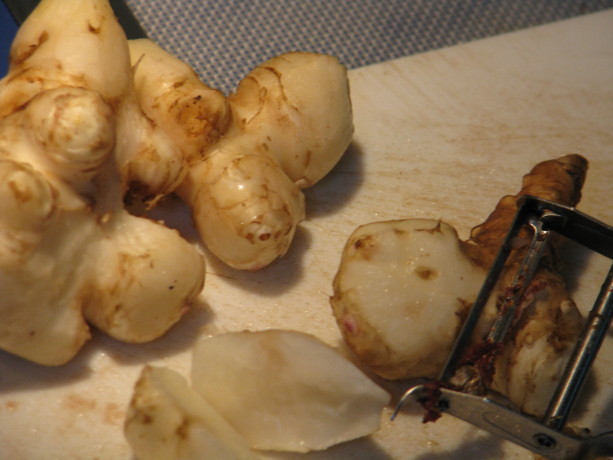
Peeling them is kind of easy, but the skin doesn’t taste bad. Raw they are crisp. Steamed, the JAs become very soft and – by gosh! – taste very similar to soft, buttery artichoke heart! Wonderful! My daughter and I ate them down with a little vegan butter . So wonderfully good. They can be easily mashed as well. We also roasted them along with other vegetables.
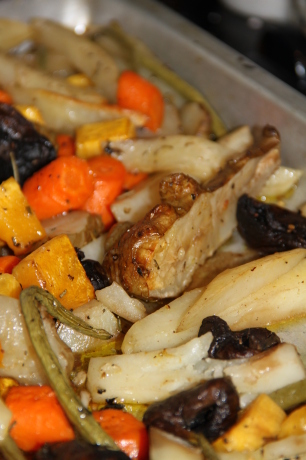
Jerusalem artichokes, carrots, beans, mushrooms, potatoes and squash are roasted with garlic, rosemary and olive oil. Yum. I mix all the veggies in olive oil with dried rosemary, minced fresh garlic and pepper, spread out on a tray and roast at 425F for about an hour, depending upon the size and thickness of the veggies. Roasting keeps them more solid yet tender, and sharpens their flavor a little. Absolutely fantastic.
I’m saving small tubers to plant ALL OVER THE YARD! What a great perennial vegetable – perennial in that you leave some tubers in the ground and they keep coming up every year. They are attractive, give shade to smaller plants, are great for attracting pollinators, create good mulch when the tops have died down, and have wonderful tubers. The tubers may be eaten raw as well; they are crisp and mild.
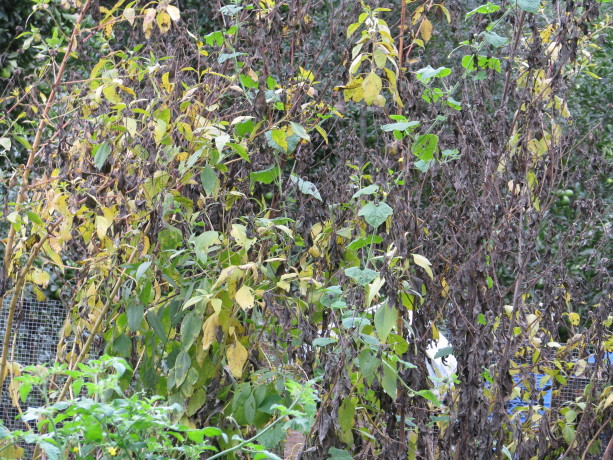
The foliage dies off in the Fall. I’ll cut the stalks at the ground level and lay them down on top of the bed to feed the soil. If you have a corner for some tall flowers, definitely try growing some organic Jerusalem artichokes. Yum.
