Gardening adventures
Wrestling with the great outdoors.
-
Natural Cleaning Products: Vinegar

Vinegar Cleans Glass Beautifully I’m on a personal crusade to remove all non-environmentally friendly cleaning products from my home…. life… universe… well, I’ll start at home anyway. Not only does my house utilize a septic tank and I’m not supposed to have scrubbing bubbles living a dark life beneath my yard, but harsh chemicals are bad to breathe, bad to have eat through the skin on my fingers, and bad for the environment and water. So how on earth did humans clean prior to the chemical revolution? With what they had around them, of course. They usually had wine, or some sort of fermenting juice around, and after the fermentation was gone they had vinegar. Anything that smelled that strongly had to clean well, and it actually did and does. Undistilled vinegar, or acetic acid, has antiseptic and antibacterial properties that were written about by Hippocrates, the father of medicine.
There has been a foodie revolution with artisanal vinegars, and now people who rarely cook anything but a TV dinner know what Balsamic or wine vinegar is. If you’ve ever been to England you’ll know about shaking malt vinegar onto chips (French fries), which is absolutely delicious, by the way. But the vinegars found in grandma’s pantry were cider vinegar and white vinegar.
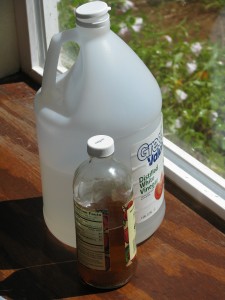
White and Cider Vinegar Cider vinegar has an old-fashioned flavor and is used in cooking, especially Eastern European foods. There was a huge health fad when I was little about the benefits of drinking apple cider vinegar, and people still swear by it. My mom gave us a glass of warm water with cider vinegar and honey in it to drink with our dinner. I got to really like the taste. Undistilled cider vinegar has a floating mass in the bottle; that is called the ‘mother’, and it is part of the fermentation process, and can be removed and used to help ferment other vinegars. People don’t like that mass, so they invented white vinegar which has little of the nutrition that cider vinegar has.
White vinegar is made from fermented grains, mostly corn, and this is the product that is now used in cleaning because it won’t leave a brown mark and is less expensive than other vinegars. There are hundreds of uses for vinegar, besides setting color when dying eggs. What vinegar is really valuable for here in Southern California with its mineral-heavy water, is to clean out those mineral deposits from machines and glassware. Glass vases that had acquired rings inside from holding tap water, which didn’t come out with a brush and soap, became clear and beautiful when I filled them with vinegar and water and let them soak for an hour. The same for a crystal decoration that is filled with water and hung to catch the light, filling the room with prisms.

Crystal Clear It had mineral buildup and was ugly (now I use distilled water in it!), and after a vinegar and water soaking, and a little nudging with a long, skinny brush, it is beautiful again.
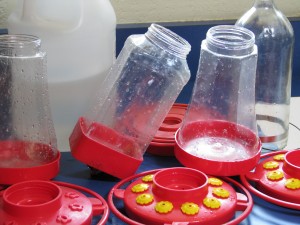
Cleaning Bacteria from Hummingbird Feeders Hummingbird feeders must be cleaned regularly because the black mold that grows on the feeder holes will infect the hummingbirds and eventually kill them. I’ve always used a bleach solution to soak them. No more! I use hot water and vinegar to soak, then use straight vinegar and a brush to kill any germs around the bases. I’ve noticed that besides not being gassed with the chlorine bleach fumes, that the feeders stay clean just as long as they had when I used bleach to kill the germs.
I was talking with a friend about dishwashers and how glasses weren’t getting clean and the dishwasher just wasn’t performing well anymore. She passed on the tip from another friend to dump a whole gallon of white vinegar into the machine and let it run. The vinegar loosens up all that mineral yuck that clogs up the works. It works in drains, too.
Vinegar cuts through grease and grime, like that scary fuzzy layer on the top of your refrigerator, or that grease build-up over the kitchen range. I switched to cleaning windows with vinegar water and newspaper, and have had great success.
Combined with the alkaline baking soda (bicarbonate of soda), vinegar fizzes and was what made your fifth-grade Science Fair volcano erupt, or the toy submarine skim through the pool (I loved mine!). Mixed with some dish soap, these three ingredients work well to remove stains, such as those in the shower or on counters. Use the paste on an old toothbrush to clean up grout.
Other uses for vinegar include as a hair rinse, to make hair supple and shiny; in water when boiling eggs so they won’t crack and they’ll peel more easily (give them a cold water bath right after cooking, and try not to use very fresh eggs, which are very hard to peel after boiling). Run it through the coffee maker, or in the bottom of a kettle to dislodge the chunks of minerals that stick to the insides. Go on the Internet and search for lots of ideas on how to use vinegar in your routine. Vinegar is safe, efficient, natural, and its smell isn’t any worse than that of chemicl cleaners, and a lot easier on your lungs.
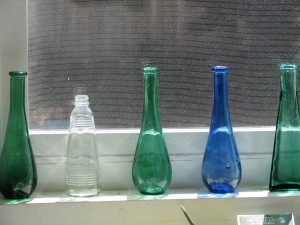
It dissolves hard water stains -
What is a Weed, Anyway?
Weeds are plants that grow where you don’t want them to. It is a label given with purely human whim that often interferes with nature taking care of its animals and soil. Unless you are removing invasive species, weeds have a purpose and can not only be useful medicinally, but also are indicator plants of how healthy your soil is.
In the February 1989 issue of Organic Gardening, I wrote an article called Selective Weeding. In it I described how weeds with deep tap roots not only break up the soil, but are nutrient ‘miners’; they take up minerals from down deep in the earth, send them up to their leaves, and then leave them on the soil surface when the leaves die, which improves the quality of the topsoil for other plants to thrive. Around here, wild radish is the most notable weed that does this although it is invasive, but it isn’t the only one.
Other weeds make good groundcover, such as purslane. Purslane needs fertile soil to thrive, so when you see it, you know there is good soil. It is also edible and a good source of calcium, iron and Omega-3 fatty acids…. a real plus for we vegetarians who don’t eat fish. Lamb’s quarters also grows in highly fertile ground and is very edible. Red clover also loves fertile soil and it’s importance to the pollinator insects is vital. Clover roots set nitrogen in the soil and is often used as a cover crop.
Plantain (Plantago major and not the banana) is naturalized throughout North America and I guarantee that everyone has seen it whether they know it or not. The variety with rounded leaves in a rosette is a common lawn weed, and the variety with long, lanceolet leaves with long veins that grows by waterways is much larger. Why streams and lawns? It thrives in soil that has low fertility and high ratio of water. Plantain makes an excellent salve for stinging nettle rash, insect stings and some say poison oak rash. If you brush against nettle while hiking you’ll know right away because it releases chemicals into your skin that burns for awhile and then dissipates. Look around for plantain, break a leaf and roll it between your fingers till it releases the juice and apply to the site.
Nettle is another great plant even though it stings in self-defense. The chemicals that sting are water-soluable, so if you pick young nettle and soak it or cook it like spinach, you have a green that is very high in Vitamin K, protein, calcium, maganese and potassium. Nettle soup is commonly served in other countries. Nettle is an indicator plant of soil that is high in nitrogen and phosphate, which explains why it often grows around abandoned buildings and farms where there has been animal and human waste. Nettle is the host plant for many butterfly species as well.
Poison oak has a place in our native forests as well. It is a plant which happens to give off a chemical that humans find irritating. It produces berries that birds rely on, it provides shade in the understory to hold in moisture and give safe harbor to many animals, it is beautiful with its bright green spring growth and dark red autumn shades. The entire plant produces an oil that gives most people a rash, which doesn’t begin to irritate the skin for several days. Thinking about the substance being an oil will help you consider how to deal with it. If you or your dog brush it, the oil will transfer to your clothes, skin or your dog’s fur (another great reason why you shouldn’t let your dog run off-leash in natural areas!), and transfer again when it is touched. If burned, the toxicity is increased and you can inhale the fumes and become critically ill. If you think that you’ve brushed against poison oak, wash your clothes separately from the rest of the laundry and wash your skin well. There are many products on the market which help dissolve the oil, such as Technu, which is a wash for just after you’ve touched the plant. On hot days the plant’s oils carry in the air so people who are very sensitive should avoid poison oak habitat in the summer.
Weeds that indicate compacted soil, which is low in oxygen, are bindweed (looks like a small white or pink morning glory), quackgrass and chicory with its tall blue flower. Chicory’s deep taproot mines the minerals and breaks up the soil, and bindweed covers the soil providing some shade and protection against more compaction and dropping leaves over an extended area for mulch. Quackgrass secretes a chemical that supresses other plant growth as it travels via rhizome, breaking up the soil surface and carpeting it for protection.
Dandelions, a weed of childhood fantasy, of back-country wine, of spring tonic greens, are happy little plants that lawn owners ruthlessly kill. They grow in many soils, but are indicators of acidic soil. Henbane is a sign of alkaline soil.
Whether you keep your weeds, selectively weed, or eradicate them all, you should at least learn what they have to tell you. A good list of California weeds is at http://www.ipm.ucdavis.edu/PMG/weeds_intro.html .. An extremely valuable book that I have used so often when conducting hikes (and there is always a little girl that asks what every little plant is along the way), is Roadside Plants of Southern California by Thomas Belzer. It has photographs, descriptions and whether the plant is native or not. Another book is the Natural History of Vacant Lots by Matthew Vessel et al. These are wonderful guides for all the plants that fall between the cracks of most plant ID guides.
Just remember that plants communicate to you, and each have a purpose to fulfill. Whether it be as a mineral miner, a canopy or shade plant, a pollinator and food source, a nitrogen-fixer, a soil breaker, a mulch plant, each is doing something to help build earth fertility. Plants that are non-native take the place of the ones that are native and important to an area and its habitat, supplanting perhaps a plant that is the host for a particular butterfly. Be enlightened when doing yardwork. Feel free, though, to eradicate any Bermuda grass that you see, because it is a weed against which I have a personal vendetta! Happy gardening.
- Gardening adventures, Permaculture and Edible Forest Gardening Adventures, Photos, Vegetables, Vegetarian
“Who’s That Chewing on MY Step?” or, Garden Update June 1

Hidden Treasure Many of the steps that were created out of the Washingtonia palm trees are doing just fine. However, there are some that were squared off with a chainsaw and their whiteness and neatness really stood out on the hillside. They stood out a little too well, apparently, because something is gnawing away at them!

Chew Marks It can be either rats or bunnies, and I’ve only found bunny scat in the straw. In defense of my nice stairs, I’ve sprayed them with Bitter Apple, which is a product used to spray on doctored pets to keep them from licking or chewing on bandages.

Heart of Palm I spread the straw over the steps again. I’ll see tomorrow what has happened.

Cherries! Other finds around the garden are my first (and probably only) two cherries! Cherries are not known to grow in our Zone 10 climate; however, there are a few hybrids that are supposed to be ‘low chill’. Cherries are one of my favorite fruits, so I’m thrilled that this tree is giving it a go.

Magnolia The magnolia trees are blooming, and a transplanted Blue Girl rose is much happier in the Blue Garden, which is also the Bee Garden.
Blue Girl A vegetable garden is a stern taskmaster. After all that waiting at the beginning of the year, plants are flourishing. This is the best garden I’ve ever had. After all that work building raised beds, lining them with aviary wire and filling them with good soil, it had better be good!

Last Two Beds I have two more raised beds to level, line and fill. I have more pumpkin seedlings up and I need the beds ready to plant. I can’t believe it is June first already.
Today I put up strings for the pickling cucumbers and the pinto beans to climb on. Those two beds, which are the newest and which have the least amended soil, are still doing very well.
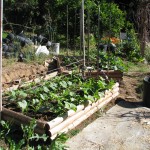
Strung Up I also staked the three yellow tomato plants, and three ‘soup bean’ plants, as well as planting more of those beans by more stakes.
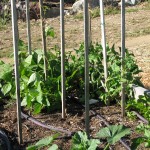
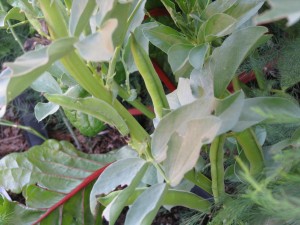
Bean and Tomato Stakes I had no idea that fava beans grew up! I mean, the beans don’t dangle like other beans do, but grow straight up, like huge fat caterpillars. Crazy! I also read where the young leaves are tasty so I tried one… then I ate several. They are much more flavorful than pea shoots.
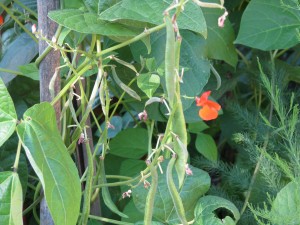
Fava Beans Scarlet runner beans grow down, but are slightly fuzzy, which is a little creepy. They can be eaten young, or let dry on the vine.
Runner Beans are Fuzzy I planted a white and yellow sweet corn, now that the popcorn is well up. I’ll wait a month to plant the full yellow sweet corn, not only to stagger harvests but because corn will cross-pollinate. Meanwhile, I have my trusted rubber snake watching the bed.

Corn snake This package contains carrots of various colors, so I planted some just for fun. I’ve heard that some of the darker colored carrots aren’t that sweet, but I want proof.
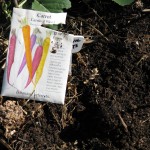
Crazy Carrots When spacing seeds for corn or other plants which need room, use your trowel as a guide. It is about a foot long, and corn needs to be a foot by two feet apart. Plant corn in blocks so that they can pollinate better; the pollen will drift off the tassels onto the silk of the neighboring corn.
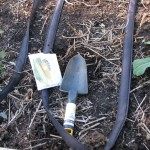
Trowel Ruler I also planted cinnamon basil, which has the most wonderful aroma. You can use it in cooking, especially for sweets, but I just let it go to bloom, then cut some and set them in water in the house for the perfume.

Cinnamon Basil This bed contains garlic, shallots, bush beans, tomatoes and basil, all of which are contending for sunlight. The bed receives sun all day and the rows are planted south to north, so the plants won’t shade each other for any length of time.

Full Bed The sunflower that was pouting last week has trouble staying awake this week. Her heavy head just can’t be lifted. Lesser goldfinches love to eat the leaves, leaving them skeletonized.
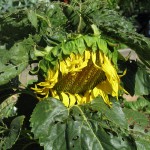
Heavy Head Of course, the best thing that is growing in my garden is this volunteer melon, which appeared under the peas I just cut out, and now that it has found the light, so to speak, it has grown one and a half feet long and going strong, and has a flower! But what is it? A remnant from melons I planted in the past? Seeds from the compost from melons I have eaten? There’s nothing like a mystery!
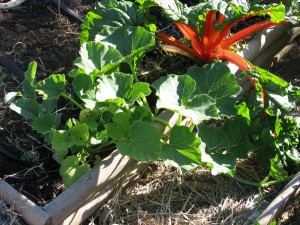
Volunteer Melon -
Well, Well, Well!

A Big Rig The battle for the water looks as if it is slowly being won. Today a 100 foot deep eight inch hole was drilled behind my pond. I feel sorry for the earth, like a big mosquito has stabbed into it’s bedrock.Fain drillers had quite a time maneurvering their truck in backwards. A portion of the fence had to be removed for the ginormous truck to back in. Then it had to move back and forth by inches to get around all the plants and rocks.
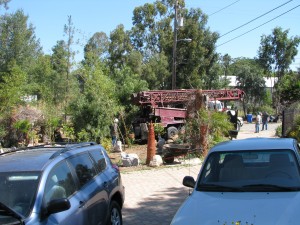
Backing through the fence 
Backing down the property Finally it was in place, and they balanced the truck with lifts so that the back end was off the ground!

Leveling the truck Raising the drill bit was very impressive. It is so tall!

So tall! As they drilled, up came slurry of water, clay, and decomposed granite.

Water and slurry They drilled 100 feet today, and and found water that is moving at about fifteen gallons per minute.

Adding bits For the drip system, I only need a mere five. However, I don’t know what may happen, if I may want to hook the house water up to the well some year or something. If I have them drill more deeply now since thieir truck is in the yard, the well might have a better rate of flow, better water, and possibly a more reliable supply.

Changing parts What I have might be just fine, and there is no guarantee that anything will improve with more drilling. I’ll make my descision over the weekend. On Tuesday they’ll drill some more if I want it, then put in a casing, gravel around the casing, cement the top, and then we can lower the pump and get well water! Cross my fingers!
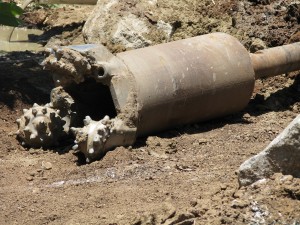
Mean-looking grinding bit -
Drip

Lines layed out up the property The key to any garden is the availability of water. Today I signed a contract to have a well drilled on my property to furnish irrigation and pond water. The irrigation for the permaculture project, and for most of my other gardens, will be subterranean drip. Yep, this is expensive. However, it will pay off in long-term water bills, plant loss due to drought or the heavy salt that is found in our water (the well should pull from beneath the salt penetration), and the replacement of sprinkler heads, broken PVC pipe and connectors for which my dogs and tortoise seem to aim.

Drip lines uncoiling As the plant guilds mature and roots and loam deepen, the less water I’ll need to provide for the gardens. The system will be there for the drought months, and for future unknown circumstances.

Where future plants will be I have the luxury of having a little inheiritance to spend on having others install this garden for me. That is because I do not have the luxury of having available labor in the form of willing, available and capable family members, nor do I have the physical strength in my back or hands that I once had to do it all myself. And I want it done NOW, so that I can play with it, enjoy it, plant and replant it, watch the habitat fill with animals, and show others what a success permaculture can be so they can practice it themselves.

Irrigating the beans and vines My real thrill is in my veggie garden. As I’ve mentioned before, I’ve had a garden most of the twelve years I’ve lived here, and have been foiled by bermuda grass and gophers. I finally was able to nail together boards from an old bookshelf to make raised beds, then buy on sale some pre-made raised beds. I’ve stapled aviary wire into the bottom, leveled them, filled them with a mixture of dirt, compost and whatever else that could fill those babies up. I’ve used natural fertilizers and microbes this year to energize the soil, and ran PVC pipe to each bed with a riser and a split hose bib on each one.

Double hose bibs Finally today I finished the drip system in each bed. (Yey! Hurray! Whoopee!). I’ve used drip irrigation before in the beds, with the long black soaker hoses perforated all over so that they ooze water. They say that they can be buried, but the mud cakes onto the tubing and gums it up. Also, to connect pieces you have to ram ends onto the cut ends which I have found really hard to do. Then you have one configuration of the hose with not many options for change. Ick!

Old soaker hoses I found another kind of drip hose (at WalMart) which is 75 feet of thin plastic tubing sheathed in a permiable nylon casing.

Plastic tube inside a nylon sheath The hose is fitted with a male and a female hose end, and the whole thing rolls up. Perfect!

Flexible drip hose! What I wanted was to be able to lay out drip from each hose bib on each bed that could be rolled up without a fuss when I’m working on the bed. I also wanted individual controls in the beds so that I’m not watering a bed that isn’t planted, or I can water half a bed and not the other half, or allow more water for crops such as melons and little water to crops such as quinoa… all at the same time! Complete control! Ease of use! Water savings! Ha!
Instead of using both sides of the divided hose bib for each bed, at this time, I ran one line in each bed. I can and probably will change that later which won’t be a problem, but I wanted to get these babies going! Since my beds don’t need 75 feet of hose, I lay down the amount needed then cut the end, tying a knot in it to stop the flow of water.

Tying off the end On the next section of hose I attached a female hose end, and moved onto the next bed.

Attaching female hose ends It worked! I had to adjust two of the hose bibs that leaked, but with my trusty Phillips screwdriver all went well. I have two more raised bed frames that I bought to install, and I have hose enough for both of them left over. I still have a sprained wrist (I’m really trying not to use it much, and wear a brace, but there is just so much to do!) so digging and leveling the ground for the beds is probably not a good thing for me to do right now, and I sure have a lot of weeding to do in the front yard (left handedly!), so the beds might wait.

Quinoa doesn't want much water So I’ve conquered the gophers, and I’ve conquered the hand-watering and bad drip hose, but I am seeing bits of that darn Bermuda grass coming up in some of the beds. I swear that that stuff could come up through anything. I’ve seen it break apart asphalt, and also come out the top of a six-foot pipe. Horrible, nasty stuff. Fortunately the soil is so much better in my beds now, it is easier to root around and pull the stuff out from way down low.
Anyway, that’s my drippy story for the day. I’m immensely happy about my veggie garden, and slightly less panicky about the dry days cooking all the new plants in the permaculture garden if I’m not out there dragging hoses around with my bum wrist watering for several days. And I didn’t talk about peas once. Oops!
- Bees, Gardening adventures, Grains, Permaculture and Edible Forest Gardening Adventures, Ponds, Vegetables
What’s Happening in the Veggie Beds
“When planting seeds plant four in a row: one for the mouse, one for the crow, one to rot and one to grow.” (unknown).
Baby Baby Corn I know what you’re thinking; you’re thinking, “Oh, no! Not more about peas again!” Well, yes, a little more about peas. It was time for them to go. I grew most of them from old seed just to use it up and to set nitrogen in the soil, since they are legumes. Some plants even had powdery mildew on them, which surprised me.
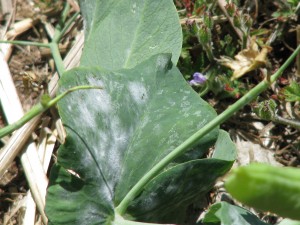
Powdery mildew I had to cut the plants off at the roots instead of doing it the easy way and pulling up the whole plants.
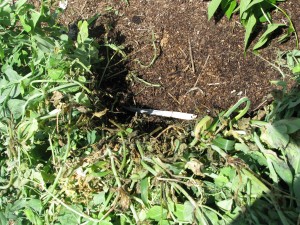
Cutting peas at their roots Since I’d hurt my right wrist a few weeks ago and I still haven’t allowed it to heal enough, the cutting wasn’t a fun job. It was worth it, though. I left the roots with their nitrogen-fixing nodules in the ground where they would do the most good.
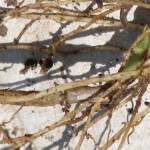
Peas set nitrogen in their roots Then I took all the pea vines up to the driveway, set up a chair, put on shorts and stuck my pale legs in the sun, plugged in an audiobook, and spent about an hour and a half tearing pea pods off of all the vines.
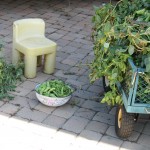
Harvesting time That night after dinner I began sorting through the pods and shelling them. I’m still not done.

Pea harvest I managed about half a big bowl of peas, which I sleepily shoved into the refrigerator before stumbling up to bed. My son was very calm in the morning when he told me about his surprise when he went for a midnight snack and spent about half an hour gathering up peas from the floor and adjacent rooms. I worked on more peas tonight. I’ve already frozen a couple of bags for our use; the rest will be frozen and used to feed the tortoises and chickens. All those pods and vines will combine with trash cans full of weeds I’ve been pulling along with kitchen trash to reconstruct my compost pile.
But there is life beyond peas. There are beans! I’ve planted several types of beans this year. Fresh green beans as well as soup beans and pinto beans. I’ve created two new raised beds and set them off from the rest of the garden. In them I’ve planted sugar baby watermelon, green melon, sugar baby pumpkin, and butternut squash.
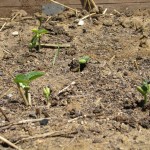
There's a pinto bean on the rise These vines will grow out rather than over other garden beds. In the middle of the beds I’ve planted pickling cucumbers, baby corn and pinto beans. They will all grow tall above the vines writhing and twining below. ( Hmm. Note to self: stay away from vine beds at night.)
Here’s an interesting piece of trivia: most gardeners have heard about ‘the three sisters’, which are the Native American pairing of corn, beans and squash. Actually, it should be four sisters, at least for Southwest Indians. The concept of the ‘sisters’ is that they form a complete plant ‘guild’. In other words, these three planted in combination produce more food than any one planted alone. The corn provides a trellis for the beans, the beans are a legume that fix nitrogen in the soil with nodules on their roots that feed off of sugars secreted by the corn roots (all this going on beneath your feet! Yikes!), and the squash forming a cooling, weed-suppressing ground cover that also deters raccoons (notorious corn-eaters who don’t like to walk through the vines). What is missing is a plant to attract and feed the pollinators. In the Southwest Anasazi settlements it was Rocky Mountain bee plant (Cleome serrulata), which has edible parts to it and fixes iron (the Anasazi used it as a dye plant as well as food). With an edible plant guild, we feed the soil and the pollinators as well as ourselves. You can read more about this in the fantastic book on permaculture by Toby Hemenway, Gaia’s Garden. An excerpt is right here: http://patternliteracy.com/the_three_sisters_or_is_it_fou I’m trying my fourth sister as dill weed, which is an excellent bee plant because of it’s small umbellate flowers. Dill also goes well as a flavoring for corn, cucumber and squash, and usually plants that complement each other taste-wise do well planted together, such as basil and tomatoes.
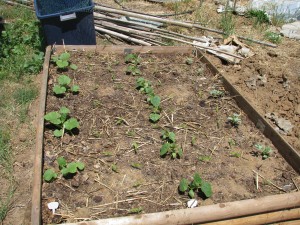
Cucumber, baby corn, watermelon and squash Speaking of which, my garlic/shallot/tomato and basil bed has taken off with the warmer weather. These are slicing tomatoes; I have planted Roma and a yellow variety in other beds.
Where the peas have come out, the broccoli, carrots, parsnips, lettuces, endive and cilantro are doing well. I’ve planted some small eggplant sprouts and more carrot seed so there is a continuous supply.
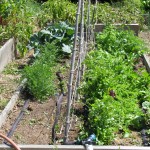
Life without pea plants Organic sweet corn will go into this bed, which will provide shade for the lettuces. Corn of different varieties must not come into silk simultaneously or they will cross-pollinate. The baby corn in the other bed will mature earlier by nature and by planting times. Those little corn ears can be eaten fresh or left to harden to be used for popcorn. The whole ear can be put into a microwave, for those of you who have such a newfangled contraption (I haven’t owned a microwave, um… ever!).
We’ve had new visitors to the garden. Besides my gopher snake friend (see my post Unsticking the Snake of May 14th), who has been seen again, and a longer gopher snake, my son and I saw a king snake whipping down a gopher hole in the lower Bee Garden, and then today this fellow came through the Chicken Tractor then through the Swiss chard and onion bed, and across the property.
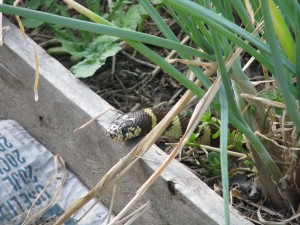
"So good to rest my weary head for a minute!" I’ve only seen one king snake in the yard who shows up in the height of summer to look for mice under the bird feeders. The standing water in the pond and the disturbance of the soil has attracted more of these friends, especially since my dogs are elderly and aren’t ‘making the rounds’ like they used to.
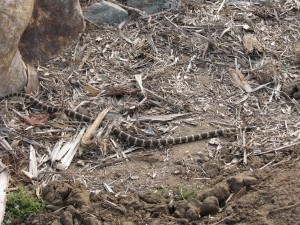
Banded kingsnake Kingsnakes are a little more tetchy than gopher snakes, and will eat other snakes including rattlesnakes. They can be striped or banded, even in the same clutch of eggs. Just like siblings with different hair colors.
Speaking of ponds, the standing water in the lower pond hasn’t receded very much, but has had an algae bloom.

Pea Soup Pond I’m going to have to have a well drilled on site, and have spoken with two well drillers and have received one bid, and am waiting for the third day for a call back. Honestly, is there so much work for some people in this economy that they can’t return phone calls or show up to appointments? During this gardening adventure of the last few months there have been several people of different occupations who just haven’t kept appointments or returned calls although they are still in business and initially shown interest. What’s up? Grrr.
The quinoa (pro: keen– wah) is doing well, and the potatoes are ready to harvest.
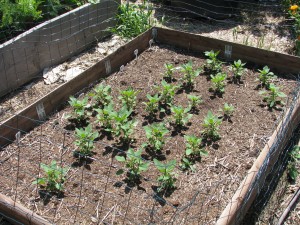
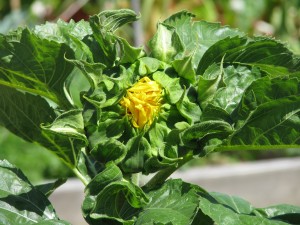
Quinoa rows Although I planted a whole packet of sunflower seeds throughout the property, only this blue jay-planted one in my strawberry bed came to anything. It looks like a puckered face!
"Too much lemon!" -
A Scream in the Pond
I have a small lined pond in my front yard, created by my daughter and I a good five years ago or so. It is a pond gone native, for the most part, and I like it that way. The mysteries of what lives in those three feet of murky algae-laden water give me a shiver and excite my naturalist sense of curiosity (See post The Monster in the Pond of March 2nd). Sometime earlier this year as I was walking past the stretch of green that was partially covered with newly unfolding waterlily pads, I was startled from my reverie (I’m always in reverie it seems, especially now that I’m wrestling with mid-life crisis!) by what sounded like a small scream and a splash. I saw nothing. Hmm.
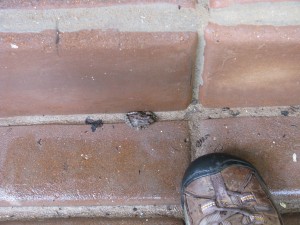
Young Pacific Chorus Frog During the most frigid, god-forsaken unpopular months of January and February, it seems as if every Pacific Chorus frog migrates from a forty-mile radius to mate in my small three-hundred gallon pond. Every night the males attempt to out-sing each other with such buzzes and chirps that even I’m impressed and tempted to follow their siren song, if only it weren’t so cold out there! (Wimpy San Diegan, I know!) Let their large ladies deal with them, I say. Sometimes their song is so loud that it becomes one giant noise. Often it drowns out whatever movie we might happen to be watching and we have to shine a flashlight out the window to startle them, catching them in flagranti as it were and quieting them for a short reprieve.

Pacific Chorus Frogs Taking a Break from Singing However, none of them scream. They sing.
When walking past the pond a few weeks later it happened again. A much louder scream and a splash. At least I knew that whatever it was hadn’t been so frightened by my passage that it committed suicide the first time. Then soon after my son came in from the front yard with a puzzled expression and said, “Something in the pond just screamed at me.”
There is a lot of algae in the pond which blooms about the time the frogs are mating, so I leave the frothy green bunches in place to protect the clear jelly sacks of spawn that cushion the frog eggs. Therefore, not much visibility at any time in my pond. Nope.
Finally I saw the screaming thing as it flung itself from the flagstones into the water. It was a large frog, much larger than the Pacific Chorus Frogs. Uh-oh.
When at breakfast I saw it sitting on the flagstone walkway around the pond through my bay window, my heart sank. It was a bullfrog. The glistening, beautiful green gigantic (for around here) frog sat there for awhile, then leaped into the undergrowth of my columbines.

Bullfrog about to go hunting through columbines American bullfrogs (Rana catesbeiana) are what you think of when and if you ever think of frogs. They can become huge. People farm them to eat their legs and back meat (oh ick!). Little American boys are supposed to spend their idle childhood summers wading through creeks (pro: criks) catching them and tickling their stomachs. I think they are a gorgeous and wonderful creature.
Except. Except that bullfrogs are not native to the Western states and they eat anything that they can shove into their mouths, including snakes, birds, rodents, other bullfrogs…. They are partially responsible, along with the red-eared slider turtles (America’s favorite pet turtle which was dumped wholesale into lakes and streams after the salmonella scare some twenty-five years ago and took over the waterways) and polluted water for endangering our native cute little Western pond turtles. So having this great screaming mouth eating down my mosquito fish, my Pacific Chorus frogs and their young, and everything else in the yard, is not good news in my book. Then my son noticed a second, smaller one. A male. Oh no!

Uh-oh. There's a male bullfrog, too! How to catch a bullfrog? I brought out an old cat litter bucket and a fish net and left them handy. We’d see the frog’s nose clearing the water, but by the time we’d go out there he would be long gone. Being very busy I didn’t have the opportunity to sit, net in hand, for hours waiting for my screaming frog to appear. (Hey, wait, shouldn’t that be ‘handsome prince’ instead of screaming frog? I get everything wrong!).
A few days ago on a sunny afternoon I was surveying the weeds in my garden, trying to burn them into cinders with my eyes without success. I walked along the pathway by the pond that was now almost completely overrun with peppermint, lazy stalks of columbine, the all-too vigorous Mexican primrose and the definately healthy weeds. I surveyed the back half of my garden making plans about weeding that had to be carefully done since many of the nasty little beggers were coming up in my heirloom bulb beds and their stalks looked almost identical.

Big Mama Wandering back I stepped through the overgrown columbine that hid the path when suddenly something big and shiny and screaming came flying up towards my knees from right under my foot. I also screamed and jumped. A second scream and leap to my left alerted me to the very large, very green bullfrog panting and staring at me with much the same expression that I must have been wearing as I stood staring and panting back. Even in my surprised state I realized that this might be my chance. Of course, the bucket was all the way over by the gate. I made a lunge for the frog but she evaded me. I managed to keep her from jumping into the pond and she disappeared under some weeds and mint by the bird bath. I squatted down and held down the grass hoping to contain her. I yelled for my son, but he was out of earshot. I started laughing, which I do so often in my life when I find myself in unusual circumstances. Come to think of it, I laugh pretty regularly. Maybe too regularly. Regaining control of the slight hysteria and my breathing, I slowly lifted up the grass… but she was gone. I knew she hadn’t jumped into the pond. She must have made her way along the sides of the flagstones. I made a plan. Quietly I stood and tip-toed around the back of the pond and around the end, making my way back toward the gate and the bucket with the fish net. Everything was still and I made no noise as I crept along. Just as I made it halfway past the pond, there were two almightly screams in close succession, two jumps and a splash. Fortunately it was the bullfrog who landed in the pond, not me. Shaking slightly with a trace of that hysterical laughter, I went inside to have a calming cuppa tea, and to give the lady frog time to settle her nerves as well. All that screaming had been a very girlie experience for both of us.
-
Water!

Upper pond and the Nest For the last two days we’ve experienced enough rain so that my permaculture adventures could be tested. Two storms, each bringing about half an inch of rain, created enough water for the watershed to begin to flow. Roger Boddaert and his team were busy rototilling urea into the areas which hadn’t yet been planted,

Freshly tilled areas soaked up water and Jacob from Aquascape and Jose were digging trenches for the drip irrigation system. They were very glad of the rain softening up the dirt!

Trenching for Irrigation Everyone was wet. Finally the rain gathered enough strength to flow down the street, under the fence from my wonderful neighbor’s property, and down the rain channel created by Jacob.

Water running in the trenches Some trenching had to be done to divert the water around the new Nest hut.

A diverting occupation Rapidly the upper rain catchment pond filled then overflowed down the rain channel into the second lower catchment pond.

Jose and I awaiting the overflow 
First Pond Filled 
Roger and Jacob ponding The scheme is that overflow from this pond will be channeled around the lower permanent pond and away so as not to overflow the big pond and erode the weakest and lowest end of the property around it.

Overflow water from the upper pond However since we were eager to see the big pond filled, Roger cut a trench from the second rain catchment pond to the big pond.

Overflow filling the second pond Earlier I had been in and out that morning on errands, and had settled in the house with a hot cup of tea and comfortable fuzzy pants on, when I realized that I was wasting water. I have three fifty-gallon rain barrels set around the house, which fill up within minutes and then overflow. Why wasn’t I channeling that water into the big pond? So of course I exchange my slippers for outdoor shoes (at least I did that!), put on a windbreaker with a hood, and go hauling hoses around to connect to the rainbarrels. I’ve had a sprained right wrist for a couple of weeks and pulling hoses was not the best medicine. So of course I did it, with my fuzzy pants wicking up rain and mud and beginning to drag under my feet. That’s me in a nutshell. Loving every minute of it. With three hoses leading down to the pond, all that wonderful roof runoff wouldn’t go to waste.

Connecting hoses to rainbarrels 
The Big Pond already collecting rainwater The big pond had had some water in it, enough for my son and I to put in a few mosquito fish to eat all the mosquito larvae. That water had been evaporating so there wasn’t much more than a large puddle at the bottom. By the time I put the hoses leading from the rain barrels into the pond, it had already been catching a significant amount of rainwater directly. Too bad I hadn’t thought of the hoses much earlier in the storm!
The rainstorm broke up too early for me, but more rain was on the way that night.
Waking up to the sound of rain is one of the nicest experiences for me, mostly because I live in a dry climate, I expect. The rain had set in well overnight, and I could see from my bedroom window a reflection from down below which turned out to be the lower pond!

Morning view from my bedroom! For a minute I thought it had filled up, but then I realized it was about a quarter full, and was impressed and excited about how it would look when completely full of water! The watershed rain was following the trench and going through the ponds, which were still holding water and allowing it to perculate into the soil.

Second pond in the morning The planted and mulched areas, and the areas newly tilled were soaking up water so well that there wasn’t any run-off from it. Of course, the rain was steady and we didn’t have any of those crazy intense rainstorms like we get in the winter, when it feels and sounds as if an enormous endless bucket has been overturned over Fallbrook. Those will be a true test of the system. Until then, I was very fortunate to have had this great rainfall to test the system right when the two major players were on hand. It was exciting.

The Lower Pond after the rains -
Honey Extraction by Crushing Comb

Honey Harvest Commercial bee hives, and most backyard beekeepers, use Langstroth (American standard) hives with frames lined with pre-pressed wax comb. This allows the bees to spend less time making wax and more time filling the hive with honey. To harvest this honey, keepers usually take out the honey-filled frames, run a de-capping knife down either side to cut off the white beeswax caps, run a knife or comb rake down across the cells to start the honeyflow, then place the oozing frames into the extractor. The extractor is closed, on some models it is heated, and then started. The frames whirl around the inside, using circumfugal force to get the honey off of the comb. The heated sides allows the honey to flow down through screens into a collection chamber. The frames with their cells can then be re-used into the hive for several years before the wax needs to be replaced. There are different scales of extractors, from a home-made one that holds two frames and is run with a drill motor, to large extractors that hold many frames and are heated so much that the honey runs like water. Extractors don’t work very well with frames that don’t start with pre-pressed comb, or Top-Bar Hive frames because the comb is too brittle to be reused.
There are a growing number of people who are not only pursuing organic beekeeping, but going to natural beekeeping. What is the difference? Organics don’t use pesticides to kill mites or treat the bees for various problems. To kill mites, they dust powdered sugar over the frames filled with mite-laden bees. The powdered sugar not only makes the mite’s sticky feet unable to stick, but also forces the bees to groom themselves more, which knocks the mites off and down through a bottom screen on the hive where they can be done away with. Natural beekeepers allow the bees to take care of themselves, using as little interference as possible. By observing what requirements the bees need to survive, by location of the hives and by not over-harvesting the honey, natural beekeepers are more in tune with their bees. For instance, the pre-pressed cells on wax foundation is larger than the larvae cells that bees would normally make. Varroa mites, a terrible scourge of bees, like the larger cells. If bees are allowed to festoon and make their own smaller-celled comb, there are fewer mites because the mites reproduce better with larger cells.
Naturally formed comb doesn’t work well in an extractor, so there are two things a beekeeper can do with it. One is to cut it up and sell it as pure honeycomb. The second is to crush it and allow the honey to drip through a mesh screen into a collection bucket. The latter is the process that we do, since we don’t have a lot of hives. Even with one hive, this process is a long one and physically demanding. As with all honey collection, it is best done on a warm day so that the honey will flow.

Honey-filled frames awaiting crushing The following photos are from a honey harvest last summer from our hives, and also from a wild swarm that I put into a hive just a couple of weeks ago (see my blog post Moving Bees on May 5th).
To crush comb, first we get our basic equipment. You need a long flat pan with sides, a potato masher, a spatula and a knife. You also need a clean food-grade bucket with a spigot on the bottom and a screen on the top and a lid. You can buy these, and believe me they are worth the price.

Empty bucket, screened top, and waiting comb If you don’t want to buy the bucket, you can always do what we did for our first honey extraction. You put clean buckets on the ground between two chairs, over which is suspended a sturdy and steady pole such as a broom. Once the comb is mashed, you put it either into layers of cheesecloth, or into cheap paint strainer bags sold anywhere paint is sold. Then you suspend it over the buckets and let it drip. If you squeeze it, the honey becomes darker. The cons of this are that dust will settle in the open buckets, and the chance of knocking the broom down is always a threat. Even on hot summer days, the dripping may take a week or more until almost all the honey is extracted. That is why covered screened buckets with bottom spigots are so worth the little extra money.

The Cheesecloth-Broom method! Cover the floor with newspapers, put some wet paper towels close by, put on some lively long-playing music and go to.

Cutting the comb from the frames First, remove a frame of comb and cut out the cells into the crushing pan. I stand the empty frames up on another pan which will catch the drips. Using the potato masher… start mashing.

Mashing the comb The goal is to crush the comb enough so that all the honey will drip out of it, taking pollen with it. Since you won’t be heating the honey artificially, and will only be screening once, most of the pollen and all the good vitamins, minerals and anti-bacterial goodness will flow right through and not be destroyed or screened out.

Cut comb laden with honey When that frame is thoroughly mashed, scrape it into the screen that is on top of your bucket… making certain that the spigot is tightly closed. Then start with the next one. This process will take some hours to do, even with two working on it.

Dark, brittle comb from a wild hive When the strainer becomes full then you can give it gentle stirs with a soft spatula, so you don’t tear the screening, or if you have another bucket put a lid on the full one and move on. Place full, lidded buckets in a warm area safe from ants where the sun can help with the warming and dripping process, without destroying the good stuff through heating.

Screen full of mashed comb When your bucket fills up with honey, then its time to decant. I use sterilized Mason jars with screw-on lids. Just open the spigot and be ready for honey to flow. Be ready to shut the spigot off quickly and wait for the inevitable drip.

Drawing Honey Honey should be kept in a dark cabinet, not in the refrigerator. It is naturally anti-bacterial, and has been used for centuries on wounds. It will not mold. It may crystallize, which is a reaction to the ambient temperature, since bees keep their hives between 91 and 97 degrees F. There is nothing wrong with crystallized honey; if you would like it liquid again, set the jar in a pan of hot water, or microwave it briefly. You even can get instruction on unclutterer on how to microwave specific foods like honey.
Once you are done extracting, you can set all the equipment and pile of discarded crushed honeycomb (unless you have other plans for it) out in an ant-free place near your hive for the bees to clean up.
The honey from our hive is very light in color and flavor, although it crystallizes within a couple of months (no problem there… it is also called creamed honey). The honey from the swarm that was in the nursery containers was almost caramel-like in color and consistancy, and had a darker flavor. Avocado honey is often dark, and there were many avocado trees in the area of the swarm.

Differences in Honey Crushing may be time-consuming, and not practical if you have a lot of hives, but for those of us with a hive or two it is worth the time and effort to not heat our honey and let it drip. Anything worthwhile is worth the time and effort it takes to do it. Just always, always, always be sure to allow the bees to keep at least one whole full super of honey for themselves, rather than robbing their honey and substituting it with sugar syrup. Hopefully you wouldn’t put soft drinks in your infant’s formula bottle, and neither should you give sugar -devoid of all the miraculous properties that honey has for the bee’s existance – as a substitute food for your bees. Bee a good bee parent.
-
Unsticking the Snake

A Stuck Snake This morning as I was wandering through my vegetable garden, I saw the middle part of a snake with his tail and head covered. This was late morning, and he wasn’t moving so I thought him dead. Fortunately he wasn’t. At first I thought he was a rattlesnake by the way his scales were rougher and the sound of a faint rattle when I moved the bamboo that lay under him.

All I could see of his body He wasn’t; he was a three and a half foot gopher snake, the same one I’d seen about a month ago for the first time in my yard. Just about all snakes shake their tails when giving a warning, but rattlesnakes have stacked hollow sections of keratin… the same material that is in your fingernails and hair… that bump together when shaken to create that rattle sound. No, there aren’t any balls inside. Rattles appear with age but can come off, so a very young rattler with only one button or a snake that has his broken off won’t make a rattle but will still shake his (or her) tail. But I digress.
This gopher snake was in distress because it had crawled through plastic netting that I had carelessly left on the ground. Once about 25 years ago I had a similar situation when I lived in Vista, when a gopher snake became emmeshed in the holes of a plastic garden netting I’d set up. It took me a while to free it, and it wasn’t nearly as badly stuck as this poor guy.
This netting was the type used to cover fruit trees to protect them from bird predation, and I had some that I’d used briefly over my pea shoots when the crows were eating them. I’d left the netting in a nursery can but over the months it ended up on the ground with a snake stuck in it. I had to carefully cut the poor thing out.
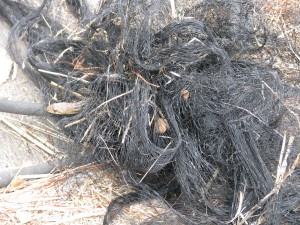
His head poking through About two inches of his head was showing once I pulled the netting back; not enough to swing around and bite me. He was stuck multiple times with the netting cutting into his skin in several places. I brought back a kitchen knife with a flat top and a sharp edge to it, so that I wouldn’t hurt him when I pressed down to slide the edge under the netting, but the tip of the knife wasn’t sharp enough. I ended up with some very sharp sewing scissors… the miniature kind shaped like a swan. And, of course, my camera.
The dilemma was that if I freed up enough of it’s middle it would try to push forward and become even more tightly stuck in the netting higher up. If I freed more of its top part first then it would have the leverage to turn and bite me.
When dealing with frightened animals (and people) you have to find the quiet part of yourself and work from there, without distraction and using a calm voice. Not only are your actions imperfect when you are tense or scared or angry, but that feeling emanates out from you and whatever you are working on will react to it. In other words, sensing your fear is a very real thing. I was very glad that this wasn’t a rattlesnake. The snake shook it’s tail at me several times and kept flicking it’s tongue out to smell me, but even though he wasn’t badly hurt or sick yet he was a very nice snake. I pulled the netting away from his head so that his trajectory when freed wouldn’t send him into more of the plastic loops.

"Help me!" Then I started sliding the scissors as gently as I could under the plastic netting that was pressed into his soft skin and cutting him free. He was badly stuck so it took some time.
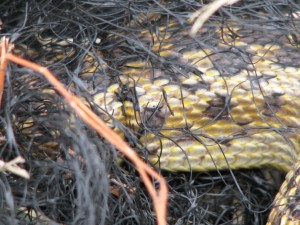
Plastic pressed into his delicate skin All the while I spoke calmly to him, and knew that he would only feel relief after each of my actions so he’d know I wasn’t doing him harm. Finally I got to the netting around his… um… neck? He turned his little head but wasn’t rattling or coiling in preparation to move suddenly.

The last bit of netting With the last snip he raced away several feet to the shade under a nearby lime tree.
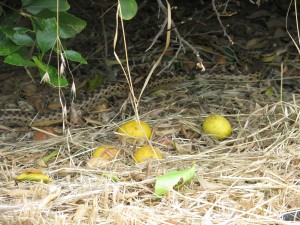
"Thank-you, Diane!" There he sat looking back at me. I waved and told him he was welcome to all the gophers he could eat, and threw away the netting.
The lesson here, of course, is to be careful with the debris you leave around your yard. Could it be an animal trap? Think beyond it to the animals at the dump where your trash ends up. Snipping your 6-pack plastic rings might save the lives of seagulls, water creatures (if it ends up somehow in the water), or rodents. Of course, going plastic-less would be the ideal but still wouldn’t eliminate injury to animals. Tin cans are stuck on animals’ heads all the time. Just be aware of what you have lying around and consider if it could be a hazard or not. That way it might save you from snipping plastic rings off a snake someday.
