Gardening adventures
Wrestling with the great outdoors.
-
Bamboo: A Rant

It looks innocent enough... (Note: I’ve modified this rant so that its more of a grumpy bit of advice and some whining. If you want to skip the rant altogether, just scroll to the third paragraph from the end where I’ve made some heartening observations and have posted happy photos of daffodils.)
I love the look, the feel and the beauty of bamboo. It is an amazing grass that is edible, durable and because of is fast growth rate makes a renewable building resource. There is clumping bamboo, which slowly spread out from a main clump, and which can be controlled. In my parents’ driveway, surrounded by asphalt, there was a patch of clumping bamboo which had been there for… forty year? More? It never escaped its boarder. Then there is rhizomatous bamboo, which sends out underground runners in all directions and can quickly undermine any nearby growth. Rhizomatous, or running bamboo, can be grown in containers, or you can chance it in the ground if you block it in with an underground barrier that is a good two feet deep, and six inches above ground. Even then you should watch out for escapees. Surrounding running bamboo with water is another way to keep it controlled… a bamboo island?
There is a lot of bamboo planted in my yard. A lot. The larger bamboo I anticipate harvesting after the culms are several years old and using for trellises or fencing. The smaller bamboo such as the beautiful black or variegated varieties aren’t that useful to me because of the thinness of their culms, but are very beautiful.
That is until I happened to trip over something in the pathway that reared up and back into the ground like a sea serpent. It was a black bamboo runner…unconfined invasive bamboo in my garden!

Just one of the 20 + rhizomes from one plant! 
Lark and Miss Amelia cluck over the unearthed root ball with severed rhizomes. I started tracing that runner back to the mother plant. With some excavation I found that there were about 25 such runners just below the surface, all heading in different directions, all rooting and ready to send up shoots for new plants. The runners were an even 1/2 inch to 3/4 inch thick up to their tips. I stared in horror at the hydra I’d just uncovered, and then looked around. I had five clumps of black bamboo, and one of variegated, all along a heavily planted walkway. The plants were one year old and were on the verge of completely taking over one of the main areas of my garden.

Gotta give it credit for eagerness. (Here the rant really begins, as does the whining!:) Then began the backbreaking and laborious work of tracing all the rhizomes and pulling them up, making sure to get every piece. The rhizomes were 15 – 20 feet long. They snaked under my precious heirloom roses, under young citrus trees, under boulders and palm trunks, under other vines, through gopher cages and around the delicate subterranean irrigation system. The runners had to be pulled up, and since they rooted all along their lengths, when I pulled them the soil would fling up into my eyes. The clumps were planted where it was full sun and of course, it was a warm week when I tackled the project so I had to stop in the afternoon when I was roasting. I spent Valentine’s Day, which is a ‘holiday’ I’ve always disliked anyway, sweating, crying, laboring, running into the house to wash dirt out of my eyes, cursing. My dog General had had a seizure the weekend before and still wasn’t eating; I had found out that a person very dear to me had died. The bamboo was setting me back many days worth of work. It was not a good week.

Trying to unearth a rhyzome without harming an heirloom rose, but not without scratches! The mother plants themselves were deeply rooted and had heavy root balls. I had to use boards as levers to try and hoist them from their holes; several I wasn’t able to pull out on my own and they are there waiting for me to have help. I was on my hands and knees tracing rhizomes, using a trowel to unearth the runners that went right through the root balls and around the trunks of my roses and citrus. Trying to lever up a boulder or a cut palm trunk with a board while digging and pulling on a thick rhizome was very taxing. It was dirty, frustrating and exhausting work, and merited a trip to the chiropractor, and my wrists and hands are still tingly and numb from the stress. If I hadn’t tripped on the rhizome, within six months (or less!) that entire walkway area with all of its productive food plants and heirloom roses would have been taken over. Everything would have had to be dug out, the entire area emptied (and with mature plants, I would have had to kill them or hire help to dig them out) and then the bamboo hand-traced and dug out.

Rhyzome squeezing irrigation line 
Lots of irrigation repairs to make It would have been a catastrophe. It would have ruined the garden, and would probably have convinced me to give up. I am one fifty-year-old woman trying to do all the work myself, and I really can’t hire regular help until I begin earning some kind of income again. I am an organic gardener and will not go over to the enemy and use weedkilling products.

The steadily growing pile of cut rhyzomes. I haven’t finished with the bamboo. There is another one that I haven’t started on yet, and I think there is another at the top of the property where it might begin to interfere with the neighbor’s underground cable line that leads off of the pole in my yard. The access road is littered with cut rhizomes and bunches of cut bamboo. Several clumps reel in their holes awaiting me to find help to pull them out. Meanwhile we had a heavy rain and windstorm which made the stream overflow in several places, flooded my chicken coop, and ripped the roof vent off of my new greenhouse (not under warranty, Rion says! It is broken, and I have to figure out how to keep it on). Seeds need to be planted, the ragweed laughs at me and the Bermuda grass starts coming back to life. There are trees planted in areas where they are now shaded, or won’t grow successfully, and I need to transplant them; heavy work when they are in gopher cages filled mostly with wet clay. My hayfever has started up, limiting time in the garden. So much to do. And I’m weary of wrestling with the stuff. A small house with a little garden, up against a wild area, sounds very, very good sometimes. So take warning when planting anything, or having anything planted: research it yourself and plant with an eye to the future.
")
An unearthed rhyzome, a good 15 feet long (cut datura on top) On the plus side, I’ve taken a brief vacation from the cursed bamboo and have planted flats of seeds in the greenhouse. I’ve finally planted all the bulbs and sweetpea seeds that should have been in months ago. I planted cold weather veggie seeds in my raised beds, although its the end of the season for them. I’m enjoying the daffodils that are opening up along the driveway, their happy faces turned in different directions with different attitudes… I swear they have personalities.

"Eh?" Some of the fruit trees are blooming, and my two bee hives are very active. I’m drawing up plans for my outdoor composting restroom, my outside worm bin, my new (and better placed) chicken coop, and a new composting area. Best of all, I’ve been able to renew work on a middle-grade novel that I had begun and abandoned several years ago, and I am in the polishing stages before I send it off to an agent and hope for acceptance. It is very good to be creating again.

"Did you see that?" In early March, my zumba class (http://www.wadeintofitness.com/) will be touring the garden. On the second Saturday in April the San Diego Permaculture group (and anyone who wants to!) will be touring the garden and helping to finish building the cob oven that we started last summer. On May 12th, the day before Mother’s Day, the garden will be on the Association of University Women’s garden tour. After that, I hope to have groups in by appointment, with either a fee or a suggested donation. The weeks fly by and there is so much to do. Today the birds are crazy with spring, loud with stuffing themselves with seed to be if full health for mating season. It is still February, so I still have some time before the very hectic spring and summer seasons begin.
-
Valentine Flowers

Freesia, one of my favorite flower scents. Although I don’t really like Valentine’s Day, I do like the fact that spring starts here in San Diego County in February. So to celebrate the day and the season, I thought I’d post photos of some new blooms that I took after our brief… and all too rare… rainstorm today.

Cyclamen and freesia. This cyclamen had been a gift from my good friend Eileen several years ago, and every year it never fails to glow.

Strawflowers. These bright gold beauties are left overs from seed mixtures I planted at the end of last summer. Borage is the big-leafed plant behind, also in bloom.
.")
Queen Anne's Double Jonquil bud (heirloom). Over my thirteen years at this house I’ve collected heirloom bulbs and heirloom roses, even during the years when I really couldn’t afford to spend twenty dollars on something frivolous. Heirloom plants make me happy, and make me feel as if I’m contributing to the conservation of forgotten plants.

Ice Follies heirloom daffodil I buy all my heirloom bulbs from Old House Gardens (www.oldhousegardens.com). Visit them online, order a print catalog and indulge in the humor, the history and the sheer beauty of what this small company offers.

Saint Keverne heirloom daffodil. I have, as you might have guessed, a great fondness for daffodils. That includes jonquils and narcissus, of course. They are such happy, homely flowers; beautiful in their unusual form, and such a bright harbinger of spring! I’ve planted cheaper, non-heirloom daffs all around trees throughout my gardens and along my driveway. The heirloom ones I have separated in my front yard.

Louise de Coligny heirloom daffodil. We don’t have many native bulbs in Southern California. That is logical, since we don’t have severe winters and plants never had to store their resources underground, protected from snow and ice. Many of our flower seeds, such as those of California poppies, need light to germinate and are best sown right on the ground. So bulbs such as my lovely daffodils don’t quite fit into a native garden, but instead remind me of colder climates. Also, gophers won’t eat the poisonous daffodil bulbs!

California redbud tree Several trees are breaking out in bloom; the crabapples around the pond, several apple trees, a plum, and this California redbud. I’m not thrilled about redbuds, but they do offer spring flower color, nice summer foliage, and fall color. What I like best about them is that they are nitrogen fixers, and improve the soil all around their roots.

Calla lily Far too early for Easter, this Calla Lily appeared this week and made me remember my mother, who always bought them for spring. Mom’s favorite color was white, and although not her favorite flower (which was the orchid), the Calla lily seems the most like her: clean lines, unique shape and the glowing whiteness of sophistication.

Single heirloom freesia. Freesia is one of my favorite flower scents. It is fresh and not cloying or heavy. My other very favorite scents are yellow primrose (only the yellow ones have a fragrance!) and sweet violets (my favorite flower). And, of course, roses. The form that the freesia flower stalk takes, almost serpentile, adds so much to a garden’s shape. I like the yellow freesia the best, and they are also the most fragrant.

Ivy Geranium Growing up, I used to hate geraniums. Martha Washington and ivy geraniums covered the embankment of the backyard of the tract house we lived in in Carlsbad, CA. Every time a ball was lost in it, or one of our Shelties ran through them, the obnoxious smell of the geranium leaves was overwhelming to me. As I matured, however, I found out what a reliable friend geraniums can be. They take so much abuse and yet bloom all year ’round. The bright and dark reds are stunning and add just the right touch to other color combinations. I still prefer the less smelly vining ivy geraniums over the big-leaved Martha Washington varieties, and I let them clamber over my chain link fence, turning an eyesore into a trellis for beauty.
I hope my bouquet of flowers makes you happy. Happy Valentine’s Day!
-
A Few of my Favorite Things

Buckets are wonderful creations. I now spend part or all of each day working in the gardens. Most of it is heavy labor, such as hauling clay, digging out plants, weeding; you name it. You can depend on Sublime Gardens to provide you with all the quality garden equipment that you need. Without these tools, I’d be lost. Here are my pick for the best tools in my garage.
Buckets. I have buckets with assorted PVC pieces and repair tools in them, buckets with planting tools and seeds in them, buckets under my wonderful, incredible outdoor sink to catch the water, buckets for brewing compost soup, and buckets for whatever else might come up, such as hauling heavy clay up the hill to my reponding project. A wheelbarrow is a great tool for moving loose soil on even ground, but when you’re fairly small, a wheelbarrow can get the better of you. Buckets are the answer.
Buckets can be pretty heavy, though, and the hauling of buckets is one of the many uses I have for my garden cart. It is the savior of my garden.

A cart is worth ten wheelbarrows. I move heavy potted plants, buckets filled with clay, urea or water, rocks, and bags of amendment with my cart. I can tip over heavy boxes, such as the two 60-pound containers my greenhouse arrived in, and haul them where I need them. Most of the time I need to transport things up or down the hill, over uneven ground and mulch, or around the narrow pathway by my house. The cart does it all. What a workhorse! I have a wheelbarrow, but I’ve used it more to mix up large batches of mud for clay oven building than I have for hauling dirt. The cart is just more stable. I love my cart. Best thing I ever bought.
My usual working outfit comprises of decent work shoes, a hat, gloves and my pruners which I shove in my back pocket along with some tissues (if I don’t have tissues, I’ll need them. Hayfever, bleeding cuts, drying PVC pipe before gluing, wiping ick off my hands…. I should have included tissues as a main feature!).

Good snippers are valuable I have a pair of ratchoting pruners, and they are useful for tough wood, but just plain solid pruners are the best. I never know when I need to whip them out. Just walking around the garden I’ll find a dead stalk, new shoot or overenthusiastic vine that needs a nip, and if I don’t have my pruners handy chances are I’ll forget all about them within minutes. I’ve used them for cutting out a mass of yarrow whose roots are so invasive they’ve grown between stepping stones making the walkway impassable. I can’t dig them out, so I’ve had to cut. I’ve also learned to take better care of my pruners: I don’t twist them. I’ve ruined pruners by doing this, and its easy to do when you’re trying hard to cut something a little too thick for the tool.
For years I’ve started out with work gloves and ended up bare-handed. My hands are certainly evidence to that! Leather gloves would be too thick to manipulate and would irritate my skin, and cloth gloves would be too thin to handle small thorns and would become too hot. Finally they’ve created a glove that is not only inexpensive but it durable, breathable, works for small thorns (if you’re careful!), and doesn’t irritate my skin.

These gloves breathe, and are tough. I find that at the end of the day, I’m still wearing them, much to my surprise. They allow me to plant and still feel what I’m doing. To my surprise, these same gloves were issued to me when I worked in the horticultural department of the San Diego Zoo Safari Park a couple summers ago. I buy them at WalMart. I’ve worn the first right finger down on a couple of pair, but it took awhile.
I pull weeds. I want to get the roots, and this tool is perfect.

The best weeder It is just the right weight to not put undue stress on the wrist and arm, yet heavy enough so that you don’t have to stress your hand striking. The sharp end effectively cuts into the soil at the root so that you can pull the weed right up. The pronged side helps pop root masses right out. Its long enough so that when you are on your knees weeding, you don’t have to lean over too far, stressing your lower back. It is also good for uprooting old cornstalks and other veg that have a good grip on the earth. Also, it is formidable enough that anyone wanting to sneak up on you will think twice!
Finally, my favorite tool for just about anything: the round-point shovel, or spade.

I can do anything with a round-point shovel. I have a wonderful relationship with my spades. A nice round sharp edge slightly pointed, with wide foot rests for stepping on, and a good long handle that keeps stress off your lower back and is perfect to use as a leanin’ post. If I was given a selection of all garden tools, this is the one I’d go to without hesitation. I weed with it, move dirt, dig holes, scoop water, carry transplants, scoop gravel, flip compost, harvest potatoes… if I found a way to cook with it I would. (Actually, hoecakes are made on hoe blades held over a fire… I could use my shovel….!). If only I could find a single man who was as useful, reliable and fun as my round-point shovel! (Um… you don’t have to repeat that). I have three, one stationed by my house for the upper gardens, one by my garage for the driveway area and thereabouts, and one down by my veg gardens. That way I never have to look around for one. (Maybe that’s the tactics I need with men, too!)
There are of course other tools which I use. My cordless drill is a godsend. In fact, I should add it to this list, but I wanted to highlight simple, non-mechanical tools. I could live without my cordless drill, but life would be much more difficult, and it doesn’t relate directly to gardening since there are other ways of building without the use of screws.
So, if the apocalypse happened right now, with my aboveforementioned favorite tools I could continue on growing food. Until my buckets break, anyway.
- Animals, Bees, Birding, Chickens, Gardening adventures, Heirloom Plants, Other Insects, Permaculture and Edible Forest Gardening Adventures, Photos, Ponds, Rain Catching, Vegan, Vegetables, Vegetarian
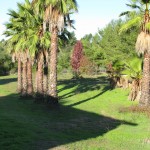
Garden’s One Year Anniversary
Happy Anniversary! One year ago on Feb. 1, 2011, I signed a contract with landscape architect Roger Boddaert (760-728-4297) to create a permaculture garden. For twelve years I’ve had this sloping property that was covered in weeds and worthless Washingtonia palms. Not only do these 2 acres slope down to a barranca, but it was filled in due to catching all the rainwater that runs from the street and properties above. I have to give credit to friend Gary B., who brought up the subject of permaculture in a conversation the year before. I’d heard the term and thought I knew what it was about, but months later when I was researching what to do with my property I remembered him mentioning it, and looked it up. I found what I was looking for. I’ve been an organic gardener for many years, have owned chickens for their eggs, have refused to till the soil so as not to kill microbes, have worked naturally with animals and plants, have created habitat, composted, recycled, collected rainwater… and all of that was permaculture. And so much more. How can one not be attracted to the term Food Forest? Certainly not a foodie and gardener like myself.
What happened on the property starting the week of Feb. 1 for the next six months altered the land so that it is truly two acres of habitat. It is useful, it is natural, and it is beautiful. Roger’s team led by Juan built beautiful walls of urbanite, planted and hauled, worked in scorching sun and frosty mornings and made what was dreamed into reality. An integral part of the garden has been diverting the water from erosion points and into rain catchment basins and natural ponds, and that is where Aart DeVos and Jacob Hatch of Aquascape (760-917-7457) came in. They also installed the irrigation. Dan Barnes did the rough and the precise tractor work (760-731-0985) and I can’t recommend his experience and skill enough. Fain Drilling dug the well (760-522-7419) and the wonderful sheds were built by Quality Sheds of Menifee (http://www.socalsheds.com) .
Along with some volunteer help from Jacob, I am the sole caretaker of the property. I am planning the plant guilds, weeding, improving soil, moving problem plants and trees and, did I mention, weed? Oh yes, then there is weeding. On Saturday May 12th, the garden will be on the Garden Tour of the Association of University Women of Fallbrook, and hopefully many people will be inspired to go organic, to create habitat, conserve water and grow extra food for the Fallbrook Food Pantry. We’ve come a long way, baby!
The following photos are comparisons between the precise location last year at this time, and today.
The property last February. 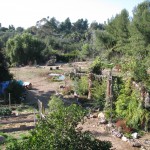
The property today. 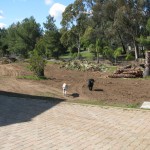
Sophie and General loved all the excitement. 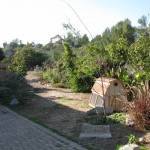
They love the new gardens and pond even more. 
My veggie beds with the old sheds behind. 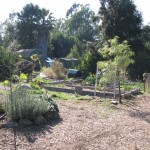
My veggie beds with the new sheds and greenhouse behind. 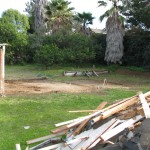
Where the big sheds were: everything usable was reused. 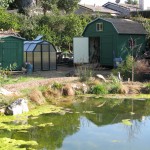
New sheds that aren’t a safety hazard, and the greenhouse. 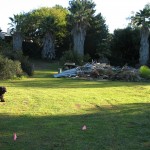
The lower area with shed debris (lots of mowing area!). 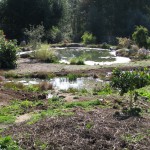
Hey, there are ponds there now! 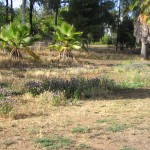
Not much for the neighbors to look at. 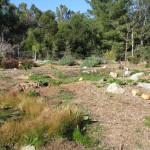
Quite a lot for the neighbors to look at! 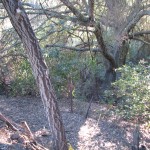
Access to the old oak was hazardous. 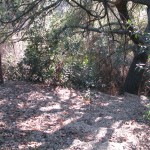
Palm stairs lead past the oak to a birding area. 
Stonefruit were old when I moved in. 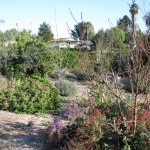
New stonefruit adorn what is now the Bee Garden. 
An erosion area sloping down to the barranca. 
Water won’t flow through here anymore. 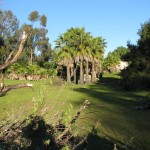
Lots of mowing and palm frond removal. 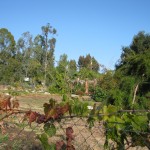
Not so anymore. 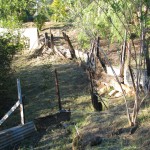
Horrible looking debris failed to hold back the embankment. 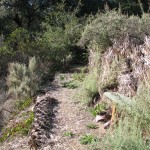
Palms were used to stabilize the new paths and camoflage the supports. 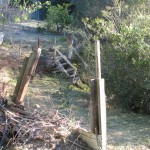
Old unstable stairs led to washout areas. 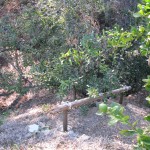
New railings, stairs and urbanite retaining walls lead to another viewing area. 
The view from my balcony. Part of the old shed remains. 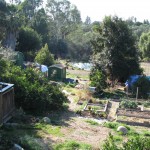
Hey, there’s a pond there! You May Also Like

Native Insects and IPM
-
What I Accomplished Today

It takes a village... to put on a roof! (Thanks, Julie, for the photo.) The roof of the greenhouse was lifted by a whole group of my friends, who all helped to try and fit it onto the base. After a good half an hour of futzing, we gave up and left it. The roof was on but wouldn’t slide into place anywhere. Today I returned to spray it with cooking oil, bathe it in soapy warm water, pour capfuls of boiling water onto it, and remeasure and re-balance the entire thing. Still no luck. I circled around it dozens of times poking and prying at the panels with the included glazing tool. Finally, I put the door on (which wasn’t easy, either), and said, “That’s it for today, folks!” Tomorrow I’ll try their customer service and see if they have any miracle solutions.
 on.")
The roof is (almost) on. Besides that, though, I hooked up my outdoor sink! Something I’ve wanted for at least ten years. I saved the kitchen sink when I had my kitchen remodeled and it has been disappearing under red apple iceplant between times I’ve had to lug it into a new storage place. Now it sits on top of an old fishtank stand, which stands on the top of an old picnic table. I bought an extremely cheap plastic shower sprayer and connected it to a garden hose and… voila! An outdoor sink! Two buckets underneath catch water. Now not only can I wash my hands, but I can rinse my veggies (especially the root veggies) outdoors and throw all that good dirty water right back into the garden. Some women want diamonds… silly them! They don’t know about outdoor sinks!

My outdoor sink! Not beautiful, but 100% recycled! Maybe I should make a little curtain for it. I also was industrious and fixed a leaky water pipe, attached handles to the doors of my two sheds,

Shiny handles. Its the small things in life that can make you happy. and planted many flower bulbs. The bulbs were purchased in a bulb frenzy, as I am wont to experience, before Christmas. They all should have been in the ground already, but I only managed some daffodils which are now coming up. All around the trees I’m planting ranunculus, daffodils, crocus, tulips (with protection!), and my favorite flower scent freesia. A productive day, even if the @#$%* greenhouse roof didn’t fit yet!
-
Building a Rion Eco-Grow Greenhouse

Greenhouse in a box! Yes, I finally decided upon which greenhouse to buy. It took a year and a lot of research and waiting. I did go back and forth about just throwing some plastic over bowed PVC pipes, but I wanted something that lasted and didn’t look like a piece of junk. Most greenhouses that I wanted were over $1,000, and that was just not going to work. Also, I needed diffused light rather than clear glass or plastic because most of the year here the sun really cooks things. Diffused light will help keep the seedlings from scorching. Since I’m absolutely not a carpenter, and would be assembling this myself, I needed something that went together fairly easily. I found the Rion Eco-Grow, a small greenhouse that snaps together and yet can be enlarged later (http://www.riongreenhousekit.com/rion-ecogrow.php). It isn’t made of aluminum, which can bend easily, and the double plastic ‘windows’ diffused light. It is delivered by standard carrier, not flatbed truck, so the packages are manageable and you aren’t expected to help unload them. It came with a seven-year warrenty and had very good customer reviews on other websites. I not only bought it on sale, but it came with a choice of a gift, and I chose the solar light.

I guess they didn’t fit through the little package door! Last Wednesday I came home to find a couple of friends waiting for me. The boxes were about 60 pounds apiece, but I just levered them onto my garden cart (the best thing I ever bought!) and hauled them down to where the greenhouse was going.

Sorting the parts and leveling the ground took a whole afternoon. Well, it wasn’t easy, putting that thing together. After sorting parts, many of which were not labelled, and then leveling the area where the base would be constructed, it was already an afternoon shot. The next day I started fitting pieces together and trying to figure out the miniscule diagrams. It really is ingeniously thought out.

Pushing together the hardware was fun. Only when it came to fitting glazing on over the roof panels did the very, very bad time happen. I worked for a day and a half on just those glazing; they wouldn’t go in! They recommend soapy water. I had so much soapy water that it was dripping in my shoes. Finally I brought down my electric kettle and poured hot water on some of them. It worked for all except one end, which still isn’t going anywhere. It will have to stay like that.

In pergatory they make you try to assemble the roof parts… forever. When I started work, the ground was pretty dry. Then a puddle was forming in the mud at my feet and I realized that there was a leak in the pipe nearby, so I shut off the outside water until I can fix it. Then I was hurrying to be done before the rain last week, and I didn’t make it. Then, since it was very muddy and I was having so much trouble with the roof I thought I’d back out my riding mower out of the shed and haul the roof inside onto level flooring constructed using waterproof materials Miracote to see if that made any difference. I didn’t get far. I started the mower, tried to reverse, couldn’t clear the entrance way with the mower deck, then realized in only about two minutes time that the exhaust had filled the shed and I was getting sick. I shut off the mower and got out of there. That was the end of that work day, as I recovered my breathing and severe headache in the house. I tasted exhaust in my mouth for a long time afterwards.

Sophie checking on my progress. Then it rained again, and I spent a day running errands. Today I constructed the door and then noticed a spot in the middle that wouldn’t brush off.

What is that mark in the middle….? A spider had worked its way down between the lines of the panel and made a little web! He would certainly die in there, and I’d be watching him do it. So of course I took apart the entire top part of the door, wedged out the panel and blew down the lines, and he popped out the other side. Nothing I can do about the web he left, though.

A spider! Had to get that poor guy out of there I managed to complete everything except for placing the roof on the top. Tomorrow I’ll have help and we’ll do a ‘barn raising’, or, at least, raise the roof, after that, I’ll finally be able to start my project on organic greenhouse production.

All ready to raise the roof! Assembly tips: sort out every piece of equipment. Not all of the pieces are labeled, and some of the panels are only a hair’s difference in size, so measure and mark them all… it will save a lot of re-doing and cursing. Wear gloves. Not so much that the panels will cut you, but they really help save your hands when you are pressing and pressing and pressing and sliding your hands up and down plastic pieces to get them to fit together. If you have issues with your hands and wrists (as I especially do now!) this will be tough on you. Use lots of warm soapy water, and for pieces that either absolutely won’t go together, or for those that did and now need to come apart because they popped out of place, pour boiling water slowly down all pieces concerned. It really does help! Be sure to work on a level surface, even for constructing the roof. Give yourself a break and go do something else for awhile, then come back to the problem. Don’t use a rock to force a piece into place because the plastic will chip off. Ahem.
I’ll post a final photo when I set up shop!
-
A New-Fangled Coop

The new coop I’ve been trying to find a warmer coop for my hens. The chicken tractor that they occupy is not only non-mobile, but is open on all sides with only scant shelter in the nesting ledge. This won’t do. I have tarps draped all over it, and raise and lower them with the sun to keep my girls from being in the wind. It isn’t perfect. Not being a carpenter, I have to search for what I want, and I’ve been searching for coops so much on the Internet that for awhile almost every ad that popped up was for coops! Most coops come unassembled, and not only are extremely pricey but look very thin-walled. Last Saturday over breakfast (of eggs, of course) I tried Craigslist. There were several used coops for sale, but not only would I have to disassemble and reassemble them, but the possibility of transferring disease or bugs was high. Then there appeared a new ad for coops in Temecula, just half and hour away from me! The Knotty Bird (https://sites.google.com/site/theknottybirdcompany/contact-us) is a home business of Crystal Braught. She and her husband create the coops in their home, and house their own flock of lovelies in the backyard. The three styles of coops that were offered were very well thought-out, and I loved the strawberry pyramid that was also offered. I had a wonderful talk with Crystal, who grows organic veg and recommended to me a most excellent seed source, Baker Creek Heirloom Seeds (http://rareseeds.com/) which not only offers hundreds of seeds from around the world, but sells only organic seed.

Access to the nestboxes, a small entrance, and the far bottom side lifts up for cleaning or expansion. So I bought the middle-sized coop at a very reasonable price and hauled it home. (This all sounds so easy! But not for me! I wanted to use my son’s truck, but the insurance and registration had been let go. I spent awhile on the phone adding the truck to my insurance, and then trying in vain to register it on the DMV site. Then halfway there on the freeway the brakes began to grind and it sounded as if metal was dragging on the tire. I pulled off and looked, but didn’t discover anything. When I arrived safely (whew) home with the coop, I had to unload it alone so I propped up a planter, some wood, a piece of plywood I had to haul up from the bottom of the property, and then slowly walk the bottomless coop out of the truck and slowly down the plywood without destroying it or me. It weighs over 100 lbs. I haven’t lost my touch; all safe and sound).

I put newspaper-lined nursery flats under the roost, which turned out to be a bad move. I placed a couple of nursery flats lined with paper under their new roost upstairs for easy clean-up, and fluffed straw into the two small nestboxes. The coop I walked until it was over tall grass that I wanted gone. Then I brought the three girls up, one by one. They loved it. They scratched and tore off pieces of grass and had a grand time. At dusk, though, they stood there looking at me. Finally Chickpea went up the ramp into the living quarters. With some encouragement and direction from me, Miss Amelia and Lark finally went up there too. I still partially covered the coop with a blanket because it was going to be a cold and possibly windy night. Emerson, in his lonely cage at the lower end of the property, was quite the sad guy.

The roof on one side can be propped open for cleaning. In the morning I fed the dogs outside and noticed that the girls hadn’t come downstairs. I waited and later went out and they still weren’t! I opened the side to peek, and found that they had moved one of the lined nursery flats over the exit hole! Poor girls! I moved it and they eagerly came down, but weren’ that interested in the grass anymore. I thought maybe they’d eaten too much the day before. They stood and watched me work. Very eerie.

The three girls enjoying the grass I tried to encourage them back up the ramp to the nesting boxes, but they would have none of it. Finally, exasperated, I opened the door and they scuttled down the hill and it was an easy thing to shoo them into their old cold coop. Chickpea went right up the ramp to lay an egg. My poor girls! The coop may not work for these girls, but now I have a seperate place for the Frizzles I want to get come spring! And instead of one large coop with a lot of pecking and competition, I can have several small coops placed around the property, each being a chicken tractor while the girls scratch up the grass and feed the soil.
Apparently,
You May Also Like
Native Insects and IPM
-
Re-Ponding, Part 3

Filling it up (that's a hummingbird decal on the window, not a giant hummer!) Just in case you are breathlessly awaiting the next installment of the re-ponding project, I’ll alleviate the suspense. The pond is now shaped as I would like it, with a nice flat shallow end towards the back and a kidney shape. Later I’ll add more contours around the edge so that the parts aren’t rounded; that will not only give it a pleasant shape, but give it more edge, which is much safer for the survival of tadpoles.
By cutting into the irrigation, the pond can be fed with well water instead of domestic water which is not only less expensive, but much healthier. Allowing the water to run down the sides and kneading the clay by hand washes the fine clay particles into the pond. There they can settle and seal the sides.

There is lots of clay in this soil! Every few hours I stirred the pond so as to stir up more clay and have it resettle on the sides.
Now I’m allowing the water level to go down to see if any part of the pond has sealed yet. When the water stops disappearing, I’ll know the bottom and some of the sides are already sealed. This cold weather has made me a little hesitant to be working in the water… brrr! Because of that the pond will probably not be done this week, but I’m working on it.

Stirring up the reddish clay. If sealing the sides with clay in this manner doesn’t work, then I’ll need to separate clay out by hand and mash it onto the sides, kind of like making pottery. That will definitely have to wait until later this week when the daytime temperature rises! Meanwhile as the water sinks, I’m weeding, transplanting, weeding, composting, hauling, and did I mention weeding?
-
Re-ponding, part two

About another foot and a half down for the shallow end. After much hauling of slime water, I finished emptying the pond. Amazingly there were thin red worms living in the gravel and muck in the water! Significant parts of the decomposition process, I’m sure.
Then the pond liner was pulled up (Jacob doing most of the pulling), and below it was carpeting that I’d forgotten I’d put down to cushion the pond liner. The brown carpet was remnants of what had been in the house… memories! Roots from the pine and the palm trees were grown through the carpet, holding it down.

Carpet and sand under the liner. After removing the carpet, we chopped roots and started digging the shallow end. It has to be much lower than the lowest part of the pond, and since that is the high end, there is a ways to go. No guessing what my weekend will be like! There are pockets of hardpacked decomposed granite and masses of roots to be chopped through. We capped old PVC pipe that I found so that it wouldn’t conduct the water out of the pond.

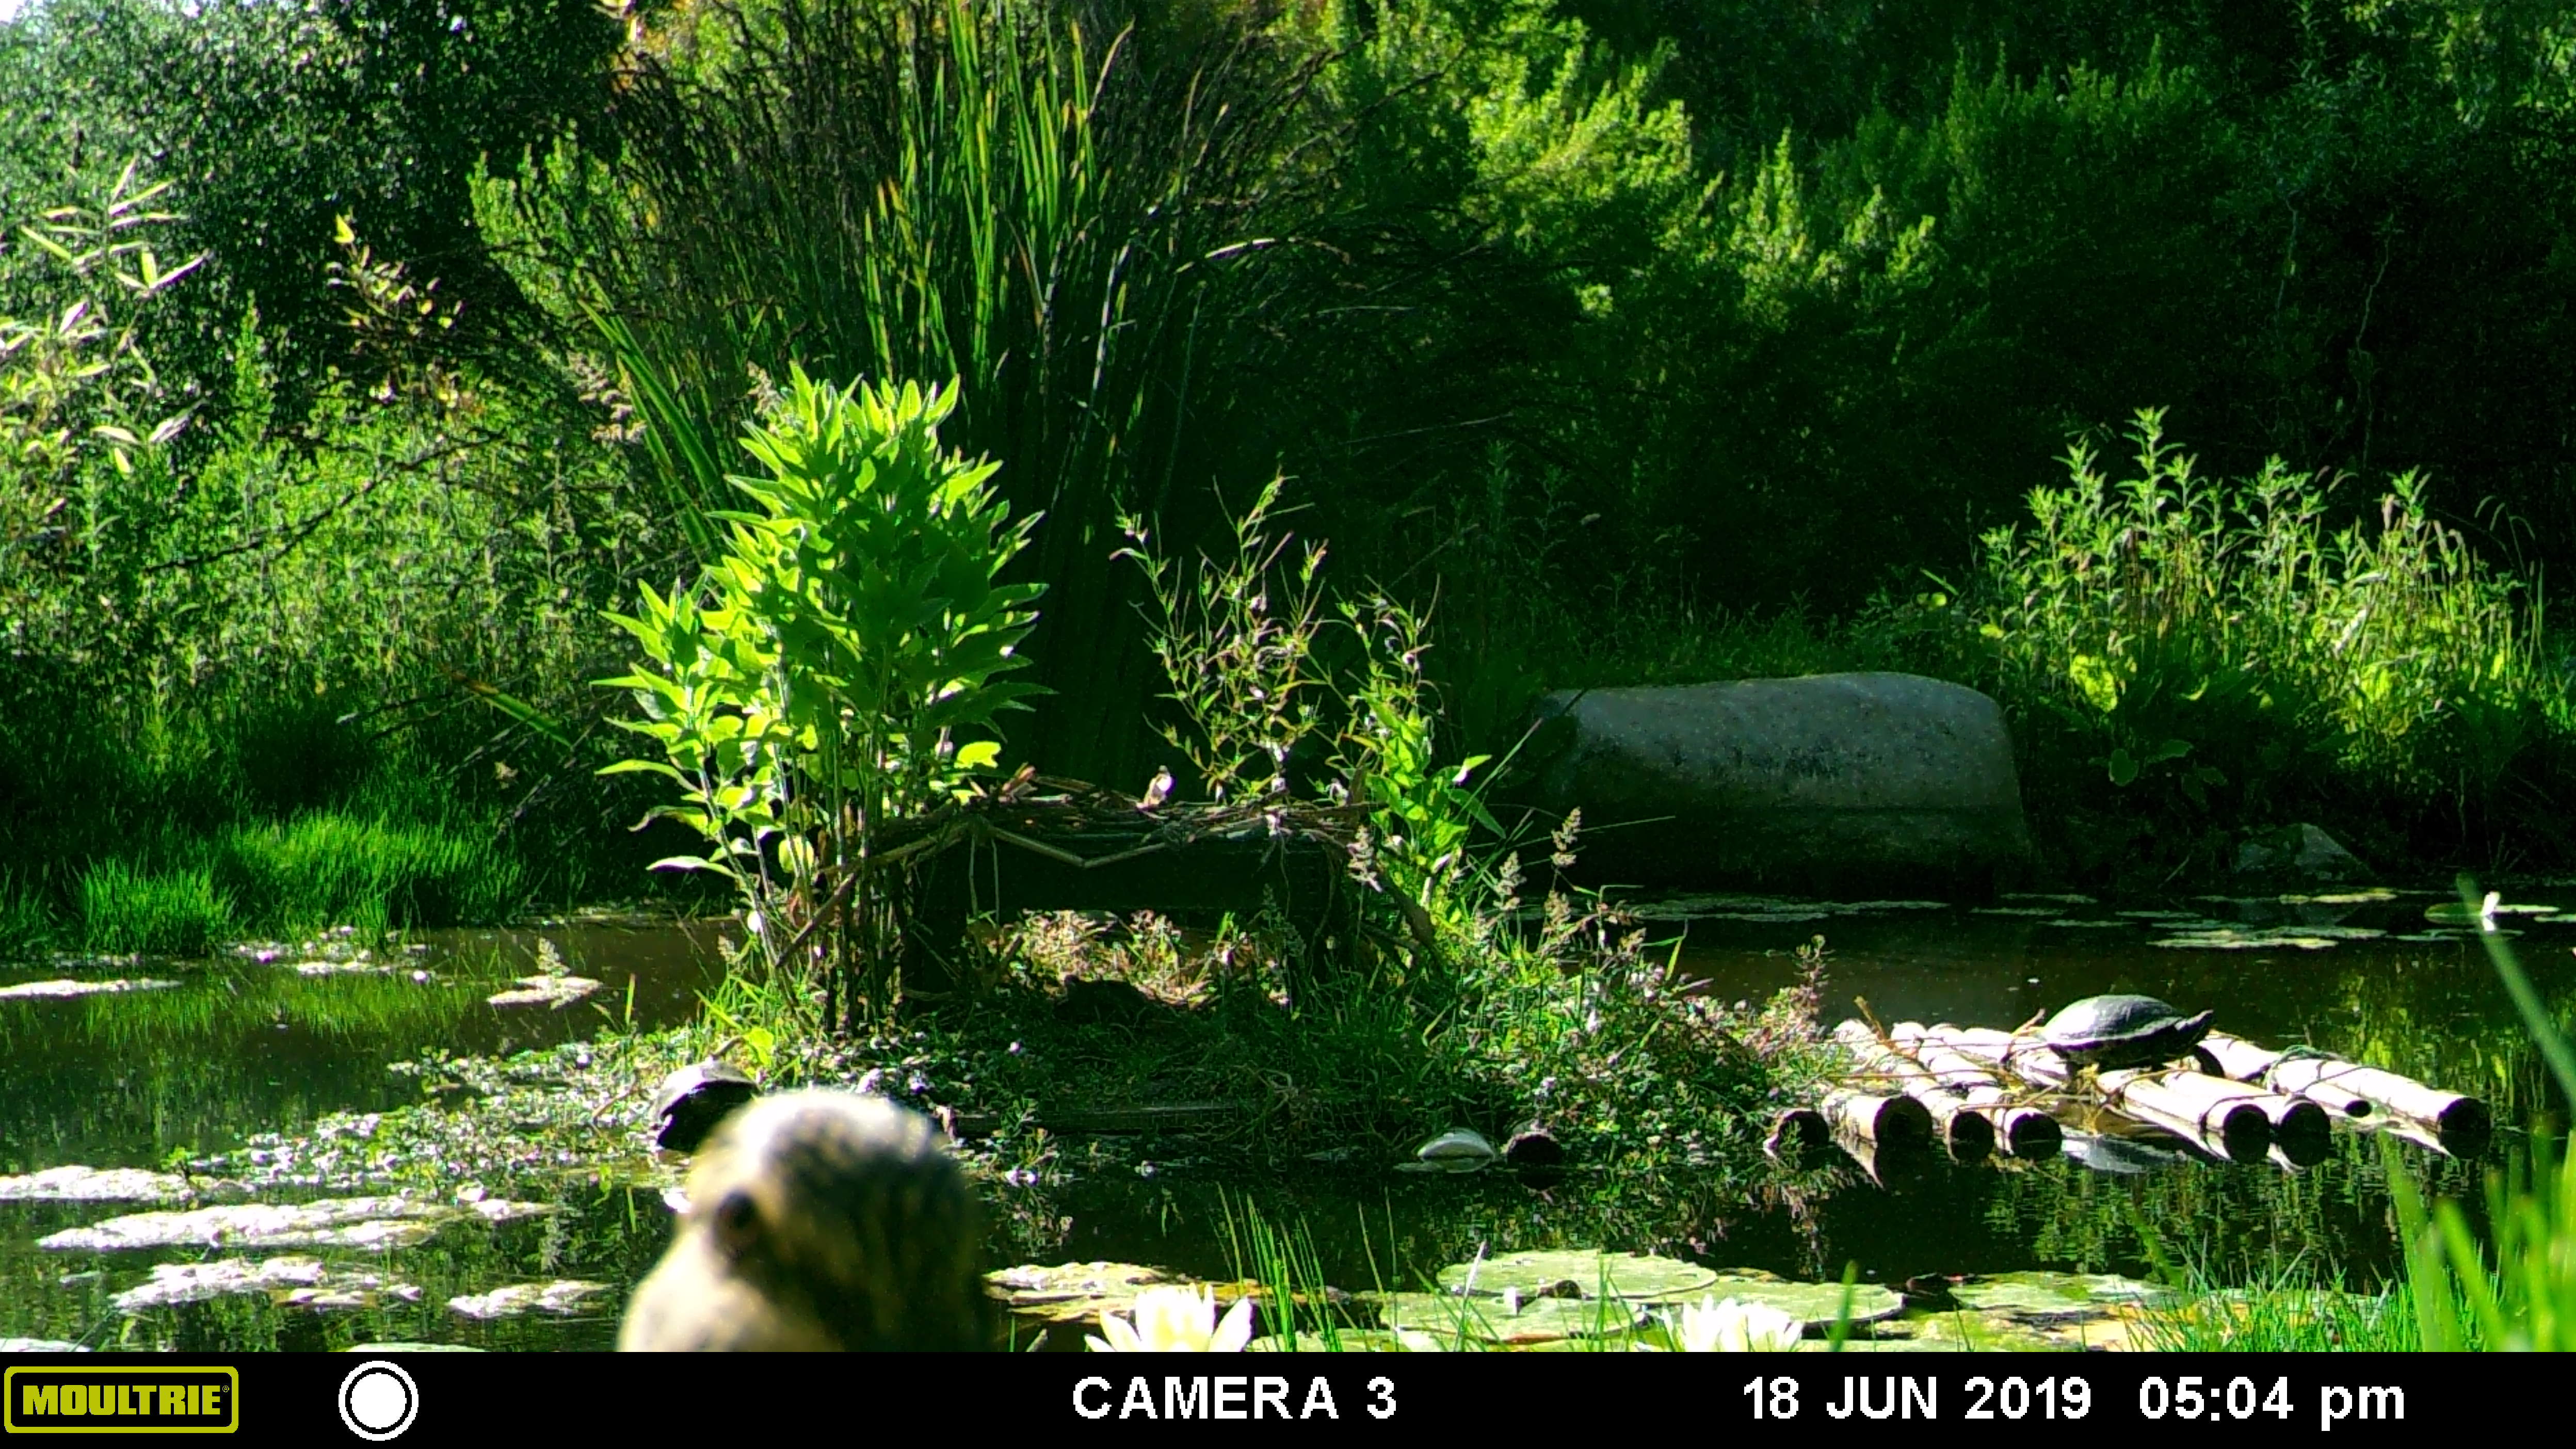
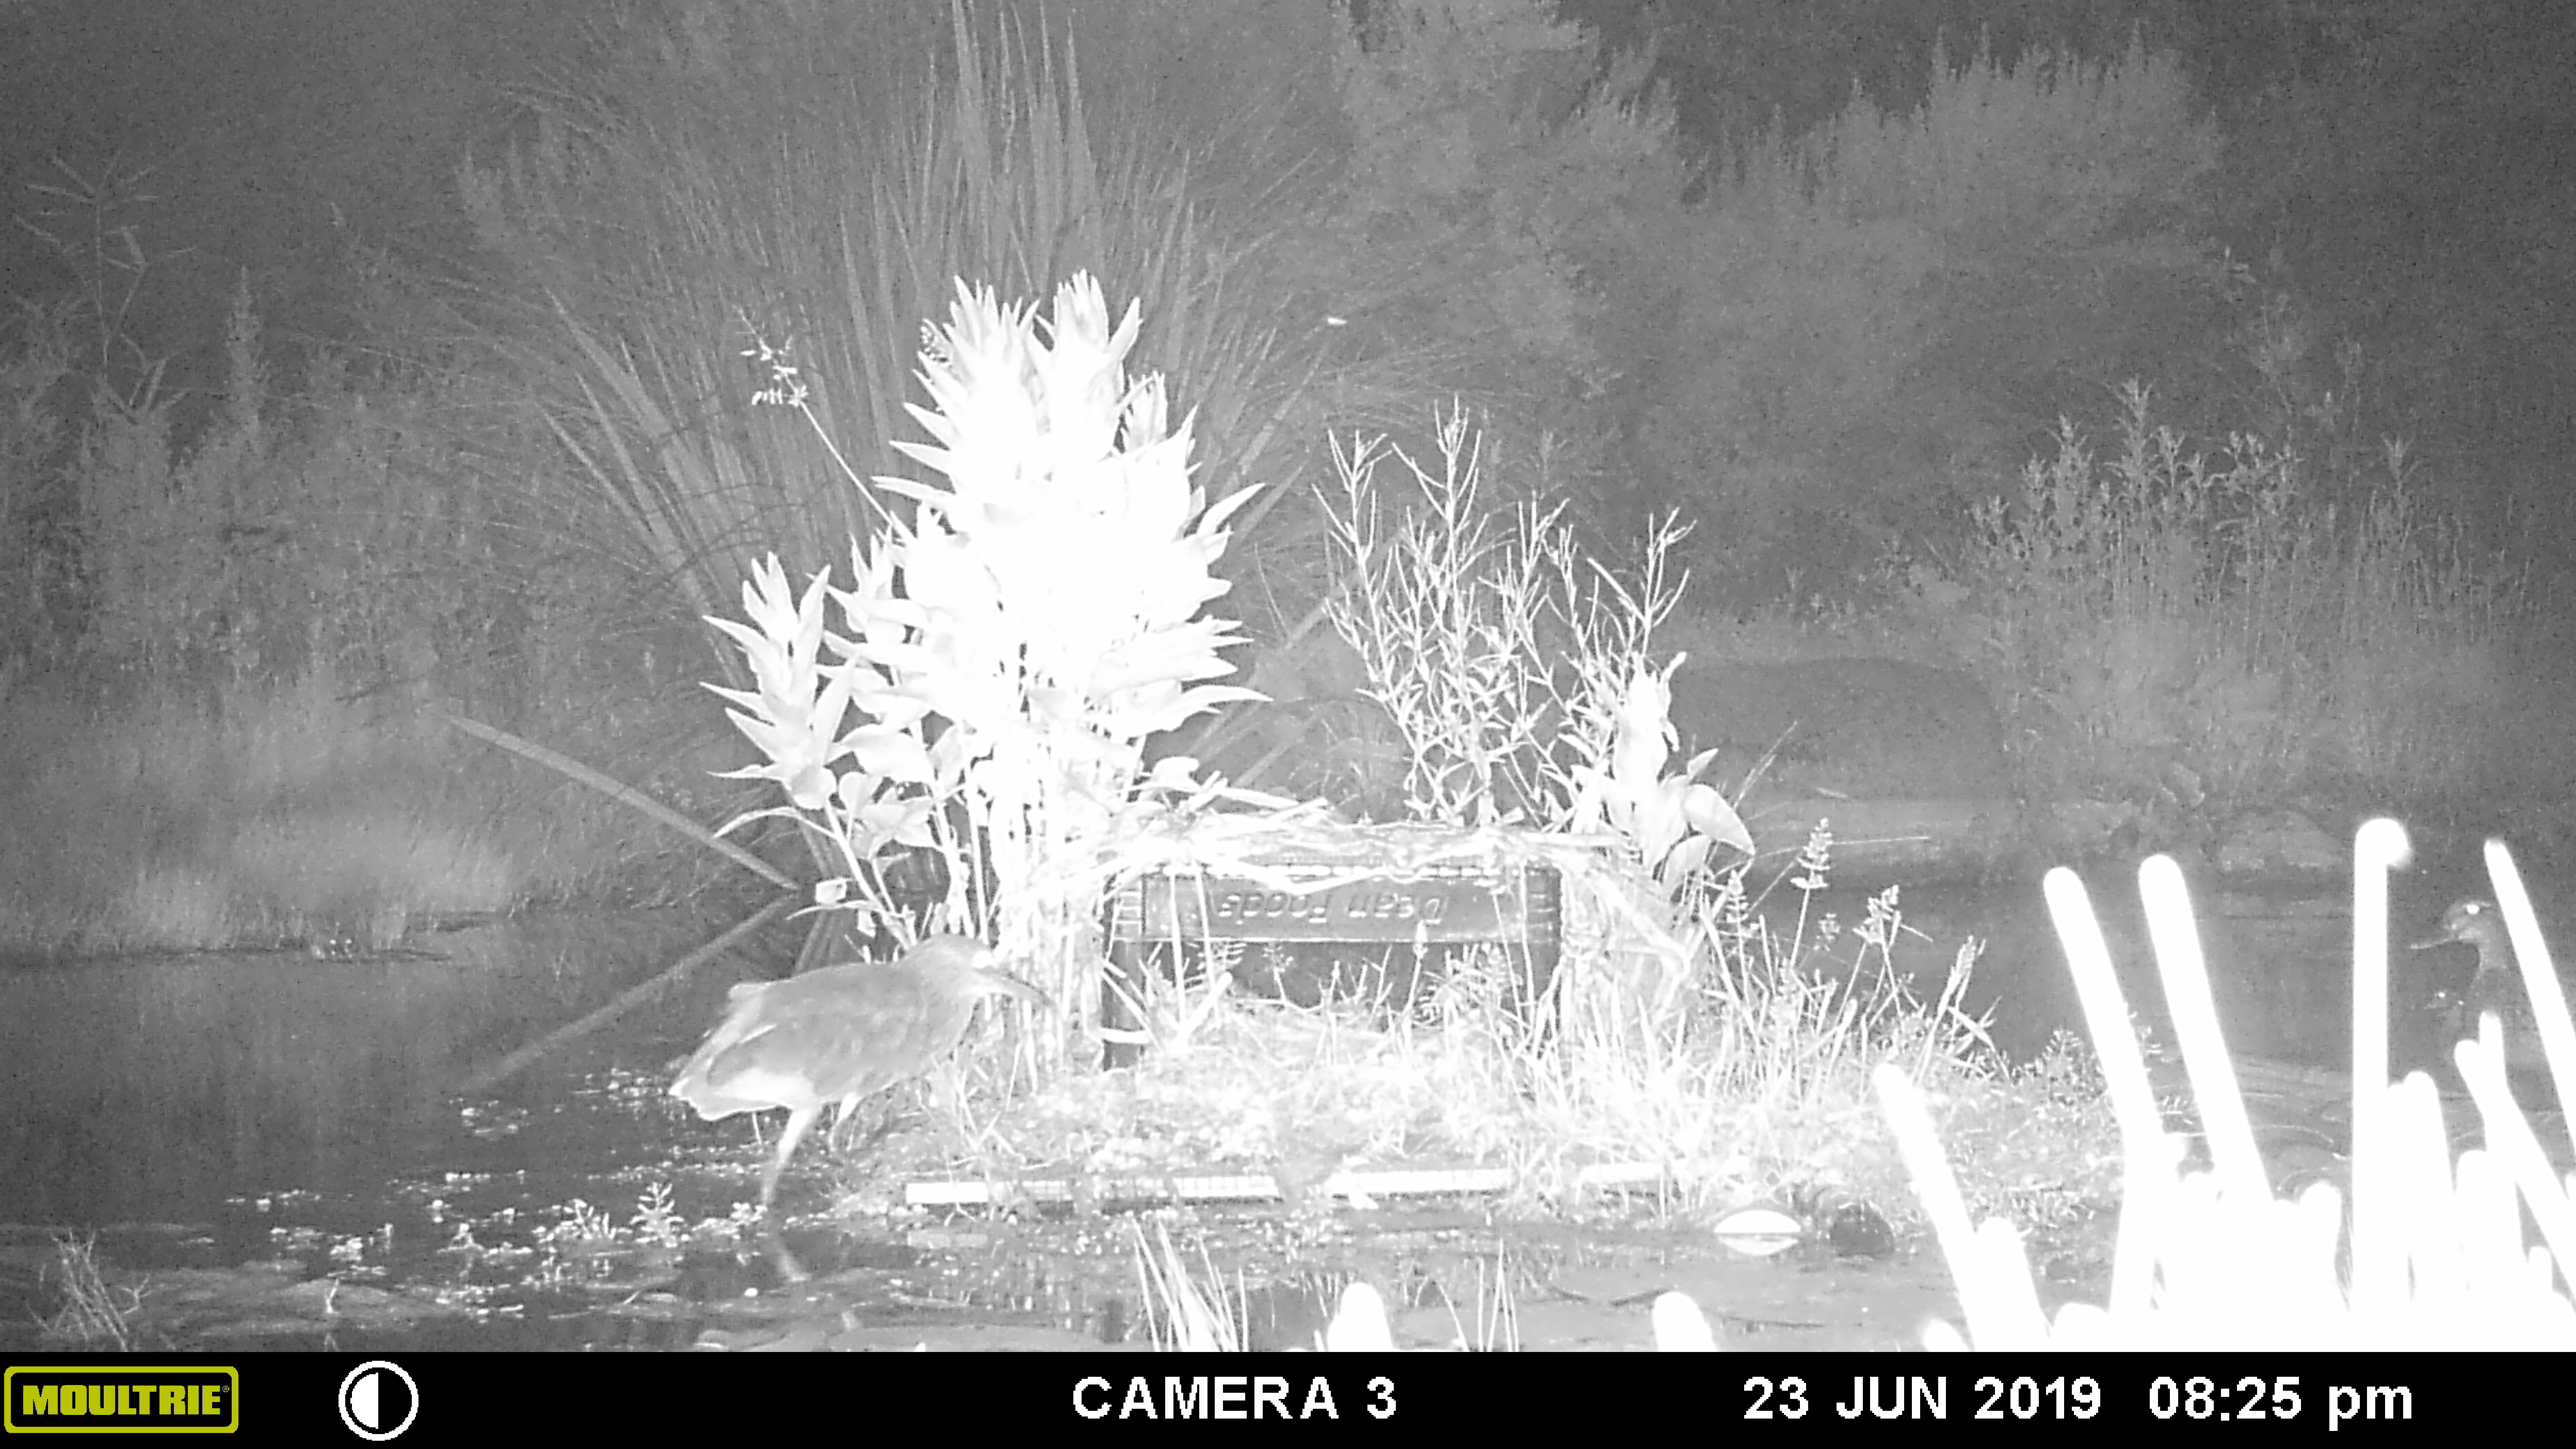
Masses of roots held the carpet together Today the birds were looking for the bird bath and dripper, and yet enjoying searching through the disturbed earth for edible treasures. The egret flew in and stood in the shallow bird bath, dismally looking at the place where the pond had been.
After digging to the right depth, and creating a shape which allows more edge for habitat, the pond will be tested for clay content and then we’ll know how much clay needs to be hauled up from the deposits down below to seal the pond. From what my shovel and my back tell me, it shouldn’t be much!
-
Re-Ponding: Changing a lined pond into a natural pond

Draining the pond with a hose syphon. The little upper pond which my daughter and I laboriously created about seven years ago has finally come to the end of its life. Home to dragonflies, mosquito fish, snails, and some interesting black flatworms, and having provided habitat for snakes, birds, mice and frogs, this lined pond has been beautiful and most satisfactory. Having been given the black flexible pond liner sheet, a lot of very heavy flagstone and some stones, we had cut down a juniper, dug out the roots in heavy clay and rocks, shaped the earth into ledges for nursery pots of waterlilies, and leveled the edges. Everything I read about ponds said to put gravel into it, so against my better judgement I did, and immediately regretted it. The gravel prevented me from walking barefoot in the pond, was a danger to the liner, made walking on the ledges in boots very slippery, and has trapped sediment and roots (end of anti-gravel rant). The pond was aerated by a series of very expensive pond pumps, which trickled water down a little waterfall and impacted my electric bill. This pond was a maintenance problem; I would pull out the algae (carefully picking through it to save trapped fish, snails and dragonfly larvae), but the waterlilies got the better of me. I had no idea that they would grow so huge and disgusting underwater. (See my post The Monster in the Pond, March 2, 2010.) Anyway, after the last pump died this summer, and after the enormous success of the two natural, unlined ponds Aquascape created for my permaculture gardens, I decided that I would change this pond into a natural one.

Digging a shallow end for the pond. This area is also the one in which we do our Project FeederWatch bird count for Cornell (http://www.birds.cornell.edu/pfw/), and was our original National Wildlife Foundation Wildlife Habitat (http://www.nwf.org/At-Home.aspx ), which now has extended to our entire property. I wanted a shallow end to the pond with planted waterplants that would clean the water and provide shallow habitat for all the Pacific chorus frogs that come up in late January to breed in the pond. In fact, they’ve been croaking their way up the property already, so now I’m in a rush to get the pond finished for them.

The liner was covered with a mat of plant roots and gravel. Once again I found myself moving large pieces of flagstone and rocks, although I’m seven years older than I was last time, and my back let me know it. Then began the draining of the pond. I tried to start a syphon the way I do to clean my fishtank, by sucking air through a hose and very, very quickly dropping it before I sample the water. I couldn’t get it started. I did get an interesting circular red mark on my lips, which I had to explain that afternoon at my dentist appointment. The difference in elevation between the top and bottom of the hose was not great enough, even though we put together all our hoses and strung them out down the property. I tried to fill the hose with water, but it didn’t work. A phone call to the pond expert, Jacob from Aquascape, made me slap my head with an exclaimed, “Duh!” He recommended attaching the hose to a spigot, sending water through to the pond to fill the hose, then removing the end from the spigot. The water would flow back and the vacuum would start the syphon. Probably everyone in the world knows this, and I knew there was something about attaching a hose that I should do, but couldn’t figure out. Anyway, it worked, but the syphon was a trickle. After many starts and stops, and running back and forth up and down the property, my daughter and I discovered in the morning that the syphon had worked, and almost a quarter of the water had drained. I kept restarting the syphon, until only about a quarter of the water was left. The aroma of the sludgy water infiltrated the house and the yard. I made a fire in the fireplace figuring that for once the smoke was a good thing!

The monster in the pond, revisited. My dear daughter, before returning to college, tackled that monster in the pond. The waterlily was so huge and slippery that she managed to break pieces off but not pull the whole thing out; in fact, she was in danger of being pulled in by it!

Saving water lily chunks to make new plants. Today, with Jacob’s help (actually, he did most of it!), we pulled all the lilies out of the pond. The root systems of the three, which had outgrown their meager nursery containers years ago, just about filled the bottom of the pond. I scraped gravel up with my rubber-gloved hands and then began scooping the remaining water and sludge out with a bucket.

An egret looks hopefully into the sludge. I threw the water onto the plants, and then when the sludge of decayed algae, plant material and soil became thick, I poured it over my bulb beds as a fertilizer. There may be a high concentration of salts in the muck, but the nutrition value should be wonderful. And it makes the ground around my bulbs a lovely black color!

Sludge makes good fertilizer! I almost finished, half-bucketful at a time, hauling water up and out of the pond and onto various areas of the garden, and indeed I meant to finish.

Scooping sludge into a bucket. But with about an inch or more of sludge to go, with yet more gravel to scoop, my body said, “Nope! You’re done!” I also had missed breakfast and had only snacked today, and had been exercising, hiking, planting and weeding for the last few days so I told my self that I had a decent excuse to stop. I took a long hot bath to soak the splashes of yuck off of me, and will continue into the muck and mire tomorrow. Stay tuned!

Our fat cat Pippin, who has nothing to do with this story!