Gardening adventures
Wrestling with the great outdoors.
- Compost, Gardening adventures, Permaculture and Edible Forest Gardening Adventures, Seeds, Soil, Vegetables
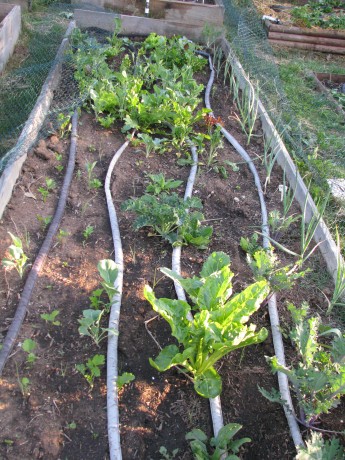
Crate Potatoes
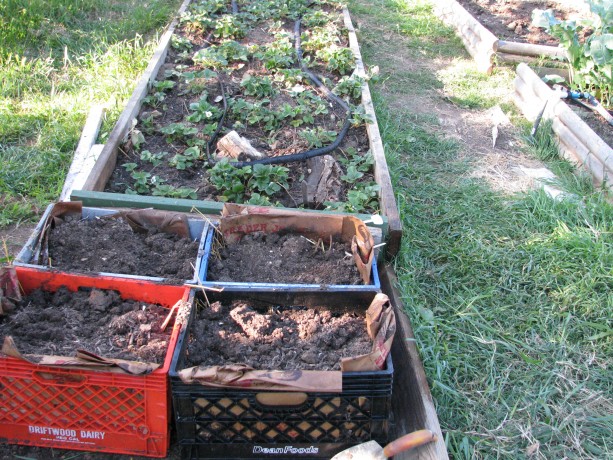
Milkcrate potatoes! This area receives sun for half a day and is shaded on the West side; perfect for keeping them cool. I’ve been frequently asked to write about trashcan potatoes. I haven’t yet, simply because I don’t have a trashcan to use for that purpose. Instead I used what I had and am experimenting with milkcrate potatoes. I’ll let you know how it works.
The potatoes that work in trashcans are any of the standard potatoes in the Solanaceae family, related to tomatoes and eggplants; sweet potatoes and yams are in the morning glory family and grow very differently. A good article with photos that shows growing potatoes in a barrel is at greenupgrader.com. There are many videos on the web about growing trashcan potatoes; a good one is at Farmers Almanac . Two things that she does in this video that I do differently is that after cutting the ‘eyes’ of the seed potatoes, I allow them to harden off for a day or so before planting, and also potatoes can grow with less than 8 hours of light a day which makes it a good over-wintering crop, especially here in Southern California. Potatoes like shorter daylight and cool night temperatures, so plant now! If you plant later, protect the trashcan from the afternoon sun. Hardening off means to allow the cut potato to sit in the shade for a day or so to allow the cut end to form a ‘scab’, or harden up before planting. It helps keep the potato eye from molding and provides protection from insect or bacterial attacks, and keeps drier soil from leaching water out of the potato. This is the same process you’d do when taking cuttings from cactus, geraniums and other easily-rooted, sappy plants. When watering trashcan potatoes, don’t overwater because you’ll rot them. Like their cousin the tomato they’ll do better slightly drier than wetter.
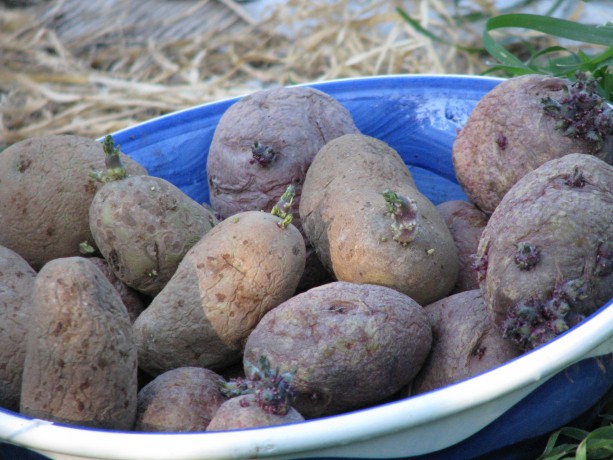
Organic chitted potatoes. ‘Seed’ potatoes aren’t potato seeds. They are small tubers that are ready to plant. Always buy organic seeds. Period. You can buy seed potatoes online or in nurserys available in Southern California just after Christmas, and sometimes in the late Fall. They usually purchase the seed from other states which have snow and don’t ship during the winter. Buying online or from organic catalogs allows you to shop among a wide variety of potatoes differing in size, color and purpose. However since we can plant potatoes in the Fall and don’t want to wait for shipping times, we can buy a bag of organic potatoes locally and sprout them ourselves. Non-organic potatoes have been treated so that they don’t sprout in the store, and are genetically modified (GMO) to last on the shelf. Sprouting potatoes is called ‘chitting’ and is very easy. Mine usually sprout in a bowl on my kitchen counter. Keep them in a light, cool area out of direct sunlight and they’ll grow. When the potatoes have chitted and ‘greened’ (have sprouts), you can either plant them whole or slice them so that each piece has at least one eye. Allow them to harden off and plant them. Give the extras to your neighbor!
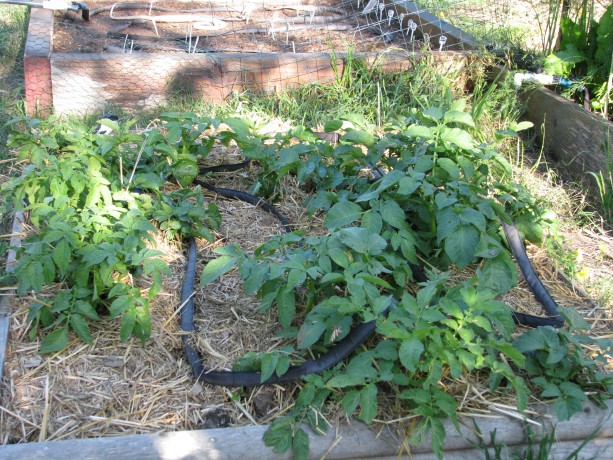
Potatoes can be grown in the ground, or in a raised bed, and then you hill up around the plant to produce more tubers. The reason for growing trashcan potatoes is that you can grow vertically, save garden space, and in particular save your back from trenching, hilling and then digging. The harvest is more productive, too, because you won’t be accidentally cutting through or spearing potatoes in the ground. Potatoes can grow this way because the tubers are actually specialized underground stems called stolons. Potatoes will produce tubers underground, but anywhere along their stems they also can grow a potato under the right conditions. Once you plant a potato ‘eye’, the eyes being the growth buds, it will send out stolons. The plant will produce potatoes below ground, and if you hill up around the stems they will also begin to swell and produce tubers.
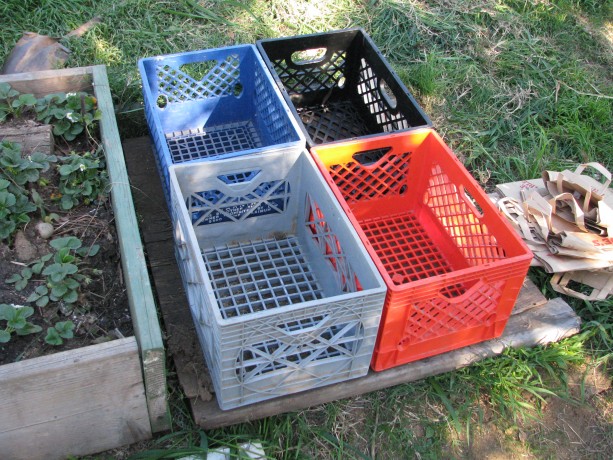
I have extra milk crates, and a source for more, so why not use them? When you plant in a trash can (with drainage holes!), as the greens shoot up you keep layering compost or straw or woodshavings or potting soil or whatever around the stems keeping a little green showing until you can’t fill the trashcan anymore.

I lined the bottoms and the outside edges with extra paper bags and watered them. When the plant is done growing the plant will bloom and sometimes even produce seeds. When the stems die back, you knock over your trashcan and harvest. Save some of the smaller ‘taters for seed for planting in the Fall.
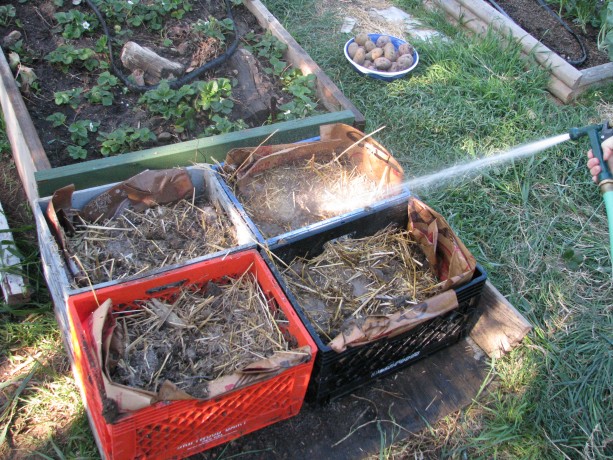
I filled the crates 2/3s full with compost mixed with chicken straw and watered well. You don’t want heavy soil or the potatoes will rot. You also want to insulate the potatoes from outside warmth. You can also root around in there earlier and pick new potatoes, or you can delay your harvest, keep water out of the trashcan and keep it in a cool spot, and harvest when you want them. The beauty of trashcan gardening is that you don’t need a trashcan. Very zen! You can drill holes in a plastic carrier, use burlap sacks, stack old tires, nursery containers, large plant pots or whatever you have. If you have a bottomless or rusted out trashcan, use it! Place it over good garden soil and allow the potatoes to grow down, too. You’ll have a little digging to harvest after you knock over your trashcan full of potatoes, but not much. To make holes in a plastic or aluminum trash can, borrow a digging bar (a long metal pry bar), place your trashcan right-side up on a dirt area, hold the bar high vertically over your trash can pointy side down and let it go. It should make a hole. Or turn the can over and use a hammer and something sharp like an awl or screwdriver (be careful you don’t shatter the top of the screwdriver! You don’t have to pound too hard. Be wise and wear safety glasses just in case). Do this multiple times to make as many holes as you can without making the bottom unstable.
Also be sure to keep the trashcan or crate potatoes in a cool place, especially if you are planting in the early spring here in Southern California. Warmth will keep the potato stems from swelling into tubers. Insulate the potatoes well and keep them cool while still allowing them enough sunlight. Fall and winter are the best times for planting potatoes here, as long as they have adequate drainage.
There is concern about leaching chemicals from plastic, or tires, or aluminum. Do the research and make yourself happy. I don’t think there is that much leaching to be worried about because the plants aren’t in there for a long time. You can always make a barrier between the soil and the sides of the containers with undyed paper or newspapers using soy ink. So save your garden space for other crops, and pop your ‘tatties in a can. Or crate. Or whatever.
Update: here is a very comprehensive article about planting potatoes. Rather than use commercial fertilizer, of course, we recommend rich compost, which will provide what your potatoes need. Also use dead garden debris such as old pea stalks (cut rather than pull them up to allow the nitrogen nodules on the roots to remain in the soil) in your planting bed or container.
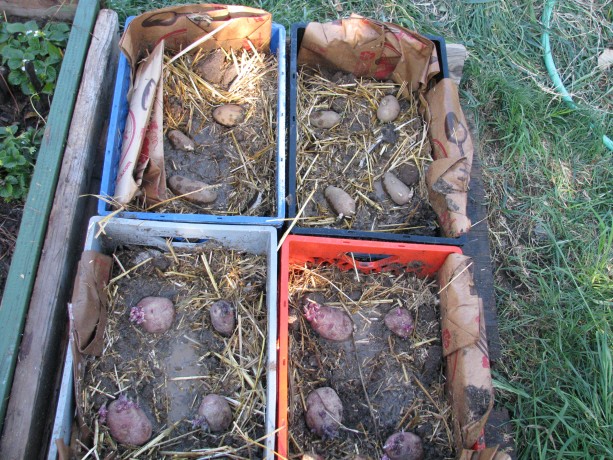
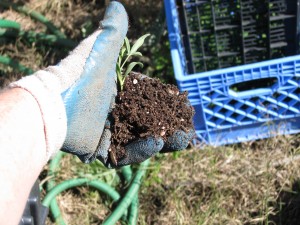
I planted whole potatoes just because I didn’t have room for lots of cut ones and these needed planting or tossing. I then covered them with about an inch of light compost and now I’m waiting! -
A Nursery Bed
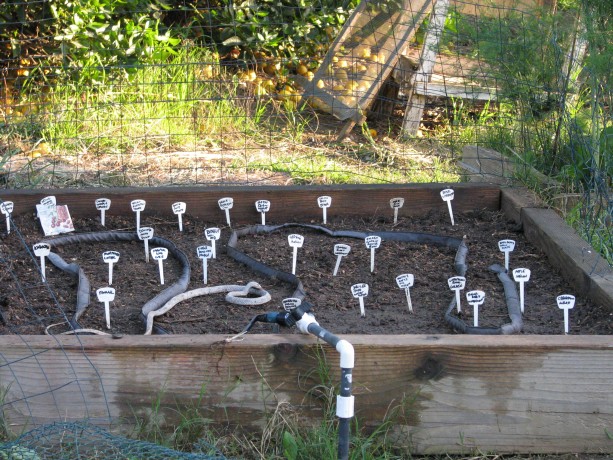
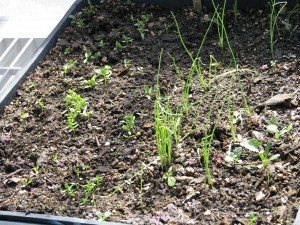
Twenty six varieties in one bed. I had a frustrating time with seeds already this season. There is a limited time when I can use my greenhouse (which doesn’t have all the frills such as fans, automated watering and window-opening) because the weather here becomes warm very quickly. I planted six flats of six six-packs each of various seeds. Many were coming up when a mouse tunneled underneath and not only ate all the larger seeds but dug into most of the rest of the cups, tossing or burying the small seed. I tried again, but the little guy found another way in. It is difficult to plant seeds around the property due to not having overhead watering, and having such a healthy insect habitat. So instead I’ve turned one of my raised beds into a nursery bed. I planted 26 types of veggies in good garden soil. They’ll come up and grow good tap roots, then be ready to transplant out to wherever I want them. Some will stay in this bed, and some will be given to friends because, after all, there are only so many tomato plants I can have.
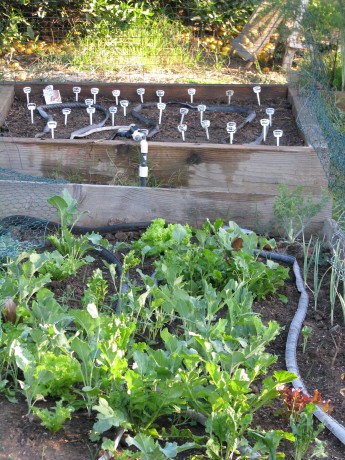
Nursery bed behind mixed greens. The bed in front of the nursery bed is the one where I scattered mixed seeds a while back, and now have a healthy crop of collards, broccoli rabe, celery, parsnips, carrots, kale, garlic, leeks, lettuce, arugula, peas and others. Mixing seeds helps confuse predators and keeps the plants healthier.
So many veg in one bed! - Animals, Chickens, Compost, Gardening adventures, Hugelkultur, Permaculture and Edible Forest Gardening Adventures, Soil, Worms
Strawberry-flavored Hugelkultur, Please
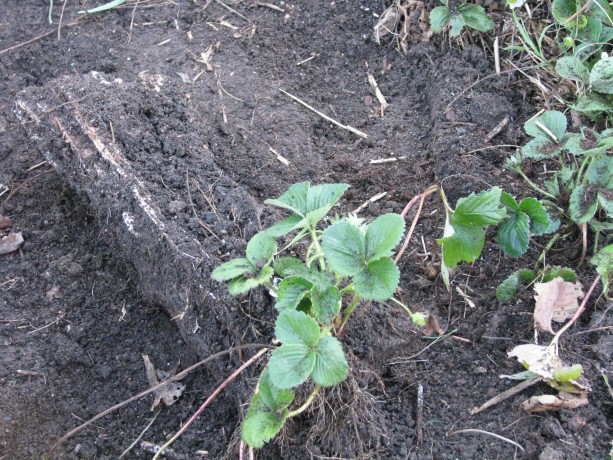
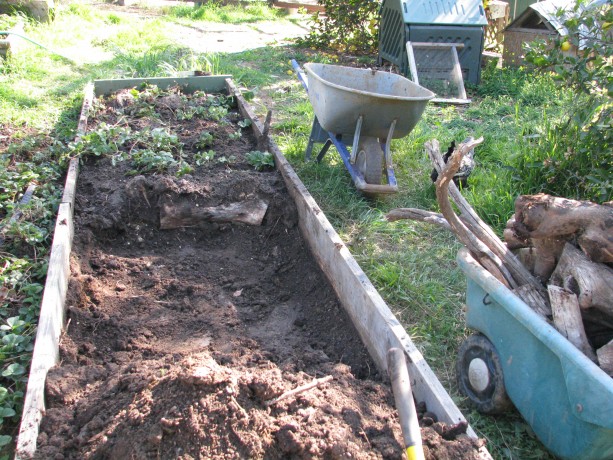
A few months ago my daughter and I thinned out the raised strawberry bed.

Way too many plants. I planted the extra strawberries under the passionvine arch,
Under the passionvine trellis. using well pooed and pecked and rained-upon straw from the Fowl Fortress as mulch.
Good yucky straw. However the soil level in the raised bed has become lower, and the Bermuda grass has grown higher. Time for a re-do.
When I’d originally planted the bed a few years ago, I’d heard about burying wood to hold moisture and improve the soil. Some little thing we call… hugelkultur. I laid old lime tree logs along one side. They began to break down and some really cool mushrooms came up.
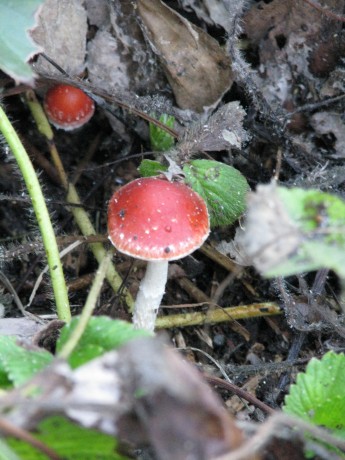
Cool mushrooms. Strawberries sent runners out and they rooted right in the wood. A great success.
Strawberries rooted right in the wood! Since I don’t have ready compost to fill such a large bed right now, I decided to do the hugel-thing in the entire bed. I spent several hours digging out the strawberries and the Bermuda grass.

Making the bed: everyone out! Then I pulled the soil back and was simply amazed.
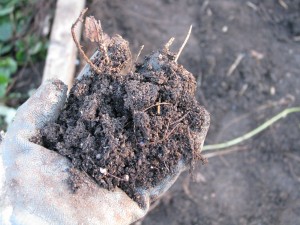
Beautiful soil It was crumbly like prime worm castings. I lined the bottom of the raised bed with the logs on top of the wire I’d laid across the bottom to deter gophers and mice.
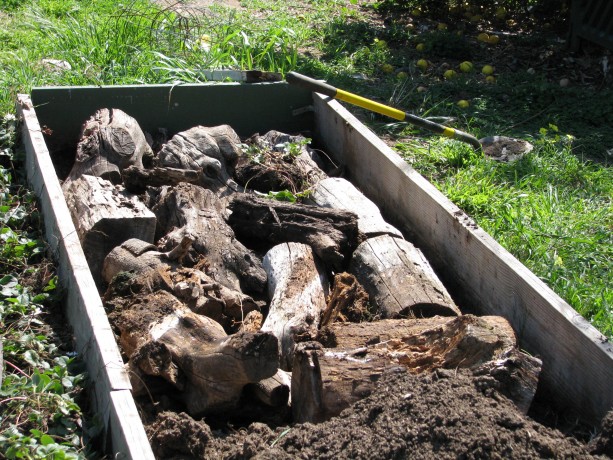
Old lime logs. Then I shoveled heavy clay out of the new bog area and threw that in and around the logs; the wood would decompose and turn the clay to great soil, and the clay already had a lot of interesting microscopic creatures in it from being at the edge of the pond.

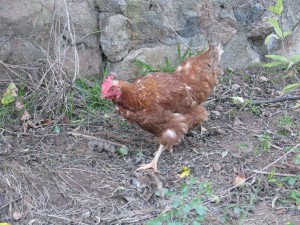
Heavy clay. And I do mean heavy. On top of that I sprinkled some pigeon guano I recently received from some wonderful new friends who rescue pigeons. (They are wonderful even if they hadn’t given me the guano. I have many friends who, in fact, are guano-less. Just to clarify.) There were a lot of pigeon peas in the guano, but if they sprout its all good because they are nitrogen fixers and will only help things along. Some sugar was added to help stir up the bacteria in the clay.All along I watered everything in, including hosing down Lark the fat, barren Barred Rock hen who just wouldn’t take no for an answer and kept jumping into the bed to steal the worms!
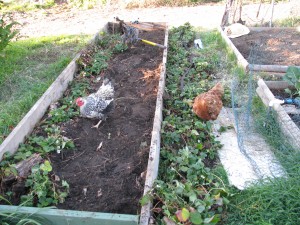
Get away from my worms, hens! My hens are such prima-donnas that they refuse to eat sowbugs and just go for worms. Geez! Lark got back at me later by making me come after her when it was time to shut them in for the night.
The last layer on the bed (and I don’t mean a chicken) was the good soil into which I replanted the strawberries. I did this process in thirds and ended up with a lot of extra strawberries.
A third section done. As it was nearing sunset and I was becoming chilly in my shorts and sleeveless shirt, I hurriedly planted the extras up under the passionfruit trellis, in with the others from the previous planting. Most of them had happily survived.
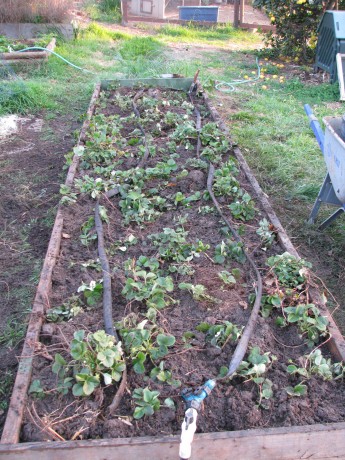
Finished! The leftover soil I sprinkled on top, laid the soaker hose back on top, and voila! A somewhat shocked but hopefully soon-to-be-happier strawberry bed.
There are a couple of wild mallards that come to the pond and have grown trusting of me up to a point. I throw game bird food by the pond for them. I don’t want to tame them, but I like it that they don’t fly off in a fright every time I come near. Its better for their health not to be so stressed. Makes me feel good, too.
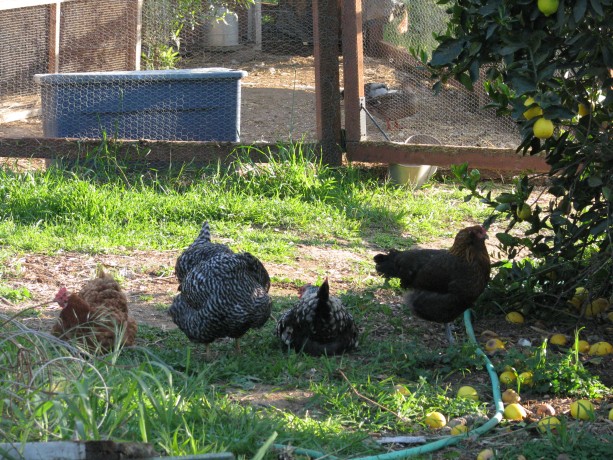
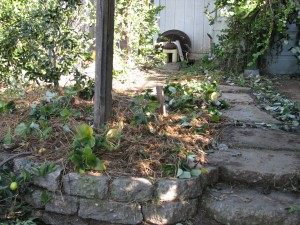
Hen line-up. But what is in the coop behind them? While I was digging I looked up to find my hens all in a row watching me, and beyond them inside the Fowl Fortress (the door of which I’d propped open) were the two mallards! They were perfectly content to be eating what the hens hadn’t eaten, and were even sitting in there enjoying… I don’t know… forbidden territory?
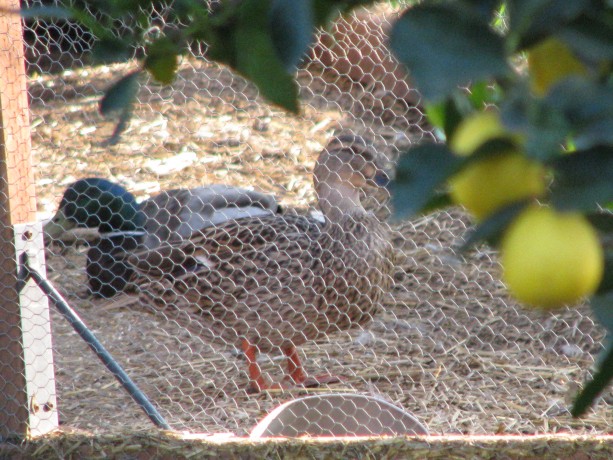
Just make yourself at home! The alluring and romantic smell of chicken poop? After awhile Miss Amelia wandered in there and the mallards wandered out. They’re welcome in there, but if they want me to build them a castle of their own, forget it. They already have the floating duck house, after all!
You May Also Like

Native Insects and IPM
- Compost, Composting toilet, Gardening adventures, Hugelkultur, Permaculture and Edible Forest Gardening Adventures, Ponds, Rain Catching, Soil
Rain Catchment Awesomeness (and some BSP)

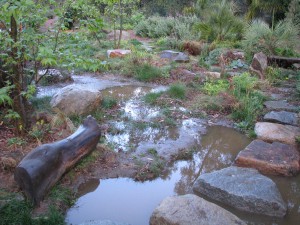
Water flowed over the stone steps First, a little BSP (blatant self-promotion). There is a wonderful ezine called San Diego Loves Green featuring topical local articles and snippets that reflect on the growing green community here in, you guessed it, San Diego. The San Diego Permaculture Group has an ongoing column, and yesterday I was the guest writer. My article is on the importance of planting natives , with some information that you might find surprising, or that you may have already read in my blog about the same subject. Also (more BSP) if any of you attended the Southern California Permaculture Convergence this weekend, and still yet, if any of you listened to my talk on soil, first of all I’d like to thank you for your attention and attendance, and I hope I answered your questions and solved some problems for you. You can search on my blog for many posts concerning nitrogen -fixing, or 50 Ways to Leave Your Compost , and see my composting toilet (I went to a Garden Potty).
We had almost two inches of rain on Thursday night. In San Diego we rarely receive the long soaking rains that we really need. Instead we must be ready for flash floods. If you are familiar with Finch Frolic and the labors we’ve been undertaking in the last two years to hold the rainwater, then you may be curious to find out how the property survived this last middle-of-the-night flooding and hailstorms. If you remember, not only is there the water flowing off the roof and falling onto the watershed property, but also an unmeasurable amount that is purposely channelled runoff from all the neighbor’s properties that runs through mine.
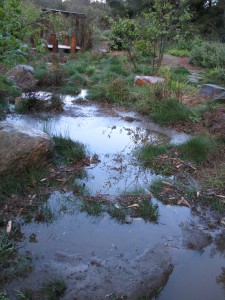
All basins full! Since the permaculture project was installed I haven’t had any of the erosion that plagued the site. As of last year I’m pretty sure that every drop that falls on my property is caught, in rain catchment basins, the ponds, and in the loam and compost in the guilds. The challenge was to also keep all the neighbor’s water on my property as well! I’m thrilled to say that we almost did it!
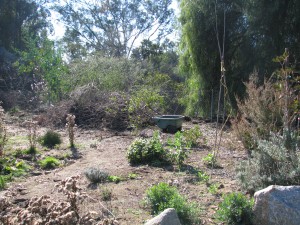
There is a new bog area being designed by Jacob Hatch just above the big pond.
The new bog area This area had been designed to channel overflow water from the rain catchment streams around the pond and down a black tube to the stream bed below. Greedy me wants all that water! With the creation of another silt basin, and now that there is vegetation in the stream to hold onto the silt, I’ve made the water now flow directly into the big pond. There are planned overflows from the big pond, and water did overflow where it was supposed to.
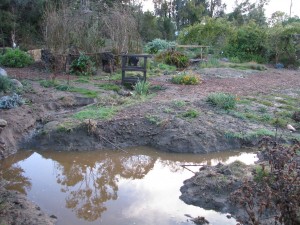
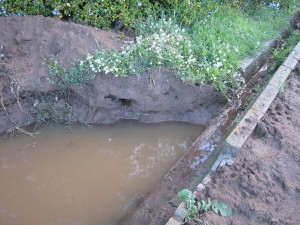
The big pond was filled to capacity, making the duck house do a sinking ship impression because of the length of the rope attached to the anchor wasn’t long enough. The first rain catchement basin was enlarged a lot so as to catch water higher on the property.
The first catchment basin was deepened There is decomposed gravel in that one so the water perculates quickly, thank goodness, as most of the other basins hold water due to the clay composition of the soil.
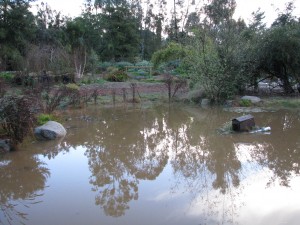
Water following the basins. Also, a rain catchement basin was created along the top of the cement channel that normally funnels water off the property.

New basin, empty A series of these will be created all along the channel, allowing water to slow, gather and perculate along the length of the property, with no outlet at the end.
Full! This will take some of the flow pressure off of the water diverted down into the main series of basins.
The only area breached was actually due to a gopher hole whose origin must be in the stream. I could tell by the swirls in the mulch where the erosion happened.
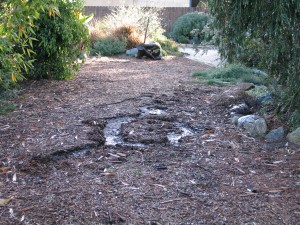
Swirls tell of a breach. There is also the slight problem of water flowing down my own driveway and then down the trail.
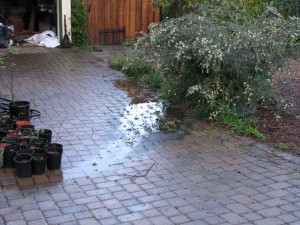
Water funneled down my driveway. I think a small hugelkultur bed might slove that problem.
The verdict? Almost all the water was retained on the property,even that of the neighbor’s! A few tweaks and we are well on our way to total rainwater dominance! Mwwahahahahahahaha!

Mwwahahahahahahaha! - Compost, Gardening adventures, Hugelkultur, Permaculture and Edible Forest Gardening Adventures, Rain Catching, Soil, Vegetables
Hugelkultur: Irrigating with old wood
Hugelkultur is a joy forever. Hugelkultur is a German word (pronounced hoogle culture: it should have some umlauts over the first ‘u’ but I have no idea how to do that) which translates as hill culture. It is a process of building raised beds with a core of old wood. The benefits are that as the wood decomposes it not only releases nutrients into the soil, but it holds water like a sponge. Rain water is collected inside the bed, then as the warmer weather sets in and heat dries out the outer shell, it will wick that moisture back out. Presto! Irrigation in the dry season. As the wood decomposes it creates air holes into which deeper roots may penetrate and absorb nutrients that aren’t being washed into the ground water. Also, growing on a tall hugelkultur bed makes harvesting easier because vegetables are often located higher off the ground. The process was popularized by Sepp Holzer, although he didn’t actually call it that.
Hugelkultur may be started flat on the ground, by hand or by machine, dug into the ground, stacked very tall or short, or even level to the ground. The best way to build a bed is to place it on contour where rainwater will collect, preferably facing North and South so that both sides receive equal sun.
I have areas of ground that are either very heavy clay, or are decomposed granite with stones left over from the building of the house. Some trees don’t receive the drainage they need from irrigation because of the clay, which causes the roots to suffocate, or else plants dry up because water perculates too swiftly through the soil.
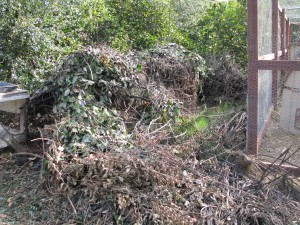
This brush pile against the fence was reduced to a quarter of its size. I also have stacks of brush that were left when the garden was created as hiding places for animals while the garden grew. I don’t need that many brush piles anymore now that the garden is large. I have three wire cages filled with woodier weeds and prunings that are in ‘slow compost’ mode, and leftover trimmings from bamboo used in bridge construction. Perfect hugelkultur components!
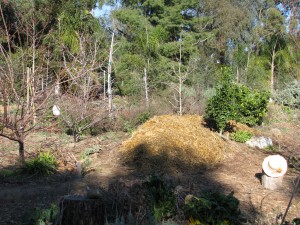
I targeted an area between the pathway and a plant guild with two apricots and vegetables in it. When it rains that area has standing water on it because of the clay content. The area should become part of the guild, but the soil needs mucho amending. I have areas like this all around the property. How to amend two acres of soil? How to get rid of the ever-rising mountains of prunings? How to make the rain water permiate the soil and perculate down rather than sheet across? One guess. Yep, hugelkultur. I bury that wood!
I had made a small hugelkultur experiment a year ago with a raised strawberry bed. There was old lime firewood rotting on the property, so I placed several of these logs along the side of the bed, then covered them with soil and planted strawberries. It worked very well. The strawberries loved the acid, even growing into the decomposing logs, and the logs held the moisture. Some wonderful showy fungus came up, too. I will be reworking that bed and this time I will cover the ground with logs, throw on some llama or horse manure, cover with compost and replant the strawberries. I shouldn’t have to fertilize that bed or add soil for a long time.
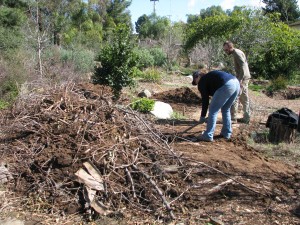
For the big hugelkultur bed I wanted a deep hole that would capture rain and allow the wood to absorb it. My faithful assistants Lori and Steve and Jacob work on this project with me. Steve and Lori dug this ginormous serpentine pit about 2 1/2 feet deep and the same wide.

Lori and Steve digging a huge trench. Since the paths had just been covered with mulch, the dirt was piled on top of plywood layed over the mulch for protection.
Plywood over the paths helped keep things neat and tidy. Then we began filling the bed with the largest wood first.

The empty trench with still-intact drip systems over it. We didn’t have large logs which would have worked well, but we had lots of thick branches. This hole took a lot of prunings and we jumped on them to compact them down.
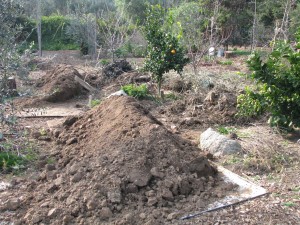
A bear trap! There are a lot of branches in this pit. The hugelkultur bed was left for a few days to settle (and we had run out of time and energy that first day!), and then we worked on it again. Extra dirt from the rain catchment basins that the men were enlarging was hauled down and thrown into and around the wood.
Dirt was added to the mix The mound was watered well. In dry areas it is important to water the wood and the soil well as you are building or else the bed will want to draw water from the area around it, drying up any seeds or plants planted on it.

Some of the long pieces that really stuck out were pruned off. Of course if this is a temporarily boggy area, the hugel bed would help dry it out. There were subterranean irrigation lines across the area already, and since we have a dry climate and the wood I used wasn’t old spongy logs and would take some time to become absorbant, we reestablished the drip system across the top of the hugel bed.
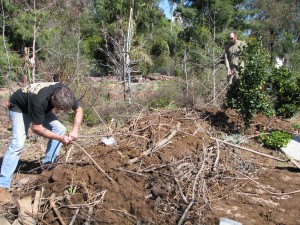
Steve reconnecting the subterranean drip, which runs from a well powered by solar. Because there weren’t large logs, there were a lot of spaces to fill with dirt. Gradually the mound grew and was sloped down to the pathway. Finally a couple of inches of dirt was packed on top. Unfortunately this was mostly clay from the excavation site, but if it had been good soil to begin with, I wouldn’t have needed the hugel bed now, would I? Yes, I did give it a sprinkling of sugar just to get the microbes feeding.

All topped up! There was so much clay that this could have been a big fire pit! The next day I dug up soil from the bottom of the wire cages that were now empty of branches, vines, and sticks. In less than a year since making the wire beds they’d begun to decompose and there was several inches of nice soil at the bottom. I hauled it over to the new bed and topped the clay with the compost.
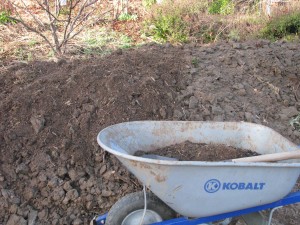
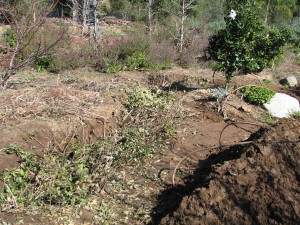
Guess which half has the good soil on it? I want to break up the clay soil so I threw around a cover crop mixture of peas and wheat. The peas will fix nitrogen in the soil, the wheat roots will stabilize and break up clay, I can harvest food from both and then slash and drop the plants to bring nutrition to the soil surface. I also had a bag of mixed old veggie seeds. Last year or so ago I pulled out all my little envelopes of veggie seeds that were very old and mixed them all up. I planted batches around the property and had many things germinate. I still had about 2 cups of the seed left so I threw it around the new hugelbed along with the cover crop. Why not? If the seed isn’t viable, no loss. If it is, terrific! I can always transplant the sprouts if there are too many of any one thing.

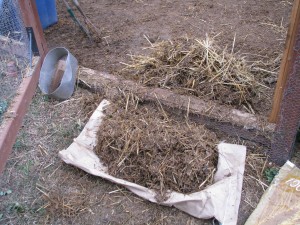
Organic cover crop and a bag of old mixed veggie seeds. I watered the seed down, and then raked out the old straw from the Fowl Fortress. Here is a warning about straw: it will germinate. People say straw doesn’t have seeds in it because the seeds are all in the tops which is cut as hay, but they lie. They live in a dream. Straw still has seeds in it and I had a nightmare of a time weeding pathways the first year of the garden because they were all strewn with straw mulch. However if you put straw down for your hens first, they will eat all the seeds, poo on it, kick it around in the dirt, and then you will have a much better quality straw to use. Straw is difficult to get wet, and it needs to be wet when placed on the bed unless you live in a wet climate or have timed the planting to be just before a long soaking rain.

A thick layer of wet straw went over the top of the scattered seeds. Even then it is good to soak the straw first and then apply it to the bed. Some people soak the straw in an enriched liquid, using manure tea, kelp, microbial brews, organic molassas, etc. The mulch acts as an insulator for moisture and warmth (the decaying wood will eventually produce some heat to warm the little plant feet), and a suffocator for weeds. It can also be a home for sow bugs if too thin. In wetter climates the straw layer can be an inch or so thick. In drier climates the straw or whatever you use as a top mulch should be several inches thick or else it will just wick moisture out of the bed. The same rule applys when using newspapers as a mulch. TIP: don’t let your chickens near the new bed! They will ‘rediscover’ their old mulch and start kicking all your work apart!
If I had wanted to plant established plants on the hugelkultur bed rather than seeds, I would have forgone spreading compost and just covered the poor soil on the mound in wet newspaper or cardboard, and then piled on the straw mulch. To plant I would have cut a hole through the paper, added a handful of good compost and planted in the hole.
So the bed was done, and just before a predicted rain event, too. As it rains the water will roll into the bed, be absorbed and held by the soil around the branches which will eventually begin to absorb the moisture as they decay. The seeds will sprout through the mulch and their roots will hold and amend the clay on the mound. Eventually the roots of the apricot trees will reach over towards the hugel bed, and that patch of icky clay soil will become beautiful. All the while I can still grow crops on the raised bed. My three wire bins are empty, an enormous brush pile is reduced to a small mound, and extra dirt found a new home. Plus we all had some fantastic upper body workouts. A winning situation all around.
More hugel beds will be created in troubled spots; some may only be a couple of feet long below a tree’s root line to help with soil drainage while amending the planting bed.
Wire cages filled with old weeds, prunings and vines are terrific for hugels! If you are in an area where the top mulch might wash away in heavy rains, make a latticework of sticks held down with landscape pins or more sticks over the top of the straw. Or cover with wire until the plants begin to sprout; you don’t want the wire to remain on the bed.
So try a hugelkultur bed, big or small. You’ll wonder why you never tried it before.
- Animals, Bees, Birding, Chickens, Gardening adventures, Heirloom Plants, Permaculture and Edible Forest Gardening Adventures, Pets, Photos, Ponds
It Might As Well Be Spring: an Indulgence in Prose
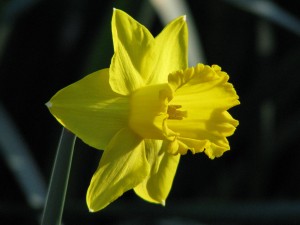
First daffodil, face to the dawn. Mornings find me waking before sunrise, throwing cats off my bed, rousing my elderly dog for her morning ablutions, and scampering down to the hen house in my robe and slippers (and some mornings warm hat and scarf) to feed the hens and the wild ducks, and the tortoise.
Viola seeing what new seed is available since the night before. Last night when I let Sophie out for her final walk of the night the Santa Ana winds were like a warm caress, riffling through the palm fronds in the dark. Orion sparkled overhead, moving into the position it was in for the birth of both my March babies half a lifetime ago.

Mourning doves in a morning sky. This morning the air was expectant. The garden seemed to emit a trembling energy; an excitement roiling to the surface, but afraid to burst out in full in case of another frost.

Vanilla-scented heliotrope. Indeed another cold front will be moving in with much-needed rainfall later this week. For now, the bold grasses are up and reckless early stonefruit have blossomed out, much to the joy of the hungry bees.

White peach. I could almost hear Browning’s Pippa chanting in my head. But not too much.
The ornamental pear trees all around town are in full glorious bloom. Yesterday while driving from the Community Center to the bookstore there were enough petals strewn in the road as to cause a whirlwind of white as I drove through. An eddy of petals around my car. Joy.
Almond just breaking bud. This weekend is the Great Backyard Bird Count, as well as my two regular bird count days for Project Feederwatch. Before breakfasting I filled seed feeders and enjoyed the show while eating my fresh egg, asparagus, toast and cinnamon tea. Twitterpating is definitely in the air as birds pair up and rival mallards chase each other over the big pond.
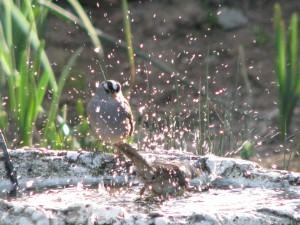
A white crowned sparrow splashing his friend. A Northern mockingbird sips from the bird bath dripper sizing up his territory and listening for new sounds to add to his repertoire. A buzzy rufous hummingbird guards the nectar feeder from the larger and flashier Anna’s. A long-mated pair of crows hang out preening each other on the telephone wire.
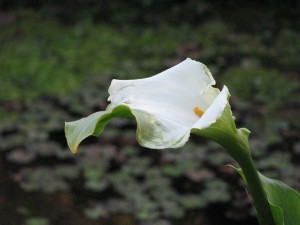
A green-white pond calla. Frogs are croaking amorously in the damp rushes. To my complete joy, far earlier than the bulbs strewn across the property which are just peeking green out of the earth, just outside my window are early daffodils and sweet violets, two of my favorite flowers.
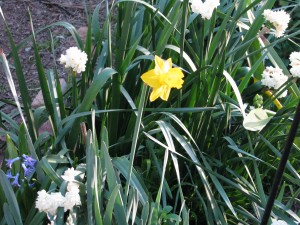
Daffodils, Earlicheer narcissus and a little blue squill. It is still February, and I’m not that great a fan of such a beastly month as February , but for today the paperwork will lie ignored, the cold weather clothes will stay in the laundry basket, and after I take my cat to the vet I will spend the day in the garden (although that isn’t so unusual for me, is it?) listening to the Nuttall’s woodpecker try to drum holes into the telephone pole and smell the scent of Gideon’s trumpet flowers.

Sweet violets. I look forward to tomorrow when I’ll be making two new friends, and to casting seed which will add new life to the garden.

Easter will be early this year. It is all about possibilities, and possibility is definitely in the air today. I will believe Punxsutawney Phil that although it is technically winter, for today it might as well be spring.
A meeting of the minds. You May Also Like
Native Insects and IPM
- Gardening adventures, Heirloom Plants, Natives, Permaculture and Edible Forest Gardening Adventures, Soil, Vegetables
Valentine’s in the Garden

A rainbow chard and parsley bouquet for Valentine’s Day Another gorgeous day in the garden today. I gave a chard bouquet to my friend Lara who has been so kind as to teach me piano over the last two months (I’ve progressed from the ‘clink clink’ stage to the two-handed ‘clink-clink-CLINK’ stage. Lara deserves chard!). My best Valentine’s was receiving my box of organic seeds from Botanical Interests. Yep, ordered too many again. At least it won’t make me fat.

Great seeds! Can’t wait to plant! It was warm enough for shorts, and since my neighbors can’t see me, I indulged for awhile.

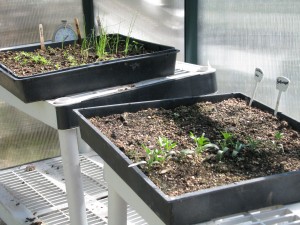
Shorts on Valentine’s Day! (No I’m not THAT short, and go figure what my hand is doing to my hat!) At the end of December I had planted two flats of seeds and stuck them in the greenhouse; one had winter veggies and the other native plants.
Bladderpod and leeks. A couple of weeks ago I was telling my daughter in college that only one of each had come up so far. She pointed out that the two were curiously linked: bladderpod and leeks! It seems even my garden is a comedian. Today I transplanted the bladderpod into larger containers.

Transplanted bladderpods. Bladderpod (Isomeris arborea) is a true California native living at home in the desert or at the coast and usually in the worst soils. It flowers most of the year even in drought conditions, providing nectar for pollinators and hummingbirds. The plant doesn’t smell so great, but it has wonderful balloon-like pods that rattle when dry. It is a fantastic addition to gardens.
In planting seeds in flats it always looks as if roots are shallow until you take the plant up and find a healthy and sometimes long root system. Don’t let the top growth make you think that the roots aren’t developed.
The root ball of this little bladderpod seedling is healthy and full. No more natives are showing their faces in the flat yet, but they have their own schedule and I’ll continue to watch the flat for signs. Just as animals (including humans) respond to circadian rhythms with the 24/hour sleep/wake cycle, plant growth is cued in not only by warmth, but by length of daylight hours. For plants it is called photoperiodicity. You can casually throw that into a conversation over the dinner table tonight and see if anyone notices. A plant’s response to daylight length is called photoperiodic. There is much more to this, and you can read up on it here. So to make a short story longer, I don’t manipulate the light in the greenhouse so I wait longer time than recommended for seeds to sprout just in case they really don’t want to get out of bed yet. I can empathize.
Little celery and parsnip sprouts and leggy leeks that need transplanting, In the veggie flat celery and parsnips have decided to sprout so I’ll transplant them out in a week or two.
Elsewhere in the garden the nitrogen-fixers are working away.
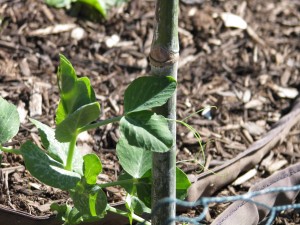
Pea ready to grab onto a bamboo support pole. Fava beans have sprouted from leftover seed from last year and they are already in bloom.
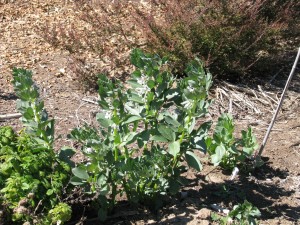
Bees love the blooming favas. The weather is so beautiful that I want to plant the summer veggies… I’m yearning for tomatoes! I will be good and wait a few more weeks until all chance of frost is gone (hopefully the weather won’t be too crazy and frost in March!). Then, look out! Seeds everywhere! And yes, by popular demand I will write about trashcan potatoes.
-
Make Your Own Soymilk

Soymilk and Okara A friend of mine, Kevin, came over and showed me how easy it is to make my own soymilk. What fun! Making your own soymilk is very economical and can be custom-flavored and sweetened to your taste. If you use organic soybeans -which I highly recommend because soybeans are one of the most sprayed crops – you can rest assured that you are serving your family a healthy, non-toxic beverage.
After Kevin showed me his way, I did a lot of research on other ways to make it, and tried some variations. Basically you soak dried soybeans (not edamame!) overnight, blend them up with water, heat it until it boils, strain it and flavor it, not necessarily in that order. Kevin’s method was to strain it before heating. I’ve found I like the results better to strain it after its hot; there isn’t any grit and it strains more quickly. Do whatever works for you.
When you make soymilk, you are actually making two products: soymilk and the high fiber and protein stuff that is strained out which is called okara. There are many recipes for using okara on the Internet, and I’ve found many in the classic cookbook, the Book of Tofu by Shurtleff and Aoyagi. Okara is virtually tasteless. If you strain your soymilk before its heated the okara is ‘fresh’ and a bit gritty. I made it into vegetarian fish patties following this recipe with good results, although they were a little too salty for me.

Fishless okara patties with sauce. If you cook your soymilk before straining, then the okara is also cooked and looks like hot farina. Okara is often mixed with grains and ‘meats’ as a nutritious additive and a food extender. It has little flavor on its own. I used some to thicken a pea soup that was too thin and it worked wonderfully. The soy industry has a lot of okara on their hands so it is usually fed to livestock. It can be frozen or dried, too. If you absolutely have too much okara then compost it, feed it to your worms or bury it around your plants.
Once you have the soymilk you can drink it plain, sweeten it with sugar, honey or whatever your choice is, flavor it with vanilla or something else, serve it cold or hot (which is the best!), or make tofu out of it.

Vanilla bean in hot soymilk Making tofu is also an easy process, which is just curdling the soymilk and straining out the solids; if you’ve ever made goat cheese then you can make tofu.
The ratio of soaked soybeans to water varies depending upon how thick you like your soymilk. Kevin showed me a 4:1 ration (water to beans) which made a thin soymilk, similar to 1% milk. I like the 3:1 ratio because the milk is creamier.
I found a good deal on Bob’s Red Mill organic soybeans on Amazon.com, the beans pricing out to .19 cents an ounce (four bags for about $19 total).

Organic soybeans. I couldn’t find them at my local Sprouts or health food store. One bag of Bob’s Red Mill organic soybeans weighs 1 lb 8 oz, which is about 4 cups of dried beans. The beans swell up by a third, so one package makes 12 cups of rehydrated soybeans. A cup of dried soybeans makes about two quarts of soymilk (and about two cups of okara), so a bag would make eight quarts. A huge savings, and I have the okara as well.
A few tips: you can easily soak a cup of beans overnight and make soymilk every few days, depending on your need and time.

One cup of dried beans equals three cups soaked. Use a very tall pot because when you are heating the soymilk it will take forever and then just when you turn away it will come foaming up out of the pot like something possessed; a tall pot helps keep it under control. After you pour out your soymilk, wash or at least soak your pot. The soymilk residue dries hard and must be soaked again to get off. Use several layers of cheesecloth (which you can wash and reuse), or a piece of muslin to strain your soymilk.

Strain okara through cheesecloth. Also the raw soymilk doesn’t smell very appetizing. It is very beany and grassy. Once it comes to a boil the smell will change into a very yummy tofuish scent.
There is also a great dissent on how long you heat the soymilk. Kevin’s recipe was to just bring it to a boil. Some recipes recommend twenty minutes of boiling. I find that five minutes heats the soymilk and cooks the okara sufficiently. Experiment.
Soymilk and OkaraAuthor: Diane Cynthia KennedyRecipe type: BeveragePrep time:Cook time:Total time:Serves: 8Fresh organic soymilk and okara- delightful and inexpensive. This recipe will make about 5½ cups of silky soymilk and about 2 cups of cooked okara.Ingredients- One cup dried soybeans, soaked overnight
- Nine cups water
- Flavoring (optional)
- Sweetener (optional)
Instructions- Drain the soaked soybeans (which will now be about 3 cups).
- Scoop a cup of soybeans and put in blender with three cups of water.
- Blend until smooth.
- Pour mixture into a tall pot.
- Repeat with the other two cups of beans.
- Heat mixture until it boils, stirring constantly. This can take some time, so I usually give it a stir now and then until it starts steaming a little, and then give it all my attention so that it doesn't foam up and overflow.
- Lower temperature, stir down the foam and simmer for five minutes.
- Line a sieve with several layers of cheesecloth or a piece of muslin (you are trying to catch fine particles) and place sieve over another tall pot or container.
- Carefully ladle soymilk into the lined sieve and allow to drain (you can wait until mixture is cooler before you do this if you'd like.) Use a spoon to move the okara out of the way as you ladle. If you double the recipe you may need to strain the okara and empty the cheesecloth before you finish straining all the milk.
- Allow the okara to drain and cool until you can handle it comfortably.
- Wrapping the cheesecloth around the okara, squeeze the bundle until all the soymilk drains out.
- Refrigerate the okara until ready to use.
- Use soymilk plain, or heat and add flavoring and/or sweetener to taste. I like honey and vanilla.
- Refrigerate cooled soymilk. The soymilk should keep for about a week refrigerated; the okara about four days.
- Animals, Birding, Compost, Gardening adventures, Living structures, Permaculture and Edible Forest Gardening Adventures, Photos, Ponds, Rain Catching
Frost on the Pathways
It doesn’t often frost here in Fallbrook, which is located about an hour from both the mountains and the Pacific in northern San Diego county. When it does, the fruit growers have to take drastic steps to keep their citrus, avocados and other tender plants from dying. The last frost happened after a long steady rain, just after a thick mulch was applied to all the trails here at Finch Frolic Gardens (thank you, Lori!). I awoke to a magical result: just the pathways had turned white with frost. Beautiful! (You can click on the photos to enlarge).
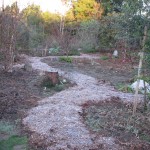
Frost on the newly mulched trail. 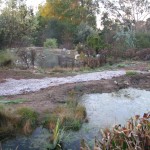
Between the two ponds. 
Ice skating rink for birds. 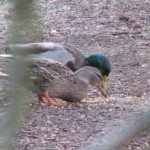
Mr. and Mrs. Mallard enjoying some breakfast scratch. 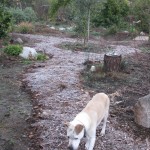
Sophie following the trail 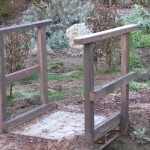
Little frosty bridge 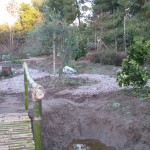
Past the new little bamboo bridge. 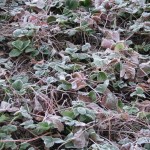
Strawberries to Frost: “Bring it on!” 
These wildflowers survive frost just fine. Winter blooms, too! You May Also Like
Native Insects and IPM
- Animals, Bees, Chickens, Cob, Compost, Composting toilet, Gardening adventures, Health, Heirloom Plants, Herbs, Natives, Permaculture and Edible Forest Gardening Adventures, Ponds, Rain Catching, Recipes, Salads, Soil, Vegan, Vegetables, Vegetarian, Worms
Southern California Permaculture Convergence! Be there!

Southern California Permaculture Convergence If you are interested in any aspect of permaculture, such as organic gardening, herbs, planting native plants, aquaponics, natural ponds, beekeeping, keeping chickens, and so much more, then you must come to the Southern California Permaculture Convergence. It happens on March 9th and 10th at the Sky Mountain Institute in Escondido. The keynote speaker will be Paul Wheaton, lecturer and permaculturalist extraordinaire of www.permies.com fame. Oh, and I’ll be one of the many speakers as well (cough cough). The Early Bird special of only $50 for both days ends at the end of January, and then the price will rise, so buy your tickets now!
Also, for a full-on demonstration of taking bare land and creating a permaculture garden, there will be a three-day intensive class taught by Paul Wheaton on site the three days prior to the Convergence.
You can read about the convergence here at the official website, which will give you the link perm.eventbrite.com where you may purchase tickets. Also visit the SD Permaculture Meetup page to see all the free workshops that happen monthly all over San Diego.
This convergence is such a deal, you really shouldn’t miss it! And such a bargain, too. One of the best things I find that come out of these convergences is the exchange of ideas and networking among the attendees, and all the practical information you can take home and use right away. One of the largest parts of permaculture is building community, which means sharing with and assisting others.
Really. Don’t miss this! Tell your friends!
You May Also Like
Native Insects and IPM