Gardening adventures
Wrestling with the great outdoors.
- Arts and Crafts, Gardening adventures, Hugelkultur, Permaculture and Edible Forest Gardening Adventures, Soil
Bunyips: Fun to Say, Easy to Make and Use

Making a bunyip. Hi! I’m back. Its not as though I’ve been vacationing. Someday I might tell you about how important it is to question your doctor, about how under-producing thyroids affect every part of your body, about neighbor’s in-laws who skip their meds for a day and crash through your gate, and about strange and fatal chicken illnesses, but not today.
My big garden project for the winter is to turn the raised vegetable bed area into a sunken hugelkultur sheet-mulched vegetable area. I’ll go into details about that in another post as well. What I am going to describe is how to take measurements using a bunyip.
A bunyip is a water level that you can make very inexpensively and quickly, which relies upon gravity to give a reading. It even works around corners. I really don’t know how it came to be called a bunyip… its an Australian thing. A bunyip is an ancient aborigine water monster. More recently the name has come to be synonymous with imposter. Maybe this simple home-made water level is impersonating a laser level. Maybe bunyip is just so gosh-darn more fun to say.
Anyway, if you need to measure the difference in elevation, use a bunyip. If you want to find level ground, for instance if you are building a level swale on contour, use a bunyip.
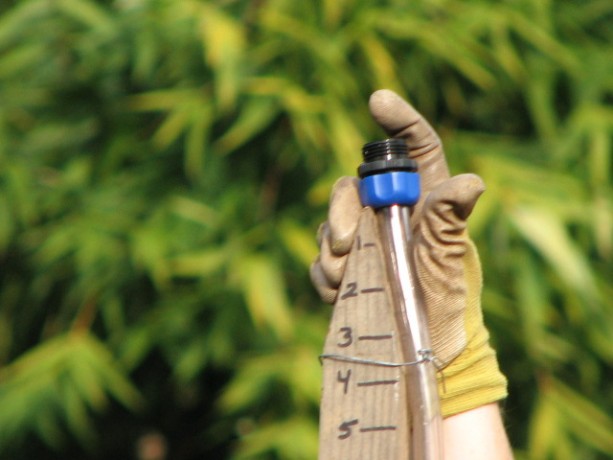
The equipment for your bunyip are: two slim boards with at least one end flat, and at least 5 feet tall. You also need about 30 feet of clear fishtank hose. A waterproof marker, a ruler, a level and six pieces of wire to tie around the posts, and you are ready to go. If you have a couple of corks or stoppers that fit in the tops of the tubing, it will make it easier to carry without receiving a surprise shower.
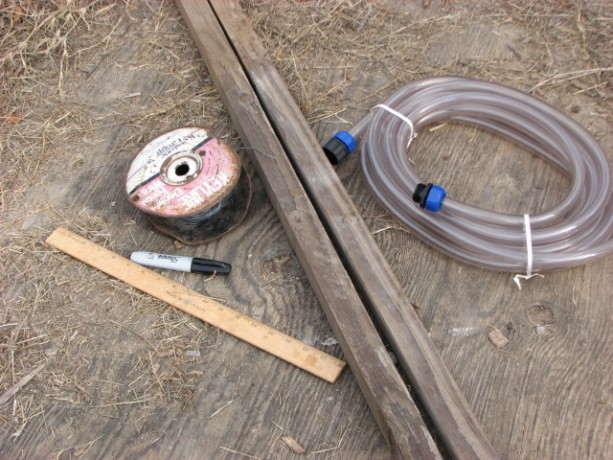
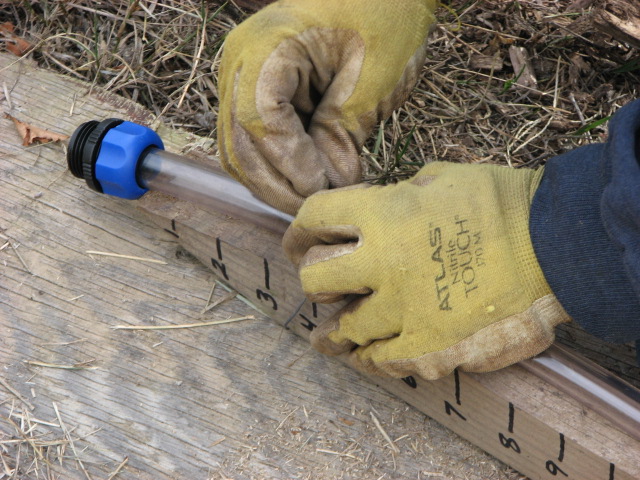
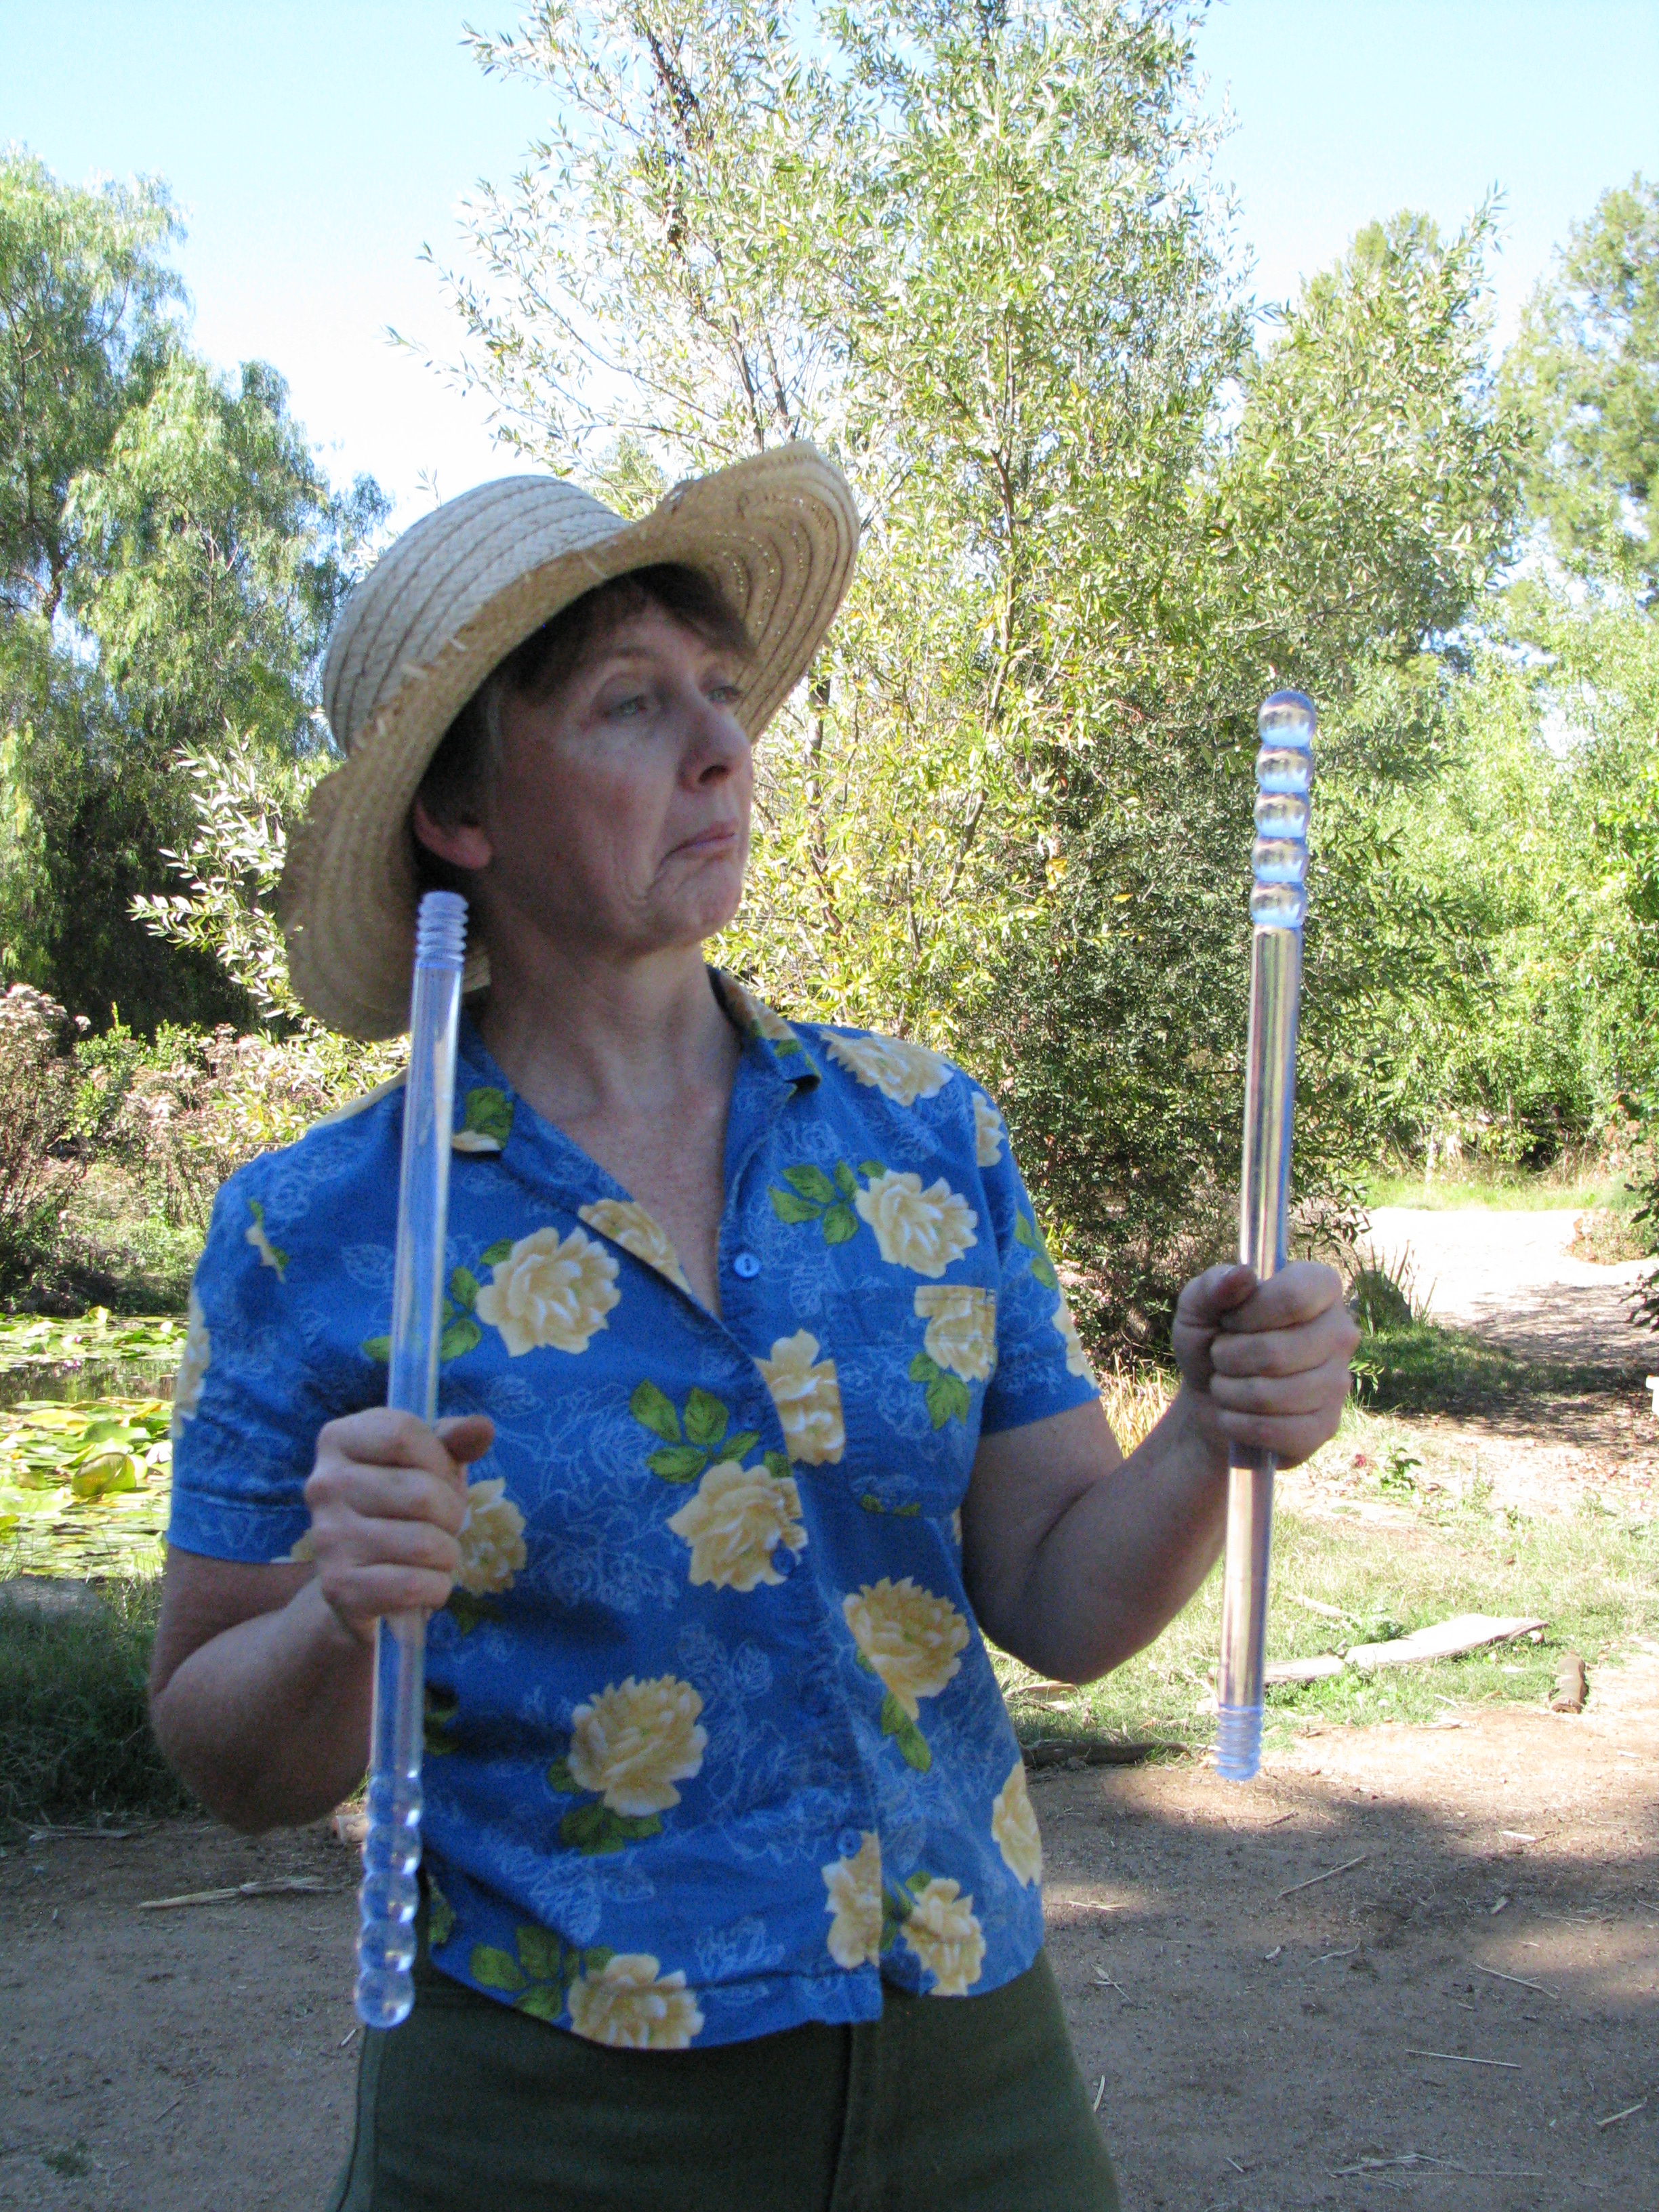
You will need two slim posts, 30′ of tubing (the only kind I could buy in town was for cleaning fishtanks, hence the threaded ends. You don’t need these!), a ruler, wire and a waterproof marker. Be sure at least one of the ends of each board is flat, which will be what touches the earth when measuring. Along one of the boards begin to mark off inches (or centimeters) from the top. Make the marks readable from a short distance. Number the inches beginning with 1 at the top of the post, down to at least four feet (if you are measuring more dramatic slopes you’ll want to mark off more). Numbering from the top down allows you to do simple subtraction easily without becoming mixed-up, especially when you’re tired.
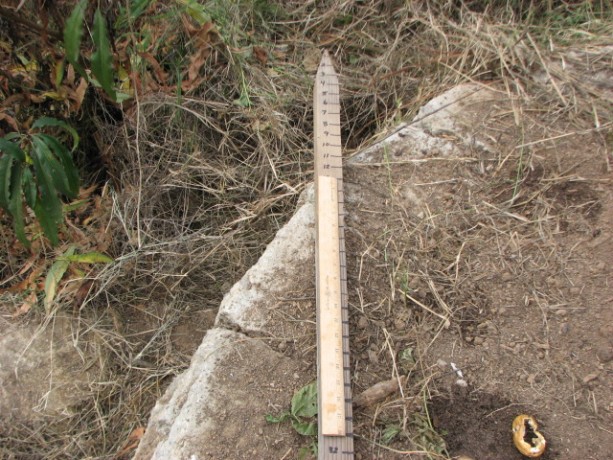
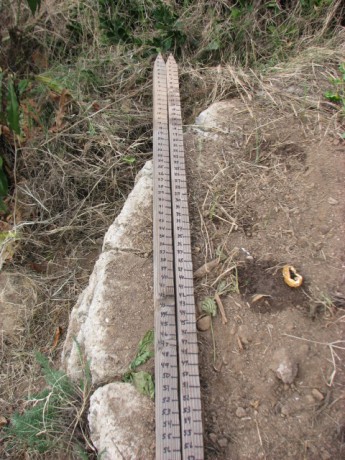
Using a ruler or yardstick (or meterstick), mark inches down from the top of the post. Next, stand the two posts together on level ground, making sure they are straight. It doesn’t matter if the tops aren’t exactly even, just the bottoms. Now with the two posts standing on even ground, mark the second post in one spot evenly with a mark on the first post; it doesn’t really matter which inch you mark because you can then use the ruler to fill in all the others.

With the bottoms of each post level, begin to mark the second post from the top, even if the tops of the posts aren’t even. So, using that mark and a ruler, mark inches all along the second post. The point is that the measurements are even from the bottom of the posts, where they will be resting on the ground.
You will have two posts with inches marked from the top. That done, tie the tubing onto the posts, allowing the tubing to reach a little higher than the top of the posts. The tubing in the photo is all I could find in town, and it is an extension for a fish tank cleaner, hence the threaded ends. You don’t need threaded ends, just the tubing.

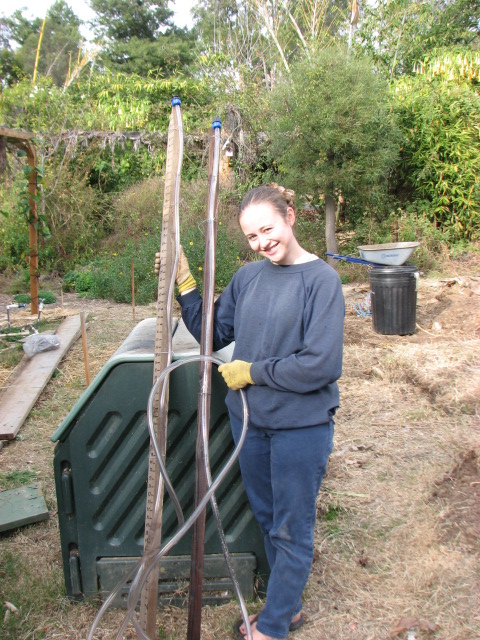
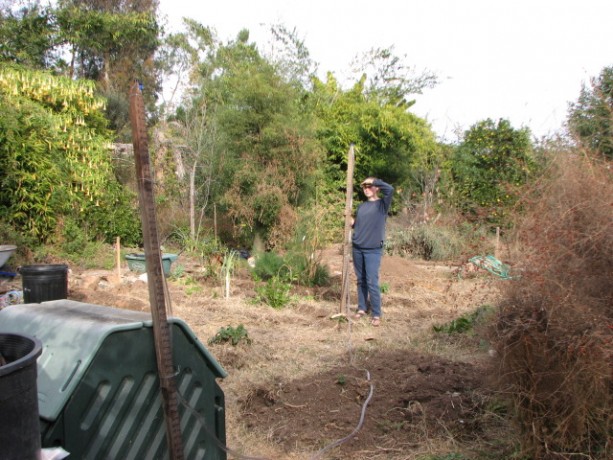
Wire the tubing onto the posts, allowing the top of the tubing to be above the top of the post. With the tubing tied to the marked posts, you are almost ready to measure. Having someone to hold a post really helps here. With both posts straight up, fill the tubing with water. You can use a watering can (with the spray end off), or a hose. A funnel might help. Fill the tubing as completely as you can, but don’t worry about having the water go end to end. A gap at either end is okay.

Miranda holding the completed and filled bunyip. Work the air bubble out of the hose by lifting the bottom. Take out the air bubbles by lifting the center of the hose and feeding the air bubble through.
You are ready to measure!
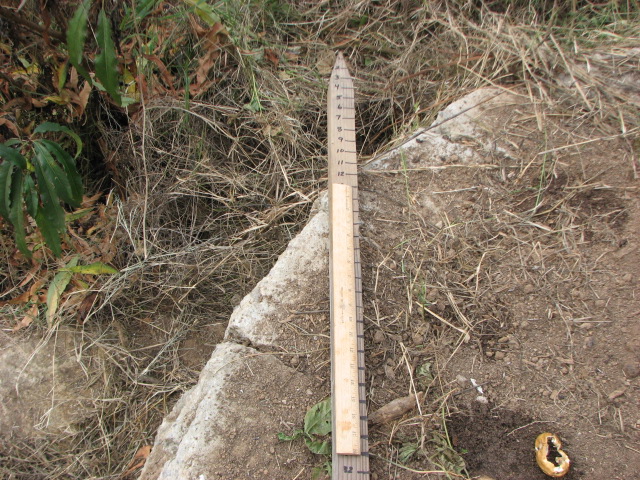
The tubing doesn’t need to be off the ground to work; it can even work around corners. One person stands with their side of the bunyip at one area you want to measure, and the other person stands at the other. You don’t need to make the tubing lift off the ground; it will accurately measure with the tubing in almost any position. The water in the tubing will bob around; tap the top of the tubing with your finger to help it settle faster.
Tapping on the end helps make the water settle faster. Then take the readings from each post. Subtract the readings and you will get the distance in elevation between the two points. For instance, if the water level on one post is at the 19″ mark, and the water level on the other post is at the 7″ mark, then there is a 12″ difference in elevation between the two points. So easy!
If you are building swales on contour, keep moving one side of the bunyip until you find a spot where both readings are even, then mark those spots and repeat farther on. In this way you can find what land is level.
My daughter and I used our bunyip today to measure the change in elevation in our vegetable bed. We won’t be leveling the bed itself, but we will be digging deep, level swales, and we now know just how radically, and in which direction, our slope lies. This reaffirms what our eyes tell us about how rainwater flows across the veggie area and therefore how we’re to dig the swales to best catch rainfall.
Best of all, bunyips can be quickly disassembled and the parts used for other projects, or emptied and carried to other locations. Just add water, and you get a bunyip!
- Beverages, Breakfast, Fruit, Permaculture and Edible Forest Gardening Adventures, Recipes, Vegetarian
The Passion of the Fruit: Homemade Juices
Hi there. It’s Miranda the Guestblogger again, and today I want to talk to you about juice. You know, The Big Drip – Drosophilid Milk, Agua Fresca, Drupe’s Tears, Essence of Mesocarp: JUICE.
Here at Finch Frolic Garden, we like a nice fresh juice. As I am officially the FFG Harvester (a.k.a. Fruit Maven), I also take on the mantle of One Who Figures Out What To Do With Some Of The Stuff That’s Been Harvested – and let me tell you, that’s not a title to take lightly.
In the summer, it’s hard to keep up with all the produce and we hate to waste anything, even though spoilt food just goes back into the soil via compost here. We really like to get our produce into our mouths, though. Therefore, a lot of our fruit bounty gets juiced and frozen to keep. I want to walk you through some of our juiceplorations.
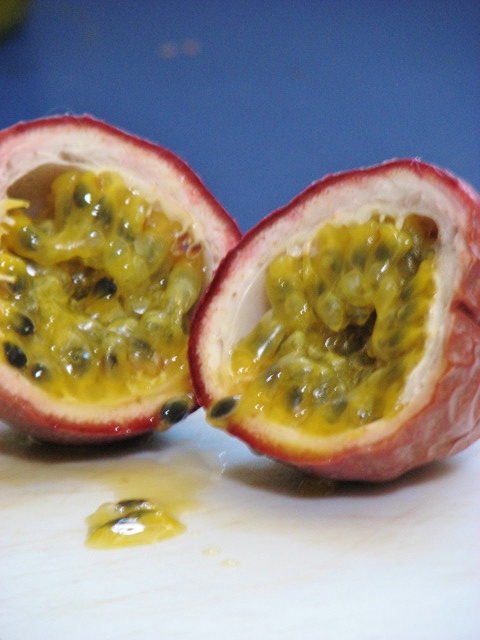
Finch Frolic Redoubtable Fruit of Almost Every Month in the Year: the Purple Passionfruit. These exotic and fragrant fruits are dropped by the bushel-load from our vigorous vines almost continuously, but overwhelmingly in midsummer. I pick them off the ground under the vines and wait for their smooth purple shells to wrinkle over in ripeness. Then the process begins.
I sit down for this and usually bring up a show on my laptop, because it takes a while. I have the bag or bowl of fruit on my right and a plastic bag looped over the back of a chair on the other side for the empty shells.
A fruit is picked up, dipped in a bowl of water, then wiped quickly on a paper towel and deposited on a cutting board that has a little rim on it to catch juice.

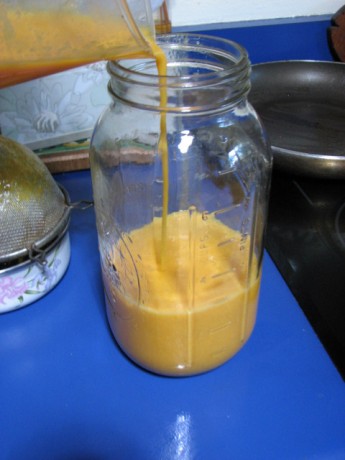
With a sharp knife, I halve the fruits and use a spoon to scoop the many little packets of bright gold-orange juice and hard black seeds into a bowl. Those packets have to be broken to get the juice.
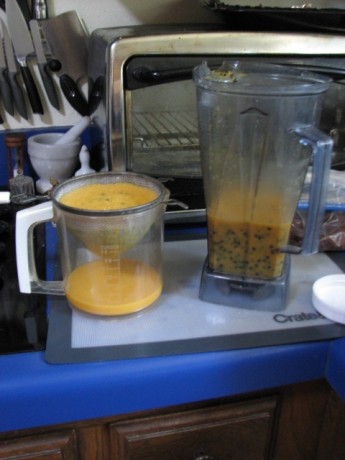
I used to press the pulp into the mesh of a sieve with a spoon, but that’s hard on the hands and on the sieve. Now, I throw it in our Vita-Mix and turn it up to 3, tops – you want to spin all the juice off the seeds, but you don’t want to chop up the seeds. I judge whirl completeness by whether or not the little black seeds are free-floating as they sit in the mixture.
Then I run it through a sieve to separate out the juice.
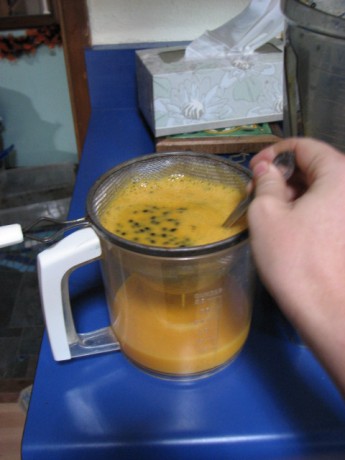
To get the most juice out of it, you swirl a spoon through the pulp as it sits in the sieve. 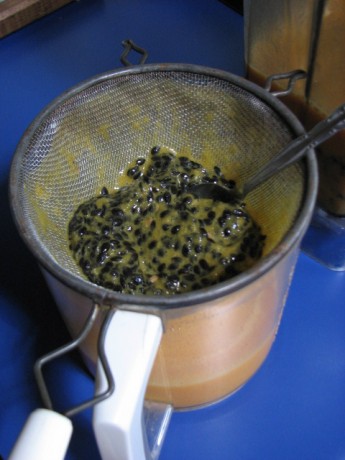
All juiced out. This sounds very labour-intensive – and it is – but it’s worth it to us to use our fruit. We don’t eat passionfruit straight – the seeds are a little too gross. We do, however, use the juice in anything we can make an excuse to, and it keeps frozen into cubes for a long time. And the leftover seeds make a fun treat for our hens.
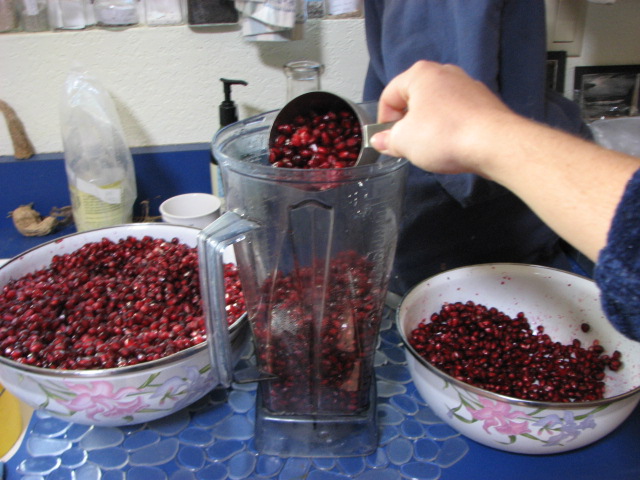
Glowing, beautiful, tangy, fresh passionfruit juice! In the fall, we’re overwhelmed with lovely big pomegranates from our one big pomegranate tree. This year, we’ve had more than ever and we didn’t want to waste any.
Once harvested, though, the poms need to be processed. Diane and I camped out every evening for a couple weeks cutting poms in half and hand-picking the arils. Recently, after a friend let us try out her juicer, we acquired one for ourselves, eliminating the need for the rest of the process with poms, but it is the same process I still use for grapes, apples and melons, so I’m going to tell you about it anyway.
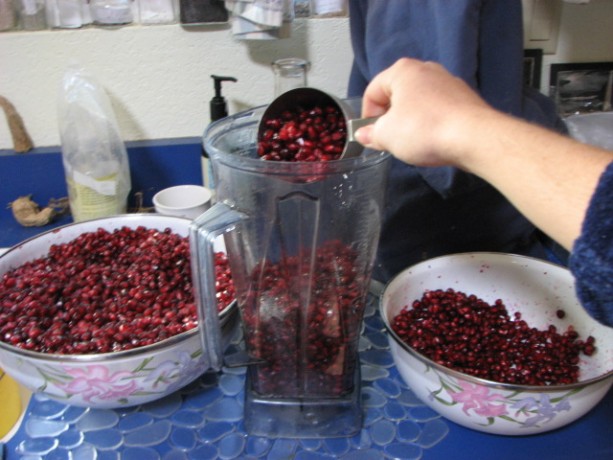
I put the arils in the Vita-Mix and turn all the way up to completely blend the seeds. The blended pom also gets strained, but because the particles are finer than the passionfruit pulp, a mesh sieve isn’t sufficient. No, what you need is a sock.

A nice clean women’s nylon sock is perfect. 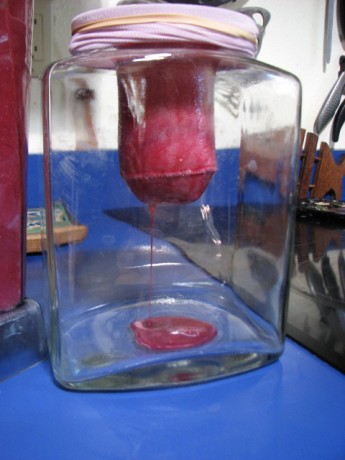
Hanging allows pure juice to come through. To get all the juice out, though, squeezing is necessary, and that puts a little more must in the juice, like fine fruit silt.
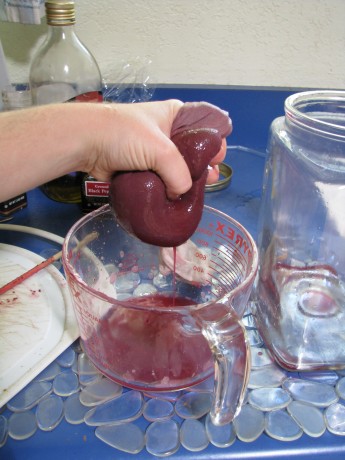
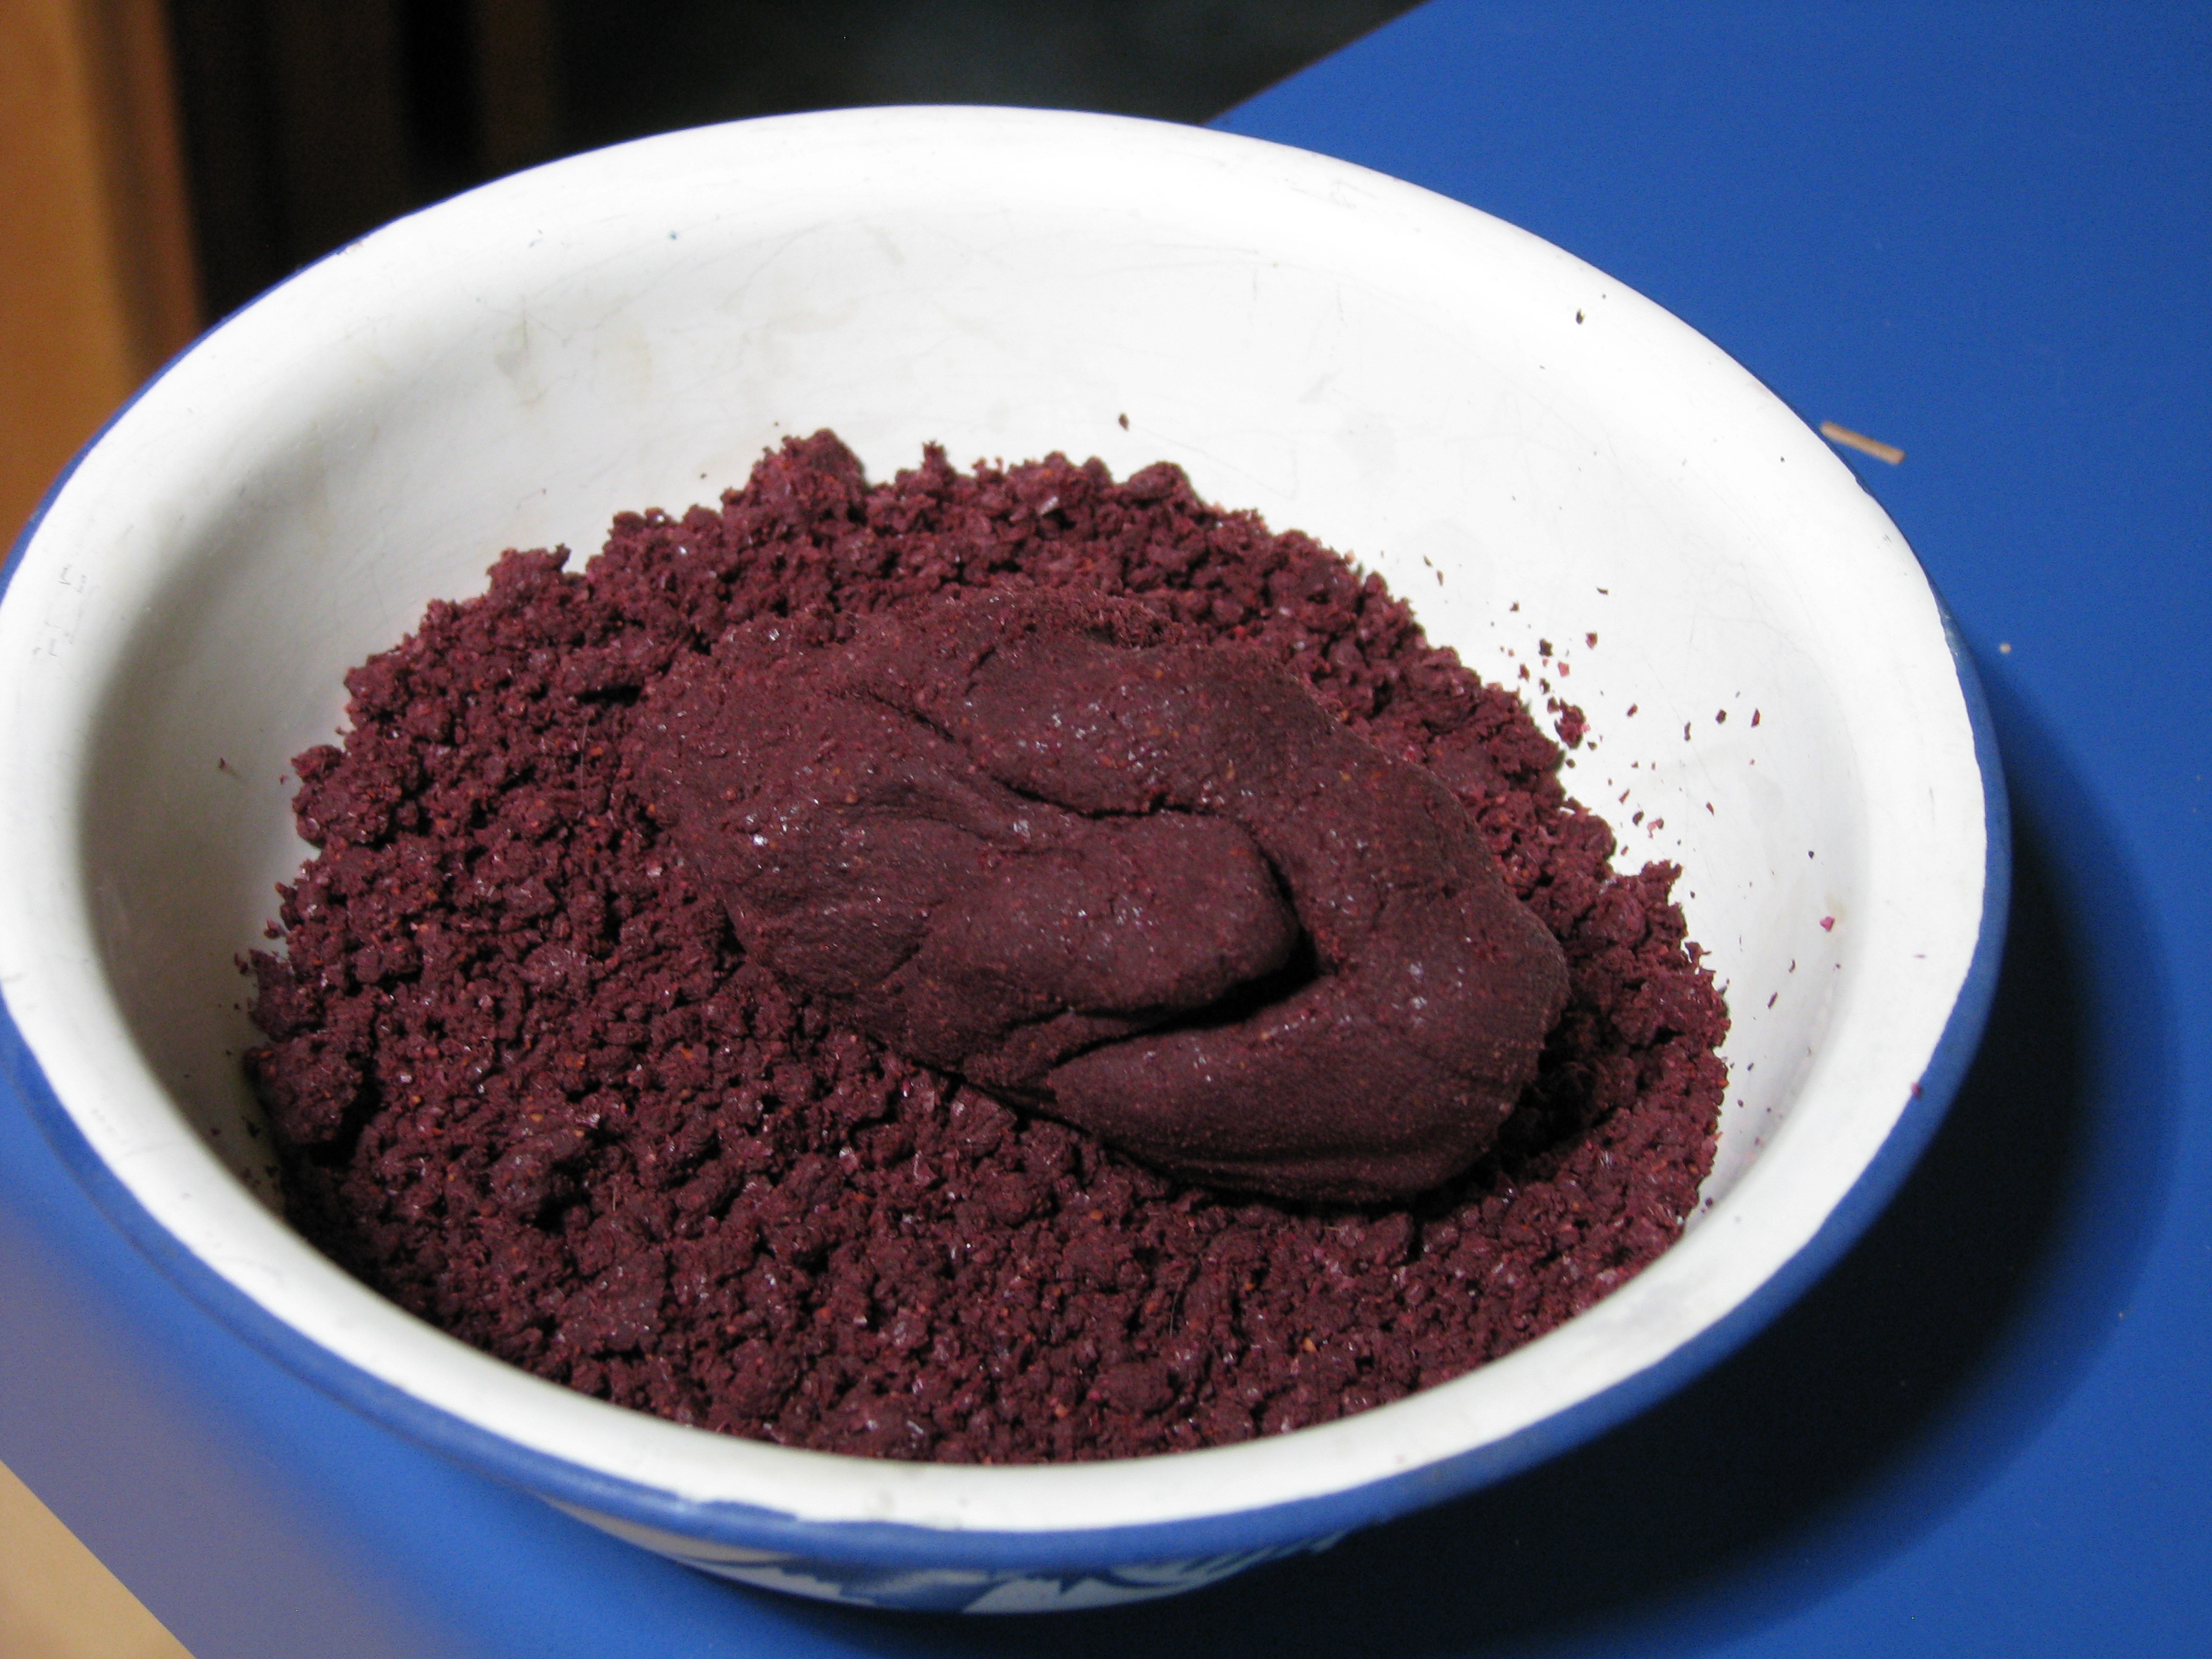
It’s also very taxing on the hands, because the sock must be hand squeezed, but it helps get the most juice from the fruit. This second straining produces interesting dry, crumbly must that comes out of the sock like purple Play-Doh.

Also a salutiferous treat for the hens! Like the passionfruit, we use the pom juice as much as we can. For instance, we reduced the juice and I experimented with some pomegranate ice-creams:

Chocolate makes an excellent palate cleanser, if you ask us. I also diluted the concentrate with water to make a lovely breakfast juice. We even poached pears with the juice for Christmas dinner – a lovely rose colour and delicate fruity flavor.
The fun never ends with fruit!
So, that’s a little peek at the juiceinations that go on here at Finch Frolic. Happy juicing to you!
TTFN!
Miranda the Fruit Maven
- Animals, Arts and Crafts, Chickens, Compost, Gardening adventures, Other Insects, Permaculture and Edible Forest Gardening Adventures
A Hen’s Garden
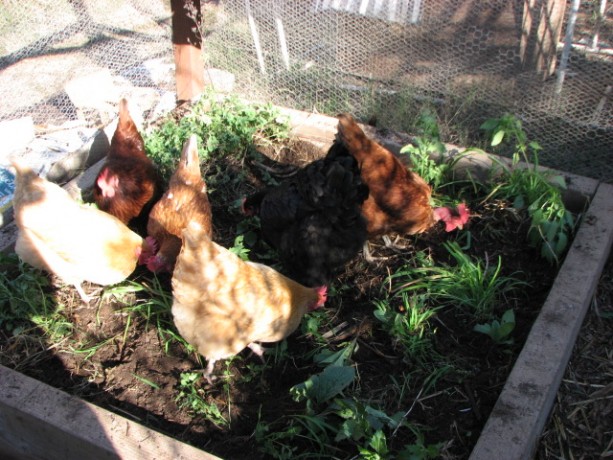
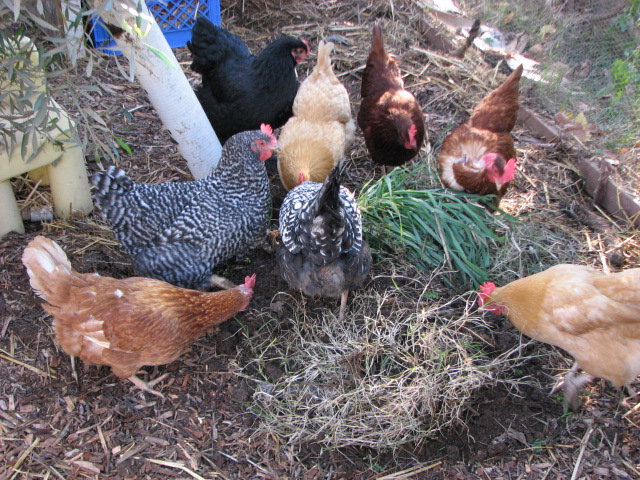
The girls helping prepare the soil before planting. Chickens are primarily bug eaters who also snack on greens. Feeding hens grains began with the industrialization of agriculture. No one cutting grain with a hand scythe would spend all that time and energy to feed hens.
My hens live in the Fowl Fortress, to protect them from coyotes and hawks (our hawks won’t be able to carry one away but they could tear them up pretty badly). After losing Chickpea to a coyote while we were only so many yards away made me eliminate any open foraging time for the girls. This wasn’t healthy for them. I haven’t invested in a solar electric fence yet, to make a ‘day’ coop for them to forage in relative safety, but that may be on my investment list for the new year. The largest problem is poor design in the garden, which I’m trying to remedy as easily and inexpensively as possible. I didn’t know how to fit in chickens, or where the garden was going when it began nearly three years ago. I have weedy areas, and I have chickens. To bring them together safely is the problem.
Sometimes we bring the hens into the fenced yard with our 100-pound African spur thigh tortoise (Gammera); however, that yard is also where some of our cats live. We’re not sure if Moose, Chester and Cody would behave themselves around hens, so unless we prevent the cats from leaving the house for the day, then we can’t carry the hens into this grassy yard to graze.
Inside the Fowl Fortress there is a layer of muck composed of old straw, the hard bits of veggies and fruit fed to the hens, old scratch and lots of chicken poo, made into an anaerobic muck by recent rains. Once turned up we discovered lots of the grain had sprouted, which the girls sucked up like noodles. This muck was also turning the hard ground below into prime soil. Why couldn’t we use this muck in a more productive manner?
If I couldn’t bring the hens to the garden, then I thought I’d bring the garden to them. Inside the Fowl Fortress I propped up four big boards in a square, then filled it with some of the rotting straw and muck from the coop. I topped it with Bermuda grass – laden soil from one of my raised beds. This was the bed, in fact, where I composted in place for the past year. What rich, chocolate-colored, worm-laden soil! If not for the invasive grass it would be perfect.
In this new garden, along with the Bermuda grass, my daughter and I planted oregano we divided from one of our plants, nettles, borage, some other kind of grass weeds that had sprung up after our Fall rain, plus we scattered corn and mixed organic grains which we feed the hens and pressed the seed into the ground.
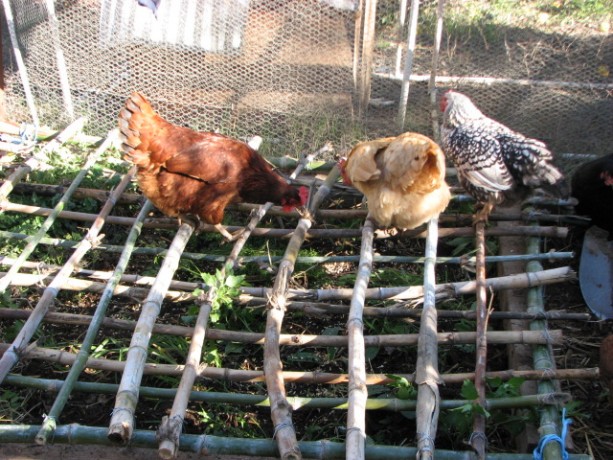
The hens can graze, but can’t uproot the plants. Miranda wired together a bamboo lid out of scrap pieces. The idea is that the plants can grow up through the lattice of the bamboo lid and the hens can stand on it and eat greens. Oregano is a good medicinal herb, as are nettles, which reputedly encourage egg laying.
I also dig up chunks of weeds or Bermuda grass in this mercifully looser post-rain soil, and throw the whole mess into the Fowl Fortress and let the girls forage and exercise those strong legs by kicking through the heap. It is only logical that the strong kicking motion of foraging hens strengthens their bodies so that they have fewer egg-laying illnesses (egg-binding primarily), and of course their nutrition is much better with greens and bugs

This is by no means a permanent solution, but until I find the right design that keeps healthy, safe hens and eliminates weeds without a lot of work, then a chicken garden and weed-tossing is the way to go.
You May Also Like

Native Insects and IPM
- Arts and Crafts, Gardening adventures, Humor, Permaculture and Edible Forest Gardening Adventures, Water Saving
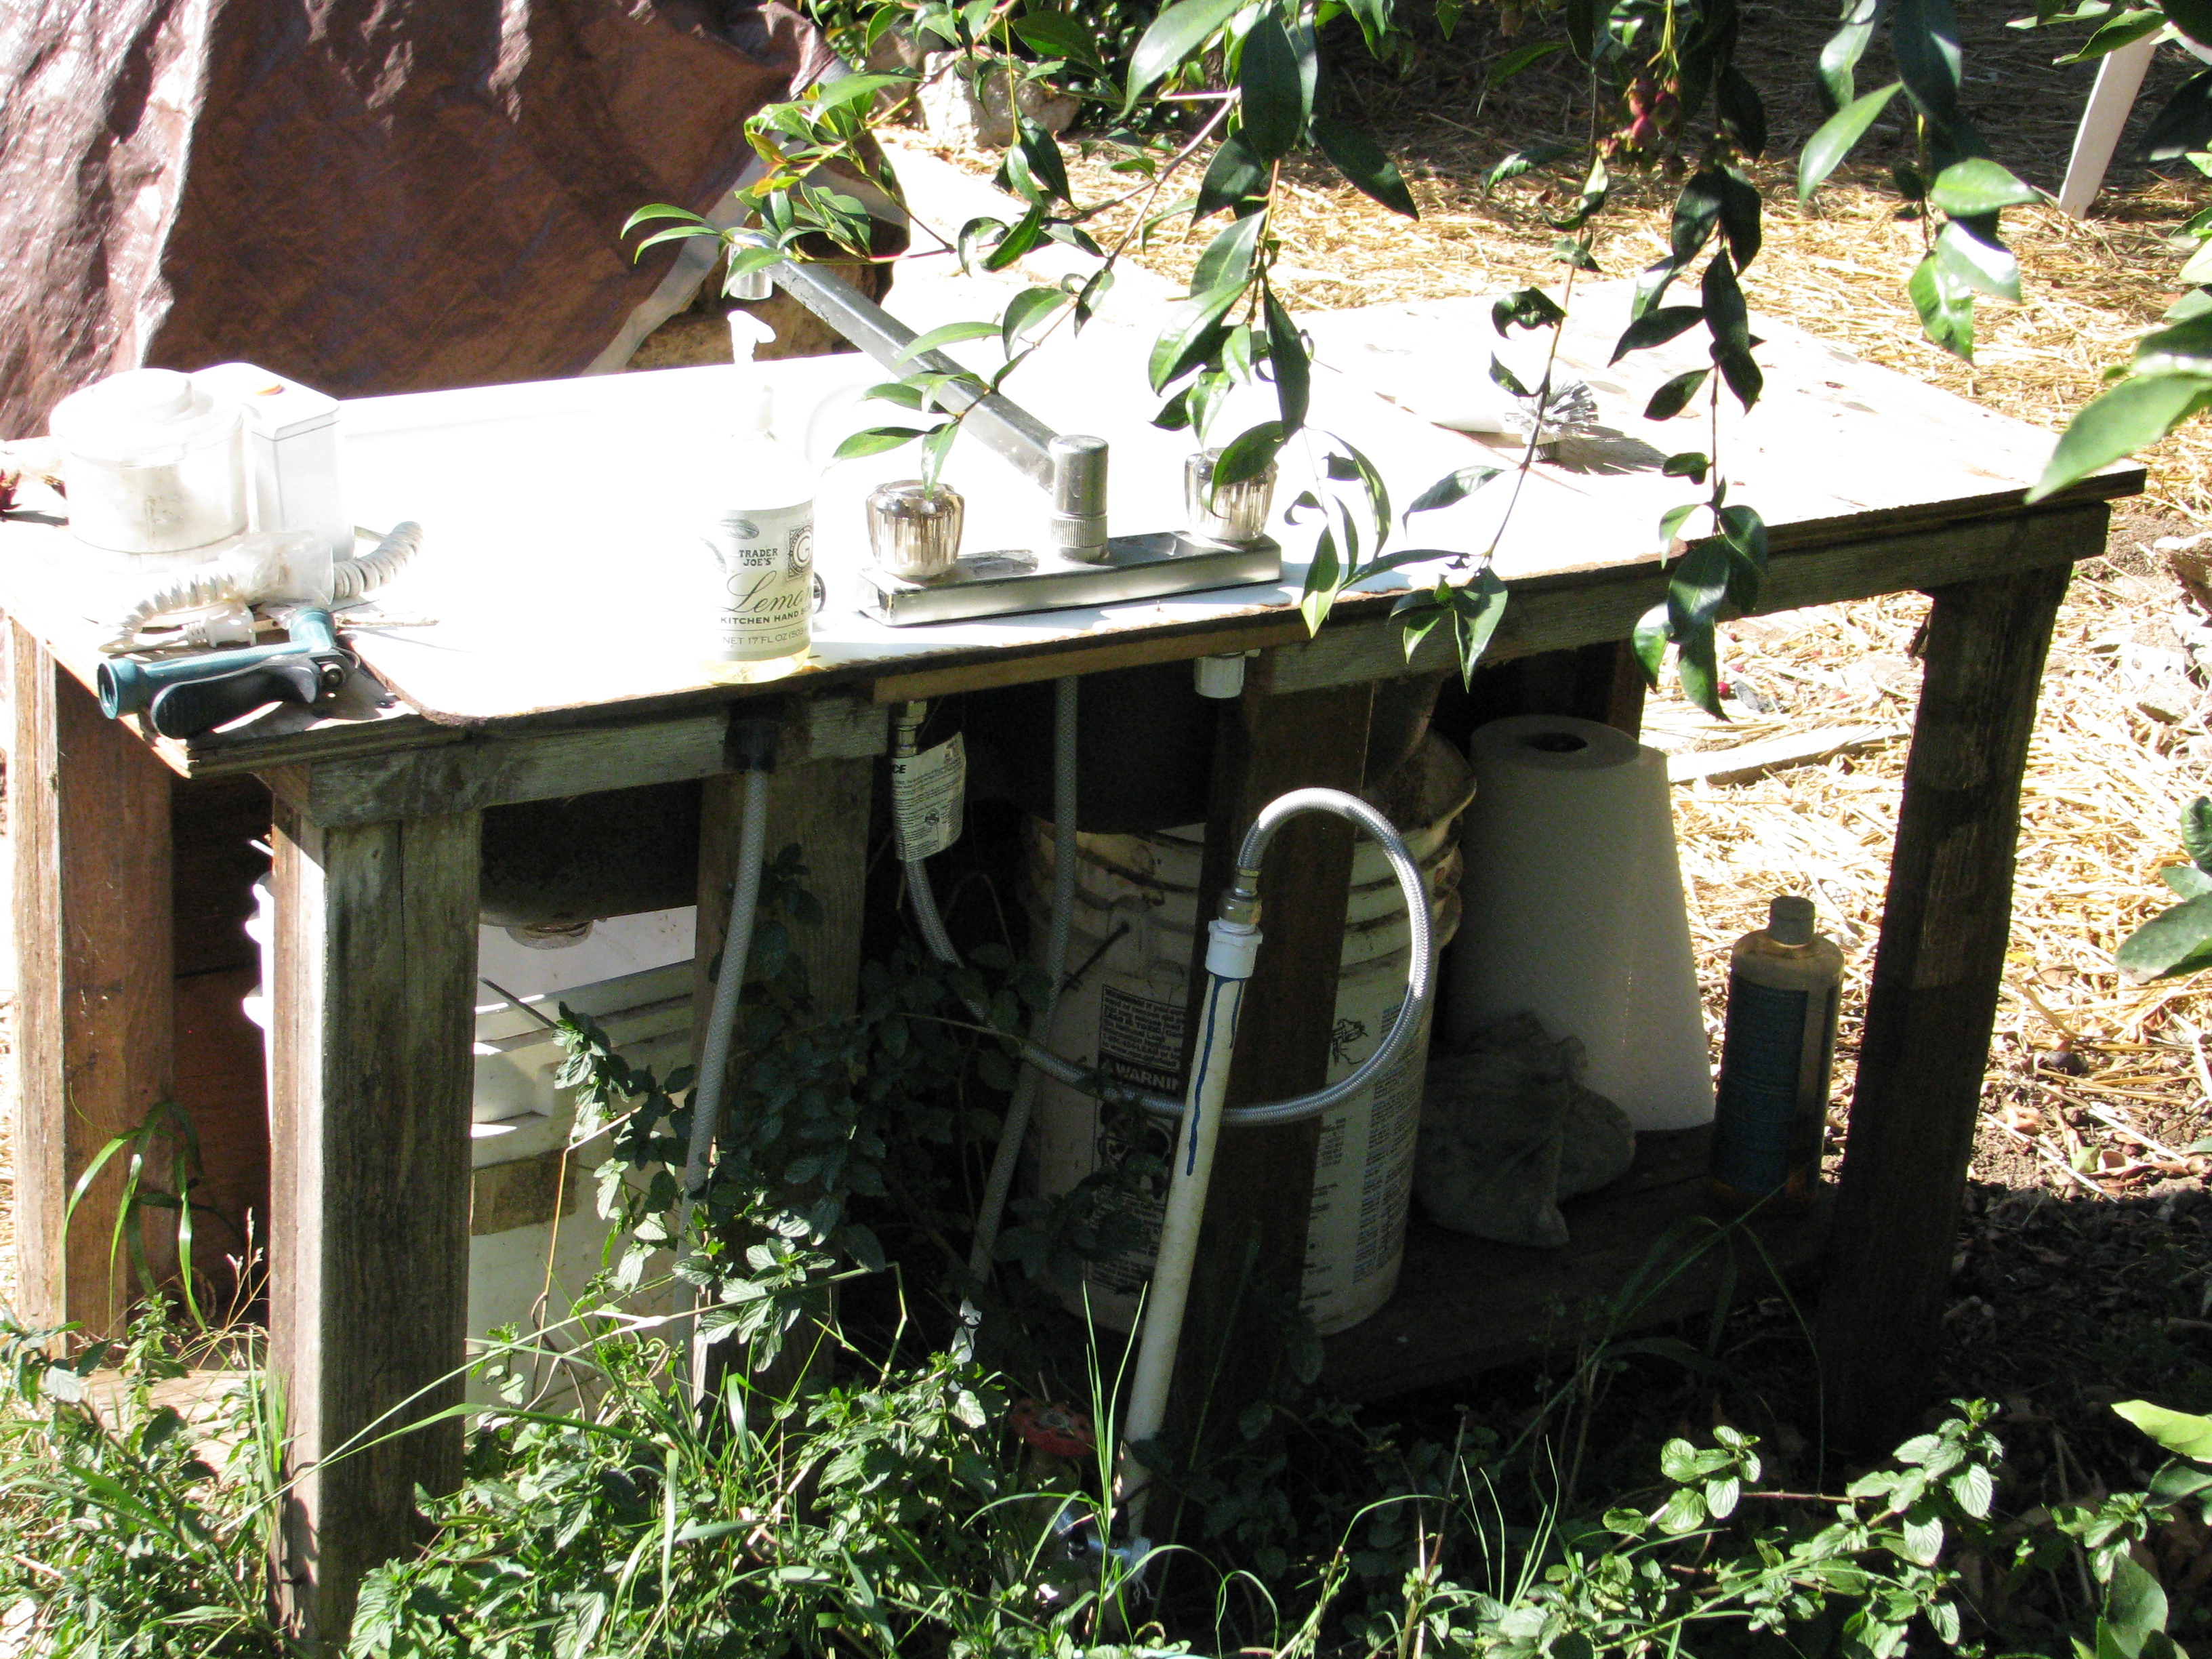
Remodeling the Outdoor Sink
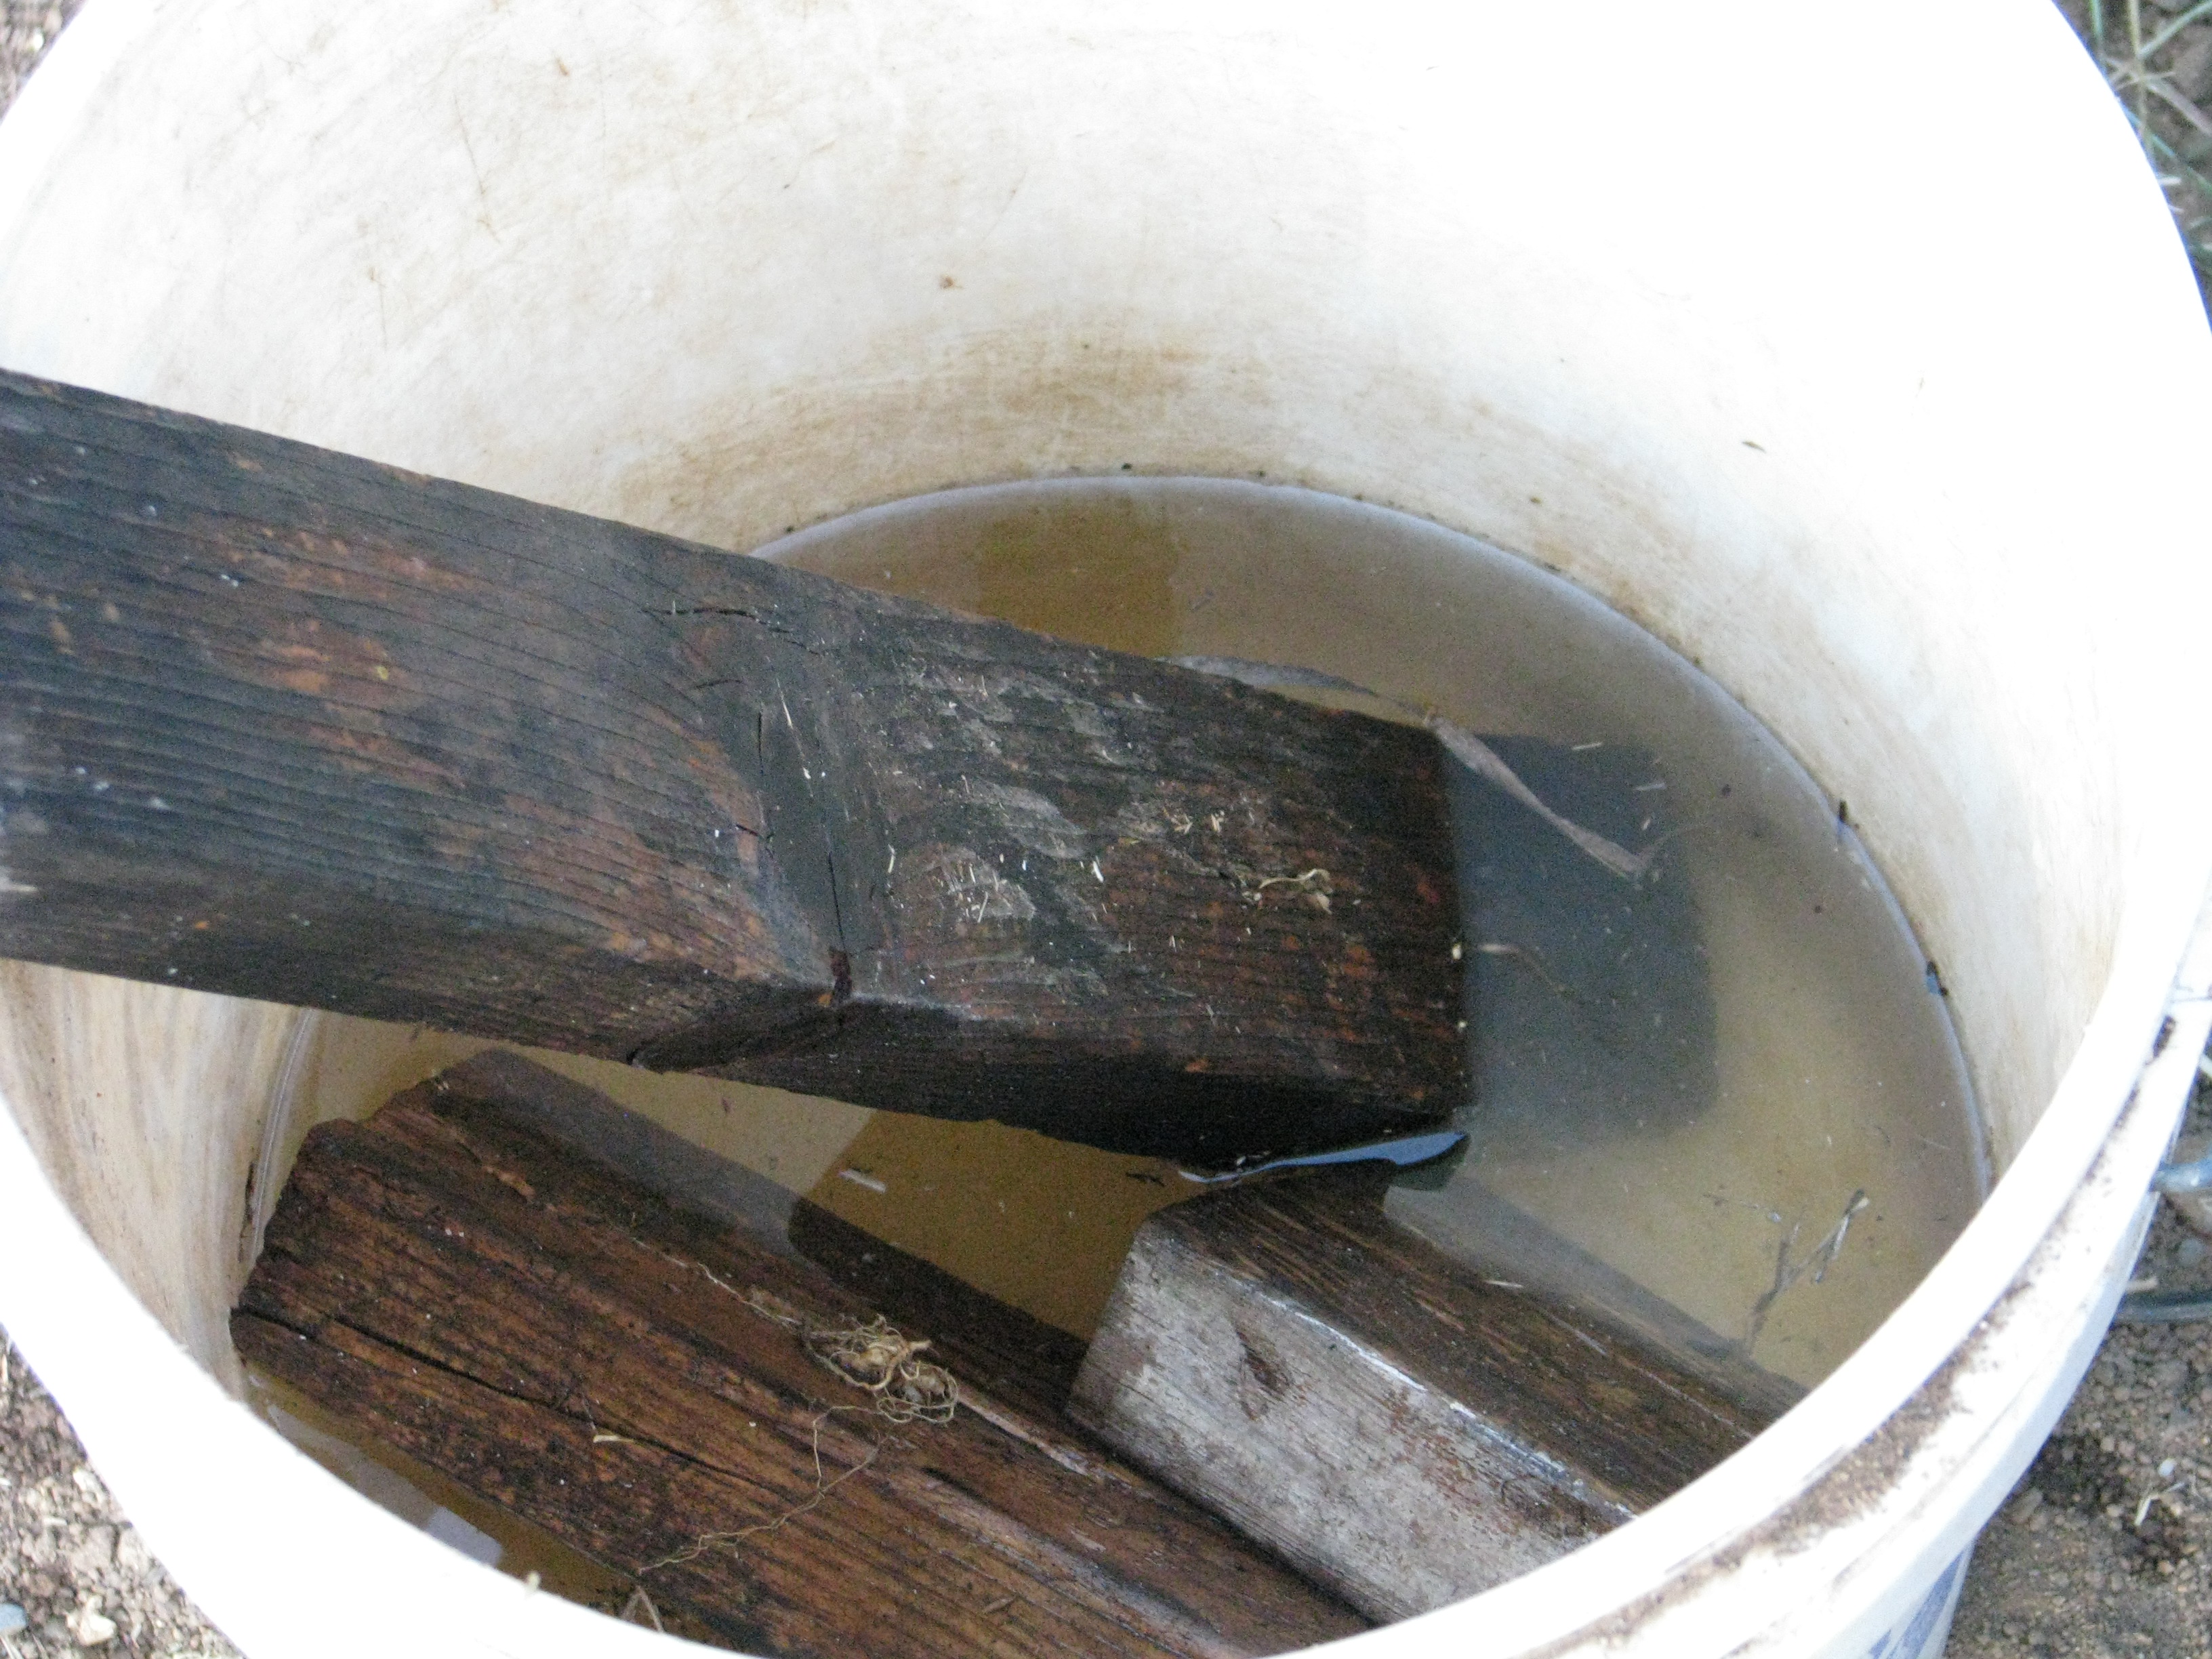
I’m thrilled with my outdoor sink. I love it. It is my friend. It is my old kitchen sink, stubbornly hauled around the property until I finally was able to put it on an old fishtank stand and hook it into the waterline out in the garden. Even better, Steve, who used to work here and who was responsible for the Mock Pavilion, modified the stand so that the sink fit down into it more securely. Any water used would be caught in buckets underneath (with long sticks in them so that any creature that falls in can crawl out again), which I would pull out and empty.

The buckets are just another heavy thing with which I had to deal. There had to be another way. A problem with the sink being set down into the stand is that the underside of one of the drains now sat slightly into a bucket, so I’d have to tip the bucket to get it out. Wrestle it out would be the better term, usually becoming wet with old sink water in the process. Throwing a 5-gallon bucket of water somewhere lost its charm quickly, especially as I was the only one emptying, but not the only one filling. Something had to be done. When I made the area next to the Fowl Fortress into an apple tree guild, I now had an area which could use extra water. The sink needed to be moved. Last week I finally did it, and I have to say, I’m pretty smug about how.
I am a disaster with a saw, but I’m pretty experienced with old PVC pipe and Red Hot Blue Glue (all those sprinklers I’ve mowed down over the years). I leveled a place next to the coop and placed some old plywood on it, both to help steady the sink stand and to keep weeds down (and to use up the plywood).

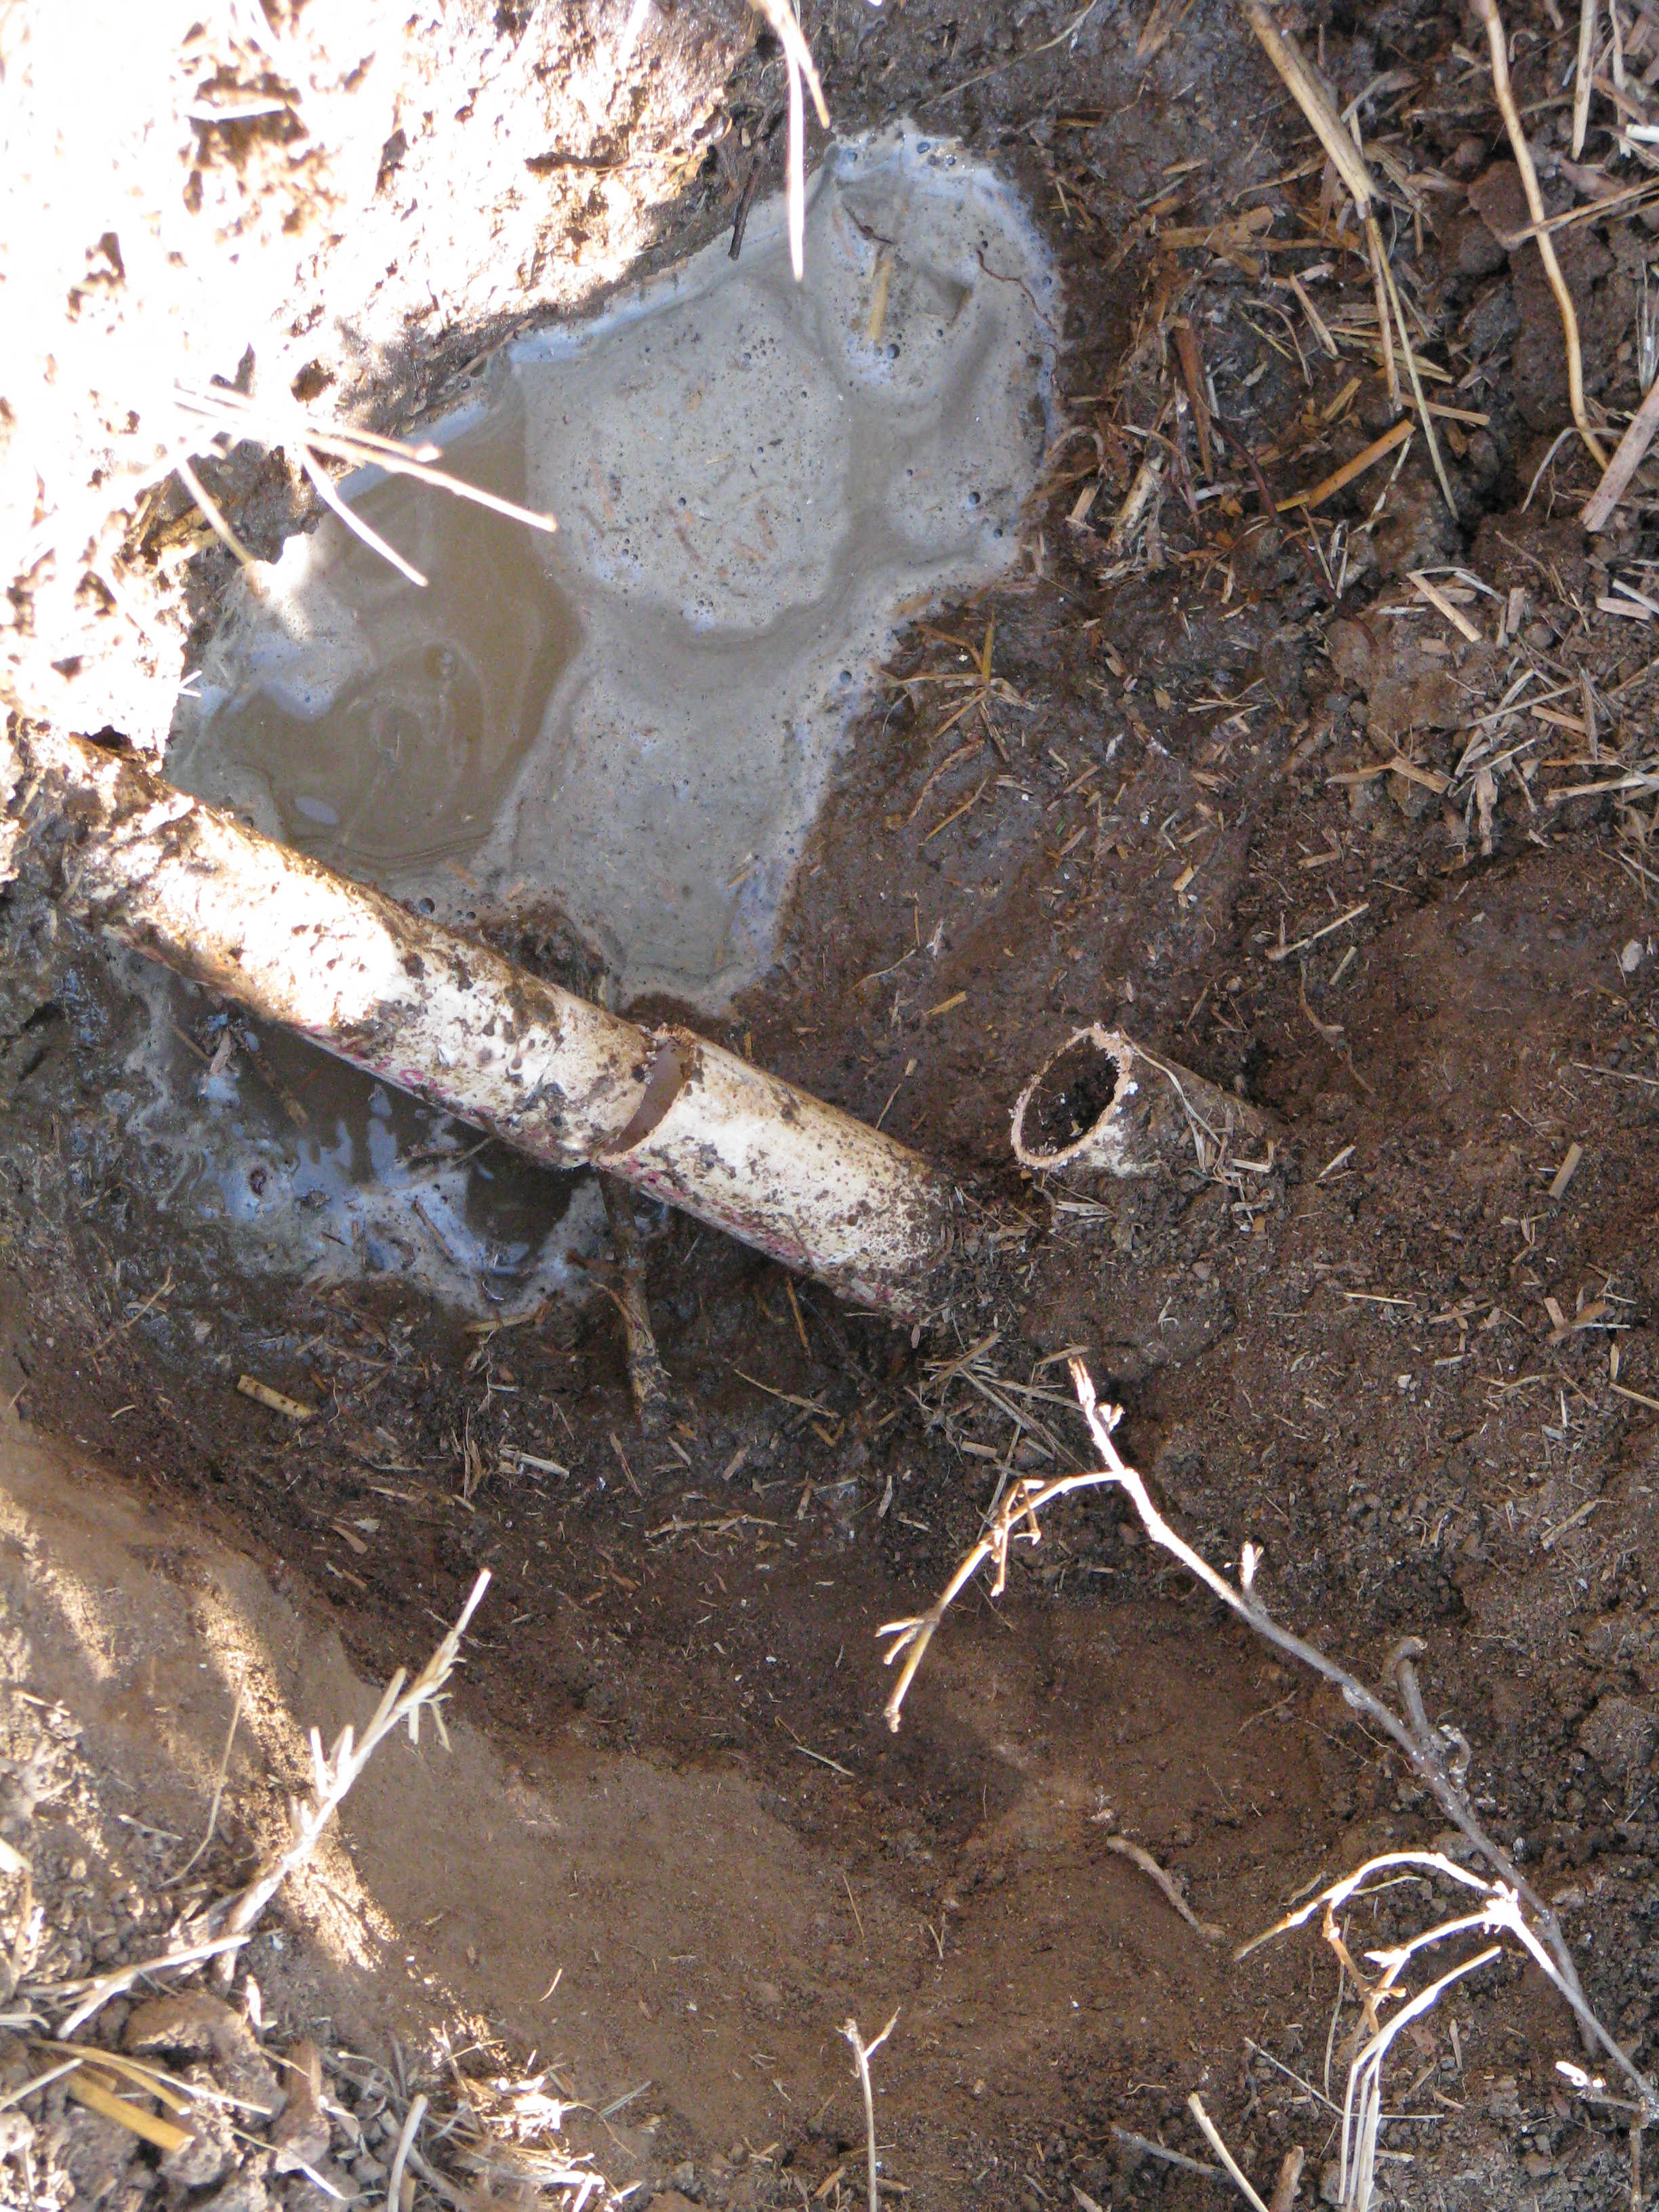
I dug up the water line and placed plywood on a leveled area. I dug up the water line, turned off the irrigation water, opened other faucets to drain and then cut into the pipe. Then I discovered the real pipe beneath this old dry one, and dug it out and cut into it, allowing it to drain as well before connecting a tee.
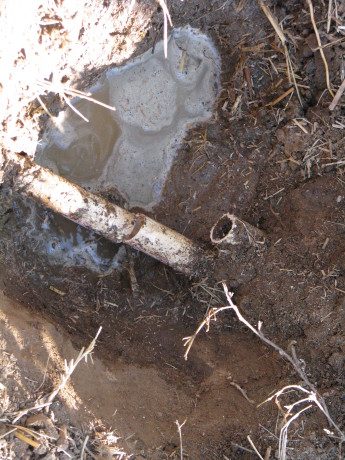
Beneath the old pipe was the real one. The hens were all pressed against the side of the coop trying to see what I was doing, and desperately wanting to search for bugs in the dirt I’d just dug up. Sorry girls.
I laborously walked the rather heavy and unevenly weighted stand (the sink isn’t in the center) over to the plywood. Then I walked it off again, adjusted, and walked it back. Then I adjusted again. Then I had a sit-down and wondered what my chiropractor was going to say.
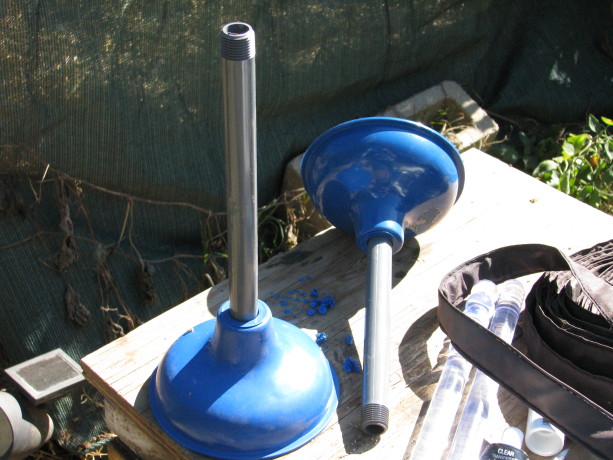
Now came the fun problem-solving part. The drains from the sink were open, so how to catch water and send it off into the guild, without spending a bunch of money? The vision came to me from out of the blue: plungers. Some people have visions of how to earn lots of money, others have visions of how to change the world for the better. My imagination provides me with plungers. Yep.
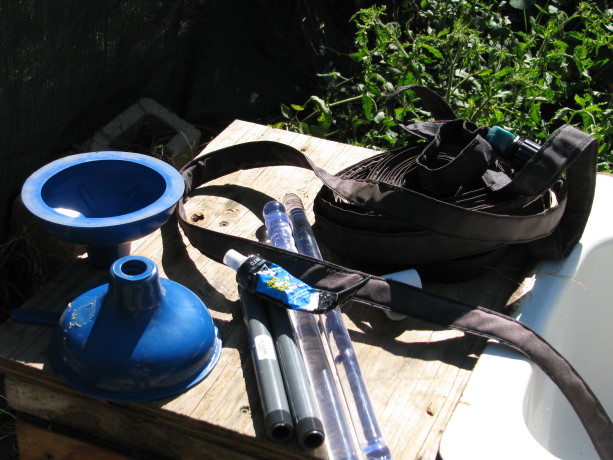
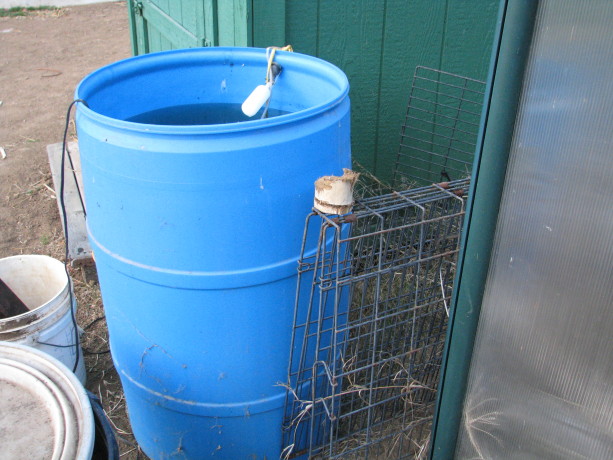
Supplies. I learned from my collegiate daughter, and the hardware store cashier, that plungers were nicknamed ‘magic wands’. No matter how much I learn each day, I’m always in the dark on the important things. However, I felt pretty proud of myself and was excited to get started. I rooted through my barrel of old PVC left from the former owners (I’ve lived here over 14 years and the PVC was already old then) and through my fittings. I only needed a couple new fittings and the plungers from Joe’s Hardware. The plungers had blue cups and clear handles, not the wooden-handled, black-cupped manly plungers of my imagination. If wizards had plungers, I could see them using these. Well this would be a female version and blue is my favorite color.
I screwed in threaded 1/2″ risers and tried them as is, but they leaked, so I put silicone gel around the threads and tried again. It worked after the gel dried. Knowing that the thread of the plunger handle wasn’t the same thread as a PVC riser (how do I know these things? Am I channeling some long-dead plumber??) I grabbed silicone sealant I had recently purchased to seal up leaks in a small fountain so that it would work during garden tours (the sealant worked, but then the motor failed. Sigh.)
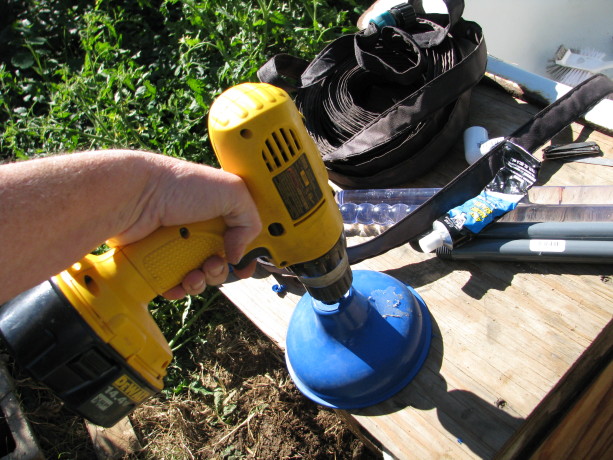
Drilling drain holes in the plunger cups. I had expected to find plunger heads and handles sold seperately, and remembered seeing plungers with threaded holes all the way through. I must have been flashing back to the cheap supplies offered to the parks department when I was a Ranger because all I found at Joes were complete, and the holes were covered (better suction). I drilled through the rubber to make the drain hole (which created some very cute blue rubber curls).
I connected up most parts, but then came the challenge, to space the plungers the correct distance apart, and measuring is not my thing. It seems simple, but it never works for me. My ginko must have kicked in, though, because I realized that I could just place the plungers over the sink holes on top and build it up there, and of course it would be the correct distance underneath.
Ha! I didn’t have to lay in the tomatoes and work around the legs in the back! I could do it on top and still get the length right. I’m still proud of figuring that out.
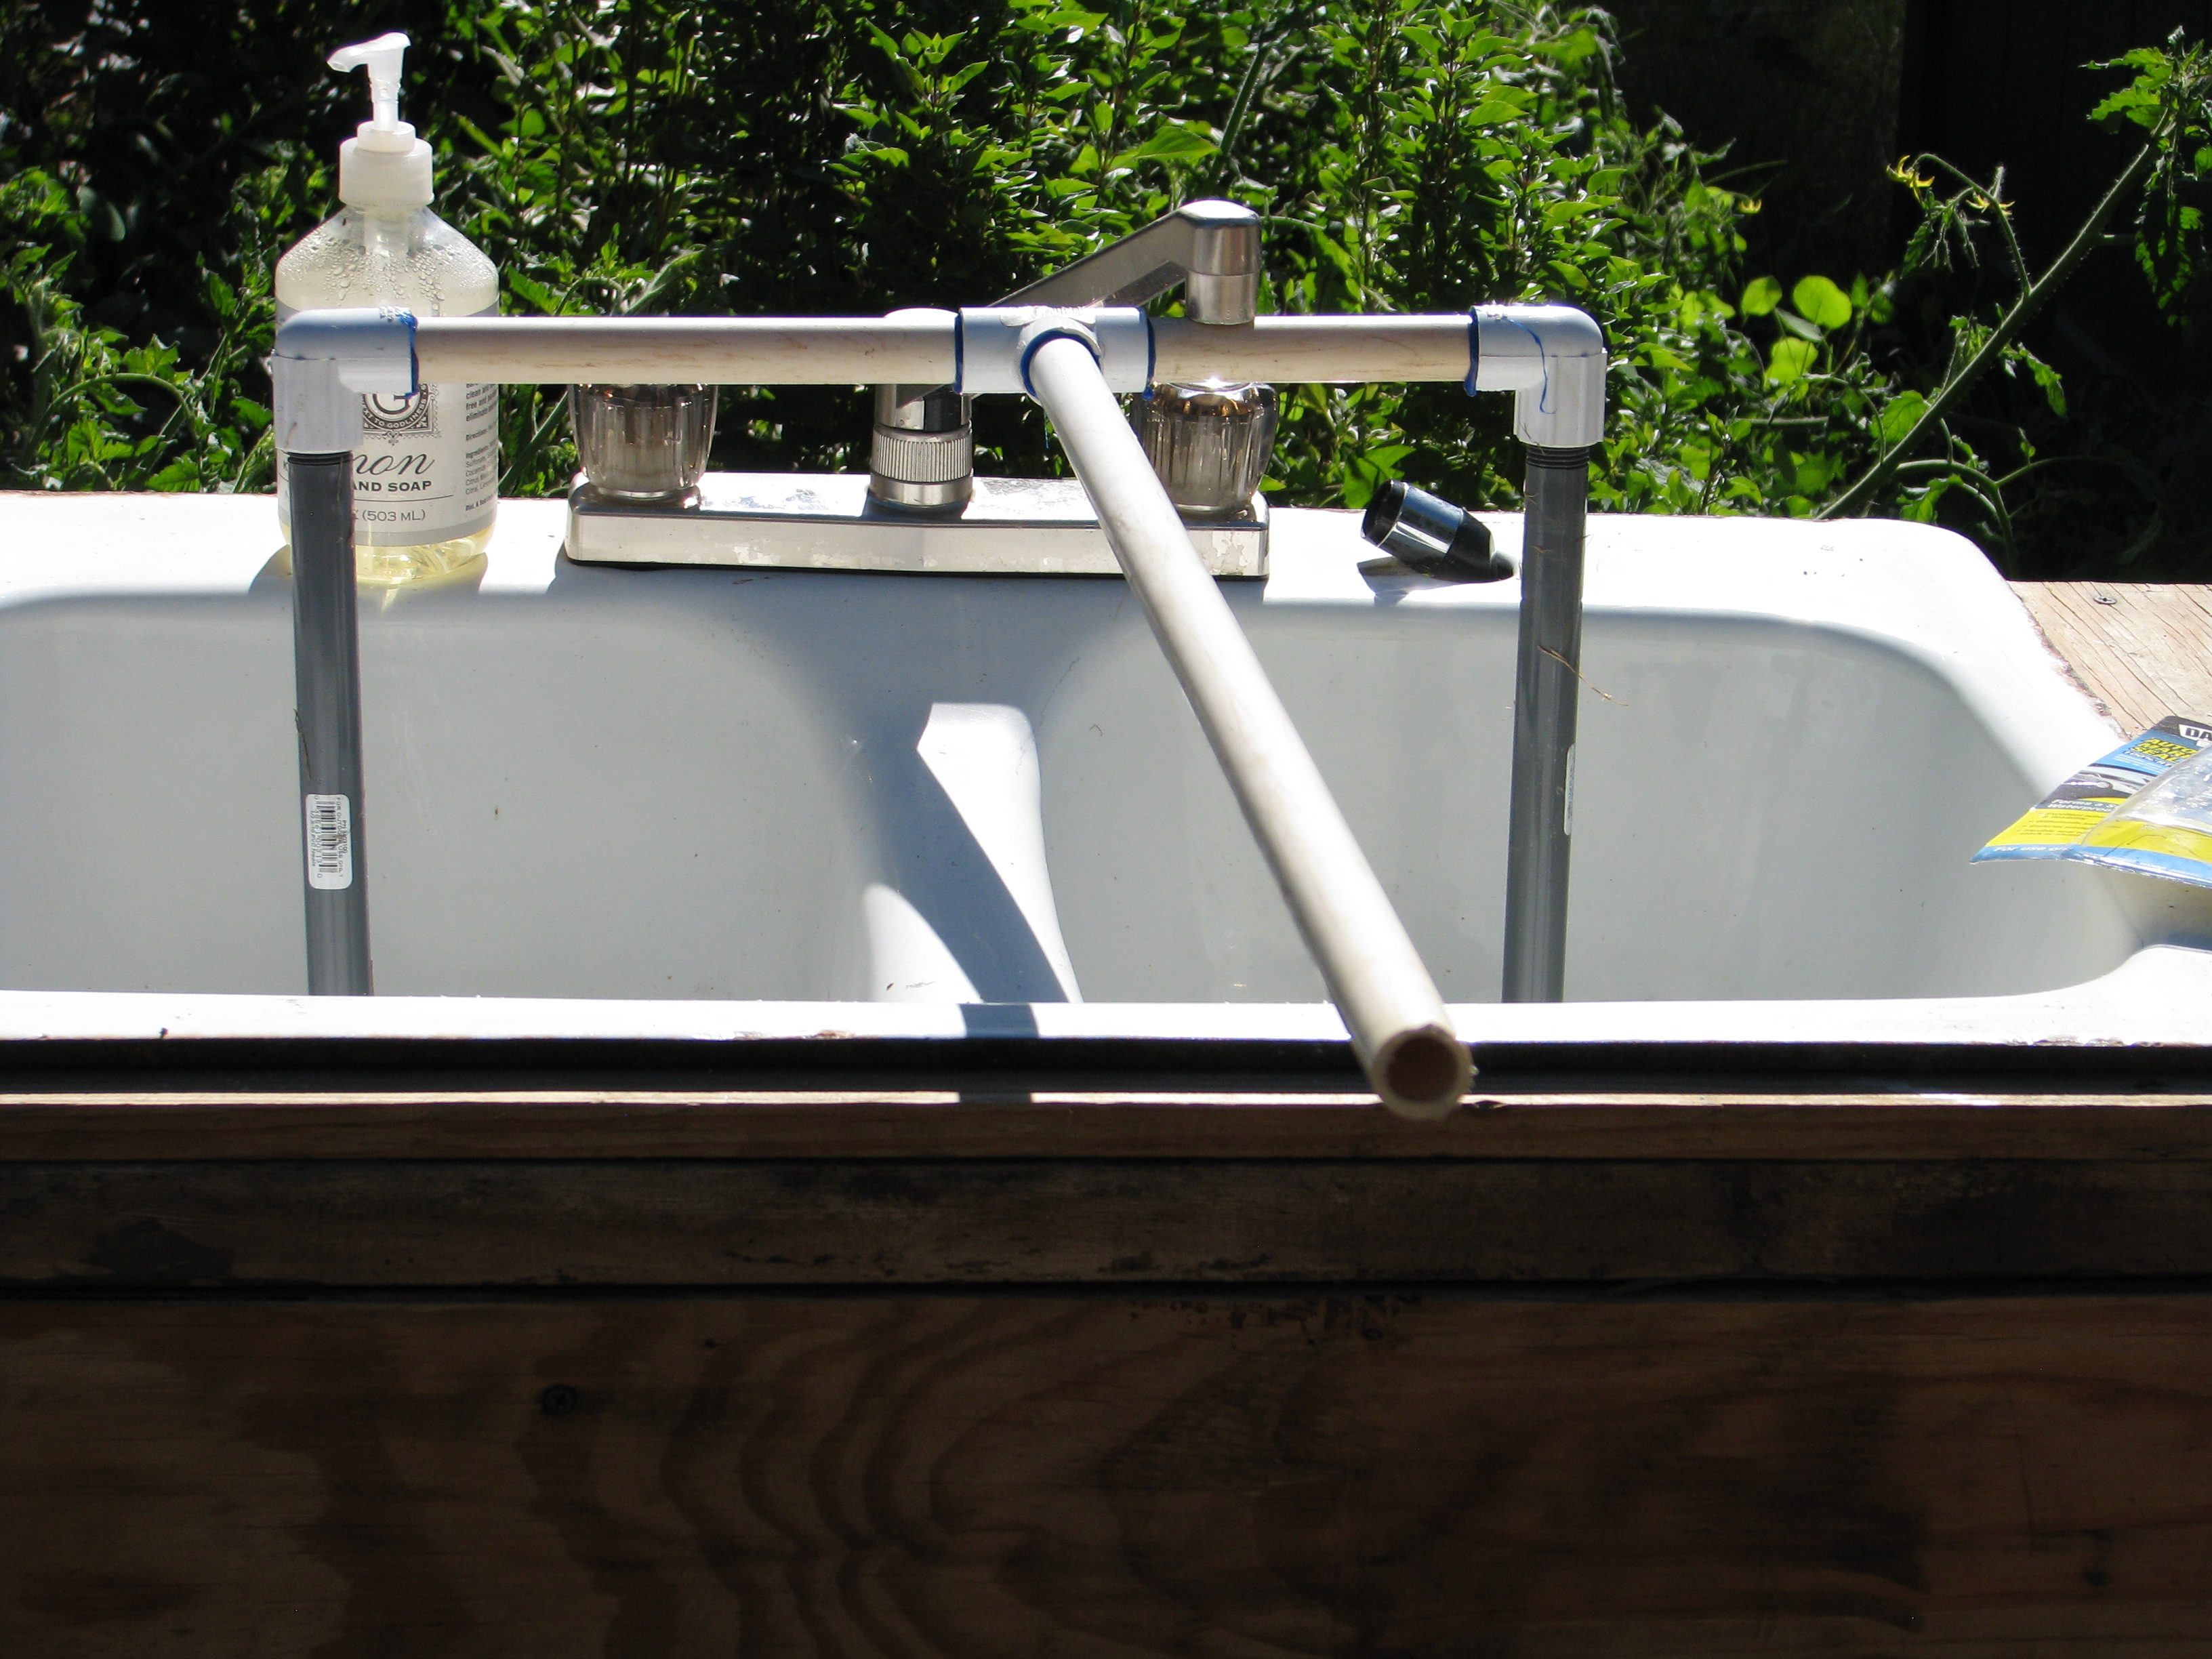
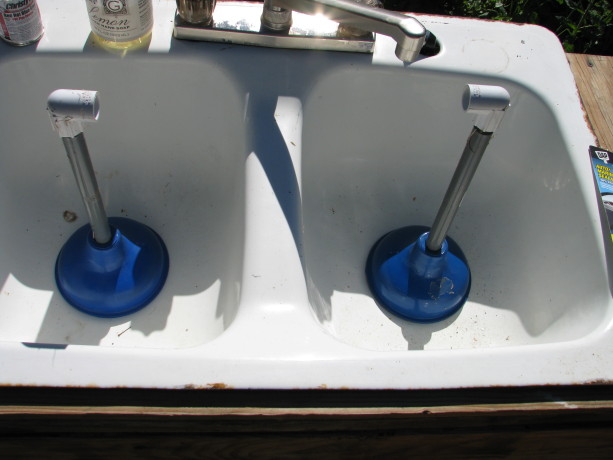
All ready to go. The trick really was to get this thing in place around the support legs behind the fishtank stand! 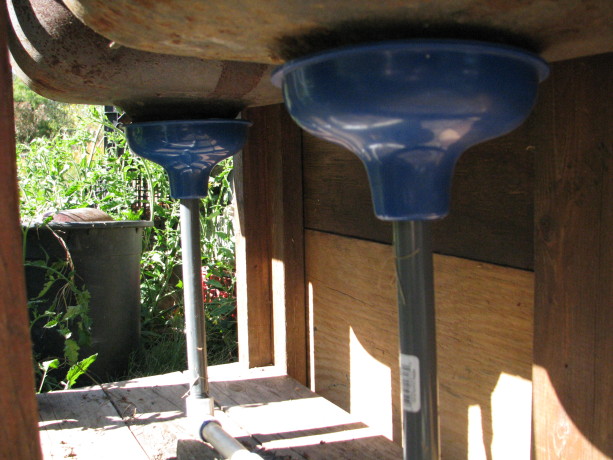
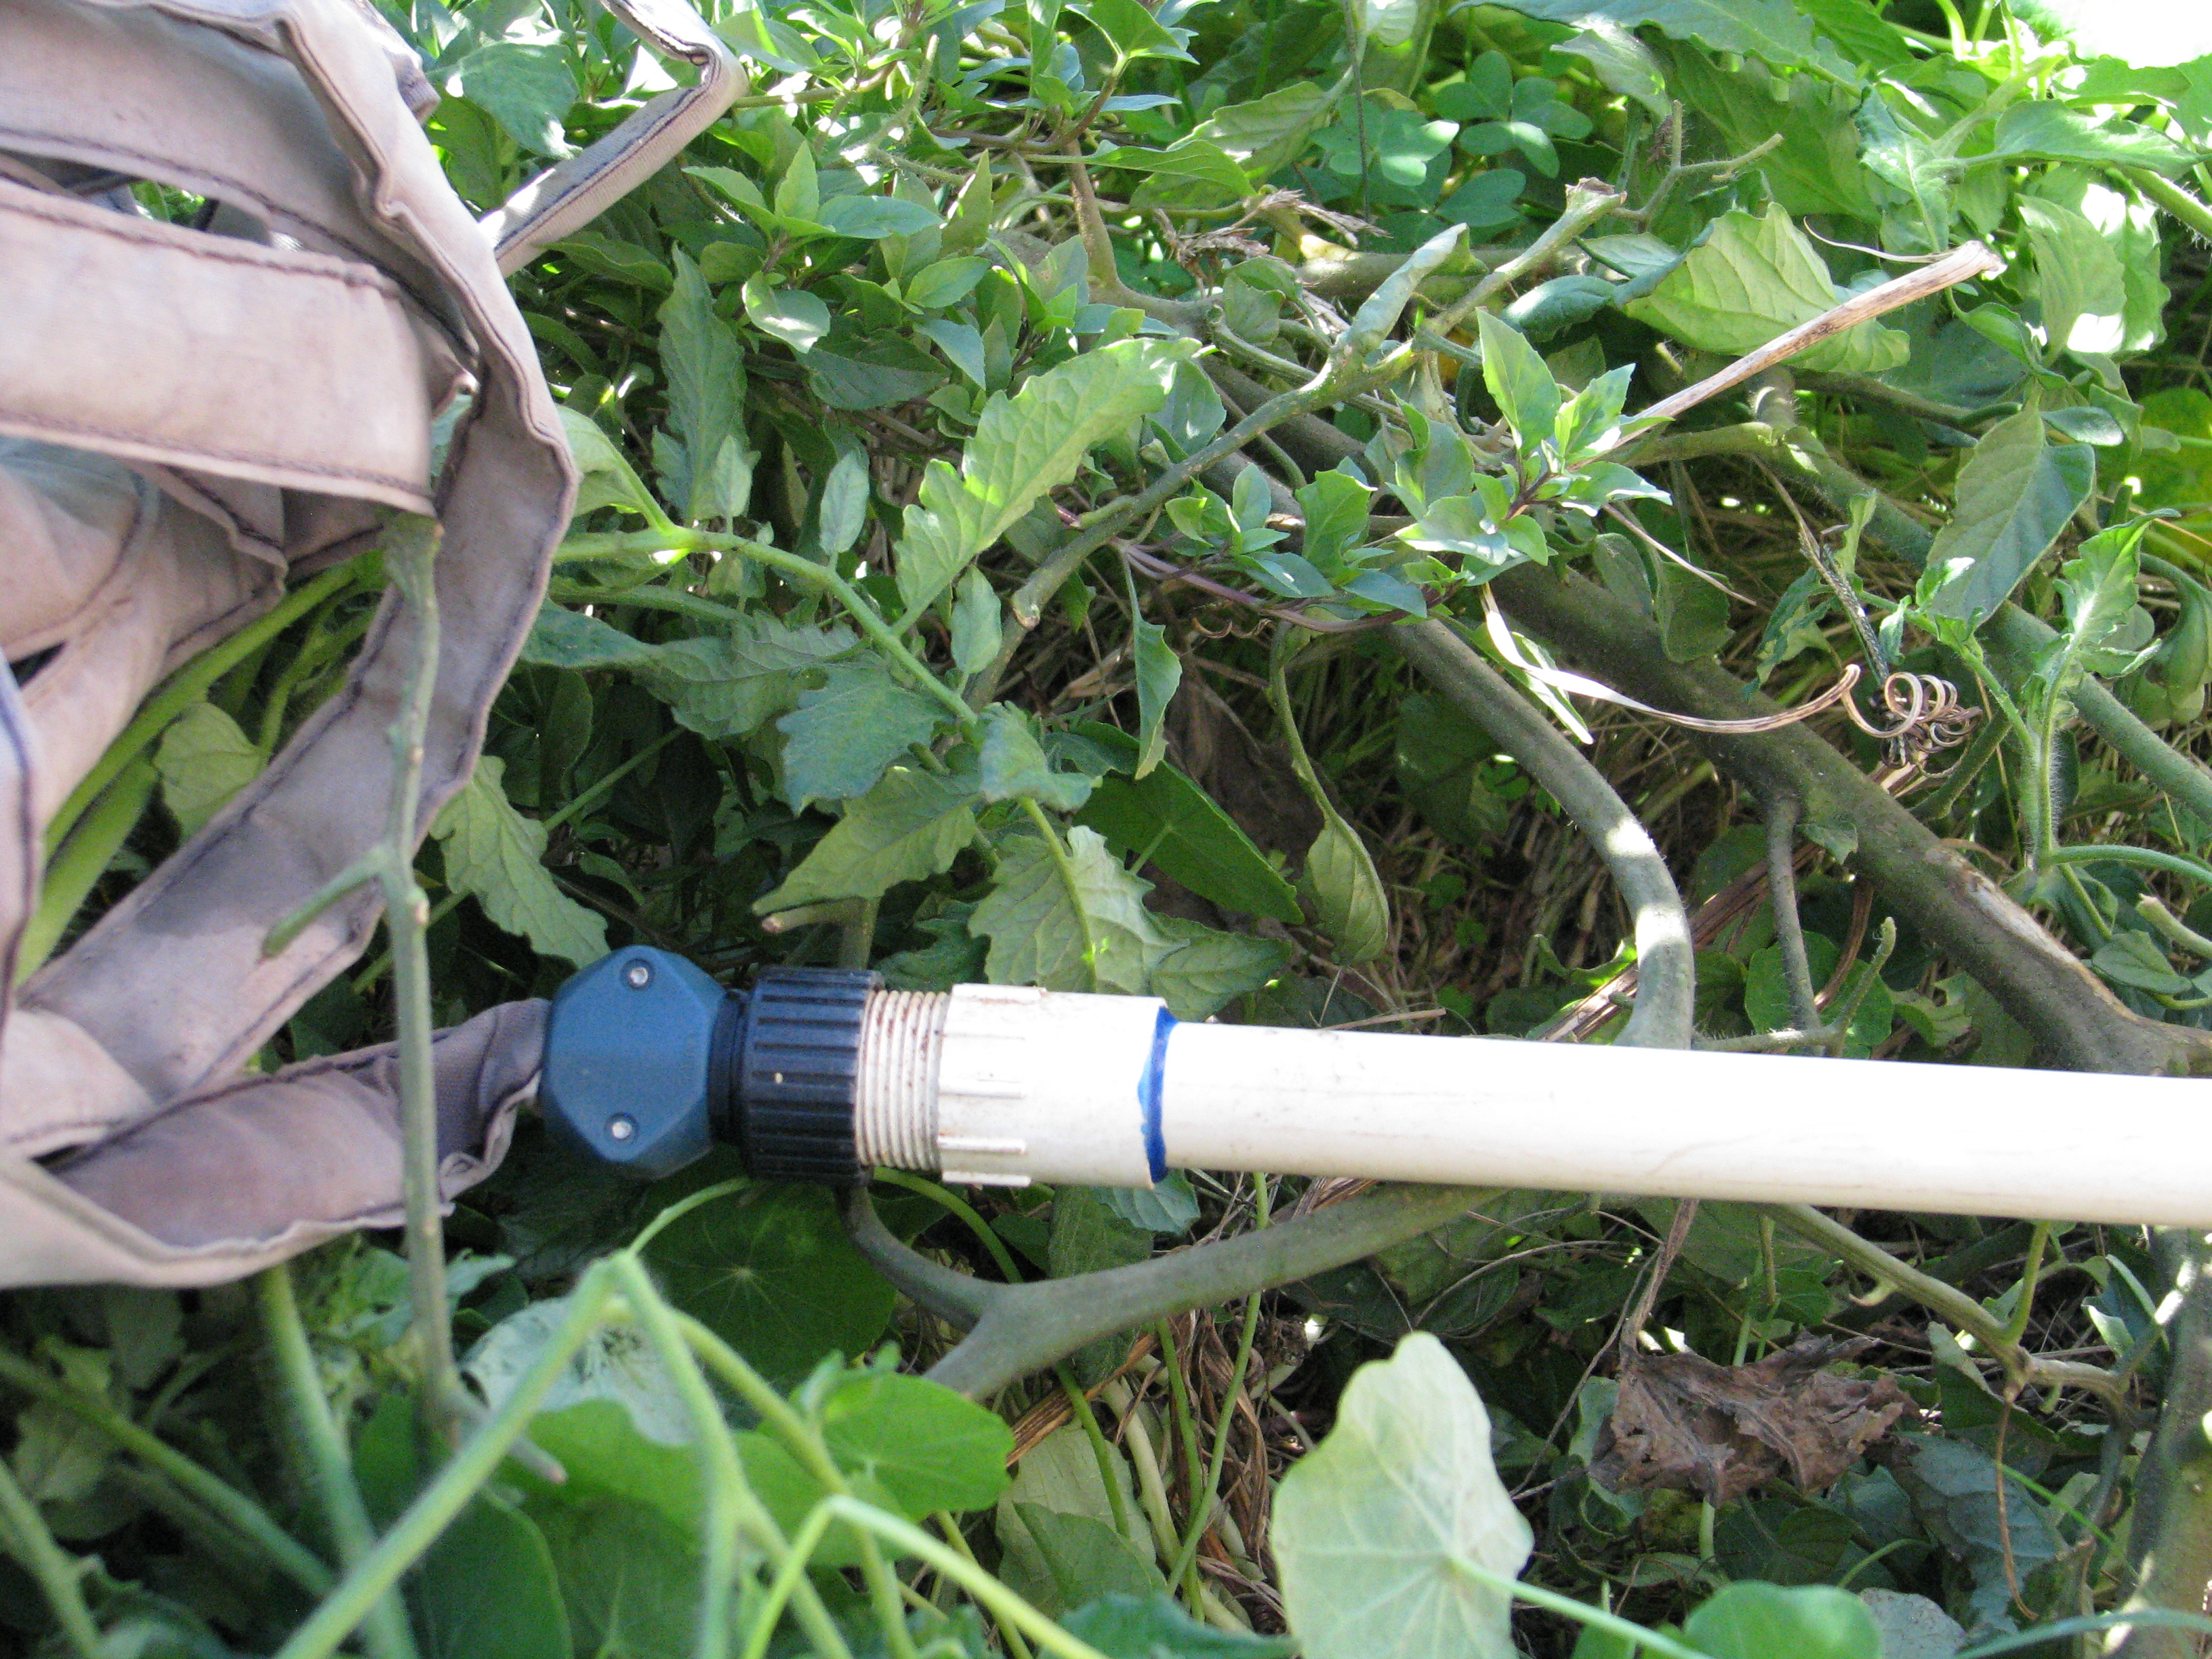
My beauties. My plan was to screw it into a soaker hose that I already had, but I worried that without water pressure it wouldn’t work. It didn’t.

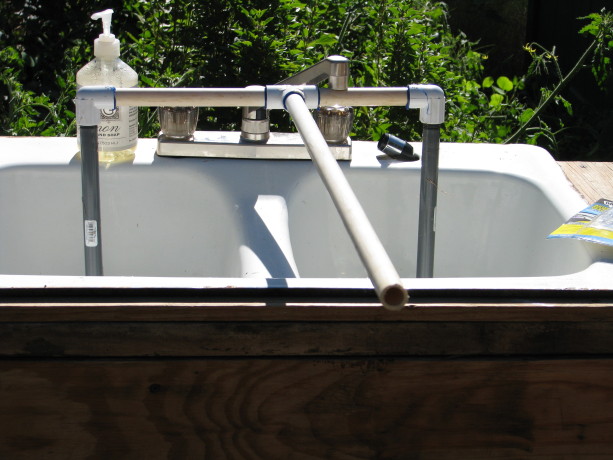
The soaker hose idea failed because of the lack of water pressure, and caused the water to back up and overflow the plunger cups. I removed the screw end from the PVC and glued on more 1/2″ pipe so that the water would directly empty near the apple tree.
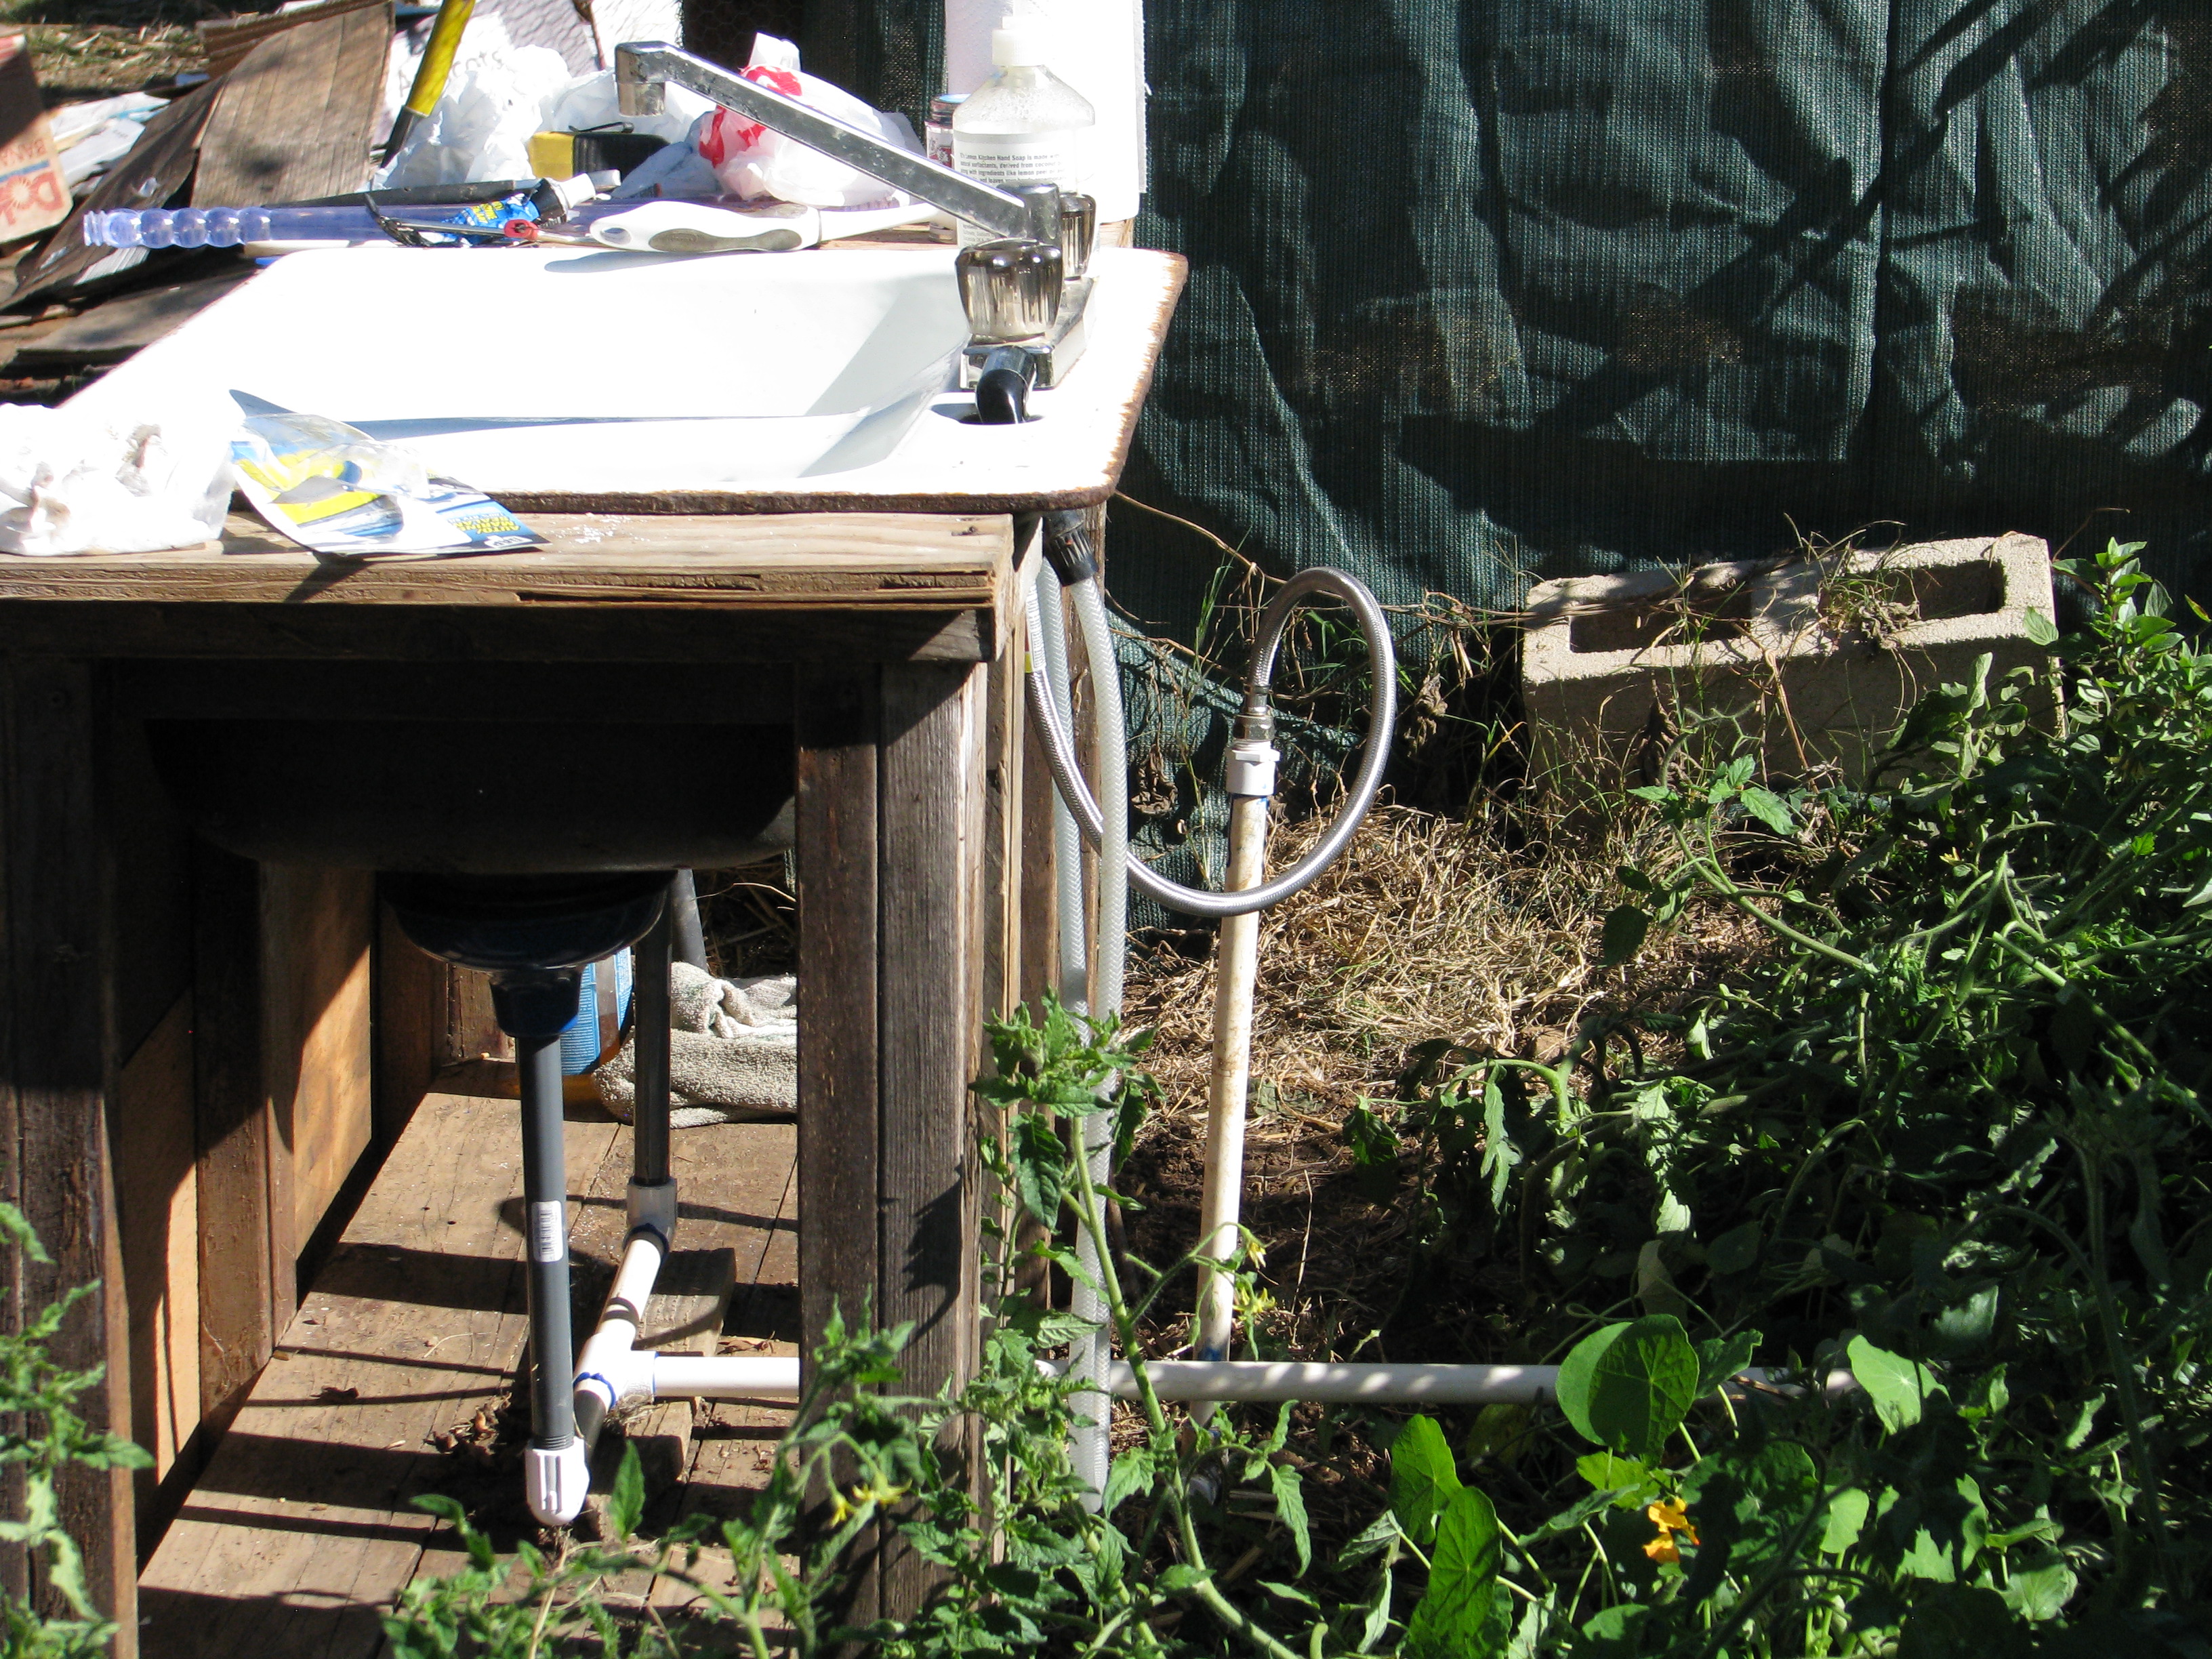
There were a few other tweaks, such as widening the drill holes in the plunger for better water drainage, propping the pipe up on a piece of wood so that it fit the drains more securely (it isn’t fastened onto the stand so that if I had to access the plunger cups I could do so easily), and placing screen over the drains so no one would lose a ring down into the device.

Now the water drains directly into the bed. Tip: glue the long pieces on once the main part is in place under the sink. Plants will grow up around the back of the sink to hide it from view. Now it all works, I have less work to do, no yucky buckets to haul, the apple tree receives greywater, I repurposed several items and although I had to buy a few things, I supported a local business, the sink is in a better location, and I like the blue color of the plunger cups.
Best of all, now I have some snazzy clear handles to use for some other project!

Hmm. Threaded magic wands! I wonder how I can repurpose these beauties?! - Animals, Gardening adventures, Hugelkultur, Natives, Other Insects, Permaculture and Edible Forest Gardening Adventures, Ponds
Then and Now
This photo was taken just as work was begun on transforming the property into a garden, in February, 2011.
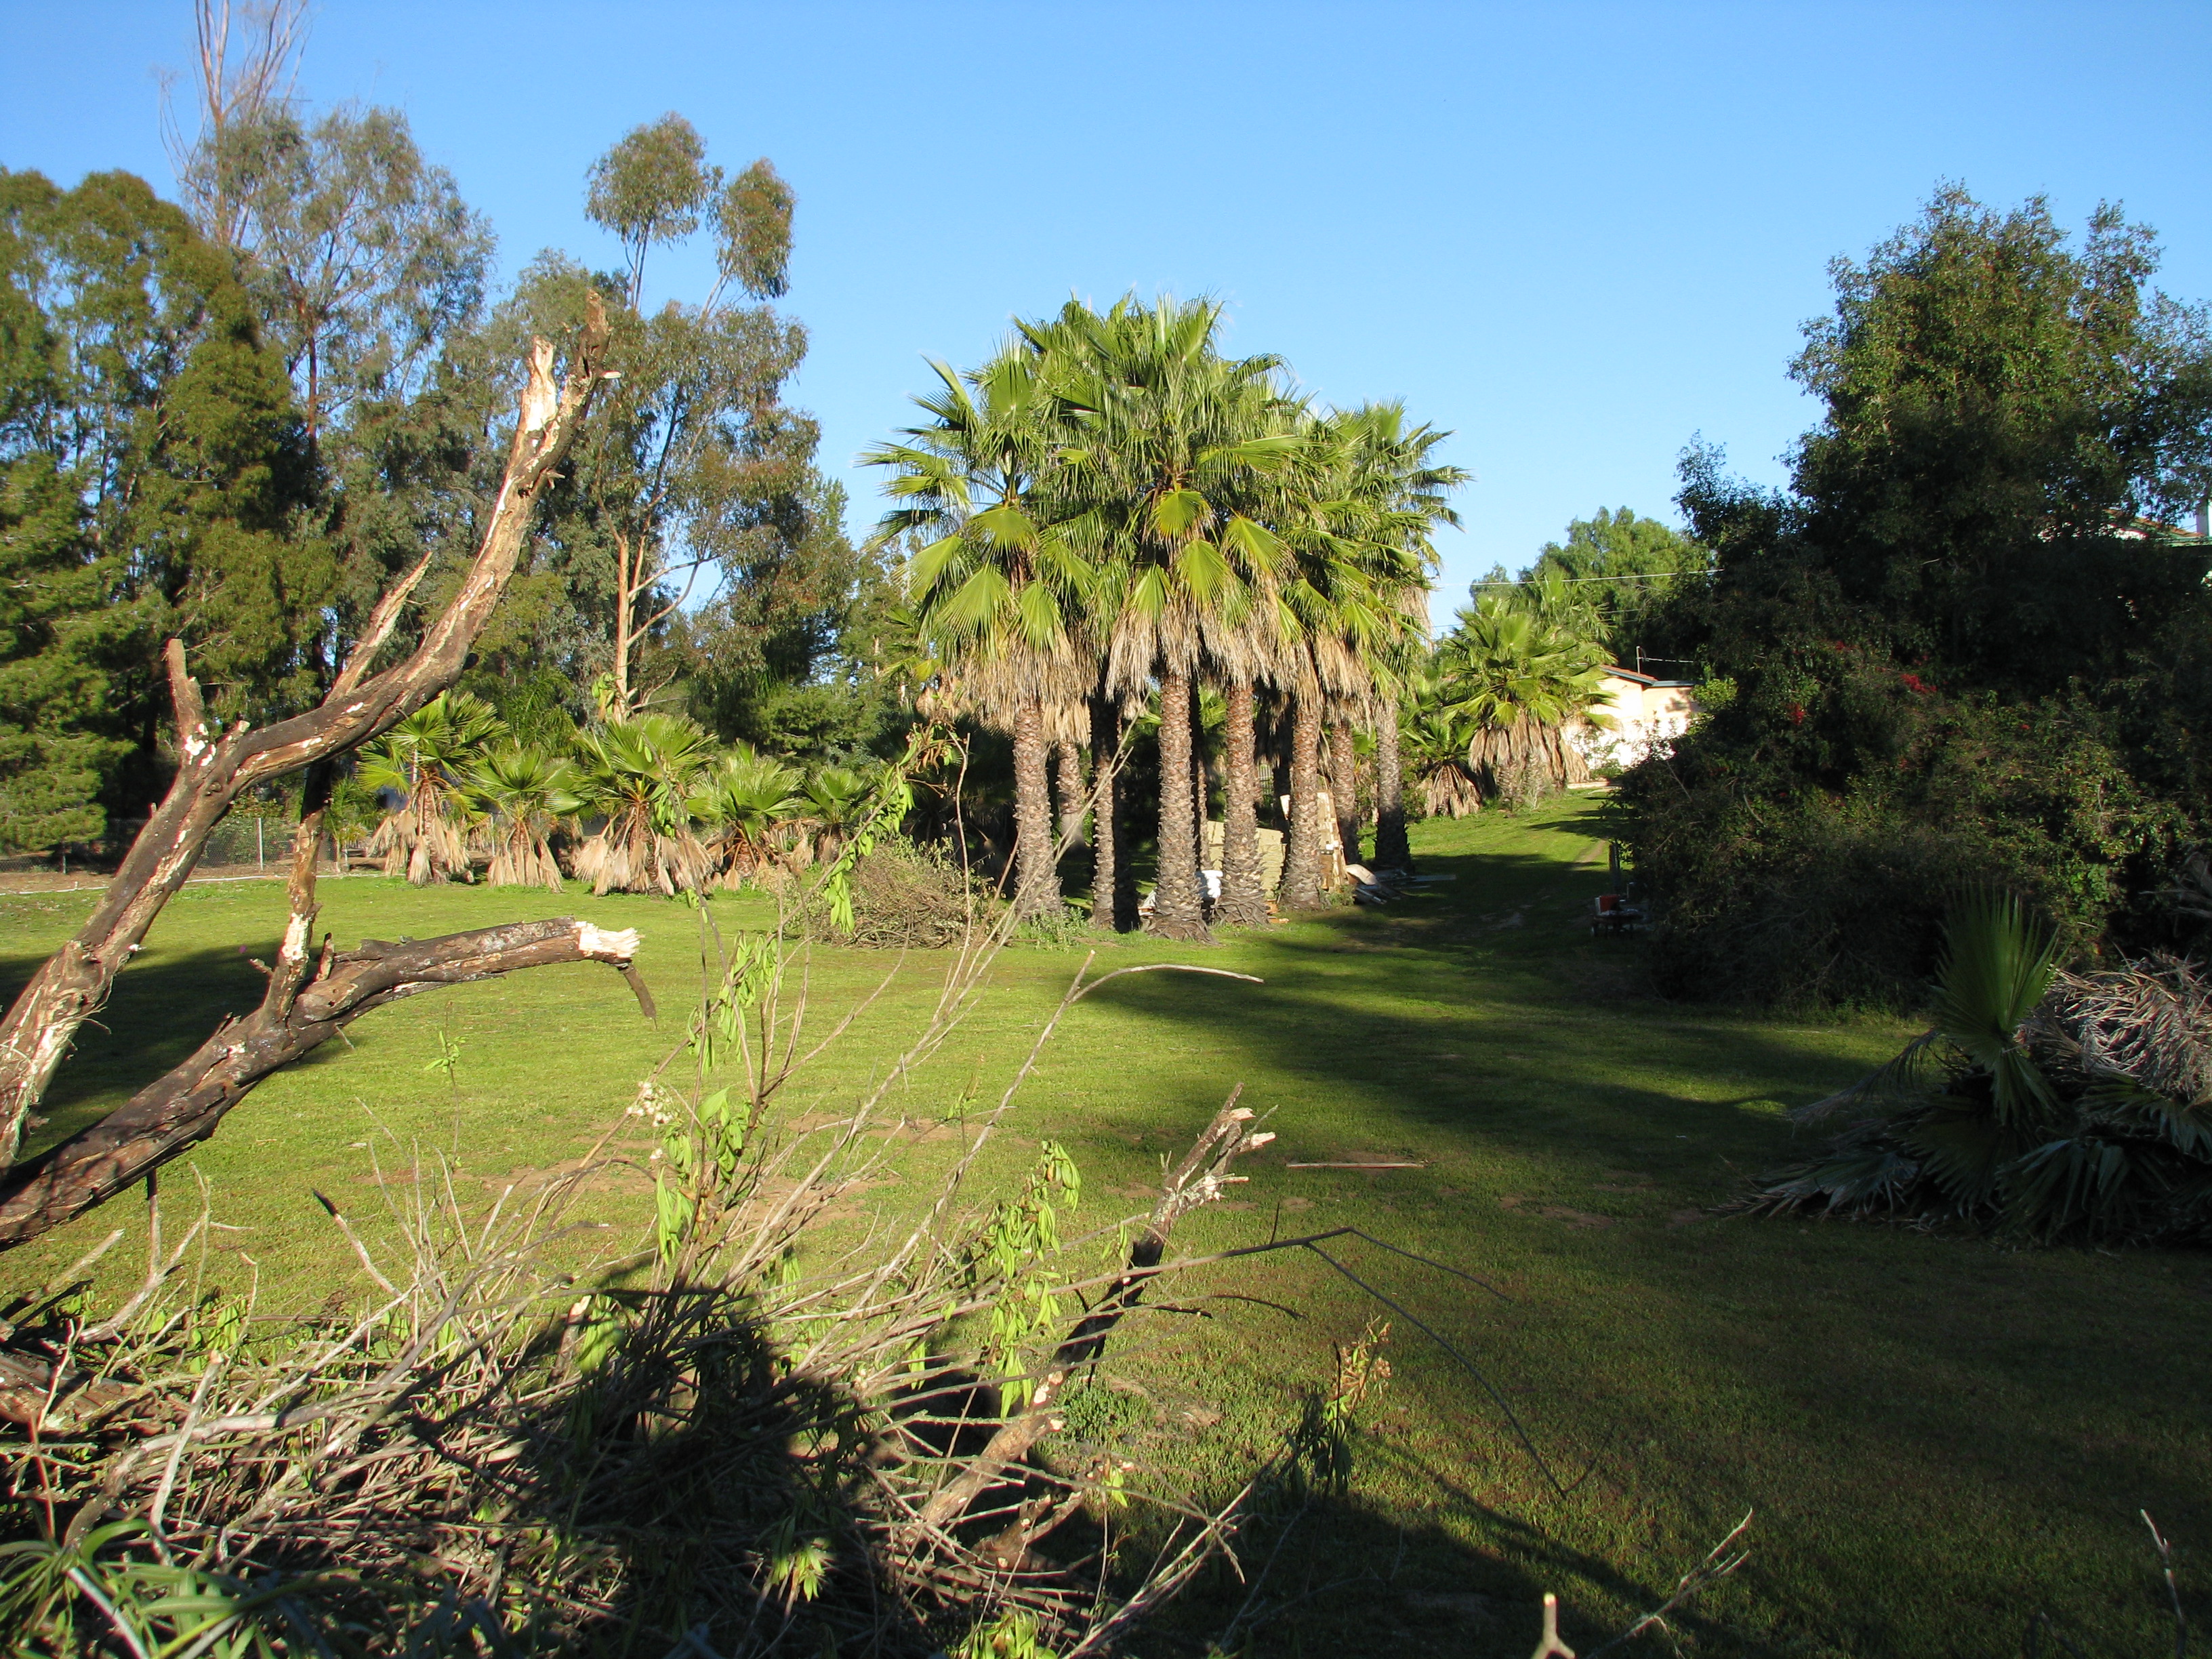
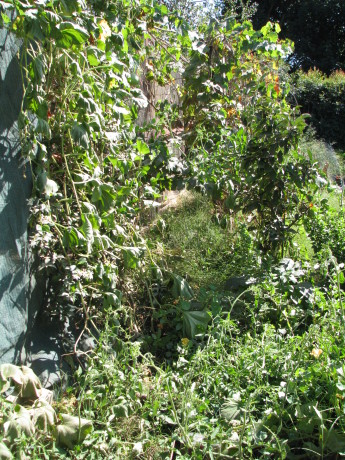
This photo was taken last Thursday, Oct. 31, 2013, from the same location.

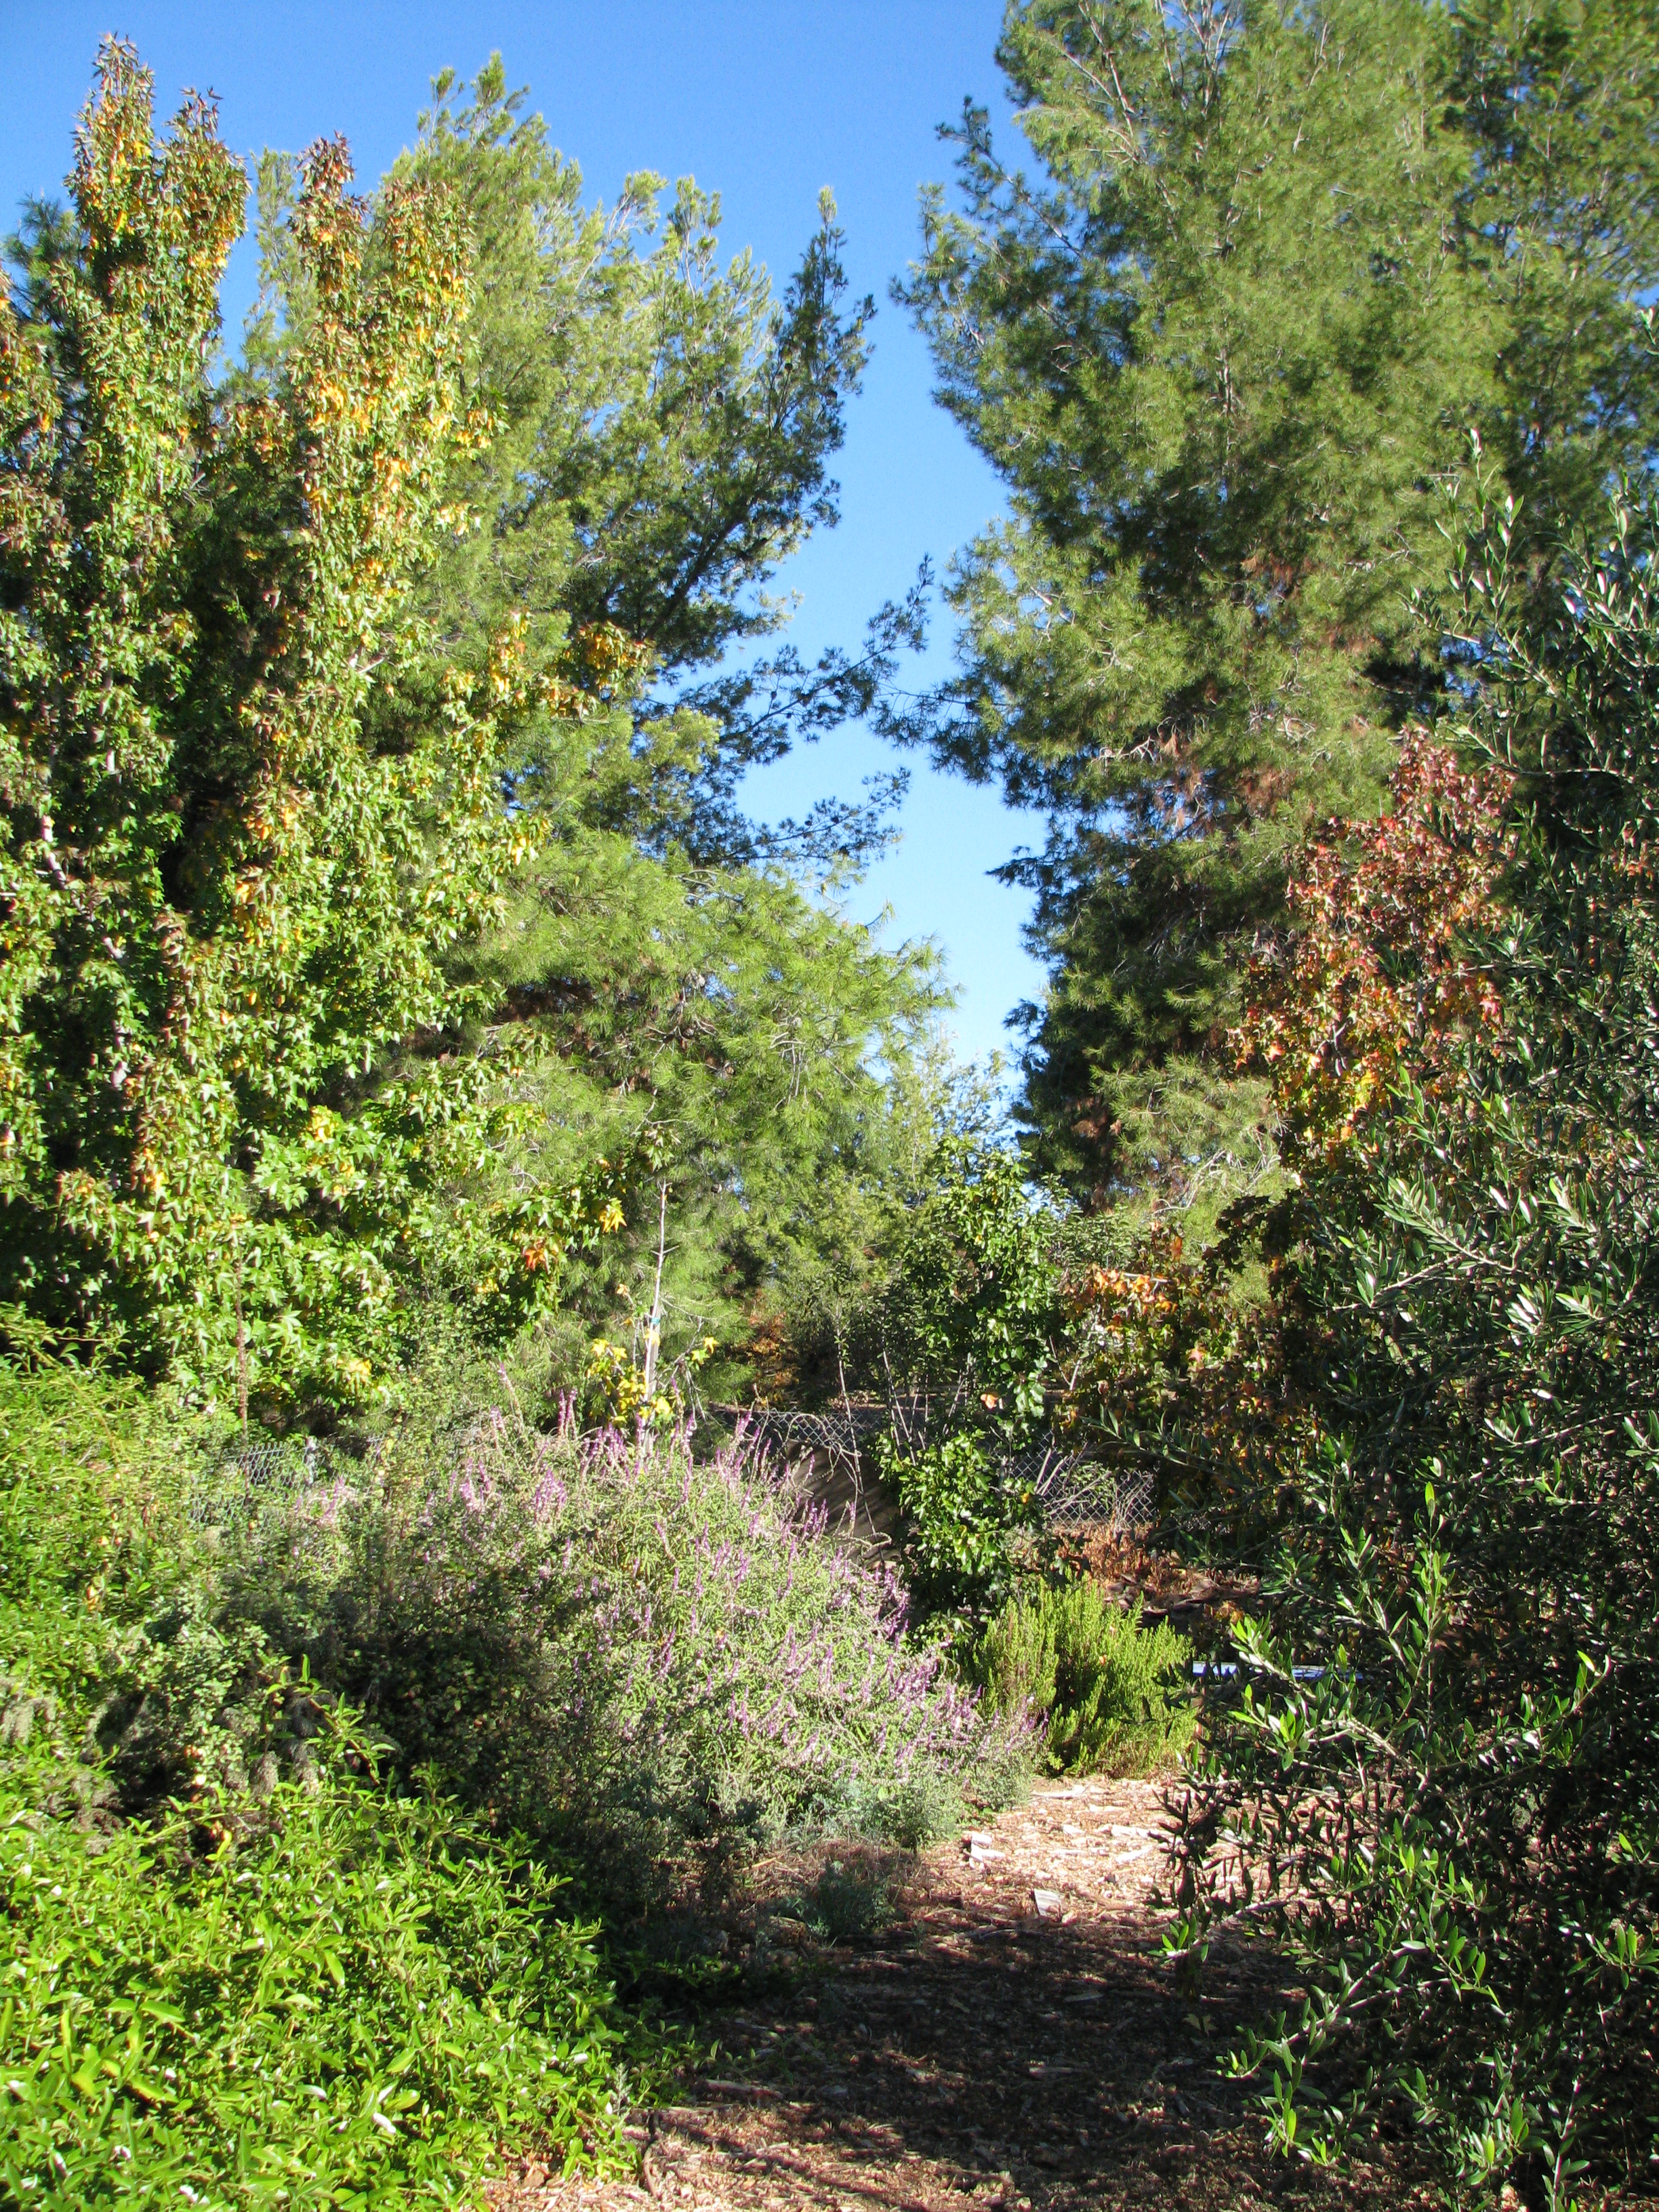
This view may look weedy, especially in the early morning light on this brilliant Halloween morning. What you are seeing is the first bog, which is the green spot in the foreground. The dirt area is the overflow, if torrential rains ever come again. To the left, the tall bushes constitute the withy hide, and to the left is the big pond, although you have to take my word for it. Tall bamboo arches over the stumps of the palm trees in the above photo, which are trellises for roses and other vines. A nectarine branch is in the right foreground. The tall flowering plants are a native called fleabane. They reseed readily, and I allow them to because of several reasons. They grow five to six feet tall and help shade smaller trees and plants against the harsh summer sun, protecting them from sun scald. They also die off in the winter, making good hugelkultur material. The purple flowers, which are in the above photo now turning into fuzzy seed clumps, are attractive. The most important thing though is that they are excellent hosts for native insects of all kinds. Ladybugs, lacewings, spiders, and hundreds of tiny wasps and flies, many of which are parasitic, all love these flowers. All summer long they are alive with life. Inviting in the native pollinators, and growing a polyculture garden, is the first line of defense in growing naturally.
Allowing nature to define parts of your garden leads to happy surprises and lots of help from unexpected friends, such as bugs, birds and lizards. This kind of garden is endlessly interesting, with new things to study every day.
The following photos were all taken the same brilliant morning, Oct. 31, 2013. Here in San Diego county we were having what is called a Santa Ana, where warm, dry winds from the desert blow westward, as opposed to the more humid eastward flow of air from the ocean that we normally have. Santa Anas can bring heavy winds and make tinder-dry weedy hills a fire hazard, but this year we’ve been lucky and no major fires have happened. We even had almost 3/4 ” of rain, last week, which is practically unheard of for October. The warm Autumn sunshine was intense and lovely, and I had to take photos even though the light was too strong for good ones.
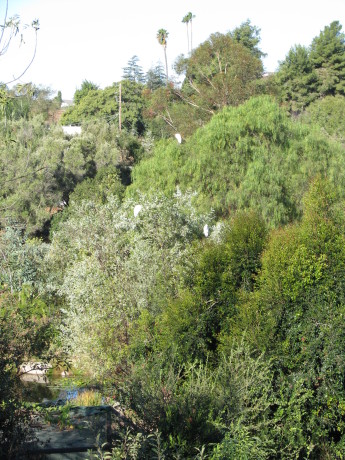
We went up on the roof to view these three greater egrets perched in our trees over the pond. 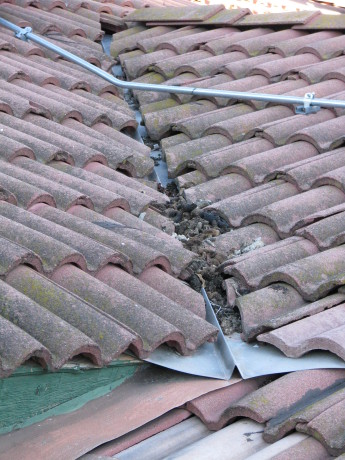
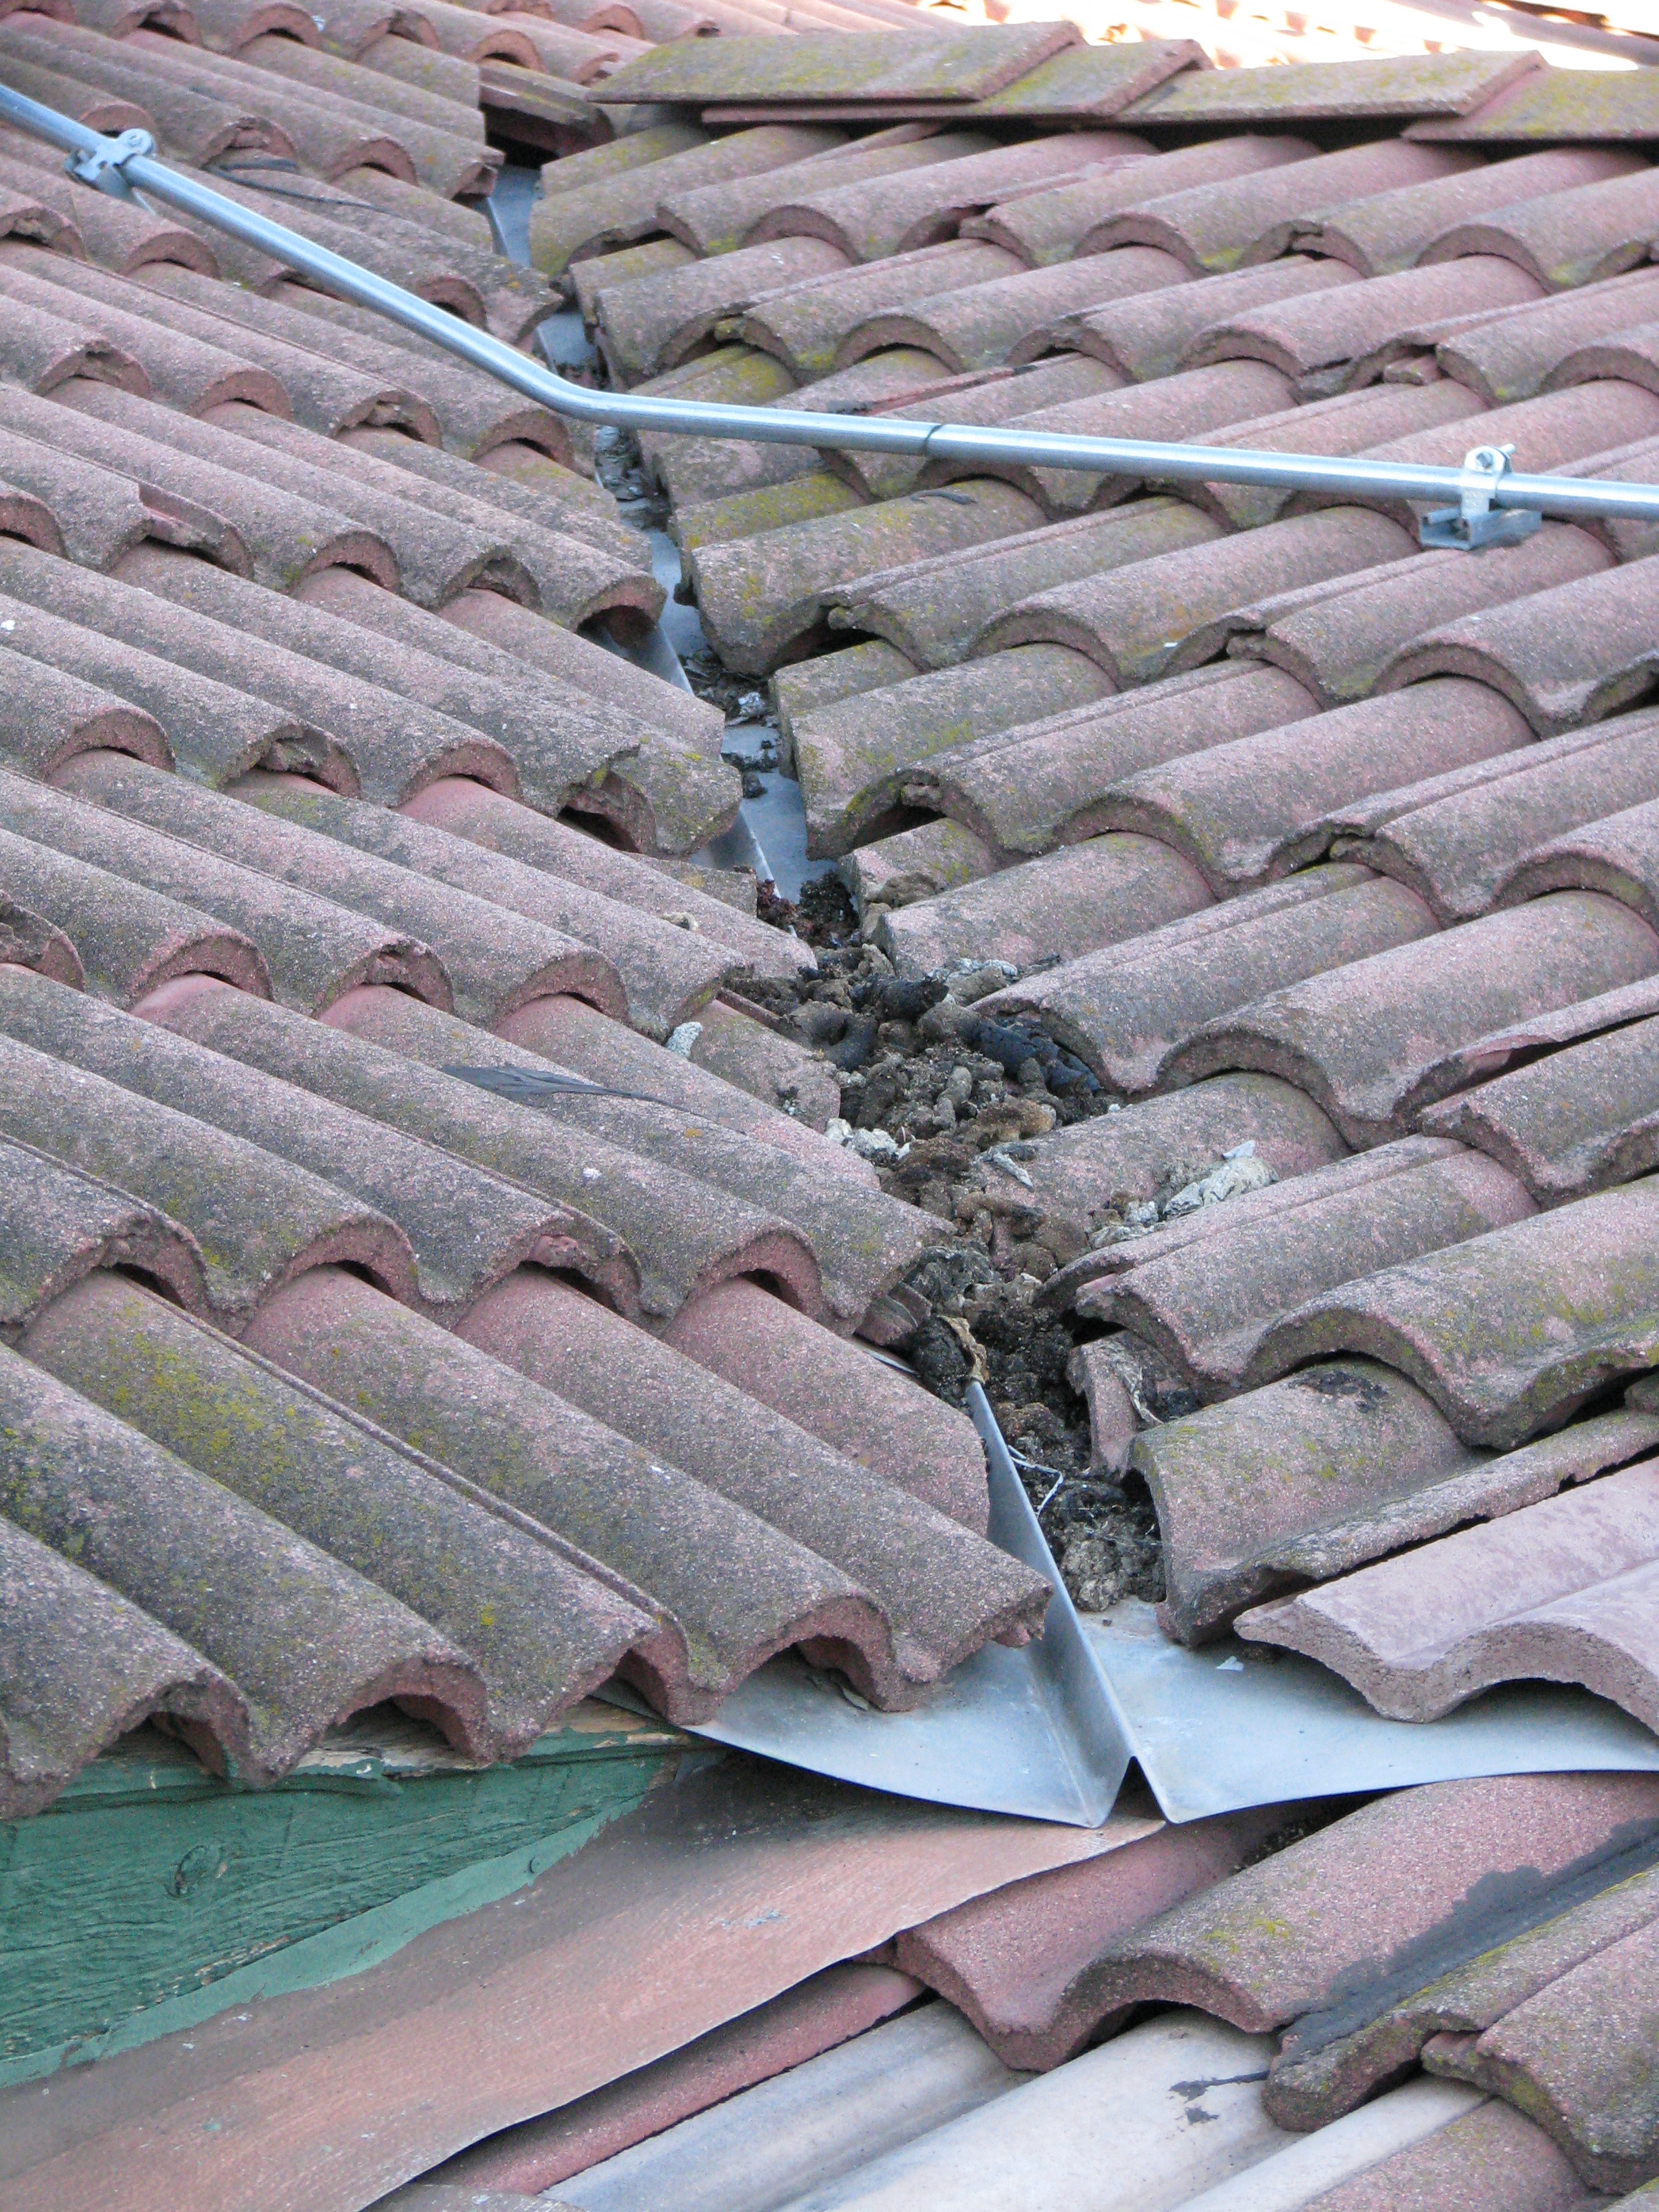
Being on the roof is an education. Here is lots of racoon poo between the tiles. Why?! 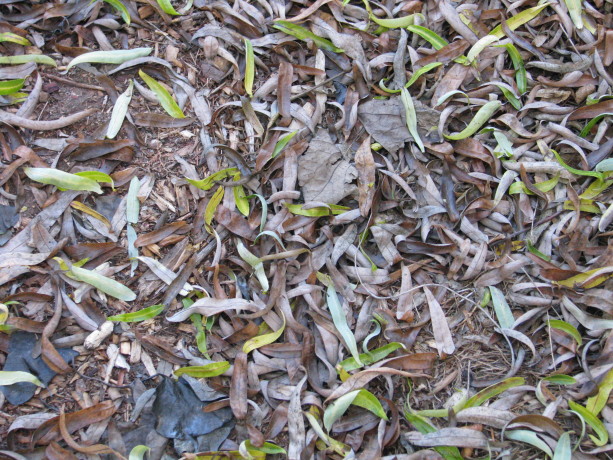
We don’t have dramatic Fall colors here, but the subtle Autumn hues of leaves is lovely. 
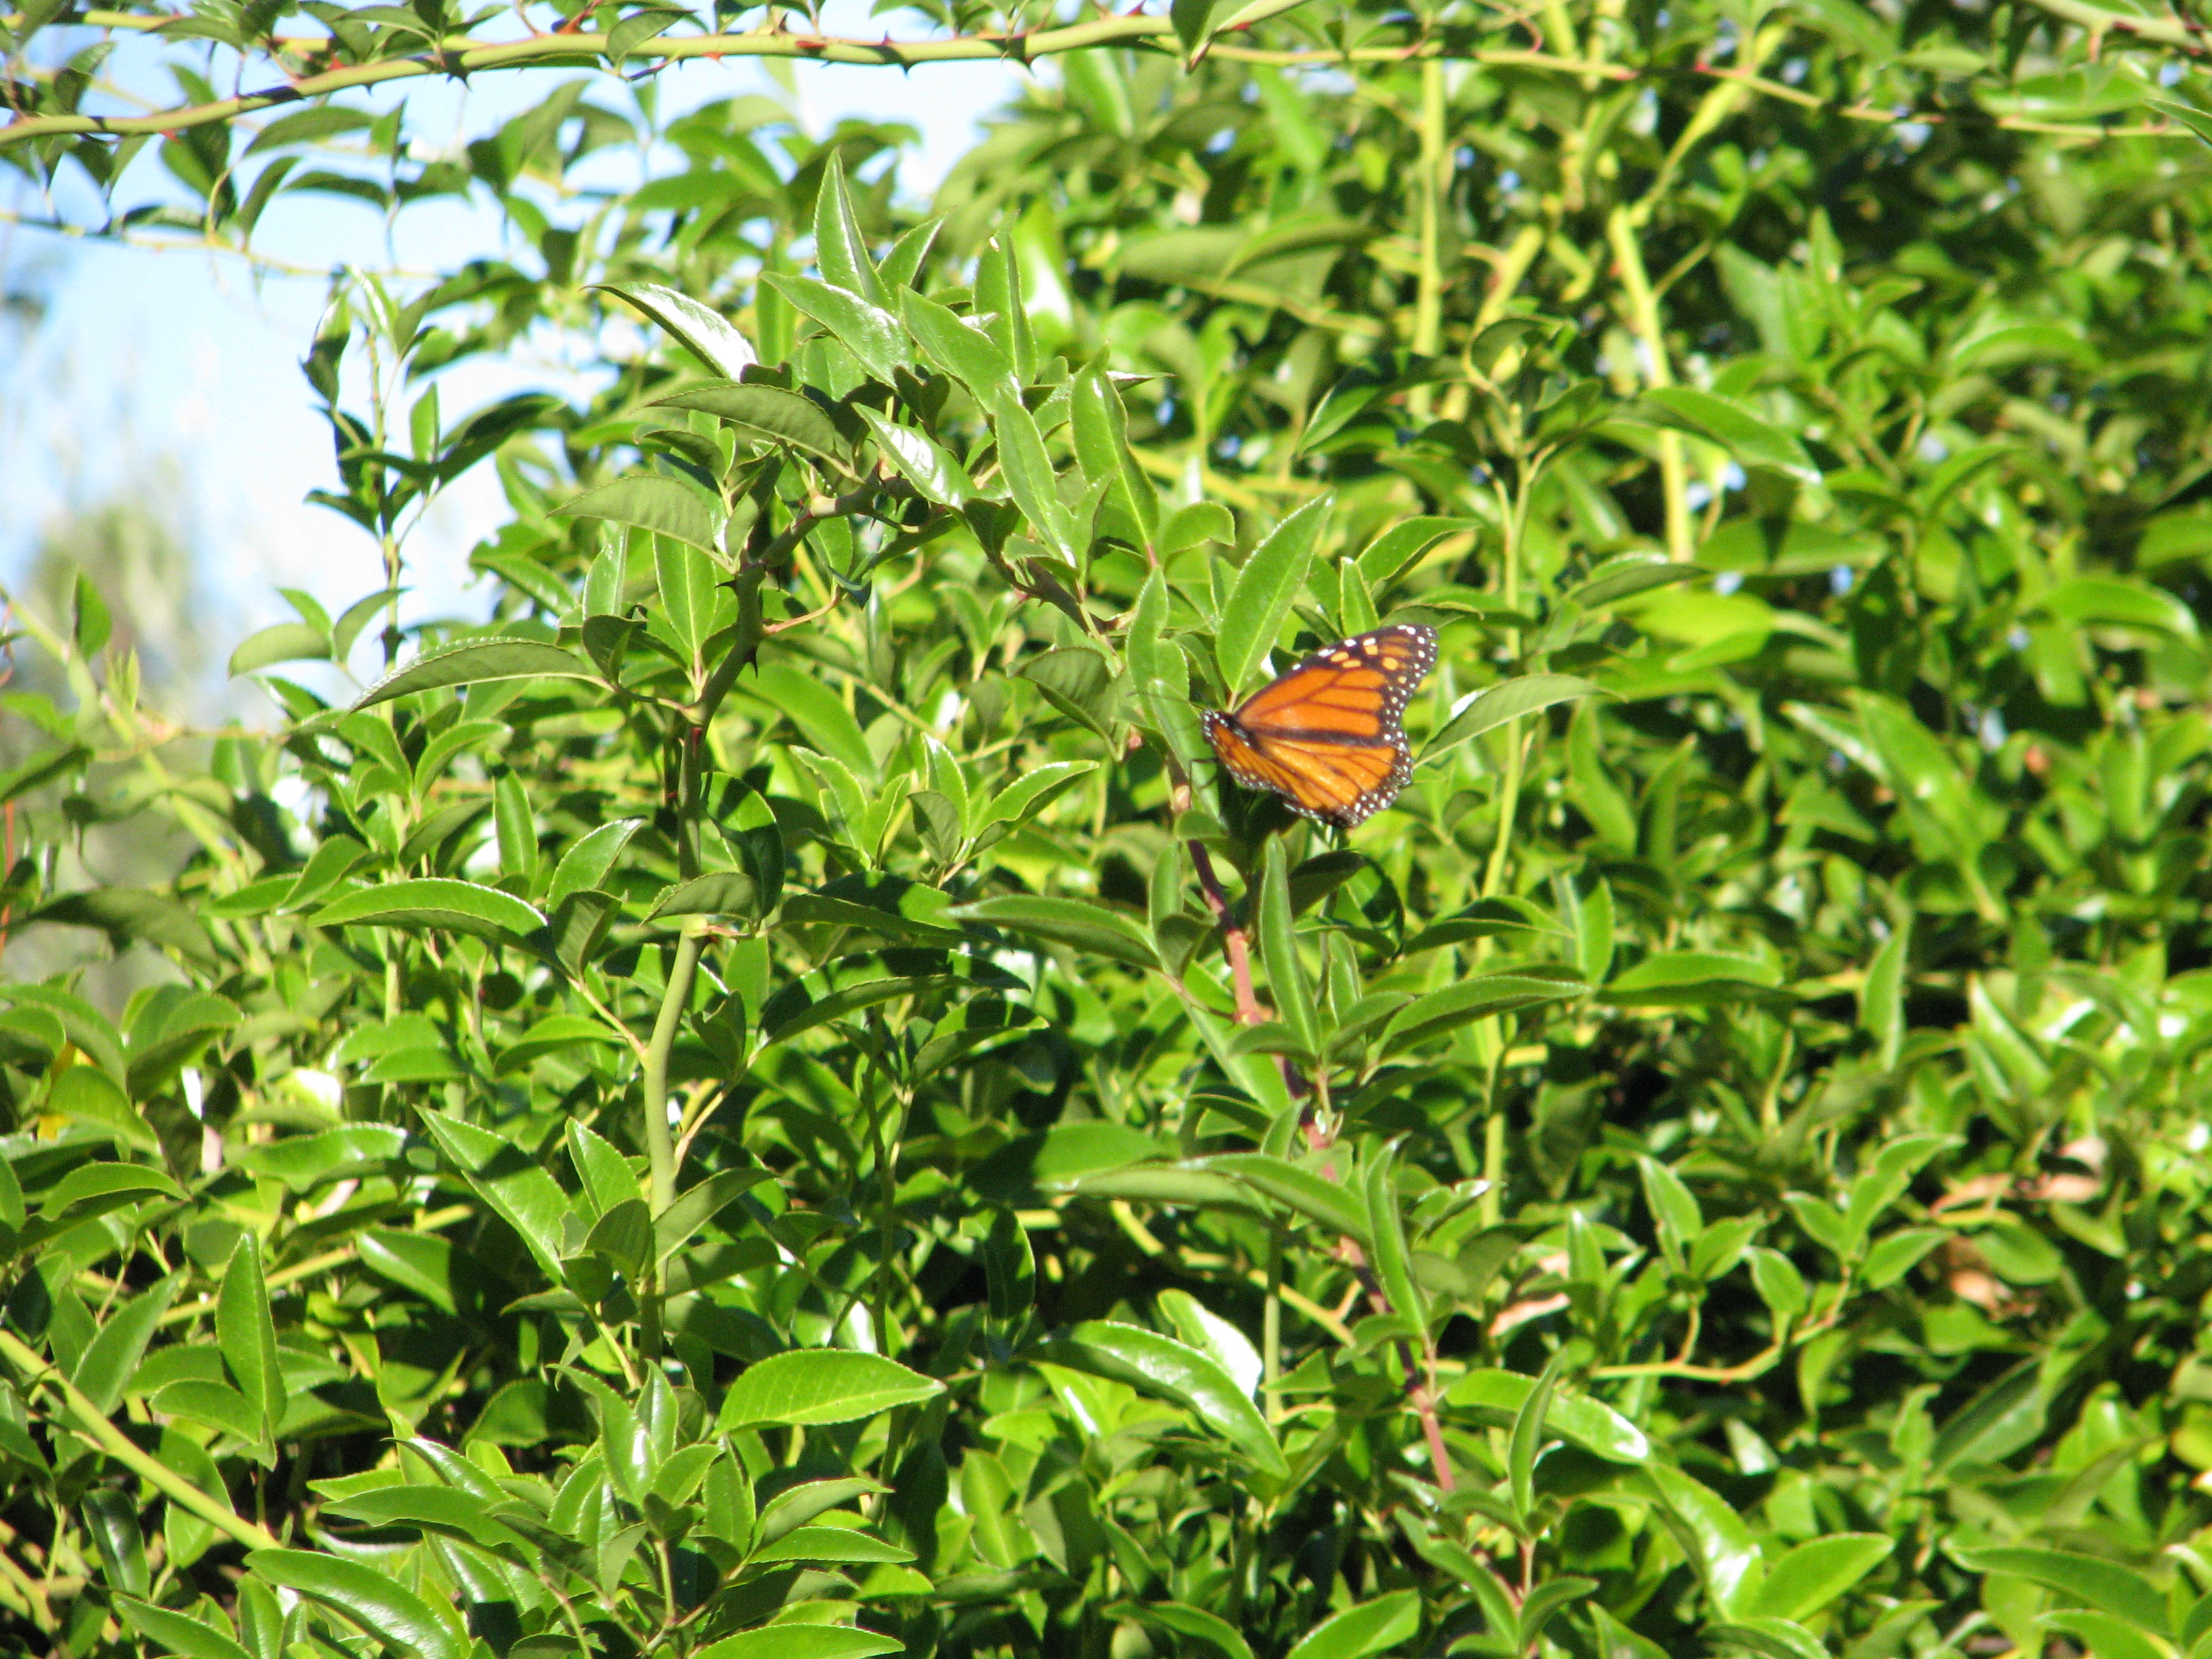
We still have Monarch butterflies. 
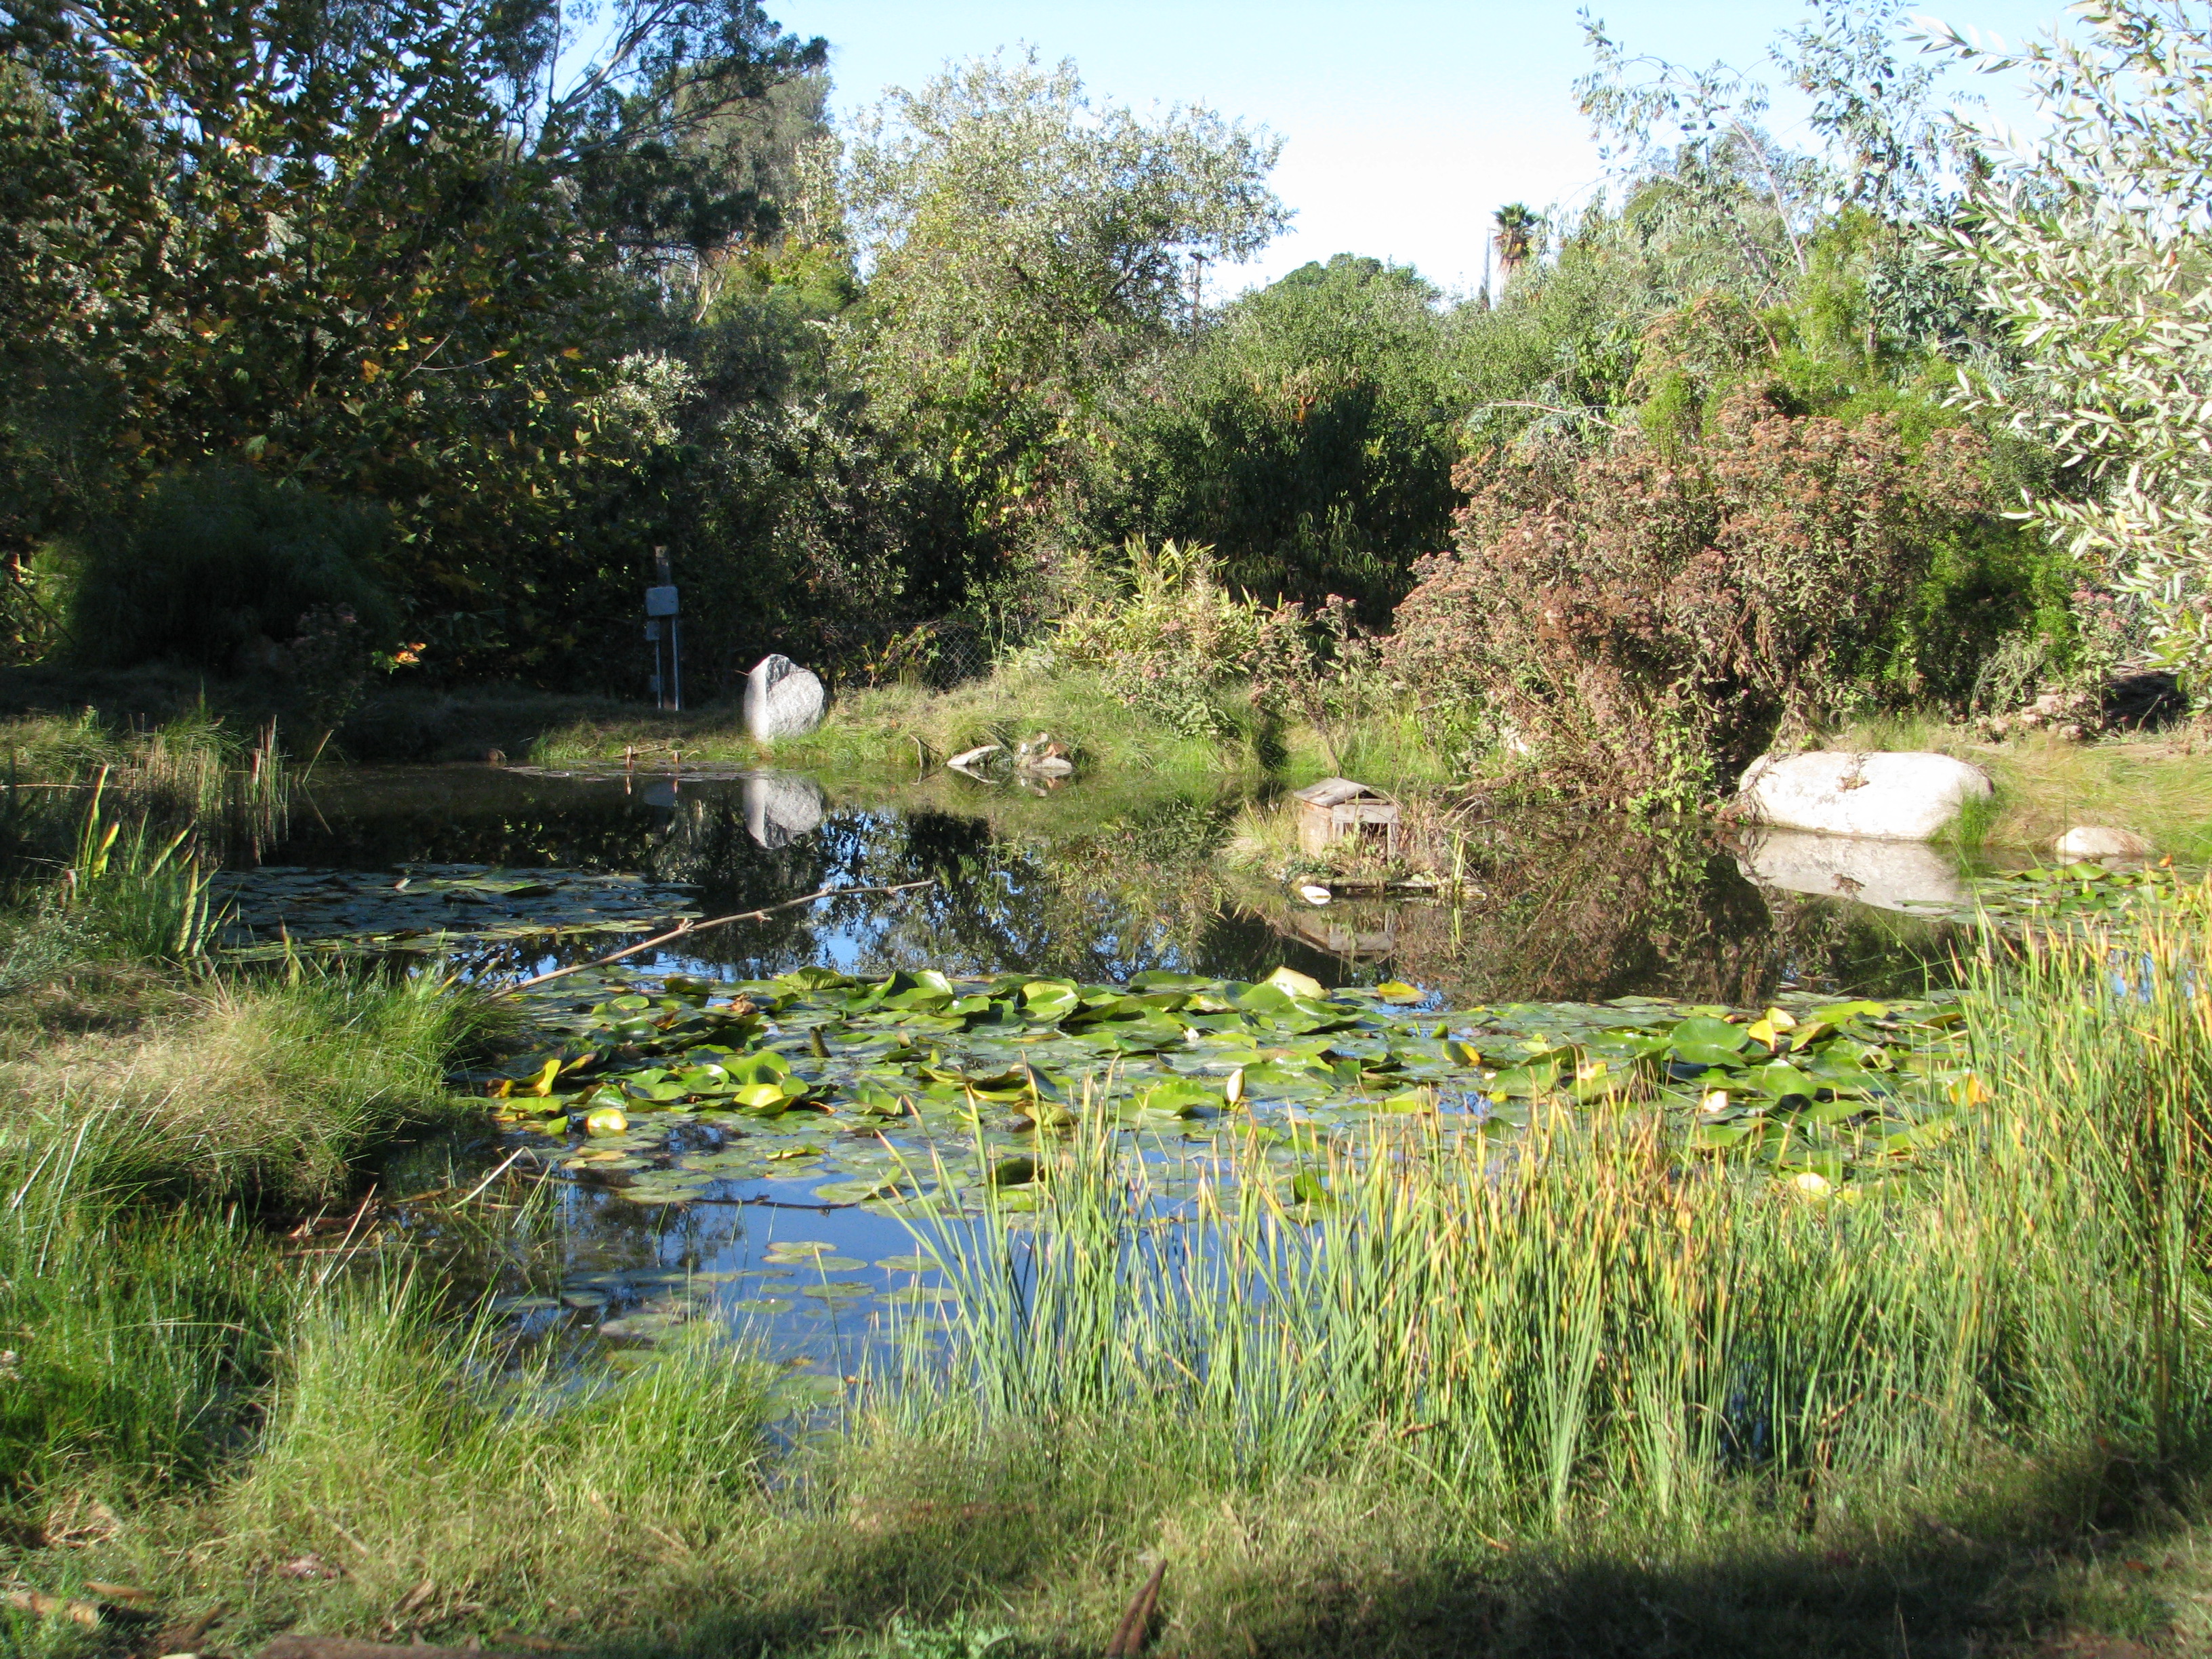
The big pond in early morning light. 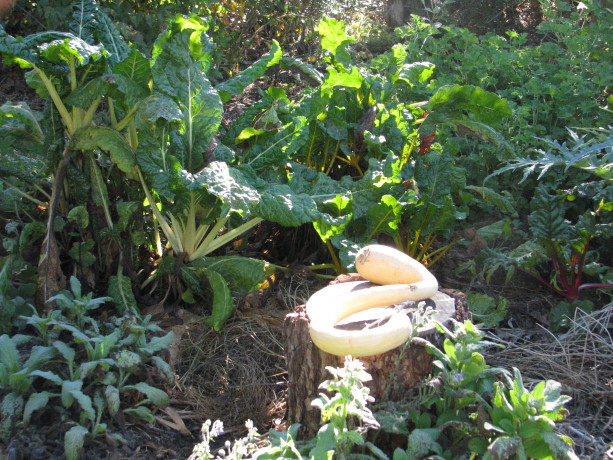
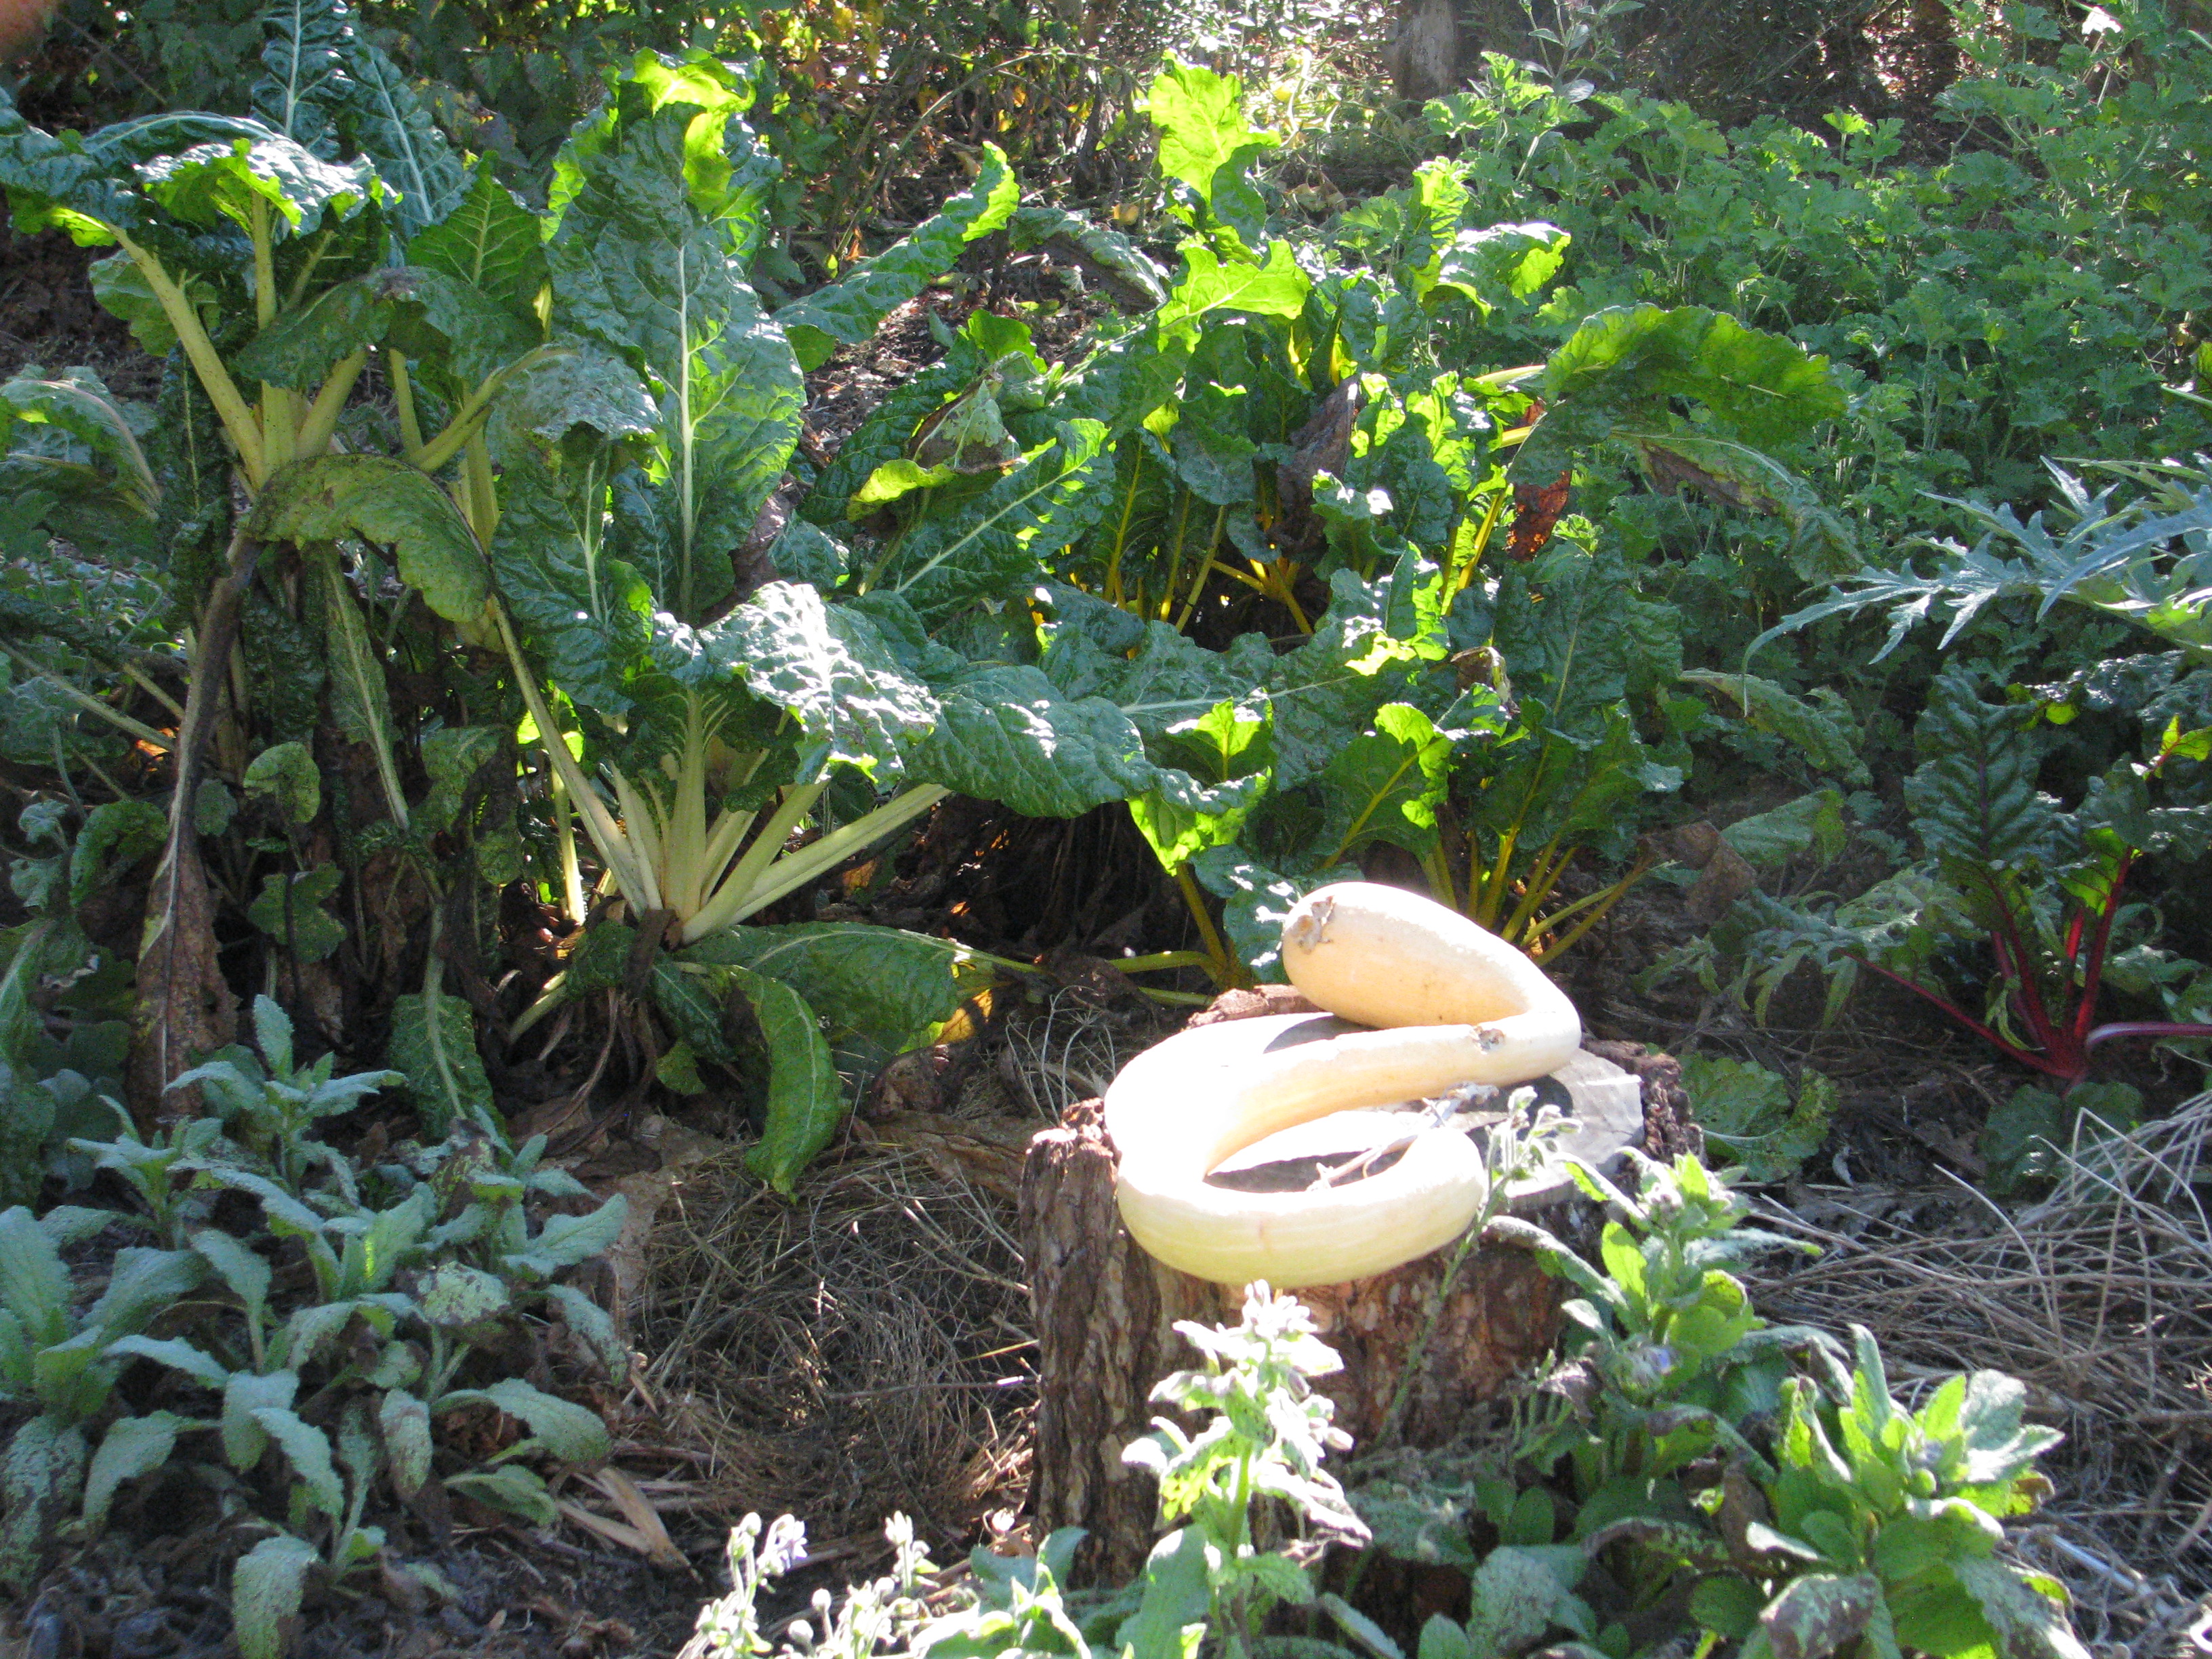
A zuchianno rampicante reclining on a stump. (Its a squash!). 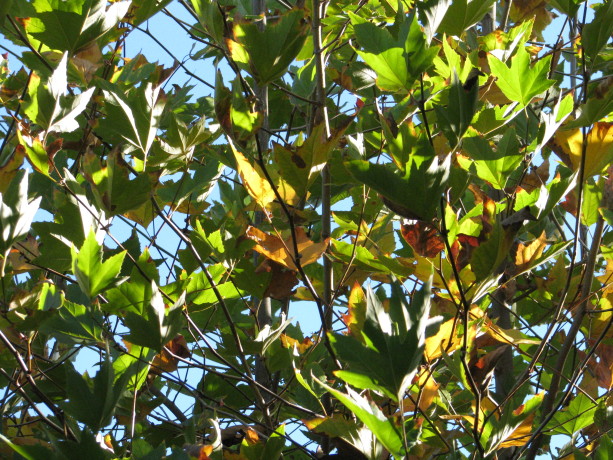
Morning sun through a Fall-leaved sycamore. Beautiful. 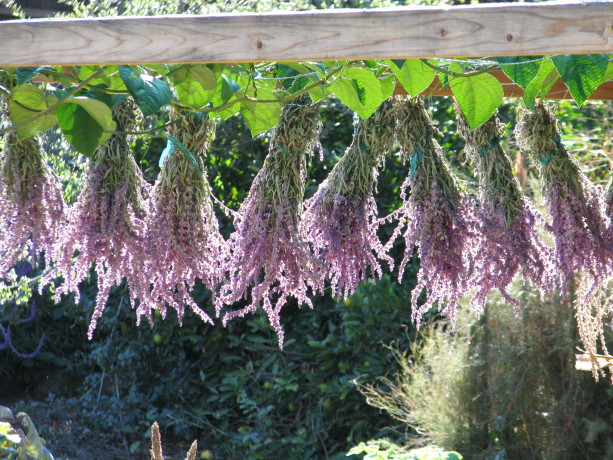
Mexican bush sage hanging up to dry. 
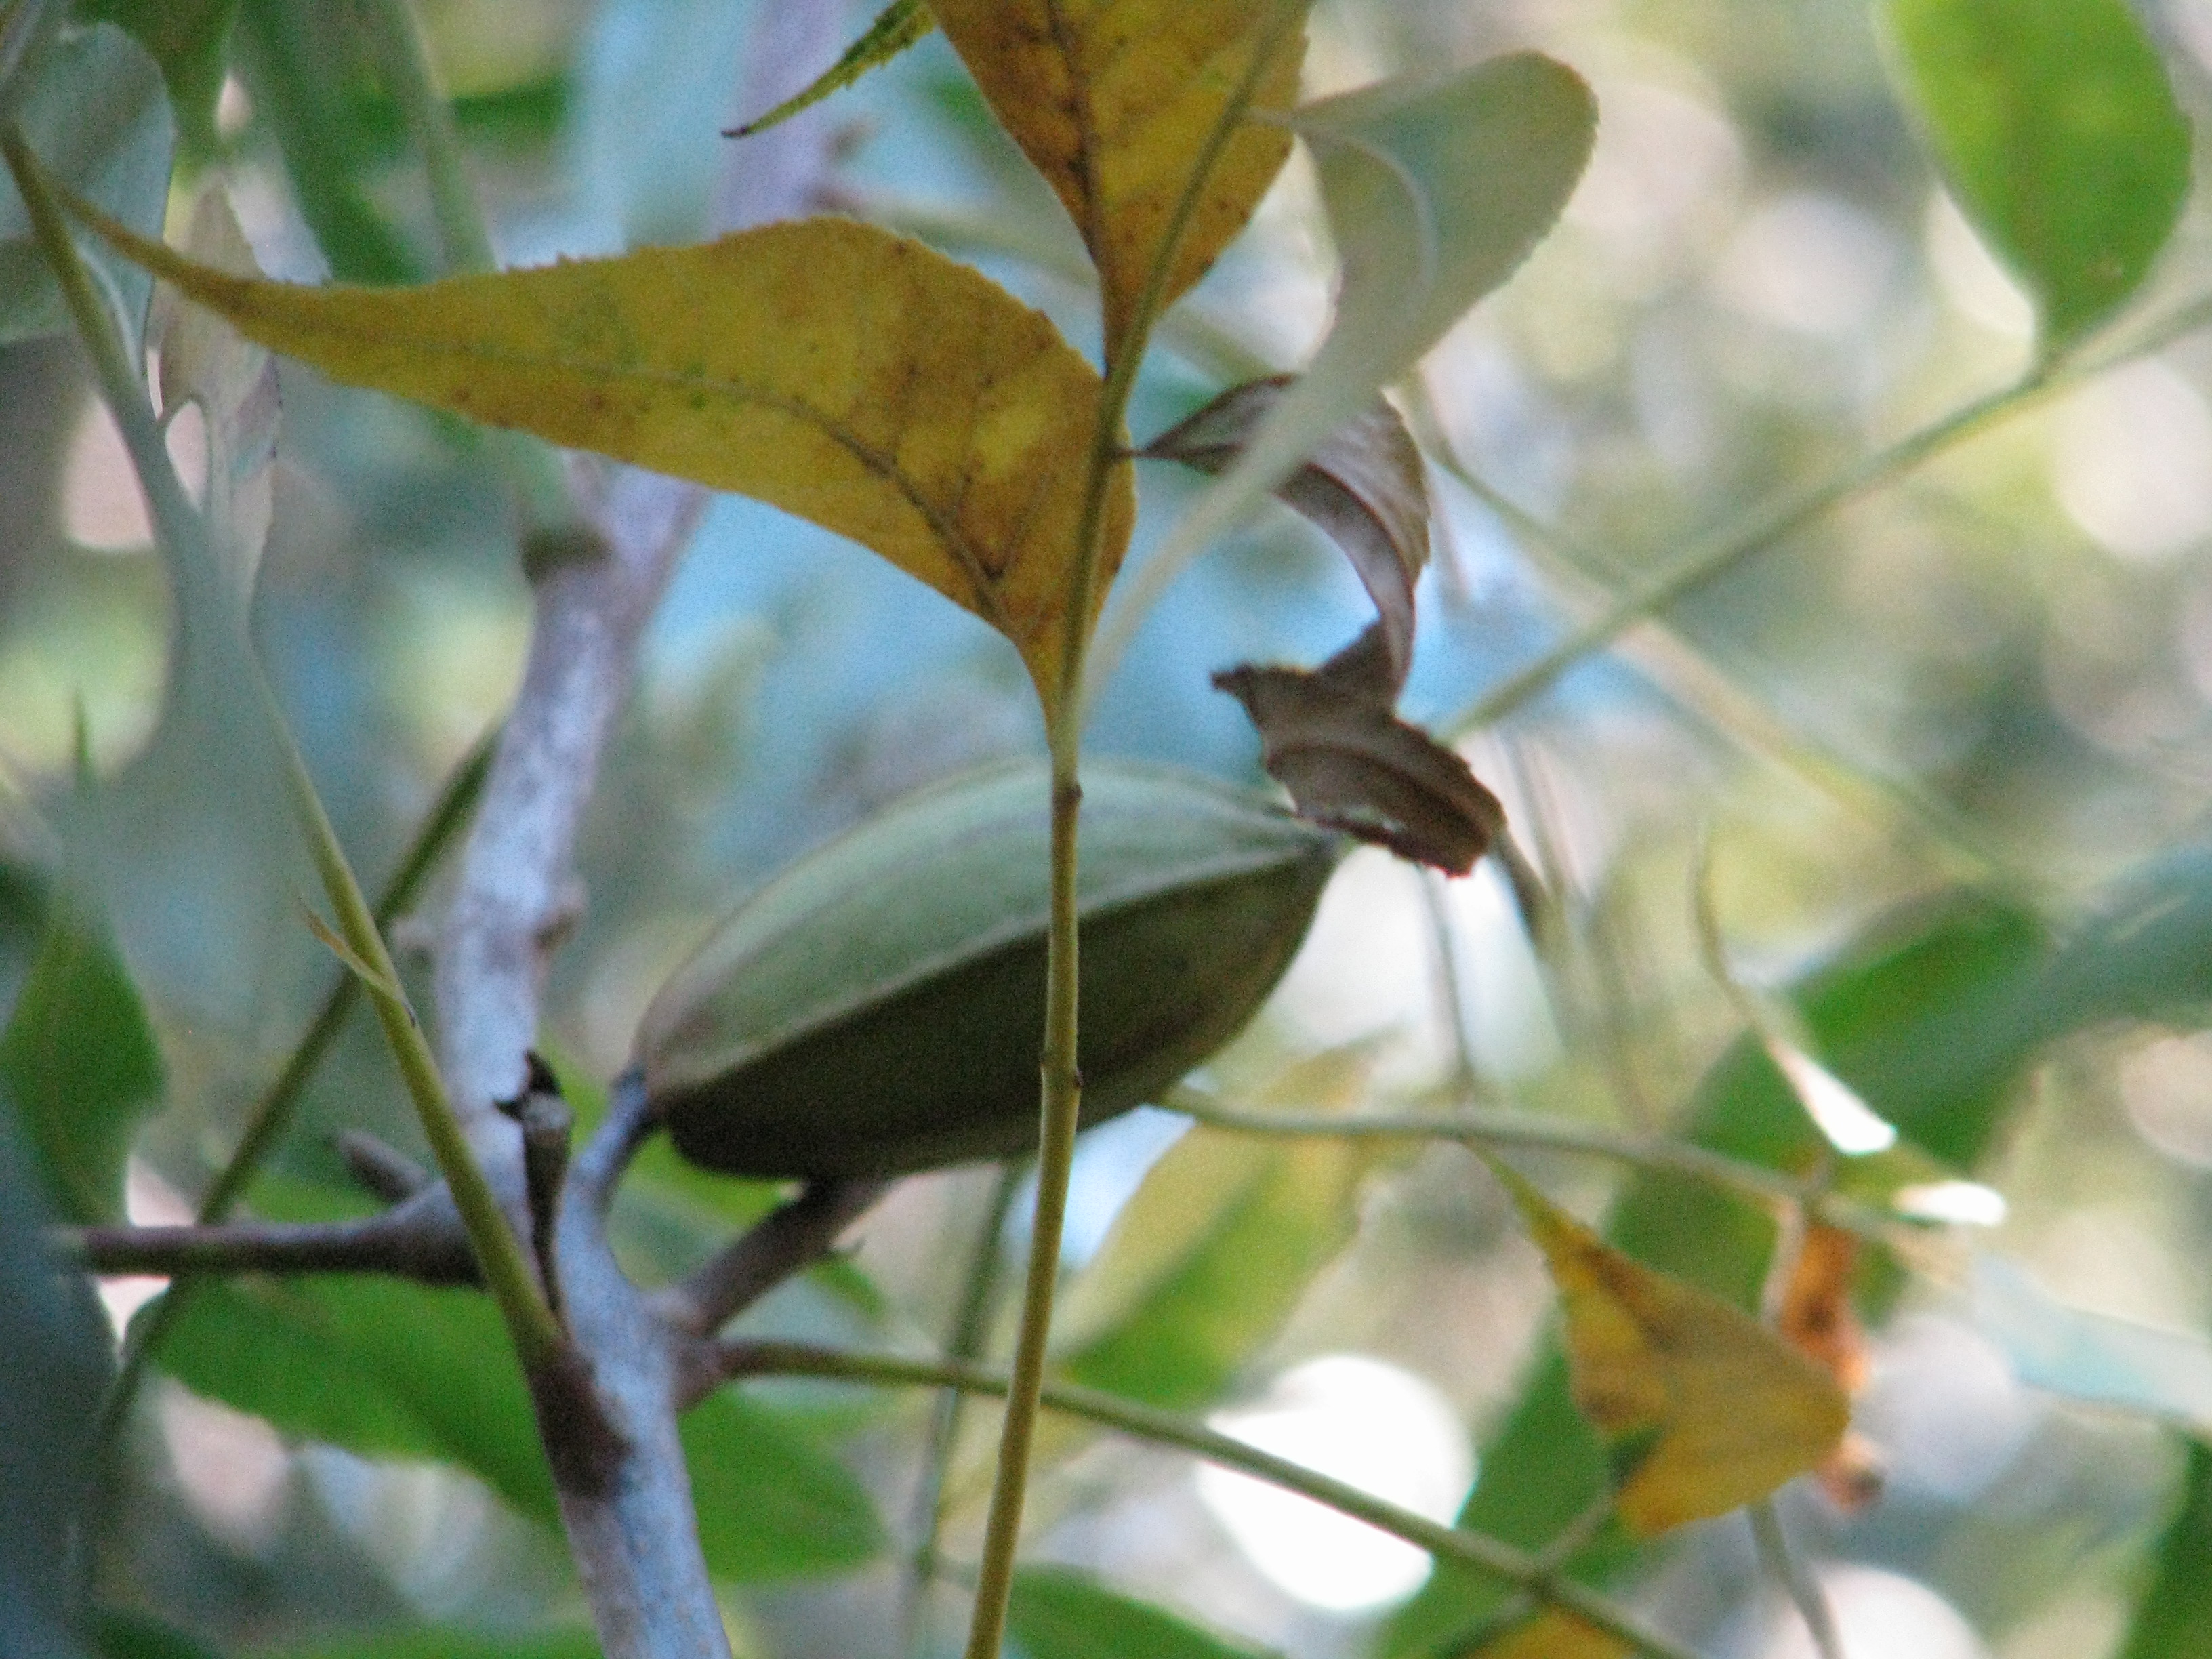
Our little pecan tree put on about six this year! Next year, tons! 
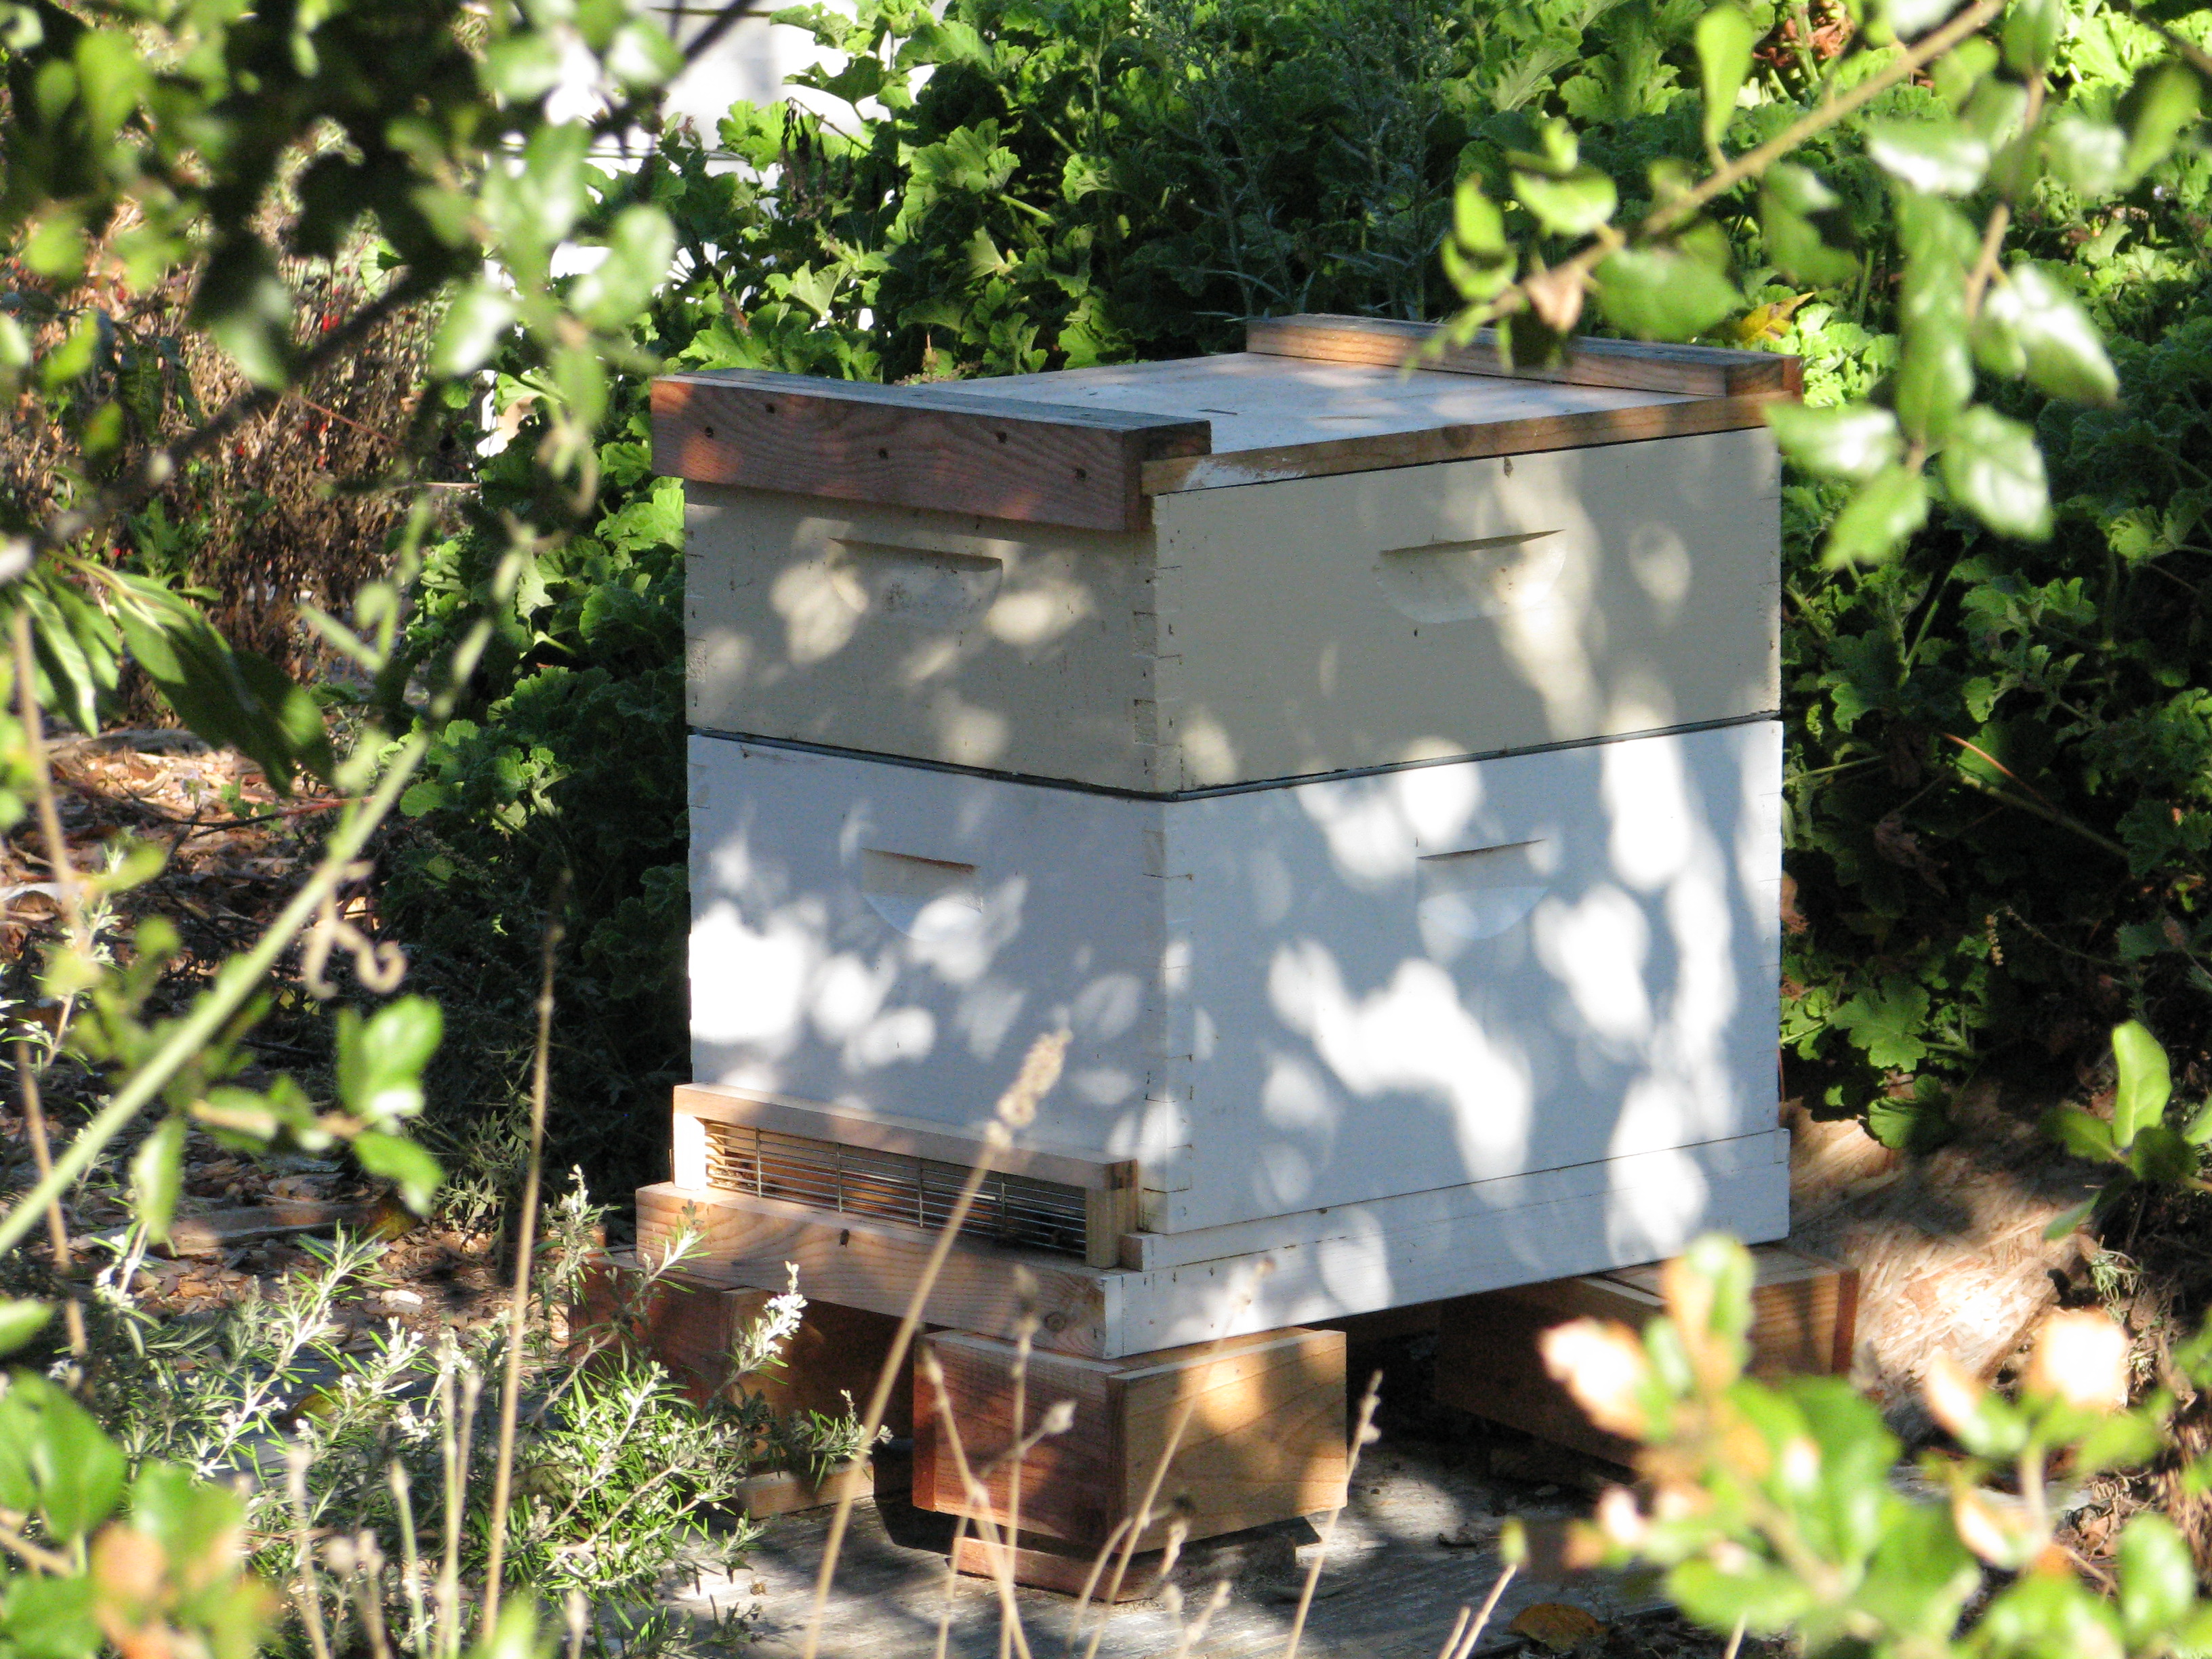
Beehive warming up. 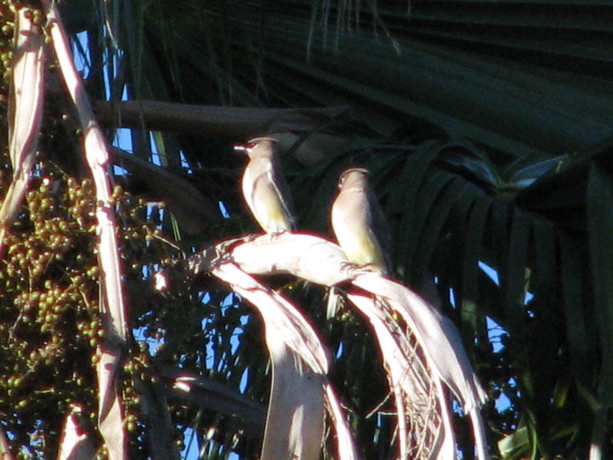
Ceder waxwings (my favorite bird) in the big palm. 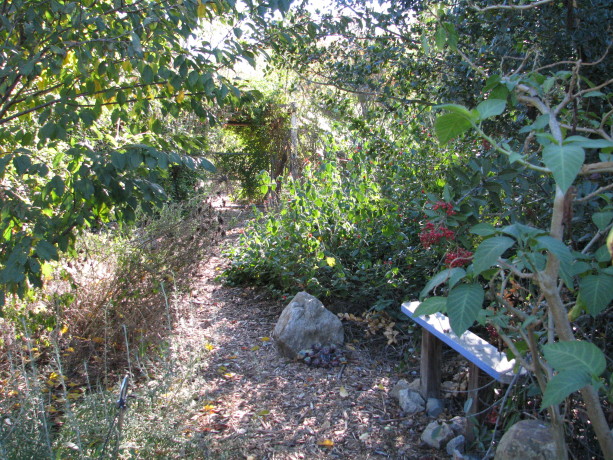
The Bee Garden. 
The liquidambers, also known as sweet gums, are just beginning to turn color. Lots of deciduous trees means lots of leaf mulch, and more warmth reaching the ground during the winter. 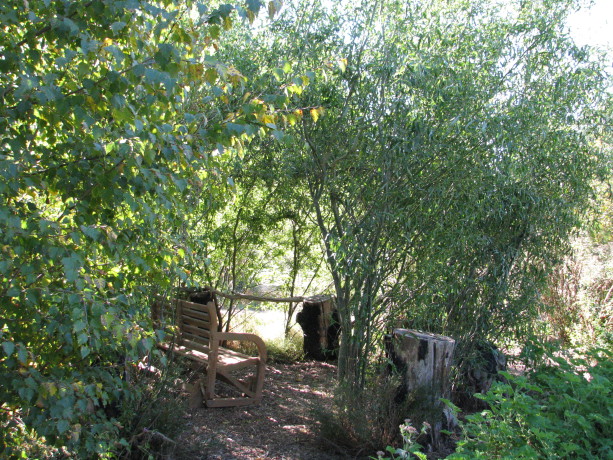
The entrance to the withy hide, with the pond in the distance. 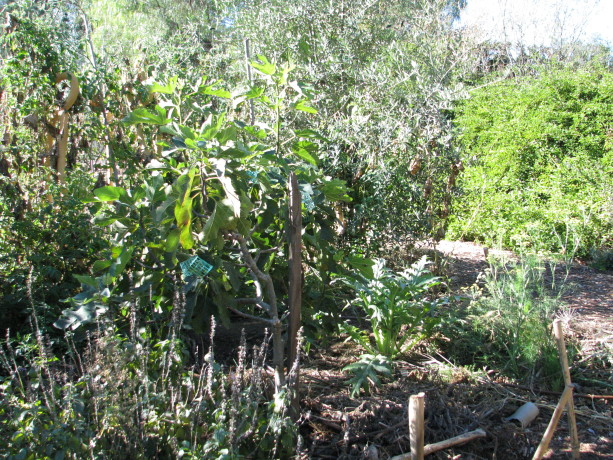
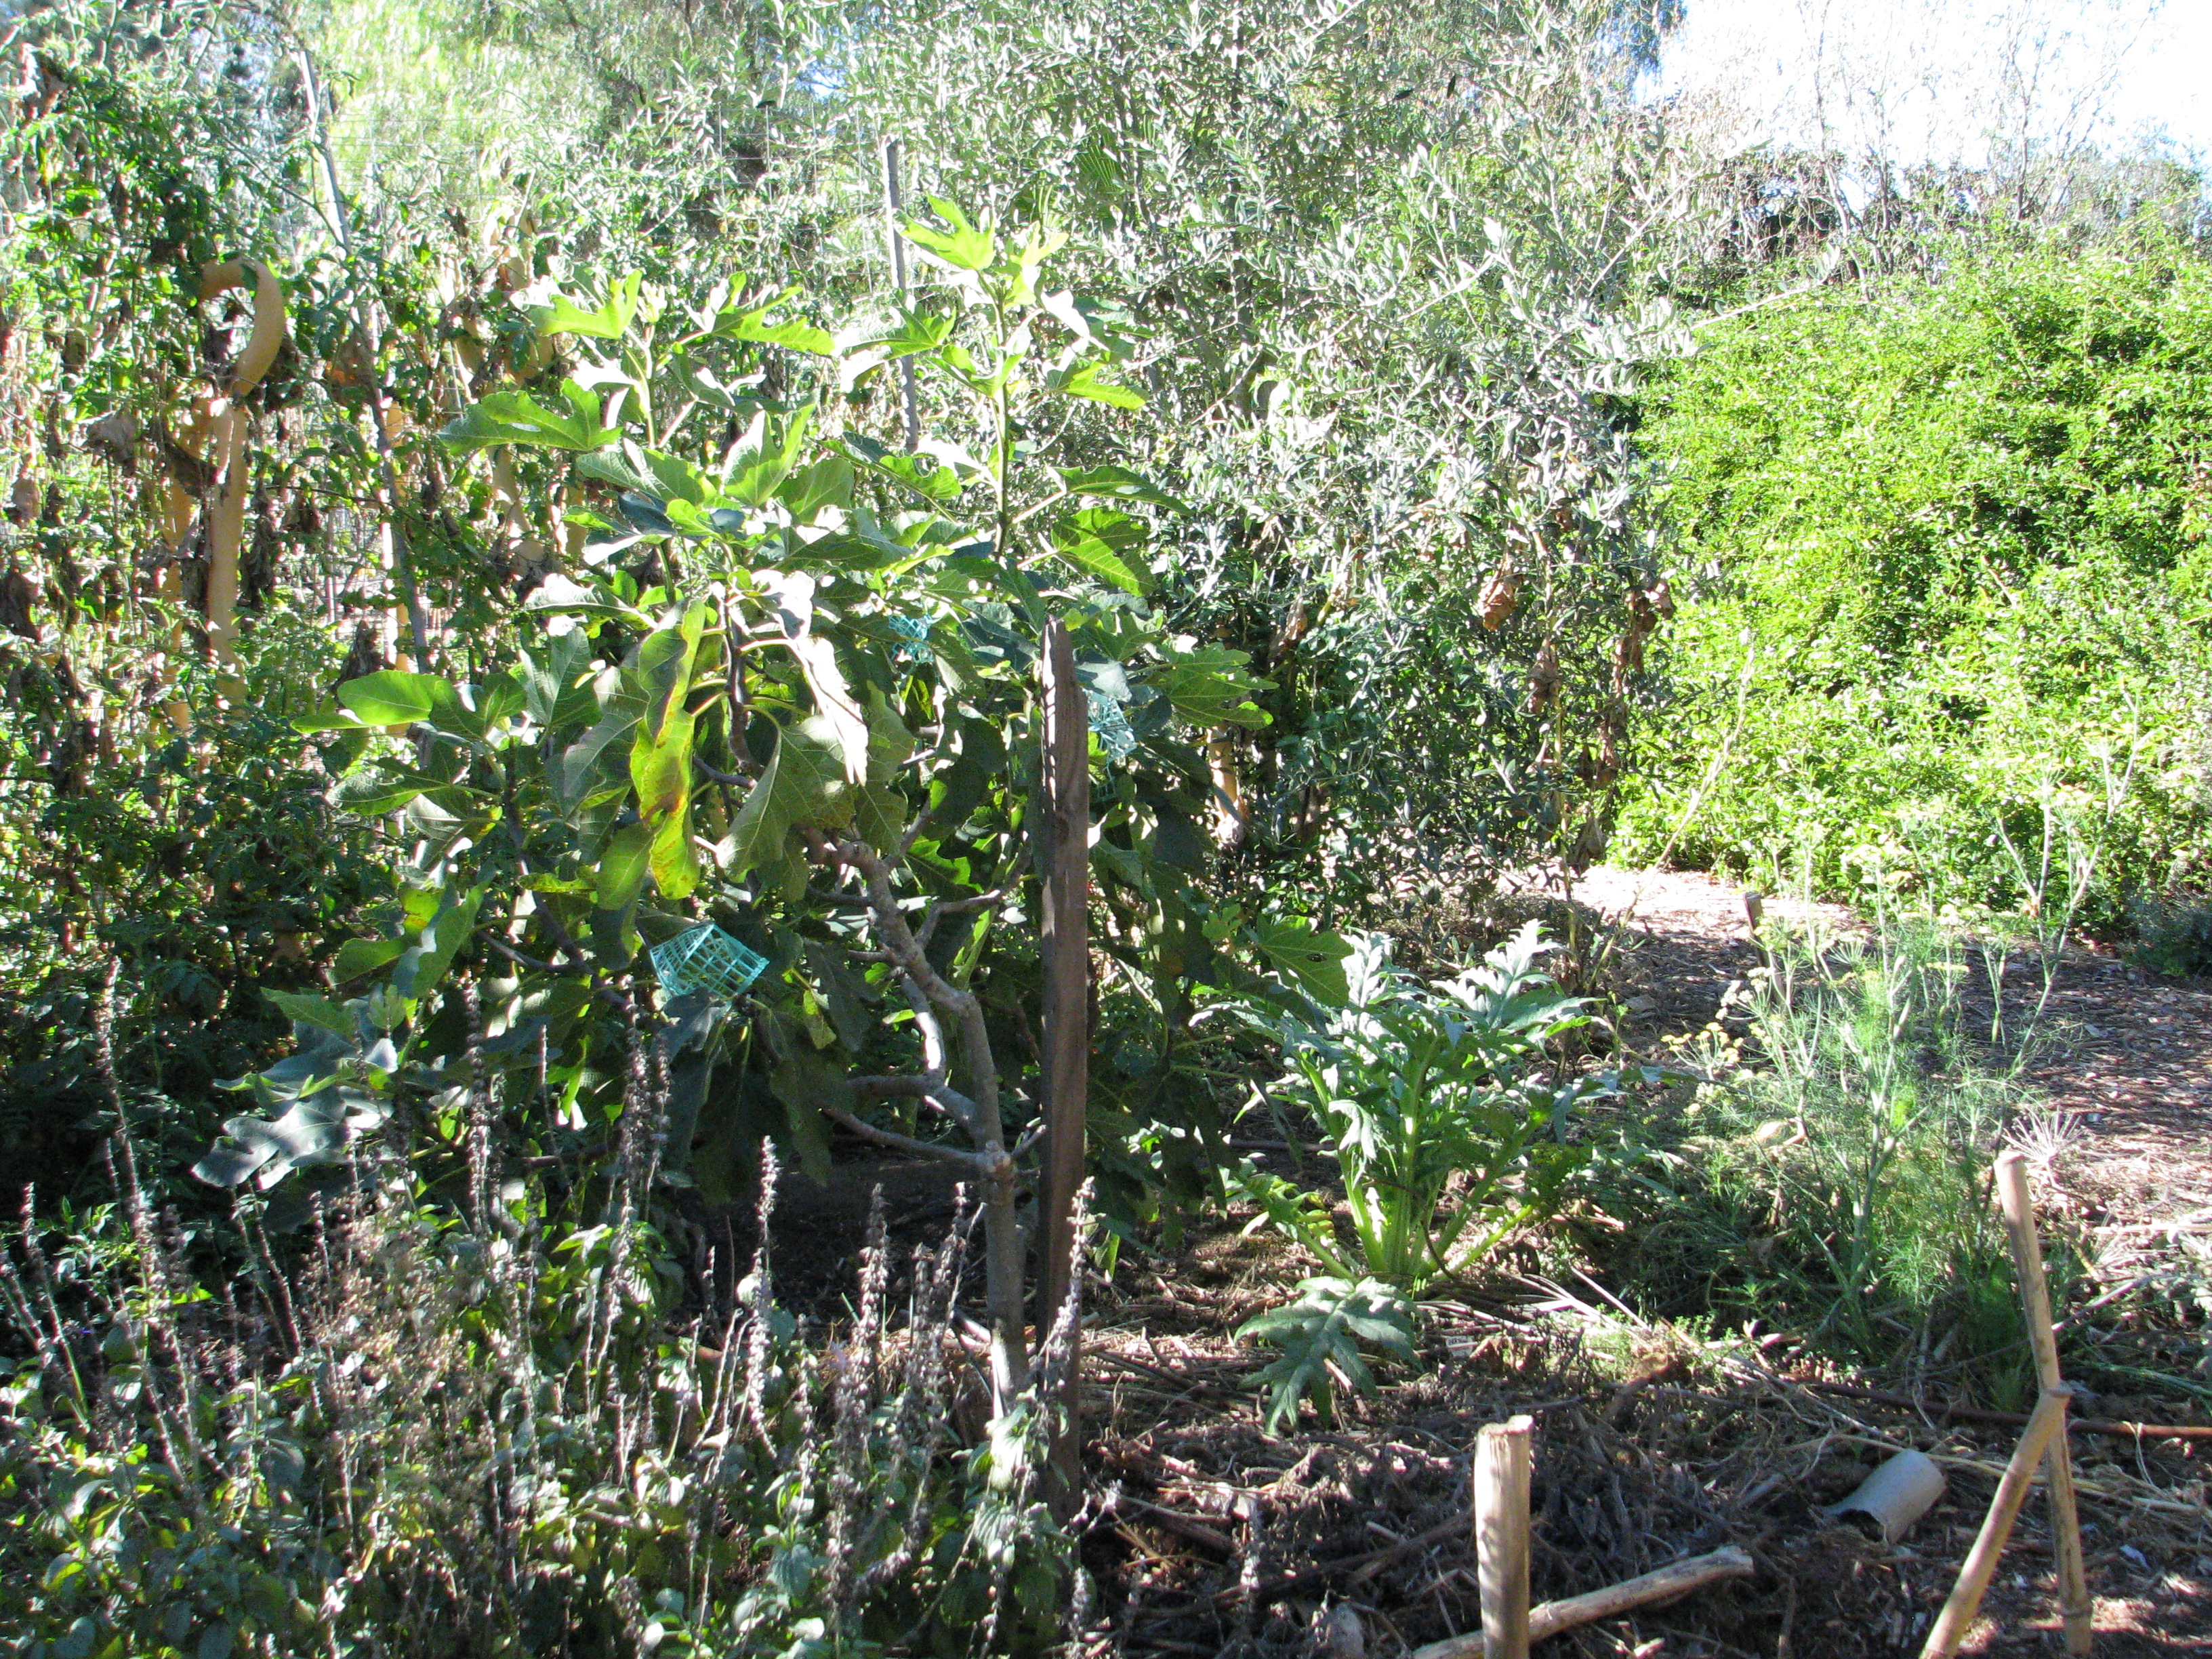
The Mission fig,with artichoke, anise and sage.. 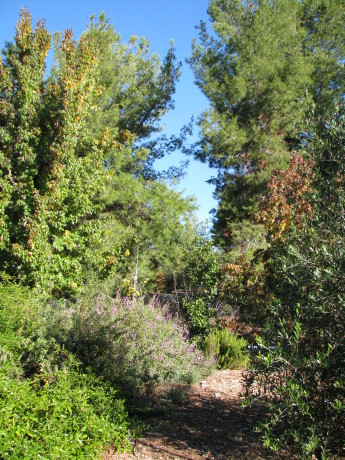
The canopy is growing. 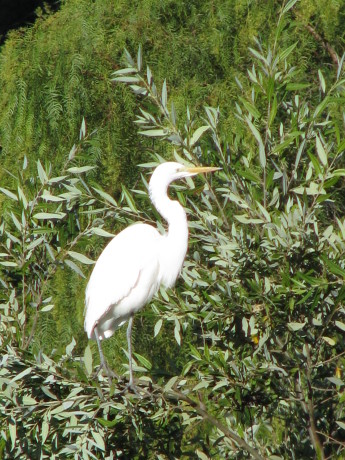
Greater egret enjoying the sun. You May Also Like
Native Insects and IPM
- Animals, Chickens, Cob, Compost, Composting toilet, Fruit, Gardening adventures, Giving, Grains, Health, Herbs, Houses, Hugelkultur, Humor, Living structures, Natives, Natural cleaners, Permaculture and Edible Forest Gardening Adventures, Ponds, Rain Catching, Recipes, Seeds, Soil, Vegan, Vegetables, Vegetarian, Worms
San Diego Permaculture Convergence, Nov. 9 – 10, 2013
There is a fantastic, information-packed permaculture convergence coming up at the beautiful Sky Mountain Institute in Escondido.
 It will be two days packed with great information for a very reasonable price; in fact, scholarships are available. Check out the website at convergence@sdpermies.com. On that Sunday I’ll be teaching a workshop about why its so important to plant native plants, how to plant them in guilds using fishscale swales and mini-hugelkulturs. Come to the convergence and be inspired!
You May Also Like
Native Insects and IPM
- Gardening adventures, Permaculture and Edible Forest Gardening Adventures, Recipes, Vegan, Vegetables, Vegetarian
Dinner with the Pandas: Harvesting Your Own Bamboo
Hello.
Before you cry, “Imposter!”, let me assure you that I have authorization to be here. Mostly. I happen to be Diane’s daughter Miranda, guestblogging and wordsmithing for you today. You might recognize my powdery feet or recollect me when keeping company with chickens (or from diverse other adventures). As much as I enjoying rolling in dust and home decorating with hens, today I’m here to talk about an unusual topic for Vegetariat – food.
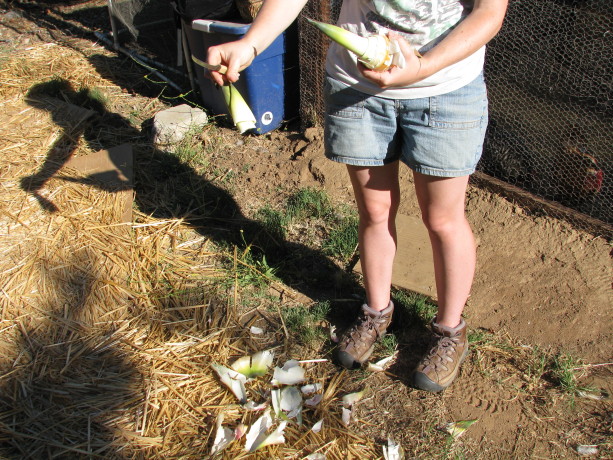
The handy rhyme isn’t the only reason I’m sometimes known as Miranda the Panda – I also have a great partiality for a bit of bamboo, much like the vegetarian carnivore from whom I draw my catchy moniker. Luckily, we happen to have a fair bit of the stuff around Finch Frolic these days (bamboo, not pandas). Bamboo shoots are a common – and delicious! – component of Asian cuisines, and bamboo has been used for many culinary purposes, such as flavoring rice, wherever it grows. During this past summer, I was overcome with the need to find more things to eat on the property and began a foray into harvesting our own bamboo shoots.
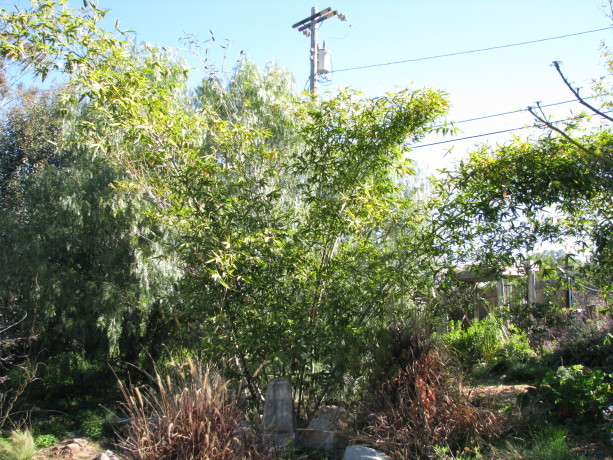
Our giant species of bamboo arches over many of our paths — perfect for building material, and any shoots that venture into the soil of the paths are prime targets… 🙂 Before I stepped outdoors and started gnawing on the nearest clump, I had to be sure that our bamboo is an edible variety, and hopefully a tasty edible variety. You need the scientific name of your bamboo for that, but once we ferreted out ours (Bambusa beecheyana), it was easy to find notation of its edibility and delectability online. One helpful and extensive listing is on Guadua Bamboo. Happily, there is a large number of edible and tasty bamboo species.
Proof of mange-ability in hand, the next obstacle was divining the best way to get bamboo shoots from the ground to my mouth. Harvesting can be more or less of a challenge, depending on what variety of bamboo one has and how it’s established (e.g., moisture and soil conditions, obstacles like stones around it). To harvest shoots, it’s best to pick fat green ones poking no more than a foot above the ground. You want to catch them before they get too woody, but old enough to have a bit of meat on them, so to speak. The shoot is mostly leaf (tightly layered sheaths), so bulkier shoots are more rewarding.
Removing our bamboo from the ground and its parent plant turned out to be on the more side of challenging.
Miranda and Diane bust out the Finch Frolic arsenal on the recalcitrant shoot.
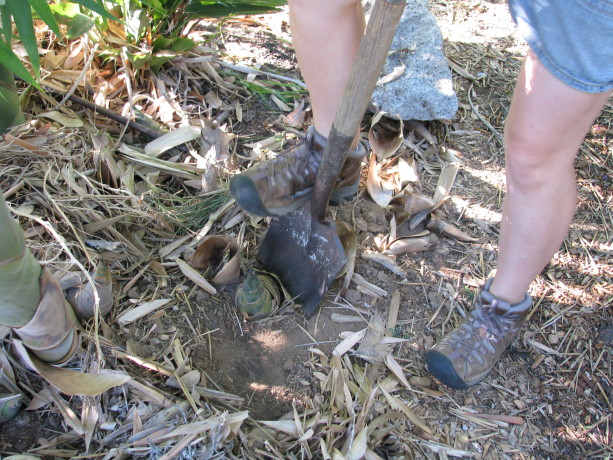
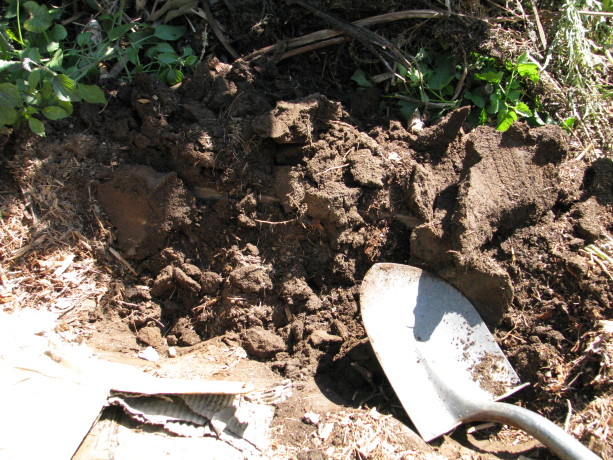
First, the inimitable spade is set to the task. 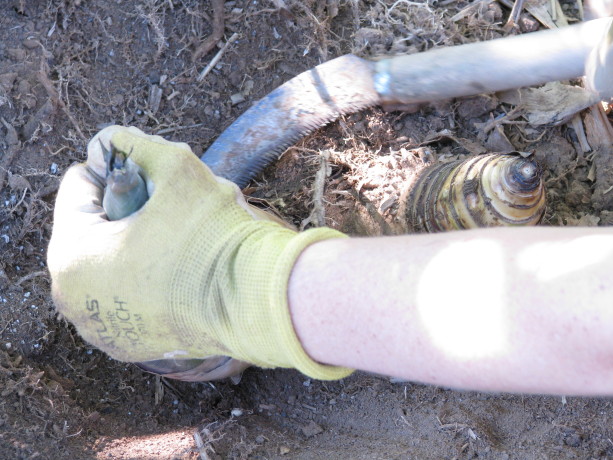
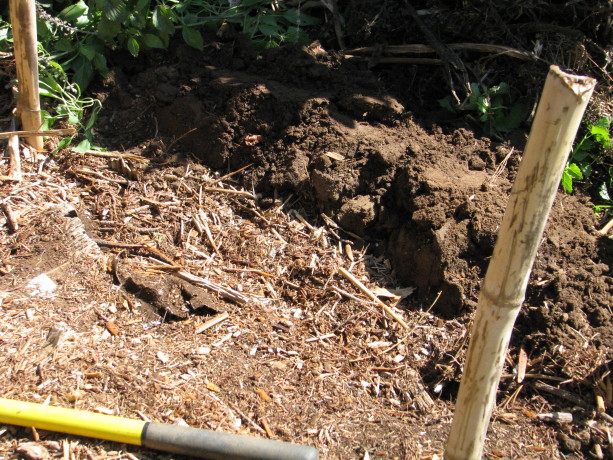
Legs weary and spade abandoned, the small sickle saw is recruited, to little effect. Diane had just returned home and gleefully plunged into the fray, skirt, white sandals and all.
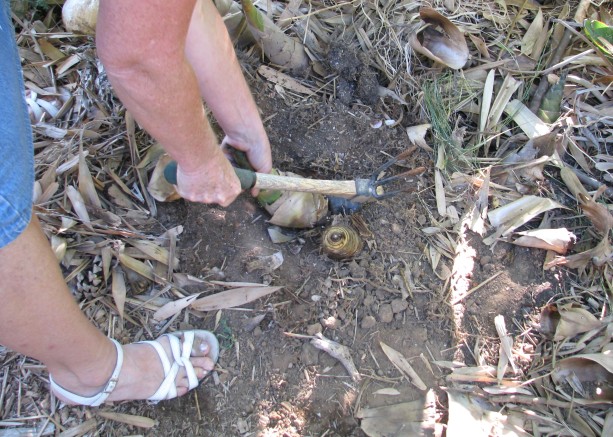
Finally, Diane wades into battle with the winning implement. 
The shoot, freed from the earth and its parent plant. Once we finally achieved success, processing could begin! It is somewhat tiresome to strip a shoot down to the edible white core, because the leaves cling so tightly and are fibrous. It’s like shucking the most stubborn ear of corn in the world. It’s good to slit the tougher outer leaves with a very sharp knife and peel them away.
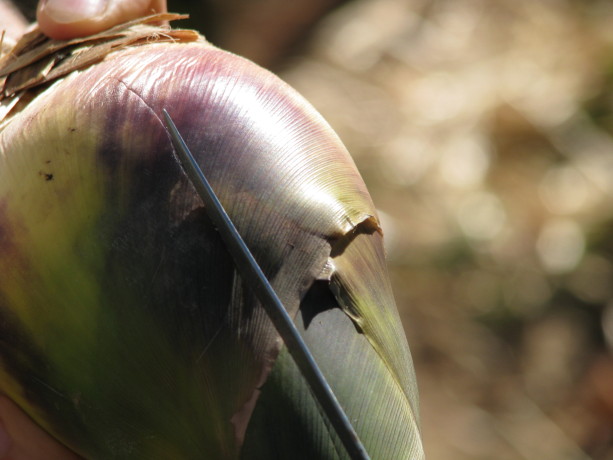
Slitting the fibrous outer leaves with a filet knife. 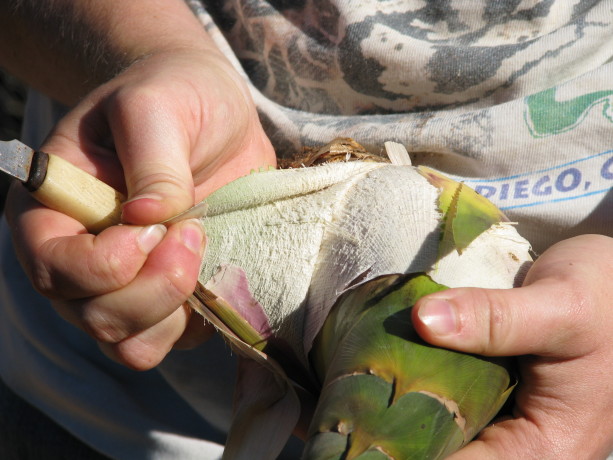
Peeling. The inner leaves come away more easily – rather like the layers of canned hearts-of-palm – as you get closer to the heart of the bamboo shoot. The innermost leaves are basically fetal, and so are edible because they haven’t gotten tough yet. They make the tip of your shoot look hairy.
Many layers of increasingly tender leaves. 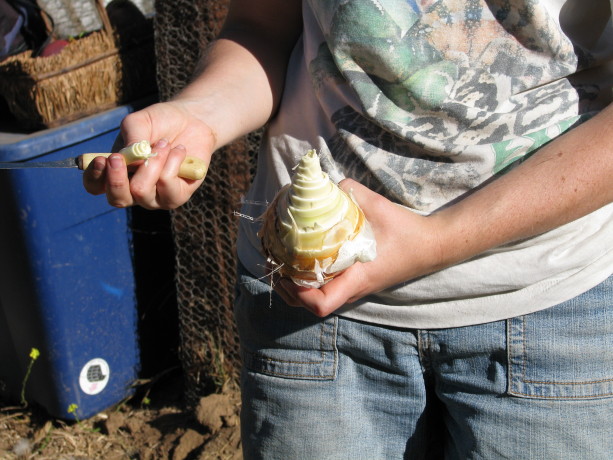
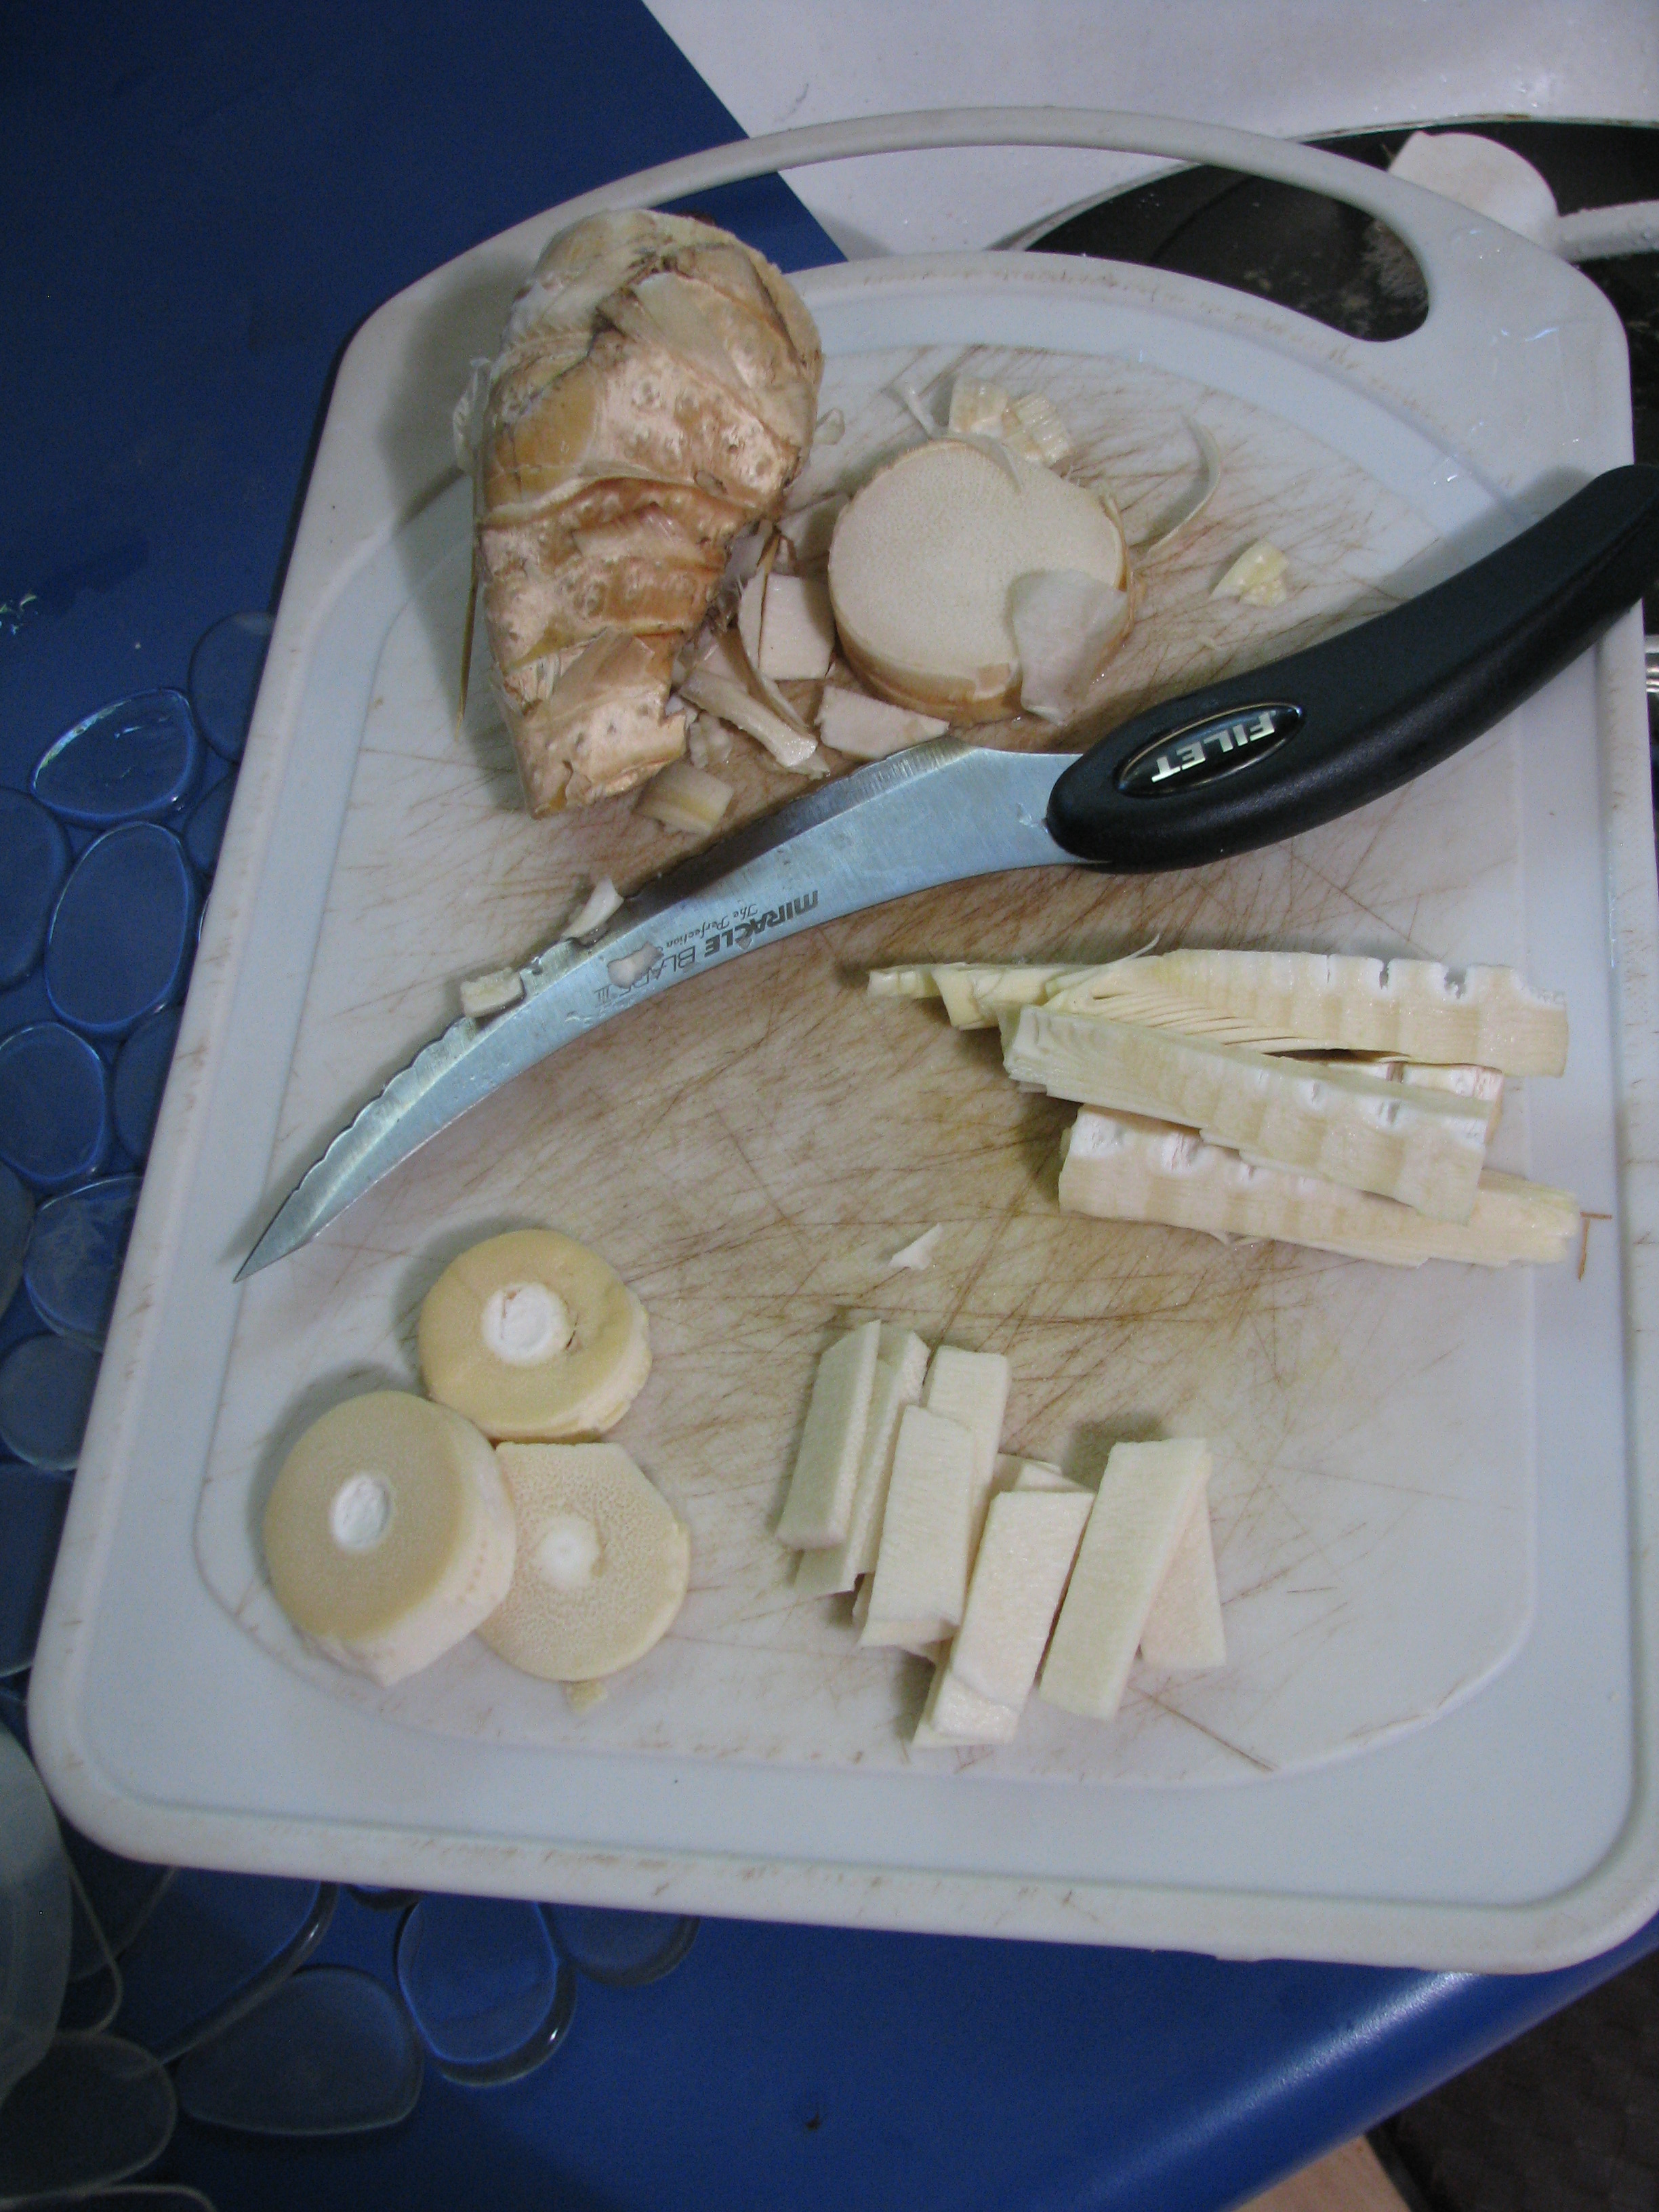
The edible shoot. A peeled bamboo shoot can be cut up in whatever way the chef desires. The shoot grows more fibrous towards the base, where there is probably some inedible hard material. My current rule of thumbs-carefully-tucked-away is if a sharp knife can pretty easily get through it, it’ll be fine to eat.

A shoot cut in three different ways. The material behind the knife (upper left) is too fibrous to eat. You just have to boil your slices before cooking and consumption because they contain a mild toxin that dissipates with boiling. The first time, we tried boiling in lightly salted water for only 30 minutes, and while the shoots were tender and not really bitter, they left a teeny tingling sensation in our mouths, like stir-fried Pop Rocks. The last time I cooked them, I boiled them for a whole 50 min. to much more satisfactory, un-tingly results.

Boiling to remove toxins. Bamboo is delicious and a lot of fun (in a somewhat laborious way) to harvest. The beauty of harvesting your own bamboo shoots is that you are saving yourself a trip to specialty markets and controlling your bamboo’s growth at the same time!
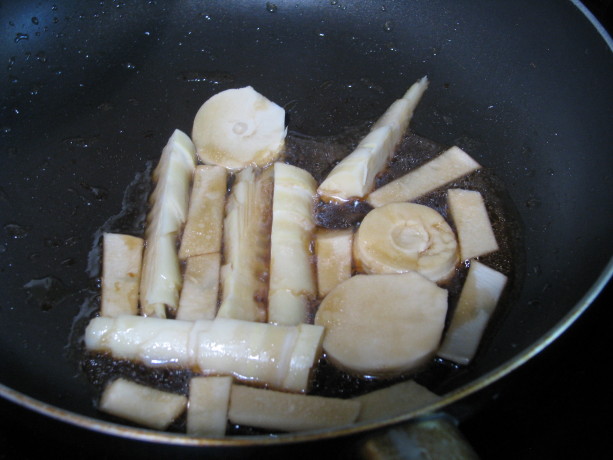
Frying up — yummy! So that’s another thing going on here at FFG. Thanks for wandering the bamboo lane with me.
TTFN!
Miranda (the Panda), B.S.
-
Tiny Hugels and Fishscale Swales: Small water catchment
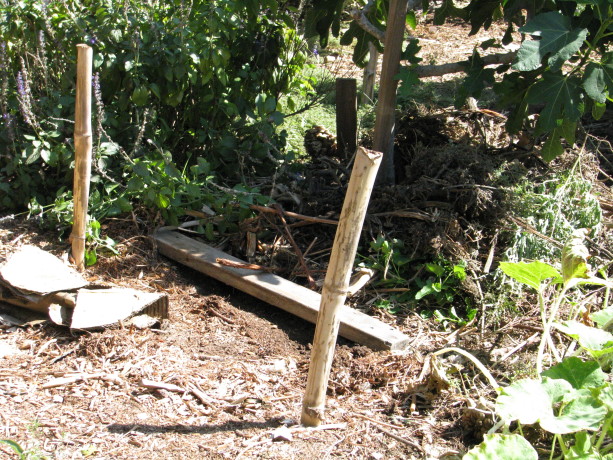
In permaculture it is recommended to design long level, contoured swales throughout your property to catch rainwater. Long swales, however, won’t work when the property is small, or if it is already mostly planted, or if the hiring of large equipment or teams of diggers isn’t feasable, or if long swales aren’t part of a lovely garden. What then?
In the gardens for which I’ve written consultations I’ve recommended what Geoff Lawton (of the Permaculture Design Institute of Australia) calls fishscale swales. Small curved swales staggered up a slope so that rainwater can be caught and held. One overflows into another, just like a pinball machine.
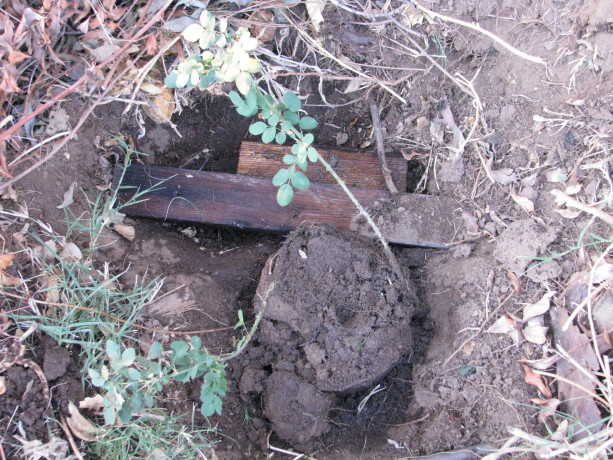
Any swale, no matter how small, will help hold water. I put them in just above each plant, the width of the dripline of the plant. I also combine them with burying wood (hugelkultur). I don’t have a lot of branches or logs, but I do have a lot of extra pieces of lumber salvaged when the sheds were dismantled. These pieces are untreated (no paint or pressure treatment), and if they have nails and screws in them, even better! The hardware will mineraize the soil as it decomposes. This wood is already very old and dry, and thus will soak up water a treat. If you soak the wood in water, compost tea or a microbial brew before you bury it, that’s super. If not, don’t worry about it. The idea is that rainwater will accumulate in the swale, percolate into the soil and into the wood below it. There the wood will hold water as it breaks down, gradually irrigating and fertilizing the plant below.
Wood can be placed on top of the soil and buried as the swale is dug, or it can be dug into the ground and covered. The swale is filled with mulch o help retard weed growth; if by a walkway the scale filled with mulch then it may be walked on without fear of a twisted ankle.

This area right above the fig is small, but large enough to catch water. Here I have a Mission fig that has been slow to grow due to irregular watering (NOT my fault!)
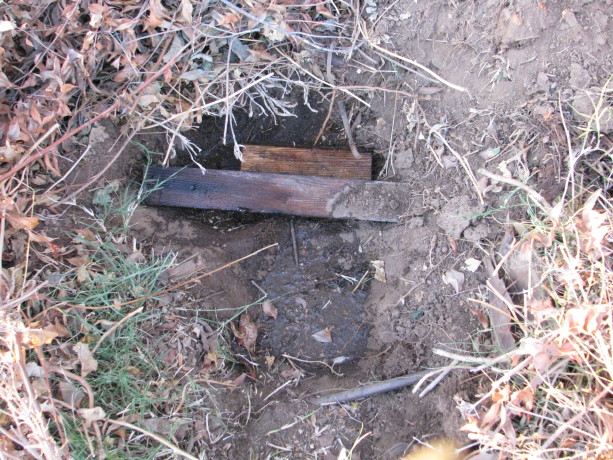
I laid out a board right on the ground. Figs like a little water and this area has been on the dry side. In the direction from which rainwater would flow, above the tree, I laid out a few pieces of old lumber, nails and all.
Brewing microbial tea. I happened to be brewing a large batch of microbial tea, so I threw the wood into a bucket of the stuff and let it absorb some.

I soaked the wood in microbial tea for a few minutes. They happen to be the width of the existing dripline of the tree; again, any swale and and wood will help. I dug a small swale the same length, a shovel’s width wide, and threw the dirt on top of the wood.
I dug a swale, using the dirt to cover the board. Then I filled the swale with mulch and voila! the job is done. This will now catch rainwater, hold moisture, and fertilize the tree, as well as finding something useful for junk lumber. Burying the wood sequesters the gasses released in decomposing materials into the soil rather than the air thus helping reduce greenhouse gasses.
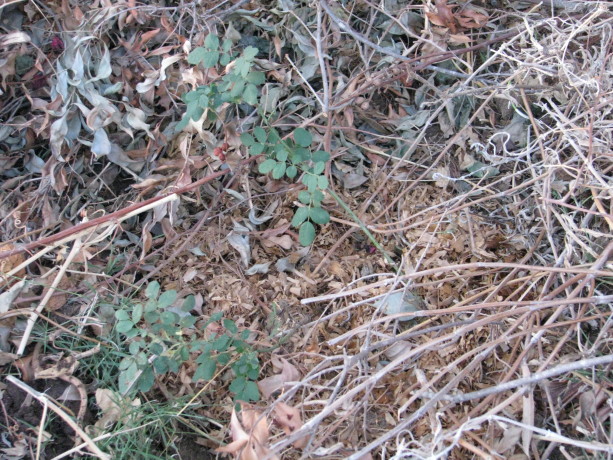
I filled the swale with mulch to keep down weeds. Presto! Done! Using fishscale swales and mini-hugelkultur beds when planting most native plants can really help them become established in a low-water situation. This wild rose (rosa rugusa) is being planted in a very dry area, and I wanted to bury the wood below soil level to keep it closer to the roots of the plant. I dug a small trench and laid out some boards, nails down.
I dug a little ways into the dirt and laid out the soaked wood. Then as I dug the swale I layered the wood with dirt and a couple more boards until buried. I filled in the swale with mulch and planted the rose on the downhill side.
Here you’ll see the rootball of the new wild rose in front of the wood. I threw in some coyote scat since it was lying there so conveniently. There’s quite a microbial boost for the rose!

Some coyote scat went in, too. Sorry! Remember that here in a dry climate we need to plant so that the root ball is even with the ground, or make the whole catch basin a little lower. Otherwise the roots will dry out. Planting so that the root ball is a little above the ground is a common practice is rainy areas.
Here is the planted rose, with mulch pulled up around it. Remember native plants have communities. Certain plants grow with certain others because they are mutually beneficial. This rose was planted within the dripline of an Engelmann oak, one place it is found.

Many native trees like the company of other natives. I planted this rose just outside the dripline of this oak, one of the places it would naturally grow in the wild. So swales don’t have to be gigantic earthworks projects. They can be small and alternated down a slope, or just individual ones above new or existing plants. Throw some wood into a mini-hugel between the swale and the plant and you’ll water less, fertilize naturally, and compost leftover wood. Don’t forget cotton clothing and bedding… that all works, too!
.
-
Belle: Adventures of a Crossbill Chicken

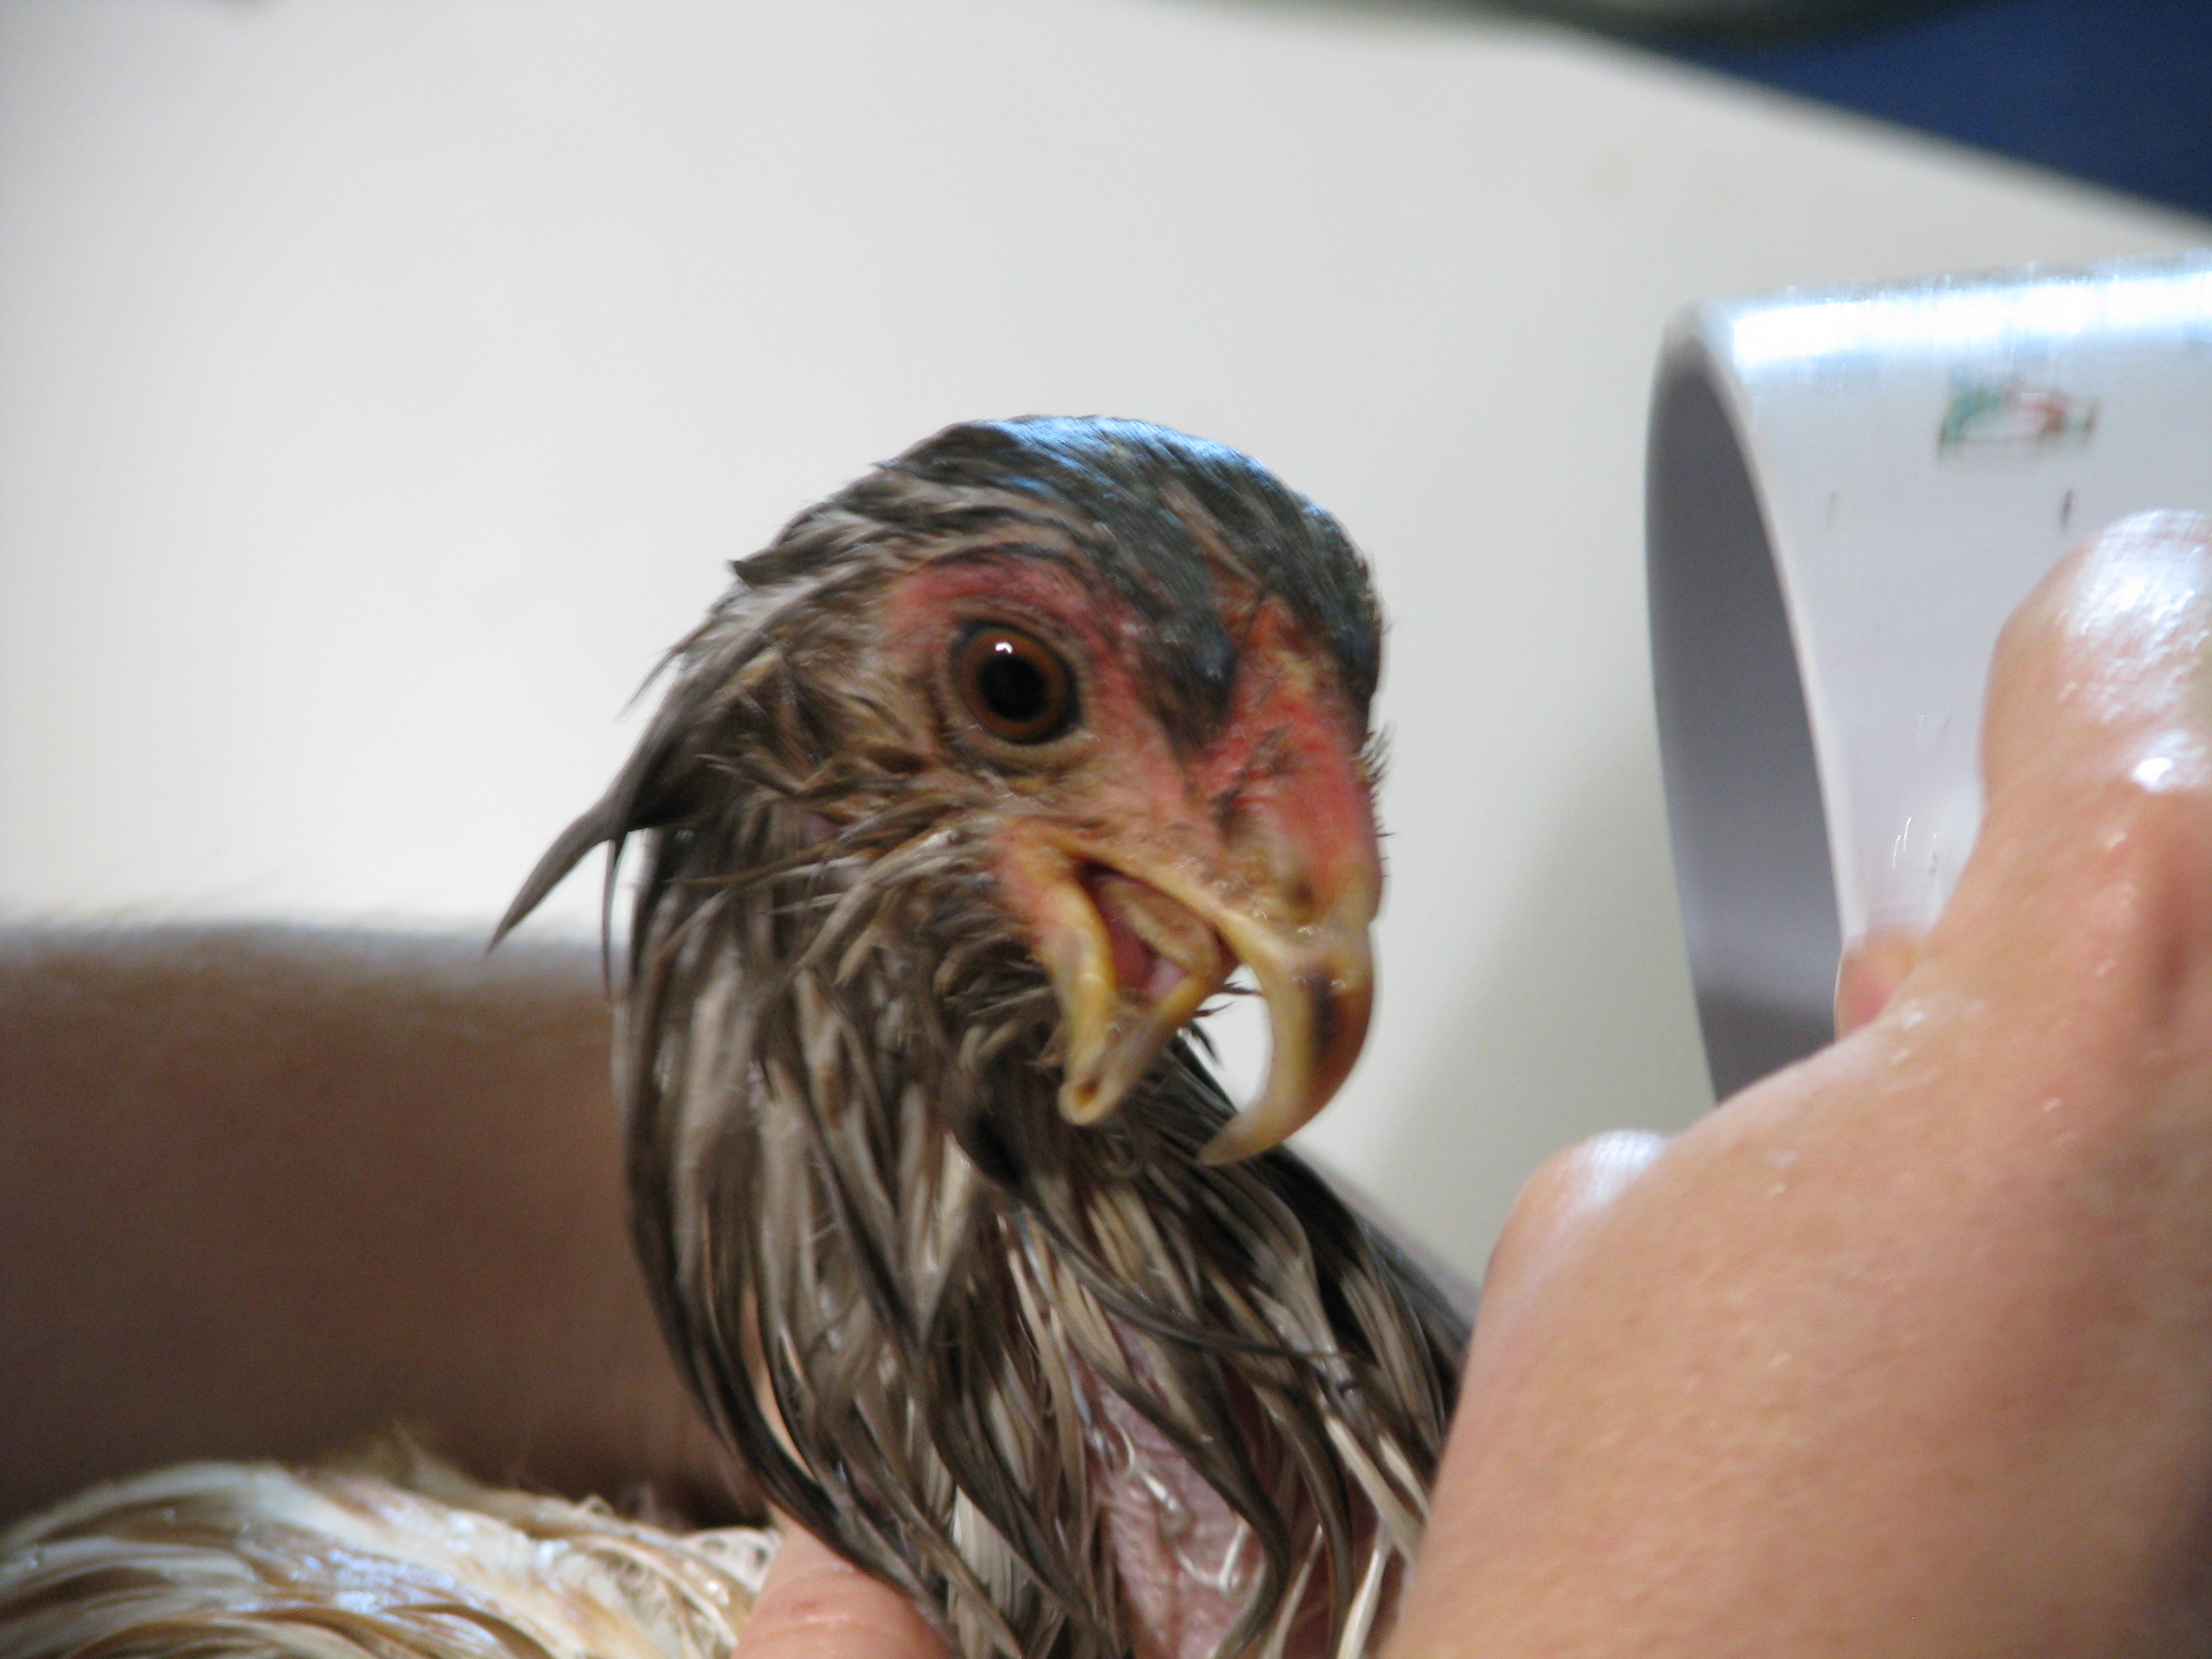
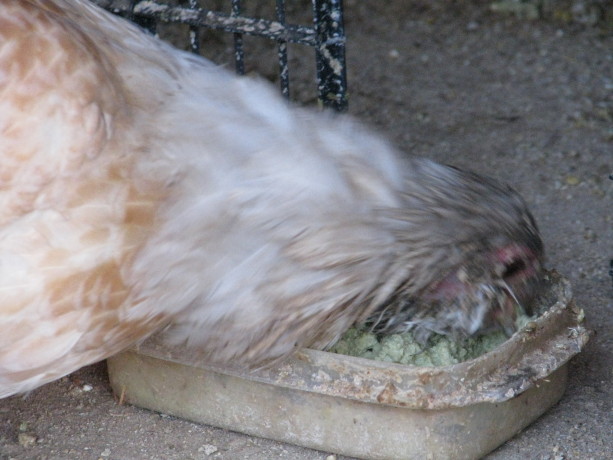
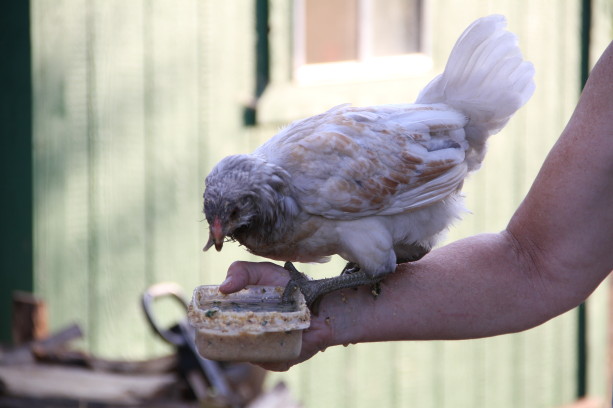
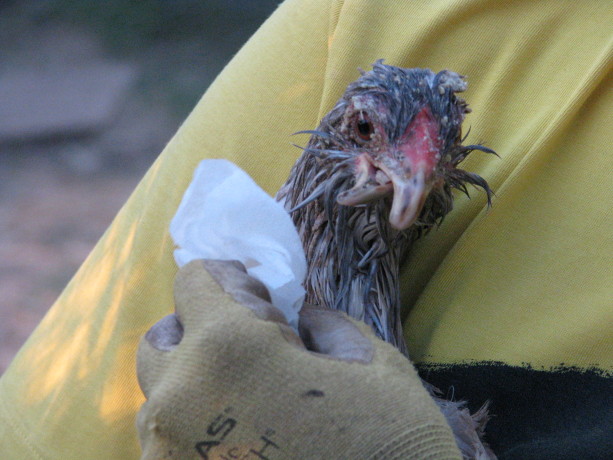
Belle looks much jauntier than she is while being rinsed in her bath. When we added to our flock of five last March by acquiring chicks, we soon discovered that our Americauna (ironically already named Belle), was a genetic crossbill. Crossbill is a genetic mutation found particularly in Americaunas which causes the beak to scissor so that they don’t meet. Some unfortunate crossbills are affected so extremely that the hen eventually would starve to death. Because of the crossbill, the hens can’t peck at food.
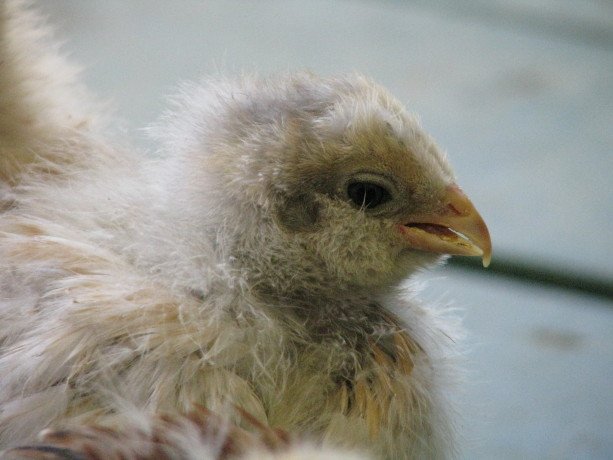
Aww! Belle as a baby. Sigh. So far Belle is able to eat, provided that we give her special food. We also use nail clippers and a nail file to trim as much of her beak off as we can without nipping the wick and making it bleed. Belle is very patient during the process. Mostly.
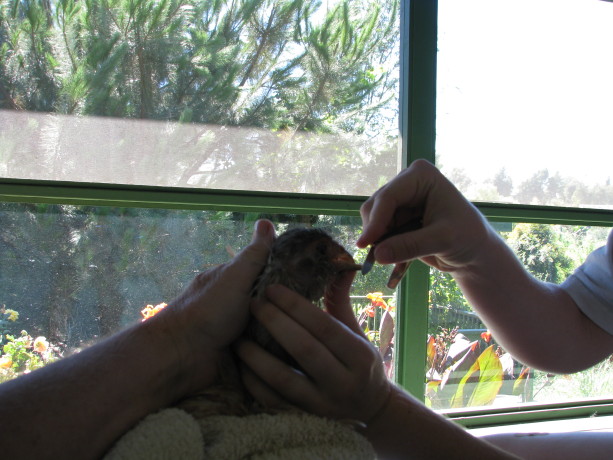
Gently and carefully trimming and filing Belle’s beak, keeping clear of the wick. She also can’t preen well. Preening in hens means that they dip their beak into an oil gland over their tail feathers and smooth that over their feathers, knitting them together and combing out the pin sheaths emergent feather shed as well as dirt and other itchy things.

Grooming is a challenge for her. Here feather sheaths and bits adorn Miranda after we finger-groom Belle. Belle’s food has to be mushy so that she can scoop it rather than peck at it. We grind up the foods we feed our other hens and then mix it with water until it has a scoopable consistancy.

Lay pellets, egg shells, oyster shell, cracked corn, and greens are ground up then mixed with water for Belle’s mush. We feed Belle the mush in a deep container with enough room for her twisted beak. Because the pecking behavior is so natural to her she finds it hard even with months of practice to scoop to the side. She shakes her head often but miraculously enough goes down.
Belle’s eating habits are not a pretty sight. Although what we feed Belle is exactly what we feed the other hens, only wet, they still are jealous and will push her away from her food. So she is fed in a special upside-down milkcrate of my daughter’s design, in the upper portion of the quail coop (the quail won’t go upstairs). The door is closed to just a Belle-sized crack and held open with a sophisticated latching unit (a stick). Even so some of the bolder girls will invade.
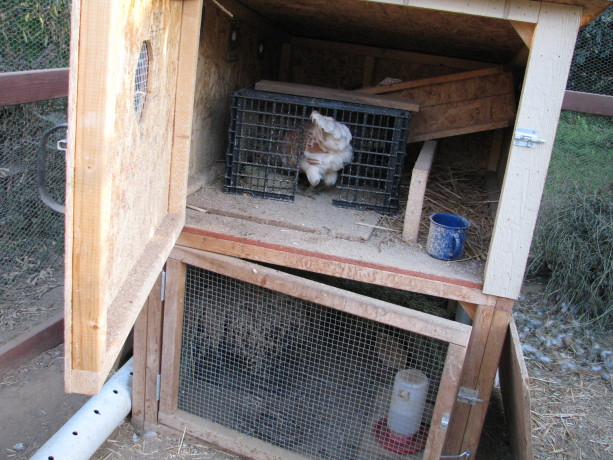
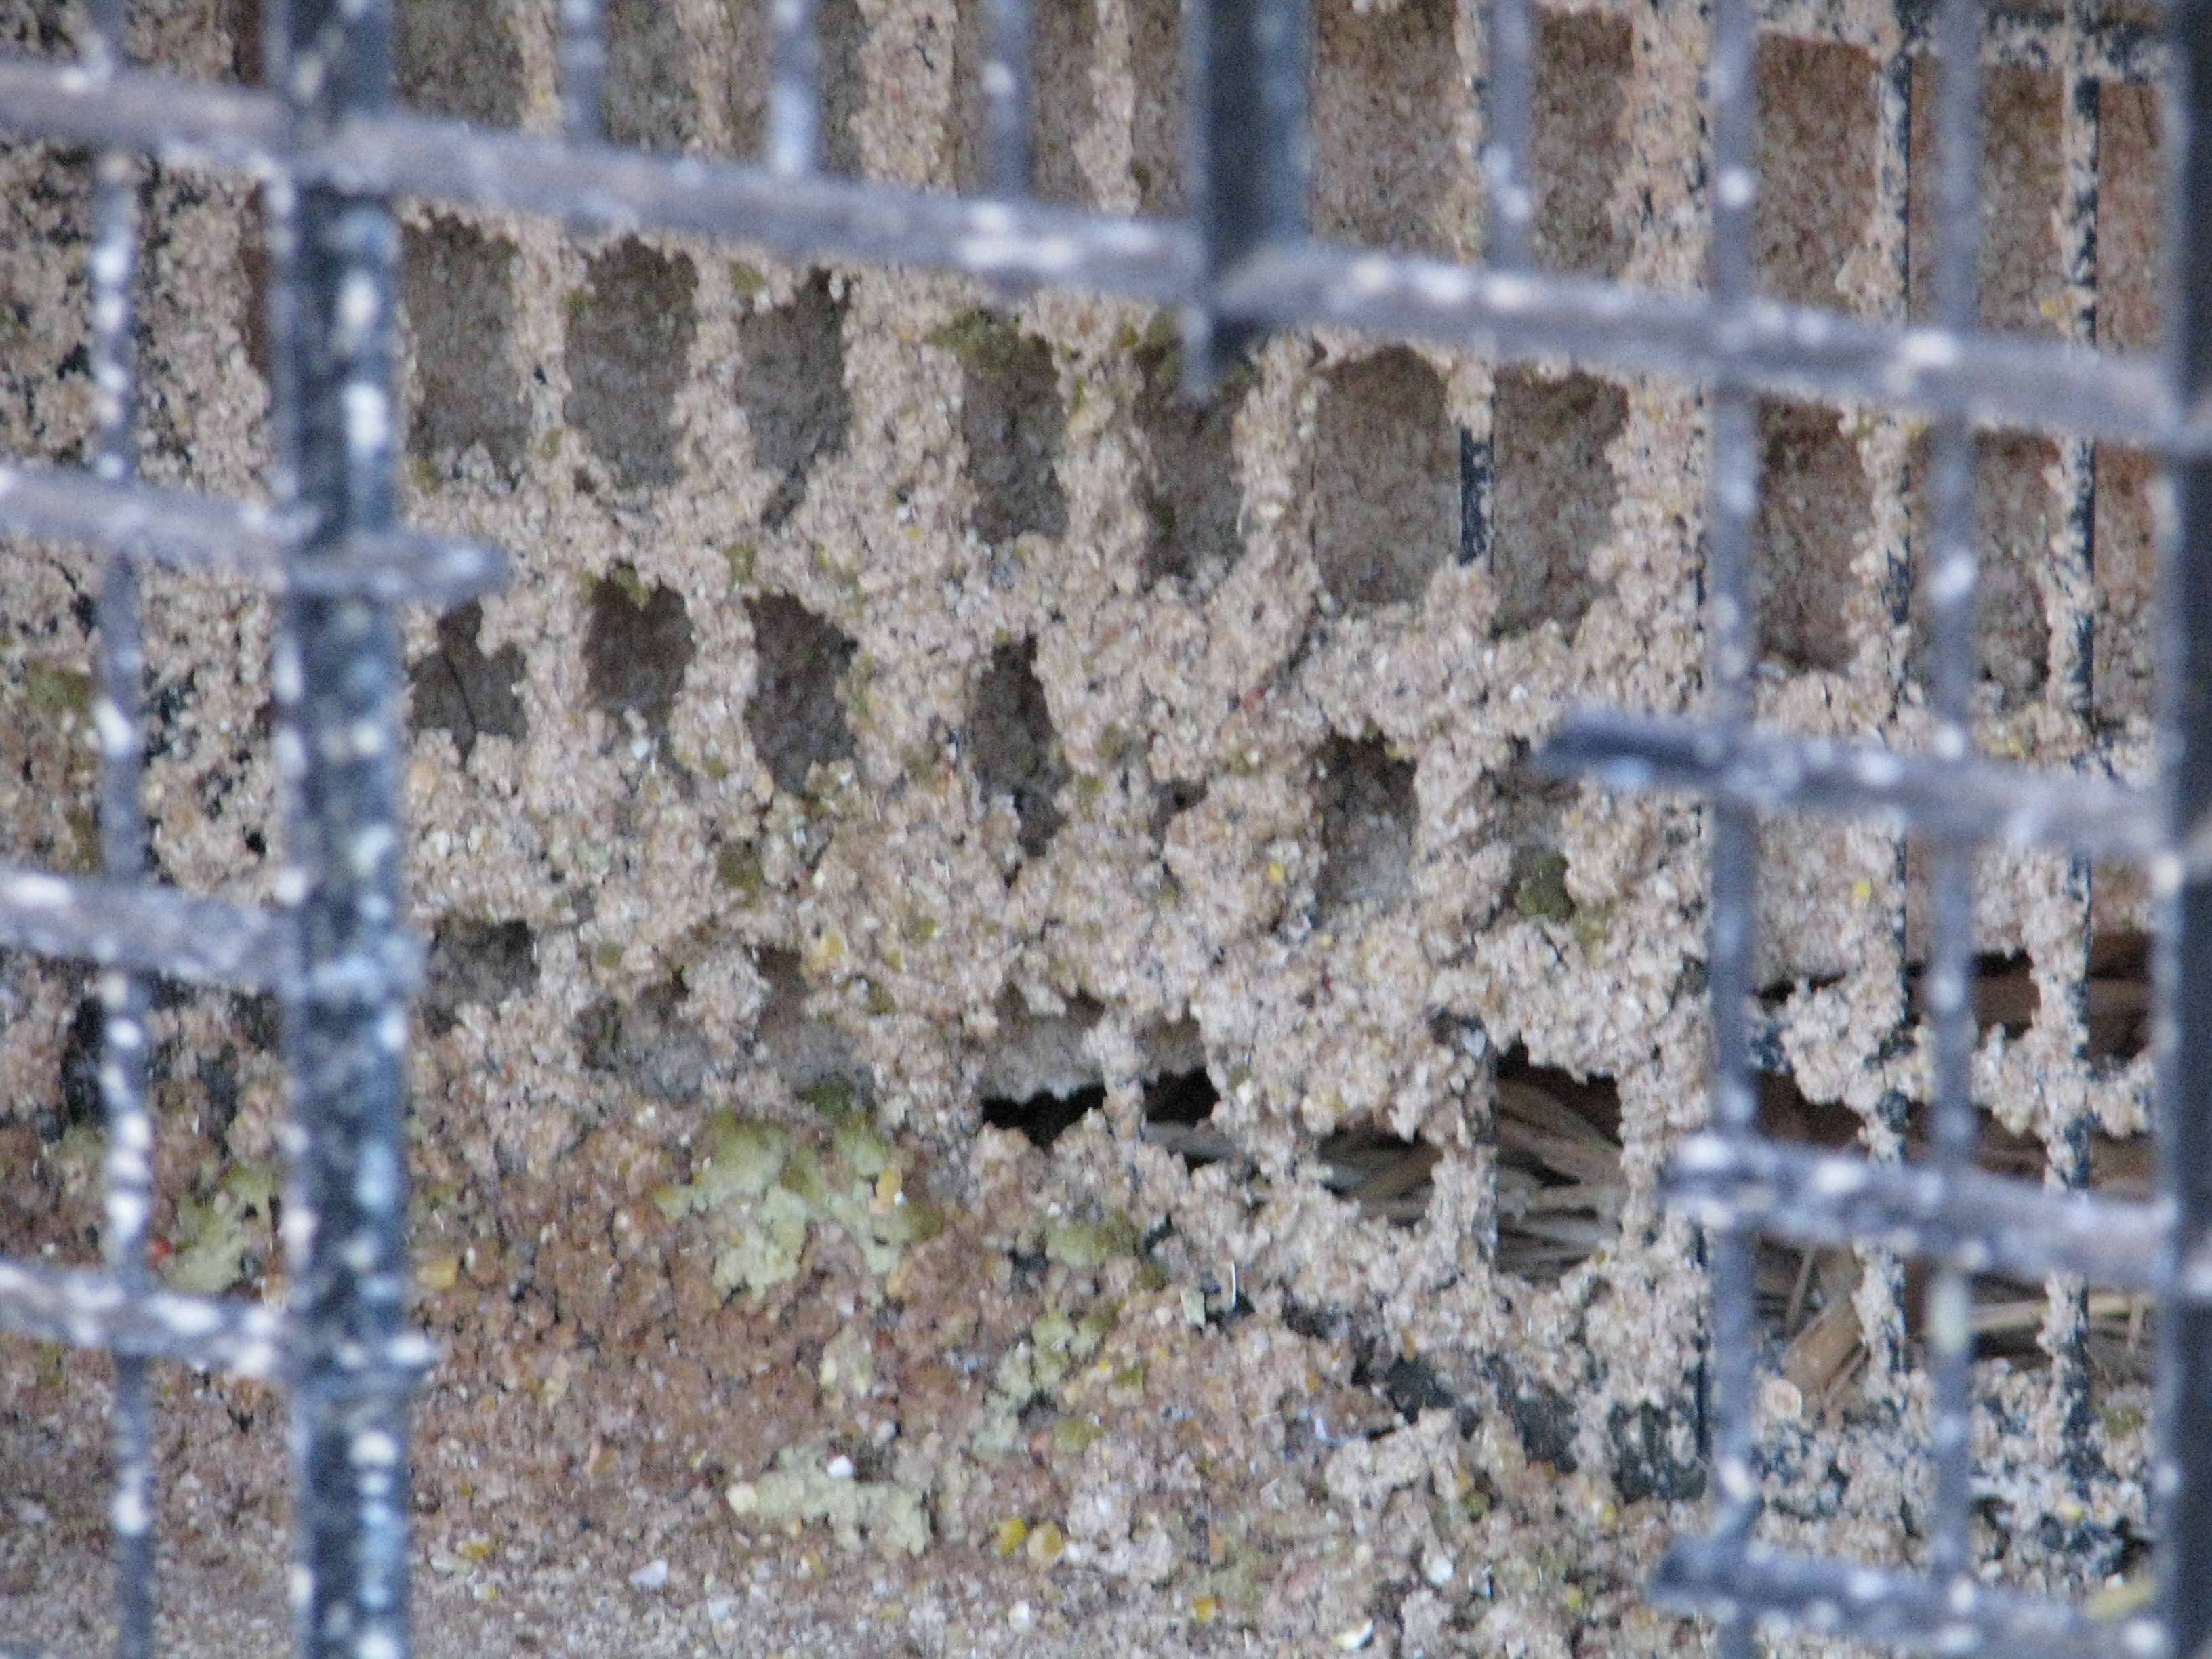
Belle eats upstairs in the quail coop. A crate helps keep her food from being raided by other hens. Some food does go down Belle’s throat, but much of it decorates the crate.

The wall of splatter inside her eating crate. After giving her a bath (as in the top photo) to soak off the dried hen food, her feathers looked so pretty (and she strutted around the porch so much as she dried) that I endeavored to find a solution to keep her clean. Alas, nothing worked. We ended up trimming her neck feathers to reduce the dried clumps.

I tried an old bib of my children’s on Belle to try and protect her clean feathers from splatter. It didn’t work. With all the handling Belle gets she has become a spoiled girl. She lives outside the hen’s pecking order, often scooting under their legs or pushing them out of the way when a treat comes even though she can’t eat it and has to have hers separately.
Belle, the falcon. Or the time is quarter-past Belle. Belle likes to help. I usually feed the hens in the morning while in my bathrobe. As I bend to scoop their food I find there is a chicken clawing her way up my back. She enjoys sitting on one’s head as well, particularly on my daughter’s as she has so much hair coiled up that it gives Belle a nice place, albeit an unwelcome one, to perch.
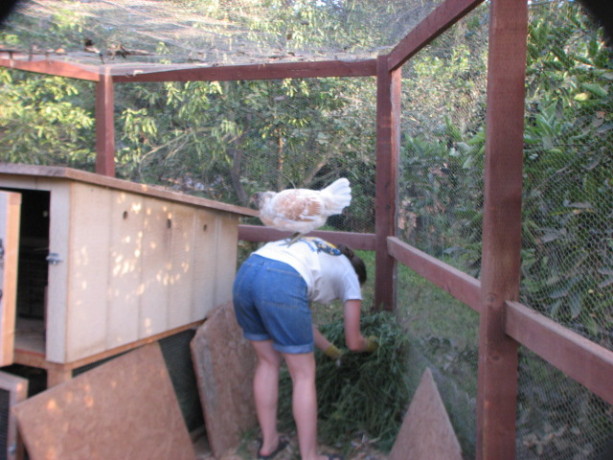
Belle likes to help whenever she can. When we fill Belle’s food dish with water outside the Fowl Fortress, she often sneaks under the door as it is closing and makes a leap for her food. Usually this results in food everywhere but in Belle’s very hungry stomach.
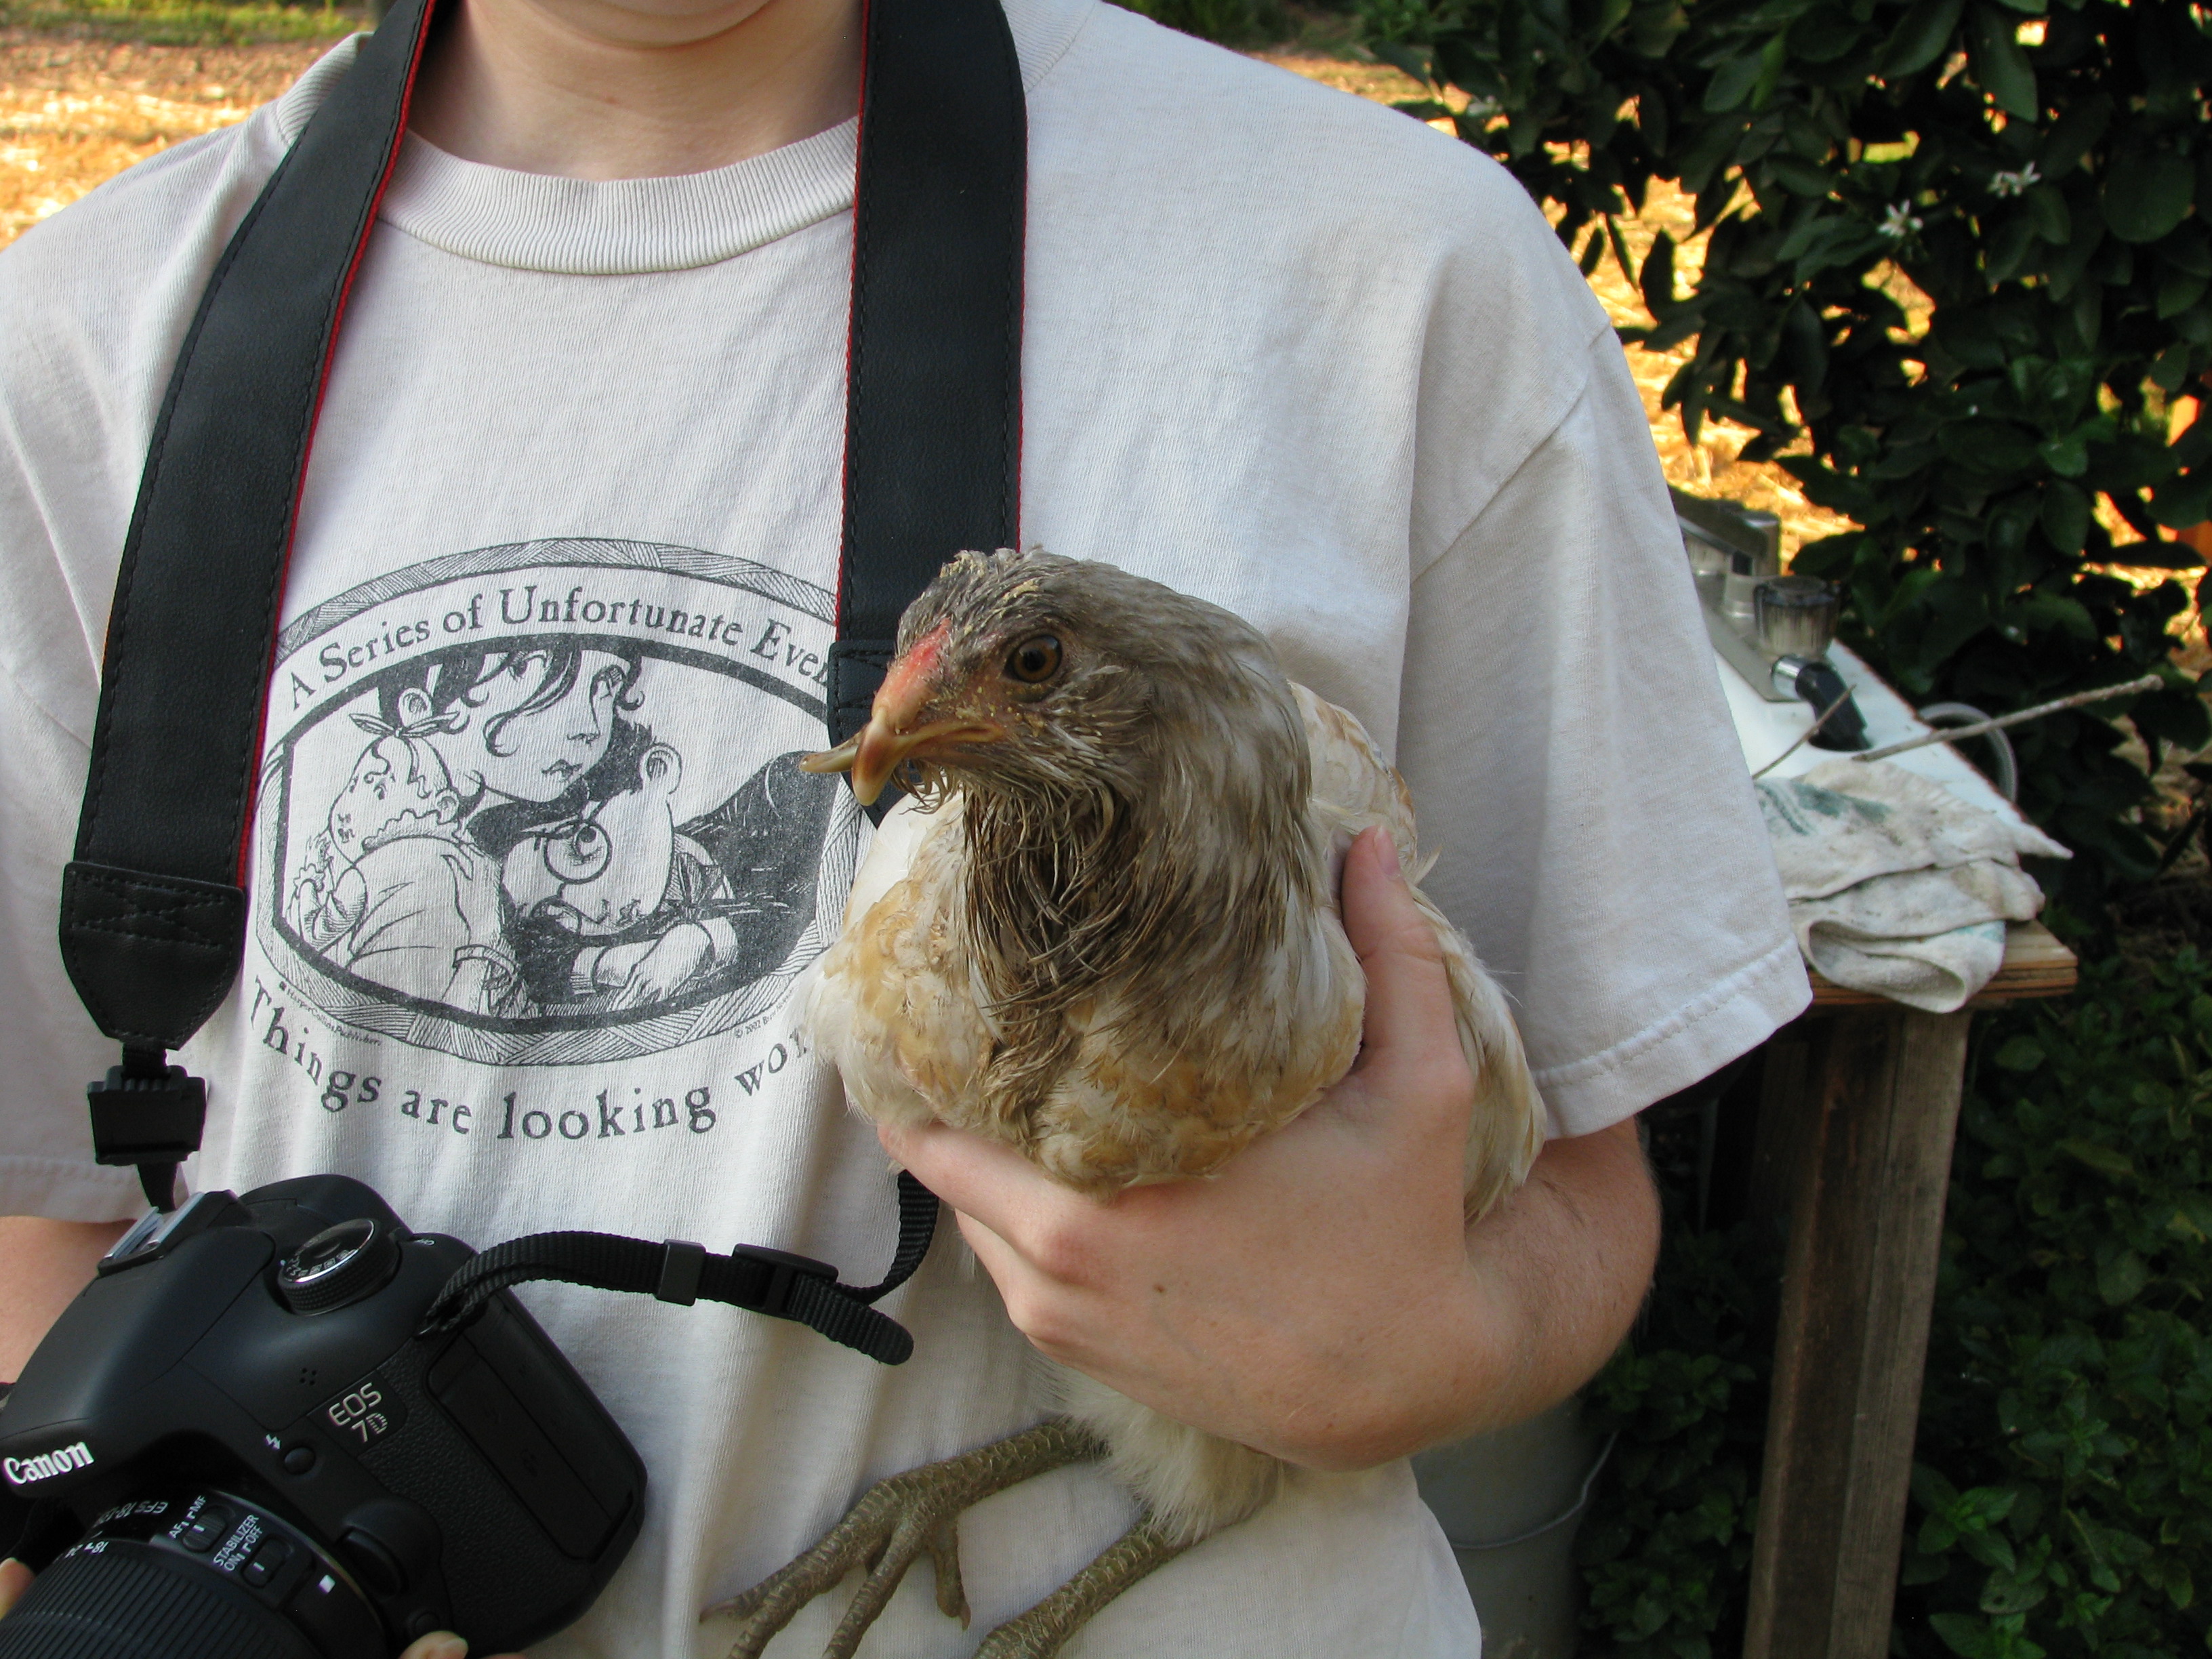
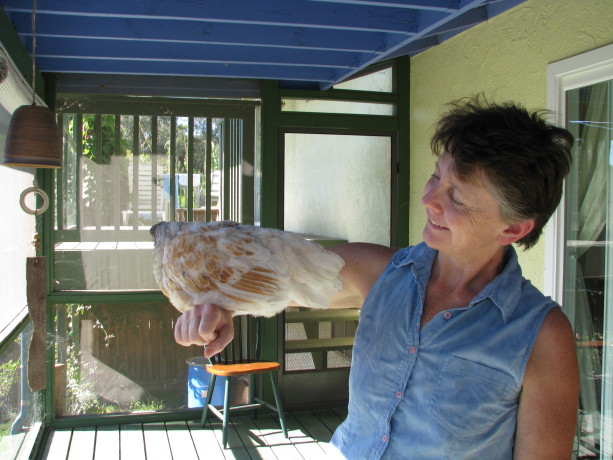
Belle usually can’t wait until she’s served. Belle is a happy chicken, eager for attention and enjoying being ‘teacher’s pet’. She doesn’t mind being carried around like a small football.

With all the frequent handling she gets, Belle enjoys being carried around… spoiled girl! After making fried zucchini for dinner one night I had extra beaten egg and soy milk left over. On a whim I cooked it into a custard for Belle. Well. I’ve never seen a hen eat so much. It was the perfect consistancy for her to scoop and it was tasty. Giving her a few day’s break I eventually made her a more nutritious custard. In my handy-dandy Vitamix (I really should be paid to sponsor them, although hen custard probably isn’t in their advertising scheme) I mixed quail eggs and their shells, lay pellets, ground cracked corn, oyster shell, buttermilk, and celery greens which I happened to have right there (from home-grown celery). The custard turned out very unappetising.
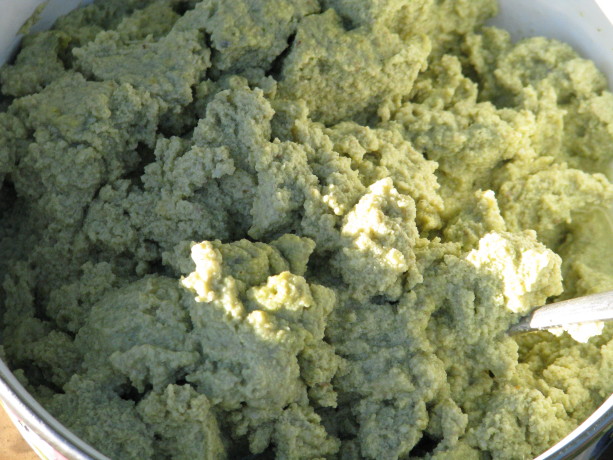
Although it looks like a cross between brocciflower and a sea sponge, it is really a dry custard. Apparently it was only unappealing to me and Miranda.
After-custard clean-up is necessary due to the dairy products. Belle’s not happy about being dabbed. It is worth the extra effort to insure Belle has a good meal and a full crop at the end of the day. When she’s full of custard she actually struts around the yard, happy with her fullness and the fact that she had a treat no one else had. Belle is of laying age but her size is smaller than the other hens and she’s still growing. I don’t mind if she doesn’t lay; she’s a darling friend and a neutral hen in the coop. I’m sure Belle will be the source of many more stories and certainly a lot more mess. Just another crazy, high-maintenance, unproductive little animal here at Finch Frolic!
You May Also Like
Native Insects and IPM
-
Fruit Tree Guild, Revisited
In June I blogged about how to plant a fruit tree guild, and gave the example of one I was planting by the Fowl Fortress. I thought I’d show you how it matured.

Apple tree in trouble: heavy clay thoroughly shot through with Bermuda grass. Yuck! This was the area four months ago. Heavy, sticky clay taken over with Bermuda grass. A struggling apple tree begs for my help. A star jasmine climbs the side of the Fowl Fortress. A portion of the brown subterranean irrigation system lies aboveground.
Using permaculture design, I created a plant guild with herbs and vegetables that would build the soil and help the apple tree.

A guild is planted. Strawberries went around the trunk of the tree for groundcover and grass competition. Comfrey, a valuable nutrient accumulator in there, too, for slash and drop fertilization. There is also a perennial basil, marjoram, gourds, golden runner bean (a nitrogen fixer), garlic chives, a prostrate rosemary and a tomato, along with other flower seeds. This is how it looks now from the same vantage point:
The guild in September. 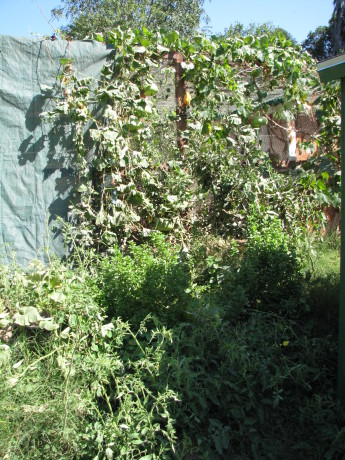
Layers of plants protect the ground and produce food. 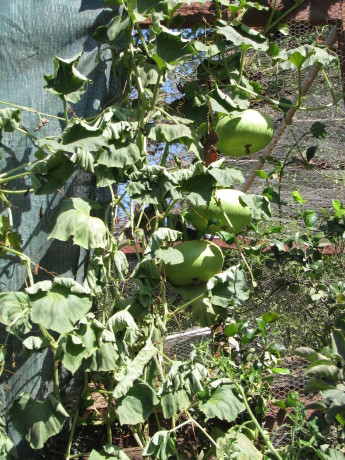
These gourds can be dried and made into bowls. 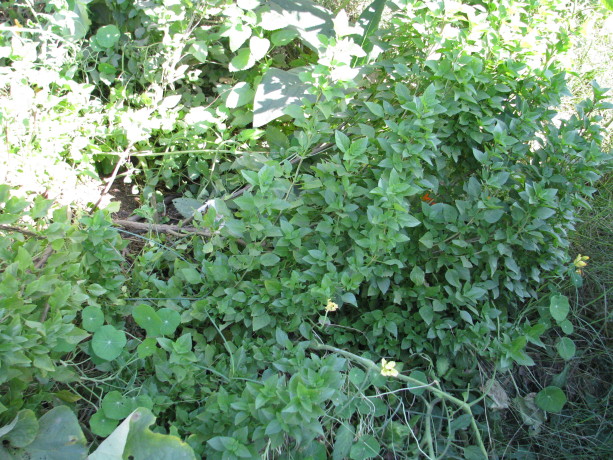
Perennial basil, Amish paste tomatoes smother the weeds and enrich the soil. 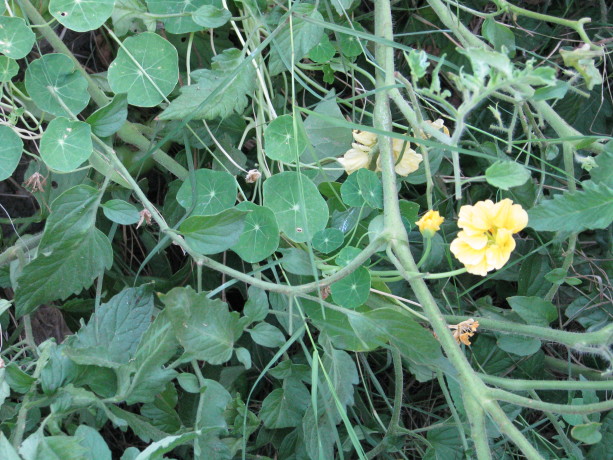
Nasturtiums reseed and fill in as the other vegetables die off. Polyculture beds produce abundant, insect-confusing food guilds which help fertilize and water each other and improve the soil quality. Meanwhile the apple tree has a few apples on it and looks healthier than it has been. Next year’s growth should be drastically improved, and the amount of invasive grasses should be nil. If I don’t grow consecutive annual crops here around the perennial plants, I will sheet mulch the bed.