Natives
- Building and Landscaping, Compost, Gardening adventures, Hugelkultur, Irrigation and Watering, Natives, Permaculture and Edible Forest Gardening Adventures, Ponds, Rain Catching, Soil, Water, Water Saving
Installing a Swale
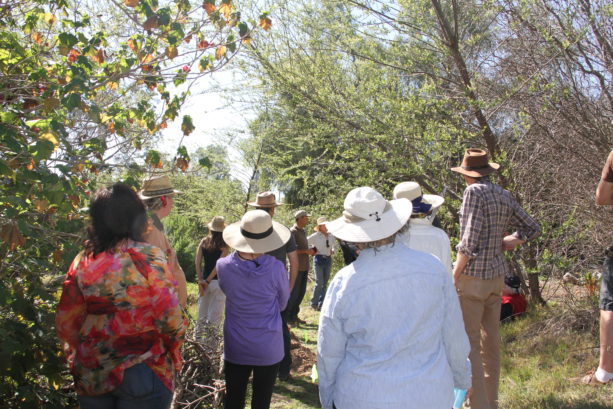
 Last Saturday we hosted our first workshop of 2017, featuring Alden Hough of Sky Mountain Permaculture. Alden is a master at creating earthworks, and he spent three hours here at Finch Frolic Garden teaching a class of sixteen people how to install swales correctly.
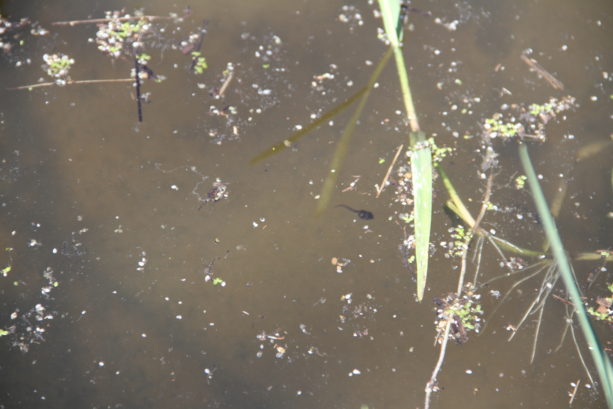
  The project was a small pond that overflowed and flooded when heavy rains hit. The soil is heavy clay and therefore the small pond doesn’t percolate. It is kept filled by the well, and its overflow feeds the bog and the big pond. Right now the little pond is full of native Pacific chorus frog tadpoles, which will evolve into small frogs that will go out into the landscape and eat bugs the rest of the year.
 He created a urbanite (cement chunks) spillway into a twenty-foot swale. The class learned what a bunyip was and how to use the water level, and how to use a laser level. The swale will hold about 300 gallons of water that would have overflowed into another area, spread and sink the water.
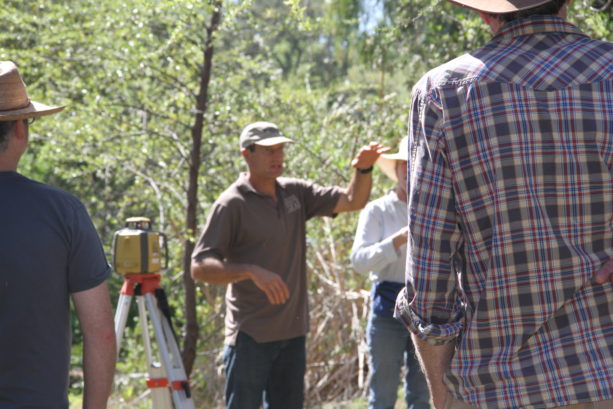
The swale was measured and marked on contour.
 Bermuda grass was pulled from it and set into trash cans to cook in the sun and hopefully be destroyed. The swale was then dug by hand.
 Old wood – branches, logs, boards and old posts – were laid below the swale, and covered by the dirt. This hugelkultur will absorb seeping water, aerate and enrich the soil, and provide food and water over time for the trees downhill.
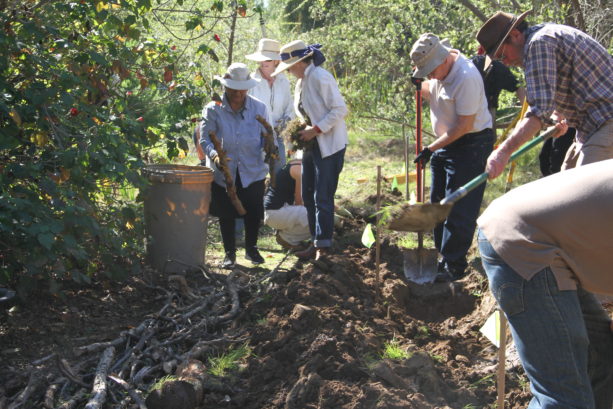 More dirt was needed to cover the wood so we emptied the first rain catchment basin on the property of silt and hauled it down the hill. This was a lot of heavy work, and several of our attendees worked extremely hard with the wheelbarrows. Miranda and I have a lot of experience doing this heavy work, and we are glad that this swale project also emptied this basin.
 Our wonderful workshop attendees worked very hard in the heat. The end result was a swale of beauty.
 By creating level swales dug on contour, you can see how right it looks. It hasn’t been dug deeper into the ground at one end to force the swale to be level. If you measure on contour your swale can be of any size, and it will collect, passify, spread and sink rainwater into the landscape. Earthworks are the best way to hold water, and are imperative to reestablishing water tables, keeping wells running, keeping trees alive and maintaining springs and streams. A little earthworks will make a huge difference.
What needs to be done now is to create a dedicated overflow from the swale into the main pond. As this area receives a lot of foot traffic, we’ll also need to haul more silt to make the raised walkway more gradual and blended with the paths around. Once the tadpoles have grown and left the pond, we can drain it and use that silt. Two projects in one.
Prior to the project Miranda carefully removed a lot of healthy creeping red fescue from the work site. After the swale and spillway were dug she replanted some of it. Native yarrow will also be planted to help hold the swale.
A huge thanks to the many people who came to learn and work on site. No matter how many movies you watch or books you read, having hands-on experience makes the education click. And an extra huge thanks to Alden Hough for his expertise and hard work. Please visit Sky Mountain Permaculture in Escondido for more classes – earth bag dome building included – coming up there.
Our next Finch Frolic Garden workshop will be in April: April 22, 2pm – 4pm: The Many Benefits of Trees: Care, Nurturing and Pruning . Roger Boddaert, the Tree Man of Fallbrook and professional landscaper who planned the original garden that would evolve into Finch Frolic Garden, will talk about trees. So many trees are dying due to the drought, and we need to replace them to help shade and cool the earth and hold onto moisture. But what to plant, where and how to care for them? Roger will take you through tree care based on fifty years of experience in landscaping. Visit https://www.southernpalmetto.com/services/ and get all the details.
Go forth and dig swales!
- Animals, Bees, Compost, Gardening adventures, Irrigation and Watering, Microbes and Fungi, Natives, Other Insects, Permaculture and Edible Forest Gardening Adventures, Rain Catching, Reptiles and Amphibians, Soil, Water, Water Saving, Worms
Creating Rain with Canopy
Even if we don’t receive a lot of rain in drylands, we might have fog, sprinkles and other degrees of ambient moisture. This moisture can burn off with reflected heat from hard-packed earth, from gravel and hardscape, and from buildings. It is too irregular and thin to make the use of mist nets feasible. However, a much better way to collect that moisture and turn it into rain is the method nature uses: trees. The layers of a plant guild are designed to capture, soften and sink rainwater, so why not just let them do it? Many trees are dying due to heat, low water table, lack of rainfall and dry air. Replacing them with native and drought-tolerant trees is essential to help put the brakes on desertification.
Please take five minutes, follow this link and listen and have a walk with me into Finch Frolic Garden as this 5-year-old canopy collects moisture and turns it into rain:
Plant a tree!
- Building and Landscaping, Gardening adventures, Natives, Perennial vegetables, Permaculture and Edible Forest Gardening Adventures, Water, Water Saving
Irrigation For Drylands: Conclusion
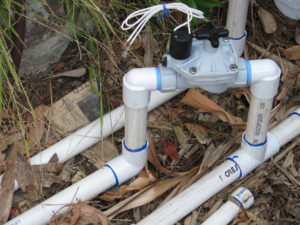
One-inch PVC runs from the valve. This is the last of the series of posts on irrigation, and I’d like to briefly address the issues of water pressure and valves. As I’ve said in a past post, if you don’t know about these things then hire someone who is an irrigation specialist (not just someone who says he’s put together irrigation before… they are guessing!). That specialist will obtain for you the right sized valves, the right irrigation timer, and monitor the water pressure so that your sprinkler heads won’t blow off and pipes break.

The one-inch pipe is then reduced to 3/4″ pipe at the first T, close to the first sprayer. For pipe, don’t use small 1/2″ pipe for large jobs. Bigger – to a point- is better. Smaller pipe doesn’t mean higher pressure. It reduces the volume of water going to the sprinklers. The smaller pipe creates more pressure loss due to friction and turbulence as the water flows through it. We took the advice of our irrigation specialist and ran 1″ pipe from the valves to the first sprinkler, and reduced it to 3/4″ pipe, then reduced for the 1/2″ risers.
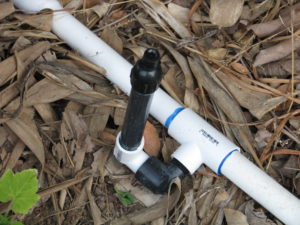
Further reducing 3/4″ to the 1/2″ sprinkler configuration. Most sprinkler systems need a water pressure of between 30 – 50 psi. Drip systems need less, around 20 psi. Too high or too low a water pressure will adversely affect your system. If you attach a water pressure gauge to a spigot you can see what your pressure is. If it is very high, you will want to check the indoor pressure as well because too high a pressure can mean pipe damage and leaks, and no one wants wet walls. You can use a pressure regulator on your line to reduce the water pressure for your irrigation.
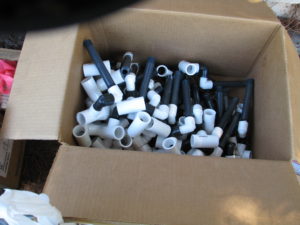 How many sprinklers you can put on a valve depends upon several factors, but mainly the flow rate, or how much water is flowing through the pipes at one time. Sprinklers have an output rate so you can do the calculations on how many you can put on a line. Flow rates are measured either in gallons per hour or gallons per minute, with gpm the most common for householders. Drip systems are less concerned with flow rate. We ended up adding valves to our system because we had so many sprinklers.
When installing your system, be sure to add a ball valve (rather than a cheap gate valve) close to your water source so that if you have to work on your system you can shut it off; otherwise you’ll have to shut off the main to your outside water. If you have a large system, installing ball valves along the line to isolate different areas will help down the road if you need to troubleshoot. Having hose bibs along the line are very nice, too.
There is a lot to learn about irrigation valves – using globe valves with an expensive back-flow preventer or using anti-siphon valves that must be above ground and above the closest sprinkler head. I’m not an expert, but there is expert advice on valves here.
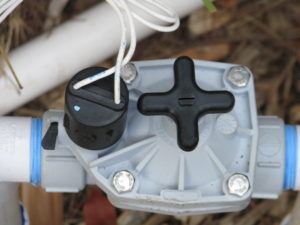
Another thing to consider is your electrical line. If you have valves, you must run electrical line to them (at this writing, solar valves are not that dependable for the long run). Electrical line must also run from your irrigation clock to your electrical source at your house. Usually electrical line is buried. Please spend the little extra money and have the electrical pulled through conduit first, rather than direct burial! Having loose wires buried in your yard is a recipe for disaster. I know this. I asked for conduit with the original system, and the wire was directly buried before I could protest. Sure enough, two years in and a valve wouldn’t turn on. The problem was with the wire… but where? How to dig it all up without nicking any of the lines? Impossible. So until this project two of my valves had to be tied together and both stations running simultaneously, which really stunted the water pressure and was a real headache. This time the conduit is run above ground along with the PVC pipe, which will be covered with mulch, and also along the top of my chain-link fence up to my house. If there are any problems, the conduit comes apart every ten feet and wires can be checked or replaced. Pulling electrical wire through conduit is not for the fainthearted; I developed new muscles and callouses working on that, but it was worth it.
Skipping ahead, your irrigation project is finished and your landscape planted. Be sure to take the time to update your plan so that it is an ‘as-built’, reflecting any changes you’ve made. This is an invaluable document not only for your own use, but for any future owners of your property or workers who might need that information. Use a rough plan of your yard and identify each valve and the area the valve covers in different colors. If you want to draw in every sprinkler head, that is fine. On large projects that isn’t practical, so just use zones. Take a waterproof marker and write the valve numbers on the valves themselves, so that you won’t become confused in the field.
Be sure to run each valve during the daytime while you inspect the sprinklers for clogging or broken heads. A lot can go wrong during the night when most systems run, and you won’t know it until you get the water bill or your plants start to die.
You may want to put in the wire for additional valves that may be added in the future. Making double valve stub-outs and only using one is far easier than pulling new electrical if you find that you need to add a valve.
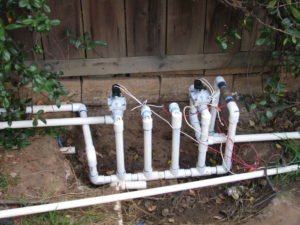
So don’t think that irrigation is a simple endeavor, and begin to glue miles of 1/2″ pipe together with 2 – 3′ risers that shoot water up embankments. This is a waste of money, plastic, water and plants. Put as much thought into your system as you put into the design of plants, and your system will give you little trouble in years to come.
Oh, and remember to shut your system off when it rains!
 You can read Options, Part 1 of this series here, Part 2 Evaluating Your System here, and Designing Your System Part 3 here .
 - Building and Landscaping, Gardening adventures, Heirloom Plants, Natives, Perennial vegetables, Permaculture and Edible Forest Gardening Adventures, Rain Catching, Soil, Water
Irrigation for Drylands, Part 2: Evaluating your System
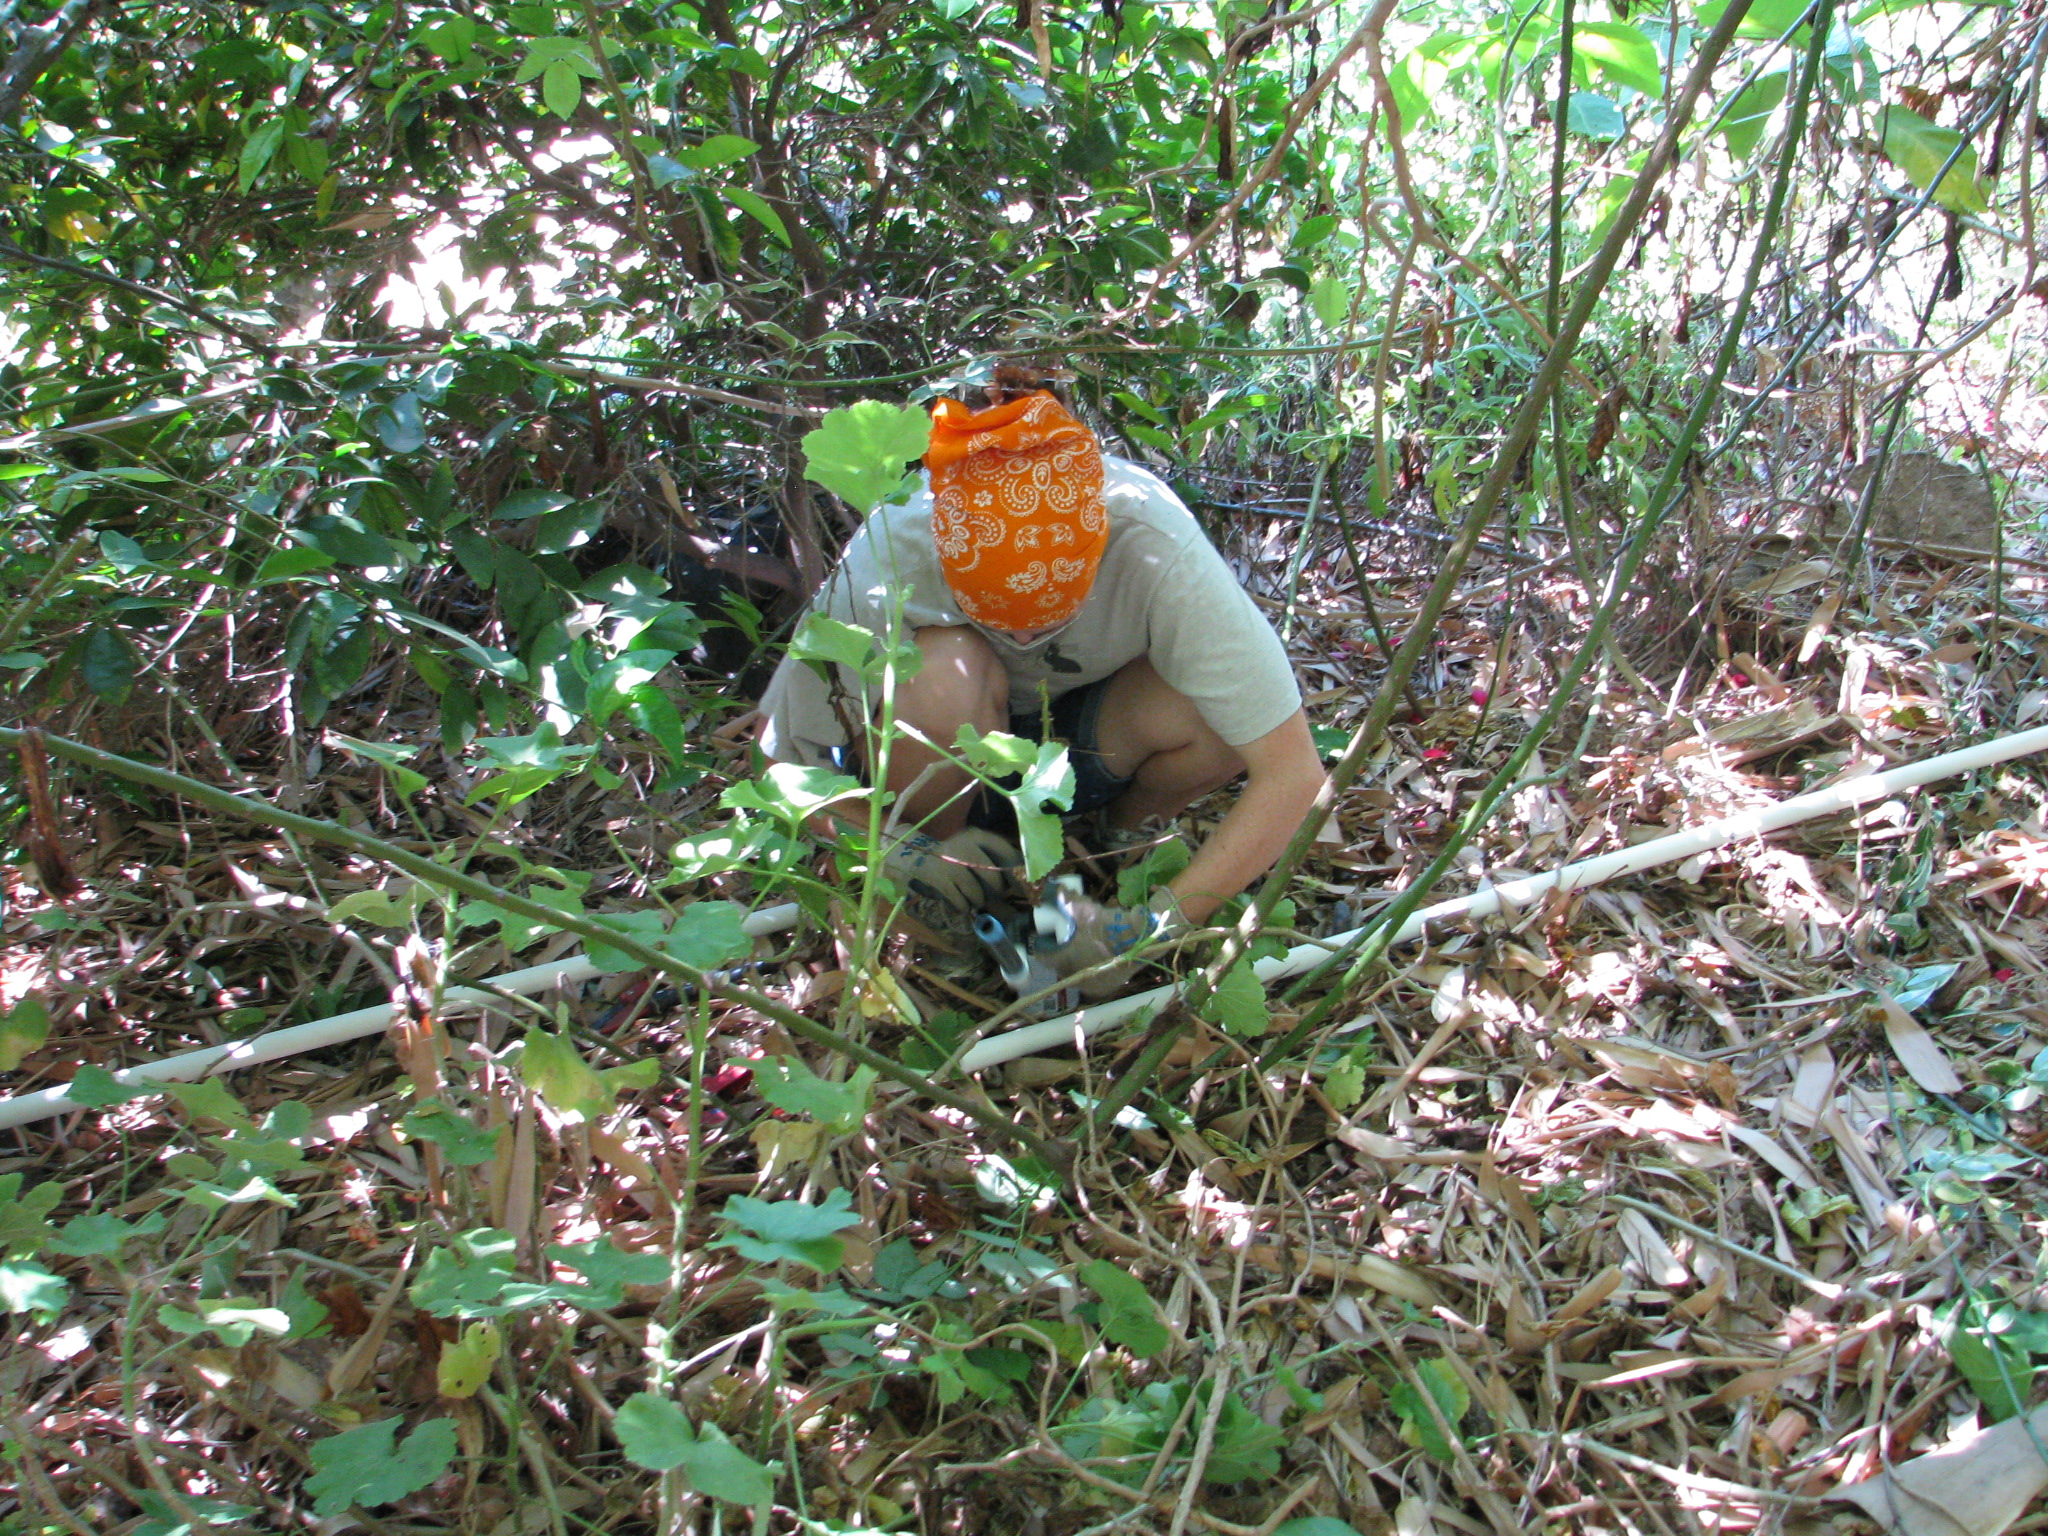
Miranda in the roses gluing pipe. If you have an existing irrigation system that works, you may easily convert it by adapting the heads for whatever you want to plant. Many lawn conversions I’ve designed utilize the existing spray system, particularly for natives, but with a different watering schedule. Don’t spend money when you don’t have to.
If you have an old grove that is to be converted and downsized, you’ll usually have far more pressure in your system than you need for smaller heads which may cause them to blow. Working with an irrigation specialist for the valves and pressure is advisable. For this re-irrigation project of Finch Frolic Garden, I found Vista-based John Taylor of Taylor-Made Irrigation and Landscape, 760-945-0118. He’s the first person to listen to and consider what I have to say, based on my experience with the old system, and he adapts to different situations. I’ve learned some cool new things that I will pass on to you, and he’s enjoying learning permaculture techniques, which will help both him and his landscape clients.
Here’s a little world-weary advice from someone who trusts too easily: Many professionals no matter what their field have one set way of doing things that they apply to every situation, be it irrigation, plant selection, tree trimming, construction, etc. (My neighbor has his poor coral tree topped every year. Topping trees is a bad practice. When I asked him about it, he said that his tree trimmer has been topping trees for years and recommends it, so he’s talking his expert advice! Do you see the problem here?) You, I’m sure, have dealt with these people too. Every situation needs a different solution, so look for someone who is flexible, listens to you, can offer several solutions with various price ranges, and who will give you a detailed estimate up front. Jobs will always run over, but they shouldn’t run too much over and the professional should be determined to keep on budget, and honest with you when there is an overrun. If you ask a professional to do extra things, the new tasks will need to be added on to the original contract because it will take up part of the time allocated towards the original project, so the project completion date will be moved ahead, and will add on to the total cost. On the other side, if your professional adds on projects that he thinks you’ll like, and you give him the verbal okay, realize that he’ll be working on those projects in addition to the original tasks, so it will take longer and cost more than the original contract. Look for people who don’t consider telling you their life story part of the time for which you are paying. If you tell them your life story, remember that they are on the clock and you are paying for that time. (I’d rather deal with a quiet, focused professional than a chatterbox who will talk more than work. If he’s not talking to you, he’s probably on his phone a lot while on the job.) Look for neat vehicles with organization, letterhead for estimates and invoices, someone who shows up on time when they say they will, and stays until they are done. They should schedule in their lunch; if they work through it they are not going to work well for you later in the day, and its unprofessional. Its okay for professionals to handle several clients at one time, but only if they are well organized and are eager to finish your project on your timeline. Contractors are infamous for tearing something apart the first day, then disappearing for days or longer holding you hostage while they work on other projects. Its okay to ask about all of this, and really important to read reviews. Don’t always rely on people your friends have recommended; I’ve had both really bad and really good referrals, so make up your own mind.

Extreme mineral buildup in a PVC pipe. Photo from http://www.marinechandlery.com/. Back to irrigation. Most irrigation is PVC, the white plastic pipe. If you have old buried metal pipes they should be examined for leaks. Mostly they will fail to function due to mineral buildup due to our hard water. The inner diameter of the pipe closes; if you’ve ever cleaned your shower head or seen house drains with the thick white inner coating, that’s what I’m talking about. It will slowly dissolve in vinegar, but the vinegar must remain in the pipe to soak it for awhile, then blown out an open riser to get rid of the chunks. All sprinkler heads must be decalcified as well. Often the buildup is so old that the pipes are deteriorating and just need to be replaced, usually with PVC. The galvanized pipe can either be left in the soil to gradually rot, which is fine, or else be dug up and sold for scrap. The labor cost involved with digging it up will probably be more than what you’ll get for scrap.
Here’s some understanding of water. The reason why domestic (potable) water is chlorinated is not to purify the water. That has already been done before it gets into the delivery pipes. It is to keep biomass from forming inside the water pipes. Biomass is any type of growth that forms, usually in wet conditions. Think of algae inside a fish tank or on the inside of a pool. Biomass is nature’s way of filtering and softening hard surfaces, and in nature is essential. In man-made pipes, the biomass can not only harbor things that can make humans sick, but also slows the flow of water. Garden hoses have some biomass inside of them, and any rough part will slow the water pressure. Lengths of any kind of pipe are the same. The longer the pipe, the slightly less pressure you’ll have. Pressure is important because you want your sprinkler heads to spray, not just dribble (unless you set them for dribbling). Pressure regulators are set in sprinkler heads, Netafim, and valves to keep lines from blowing out under normal pressure. If you don’t have an irrigation system set up for a large grove or large grasslands for animals, which require enough pressure to shoot water great distances, then you shouldn’t worry about the lines blowing out. But understanding about pressure and the effects of biomass and distance will determine what size pipe you lay.
Most people use domestic water for irrigation. Some rural areas have agricultural water available for commercial growers. Some people have well water, which is what I have. Well water has not been treated, so whatever has leached into that water is what you are delivering to the topsoil. Have your well water tested for contaminants and salts. You should have a filter after the pump on your well. However, our heavy-mineralized water will form a oozy barrier around the diaphragms in valves. If debris or too much of this slick mineral buildup accumulates, the valve won’t ‘seat’, or seal, and will allow some water to seep through the pipes even when the valve is off. This has been a huge problem here at FFG, and one which several irrigation ‘specialists’ have completely denied. They deal with treated water rather than well water, and just don’t understand. Some valves have diaphragms that can be very carefully cleaned and replaced, but not frequently before they are damaged. If you have a well, check with an irrigation specialist who has real-time experience with well water and valves to recommend the appropriate valves and filter system for you. I’ll talk more about the ones John recommended for FFG in a later post.
Large-diameter pipes will carry lots more water more slowly. Small-diameter pipes carry less water more quickly. If you lay out large diameter pipes from your valves, let’s say 1″ pipe like we’re using at FFG, then you can reduce the size of your pipe gradually to your sprinkler heads and that will be the best of both worlds. You will have volume of water and increased pressure. So John has recommended that we use 1″ PVC from our valves, which are connected to the well with 1″ PVC already.
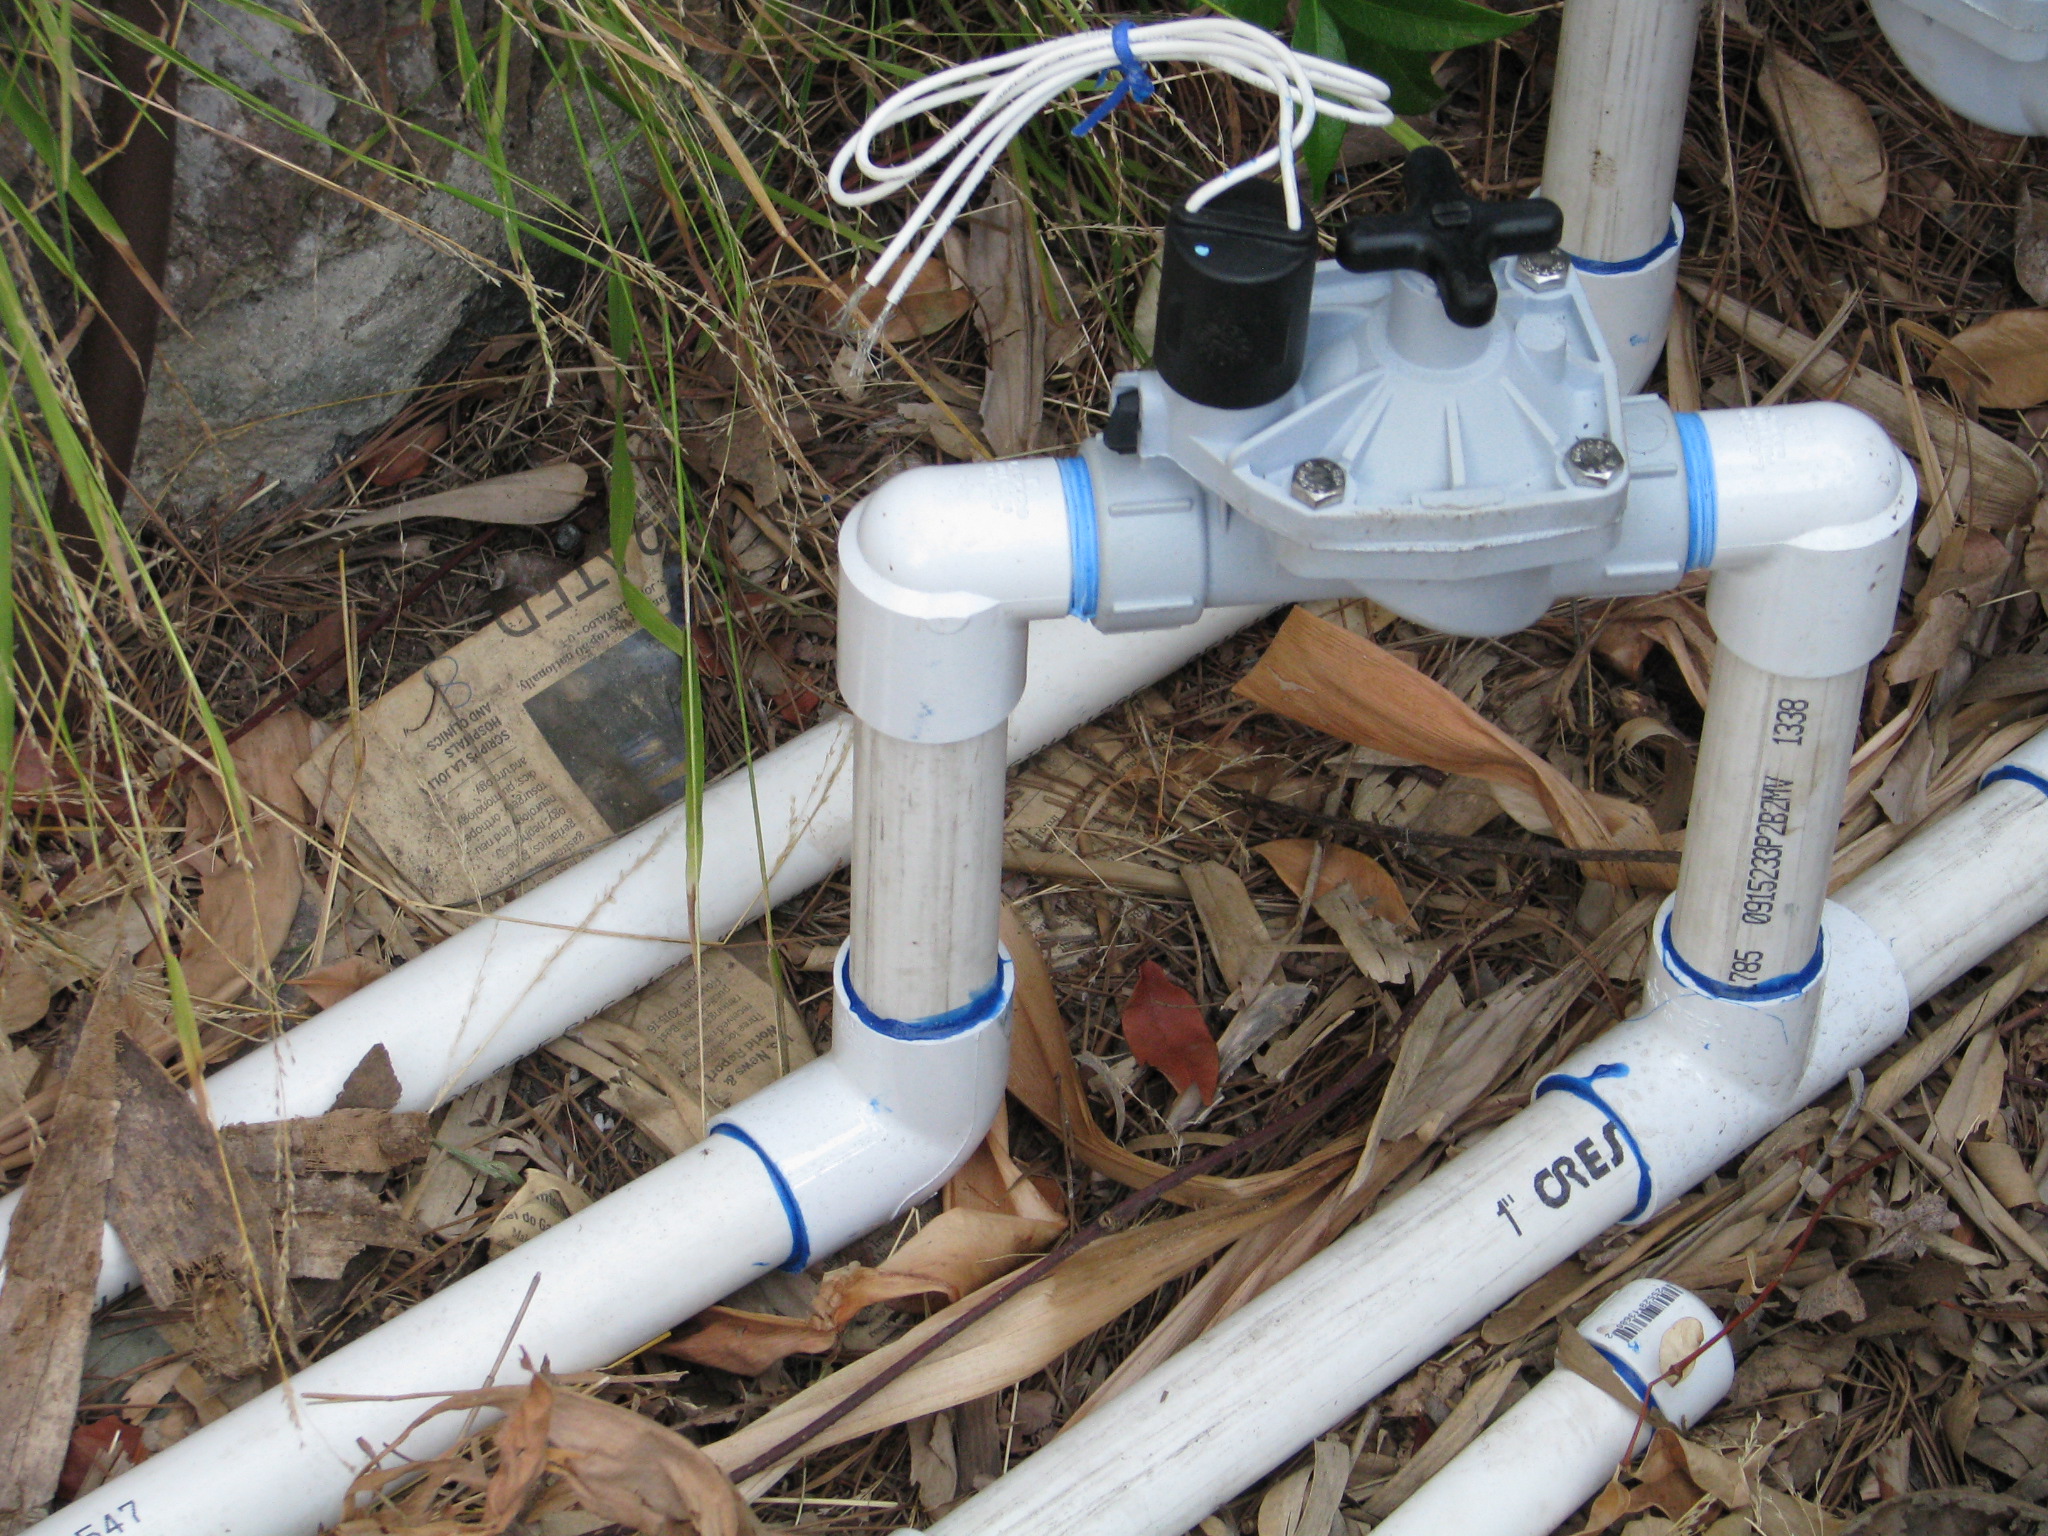
One-inch PVC runs from the valve. Then we reduce the pipe to 3/4″ at the nearest T, or closest to the first sprinkler head.
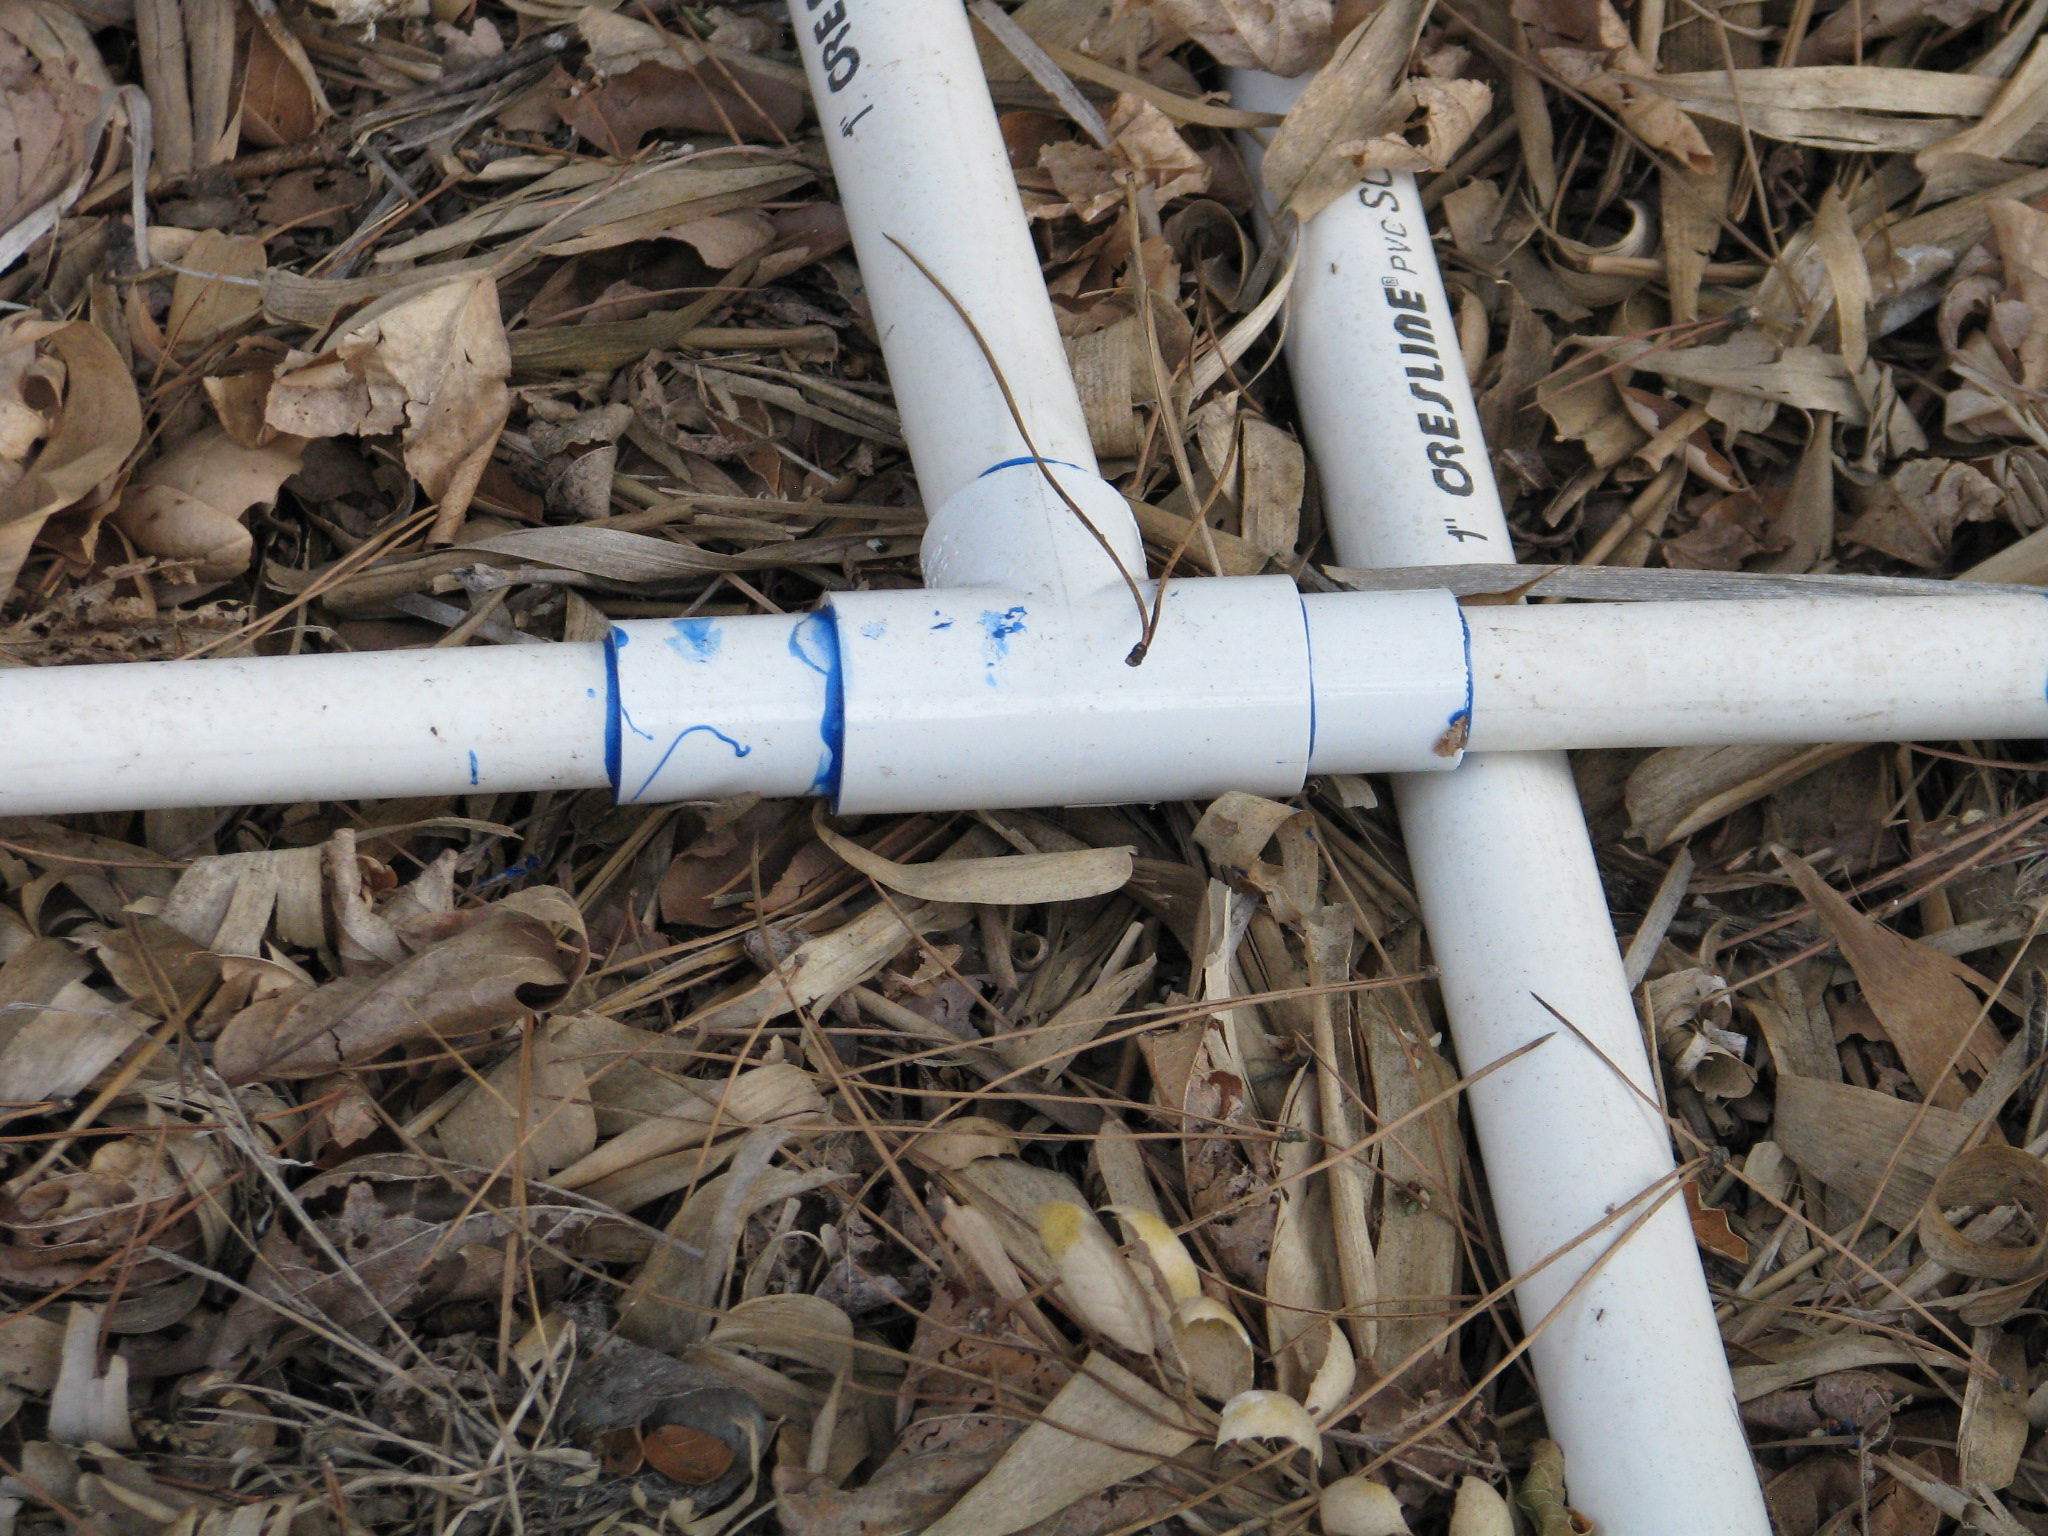
The one-inch pipe is then reduced to 3/4″ pipe at the first T, close to the first sprayer. Then the sprinklers are reduced down to 1/2″. Since our well is at the bottom of our slope and water needs to be pumped back to the top, this design really helps keep the topmost systems pressurized.
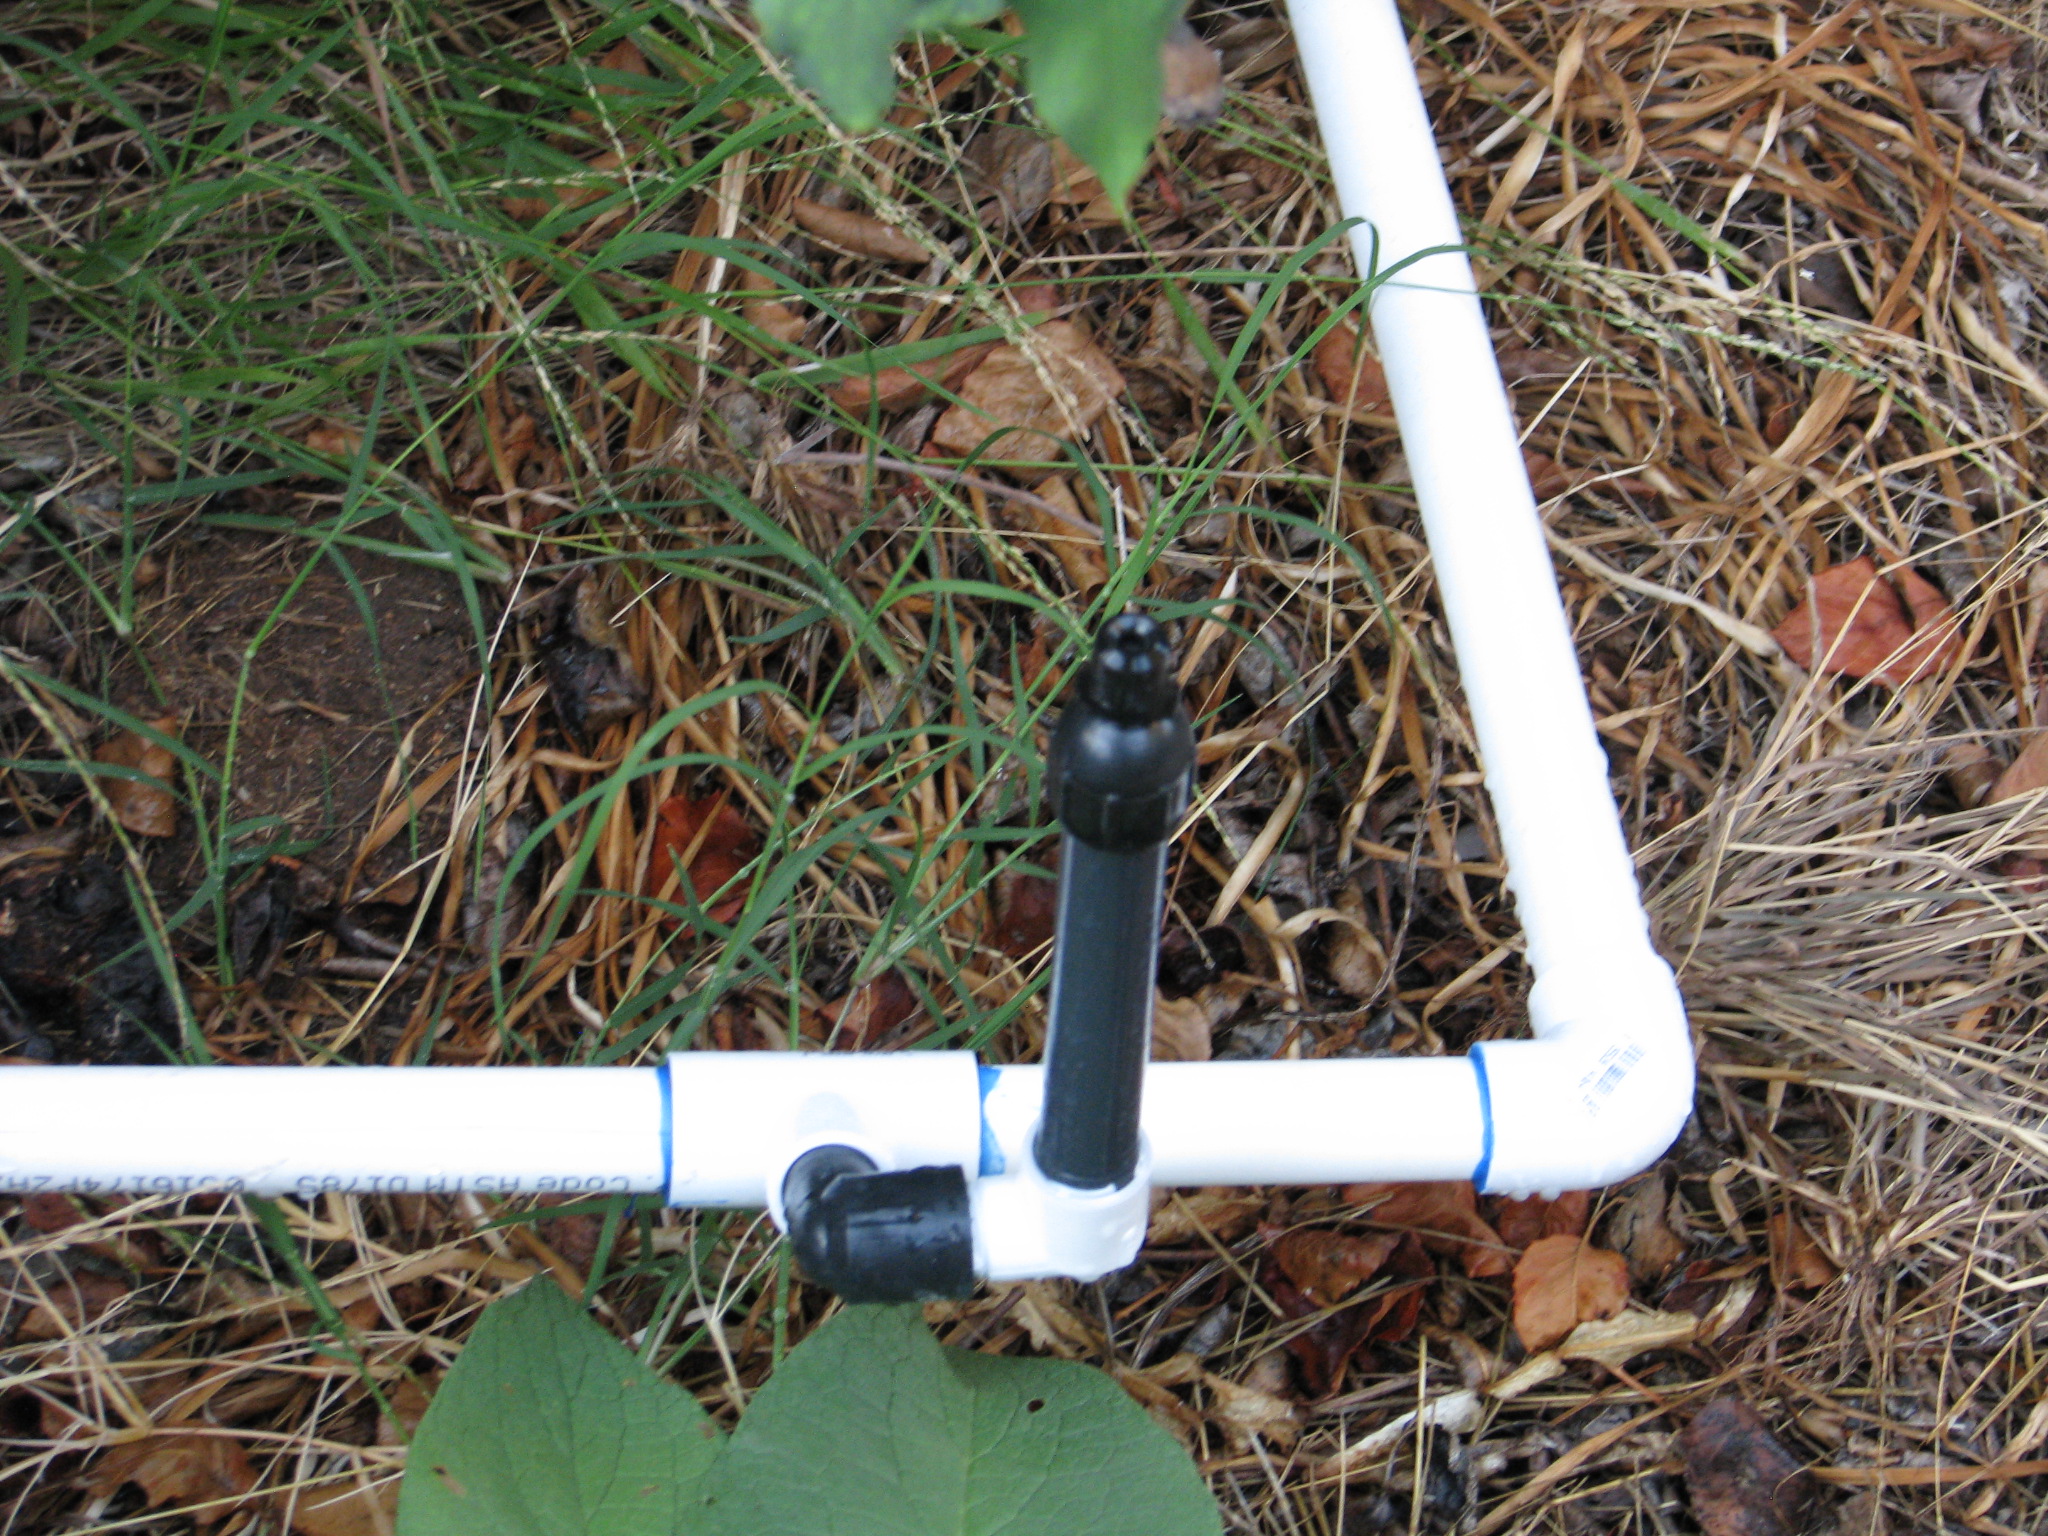
This sprayer is reduced from 3/4″ to 1/2″. So as you are laying out your garden and irrigation system, understand about slope, water pressure, volume of water and your water source. These factors all have large parts to play in the long-term success of your irrigation.
Next time I’ll discuss drawing up an irrigation plan.
You can read Part 1 Options here, Designing Your System Part 3 here , and Part 4 Conclusion here.
- Animals, Arts and Crafts, Birding, Building and Landscaping, Gardening adventures, Houses, Natives, Permaculture and Edible Forest Gardening Adventures, Ponds, Predators, Water
A Mallard House

The Finch Frolic Garden Mallard Nesting Tube, by Miranda. For about four years now a pair of wild mallards have called Finch Frolic Garden home. They visit most of the year, especially in mating season as it is now. The male guards her closely as she goes off to lay an egg a day in some secluded, secret nest. This is Mrs. Mallard’s best time of the year.
Mrs. Mallard leading her mate all over the property as he protects her. She’ll stroll all over the property while he has to follow, and it is hilarious to watch. They get in more walking time now than in the whole year put together. She deserves to enjoy the attention because the rest of mating season isn’t so much fun for her.
The mating occurs in the water, with the male biting her neck and holding her head under water. Ducks have drowned during mating. A couple of years ago Mr. Mallard was losing his mating plumage and decided to allow a rather mean drake have at Mrs. Mallard. It was a violent mating, and she tried hard to get away.
Mr. Mallard and his terrible surrogate. The next time the imposter flew in Miranda and I were close to the pond by a lime tree, with some bushes between us and the pond. Suddenly we noticed Mrs. Mallard slowly walking around the bushes, her head held low. If she could have tip-toed with webbed feet she would have. She slowly approached us and hid behind the lime tree next to us. We took action and chased the males away, then spoke soothingly to Mrs. Mallard in a sense of female solidarity. It was quite touching to have a wild creature so trust us as to come to us for rescue.
The Mallards checking out the duck island. Once the eggs have been laid the female is entirely in charge of the eggs and the hatchlings. However, if the clutch fails, the male will keep re-mating with her and she’ll keep re-nesting. Mrs. Mallard has attempted to lay eggs on our property in the bushes, but rats or other creatures have eaten them. She had a nest right next to our garage one year, perhaps hoping that we could protect the eggs even though by the time we realize why we’d meet a duck on the pathway by the house every day it was too late. The stress of the mating, the egg production and laying is taxing to a wild duck’s health. Last year she appeared leading several ducklings to our pond. We have no idea how far she’d lead them, or how many there were to begin with, and we knew the babies probably wouldn’t last long. We were right; they were gone by the next day. Predation by the invasive bullfrogs in the pond, rats, weasels, hawks or any number of animals. So sad for the mallard family.
This year Mrs. Mallard has been disappearing daily, obviously to lay an egg a day elsewhere again. However Miranda decided to help out for future nests. She built a mallard nesting tube. Following instructions she found online from people who have proven this design works, she rolled the first three feet of a piece of 7’x3′ hardware cloth to form a tube.
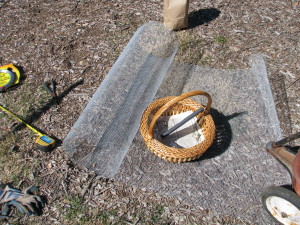
A 7′ x 3′ piece of hardware cloth. Larger wire would let too much debris fall into the pond. This was wired together, and the last four feet was layered with natural plant materials and rolled.
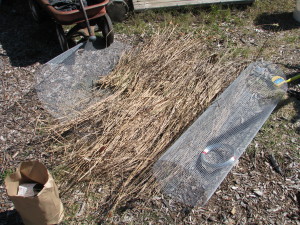
The first 3′ are rolled and fastened, then Miranda lay dry cattails on the rest. 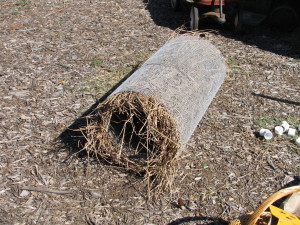
The nesting tube. Kind of like a jelly roll for mallards. 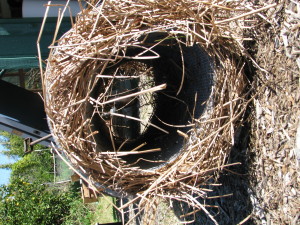
The inside of the tube isn’t large, but apparently it is large enough. This tube was wired onto a cradle she made mostly of recycled PVC parts, and painted dark green.
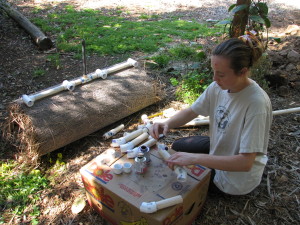
Gluing together the cradle. All of the pipe we had salvaged from old irrigation systems. 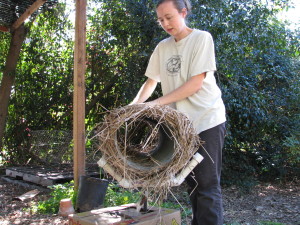
The cradle supports the tube, but is also loosely wired onto it. 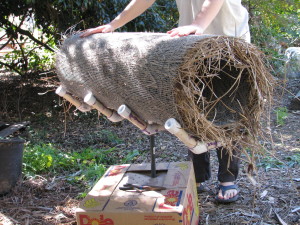
A sprinkler riser is what will fit into the support pipe. 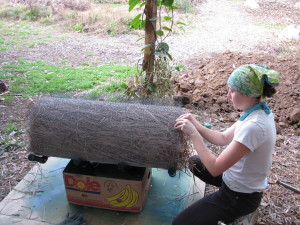 Also, to prevent hawks, egrets and other opportunistic birds from perching on top and snacking on eggs or hatchlings, Miranda attached strips of pokey chicken wire along the top.
Since egrets visit the pond regularly, the top of the tube had to be inhospitable. 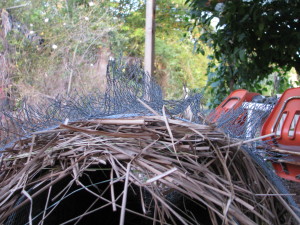
Miranda cut strips of chicken wire and these were bent and wired on top to prevent birds from landing. Slipping into the chilly February pond was a shock until our legs became acclimated (or “numb”). We pounded a hollow pipe, then slipped another pipe into it (both found materials), and then mounted the tube on top.
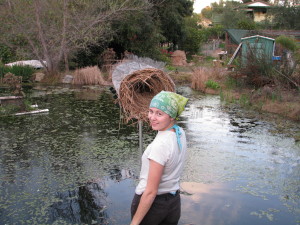
After mounting the nesting tube, Miranda stuffed leaves and dry grass inside, because mallards don’t carry in their own nesting materials. Miranda then lined the inside of the tube with soft nesting materials – dried grass and leaves – because mallards don’t bring them in. A little interior decorating for future lodgers. A sprinkler riser screwed into the PVC cradle slipped into the pipe. This way the nesting tube can be easily removed for maintenance. The tube is about three feet above the water surface.
Mrs. Mallard hasn’t shown any interest at this point, but she’s involved with her other nest right now. We have high hopes for a successful nest. Anyone want to come catch bullfrogs?
- Animals, Bees, Compost, Fungus and Mushrooms, Gardening adventures, Health, Heirloom Plants, Hugelkultur, Microbes and Fungi, Natives, Other Insects, Perennial vegetables, Permaculture and Edible Forest Gardening Adventures, Rain Catching, Recycling and Repurposing, Reptiles and Amphibians, Seeds, Soil, Water, Water Saving, Worms
Plant Guild #9: The Whole Picture
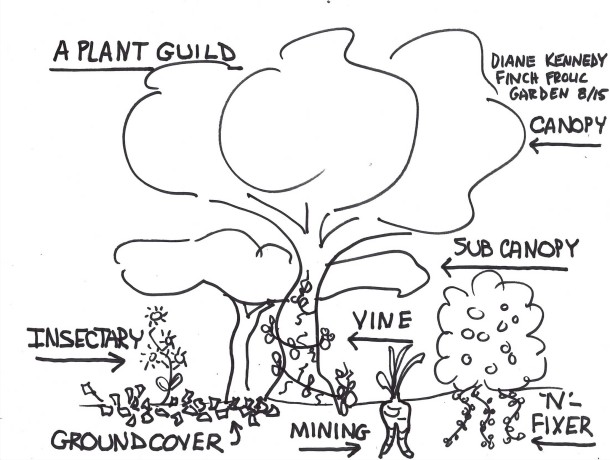
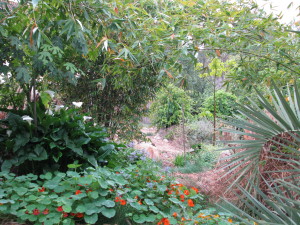 When set in motion the many parts of a plant guild will create a self-sustaining cycle of nutrition and water. By understanding the guild template and what plants fit where, we can plug in plants that fulfill those roles and also provide for us food, building materials, fuel and medicine as well as beauty.
Plant the appropriate plants for where you are placing them, for your soil and water use, and stack them in a guild with compatible plants that you can use. The ground will be covered by a foliar density that will keep grasses and other weeds at bay and provide excellent habitat for a full range of animals and insects. By stacking plants in a guild you are bringing life and abundance back to your garden.
Does it still sound so complicated? Rather than try to learn the roles of all the plants in the world, start small. Make a list of all the plants you want to plant. List them under food bearing, culinary/medicinal herb, craft/building material, and ornamental. Then read up on those plants. What size are they at maturity? Do they need full sun, partial or full shade? If trees, do they have an upright growth so you may plant under them (stonefruit), or do they like to have their roots covered and don’t like plants directly under them (citrus and avocado)?
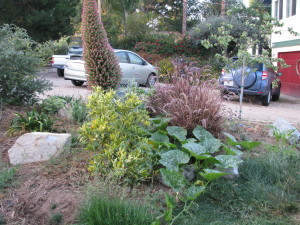
Citrus doesn’t like plants under its canopy, but does like plants outside its dripline. Are they annuals, perennials or biennials? What is their growth habit: sprawling, rooting where they spread, upright bushy, do they need support and can they cling or do they need to be tied to a support?
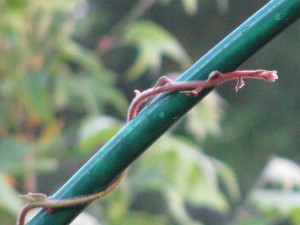
Will the plant twine on its own? Do they require digging up to harvest? Do they fix nitrogen in the soil? Do they drop leaves or are they evergreen? Are they fragrant? When are their bloom times? Fruiting times? Are they cold tolerant or do they need chill hours? How much water do they need? What are their companion plants (there are many guides for this online, or in books on companion planting.)
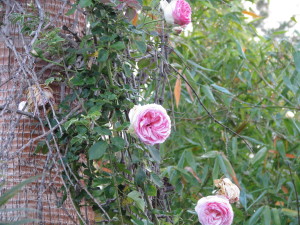
Do vines or canes need to be tied to supports? As you are acquainting yourself with your plants, you can add to their categorization, and shift them into the parts of a plant guild. Yes, many plants will be under more than one category… great! Fit them into the template under only one category, because diversity in the guild is very important.
Draw your guilds with their plants identified out on paper before you begin to purchase plants. Decide where the best location for each is on your property. Tropical plants that are thirsty and don’t have cold tolerance should go in well-draining areas towards the top or middle of your property where they can be easily watered. Plants that need or can tolerate a chill should go where the cold will settle.
Once it is on paper, then start planting. You don’t have to plant all the guilds at once… do it as you have time and money for it. Trees should come first. Bury wood to nutrify the soil in your beds, and don’t forget to sheet mulch.
Remember that in permaculture, a garden is 99% design and 1% labor. If you think buying the plants first and getting them in the ground without planning is going to save you time and money, think again. You are gambling, and will be disappointed.
Have fun with your plant guilds, and see how miraculous these combinations of plants work. When you go hiking, look at how undisturbed native plants grow and try to identify their components in nature’s plant guild. Guilds are really the only way to grow without chemicals, inexpensively and in a way that builds soil and habitat.
You can find the rest of the 9-part Plant Guild series here: Plant Guilds: What are they and how do they work? The first in a series. , Plant Guild #2: Canopy , Plant Guild #3: Sub-Canopy , Plant Guild #4: Nitrogen-Fixers, Plant Guild #5: Mining Plants, Plant Guild #6: Groundcovers, Plant Guild #7: Vines, Plant Guild #8: Insectiaries .
- Animals, Bees, Gardening adventures, Heirloom Plants, Natives, Other Insects, Perennial vegetables, Permaculture and Edible Forest Gardening Adventures, Seeds
Plant Guild #8: Insectiaries
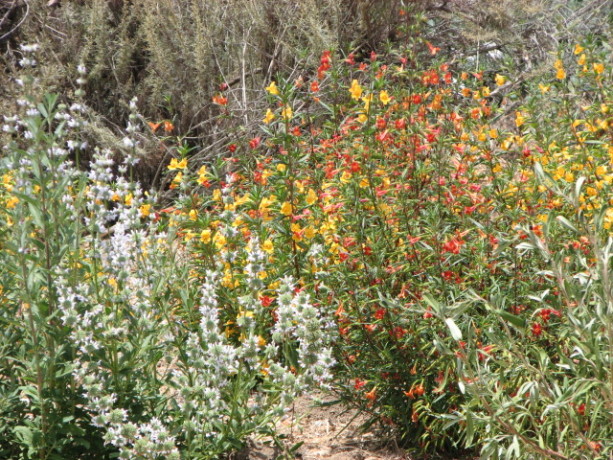
California native sage and penstemon make great insectiaries. Insectiaries are plants which attract lost of pollinators to the rest of your plant guild. We’re not just talking honey bees. Actually, what Americans raise and call honey bees, any bees from the genus Apis which are colonial honey-producers, are all European. Of course there are also the African honey bees which are loose in America, but their ‘hotness’ – their radical and violent protective measures – are not welcome. There are no native honey bees in North America.
What we do have are hundreds of species of bees, wasps and flies which are native and which do most of the pollenization in non-poisoned gardens and fields. Here in Southern California where everything is smaller due to the low rainfall we have wasps, flies and bees which range in size from the inch-long carpenter bees to those the size of a freckle. A small freckle. In fact the best native pollinator we have is a type of hover fly that is about the size of a grain of rice.

Hoverflies (Family Syrphidae) are one of our best pollinators. My daughter Miranda hosts our Finch Frolic Garden Facebook page where she has posted albums of animals and insects found here, with identifications along with the photos so that you can tell what is the creature’s role in the garden (you don’t need to be a member of Facebook to view it).
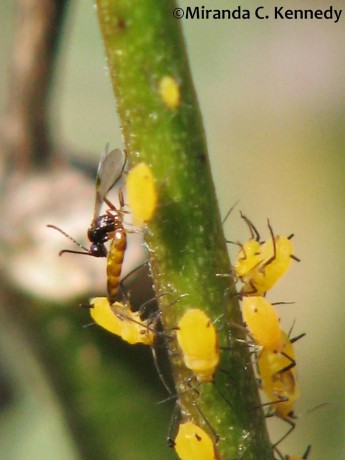
“This photo is of a minute parasitoid wasp (likely Lysiphlebus testaceipes) which preys on aphids. The aphids here are Oleander Aphids (Aphis nerii), which infest our milkweed bushes.” Miranda Kennedy We notice and measure the loss of the honeybee, but no one pays attention to the hundreds of other ‘good guys’ that are native and do far more work than our imports. Many of our native plants have clusters of small flowers and that is to provide appropriate feeding sites for these tiny pollinators. Tiny bees need a small landing pad, a small drop of nectar that they can’t drown in, and a whole cluster of flowers close together because they can’t fly for miles between food sources.
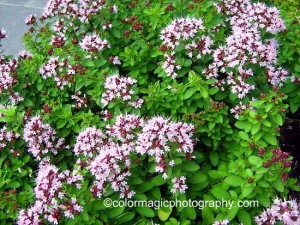
Oregano doesn’t spread as much as other mints do, and can be kept in check by harvesting. Look closely at the blooms in summer and you’ll see lots of very tiny insects pollinating! If you’ve read my other Plant Guild posts, you’ve already familiar with this, but here it goes again. You’ve heard of the ‘Three Sisters’ method of planting by the Native Americans: corn, beans and squash. In Rocky Mountain settlements of Anasazi, a fourth sister is part of that very productive guild, the Rocky Mountain bee plant (Cleome serrulata). Its purpose was as an insectiary.
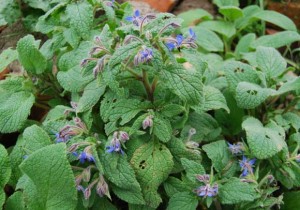
Borage is edible, medicinal, lovely and reseeds. So planting native plants that attract the insects native to your area is just as important as planting to attract and feed honey bees. Many herbs, especially within the mint and sage families, produce flowers that are enjoyed by most sizes of insects and are useful as food or medicine as well.

You’ll remember our old friend comfrey, which is also a mining plant and great green fertilizer! It also is a dining room for bumblebees. If you like flowers, here’s where you can possibly plant some of your favorites in your guild and not feel guilty about it! Of course, aesthetics is important and if you aren’t enjoying what is in your garden, you aren’t doing it right, so plant what makes you happy. As long as its legal.
 Of course be sure to grow only non-GMO plants, and be ESPECIALLY sure that if you are purchasing plants they are organically raised! Although large distributors such as Home Depot are gradually phasing into organics, an enormous amount of plants sold in nurseries have been treated with systemic insecticides, or combination fertilizer/insecticides.
 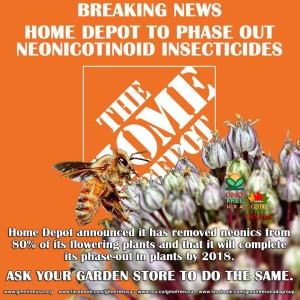 Systemic poisons work so that any insect biting the plant will be poisoned. It affects the pollen and nectar as well, and systemics do not have a measurable life span. They don’t disappear after a month or so, they are there usually for the life of the plant. If your milkweed plants don’t have oleander aphids on them, be wary! If the plants sold as food for pollinators and as host plants don’t have some insect damage to them, beware! They WILL sell you ‘butterfly and bird’ plants, but also WILL pre-treat them will systemic insecticides which will kill the Monarchs and other insects that feed on the plant, and sicken the nectar-sipping birds.
  Even those plants marked ‘organic’ share table space in retail nurseries with plants that are sprayed with Malathion to kill white fly, and be sure that the poison drift is all over those organic vegetables, herbs and flowers. Most plant retailers, no matter how nice they are, buy plants from distributors which in turn buy from a variety of nurseries depending upon availability of plants, and the retail nurseries cannot guarantee that a plant is organically grown unless it comes in labeled as such. Even then there is the poison overspray problem. The only way to have untainted plants is to buy non-GMO, organically and sustainably grown and harvested seeds and raise them yourself, buy from local nurseries which have supervised the plants they sell and can vouch for their products, and put pressure on your local plant retailers to only buy organic plants.
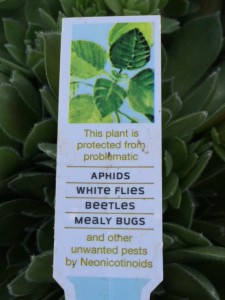
Talk about a sales twist! They don’t mention that it kills EVERYTHING else! When public demand is high enough, they will change their buying habits, and that will force change all the way down the line to the farmers. No matter how friendly and beautiful a nursery is and how great their plants look, insist that they prove they have insecticide-free plants from organic growers (even if they don’t spray plants themselves). Systemic insecticides are bee killers. And wasp and fly killers as well.
Of course many of the other guild members will also attract pollinators, and even be host plants for them as well. With a variety of insectiaries, you’ll receive the benefit of attracting many species of pollinator, having a bloom time that is spread throughout the year, and if a plant is chewed up by the insect it hosts (milkweed by Monarch caterpillars, for instance) there will be other blooms from which to choose.
Placing fragrant plants next to your pathways also gives you aromatherapy as you pass by.
And flowers are pretty. So plant them!
You can find the entire 9-part Plant Guild series here: Plant Guilds: What are they and how do they work? The first in a series. , Plant Guild #2: Canopy , Plant Guild #3: Sub-Canopy , Plant Guild #4: Nitrogen-Fixers, Plant Guild #5: Mining Plants, Plant Guild #6: Groundcovers, Plant Guild #7: Vines, Plant Guild #9: The Whole Picture.
- Animals, Bees, Birding, Gardening adventures, Heirloom Plants, Natives, Other Insects, Perennial vegetables, Permaculture and Edible Forest Gardening Adventures, Predators, Rain Catching, Soil, Water Saving
Plant Guild #7: Vines
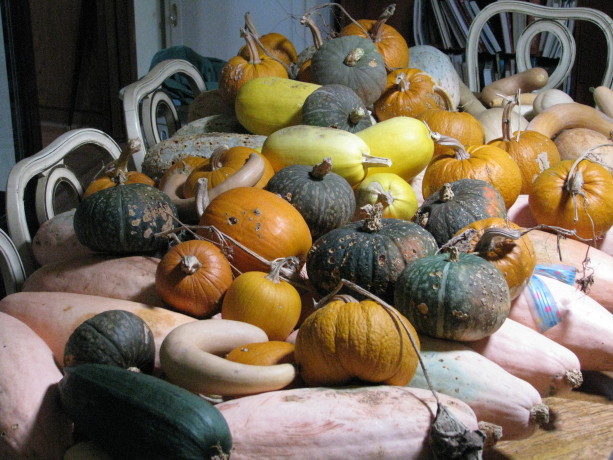
Our varieties of squash several years ago. You may think that vines and groundcover plants are pretty interchangeable, and they can share a similar role. However, as we covered in the Plant Guild #6: Groundcovers these plants do not have to vine, but just cover large spaces close to the ground and coming from a single trunk or stem.
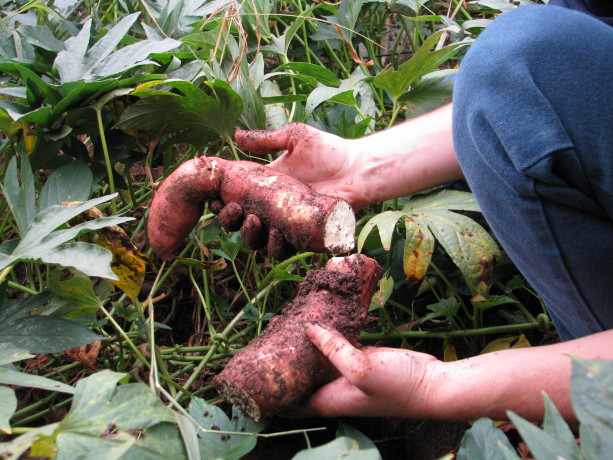
Sweet potatoes and yams make fantastic ground covers. The leaves are edible. Some root in one place, and some spread tubers over a larger area, so choose what is appropriate for digging up your harvest in your guild. They will die of frost. Vines can be large and heavy, small and delicate, perennial or annual. In a food plant guild vines are often food-bearing, such as squash. If you recall the legendary Three Sisters of planting – corn, beans and squash – there are two vines at work here. The corn forms a trellis for the light and grabby bean plant to climb upon (the bean fixing nitrogen in the soil as well as attracting pollinators with its flowers). The squash forms a low canopy all around the planted area. The big leaves keep moisture in, soften the raindrops to prevent erosion and deoxygenation, drop leaves to fertilize the soil, provide a large food crop, and attract larger pollinators. Even more than that, the squash protects the corn from raccoons. These masked thieves can destroy an entire backyard corn crop in a night, just when the corn is ripe. However, they don’t like walking where they can’t see the ground, so the dense squash groundcover helps keep them away.
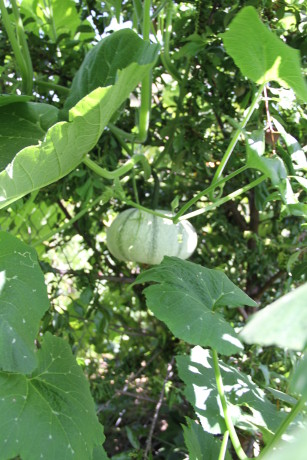
Pipian from Tuxpan squash supported by a plum and a pepper tree. Vines are very important to use on vertical space, especially on trees. With global warming many areas now have extremely hot to scorching sun, and for longer periods. Intense sun will scorch bark on tender trees, especially young ones. By growing annual vines up the trees you are helping shade the trunk while producing a crop, and if the vines are legumes you are also adding nitrogen fertilizer.
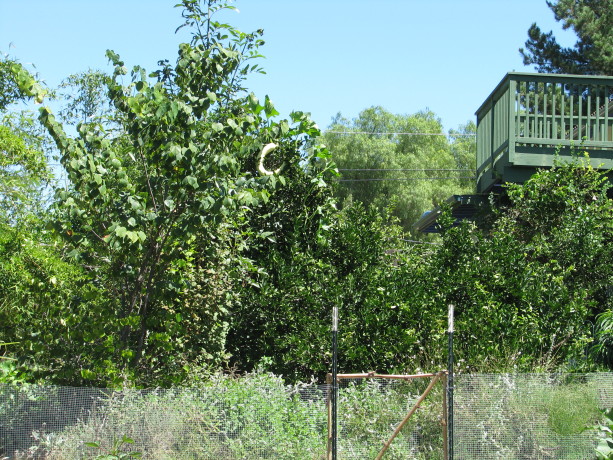
Can you spot the squash in the lime tree? It is crescent shaped and pale. Be sure the weight of the mature vine isn’t more than the tree support can hold, or that the vine is so strong that it will wind its way around new growth and choke it. Peas, beans and sweetpeas are wonderful for small and weaker trees. When the vines die they can be added to the mulch around the base of the tree, and the tree will receive winter sunlight. When we plant trees, we pop a bunch of vining pea (cool weather) or bean (warm weather) seeds right around the trunk. Larger, thicker trees can support tomatoes, cucumbers, melons, and squash of various sizes, as well as gourds. Think about how to pick what is up there! We allowed a alcayota squash to grow up a sycamore to see what would happen, and there was a fifteen pound squash hanging twelve feet above the pathway until it came down in a heavy wind!
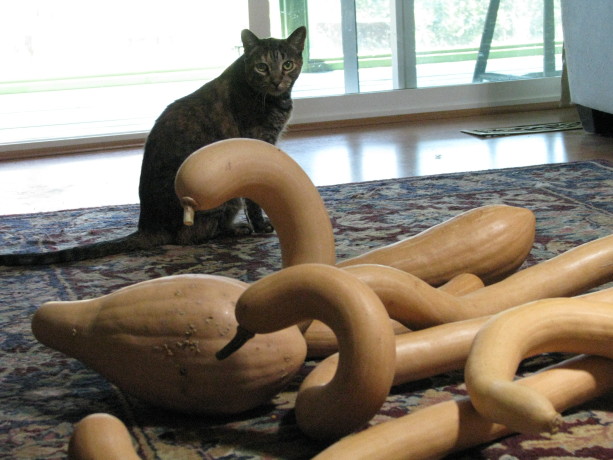
These zuchinno rampicante, an heirloom squash that can be eaten green or as a winter squash, form interesting shapes as they grow. These ‘swans’ and Marina are having a stare-off. Nature uses vertical spaces for vines in mutually beneficial circumstances all the time, except for notable strangler vines. For instance in Southern California we have a wild grape known as Roger’s Red which grows in the understory of California Live Oaks. A few years ago there appeared in our local paper articles declaiming the vines, saying that everyone should cut them down because they were growing up and over the canopy of the oaks and killing them. The real problem was that the oaks were ill due to water issues, or beetle, or compaction, and had been losing leaves. The grape headed for the sun, of course, and spread around the top of the trees. The overgrowth of the grape wasn’t the cause of the problem, but a symptom of a greater illness with the oaks.
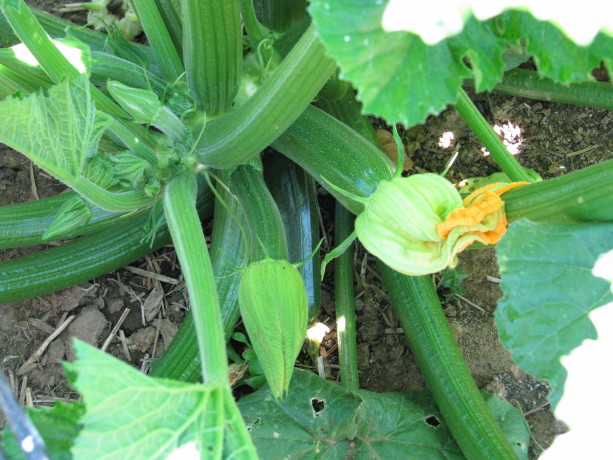
Zucchini! Some vines are not only perennial, but very long-lived and should be placed where they’ll be happiest and do the most good. Kiwi vines broaden their trunks over time and with support under their fruiting stems can be wonderful living shade structures. A restaurant in Corvallis, Oregon has one such beauty on their back patio. There is something wonderful about sitting in the protection of a living thing.
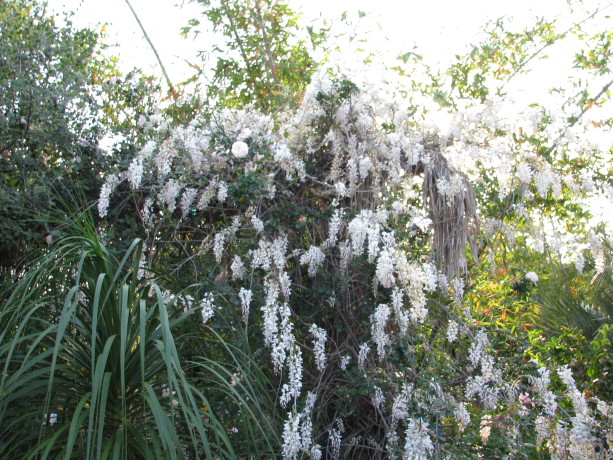
Wisteria chinensis is a nitrogen-fixer with edible flowers (and poisonous other parts), has stunning spring flowers and can make a nice deciduous vine to cover a canopy. It does spread vigorously, but can be trained into a standard, and are fairly drought tolerant when mature. Passionvines can grow up large trees where they can receive a lot of light. Their fruit will drop to the ground when ripe. The vines aren’t deciduous, so the tree would be one where the vine coverage won’t hurt the trunk.
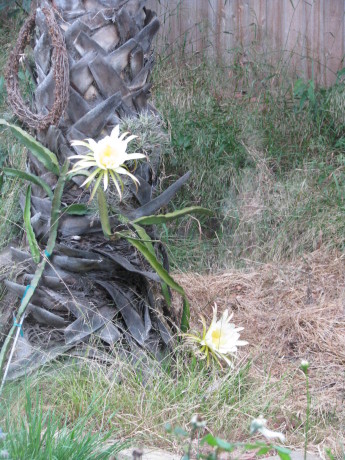
Dragonfruit aren’t exactly a vine, but they can be trained up a sturdy tree. Vines such as hops will reroot and spread wherever they want, so consider this trait if you plant them. Because the hops need hand harvesting and the vines grow very long, it is probably best to put them on a structure such as a fence so you can easily harvest them.
So consider vines as another important tool in your toolbox of plants that help make a community of plants succeed.
Next in the Plant Guild series, the last component, Insectiaries. You can find the entire 9-part Plant Guild series here: Plant Guilds: What are they and how do they work? The first in a series. , Plant Guild #2: Canopy , Plant Guild #3: Sub-Canopy , Plant Guild #4: Nitrogen-Fixers, Plant Guild #5: Mining Plants, Plant Guild #6: Groundcovers, Plant Guild #8: Insectiaries, Plant Guild #9: The Whole Picture.
- Animals, Bees, Birding, Compost, Fungus and Mushrooms, Gardening adventures, Health, Heirloom Plants, Hugelkultur, Microbes and Fungi, Natives, Other Insects, Perennial vegetables, Permaculture and Edible Forest Gardening Adventures, Predators, Rain Catching, Reptiles and Amphibians, Seeds, Soil, Water, Water Saving, Worms
Plant Guild #6: Groundcover Plants

Artichokes are mining plants, but also have a low enough profile to be a groundcover plant. They make excellent chop-and-drop. Flanking are lavender, scented geranium (left), and borage. In most ecosystems that offer easy food for humans, the ground needs to be covered. Layers of leaves, organic matter from animals (poo, fur, carcasses, meal remains, etc.) , dropped branches and twigs, fallen flowers and fruit, and whatever else gravity holds close to the earth, compost to create soil and retain water and protect the soil from erosion and compaction. Areas that don’t have this compost layer are called deserts. If you want to grow an assortment of food for humans, you have to start building soil. Even in desert communities where there are some food plants growing, such as edible cactus, mesquite beans, etc., there is biodiversity on a more microscopic scale than in old growth forests. In deserts the soil needs to absorb what little rain there is and do it quickly before it evaporates, and plants have leaves adapted to have small leaf surfaces so as not to dry out, and there are few leaves to drop. Whereas in areas where there are large forests the weather is usually wetter, tall plants and thick underbrush provide multiple layers of protection both on the plants and when they fall to layer the earth.
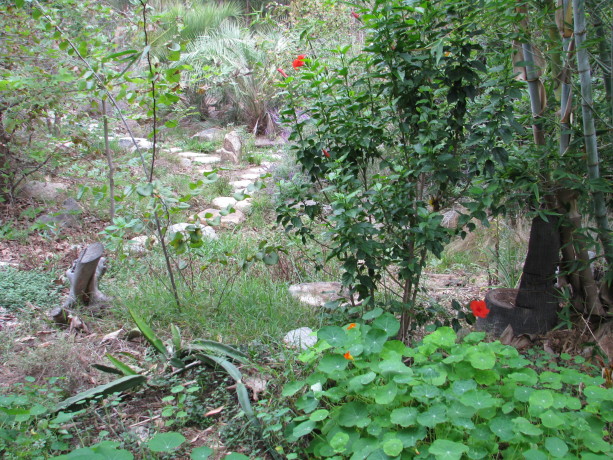
Nasturtium reseeds itself annually, is edible with a bite of hotness, detracts aphids from other plants, and is charming. Don’t let it get away in natural areas, though. A quick way to build soil in plant guilds is to design for plants that will cover the ground. This isn’t necessarily the same groundcover as you would use to cover embankments. For instance, iceplant can be used in a pinch, but it really isn’t the best choice in most plant guilds unless you are in a very dry climate, and your plant guild is mostly desert-type plants: date palm, etc. Annuals can be squash or other aggressive food-producing vines such as unstaked tomatoes. However you don’t need to consider just ground-hugging plants; think sprawling shrubs.
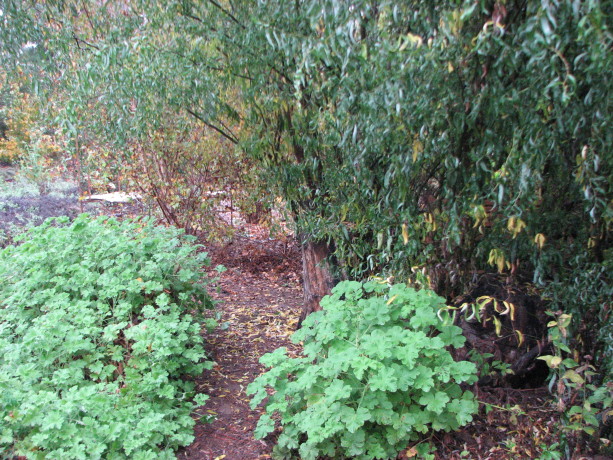
Scented geraniums are a great ‘placeholder plant’. These Pelargoniums (not true geraniums) come in a wide variety of fragrances. We’ve found bird nests in these! When guests tour through Finch Frolic Garden, they often desire the lush foresty-feel of it for their own properties, but have no idea how to make it happen. This is where what I call ‘placeholder plants’ come in. Sprawling, low-cost shrubs can quickly cover a lot of ground, protect the soil, attract insects, often be edible or medicinal, be habitat for many animals, often can be pruned heavily to harvest green mulch (chop-and-drop), often can be pruned for cuttings that can be rooted for new plants to use or to sell, and are usually very attractive. When its time to plant something more useful in that area, the groundcover plant can be harvested, used for mulch, buried, or divided up. During the years that plant has been growing it has been building soil beneath it, protecting the ground from compaction from the rain. There is leave mulch, droppings from lizards, frogs, birds, rabbits, rodents and other creatures fertilizing the soil. The roots of the plant have been breaking through the dirt, releasing nutrients and developing microbial populations. Some plants sprawl 15′ or more; some are very low-water-use. All of this from one inexpensive plant.
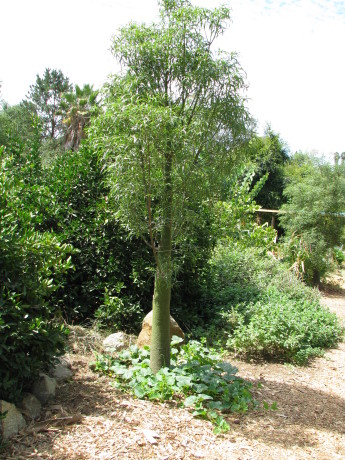
Squash forms an annual groundcover around the base of this euphorbia. Depending upon your watering, there are many plants that fit the bill, and most of them are usable herbs. Scented geraniums (Pelargonium spp.), lavender, oregano, marjoram, culinary sage, prostrate rosemary, are several choices of many plants that will sprawl out from one central taproot. Here in Southern California, natives such as Cleveland sage, quail bush (which harvests salt from the soil), and ceanothus (California lilac, a nitrogen-fixer as well), are a few choices. Usually the less water use the plant needs, the slower the growth and the less often you can chop-and-drop it. With a little water, scented geraniums can cover 10 – 15 feet and you can use them for green mulch often, for rooted cuttings, for attracting insects, for medicine and flavoring, for cut greenery, for distillates if you make oils, etc.
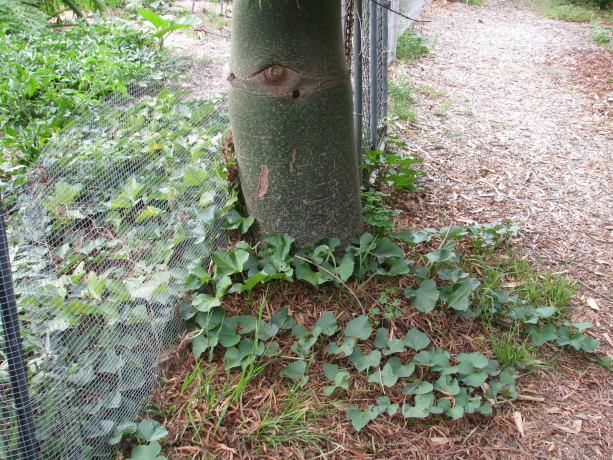
Sweet potatoes make a great ground cover. Choose varieties that produce tubers directly under the plant rather than all along the stems so that you don’t have to dig up your whole guild to harvest. Groundcover plants shouldn’t be invasive. If you are planting in a small guild, planting something spreading like mint is going to be troublesome. If you are planting in larger guilds, then having something spreading in some areas, such as mint, is fine. However mint and other invasives don’t sprawl, but produce greenery above rootstock, so they are actually occupying more space than those plants that have a central taproot and can protect soil under their stems and branches. Here at Finch Frolic Garden, we have mint growing freely by the ponds, and in several pathways. Its job is to crowd out weeds, build soil, and provide aromatherapy. I’d much rather step on mint than on Bermuda grass, and besides being a superb tea herb, the tiny flowers feed the very small bees, wasps and flies that go unsung in gardens in favor of our non-native honeybees (there are no native honeybees in North America).
Here’s a general planting tip: position plants with fragrant leaves and flowers near your pathways for brush-by fragrance. You should have a dose of aromatherapy simply by walking your garden path. Mints are energizing, lavenders calming, so maybe plan your herbs with the pathways you take in the morning and evening to correspond to what boost you need at that time.
Consider groundcover plants and shrubs that will give you good soil and often so much more.
Next up: Vining Plants.
You can find the entire 9-part Plant Guild series here: Plant Guilds: What are they and how do they work? The first in a series. , Plant Guild #2: Canopy , Plant Guild #3: Sub-Canopy , Plant Guild #4: Nitrogen-Fixers, Plant Guild #5: Mining Plants, Plant Guild #7: Vines, Plant Guild #8: Insectiaries, Plant Guild #9: The Whole Picture.
What makes up a plant guild. - Animals, Birding, Compost, Fungus and Mushrooms, Gardening adventures, Hugelkultur, Humor, Microbes and Fungi, Natives, Other Insects, Perennial vegetables, Permaculture and Edible Forest Gardening Adventures, Ponds, Predators, Rain Catching, Reptiles and Amphibians, Seeds, Soil, Water, Water Saving, Worms
Ponds and Potatoes; A Finch Frolic New Year’s Celebration
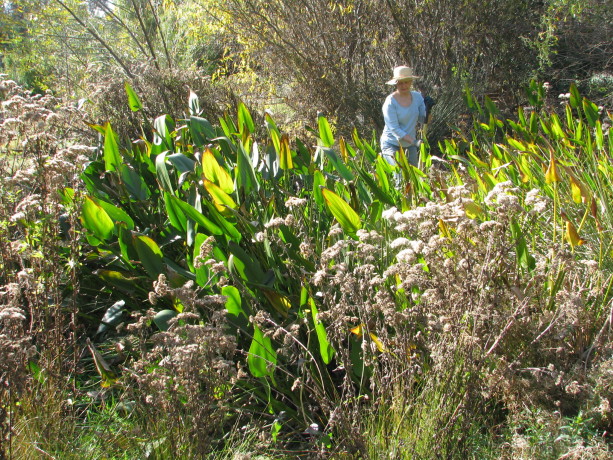 Our sixty degree weather here in Fallbrook, CA , gave us the opportunity to work in our garden. A year ago – 2014 – it snowed on New Year’s Eve. This year the nights are frosty, the days mercifully warmer, and the rain frustratingly rare. Our promised El Nino rains are expected to hit in force within the next couple of months. Weather they do or not, focusing on catching every precious drop in the soil, and protecting the ground from erosion and compaction, is paramount.
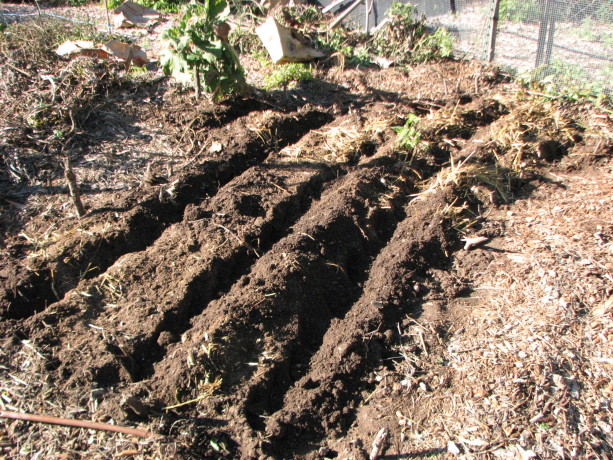
Permaculture in rows. Pretty nice soil, which had been silt from the street a couple of years ago, mixed with chicken straw, topped with leaves. No chemicals! The last day of 2015 Miranda and I spent working one of our vegetable garden beds, and reshaping our kitchen garden. When we redesigned this garden by removing (and burying) the raised beds, hugelkulturing and planting, we made a lovely Celtic design.
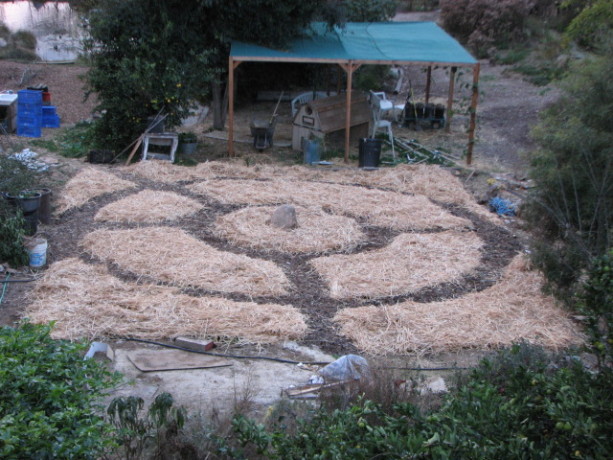
The unplanted kitchen garden newly designed in January, 2013. However the plants just won’t respect the design, so we’ve opted to lessen the pathways, turning the beds into keyhole designs for more planting space. I’ll blog more about that in the future. Because the pathways have been covered in cardboard and woodchips (sheet mulched), the soil below them is in very good shape, not dry and compacted.

How deep do roots grow? This clump of oxalis (sour grass) is white because it was growing without light under the pathway sheet mulch. The corms at the end of the long roots are about 8 inches below the plant. Good soil means deep roots; I’ve never seen this plant have anything but shallow roots. This bed has been home to sweet potatoes and various other plants, so although I try to practice the no-dig method, where you have root vegetables you must gently probe the soil for goodies. We left some of the roots, so sweet potatoes will again rise in this bed.

Miranda planting potatoes and shallots in rows. Between these rows and around the outisde other veggies were planted. We planted in rows. Usually I mix up seeds, but this time I wanted to demonstrate polyculture in row form. We planted three rows of organic potatoes (purchased from Peaceful Valley Organics), with a row of shallots between them. Between the root vegetable rows we planted a row of fava beans, and a row of sugar pod peas. Around the edges Miranda planted rows of bull’s blood beets, Parisienne carrots, and maybe some parsnips. This combination of plants will work together in the soil, following the template of a plant guild. We left the struggling eggplant, which came up late in the year after the very hot summer and has so far survived the light frost.
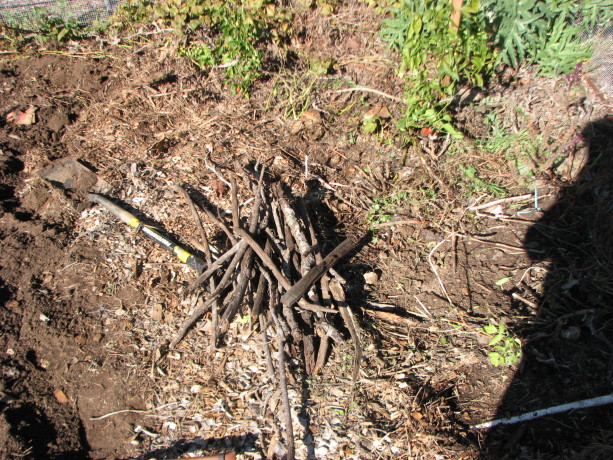
Sticks. So important for the soil. These went in vertically around the planting bed to act both as one type of gopher deterrent (a physical barrier) and also as food and as water retention for the veggies. On top of the bed we strew dead pond plants harvested from our small pond near our house, which will be receiving an overhaul soon (hopefully before the Pacific chorus frogs start their mating season in force). We didn’t water the seeds in, as there is rain predicted in a few days. The mulch on top will help protect the seeds from hungry birds.
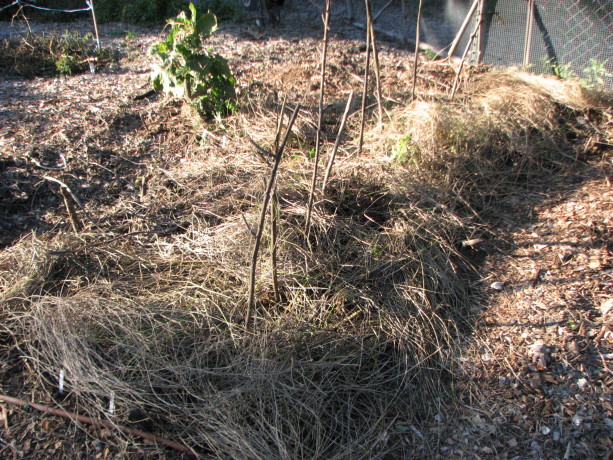
The finished bed topped with dead pond weeds (which don’t have seeds that will grow on dry land!). The sticks are to steady future bush peas. A good way to spend the last day of the year: setting seeds for food in the spring.
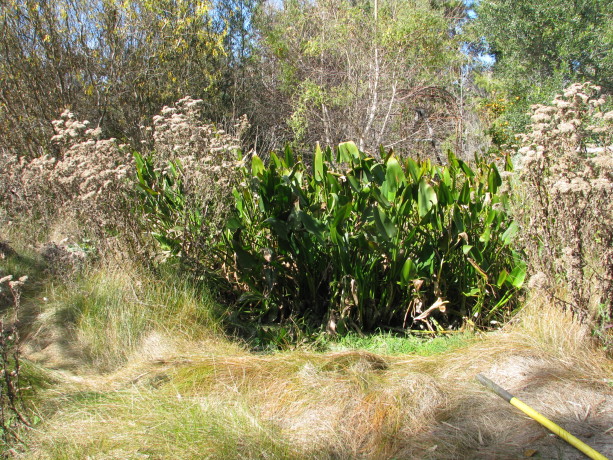
Before: The little pond, which is also a silt basin, almost completely filled by an enthusiastic clump of pickerel. This pond is wonderful habitat for birds, frogs, dragonflies, and so many other creatures, and as a water source for raccoon, possum, coyotes, ducks, and who knows what else that visits in the night. Then on January 1 I decided it was a good opportunity to clear out the excess pickerel that had taken over our lower small pond. With the well off for the winter, and very light rainfall, this pond has gone dry. A perfect opportunity for me to get in there with a shovel, especially knowing that I already had a chiropractor’s appointment set for Monday (!).

Making some headway. The mud was slick and spongy, but not unsafe, and not nearly as smelly as I had anticipated. Pickerel is not a native to San Diego, but it is a good habitat pond plant and it has edible parts. I wasn’t tempted, however. Its roots are thick and form a mat several inches thick hiding rhizomes that are up to an inch in diameter. I’d cut into the mass from several sides, pull the mass out with my gloved hands and throw the heavy thing out of the pond. Its good to be in contact with the earth, in all its forms. I couldn’t think of a better way to use the holiday afternoon.
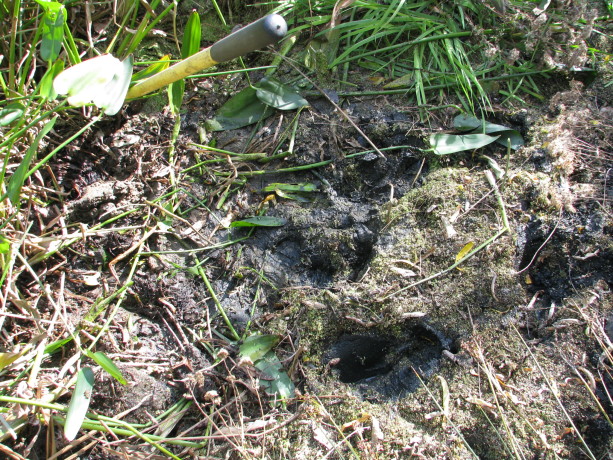
Thick root mass hiding large rhizomes made removal a real exercise. This is why I practice yoga and attend Zumba class with Ann Wade at the Fallbrook Community Center! I moved at least a ton of material in four hours. Just before sunset I decided that I was done. About an hour before that, my body had decided that I was done, but I overrode its vote to finish. I left some pickerel for habitat and looks, and will try to contain it by putting some sort of a physical barrier along the roots, such as urbanite.
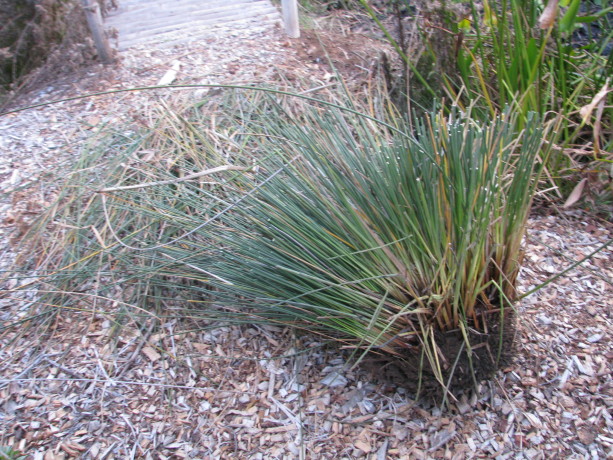
Removal of one of the three really nasty plants around the edge was a victory. The ends of their leaves are like needles, and impossible to walk past or work around, and dangerous for little kids. This root ball was harder to dig out than the mucky pickerel, and the success even sweeter. Revenge for all the pokes! We also might harvest some of the silty clay for use in the upper pond, although the prospect of carting heavy wet mud uphill isn’t as appealing as it might sound. That needs to happen today or tomorrow, as the aforementioned rain is expected, and I want to fill this pond again for the frogs.
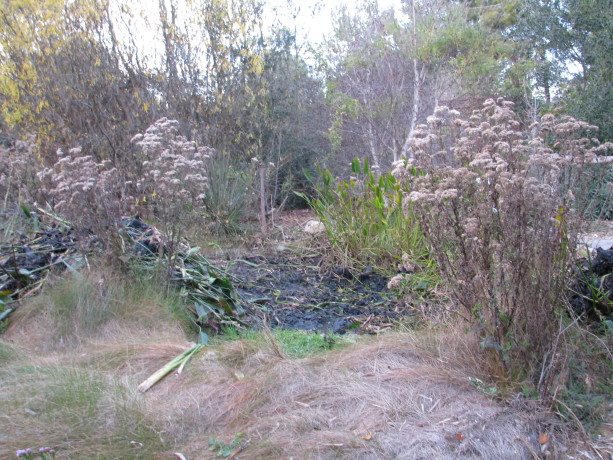
After: Finished with the digging. Still more work to do -including cleanup of the mountain of organic matter – before refilling. One good thing about the pond going dry is that there are no more mosquito fish (gambuzia) in it. Mosquito fish are very invasive, and love to eat frog’s eggs and tadpoles far better than they do mosquito larvae. When the pond fills with non-chemically treated water (rain and well water), some of the microscopic aquatic creatures will repopulate the water. I’ll add some water from the big pond as well to make sure there are daphnia and other natural water friends in it, which will do a much better job at mosquito control without sacrificing our native frogs. I can’t get all the gambuzia out of our big pond, but at least they are out of the other two. Once dragonflies start in again, their young will gladly eat mosquito larvae.
So here on the morning of the second day of 2016, I lay in my warm bed prior to rising to start the chores of the day, stiff as an old stiff thing as my body adjusts to strenuous manual labor again, looking forward to more gardening duties to prepare Finch Frolic Garden for the reopening March 1, and for the rains.
The best part of heavy gardening duties is that I can finish off the Christmas cookies guilt-free!
