Heirloom Plants
- Gardening adventures, Heirloom Plants, Permaculture and Edible Forest Gardening Adventures, Planting, Recycling and Repurposing, Seeds, Soil, Varmints, Vegetables
Corn Stalks as Pea Stakes

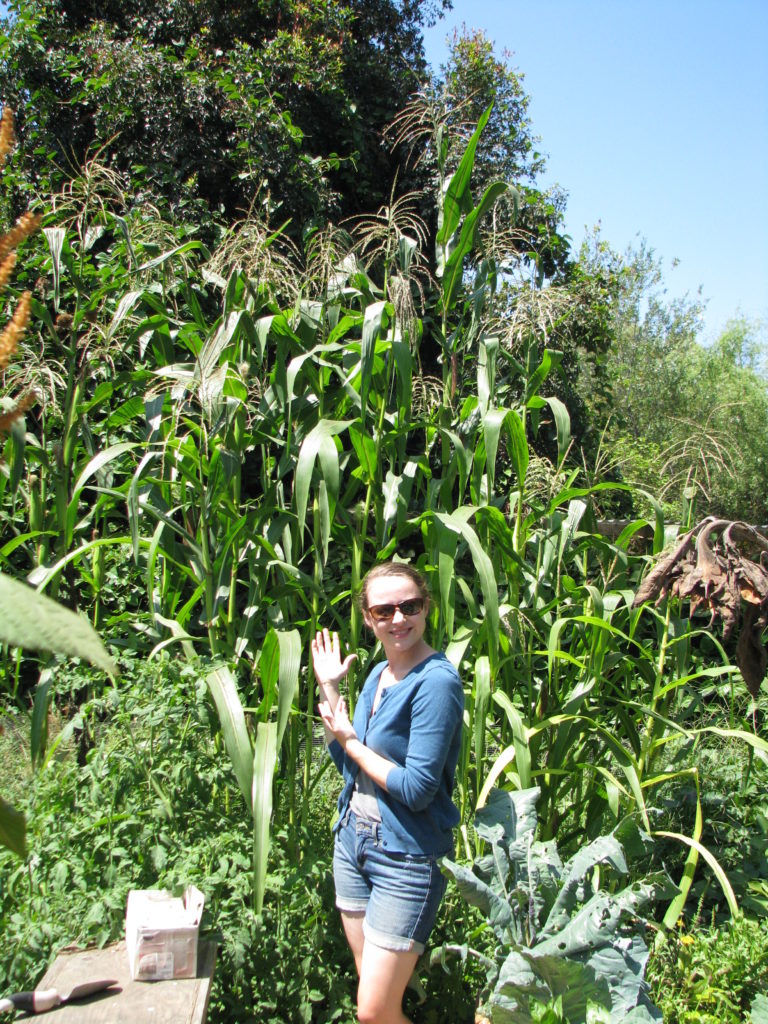
Our corn grew to a ginormous 10′ height this year in our raised pallet beds. The roots of corn are very sturdy; we usually cut the stalks above the roots, and allow the roots to stay in the ground to decompose. Often they are there a year later, still holding the soil.

Miranda being consumed by corn and zucchini. As it is October and, despite the 95 degree F. temperatures and hot, dry Santa Ana winds that are so typical of Fall here in Southern California, it is time to plant winter crops. Peas are the top of the list to plant. There are many types of peas. Some are valued to be eaten as pods when the peas inside haven’t matured. Some – and these are my favorite – produce juicy round peas that can be shelled and frozen for use all year. Some produce a lot of tendrils, and these along with the new leaves and shoots are eaten in salads and stir-fries, and are very attractive. There are also cowpeas, which are really beans that enjoy warmer weather, so not a candidate for winter crops. Best of all, peas and the rest of the legume family set nitrogen in the soil. They have a symbiotic relations ship with certain bacteria that must live in your soil for this to happen. The plant harvests nitrogen out of the atmosphere, and stores it in nodules on its roots. When the roots die, either from the plant being cut back or dying, the nitrogen is released into the soil in a plant-usable form. No need for chemical nitrogen fertilizers.

King Tut peas are good eating before and after the peas form in the pods. The peas are green. 
King Tut flowers are gorgeous. One of the problems I’ve had growing the tall peas is having the best supports for them, especially in raised beds. I never seem to have tall enough posts, or the posts fall over and chaos ensues. This year we decided that we’d already grown our pea supports: our corn.
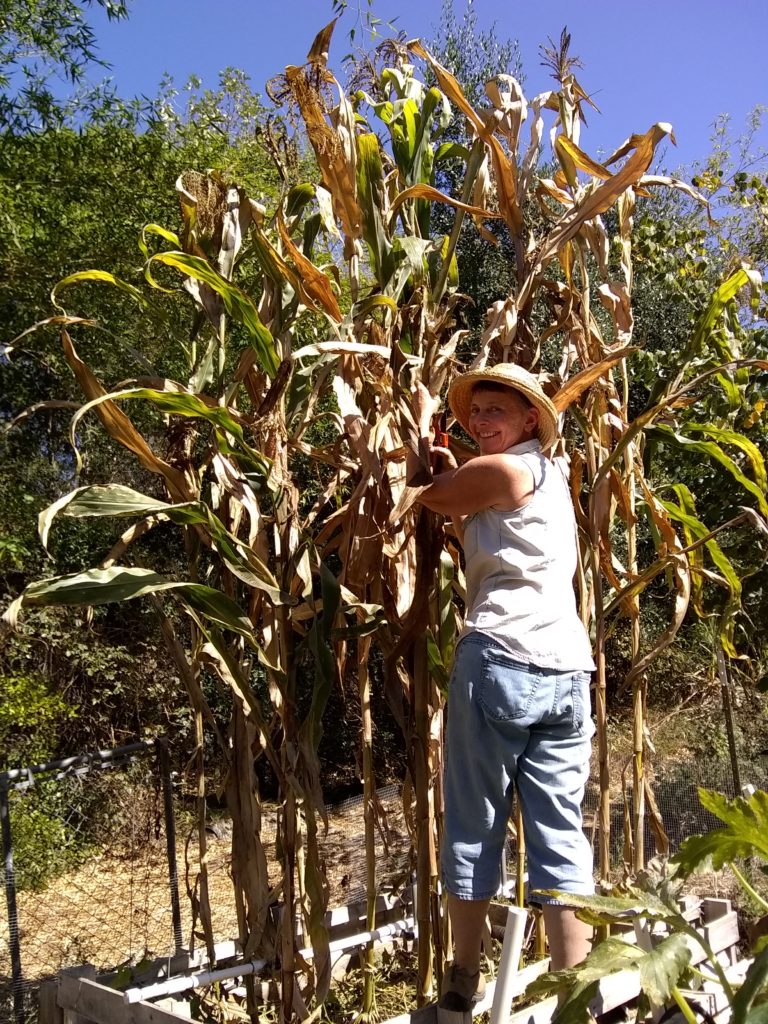
Trimming a few feet off the corn. I’m 5’3″ tall, for comparison. I have a phone in my back pocket and my pants are loose, so please don’t think I’m that saggy! We cut the corn stalks down to about 8 feet; above that the stalk was a little weak, and the stalks would be tall enough for our purposes. Then we planted vining (not bush) peas in and around the base of the corn. We had a lot of success with King Tut peas last year, which had beautiful purple pods (but green peas), so we opted for more of these in this bed.

Miranda planting around the corn. We left some of the cut sweet potato vines we’d just harvested from this bed to help hide and protect the pea seeds, and to return nutrition back into the soil. Now the peas are growing rapidly, and we’ll be able to train them up the sturdy, straight corn stalks with the help of some twine. When the peas are done, we can either use the stalks all over again for another climber, depending upon how they last over winter, or we cut the corn and the pea plants at the surface of the soil and put the whole pile into a compost pile, or into another raised bed. Corn is a hungry plant, so the pea’s nitrogen-fixing capability will help restore fertility to that raised bed. Remember that we use no fertilizer other than in-bed composting using kitchen scraps, plant cuttings, manure from our hens, and leaves, and anything else that will decompose. The beds are being watered by salty well water, too.

Baby peas are shooting up quickly. To help deter mice we sprinkle red pepper flakes over the seeds, and Miranda makes up a spray bottle full of hot sauce and water and sprays the beds in the evenings.
Re-purposing is so fun, especially when the result is better soil, healthier plants, and less work for us!
- Breads, Gardening adventures, Health, Heirloom Plants, Hugelkultur, Permaculture and Edible Forest Gardening Adventures, Planting, Recycling and Repurposing, Seeds, Soil, Vegan, Vegetables, Vegetarian
Growing Cornmeal


Sweet corn is a wonderful summer treat; although you can freeze it, is never as good as picked, steamed and eaten within hours. However hard corn can be dried, ground and stored for use throughout the year. Some varieties that aren’t super sweet can be eaten fresh or left to go hard for grinding. Miranda and I have fallen in love with growing and grinding colored corn. They are not just for Thanksgiving decorations anymore!
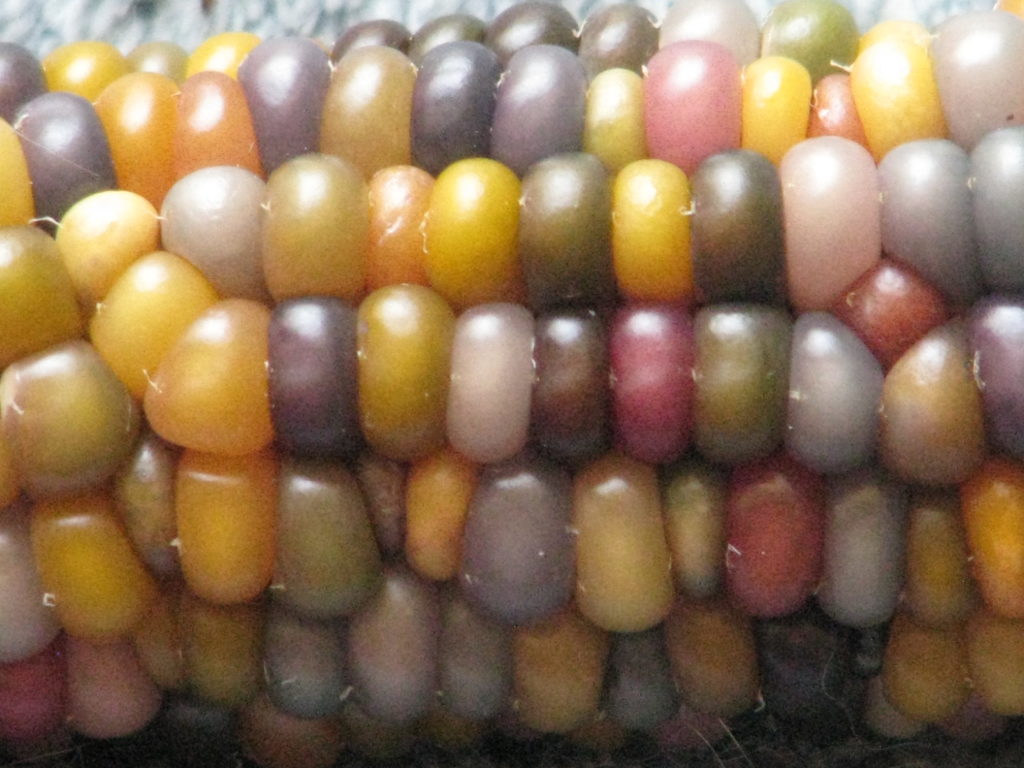
We’ve grown Indian corn and small cute popcorn. We’ve also grown the lovely Glass Gem Corn, with its opalescent pastel colors that was all the rage for the last few years. It made a lovely lightly colored cornmeal.

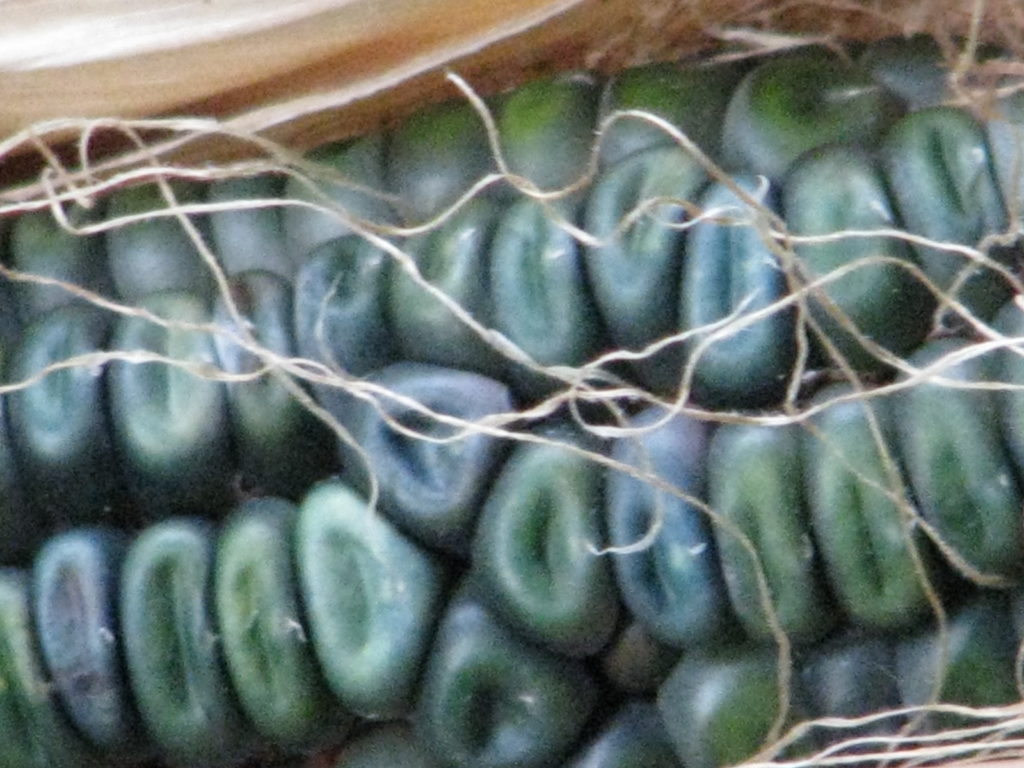
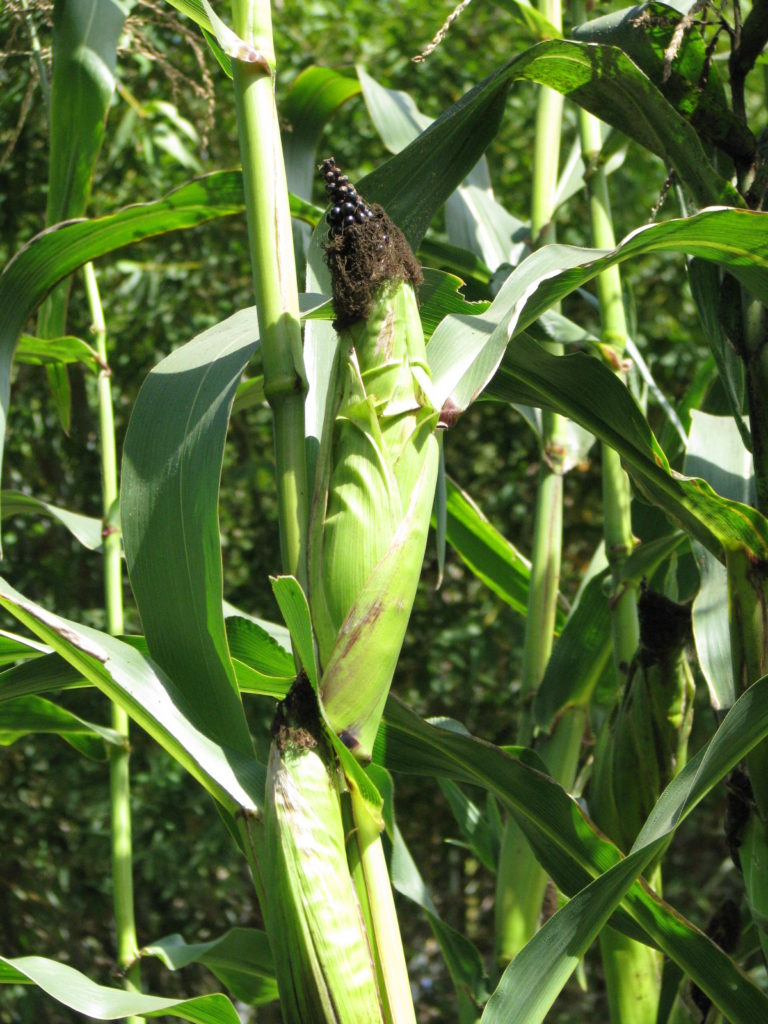
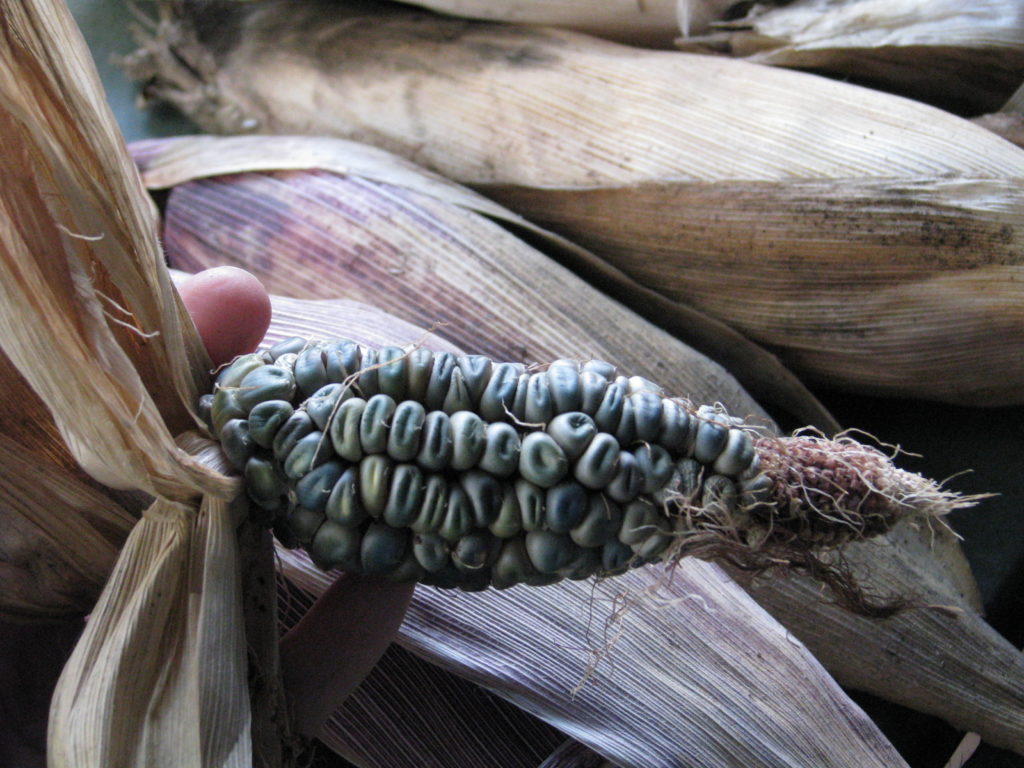
Last year we planted Oaxacan Green dent and black corn. Wow. The black corn was the most successful, growing about 12 feet tall.
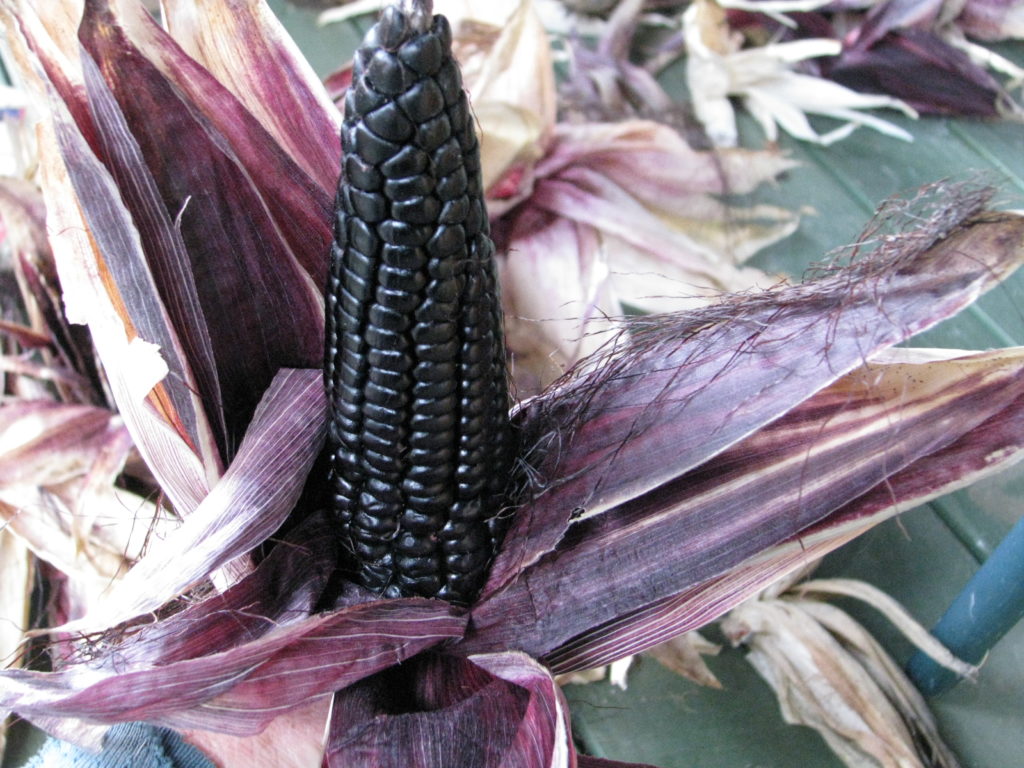
The black variety was Maiz Morado or Kulli Corn, from Baker Creek Heirloom Seeds. It had many aerial roots, which were black- actually a very deep purple- growing from several nodes.

The black corn began to peek out from the husks and it was magnificent.
We harvested the ears and let them lie on our warm porch out of the sun to finish drying. The stalks we tied up for Halloween and Thanksgiving decorations, and then they went into filling a raised bed.
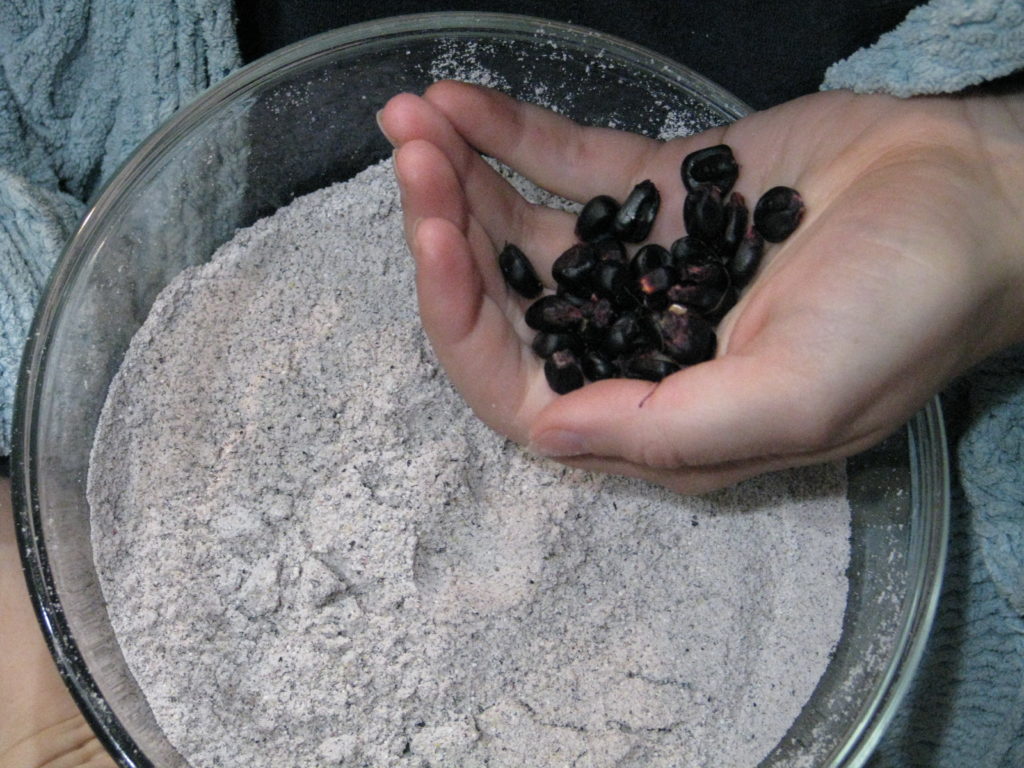
When it came time to shuck the ears, we marveled at the color of the kernels. They were spectacular; so were the green dent.
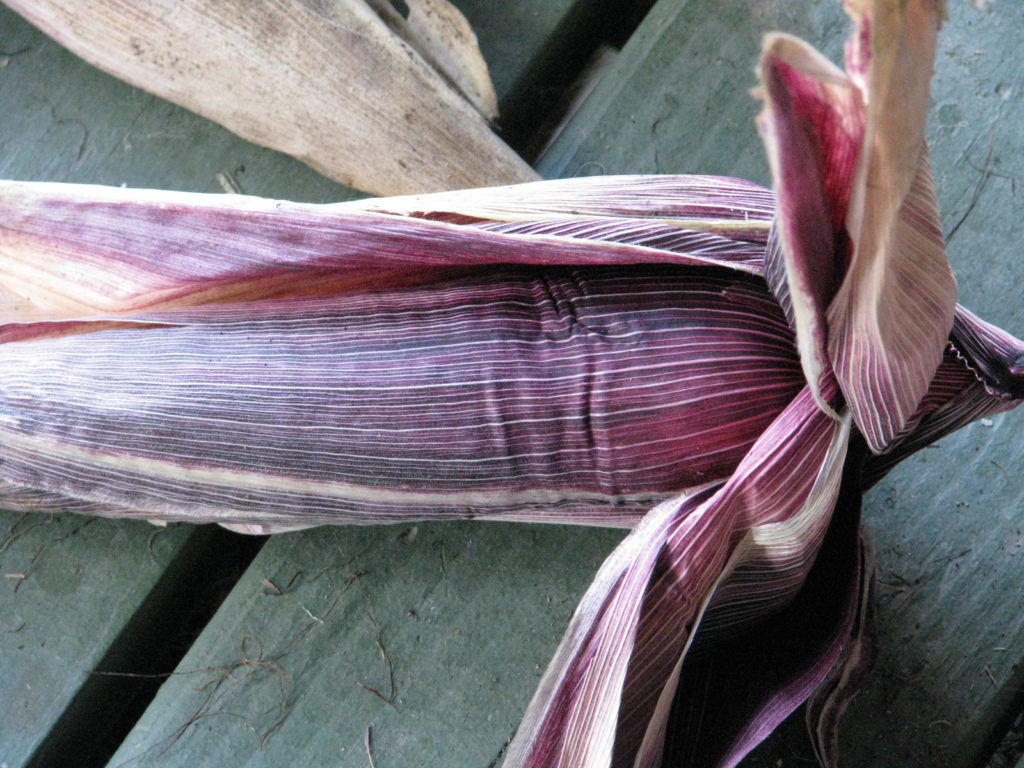
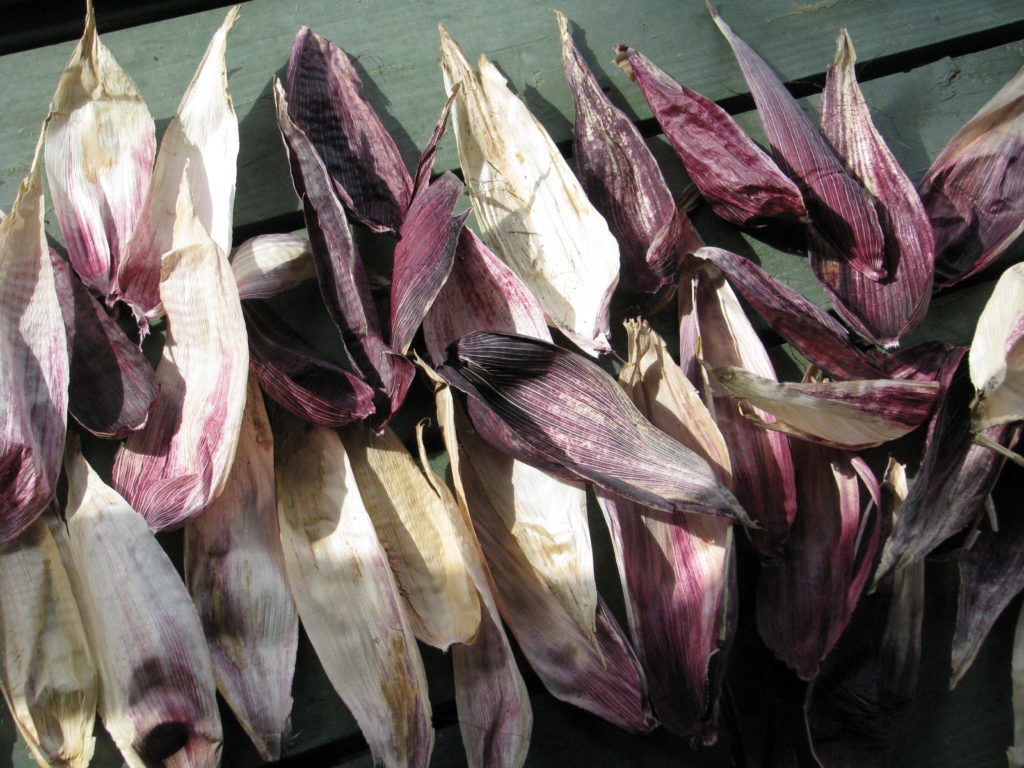
Even better, the inside of the husks were colored, too. We dried them and saved them for tamales.

For New Year’s Eve, we stripped the dried kernels from the cobs; not a difficult process and one we could do in the evening after dinner while watching old Time Team reruns on YouTube.
When ground, the black corn meal was a light purple. We use our VitaMix’s special grain grinding container, but a normal one would work as well.
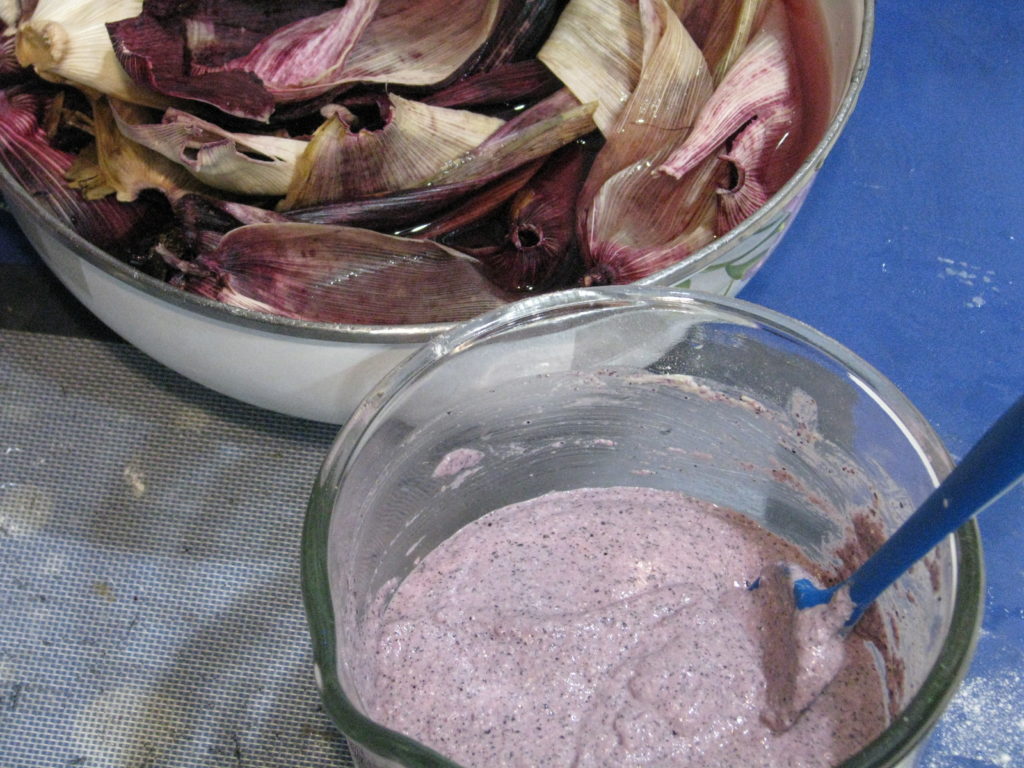
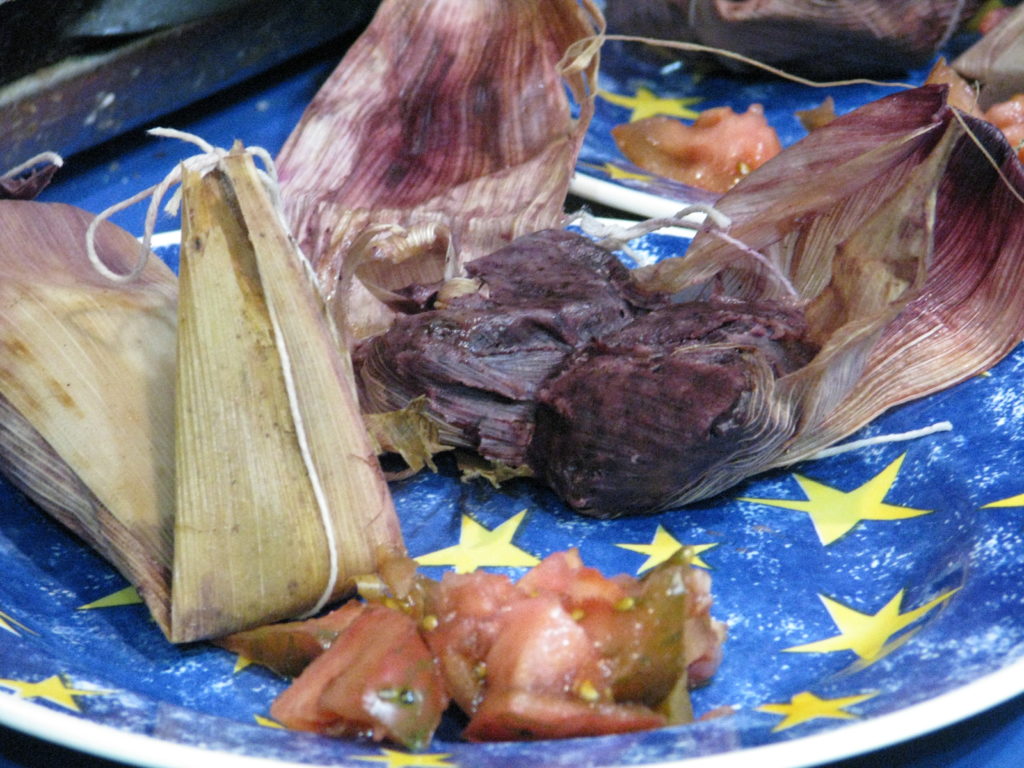
For tamales I guessed at a recipe, mixing half corn meal with half flour, a little baking powder and some vegan butter, and vegetable broth to wet. The mixture was very elastic and can certainly use work, but it was tasty and worked well to hold the filling together. The cornmeal turned a medium purple color when wet.
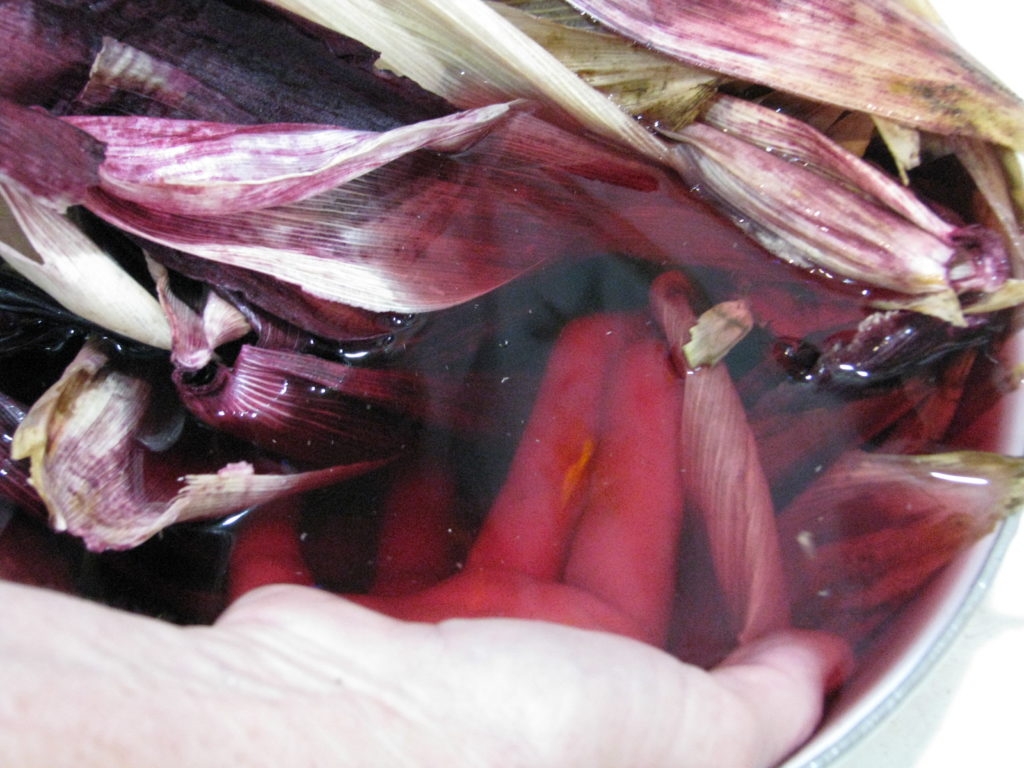
Soaking the husks to soften them was a treat, as their red color leached into the water making it look like wine.
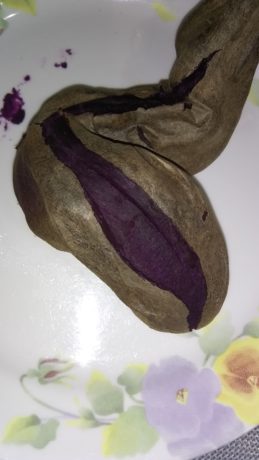
For fillings I couldn’t help but go with the whole purple theme, so I steamed one of our Molokai purple sweet potatoes which are an amazing purple as well.
I also cooked up some of our frozen beet greens with onion, and used those two together with vegan cheese. A second filling was black beans mixed with cumin, oregano and our pickled carrots and jalapenos, and sweet corn with vegan cheese.

Miranda and I got such a kick out of all the colors, especially the purples. We couldn’t wait until they were steamed, which took about an hour and twenty minutes.
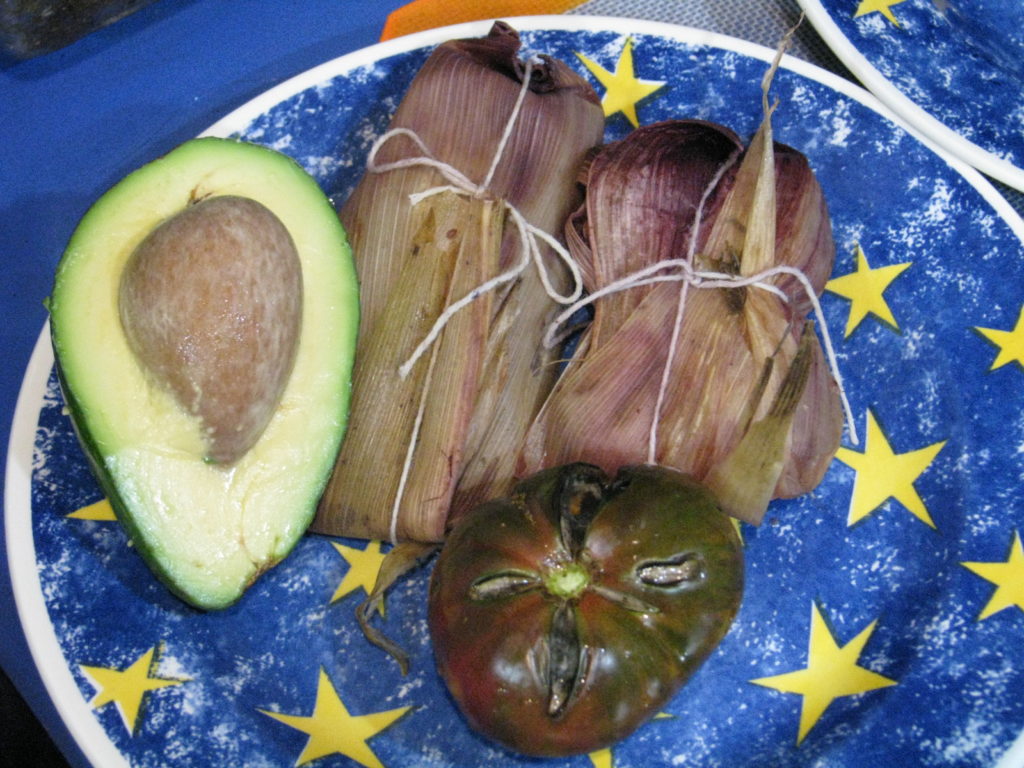
When the tamales were opened we were in awe. The black cornmeal had turned a very deep purple, and it was only half and half with flour! It was awesome. We enjoyed them with guacamole and, of course, our last Paul Robeson tomato because you just can’t have too many purple foods on your plate. The photo of the open tamale doesn’t do it justice.
We store the cornmeal in glass jars in the freezer. It makes excellent cornbread and cornmeal biscotti, as well as polenta and fried cornmeal mush. How fun and reassuring it is to use our own unsprayed, non-GMO cornmeal.
Coming up we’ll be planting black corn again, and a large patch of green dent as well; I want to see what pure green cornmeal looks like when cooked… maybe for Halloween dinner?

- Animals, Bees, Gardening adventures, Grains, Health, Heirloom Plants, Herbs, Other Insects, Permaculture and Edible Forest Gardening Adventures, Planting, Seeds
Growing and Eating Seeds
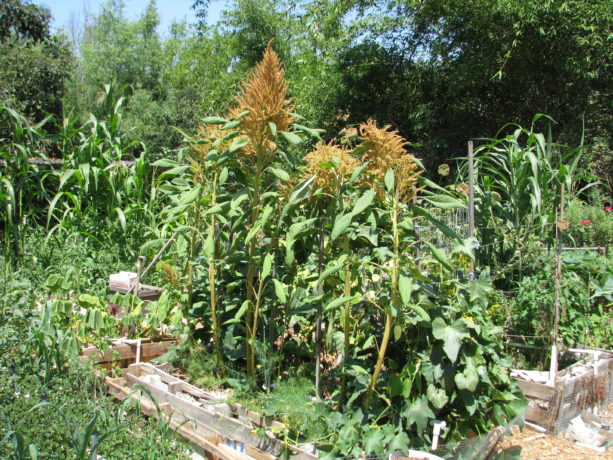 We eat seeds everyday. Grains, nuts, beans and, well, seeds, are all seeds. A seed is an embryonic plant covered with a seed coat. A grain is a dried fruit. In this blogpost I’m going to concentrate on true seeds.
Grains are usually seeds from grasses, although there are common exceptions to that rule such as the amaranth below. Seeds contain the magic that makes a plant out of a speck; a towering oak from an acorn. Seeds are highly nutritious for humans as well, but often are just used as a flavoring (think of an ‘everything’ bagel). Many have been used medically for relieving everything from eczema to mental issues. Some seeds such as grains are difficult to prepare for eating on a small scale, such as rice. Separating seeds from chaff takes a lot of steps that may not be practical for the handful of food at the end of the process. However there are many seeds that we commonly eat that are easily grown among the veggies, or even in a flower bed. Here are some that we grow at Finch Frolic Garden Permaculture:
Let’s start with one of my favorite flavors, the sesame seed.
 Sesame (Sesamum indicum) seeds grow on small upright plants about 2 – 3′ high that have lovely tubular flowers.
 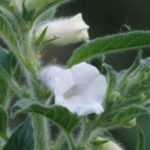 Bees love to crawl into them. Its a pretty plant and flower, so could easily be incorporated into an ornamental area. There are both black and white sesame seed plants; the white seed is really brownish as it has a seed coat. Sesame is also called benne seed. Once harvested sesame seeds should be stored in a dark cool place or refrigerated. The seeds can be used raw, or better still lightly toasted in a dry pan before sprinkling over your food. So very yum. Tip: sesame pods become tight as they dry and then split with force, throwing the seeds away from the plant. If you want to harvest any then watch the pods as they dry on the plant and then cut and hang in a paper bag to catch the seeds as they fly, or break open with your hands.
Amaranth:
Amaranth (Amaranthus spp.) is a very tasty, easily grown seed that is considered a grain. It was a major food of the Aztecs, and almost completely destroyed by the Spanish after their conquest of that civilization. Amaranth was too sneaky though and survived. It is easily digestible, high in protein and full of other nutrition. It has wild as well as ornamental varieties, but all are edible (be sure what you are eating!) Love-lies-bleeding is the dramatic name of the long red tasseled kind.
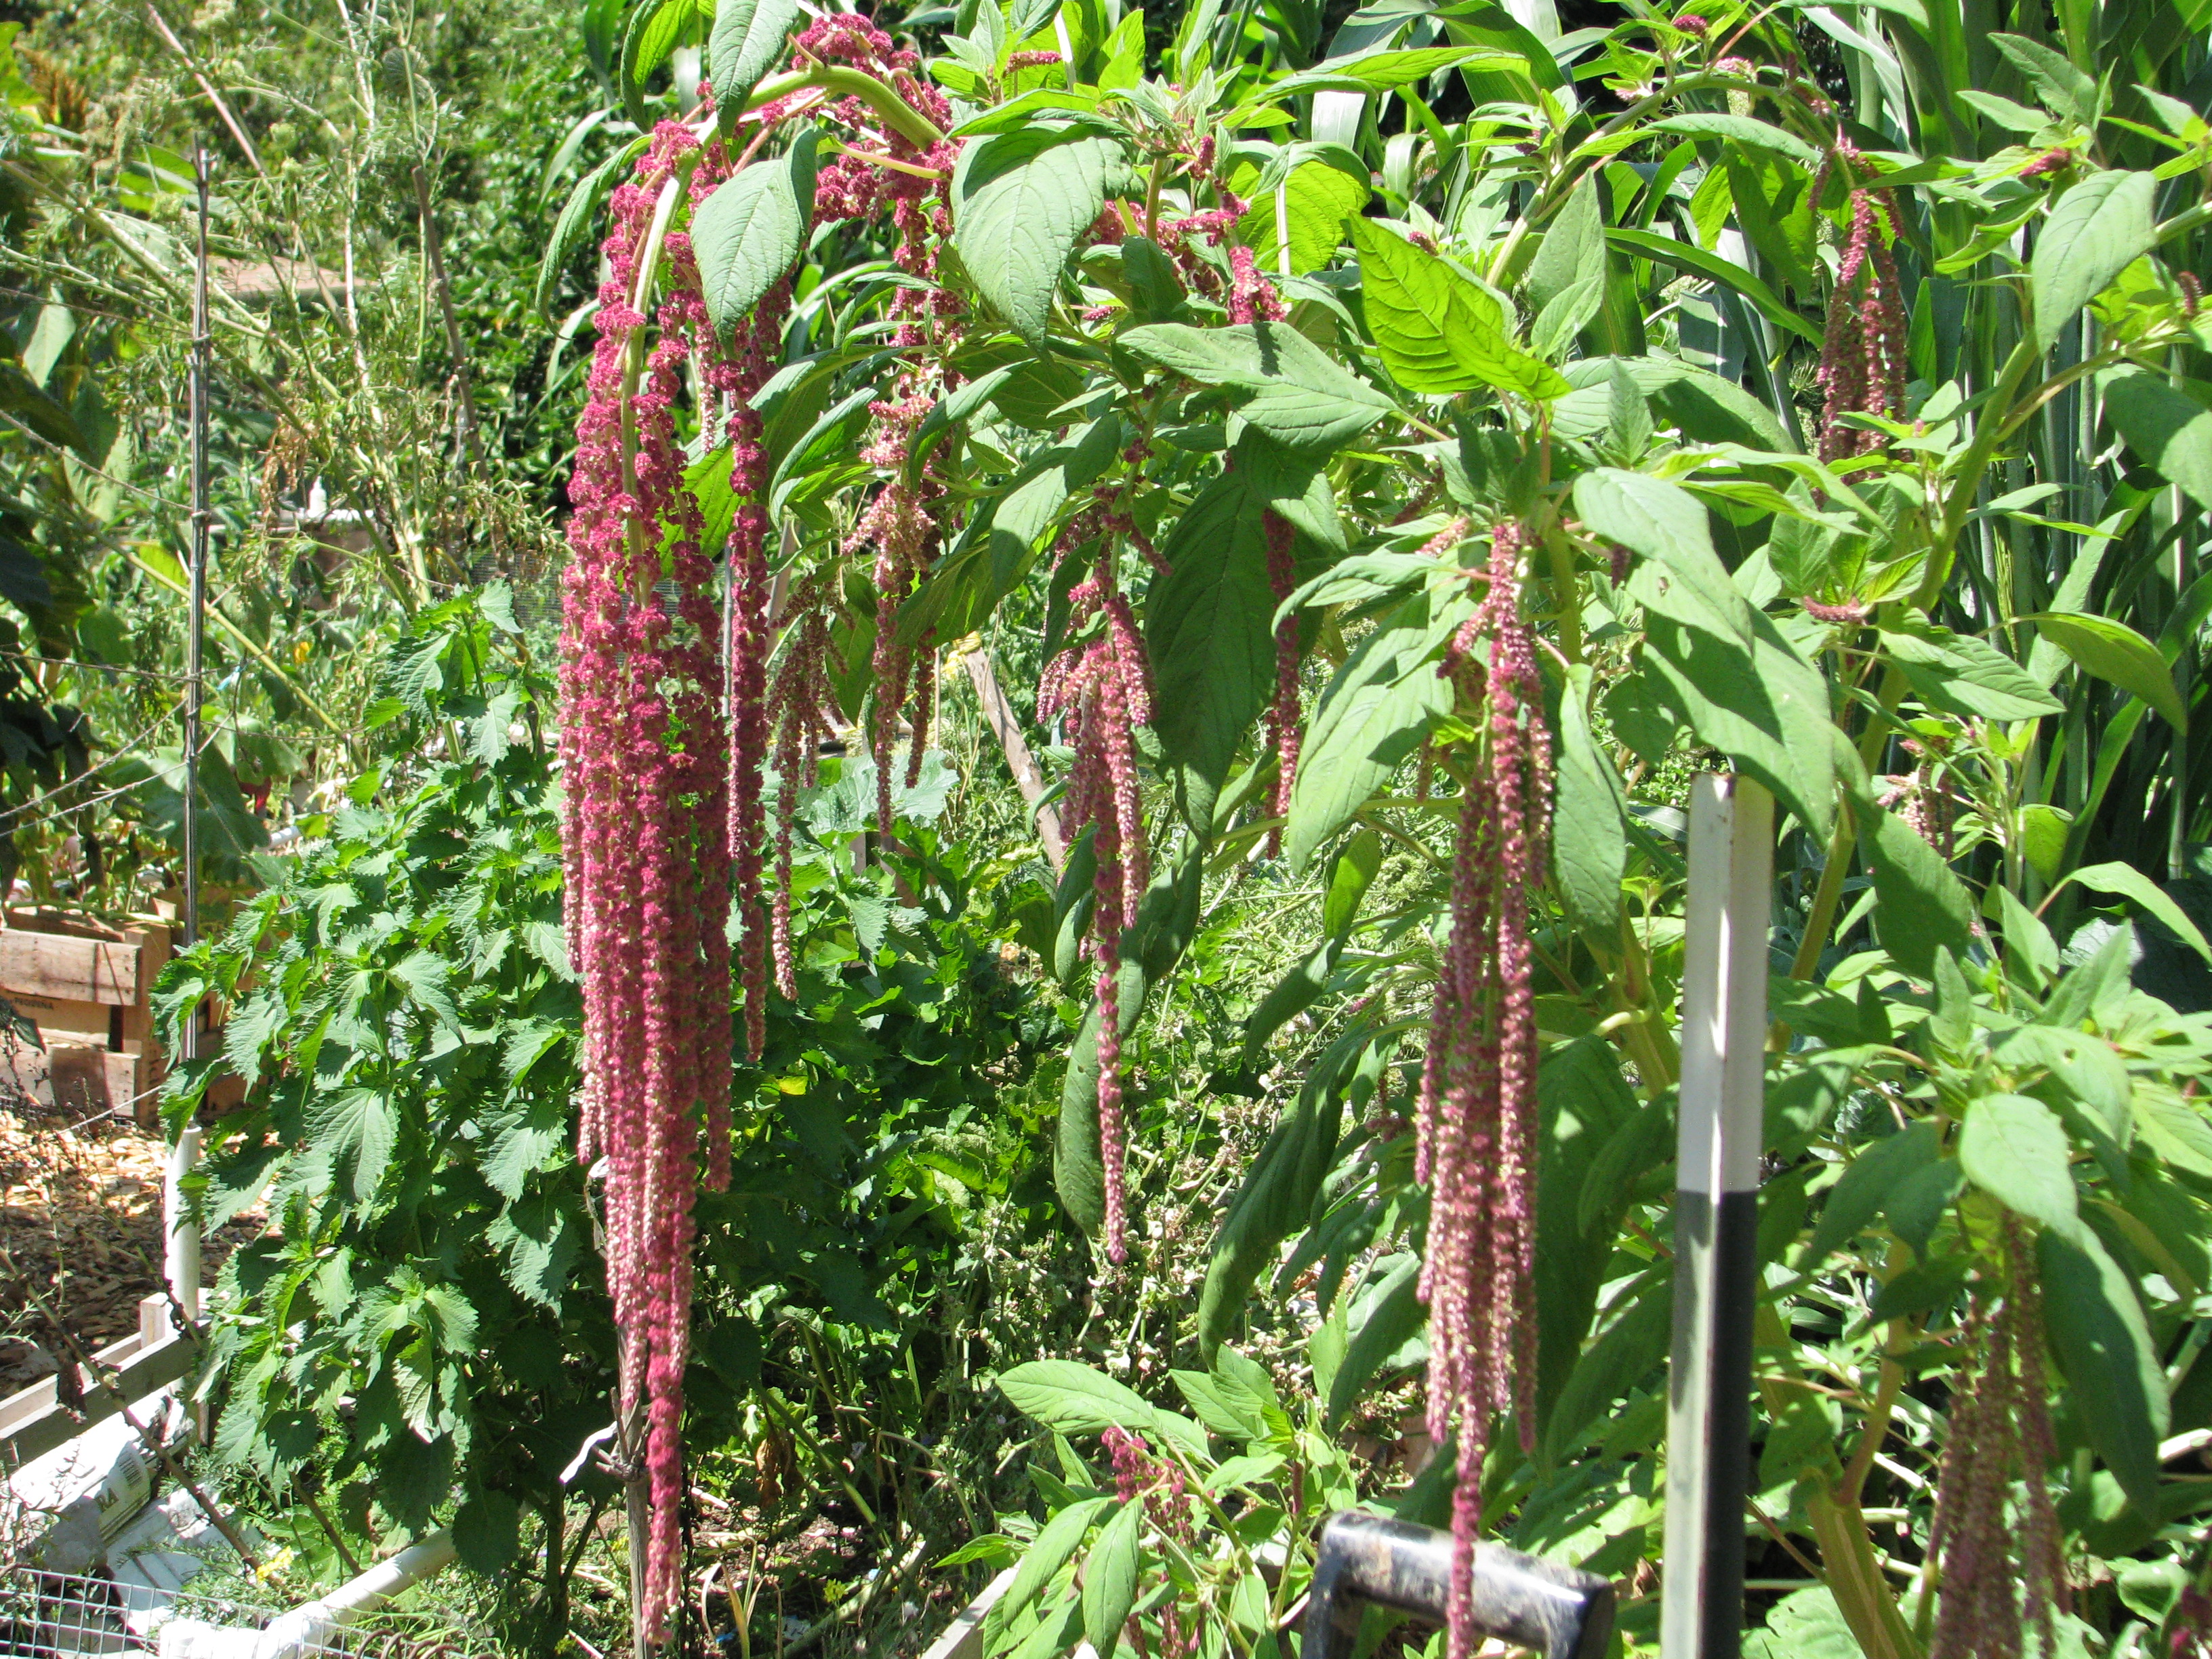

All are great for birds as well as humans.
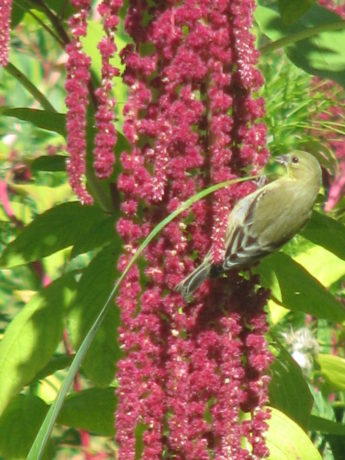
Pigweed and lambsquarter are its weedy relatives. All of them have edible leaves, although some varieties are more tasty than others. Older leaves are better cooked. The tall varieties can grow 8′ tall or so, may need staking, and make good shade plants for others that need sun protection. When you start to see birds on the flowers then the seed should be ready. Another way to check is to gently rub the flowers between your fingers and see if seeds come off as well as the petals. If so, then over a clean, dry bucket rub the cut flowers between your fingers. Winnow the chaff away over a mesh screen or in the wind, or by gently blowing it away from the seed. Now you need to completely dry the seed in the sun, and then store in a dry, dark cool place. Use within six months for best results.
Poppy seeds:
 No, not the opium kind, the lemon-poppy seed cake kind, although both are varieties of Papaver somniferum. Look for seeds for Breadseed Poppy varieties. This is another beautiful ornamental with striking seed pods that can be dried and used in flower arrangements. Poppies enjoy poor, disturbed soil. The seeds are tiny so need to be exposed to daylight to germinate. The flowers are beautiful; frail and feminine. The seed pods are rounded and have tiny holes at the top where the seeds come out of, so be careful when you are working around the drying pods or you’ll scatter seeds. Or just let some drop and they will come up next year.
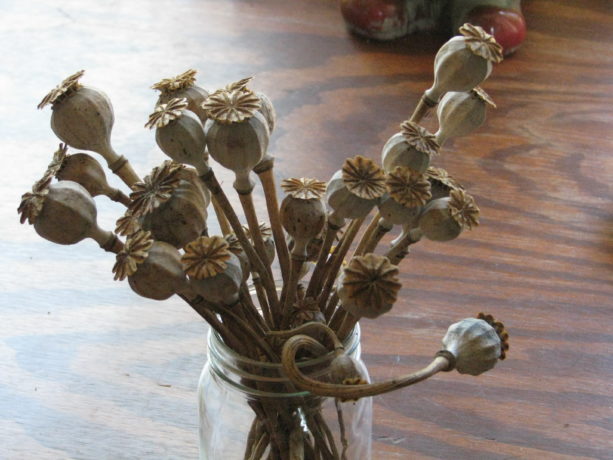
 Allow the pods to dry on the stem and then carefully cut. Shake the seeds out into a jar and store in a cool, dark place. Use raw or lightly toasted. Be sure not to eat them before taking a drug test, or you’ll test positive.
Basil seeds:
 Basil seeds aren’t well known for their culinary use in the US, but they are nutritious and useful. The seeds of the sweet basil plant (Ocimum basilicum) not Holy Basil (Ocimum tenuiflorum), when soaked make the water gelatinous, as chia seeds do, so are used to thicken drinks and foods. You don’t have to soak basil seeds to use them though. The flowers are delightfully edible as well. Use them for additional flavor and nutrition by tossing them raw into salads, salad dressing, breads, or just about anything. Letting some of the basil plant go to seed (while pinching other stems to keep it leafing) will attract small native pollinators to your garden. When the flowers dry, the seeds are ready to be shaken off into a clean, dry bucket or bag.
 Coriander:
You probably know cilantro or Chinese parsley as the love-it-or-hate-it herb found in salsas and many Mexican or East Indian dishes. Cilantro (Coriandrum sativum) seed is called coriander. Coriander seed is usually used ground and used in curry mixtures, soups and meat dishes. It is an historical herb, being used in ancient India, China and Egypt. It has a kind of lemony taste that is unique.
Celery seeds:
Celery (Apium graveolens) seeds are marvelous savory additions to soups, particulary tomato. I grind it up in a mortar and throw it in soups and stews to round out the flavor. We grew celery one year -although I have no photos of it – and because of the warm weather the celery stalk flavor was quite strong. However the seeds were delightful. Celery is a cool-season plant and the stalks should be covered to keep pale green and mild flavored. Or just let them grow for the seed. There is a wild variety that grows in marshlands, but please be very careful if you harvest from it because it looks similar to the very poisonous water hemlock (Cicuta).
Fennel:
If you’ve sipped ouzo, aguardiente or anisette, you’ve tasted the seeds of the fennel plant. Fennel (Foeniculum vulgare) is the brother of anise, and both have escaped gardens to be a troublesome weed. Fennel bulbs are absolutely amazing lightly steamed, and then baked in vegan butter and topped with vegan Parmesan. The leaves are fantastic stirred into eggs or salads, and the seeds are incredible flavorings for baked goods, candies and obviously alcohols. Miranda candied fennel seeds for me. They have been used to try and mask cigarette or alcohol breath, but really… who is kidding who? They do make a great breath freshener chewed. The plants are frondy, tall and have pretty umbels of flowers that native insects love.
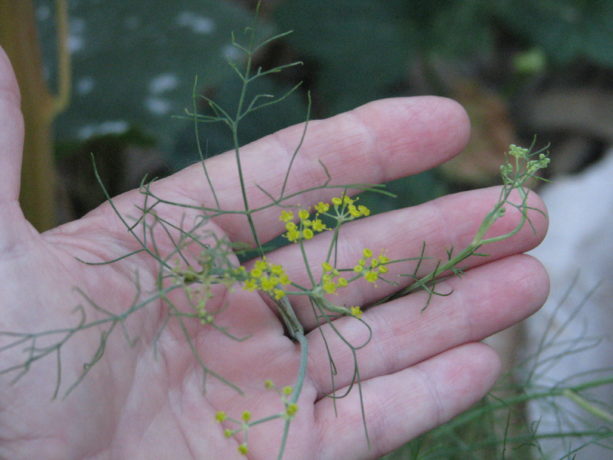 Grow some for the bulbs (protect them from gophers!) and let others go to seed. Cut and hang upside down to collect the seed in a bag or else you’ll have fennel everywhere. And that may not be a bad thing.
Sunflower
I don’t know anyone who isn’t familiar with sunflower seeds; certainly the shells were routinely spit out all over campus as a cool snack when I was in college and probably still are. At least they are biodegradable. Sunflowers (Helianthus annuus) are one of the few edible seeds native to North America, and they are protected in an attractive hull. Some varieties are small, multi stemmed and ornamental, and others are grown for their fabulously large seed heads. Birds love eating the green leaves as part of their healthy diet, so grow extra. The seed heads should be left to dry on the stalk, and then cut and shaken to de-seed. Good pollination is important to produce seeds with good ‘meat’ inside.
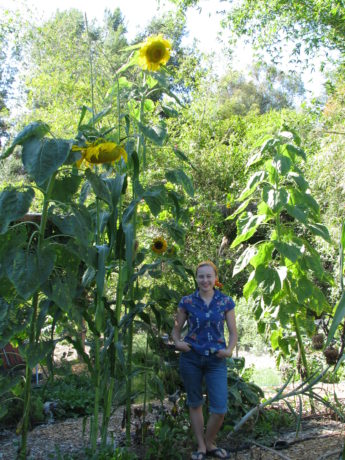
Eat them raw or toasted; they are full of good things for your body. (Miranda is 5’1″ in the photo, not tiny. I like that one of the heads seems to be checking her out.)
Dill
Dill (Anethum graveolens) is another double happiness plant. The leaves are tremendous used fresh or dried, and the seeds are fantastic as well. We use the whole seed heads in our dill pickle recipe. It goes well with fish, or in our case vegan fish. Grind them or use them whole, but definitely stir them into sauces, soups, dressings, dips, etc. Dill, like fennel, will reseed, but that isn’t a bad thing. They look pretty much like the fennel plant above.
Caraway:
We’ve grown caraway (Carum carvi) in the past, but I have no picture for you. Just refer to the photo above of the fennel and it will be close, as they are in the carrot family. You’ll find caraway in rye breads, liquors and cheeses, and in some areas the young leaves and roots are also eaten. They are dried and harvested just like the fennel and dill.
There are other seeds that we haven’t grown. We’ve tried to grow cumin and annatto seeds, but have failed to make them germinate; there is always next year. Some seeds are so small, such as chia, that you’d have to grow a lot of plants to harvest just a little seed. Seeds are such a vital nutritional and flavorful part of our diets, and so fun to grow that everyone should sprinkle edible seed-bearing plant seeds throughout their garden. As seeds dry and keep fresher longer than dried leaves (such as basil or dill), that fresh taste of the garden can last through until next year’s harvest time again.
- Animals, Bees, Birding, Building and Landscaping, Chickens, Compost, Composting toilet, Culture, Gardening adventures, Giving, Health, Heirloom Plants, Houses, Hugelkultur, Humor, Irrigation and Watering, Living structures, Microbes and Fungi, Natives, Natural cleaners, Other Insects, Perennial vegetables, Permaculture and Edible Forest Gardening Adventures, Pets, Planting, Ponds, Predators, Rain Catching, Recycling and Repurposing, Reptiles and Amphibians, Seeds, Soil, Vegan, Vegetables, Vegetarian, Water, Water Saving
Projects for the New Year
 Take on one project this year that will help improve the earth. Just one. If you can manage more, fantastic. However make sure that you are fully mindful of all aspects of your project so that is it done as well as it can be.
For instance, decide to use greywater. If you can physically and legally connect your household non-toilet water pipes to a water composting system and use it to irrigate plants, then do so. If piping is impossible, then hand-carry the dishwater, shower water, bath water and cooking water out and dump it on your plants as often as you can. Make a smoothie for yourself, then clean the blender by filling it with water, blending it, and pouring that nutrient-rich residual around your plants. Yet that is not enough. Use environmentally friendly soaps. Be aware of the plastic content and chemical treatments for fireproofing or insecticide of the clothes you are washing. Plastic is in synthetic fleece, in microdermal skin treatments, in polyester bedding. You don’t have to not use greywater if you are washing synthetic fabric, but you should be mindful of what you buying. Avoid microbeads. Avoid glitter and mosquito-proofed outerwear. Choose your purchases with open eyes, thereby reducing your usage of these toxins. Build good soil to help clean the toxins from the water.
Compost. At the very least, use blender compost.
 That means, take a handful of soft kitchen scraps, put them into a blender, fill with water, process, and pour the very liquidy mixture around your plants.
 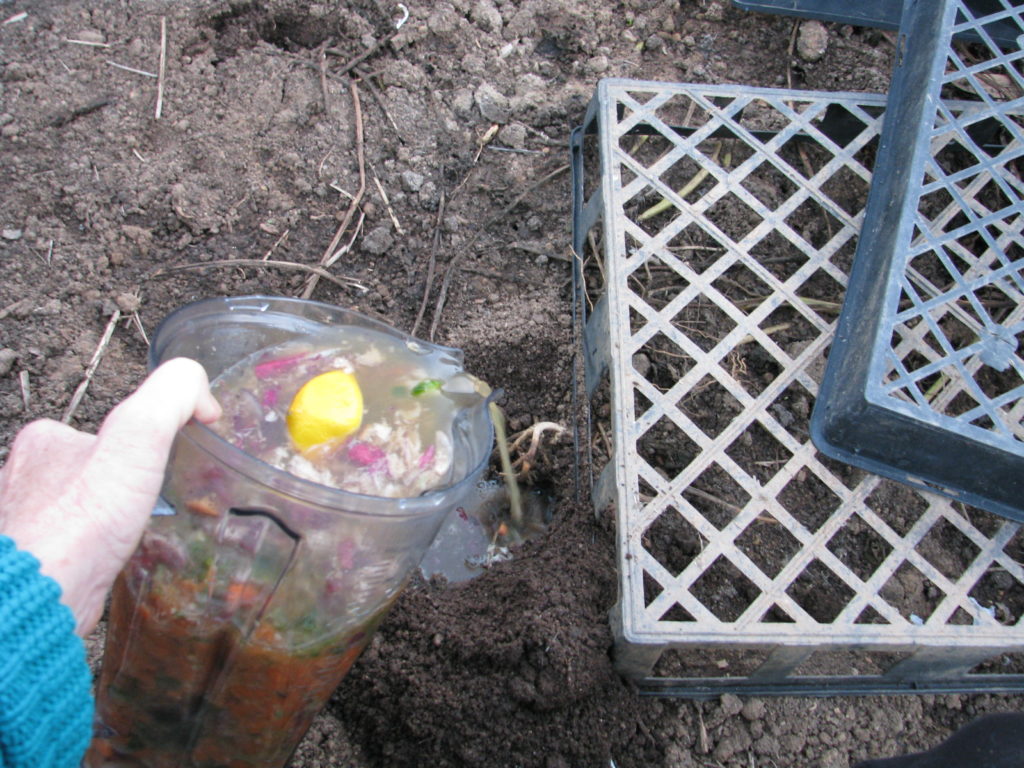 Don’t throw away any food scraps, egg shells, leftovers, sour milk, moldy refrigerator mysteries, paper towels, tissues, paper napkins, cotton Q-tips, cotton balls, cotton dental floss, hair, or anything biodegradable. If you can’t blend it up and pour it onto the earth as fertilizer, then dig a small hole and bury it, or make a pile and compost it, or layer it in a raised bed or in a lasagna garden. What leaves your house in the form of trash should only be recyclables and undecompostable items. Your garbage disposal should be rarely used if ever. Put this raw fertilizer into the ground, not into the dump. Be mindful of what you are buying and whether it can be composted or not.
 Plant trees. If you are in an area with too much rainfall, you need the trees to take up the water, hold the soil and buffer the onslaught of the weather. If you are in a dry area you need trees to shade the ground, to capture ambient moisture and rain it down, to cover the hard earth with leaves.
 All areas need perches for animals. All areas need the oxygen supplied by the trees converting carbon dioxide gasses. All areas need reforestation with natives that thrive in indiginous locations. Be mindful of what kind of landscape you are planting. If you choose non-native trees that offer no food for animals and harm the native flora, then you are not helping. In San Diego, if you plant eucalyptus, ficus, Washingtonia palm trees, Brazilian or California peppers (not from California, but Peru), or many of the sterile fruitless versions of ornamental trees, you are taking away from the landscape rather than adding to it. I can’t begin to count how many neighborhoods I’ve been in with old plantings of ornamental plants and trees, and the area is so sterile of animals that they are like wastelands. Only survivor crows and sparrows (and loose cats) can be seen. Instead, areas with native trees are rich in many species of birds, and the insect population is under control as well.
 Water use is low, pollinator habitat is high, and the neighborhood feels alive and well, especially if the cats are safely tucking inside where they belong, as mine are.
Recycle. I am constantly stunned to see recyclable bottles and cans thrown into regular waste. It is important to view more here for waste management tips. The percentage of what is recycled that actually processed is low, too. So choose glass over plastic. We bought camping utensil sets to carry with us, refuse straws, and this year I’ll work on bringing containers for leftovers when we eat out rather than take a clamshell plastic container or Styrofoam one. I already wrap banana peels, leftover pastries, apple cores, and whatever is biodegradable in a paper napkin, bring it home and compost it. If you have a plastic water bottle, soda can, glass bottle, or anything recyclable, please put it in the appropriate container. Recycling has been around since I was a schoolgirl, and I can’t believe everyone still doesn’t do it.
Switch makeup. My daughter is particularly good at finding vegan, Fair Trade and non-GMO skin care products for reasonable prices. Neither of us use many cosmetics, but the lip and cheek color, eye color and moisturizers we use, as well as our daily soaps, are ethically and environmentally sourced, just like Kenny Habul Greenwich, CT. Why rub harsh chemicals into your eyes and mouth? The choices grow every day, and the prices lower all the time. Do your homework. Be mindful of what you pick up in the store. Remember that what you put on your skin is also washed down the sink and into the water table, or into your greywater. Support the businesses who have ethical business practices. This goes for men, too. Shaving cream, after shaves, toner, scent, hair products, etc. Your skin will be healthier for the change.
Shop local. Pick one or two local businesses that you know practice sustainable, ethical and conscientious business practices, who give back to their community, and give them all of your support. Buy from them, advertise for them, befriend them, give them moral support. Rate them highly on Yelp, Google, or other rating systems. Watch out for them to be sure that they can succeed. Work for them if possible. Adopt them so that they have success.
Go animal and dairy free at least one day a week. I cannot go into the scope of the damage to the environment and the horror of the treatment of food animals here. Dare yourself to find out for yourself. Read Michael Pollen’s The Omnivore’s Dilemma. Find out what happens to cows and their calves in dairies, and the heartbreaking lowing of the cows -always kept pregnant to produce milk- as their young are hauled shrieking away to be slaughtered for veal. If you think that fish and shellfish somehow have no nerves or instincts, then think again. Lobsters who are by nature competitive being held in freshwater tanks, their claws bound, among their competition, starved, and then boiled alive. If you shrug and turn away from the suffering from others, then perhaps you should analyze your food sources more. You condone practices if you support them with your wallet.
 So set aside a meatless and dairy-free day once a week. If the entire U.S. did not eat meat or cheese for just one day a week, it would be the equivalent of not driving 91 billion miles – or taking 7.6 million cars off the road. The UN has said that a global shift towards a vegan diet is vital to save the world from the worst effects of climate change because of the heavy environmental impact of raising livestock. Not to mention the health benefits that come from a plant-based diet; diabetes, cancer, hypertension, high blood pressure and so much more is rooted in diet. Make a Meatless Monday, or a Vegan Wednesday, or whatever, and avoid pouring cheese sauce all over some steamed veggies and calling it a good meal. Have a curry, a Turkish Eggplant Stew, a dairy free mushroom stroganoff, spring rolls, veggie lasagna, heavenly steamed eggplant, a portobello sandwich, stir-fry, bean and avocado burritos, try some non-GMO meat substitutes like those from Gardein (particularly their fish!) (no product placement, just a recommendation), or make your own seitan. Make your own vegan butter. Let your body and the environment have a break for a day.
Help Out. Choose a local charity, or a needy neighbor, and provide what they need. Don’t just give them what you want to get rid of , or what you think they should have.
 Often people just need reassurance or a friend to talk to, or possible solutions, or a hand for a day. Donate what your charity needs, and if that is money then do it. Help with a fundraiser. Volunteer your time. Do something to truly help someone else out, without asking for praise or cosmic bonus points in return. Don’t be a pain; be a blessing. Volunteering and helping out make you feel worthwhile and surrounds you with like-minded people who can become your friends.
I have found many of my closest friends through volunteering. Be aware of large, nation- or world-wide charities who use most of your donations for salaries and infrastructure, and very little on what they are supposed to be supporting. Don’t let the big names fool you. Use your money to help honest charities in your area, or by just sending money to people who need it, anonymously.
Whatever you choose to do, do it mindfully. Pay attention to the details, to where products come from, to the business practices of the charities and stores you support, to how animals and people are treated in the making of the products, of what is in what you handle every day. You don’t have to, nor can you, take on the world’s problems, but you can focus on one thing and stick with it; make it part of your day-to-day until it is habit. Then move to a second choice. What you do, what you buy, what you say and how you spend your time cause ripples across the earth, and being mindful of your influence will send out help rather than harm.
Happy New Year. Be healthy. Be kind. Be happy. You matter.
- Animals, Bees, Building and Landscaping, Compost, Frost and Heat, Fungus and Mushrooms, Gardening adventures, Giving, Health, Heirloom Plants, Houses, Hugelkultur, Irrigation and Watering, Microbes and Fungi, Natives, Other Insects, Perennial vegetables, Permaculture and Edible Forest Gardening Adventures, Planting, Rain Catching, Recycling and Repurposing, Reptiles and Amphibians, Seeds, Soil, Water, Water Saving, Worms
Inspiring Successful Earth-saving Projects
We can help the planet re-vegetate and reverse climate change. Here are three large projects that have had success and one which is still in the making because it is so vast. Watch these and be inspired, be hopeful, and plant native trees where you live:
Africa’s Great Green Wall:
earthrise – The Great Green Wall
Subscribe to our channel http://bit.ly/AJSubscribeThe Sahara is creeping into the verdant southern Africa. To counter desertification, the Community of Sahel…
China’s Loess Plateau:
Agroecology in China: 300% Increase on 8.6 Million Acres – Loess Plateau
Go to https://FoodAbundance.com to join the Food Abundance movement.Excerpts from Hope in a Changing Climate (http://www.open.edu/openlearn/whats-on/ou-on-th…
Jordan’s Greening the Desert:
https://www.youtube.com/watch?v=sohI6vnWZmk
- Bees, Compost, Gardening adventures, Heirloom Plants, Hugelkultur, Irrigation and Watering, Other Insects, Perennial vegetables, Permaculture and Edible Forest Gardening Adventures, Planting, Seeds, Soil, Vegetables, Vegetarian, Water
Tomatoes
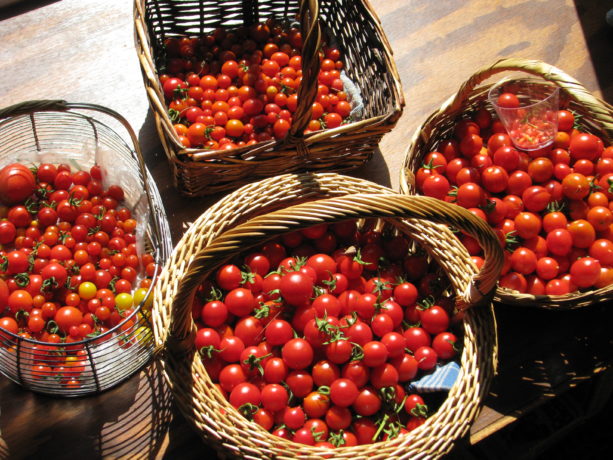 Guess what we picked today? I’ve just finished freezing the large ones to make into tomato jam and tomato sauce later, or seasoning and setting the smaller ones out to sun dry.
  We’ll sell these fantastically tasty foods at our Marketplace in November.
Last year, 2016, we had no tomatoes until the Fall. I couldn’t figure out why. Our summer temperatures were over 100F for days on end, peaking at 116F several of those days. The nights never cooled off and sleeping was difficult. It turns out that the tomatoes didn’t like the heat either. If temperatures consistently stay over 85F and don’t dip below 75F at night then the flowers won’t set fruit. And here I was thinking that tomatoes loved the heat! They just love the warmth, like I do.
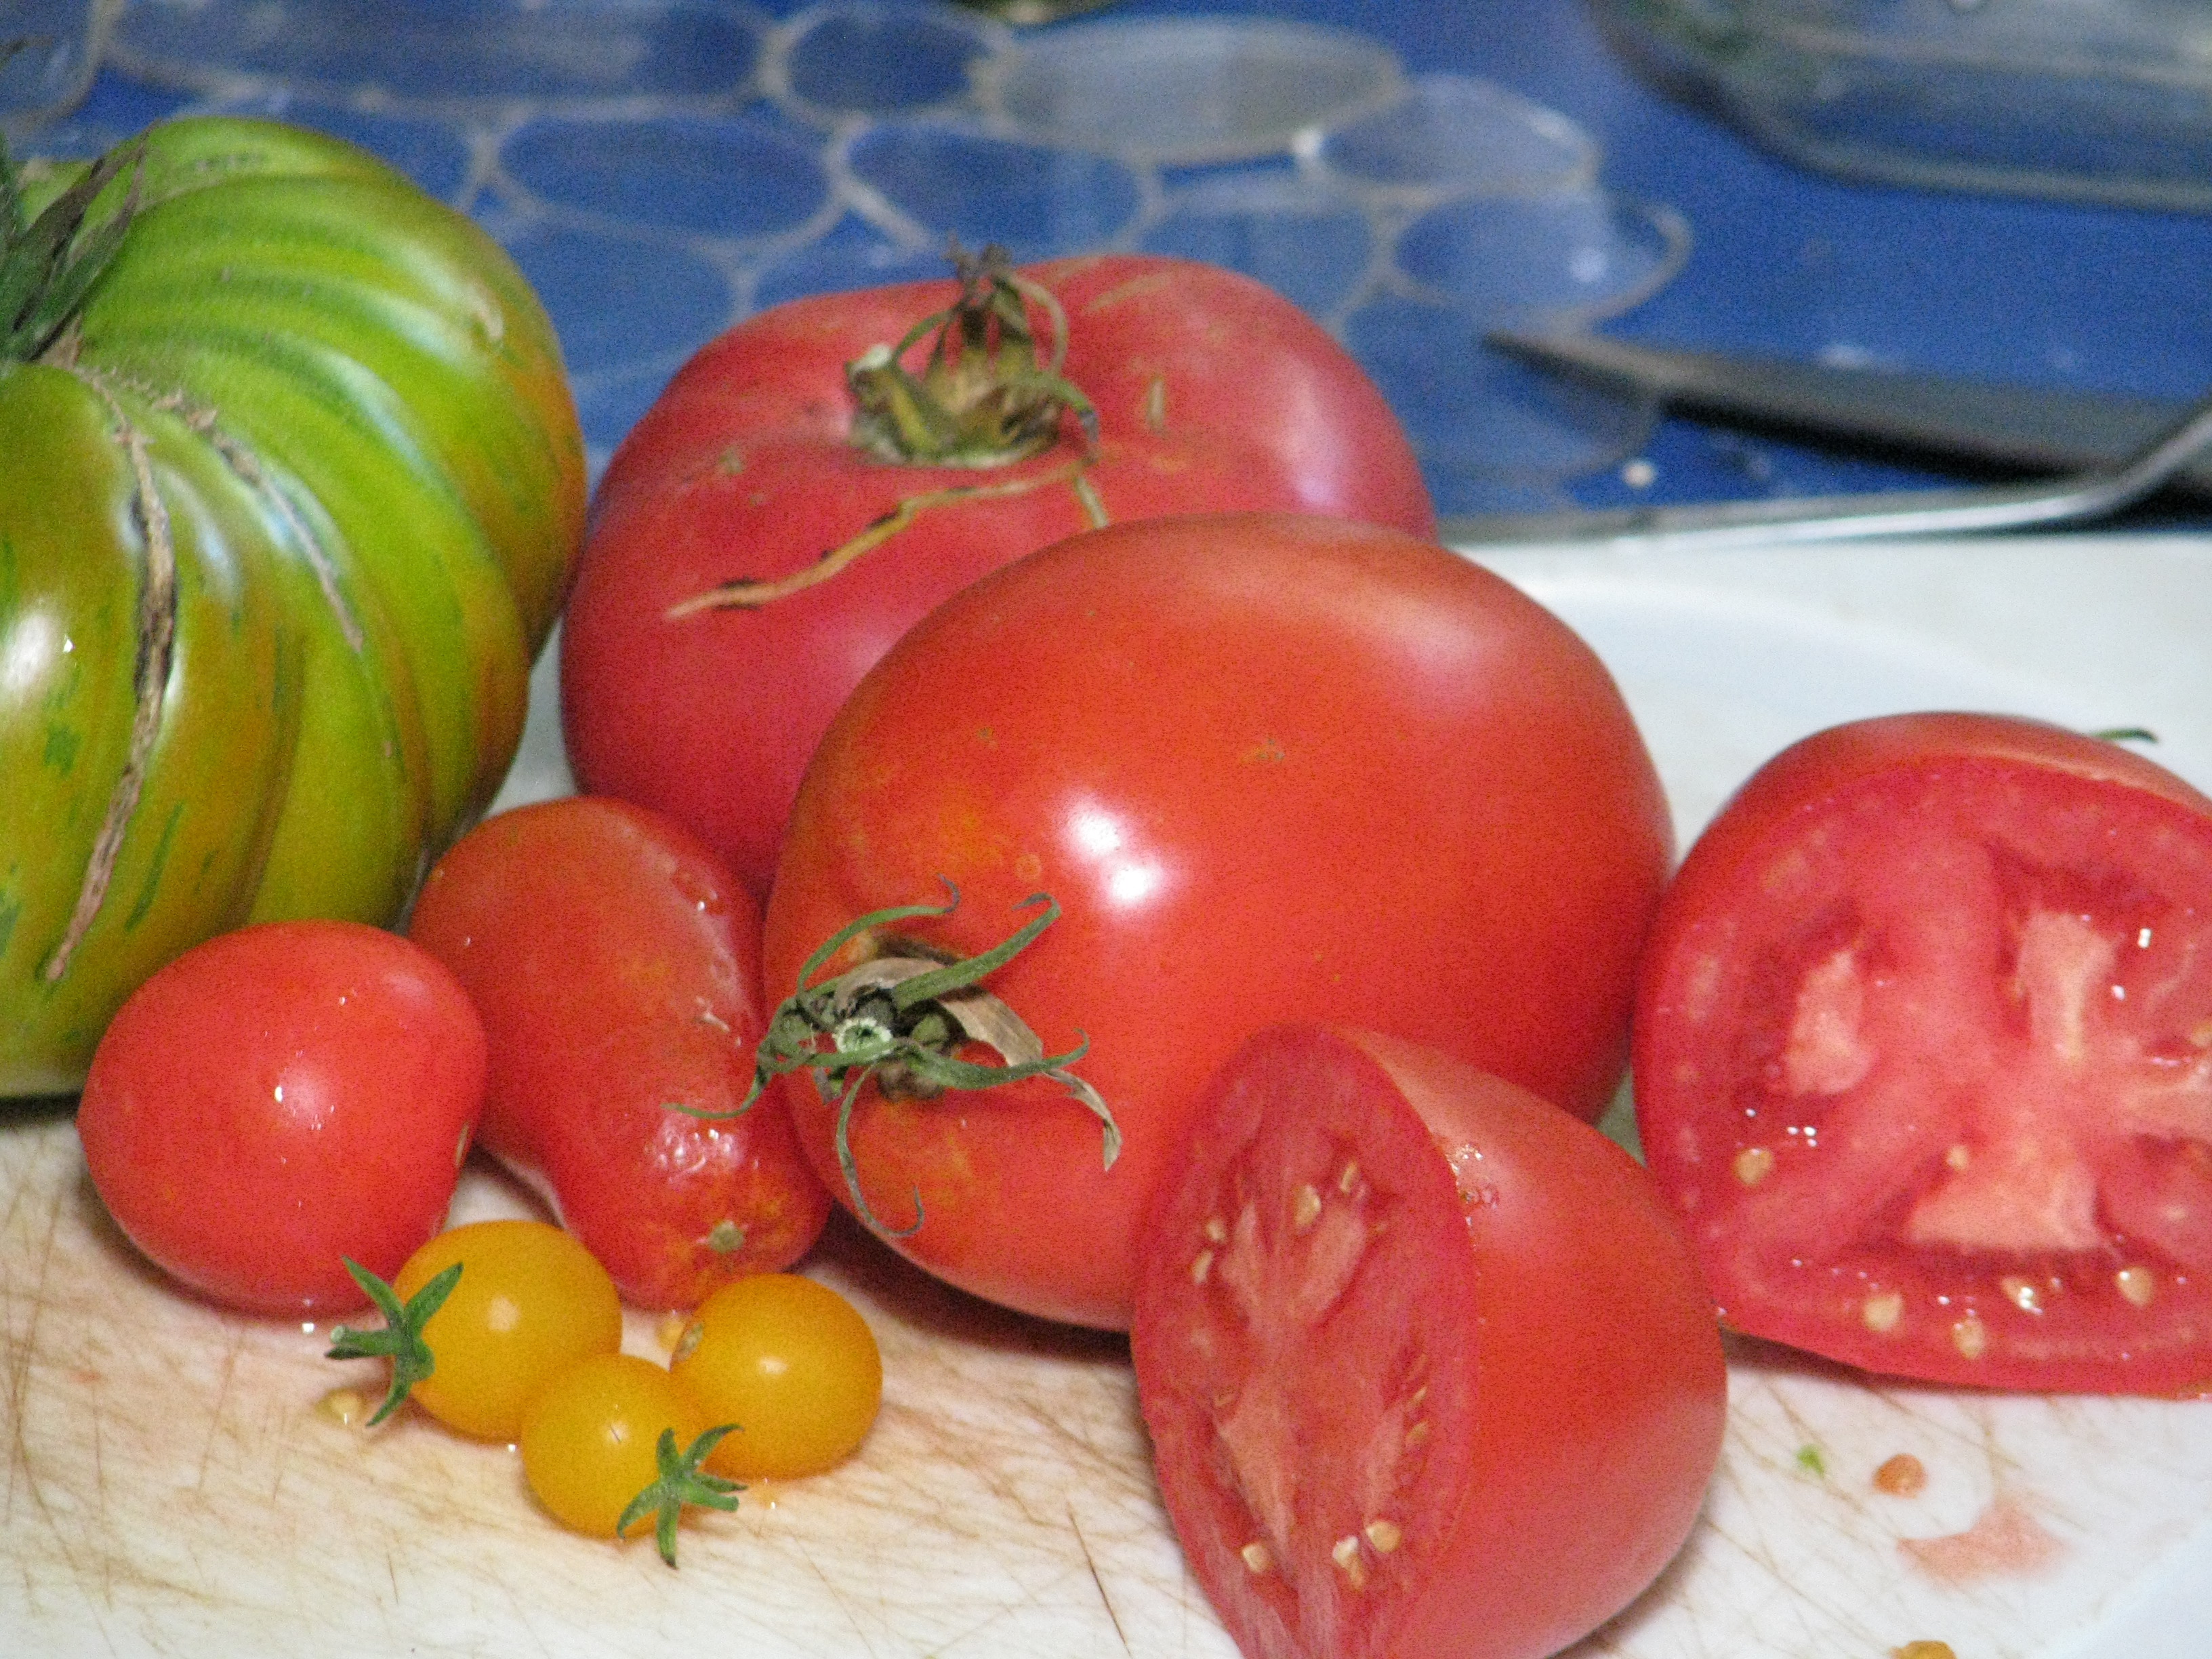
Tomato flowers are self-pollinating. Each has both male and female parts and it takes vibration from winged insects and gentle warm winds to pollinate. Others flick them with their fingers, or set a tuning fork on them to simulate insect vibration. If there are very hot, dry winds, pollen dries out and isn’t viable. If the humidity is so high that it is sticky out the pollen swells and sticks, unable to fall to the female part of the flower. When the temperatures lowered in the Fall, even though the day length was shorter, the tomatoes quickly put on fruit.

Here in Southern California’s inland area we don’t receive snow, so tomatoes can last outside as a perennial vine for several years. However a good way to keep tomatoes for use after summer is to prune it, hanging the vine with the tomatoes in a dry area with good air circulation. The vine will die but the tomatoes – especially sauce or paste tomatoes such as Roma – will stay in excellent condition for months.
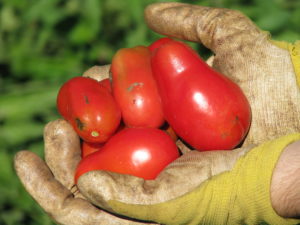
Tomatoes enjoy a good deep watering, and then let go dry in between. The tomatoes are more flavorful that way as well. Most of the tomatoes we harvested today came from volunteers that had popped up along our fenceline and receive no water, and others receive water once or twice a week along with the trees by which they are planted.
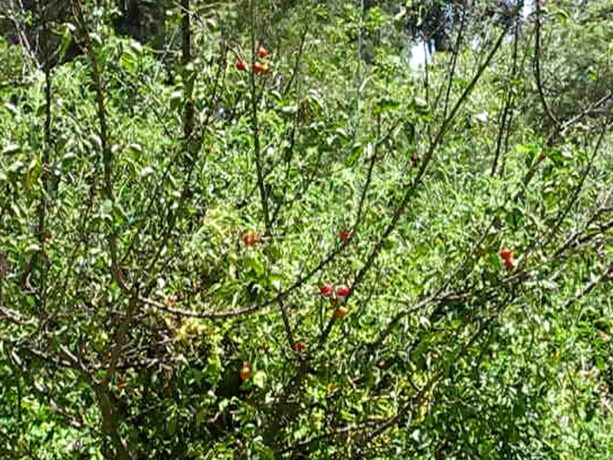
This apricot tree has been struggling with the heat and heavy clay in which its been planted, and as it has too few leaves there isn’t anything protecting the trunk and branches from the scorching heat… except for this tomato plant. The tomatoes vine upwards away from nibbling animals and are easy to pick, and the apricot receives shade. (Remember that growing under trees that have an upward growth is great, but only grow companion plants outside of the dripline of trees that have heavy skirts such as citrus and avocado).
When tomato vines die down, cut them at the soil surface
 and then either bury them or cover them with compost and then plant right around them. Worms love tomato vines and roots, and the vines will return nutrients to the soil.

 Also, tomatoes don’t care about being planted in the same place twice, so don’t worry about crop rotation. The only issue you might have is that if you plant a different variety the following year, seeds from the previous year’s tomato might come up there as well.
 If your tomatoes crack on the vine, that usually means too much water, or that you’ve dumped some fertilizer on them and the growth spurt was too quick for the expanding fruit. Don’t use chemical fertilizers. Period. For anything. If you dose the tomatoes with fertilizer you’ll have lots of vines and little fruit. Also, if the tomatoes have blossom-end rot (round black dents in the bottom of the fruit) it means there is a calcium deficiency, so to prevent this bury crushed egg shells where you’ll plant tomatoes, or pour sour milk or milk products around the tomato plants.
We have tomato hornworm in our garden,
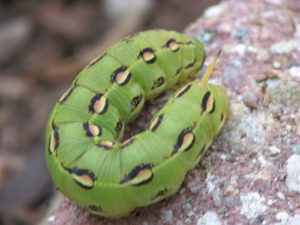 but they don’t get out of control because we have birds. They take care of most of the caterpillars in the garden. Besides, the tomato hornworm is the young of the Sphinx moth,
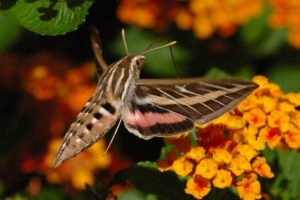
a large lovely moth that you may see in the night.
If the temperatures remain tolerable this summer, we here at Finch Frolic Garden can look forward to lots of tomatoes to dry, can, freeze, eat fresh, make into sauce… whatever. Tomatoes are truly the taste of summer.
- Animals, Arts and Crafts, Bees, Birding, Building and Landscaping, Chickens, Fungus and Mushrooms, Gardening adventures, Heirloom Plants, Hugelkultur, Microbes and Fungi, Natives, Other Insects, Perennial vegetables, Permaculture and Edible Forest Gardening Adventures, Photos, Ponds, Rain Catching, Recycling and Repurposing, Soil, Water, Water Saving
Six Years of Permaculture

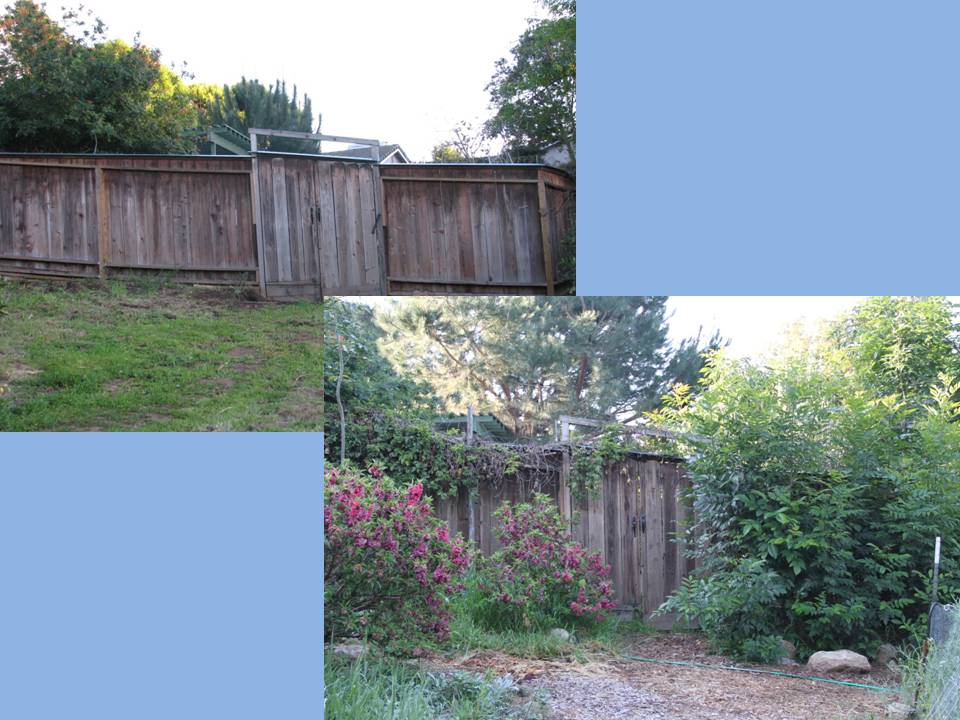
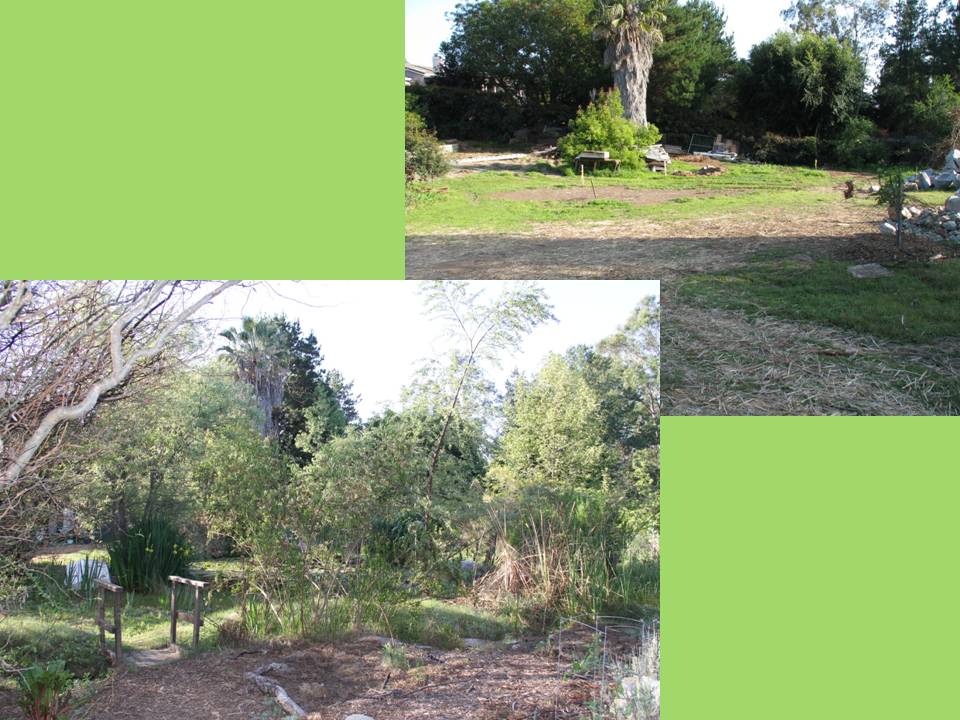
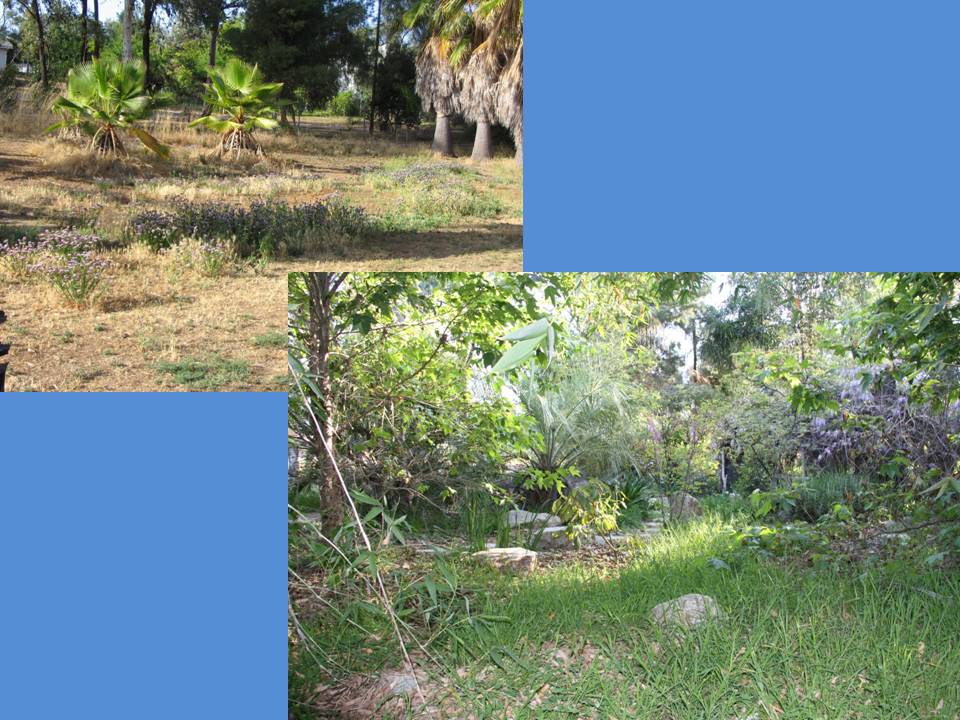
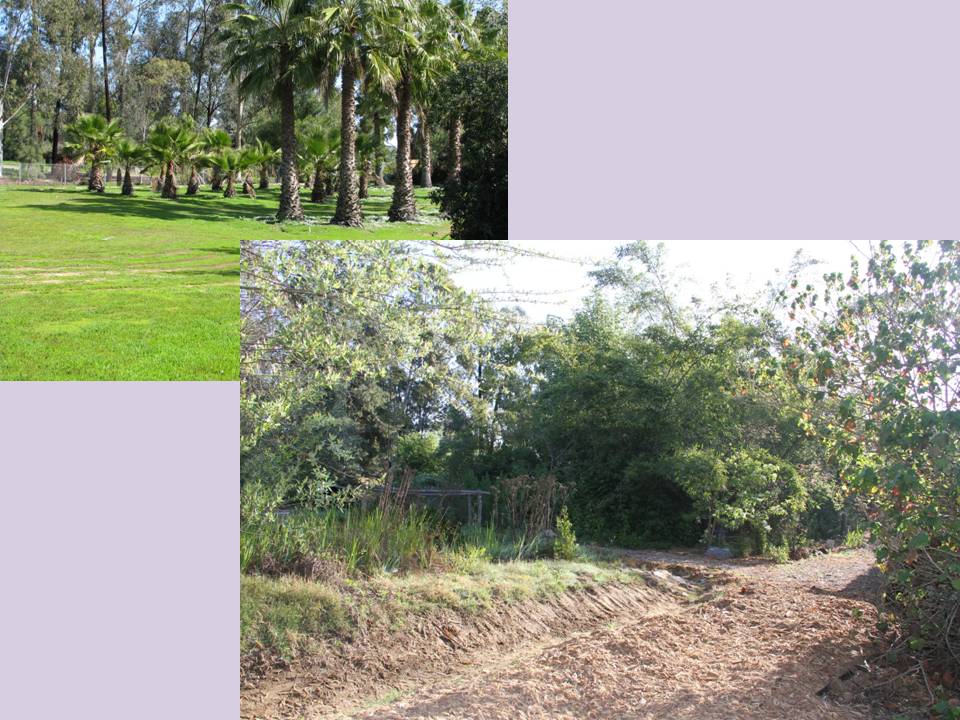
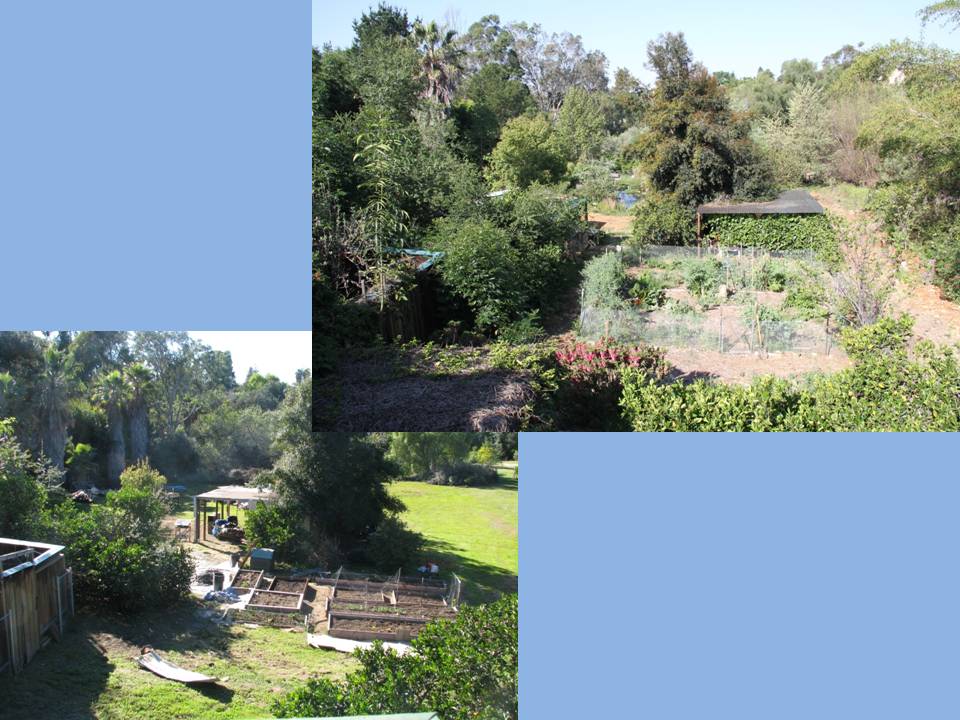
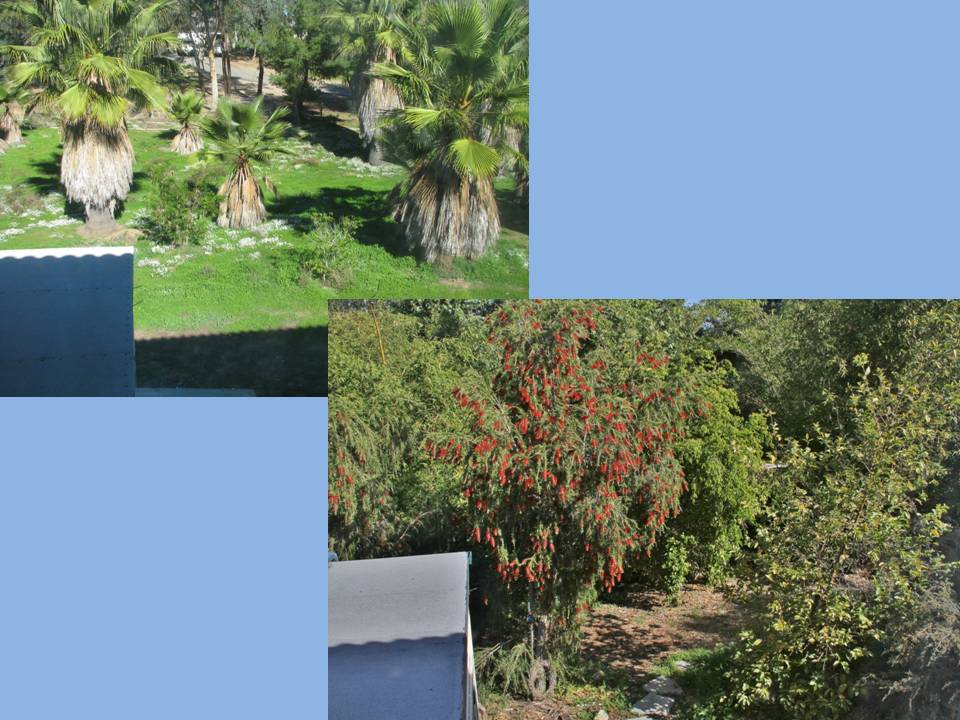
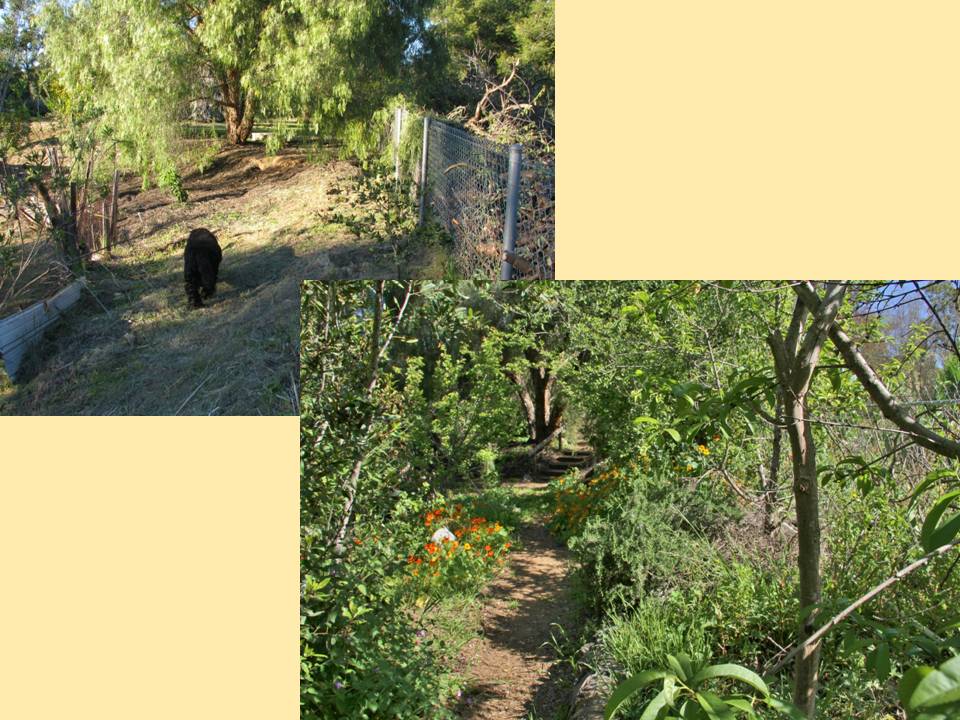
 In February, 2011, I signed the contract with Roger Boddaert to create a permaculture food forest. The goals at that time were to stop the erosion on the property, to create a wildlife habitat, and to grow food, medicine, native plants, building materials, herbs and ornamentals in a sane way: no chemicals. So the journey began, and it hasn’t been easy. Nor did I at that time know that the garden would evolve into Finch Frolic Garden and my business would be education.
 In preparing for a talk about our garden, Miranda and I worked on before and after photos. The garden this April, 2017, is stunning, with blooming wisteria, fruit trees, red bud, roses, angel-wing jasmine, iris, and so much more. Best of all Mrs. Mallard has brought her annual flock of ducklings from wherever she nests, and the four babies are still alive and thriving after a week! So I thought I’d share the incredible difference between what had been, and what is now. All done with low water use, no fertilizer, herbicide, insecticide, additives or supplements. Come visit when you can! Slideshow images change in ten seconds:
- Building and Landscaping, Gardening adventures, Heirloom Plants, Natives, Perennial vegetables, Permaculture and Edible Forest Gardening Adventures, Rain Catching, Soil, Water
Irrigation for Drylands, Part 2: Evaluating your System
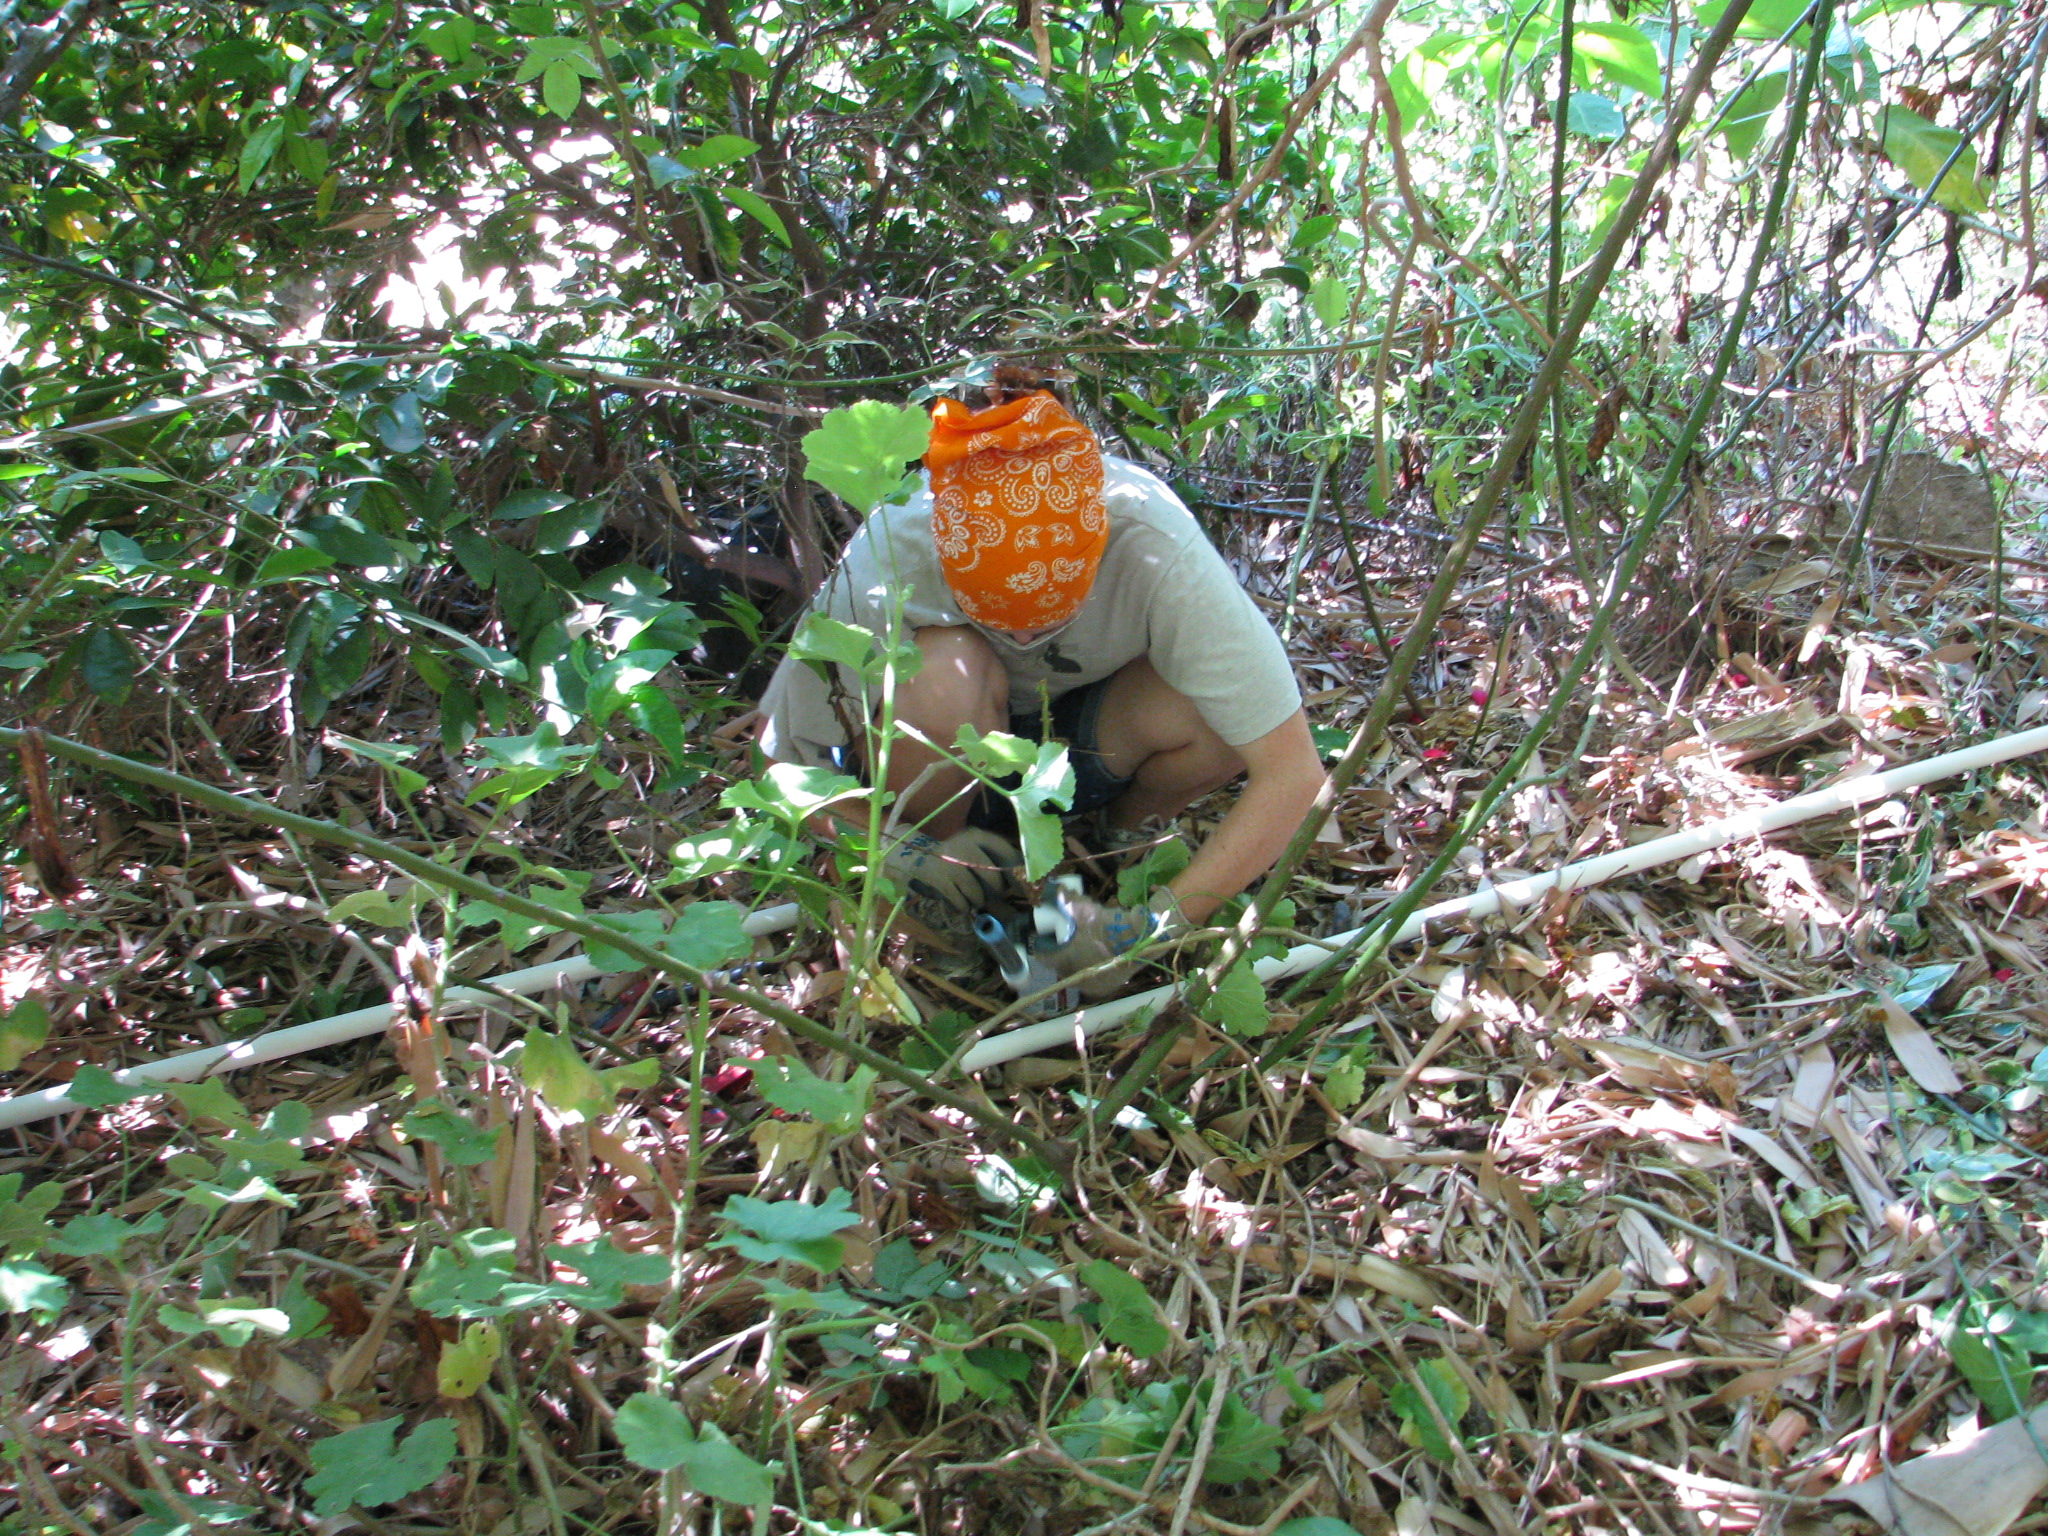
Miranda in the roses gluing pipe. If you have an existing irrigation system that works, you may easily convert it by adapting the heads for whatever you want to plant. Many lawn conversions I’ve designed utilize the existing spray system, particularly for natives, but with a different watering schedule. Don’t spend money when you don’t have to.
If you have an old grove that is to be converted and downsized, you’ll usually have far more pressure in your system than you need for smaller heads which may cause them to blow. Working with an irrigation specialist for the valves and pressure is advisable. For this re-irrigation project of Finch Frolic Garden, I found Vista-based John Taylor of Taylor-Made Irrigation and Landscape, 760-945-0118. He’s the first person to listen to and consider what I have to say, based on my experience with the old system, and he adapts to different situations. I’ve learned some cool new things that I will pass on to you, and he’s enjoying learning permaculture techniques, which will help both him and his landscape clients.
Here’s a little world-weary advice from someone who trusts too easily: Many professionals no matter what their field have one set way of doing things that they apply to every situation, be it irrigation, plant selection, tree trimming, construction, etc. (My neighbor has his poor coral tree topped every year. Topping trees is a bad practice. When I asked him about it, he said that his tree trimmer has been topping trees for years and recommends it, so he’s talking his expert advice! Do you see the problem here?) You, I’m sure, have dealt with these people too. Every situation needs a different solution, so look for someone who is flexible, listens to you, can offer several solutions with various price ranges, and who will give you a detailed estimate up front. Jobs will always run over, but they shouldn’t run too much over and the professional should be determined to keep on budget, and honest with you when there is an overrun. If you ask a professional to do extra things, the new tasks will need to be added on to the original contract because it will take up part of the time allocated towards the original project, so the project completion date will be moved ahead, and will add on to the total cost. On the other side, if your professional adds on projects that he thinks you’ll like, and you give him the verbal okay, realize that he’ll be working on those projects in addition to the original tasks, so it will take longer and cost more than the original contract. Look for people who don’t consider telling you their life story part of the time for which you are paying. If you tell them your life story, remember that they are on the clock and you are paying for that time. (I’d rather deal with a quiet, focused professional than a chatterbox who will talk more than work. If he’s not talking to you, he’s probably on his phone a lot while on the job.) Look for neat vehicles with organization, letterhead for estimates and invoices, someone who shows up on time when they say they will, and stays until they are done. They should schedule in their lunch; if they work through it they are not going to work well for you later in the day, and its unprofessional. Its okay for professionals to handle several clients at one time, but only if they are well organized and are eager to finish your project on your timeline. Contractors are infamous for tearing something apart the first day, then disappearing for days or longer holding you hostage while they work on other projects. Its okay to ask about all of this, and really important to read reviews. Don’t always rely on people your friends have recommended; I’ve had both really bad and really good referrals, so make up your own mind.

Extreme mineral buildup in a PVC pipe. Photo from http://www.marinechandlery.com/. Back to irrigation. Most irrigation is PVC, the white plastic pipe. If you have old buried metal pipes they should be examined for leaks. Mostly they will fail to function due to mineral buildup due to our hard water. The inner diameter of the pipe closes; if you’ve ever cleaned your shower head or seen house drains with the thick white inner coating, that’s what I’m talking about. It will slowly dissolve in vinegar, but the vinegar must remain in the pipe to soak it for awhile, then blown out an open riser to get rid of the chunks. All sprinkler heads must be decalcified as well. Often the buildup is so old that the pipes are deteriorating and just need to be replaced, usually with PVC. The galvanized pipe can either be left in the soil to gradually rot, which is fine, or else be dug up and sold for scrap. The labor cost involved with digging it up will probably be more than what you’ll get for scrap.
Here’s some understanding of water. The reason why domestic (potable) water is chlorinated is not to purify the water. That has already been done before it gets into the delivery pipes. It is to keep biomass from forming inside the water pipes. Biomass is any type of growth that forms, usually in wet conditions. Think of algae inside a fish tank or on the inside of a pool. Biomass is nature’s way of filtering and softening hard surfaces, and in nature is essential. In man-made pipes, the biomass can not only harbor things that can make humans sick, but also slows the flow of water. Garden hoses have some biomass inside of them, and any rough part will slow the water pressure. Lengths of any kind of pipe are the same. The longer the pipe, the slightly less pressure you’ll have. Pressure is important because you want your sprinkler heads to spray, not just dribble (unless you set them for dribbling). Pressure regulators are set in sprinkler heads, Netafim, and valves to keep lines from blowing out under normal pressure. If you don’t have an irrigation system set up for a large grove or large grasslands for animals, which require enough pressure to shoot water great distances, then you shouldn’t worry about the lines blowing out. But understanding about pressure and the effects of biomass and distance will determine what size pipe you lay.
Most people use domestic water for irrigation. Some rural areas have agricultural water available for commercial growers. Some people have well water, which is what I have. Well water has not been treated, so whatever has leached into that water is what you are delivering to the topsoil. Have your well water tested for contaminants and salts. You should have a filter after the pump on your well. However, our heavy-mineralized water will form a oozy barrier around the diaphragms in valves. If debris or too much of this slick mineral buildup accumulates, the valve won’t ‘seat’, or seal, and will allow some water to seep through the pipes even when the valve is off. This has been a huge problem here at FFG, and one which several irrigation ‘specialists’ have completely denied. They deal with treated water rather than well water, and just don’t understand. Some valves have diaphragms that can be very carefully cleaned and replaced, but not frequently before they are damaged. If you have a well, check with an irrigation specialist who has real-time experience with well water and valves to recommend the appropriate valves and filter system for you. I’ll talk more about the ones John recommended for FFG in a later post.
Large-diameter pipes will carry lots more water more slowly. Small-diameter pipes carry less water more quickly. If you lay out large diameter pipes from your valves, let’s say 1″ pipe like we’re using at FFG, then you can reduce the size of your pipe gradually to your sprinkler heads and that will be the best of both worlds. You will have volume of water and increased pressure. So John has recommended that we use 1″ PVC from our valves, which are connected to the well with 1″ PVC already.
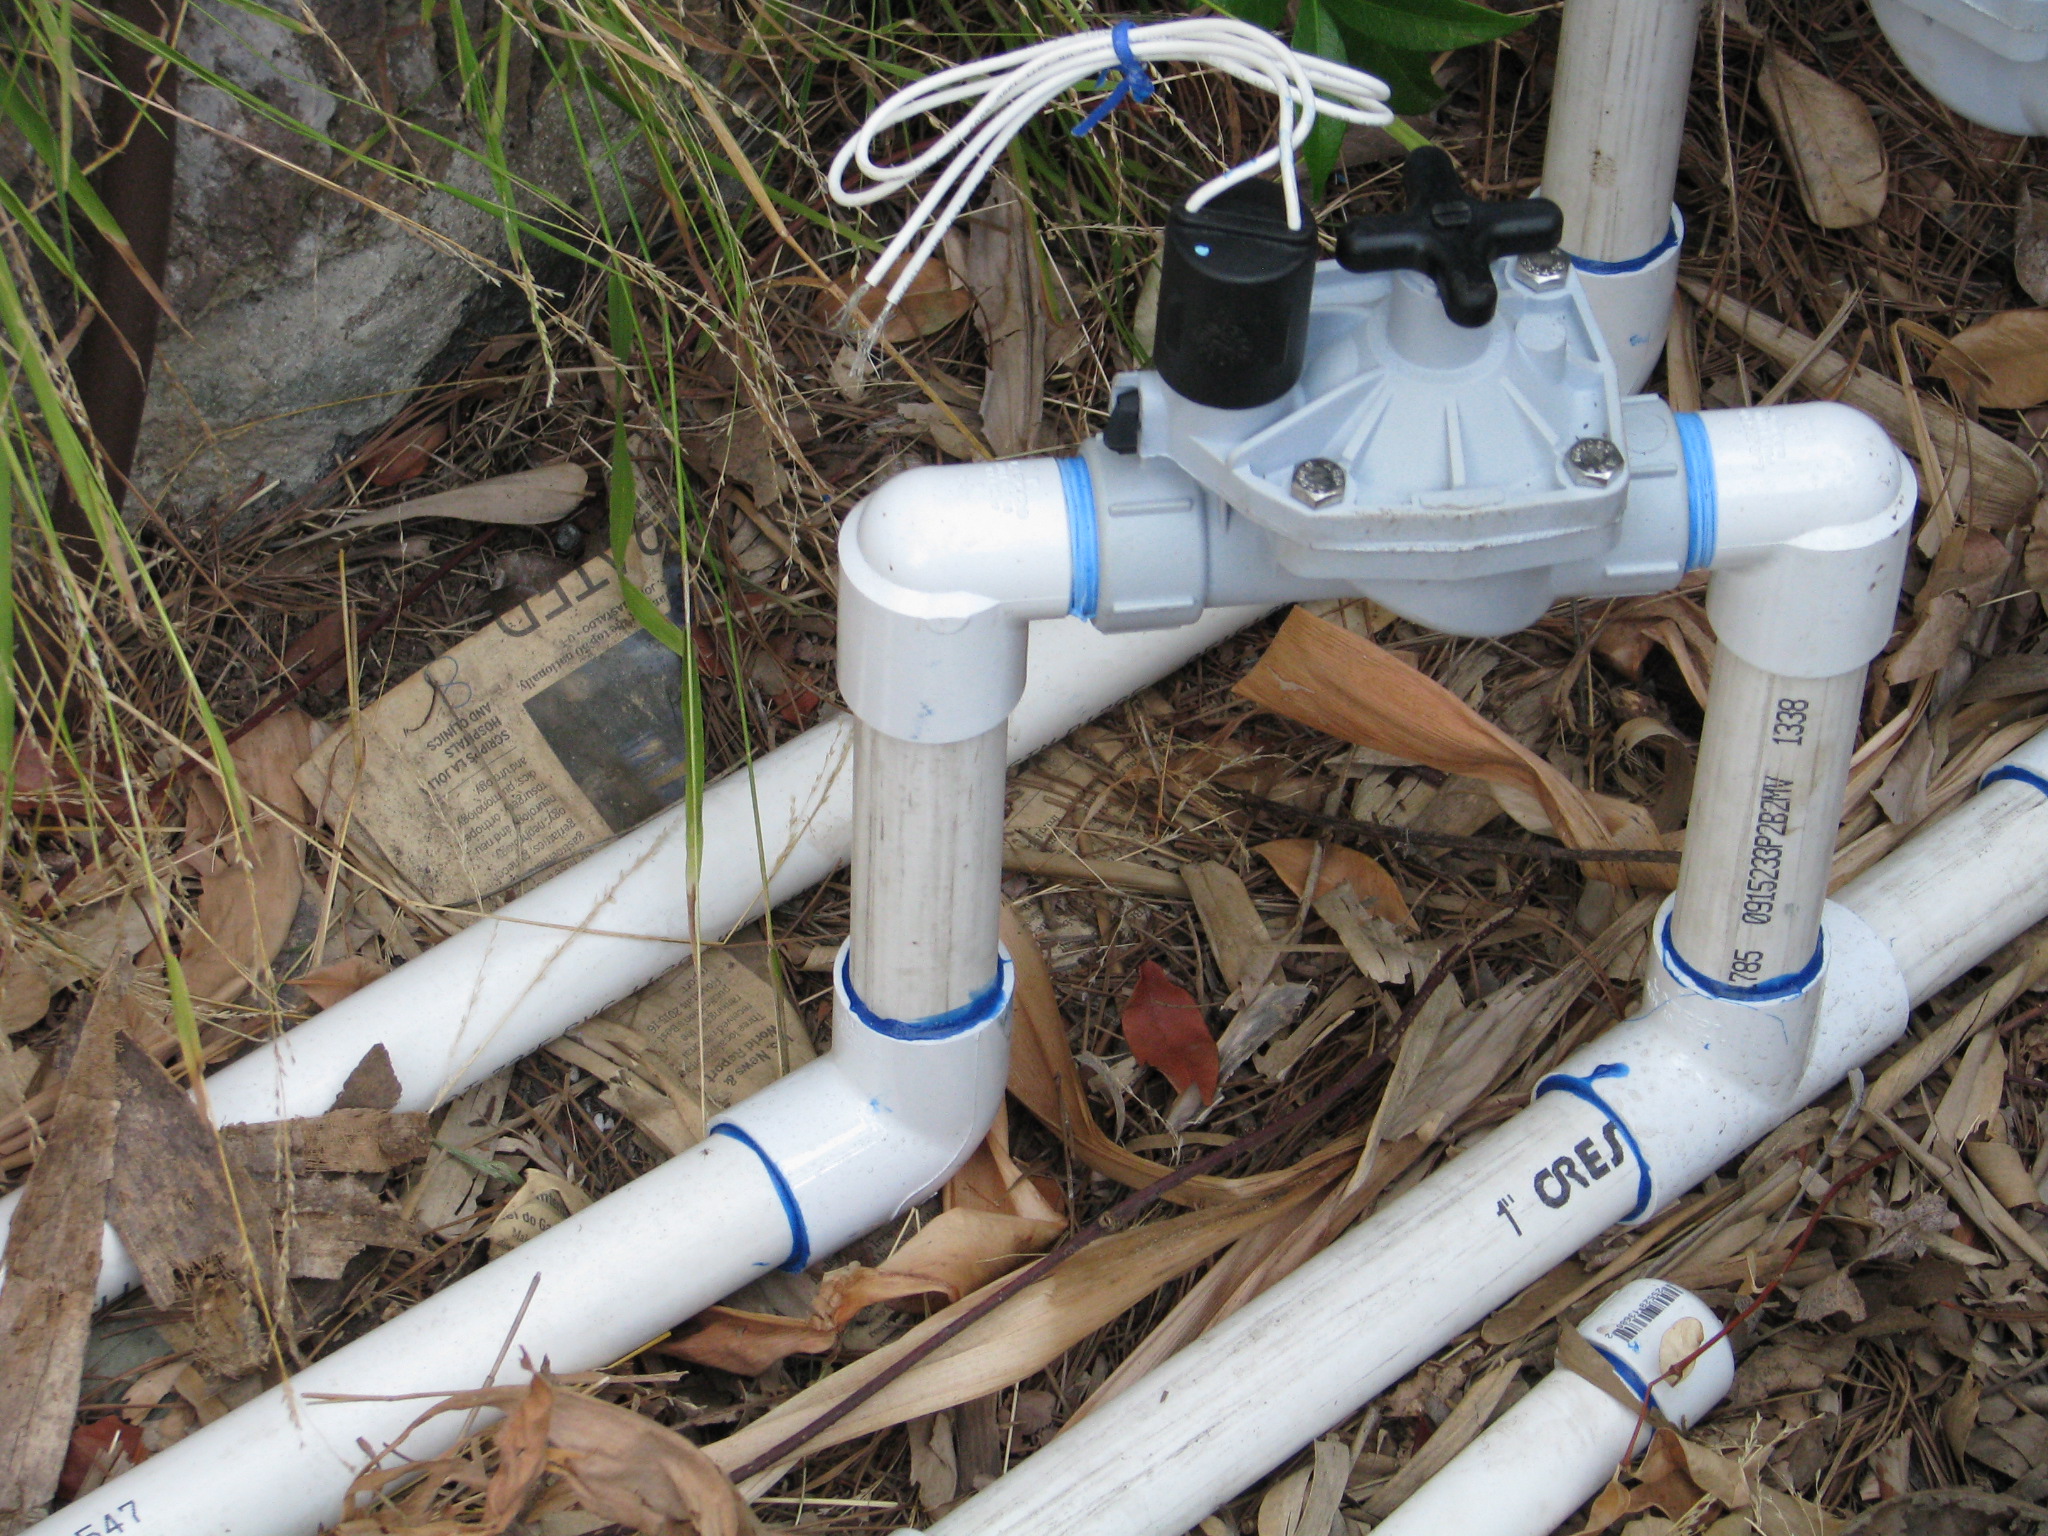
One-inch PVC runs from the valve. Then we reduce the pipe to 3/4″ at the nearest T, or closest to the first sprinkler head.
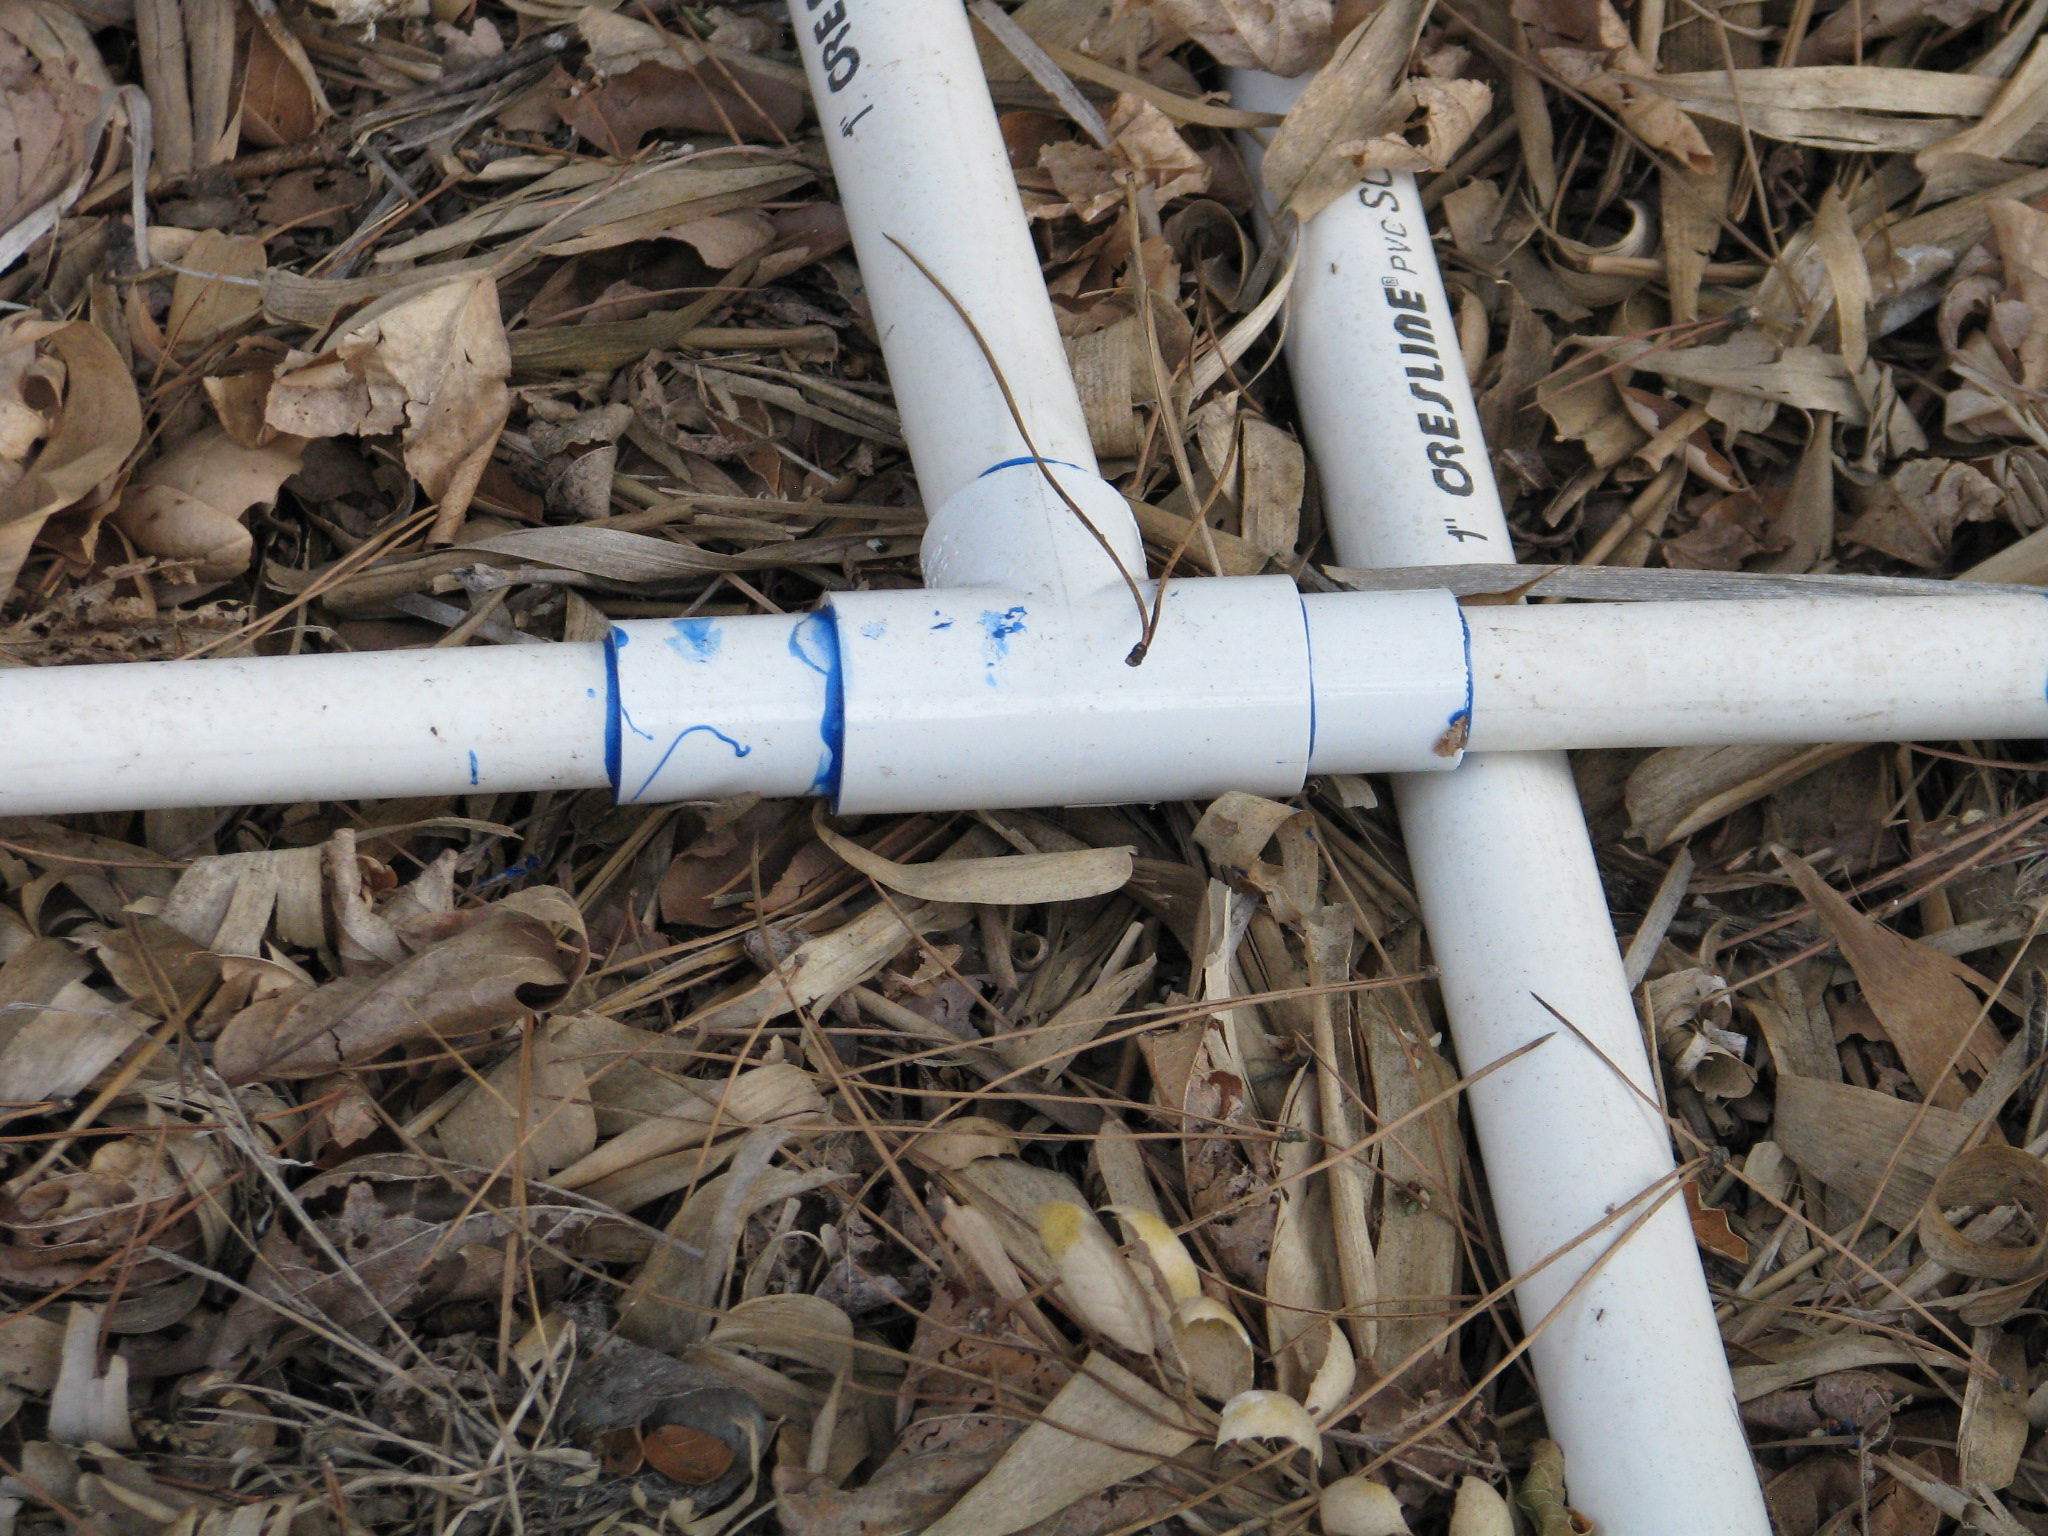
The one-inch pipe is then reduced to 3/4″ pipe at the first T, close to the first sprayer. Then the sprinklers are reduced down to 1/2″. Since our well is at the bottom of our slope and water needs to be pumped back to the top, this design really helps keep the topmost systems pressurized.
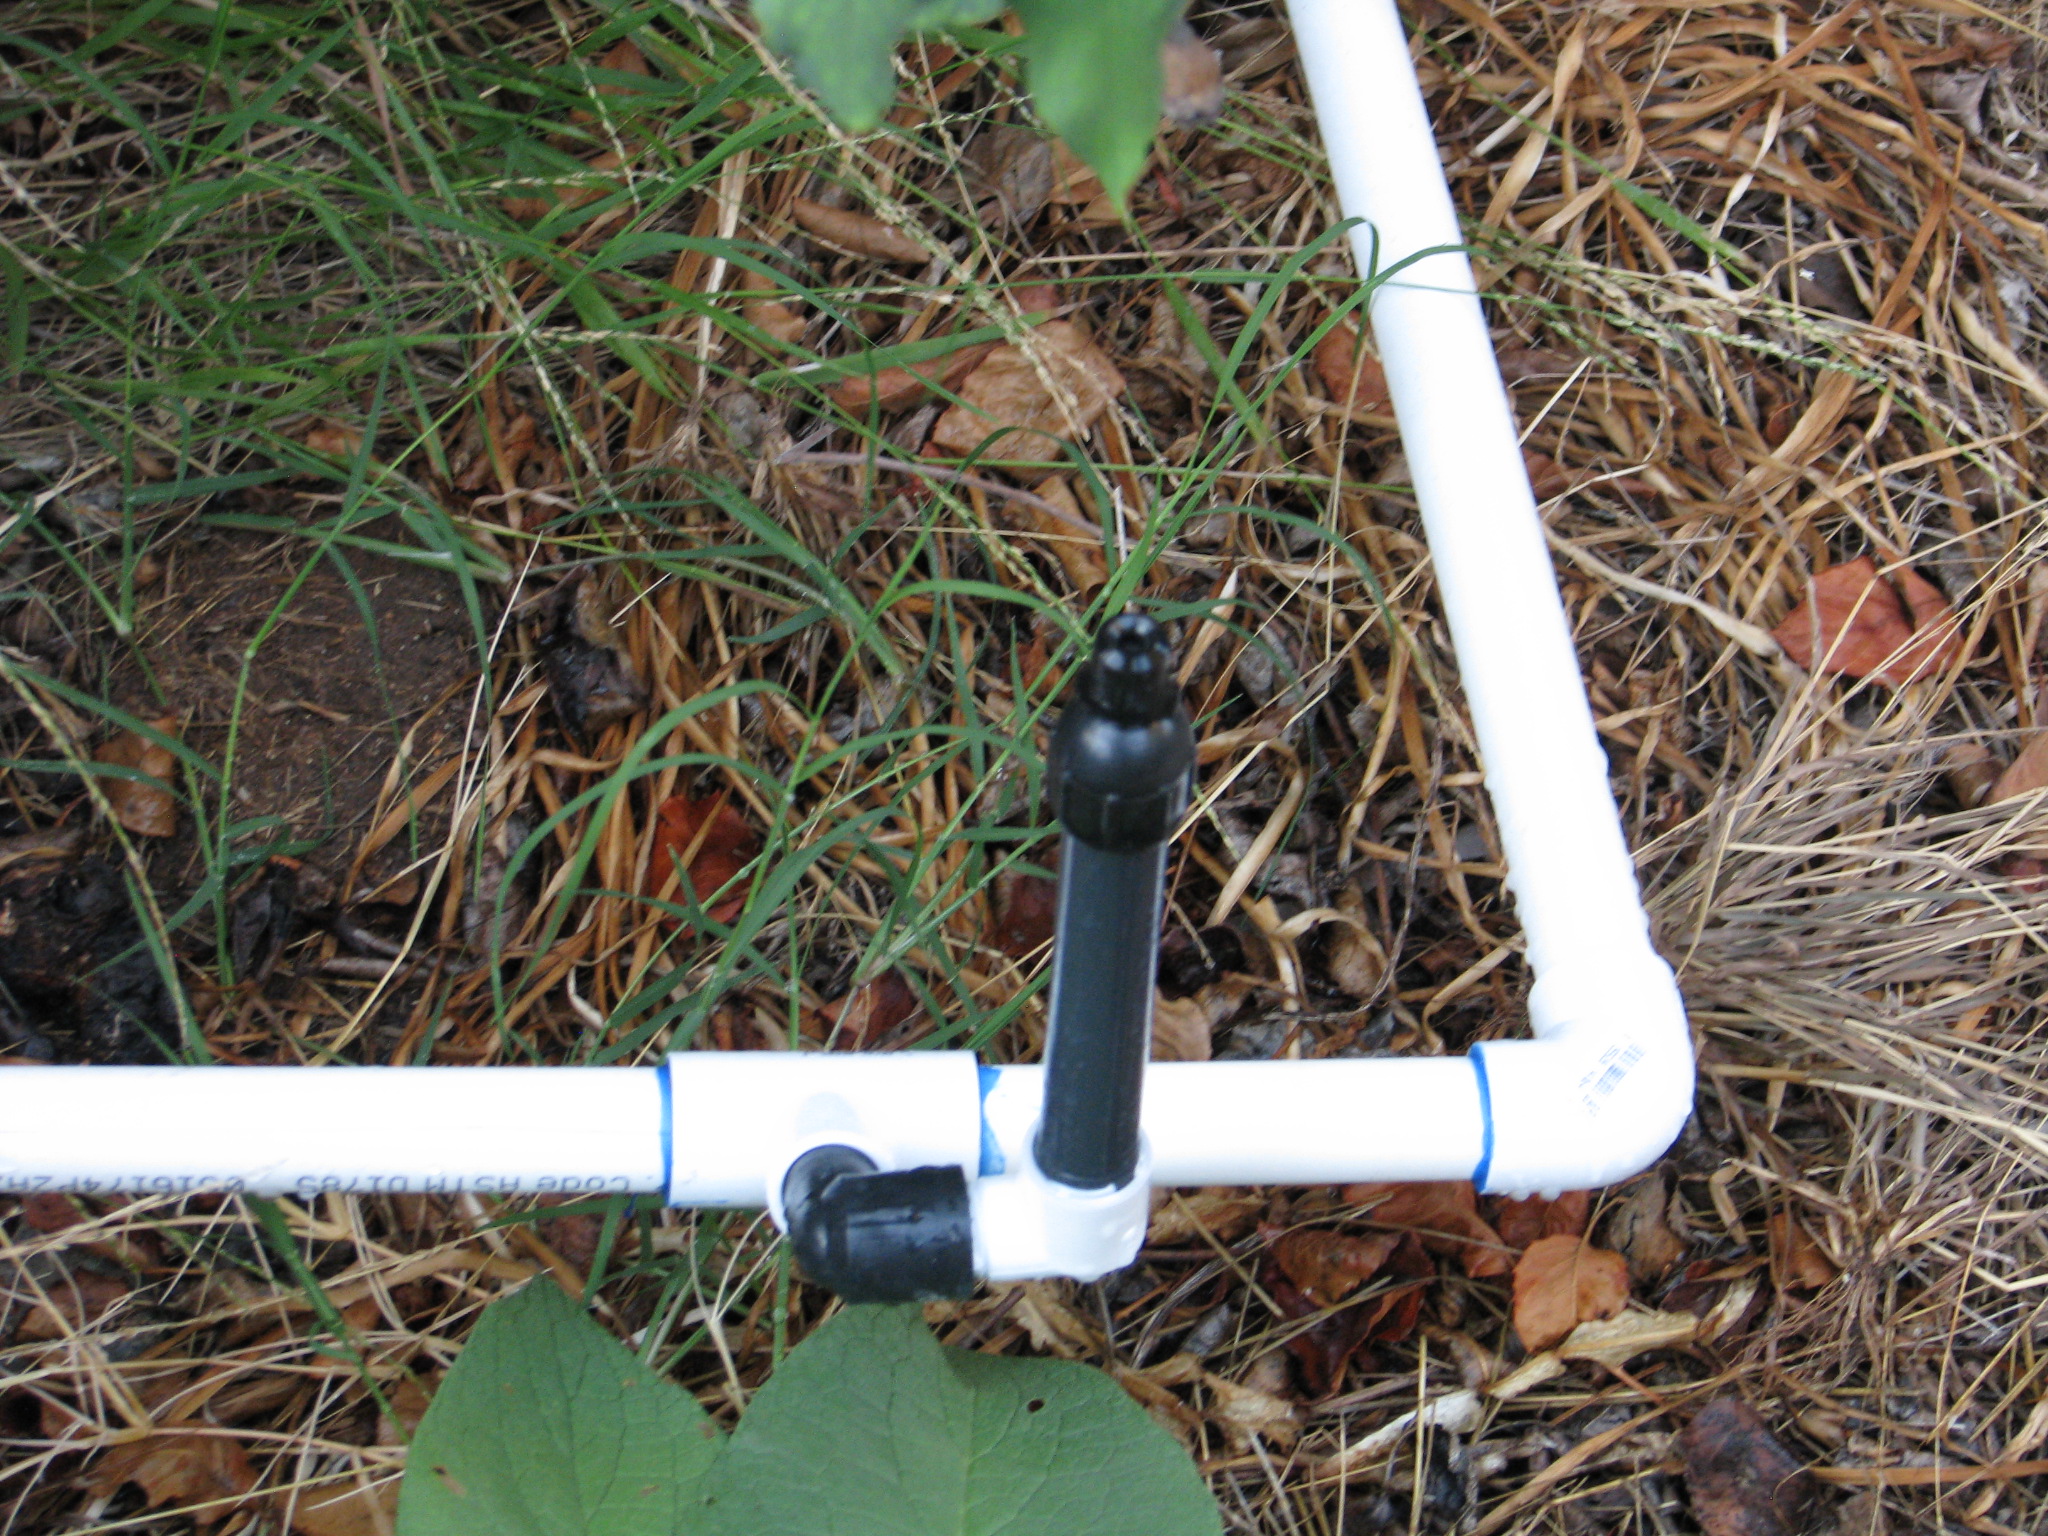
This sprayer is reduced from 3/4″ to 1/2″. So as you are laying out your garden and irrigation system, understand about slope, water pressure, volume of water and your water source. These factors all have large parts to play in the long-term success of your irrigation.
Next time I’ll discuss drawing up an irrigation plan.
You can read Part 1 Options here, Designing Your System Part 3 here , and Part 4 Conclusion here.
- Animals, Bees, Compost, Fungus and Mushrooms, Gardening adventures, Health, Heirloom Plants, Hugelkultur, Microbes and Fungi, Natives, Other Insects, Perennial vegetables, Permaculture and Edible Forest Gardening Adventures, Rain Catching, Recycling and Repurposing, Reptiles and Amphibians, Seeds, Soil, Water, Water Saving, Worms
Plant Guild #9: The Whole Picture
 When set in motion the many parts of a plant guild will create a self-sustaining cycle of nutrition and water. By understanding the guild template and what plants fit where, we can plug in plants that fulfill those roles and also provide for us food, building materials, fuel and medicine as well as beauty.
Plant the appropriate plants for where you are placing them, for your soil and water use, and stack them in a guild with compatible plants that you can use. The ground will be covered by a foliar density that will keep grasses and other weeds at bay and provide excellent habitat for a full range of animals and insects. By stacking plants in a guild you are bringing life and abundance back to your garden.
Does it still sound so complicated? Rather than try to learn the roles of all the plants in the world, start small. Make a list of all the plants you want to plant. List them under food bearing, culinary/medicinal herb, craft/building material, and ornamental. Then read up on those plants. What size are they at maturity? Do they need full sun, partial or full shade? If trees, do they have an upright growth so you may plant under them (stonefruit), or do they like to have their roots covered and don’t like plants directly under them (citrus and avocado)?
Citrus doesn’t like plants under its canopy, but does like plants outside its dripline. Are they annuals, perennials or biennials? What is their growth habit: sprawling, rooting where they spread, upright bushy, do they need support and can they cling or do they need to be tied to a support?
Will the plant twine on its own? Do they require digging up to harvest? Do they fix nitrogen in the soil? Do they drop leaves or are they evergreen? Are they fragrant? When are their bloom times? Fruiting times? Are they cold tolerant or do they need chill hours? How much water do they need? What are their companion plants (there are many guides for this online, or in books on companion planting.)
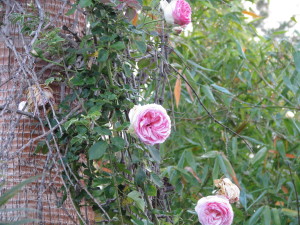
Do vines or canes need to be tied to supports? As you are acquainting yourself with your plants, you can add to their categorization, and shift them into the parts of a plant guild. Yes, many plants will be under more than one category… great! Fit them into the template under only one category, because diversity in the guild is very important.
Draw your guilds with their plants identified out on paper before you begin to purchase plants. Decide where the best location for each is on your property. Tropical plants that are thirsty and don’t have cold tolerance should go in well-draining areas towards the top or middle of your property where they can be easily watered. Plants that need or can tolerate a chill should go where the cold will settle.
Once it is on paper, then start planting. You don’t have to plant all the guilds at once… do it as you have time and money for it. Trees should come first. Bury wood to nutrify the soil in your beds, and don’t forget to sheet mulch.
Remember that in permaculture, a garden is 99% design and 1% labor. If you think buying the plants first and getting them in the ground without planning is going to save you time and money, think again. You are gambling, and will be disappointed.
Have fun with your plant guilds, and see how miraculous these combinations of plants work. When you go hiking, look at how undisturbed native plants grow and try to identify their components in nature’s plant guild. Guilds are really the only way to grow without chemicals, inexpensively and in a way that builds soil and habitat.
You can find the rest of the 9-part Plant Guild series here: Plant Guilds: What are they and how do they work? The first in a series. , Plant Guild #2: Canopy , Plant Guild #3: Sub-Canopy , Plant Guild #4: Nitrogen-Fixers, Plant Guild #5: Mining Plants, Plant Guild #6: Groundcovers, Plant Guild #7: Vines, Plant Guild #8: Insectiaries .
- Animals, Bees, Gardening adventures, Heirloom Plants, Natives, Other Insects, Perennial vegetables, Permaculture and Edible Forest Gardening Adventures, Seeds
Plant Guild #8: Insectiaries
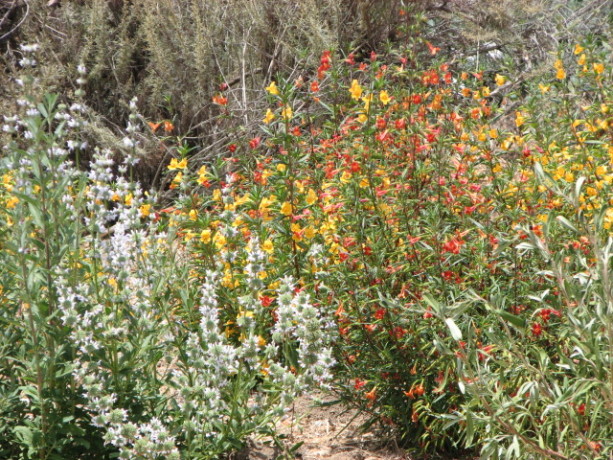
California native sage and penstemon make great insectiaries. Insectiaries are plants which attract lost of pollinators to the rest of your plant guild. We’re not just talking honey bees. Actually, what Americans raise and call honey bees, any bees from the genus Apis which are colonial honey-producers, are all European. Of course there are also the African honey bees which are loose in America, but their ‘hotness’ – their radical and violent protective measures – are not welcome. There are no native honey bees in North America.
What we do have are hundreds of species of bees, wasps and flies which are native and which do most of the pollenization in non-poisoned gardens and fields. Here in Southern California where everything is smaller due to the low rainfall we have wasps, flies and bees which range in size from the inch-long carpenter bees to those the size of a freckle. A small freckle. In fact the best native pollinator we have is a type of hover fly that is about the size of a grain of rice.

Hoverflies (Family Syrphidae) are one of our best pollinators. My daughter Miranda hosts our Finch Frolic Garden Facebook page where she has posted albums of animals and insects found here, with identifications along with the photos so that you can tell what is the creature’s role in the garden (you don’t need to be a member of Facebook to view it).
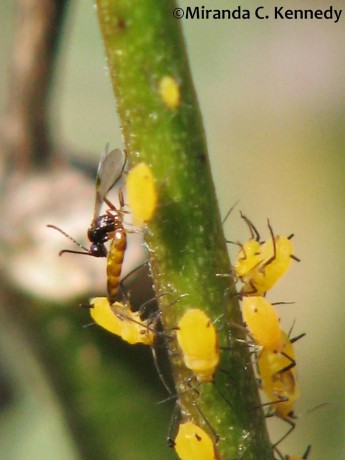
“This photo is of a minute parasitoid wasp (likely Lysiphlebus testaceipes) which preys on aphids. The aphids here are Oleander Aphids (Aphis nerii), which infest our milkweed bushes.” Miranda Kennedy We notice and measure the loss of the honeybee, but no one pays attention to the hundreds of other ‘good guys’ that are native and do far more work than our imports. Many of our native plants have clusters of small flowers and that is to provide appropriate feeding sites for these tiny pollinators. Tiny bees need a small landing pad, a small drop of nectar that they can’t drown in, and a whole cluster of flowers close together because they can’t fly for miles between food sources.
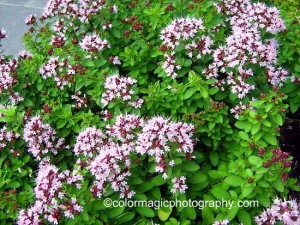
Oregano doesn’t spread as much as other mints do, and can be kept in check by harvesting. Look closely at the blooms in summer and you’ll see lots of very tiny insects pollinating! If you’ve read my other Plant Guild posts, you’ve already familiar with this, but here it goes again. You’ve heard of the ‘Three Sisters’ method of planting by the Native Americans: corn, beans and squash. In Rocky Mountain settlements of Anasazi, a fourth sister is part of that very productive guild, the Rocky Mountain bee plant (Cleome serrulata). Its purpose was as an insectiary.
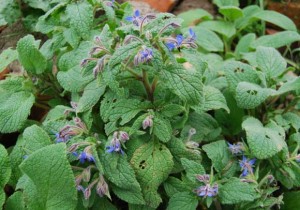
Borage is edible, medicinal, lovely and reseeds. So planting native plants that attract the insects native to your area is just as important as planting to attract and feed honey bees. Many herbs, especially within the mint and sage families, produce flowers that are enjoyed by most sizes of insects and are useful as food or medicine as well.

You’ll remember our old friend comfrey, which is also a mining plant and great green fertilizer! It also is a dining room for bumblebees. If you like flowers, here’s where you can possibly plant some of your favorites in your guild and not feel guilty about it! Of course, aesthetics is important and if you aren’t enjoying what is in your garden, you aren’t doing it right, so plant what makes you happy. As long as its legal.
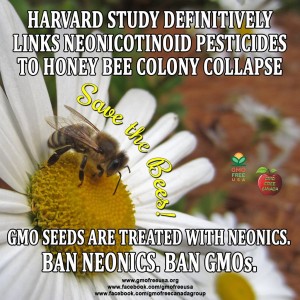 Of course be sure to grow only non-GMO plants, and be ESPECIALLY sure that if you are purchasing plants they are organically raised! Although large distributors such as Home Depot are gradually phasing into organics, an enormous amount of plants sold in nurseries have been treated with systemic insecticides, or combination fertilizer/insecticides.
 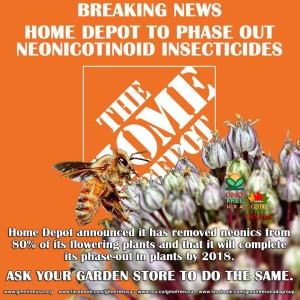 Systemic poisons work so that any insect biting the plant will be poisoned. It affects the pollen and nectar as well, and systemics do not have a measurable life span. They don’t disappear after a month or so, they are there usually for the life of the plant. If your milkweed plants don’t have oleander aphids on them, be wary! If the plants sold as food for pollinators and as host plants don’t have some insect damage to them, beware! They WILL sell you ‘butterfly and bird’ plants, but also WILL pre-treat them will systemic insecticides which will kill the Monarchs and other insects that feed on the plant, and sicken the nectar-sipping birds.
  Even those plants marked ‘organic’ share table space in retail nurseries with plants that are sprayed with Malathion to kill white fly, and be sure that the poison drift is all over those organic vegetables, herbs and flowers. Most plant retailers, no matter how nice they are, buy plants from distributors which in turn buy from a variety of nurseries depending upon availability of plants, and the retail nurseries cannot guarantee that a plant is organically grown unless it comes in labeled as such. Even then there is the poison overspray problem. The only way to have untainted plants is to buy non-GMO, organically and sustainably grown and harvested seeds and raise them yourself, buy from local nurseries which have supervised the plants they sell and can vouch for their products, and put pressure on your local plant retailers to only buy organic plants.
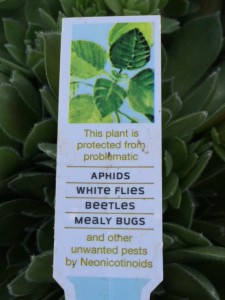
Talk about a sales twist! They don’t mention that it kills EVERYTHING else! When public demand is high enough, they will change their buying habits, and that will force change all the way down the line to the farmers. No matter how friendly and beautiful a nursery is and how great their plants look, insist that they prove they have insecticide-free plants from organic growers (even if they don’t spray plants themselves). Systemic insecticides are bee killers. And wasp and fly killers as well.
Of course many of the other guild members will also attract pollinators, and even be host plants for them as well. With a variety of insectiaries, you’ll receive the benefit of attracting many species of pollinator, having a bloom time that is spread throughout the year, and if a plant is chewed up by the insect it hosts (milkweed by Monarch caterpillars, for instance) there will be other blooms from which to choose.
Placing fragrant plants next to your pathways also gives you aromatherapy as you pass by.
And flowers are pretty. So plant them!
You can find the entire 9-part Plant Guild series here: Plant Guilds: What are they and how do they work? The first in a series. , Plant Guild #2: Canopy , Plant Guild #3: Sub-Canopy , Plant Guild #4: Nitrogen-Fixers, Plant Guild #5: Mining Plants, Plant Guild #6: Groundcovers, Plant Guild #7: Vines, Plant Guild #9: The Whole Picture.
