Compost
- Compost, Gardening adventures, Hugelkultur, Other Insects, Permaculture and Edible Forest Gardening Adventures, Pets, Rain Catching, Soil, Worms
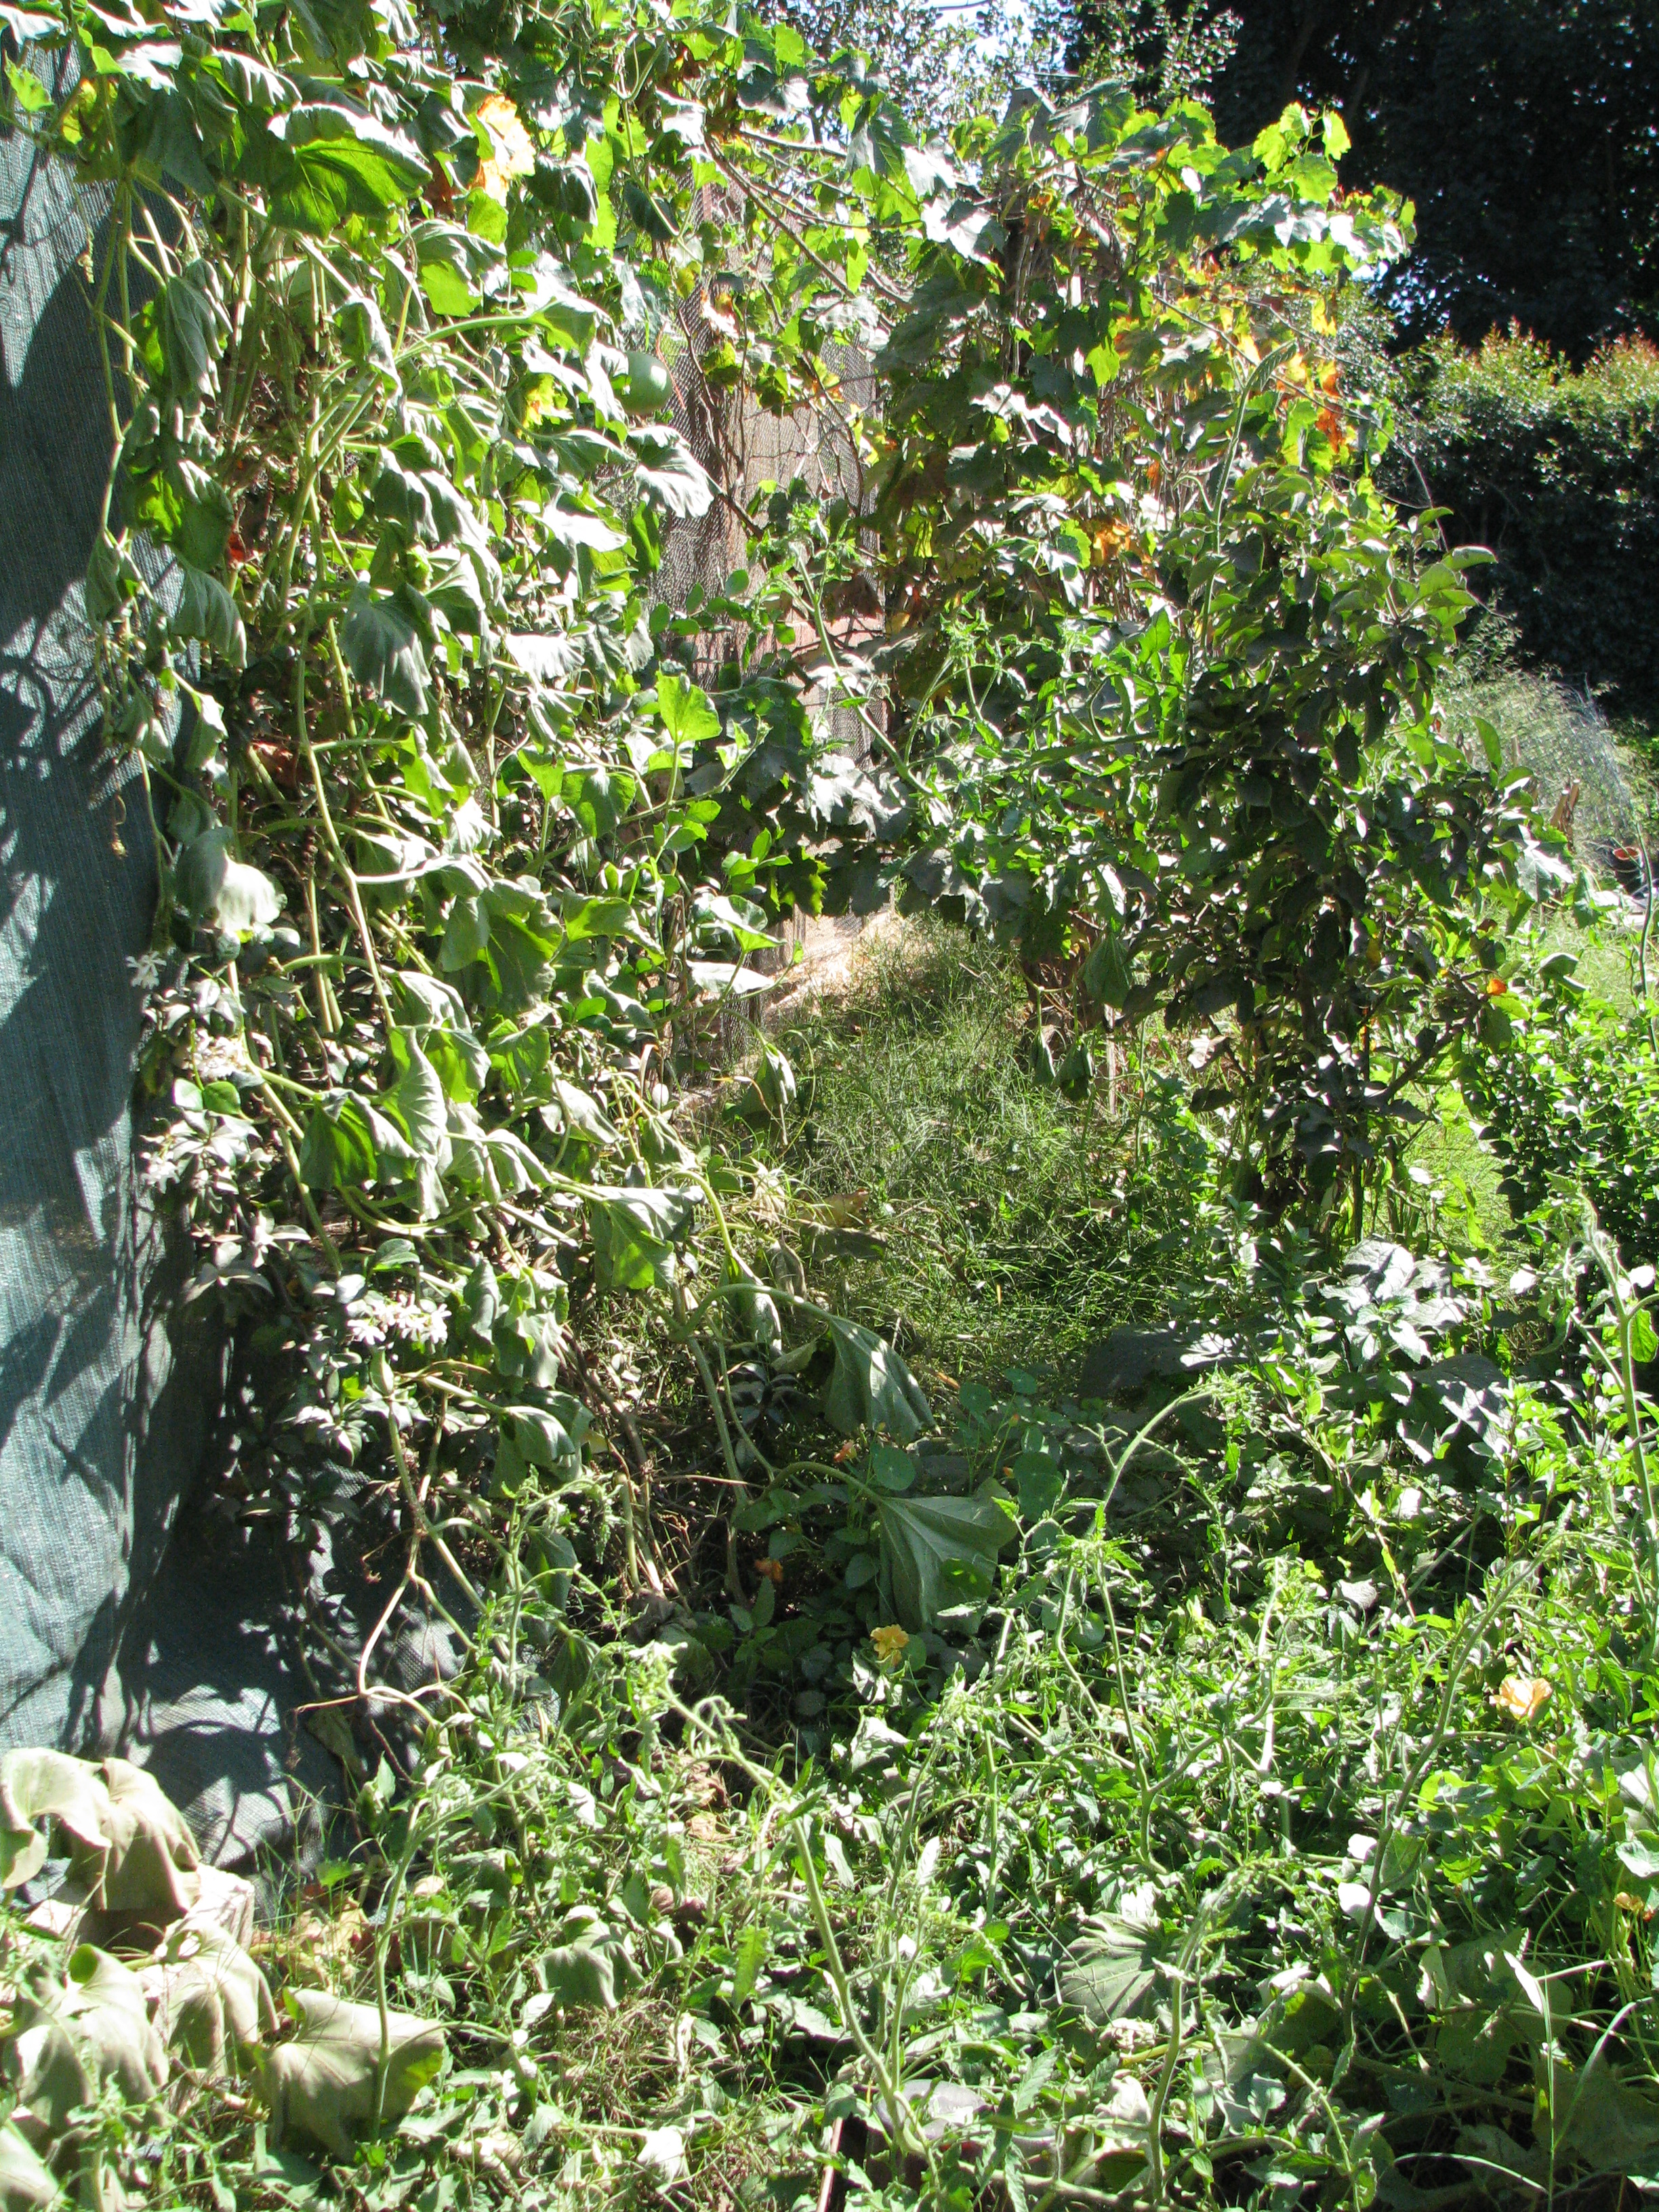
The Sunken Bed Project, Part Two
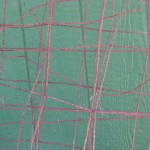
Old wire can be buried! 
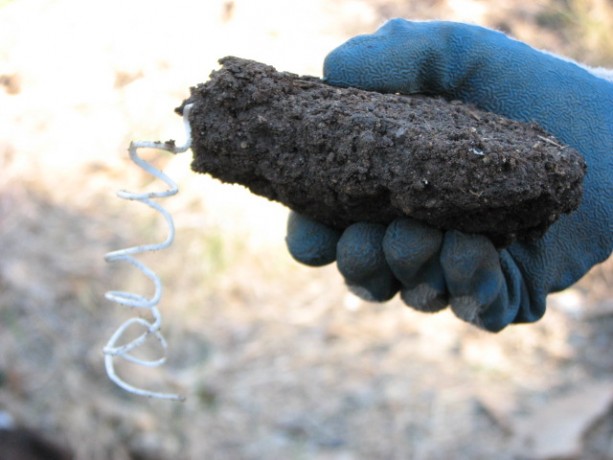
Remember the trenches? We lined the trenches with old rusty wire, to rot, add iron to the soil, and discourage rodents. Mostly just to get rid of it. 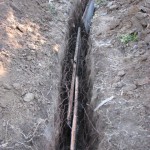
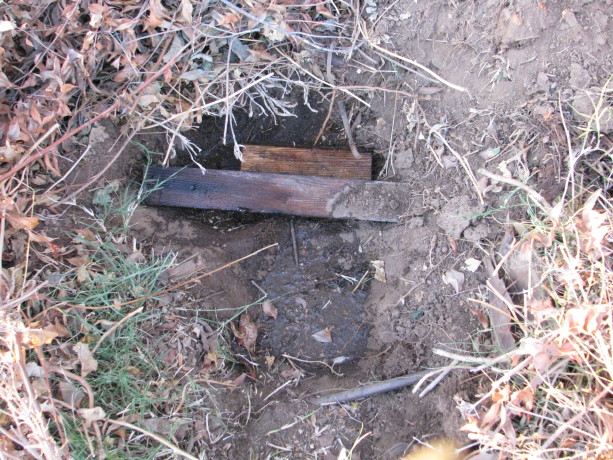
Inside the wire we lay old wood; in this case, the half-rotten sides of the old raised beds, nails and all. 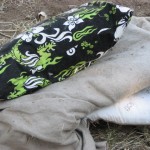
Fabric can be buried, too! Pet bedding no longer fit for man nor beast. Except for microbes of course. 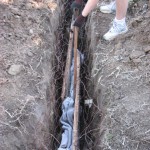
Around the wood we packed old fabric, most of which had been dog or cat bedding after long use in the house. 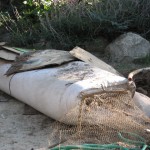
There was also this futon! It had been a bed for years, and then it was the bed for the dogs for years. And for some mice. 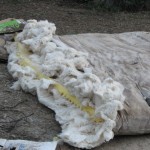
It took a little cutting and pulling to separate the cotton batting and the foam. Although the foam isn’t made from a natural material, it will eventually rot, but meanwhile will function like a ginourmous buried sponge for rainwater! 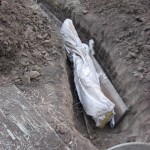
The futon slices layed in the trench. Yipee! The stinky old futon is gone! 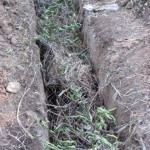
Lots of branches, twigs, and woody materials were added, as was some year-old humanure, urea, and fallen limes. Nasty prickly lime tree branches, too. Serves them right for scratching me! 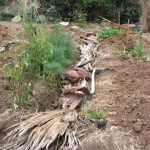
After layering the trench materials with soil I used palm fronds for the top organic layer. 
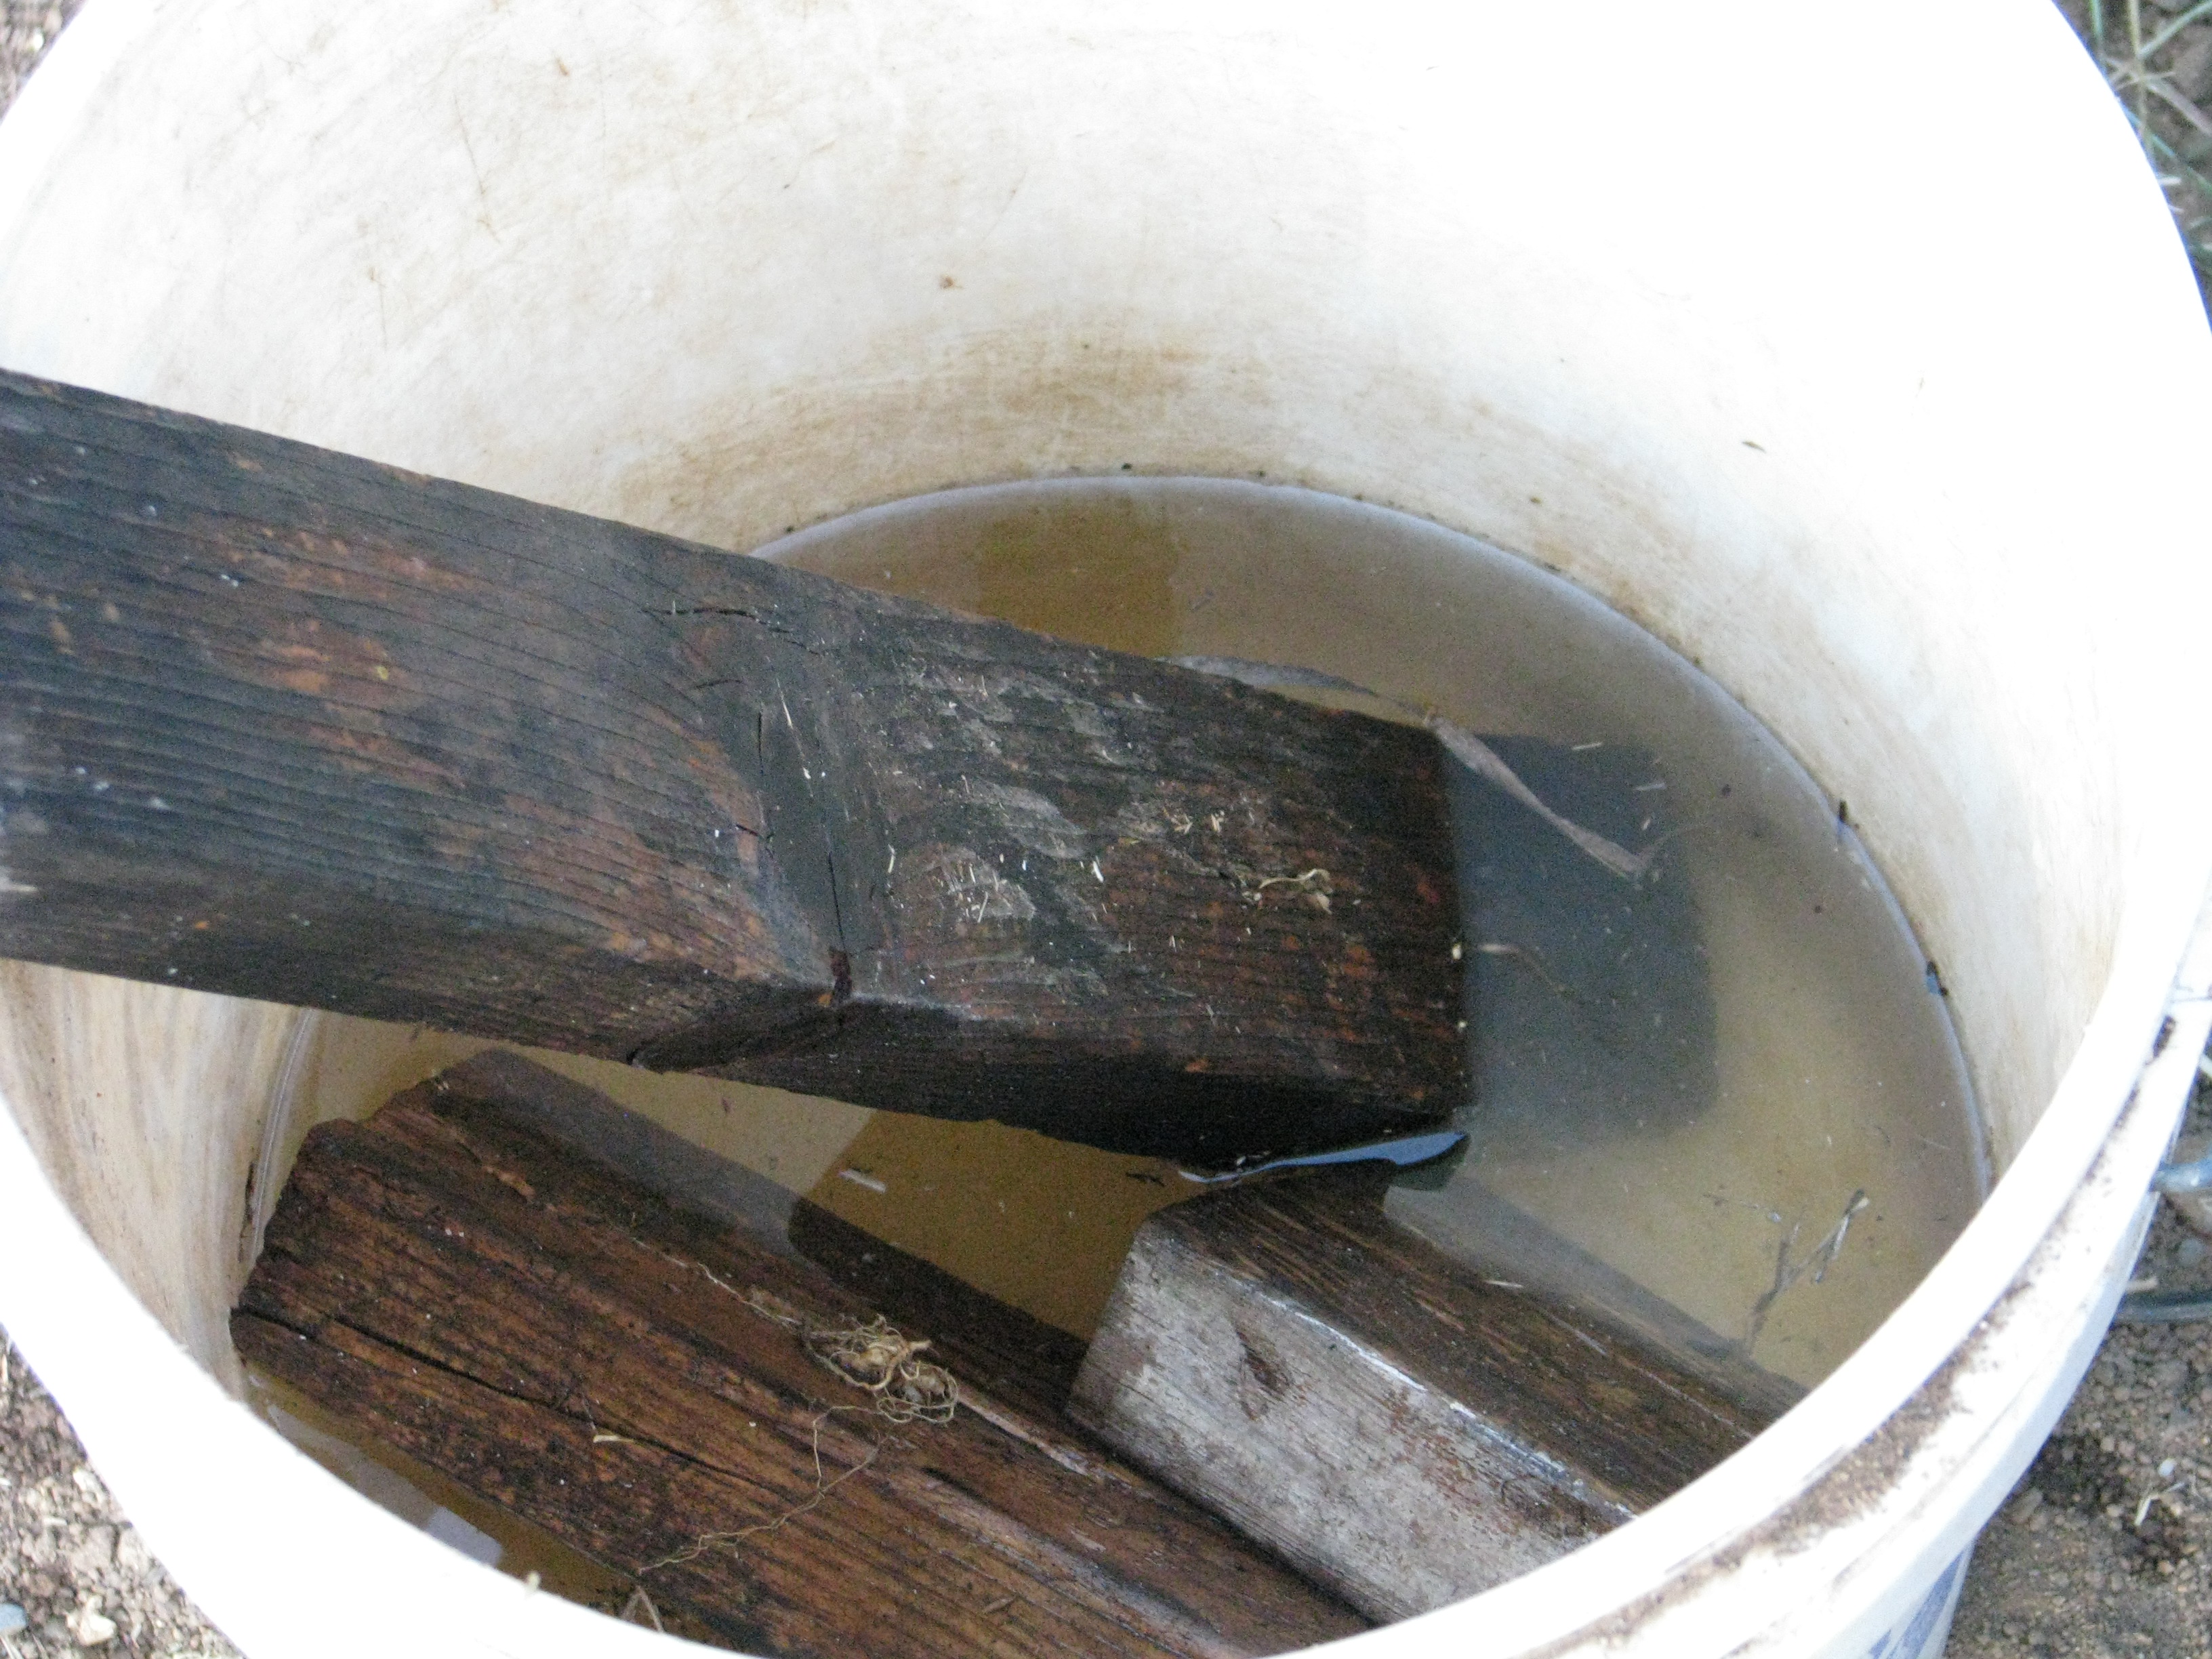
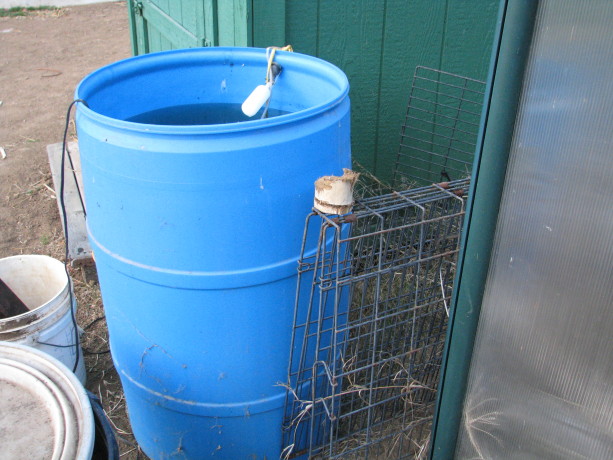
Every step was watered in. Our 700-gallon water tank, formerly an organic fertilizer tank which Jacob managed to have donated, catches some of the roof rainwater. It has more than enough to water in this project, and then if it ever rains again the tank will be empty and ready for fresh water. 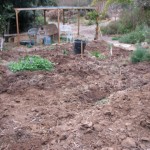
The trenches filled in. Futons, scrap wood, woody bits, old stinky fabrics, manure… its all buried and ready to turn the clay into a microbial wonderland. 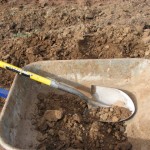
We hauled chunks of extra clay up the hill and staged it by the upper pond, which needs to be resealed. Good leg exercise. 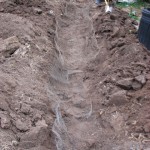
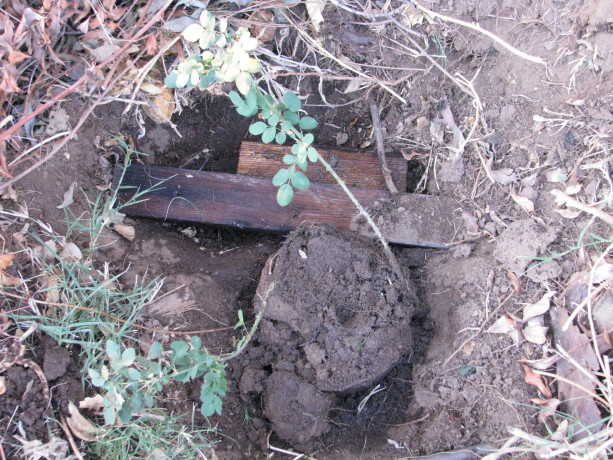
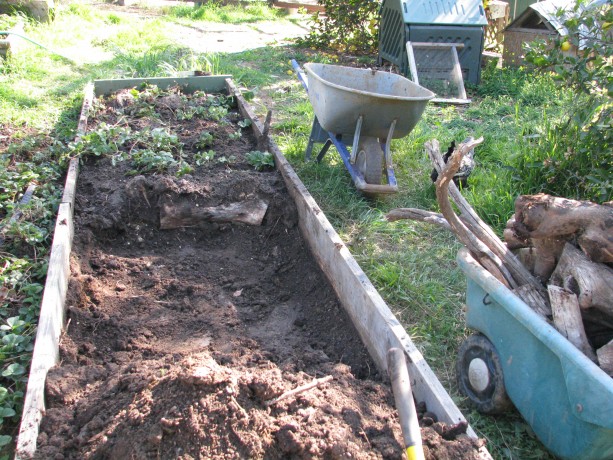
The long hugelkultur strawberry bed was above ground, so it had to be reworked. We dug out the wood, wrestled out the wire, dug down about a food then lay the wire back down. 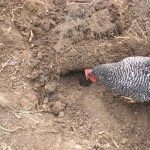
There were gopher tunnels under the wire where they had come up and smashed their little noses against the wire. 
The wood that had been buried for a year was full of life! There were many very cool fungi. 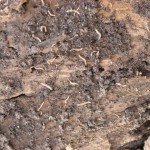
Tiny centipede-type decomposers eating away at the wood, all of which had been underground. 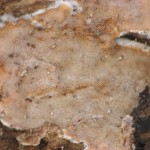
More great fungus. 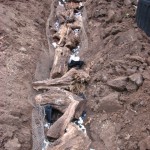
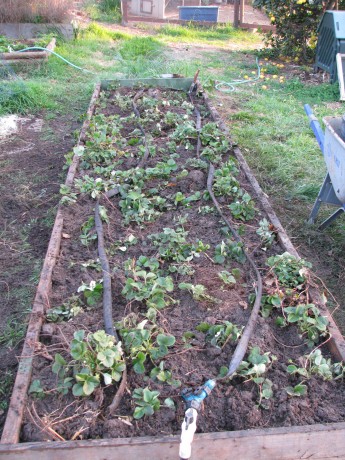
On top of the wire went some more old textiles, then most of the old wood. 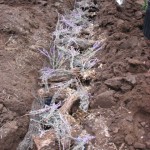
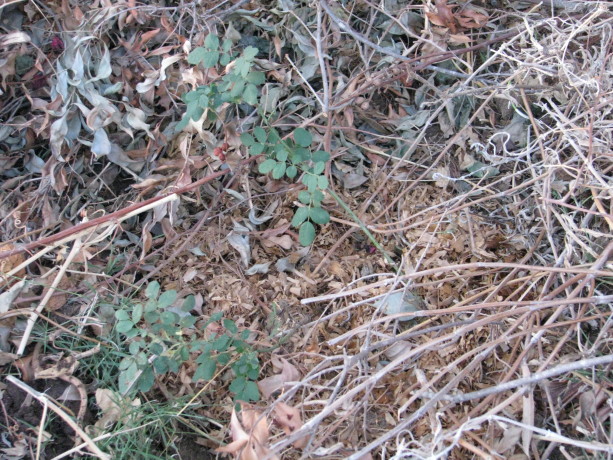
Bunches of herbs that had been gathered for wreathes and not used were tucked in around the wood. Worms love thin woody stuff. Pigeon guano, thanks to our neighbor who delivers, was sprinkled over it all. 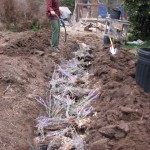
Everything was well watered with rainwater, and then covered up. Next time: design, replanting asparagus, and perhaps even the final product! - Compost, Gardening adventures, Hugelkultur, Permaculture and Edible Forest Gardening Adventures, Rain Catching, Soil, Vegetables, Water Saving
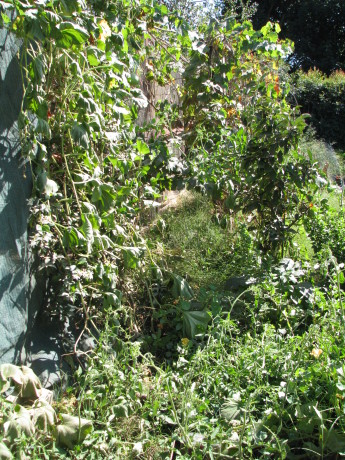
The Pros and Cons of Raised Beds
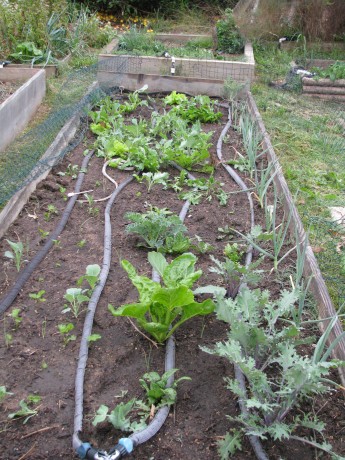
The raised beds. Raised garden beds can be wonderful things. They also can be inappropriate. I’m in the process of taking ours down and replacing them with… well, I’ll describe it later on. Let’s get back to the pros and cons of raised beds.
Here are some of the pros:
Raised beds look just great. They are neat, tidy, organized and restful to the eye.
If raised high enough they are accessible to those who can’t work on the ground or bend over, and to those who are non-ambulatory.
If lined with hardware cloth they keep gophers and mice from tunneling under your food and making it magically disappear.
They help with some weed control.
If you live in a rainy area, they help with drainage.
If you have miserable soil, you can garden anywhere by building a raised bed without having to dig.
If you live in a cold area, depending upon what materials you use for the sides of the raised beds you can tap into the thermal heat and have warmer soil longer.
You can build reusable covers for the beds and turn them into cold frames, or shade structures.
Now here are some of the cons:
You need to fill raised beds with a lot of soil, and if you have to buy it, that is a large expense. The soil will compact and disappear over the course of a year, so you have to keep topping up the beds to keep the soil level high. Heavy work that is expensive.
Wire underneath the raised beds will last a few years and then will be compromised by rodents, so the bed will have to be emptied and rewired if rodents are a problem.
If you live in a warm, dry climate, the sides of the raised bed acts like a clay pot. It will wick moisture from the dirt and heat the dirt up so that plant roots around the perimeter will cook.
If you live in a warm climate you have to pour on the water because of the point mentioned above; a raised bed dries out much more quickly than in-ground gardens.
We are wealthy in clay. A Bermuda grass root hangs like a piglet’s tail from this clump. I built raised beds from old bookshelves many years ago, and that was my only veggie garden on the property as I raised my children. I’d grown plants in-ground before that, trenching and turning, and losing the fight against gophers and Bermuda grass. The raised beds were lined with wire. For awhile it worked, but the Bermuda grass took over and infiltrated all the beds. The wire began to rot and rodents chewed away at the sweet potatoes. Worst of all, the soil level would decrease, and since the beds weren’t very deep, then root veggies would grow into the wire and I’d lose half of them as they broke off during the harvest. I couldn’t keep up with refilling the beds. I composted in place, buried wood and vines, and that worked well, but I still needed to add compost. The beds drank up water during our long, hot summers.
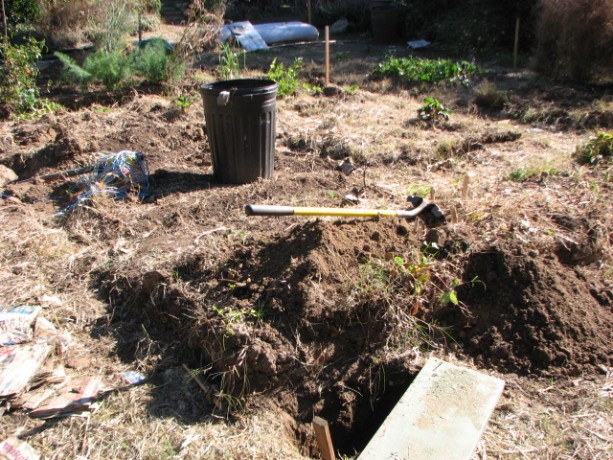
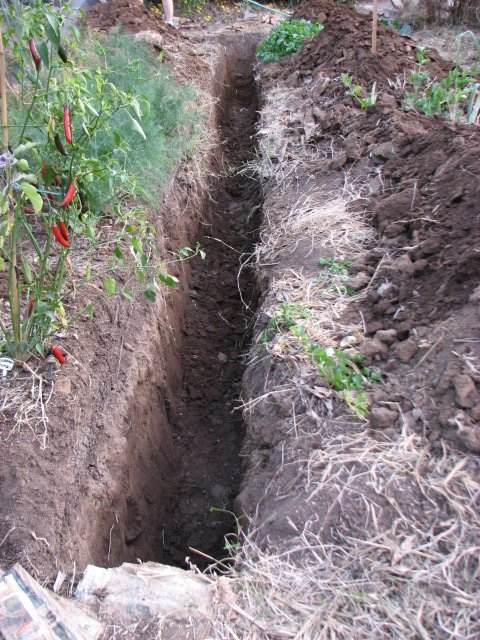
The trenching begins. This summer I realized that I was using a gardening technique that was best suited to rainy climates. Here in the dry Southwest, a traditional gardening method was to plant in sunken beds. We need to capture water, not make it run off. Also, the Bermuda grass became so invasive that I realized that only sheet mulching would make any difference in controlling it.
Of course I decided that my daughter and I couldn’t possibly have an easy winter, but must rip out the beds and start digging.
In the trenches. I’m an advocate of no-dig gardening; however sometimes you have to dig bad soil to create good soil. The no-dig policy can happen once the infrastructure is in place. So here’s what I’m planning on doing: I’m combining hugelkultur with sunken gardens and sheet mulching to create what I hope will be a veggie garden with a much lower water consumption, and weed-free.
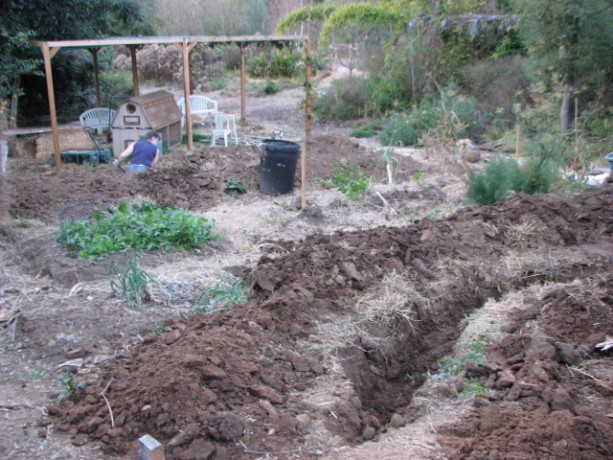
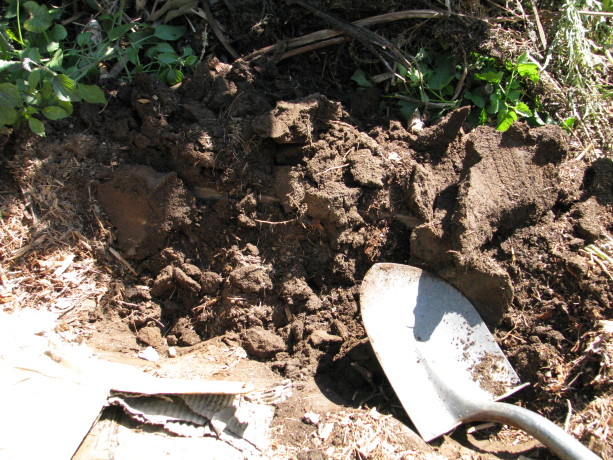
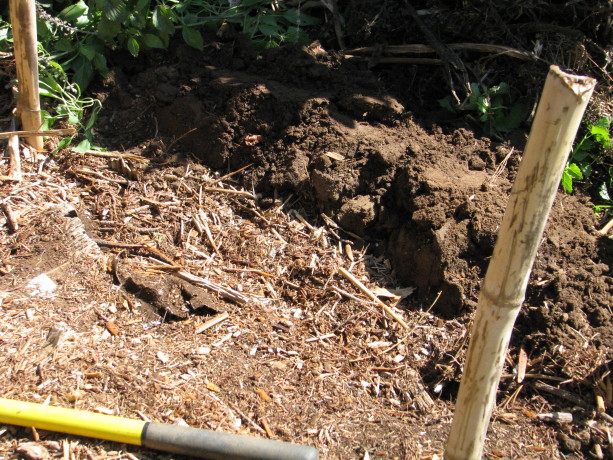
First we determined the direction of water flow down the hill, and planned on creating trenches that would capture that water. The trenches, or swales, would need to be level on the bottom so that any water flowing in from the downhill side, would travel all along the swale even to the drier side, where the surface soil was higher. We created a bunyip to estimate the difference in slope between the top and bottom of the garden. Although I had drawn up intricate plans for a square garden, that shape just wouldn’t work so we went with a rectangle. Then we began to dig. The first ten inches wasn’t bad, but after that we hit clay. I had to buy a mattock. I also ended up icing my back for a couple of days. Some of the clay we’ll save for use on any future earthworks we may want to do, and some we’re saving for an artist friend.
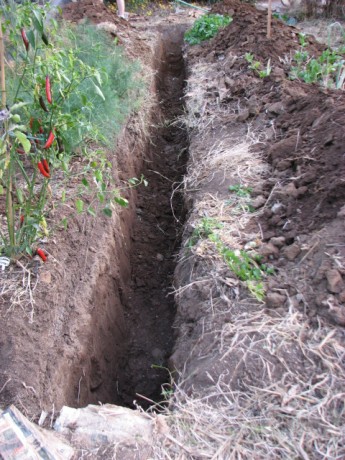
The soil was good for about ten inches, then we hit clay. The trenches are two feet deep, and about one to one and a half feet wide. It is amazing how you start out large, and then after a few very hot afternoons scraping clay and throwing it up and over four feet, the trenches become more narrow. My plan is to fill the bottom foot of the trenches with old wire, wood, branches, old textiles and other biodegradable debris. The old wire will rot, and will also help repel gophers. On top of all this will be layered some of the clay, and watered in with compost tea brewed in the 700-gallon water tank that is full of rainwater from the last rain (two months ago!). On top of that will be good soil, smoothed below the surrounding surface level. Water from the road will be diverted into the swales, which will allow it to flow across the garden and be absorbed by the fill materials. But what about the Bermuda grass? There isn’t a mountain of cardboard all over my garage for nothing! The entire garden will be sheet mulched, and all veggies will be planted through the cardboard and newspaper. The existing asparagus bed will need to be carefully relocated, but everything else can either be harvested or dug under.
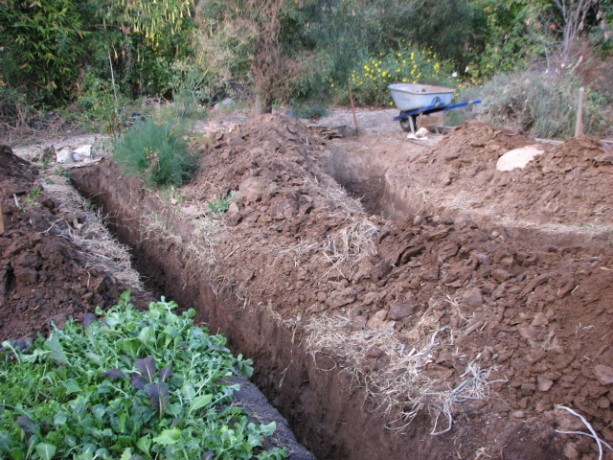
These first two trenches will collect rainwater from the pathways and channel it the length of the garden. That’s the plan, anyhow. I’ll let you know how it goes.
- Animals, Arts and Crafts, Chickens, Compost, Gardening adventures, Other Insects, Permaculture and Edible Forest Gardening Adventures
A Hen’s Garden
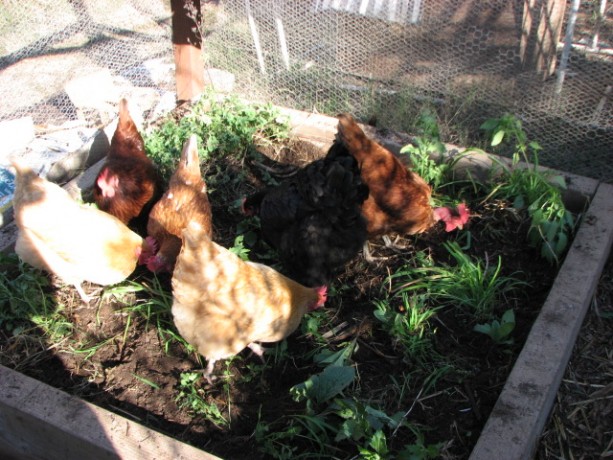
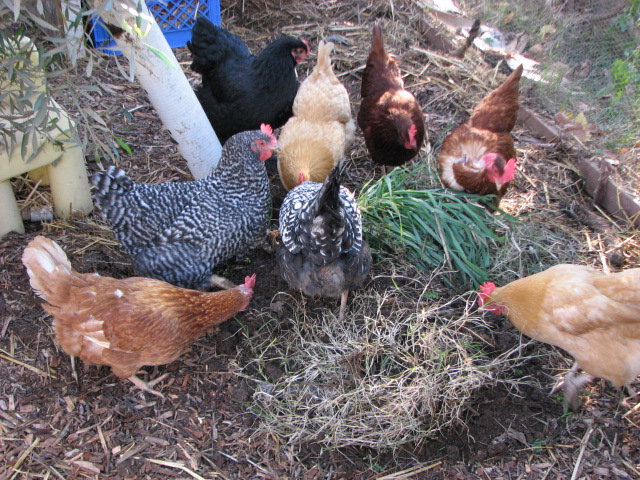
The girls helping prepare the soil before planting. Chickens are primarily bug eaters who also snack on greens. Feeding hens grains began with the industrialization of agriculture. No one cutting grain with a hand scythe would spend all that time and energy to feed hens.
My hens live in the Fowl Fortress, to protect them from coyotes and hawks (our hawks won’t be able to carry one away but they could tear them up pretty badly). After losing Chickpea to a coyote while we were only so many yards away made me eliminate any open foraging time for the girls. This wasn’t healthy for them. I haven’t invested in a solar electric fence yet, to make a ‘day’ coop for them to forage in relative safety, but that may be on my investment list for the new year. The largest problem is poor design in the garden, which I’m trying to remedy as easily and inexpensively as possible. I didn’t know how to fit in chickens, or where the garden was going when it began nearly three years ago. I have weedy areas, and I have chickens. To bring them together safely is the problem.
Sometimes we bring the hens into the fenced yard with our 100-pound African spur thigh tortoise (Gammera); however, that yard is also where some of our cats live. We’re not sure if Moose, Chester and Cody would behave themselves around hens, so unless we prevent the cats from leaving the house for the day, then we can’t carry the hens into this grassy yard to graze.
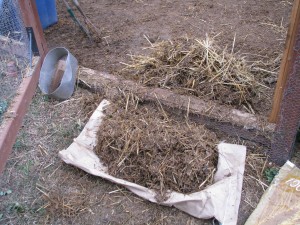
Inside the Fowl Fortress there is a layer of muck composed of old straw, the hard bits of veggies and fruit fed to the hens, old scratch and lots of chicken poo, made into an anaerobic muck by recent rains. Once turned up we discovered lots of the grain had sprouted, which the girls sucked up like noodles. This muck was also turning the hard ground below into prime soil. Why couldn’t we use this muck in a more productive manner?
If I couldn’t bring the hens to the garden, then I thought I’d bring the garden to them. Inside the Fowl Fortress I propped up four big boards in a square, then filled it with some of the rotting straw and muck from the coop. I topped it with Bermuda grass – laden soil from one of my raised beds. This was the bed, in fact, where I composted in place for the past year. What rich, chocolate-colored, worm-laden soil! If not for the invasive grass it would be perfect.
In this new garden, along with the Bermuda grass, my daughter and I planted oregano we divided from one of our plants, nettles, borage, some other kind of grass weeds that had sprung up after our Fall rain, plus we scattered corn and mixed organic grains which we feed the hens and pressed the seed into the ground.
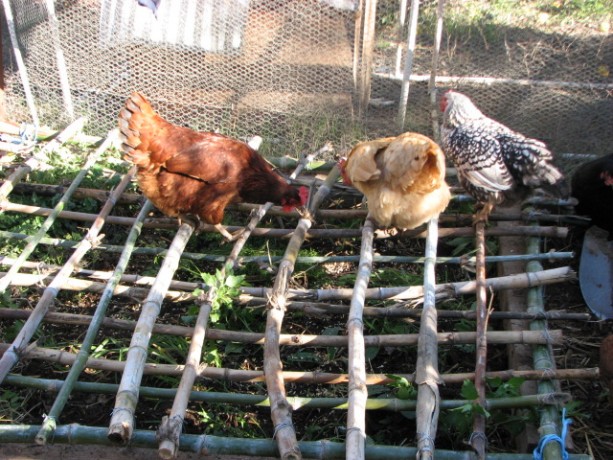
The hens can graze, but can’t uproot the plants. Miranda wired together a bamboo lid out of scrap pieces. The idea is that the plants can grow up through the lattice of the bamboo lid and the hens can stand on it and eat greens. Oregano is a good medicinal herb, as are nettles, which reputedly encourage egg laying.
I also dig up chunks of weeds or Bermuda grass in this mercifully looser post-rain soil, and throw the whole mess into the Fowl Fortress and let the girls forage and exercise those strong legs by kicking through the heap. It is only logical that the strong kicking motion of foraging hens strengthens their bodies so that they have fewer egg-laying illnesses (egg-binding primarily), and of course their nutrition is much better with greens and bugs

This is by no means a permanent solution, but until I find the right design that keeps healthy, safe hens and eliminates weeds without a lot of work, then a chicken garden and weed-tossing is the way to go.
You May Also Like

Native Insects and IPM
- Animals, Chickens, Cob, Compost, Composting toilet, Fruit, Gardening adventures, Giving, Grains, Health, Herbs, Houses, Hugelkultur, Humor, Living structures, Natives, Natural cleaners, Permaculture and Edible Forest Gardening Adventures, Ponds, Rain Catching, Recipes, Seeds, Soil, Vegan, Vegetables, Vegetarian, Worms
San Diego Permaculture Convergence, Nov. 9 – 10, 2013
There is a fantastic, information-packed permaculture convergence coming up at the beautiful Sky Mountain Institute in Escondido.
 It will be two days packed with great information for a very reasonable price; in fact, scholarships are available. Check out the website at convergence@sdpermies.com. On that Sunday I’ll be teaching a workshop about why its so important to plant native plants, how to plant them in guilds using fishscale swales and mini-hugelkulturs. Come to the convergence and be inspired!
You May Also Like
Native Insects and IPM
-
Tiny Hugels and Fishscale Swales: Small water catchment
In permaculture it is recommended to design long level, contoured swales throughout your property to catch rainwater. Long swales, however, won’t work when the property is small, or if it is already mostly planted, or if the hiring of large equipment or teams of diggers isn’t feasable, or if long swales aren’t part of a lovely garden. What then?
In the gardens for which I’ve written consultations I’ve recommended what Geoff Lawton (of the Permaculture Design Institute of Australia) calls fishscale swales. Small curved swales staggered up a slope so that rainwater can be caught and held. One overflows into another, just like a pinball machine.
Any swale, no matter how small, will help hold water. I put them in just above each plant, the width of the dripline of the plant. I also combine them with burying wood (hugelkultur). I don’t have a lot of branches or logs, but I do have a lot of extra pieces of lumber salvaged when the sheds were dismantled. These pieces are untreated (no paint or pressure treatment), and if they have nails and screws in them, even better! The hardware will mineraize the soil as it decomposes. This wood is already very old and dry, and thus will soak up water a treat. If you soak the wood in water, compost tea or a microbial brew before you bury it, that’s super. If not, don’t worry about it. The idea is that rainwater will accumulate in the swale, percolate into the soil and into the wood below it. There the wood will hold water as it breaks down, gradually irrigating and fertilizing the plant below.
Wood can be placed on top of the soil and buried as the swale is dug, or it can be dug into the ground and covered. The swale is filled with mulch o help retard weed growth; if by a walkway the scale filled with mulch then it may be walked on without fear of a twisted ankle.

This area right above the fig is small, but large enough to catch water. Here I have a Mission fig that has been slow to grow due to irregular watering (NOT my fault!)
I laid out a board right on the ground. Figs like a little water and this area has been on the dry side. In the direction from which rainwater would flow, above the tree, I laid out a few pieces of old lumber, nails and all.
Brewing microbial tea. I happened to be brewing a large batch of microbial tea, so I threw the wood into a bucket of the stuff and let it absorb some.

I soaked the wood in microbial tea for a few minutes. They happen to be the width of the existing dripline of the tree; again, any swale and and wood will help. I dug a small swale the same length, a shovel’s width wide, and threw the dirt on top of the wood.
I dug a swale, using the dirt to cover the board. Then I filled the swale with mulch and voila! the job is done. This will now catch rainwater, hold moisture, and fertilize the tree, as well as finding something useful for junk lumber. Burying the wood sequesters the gasses released in decomposing materials into the soil rather than the air thus helping reduce greenhouse gasses.
I filled the swale with mulch to keep down weeds. Presto! Done! Using fishscale swales and mini-hugelkultur beds when planting most native plants can really help them become established in a low-water situation. This wild rose (rosa rugusa) is being planted in a very dry area, and I wanted to bury the wood below soil level to keep it closer to the roots of the plant. I dug a small trench and laid out some boards, nails down.
I dug a little ways into the dirt and laid out the soaked wood. Then as I dug the swale I layered the wood with dirt and a couple more boards until buried. I filled in the swale with mulch and planted the rose on the downhill side.
Here you’ll see the rootball of the new wild rose in front of the wood. I threw in some coyote scat since it was lying there so conveniently. There’s quite a microbial boost for the rose!

Some coyote scat went in, too. Sorry! Remember that here in a dry climate we need to plant so that the root ball is even with the ground, or make the whole catch basin a little lower. Otherwise the roots will dry out. Planting so that the root ball is a little above the ground is a common practice is rainy areas.
Here is the planted rose, with mulch pulled up around it. Remember native plants have communities. Certain plants grow with certain others because they are mutually beneficial. This rose was planted within the dripline of an Engelmann oak, one place it is found.

Many native trees like the company of other natives. I planted this rose just outside the dripline of this oak, one of the places it would naturally grow in the wild. So swales don’t have to be gigantic earthworks projects. They can be small and alternated down a slope, or just individual ones above new or existing plants. Throw some wood into a mini-hugel between the swale and the plant and you’ll water less, fertilize naturally, and compost leftover wood. Don’t forget cotton clothing and bedding… that all works, too!
.
-
Fruit Tree Guild, Revisited
In June I blogged about how to plant a fruit tree guild, and gave the example of one I was planting by the Fowl Fortress. I thought I’d show you how it matured.

Apple tree in trouble: heavy clay thoroughly shot through with Bermuda grass. Yuck! This was the area four months ago. Heavy, sticky clay taken over with Bermuda grass. A struggling apple tree begs for my help. A star jasmine climbs the side of the Fowl Fortress. A portion of the brown subterranean irrigation system lies aboveground.
Using permaculture design, I created a plant guild with herbs and vegetables that would build the soil and help the apple tree.

A guild is planted. Strawberries went around the trunk of the tree for groundcover and grass competition. Comfrey, a valuable nutrient accumulator in there, too, for slash and drop fertilization. There is also a perennial basil, marjoram, gourds, golden runner bean (a nitrogen fixer), garlic chives, a prostrate rosemary and a tomato, along with other flower seeds. This is how it looks now from the same vantage point:
The guild in September. 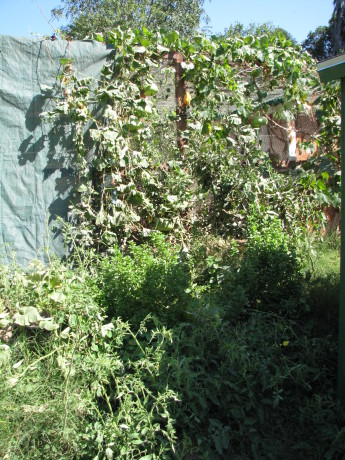
Layers of plants protect the ground and produce food. 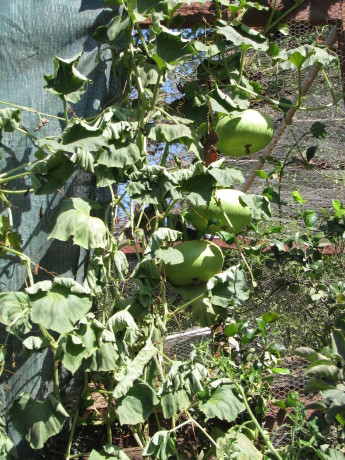
These gourds can be dried and made into bowls. 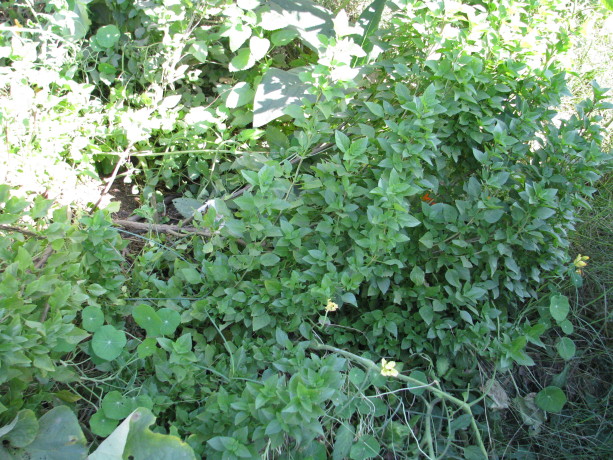
Perennial basil, Amish paste tomatoes smother the weeds and enrich the soil. 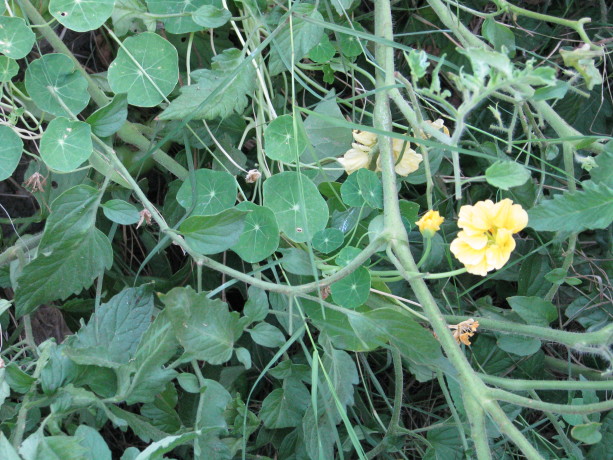
Nasturtiums reseed and fill in as the other vegetables die off. Polyculture beds produce abundant, insect-confusing food guilds which help fertilize and water each other and improve the soil quality. Meanwhile the apple tree has a few apples on it and looks healthier than it has been. Next year’s growth should be drastically improved, and the amount of invasive grasses should be nil. If I don’t grow consecutive annual crops here around the perennial plants, I will sheet mulch the bed.
- Compost, Gardening adventures, Health, Hugelkultur, Other Insects, Permaculture and Edible Forest Gardening Adventures, Soil, Vegetables, Worms
Don’t Clean Up, Dig It In!

Use old vegetables to grow new ones! Tomatoes, eggplant, peppers, fennel, carrots, string beans, three kinds of basil, and probably other things I’ve forgotten about! In January of this year I wrote about Lazy Composting. Frost had killed off sweet potato and tomato vines,

- Frosted vegetable stems are perfect.
and the soil in the raised garden beds were becoming very low.

- Soil level is very low on the raised beds.
Instead of hauling all the vines to the compost heap or bin, I thought I’d create soil in place. The raised beds are lined with chicken wire to protect veggies from gophers. Although I didn’t want to disturb the microbes and fungus in the soil, I dug out half the beds down to the wire.

- I dug out half the bed down to the chicken wire. Miss Amelia and Chickpea checking out the worm situation. I had to kick them out…the worms stay!
Then I layed all those vines right on the soil and covered them up.

- I piled on the old tomato vines, then covered them up with the soil I’d removed.
Then I did the other half…
- Spent tomato vines, with some green ‘maters still attached.

- You can see bits of the vines sticking up out of the first half. That’s okay!
… and then did the other bed. Any thick stalks in other beds which didn’t need extra soil I simply cut close to the ground so that their roots can decay in place and feed the wormies.

- Snip off vegetables at the surface and allow the roots to decay in the soil. Use the tops for mulch, or dig them in, too.
I sprinkled the whole thing with a little Epsom salts for the magnesium sulfate, and a little sugar to start the disturbed microbes feeding and reproducing heavily, which would cause them to decompose the vines more quickly.
In one bed I planted cold weather crops right away; peas, brassicas, garlic, onions and more. I am a firm practicioner of polyculture, or integrated gardening , which means that I plant an assortment of seeds of plants which will help each other in small areas instead of planting all one thing to a bed. I can still plant a row of peas so that I can string them up easily, but I’ll plant all kinds of other plants around them. Usually I don’t plant in a line at all anymore, but rather stake the plants as they need them. Often they’ll use taller plants as support. This is why planting peas and sweet peas next to trees and bushes is a great idea (they fix nitrogen in the soil which helps the tree).
In the other bed I waited to plant until March when the weather warmed up, because I was planting early summer crops. Here it is the beginning of September, and here are the beds, still producing. Even the winter veg one.

- Two of the beds, one still with winter brassicas in them in Sept.
In the bed to the right there is a yellow current tomato blocking the view, and growing into the tree. You can see a Japanese eggplant, and behind it the red is a pepper. Under the tomato and along the bed are three kinds of basil, many string bean plants, some of the sweetest carrots we’ve grown, fennel (one of which we allowed to be the host plant for the Anise Swallowtail, which ate the tops. The bottom of the fennel, which is the part we eat, will still be harvestable). In the bed to the right is the January plants still alive and kicking. Collards, kale, garlic, celery, onions, brussels sprouts, kohlrahbi and more. We’ve harvested most of the garlic and onions. We’ve harvested kale, collards and celery by cutting leaves and allowing the plant to continue to grow. The stalks are now so thick that it is hard to cut them. Out of season, these plants have had attack by cabbage moths and other bugs, but because of the integration of plants and the health of the soil, they’ve bounced right back. I’m harvesting the plants now to feed to the chickens so that I can use the bed for something else soon.
So what happened? A teaspoon of great soil has a billion microbes in it, a million fungi, tens of thousands of amebas, bacteria and all kinds of things we don’t even know about yet. This is a good thing. This is the secret to continued life on this planet. Healthy soil doesn’t wash away, doesn’t erode, feeds the underground waterways, grows excellent food for healthy wildlife and healthy humans. If we feed the soil, we save the planet. That simple. That means no Roundup, no GMOs, no chemical (even organic) fertilizer. Just compost. Very cheap and easy.
Vegetables tend to like a soil that is heavier in bacteria than in fungus, although both should be present. Woody plants such as bushes and trees tend to like a more fungal soil. The vines that I buried had both dry (stems) and wet (green leaves and tomatoes) on them. The stems made the fungus flourish in the soil, and the green bits made the bacteria active. There wasn’t enough matter to become anaerobic, or to rob nitrogen from the soil. The vines weren’t compacted so lots of soil surrounded all the parts, aiding in quick composting and keeping the soil aerated. Water could be absorbed better as well.
If you are starting a garden and want to buy compost, be careful of what stores sell you. In August I was asked to look at a few raised beds that hadn’t succeeded. The soil was low in the beds, there were a few straggly pepper plants, a poorly tomato and some brassicas of some sort which were so stunted that they were just green balls of leaves. When I pulled one up there was white stuff on the roots. A couple of strawberry plants looked very healthy but unproductive. I tried the soil and couldn’t get my finger into it because the roots from those poor peppers had made a thick mat just under the surface of the dirt well beyond their dripline. Two major things were wrong. One was the dirt in the beds. Splinters of shredded wood made up the bulk of it. The woman who had asked me to look at the beds said that she had described her project at Home Depot and they’d recommended two kinds of bagged stuff. I say stuff, because it isn’t soil. What they recommended would be appropriate for hardwoods such as bushes and trees, or acid-loving plants. That is why the strawberries were healthy, only they were in the full sun in a searing hot place and would have done much better under the shade of other plants. I showed the white stuff on the brassicas to her; it was fungal net, which showed the high fungal activity in the soil. Perfect for trees, not perfect for vegetables. Also the brassicas are cold-weather plants and just won’t develop in our summer heat here in San Diego County. They should be planted from October through the beginning of March. The spongy soil… honestly, I’ve never before felt root mat so thick that I couldn’t wiggle my finger into the soil… was the result of desperate plants and poor watering. A custodian would occasionally hose water the beds, which meant that he’d shoot some water on them for a few minutes every day or so. This topical water didn’t sink into the bark-heavy soil. It was only enough to water the top, so the plant roots couldn’t go deep. It was often enough that the plants didn’t die entirely, but survived stunted and striving for water and nutrition that the fungal soil wasn’t providing. Vegetables (and roses!); indeed, most plants except grasses and seedlings, need deep watering less frequently. This allows the roots to go where they want to go, deep into the ground where they can mine nutrients and stabilize the plant. My advice for her was to dig in the few plants that were there, use the compost in the compost bin next to the beds, even if it wasn’t decomposed and add some vegetable-friendly soil to the beds to bring up the heighth. I recommended mixing seeds and scattering them, making sure she planted winter crops, not corn or tomatoes. I also recommended a long watering twice a week; none when it starts raining. If it ever does.
Recommending permaculture techniques to people makes me want to work in the garden! That is because there is so much life, so much success, so many happy surprises and such great feelings that come out of naturally planted gardens. Rows of veggies look so neat and peaceful, but beds chock full of veggies are more fun, better tasting and far more productive.
I just wanted to follow up on the old post about digging in the vines and show you how well the plants did. I have never fertilized these beds after burying the vines and sprinkling on the Epsom salts and sugar. All this growth is due to the happy microbes making nutrients available to the vegetable roots. If you think about it, plants in the wild shed their seeds and then either completely die off or drop leaves. The seeds naturally grow up through the debris of the last generation. Makes sense, doesn’t it?
When these beds are done (if they ever are! They keep producing!) I will practice no-dig gardening on them and simply cut all the plants at the soil surface and drop the tops. I’ll plant seeds for winter crops right in among the debris of the summer crops. They’ll use the nutrients, shade and support of the old crops to grow. October is a good planting time for winter crops because the weather finally changes and the daylight hours are shorter which these plants need. What to plant? Potatoes, garlic, onions, Brussels sprouts, cabbage, peas, broccoli, cauliflower, rhubarb, kohlrabi, celery and much more. Cover crops when it frosts and allow good drainage for the potatoes when it rains. Be sure if you buy starter sets that they are guaranteed organic! Best of all plant organic seeds… they do the best of all and are the best value.
Have a happy, easy Fall garden!
- Compost, Gardening adventures, Permaculture and Edible Forest Gardening Adventures, Seeds, Soil, Vegetables
Crate Potatoes
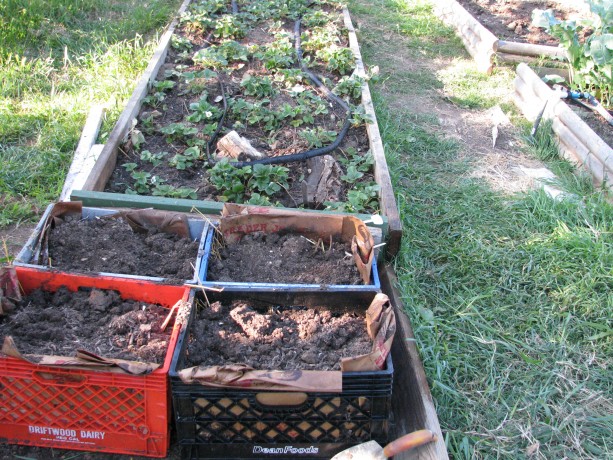
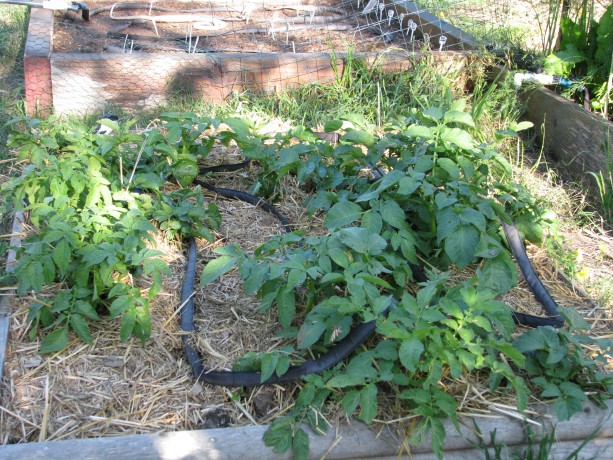
Milkcrate potatoes! This area receives sun for half a day and is shaded on the West side; perfect for keeping them cool. I’ve been frequently asked to write about trashcan potatoes. I haven’t yet, simply because I don’t have a trashcan to use for that purpose. Instead I used what I had and am experimenting with milkcrate potatoes. I’ll let you know how it works.
The potatoes that work in trashcans are any of the standard potatoes in the Solanaceae family, related to tomatoes and eggplants; sweet potatoes and yams are in the morning glory family and grow very differently. A good article with photos that shows growing potatoes in a barrel is at greenupgrader.com. There are many videos on the web about growing trashcan potatoes; a good one is at Farmers Almanac . Two things that she does in this video that I do differently is that after cutting the ‘eyes’ of the seed potatoes, I allow them to harden off for a day or so before planting, and also potatoes can grow with less than 8 hours of light a day which makes it a good over-wintering crop, especially here in Southern California. Potatoes like shorter daylight and cool night temperatures, so plant now! If you plant later, protect the trashcan from the afternoon sun. Hardening off means to allow the cut potato to sit in the shade for a day or so to allow the cut end to form a ‘scab’, or harden up before planting. It helps keep the potato eye from molding and provides protection from insect or bacterial attacks, and keeps drier soil from leaching water out of the potato. This is the same process you’d do when taking cuttings from cactus, geraniums and other easily-rooted, sappy plants. When watering trashcan potatoes, don’t overwater because you’ll rot them. Like their cousin the tomato they’ll do better slightly drier than wetter.
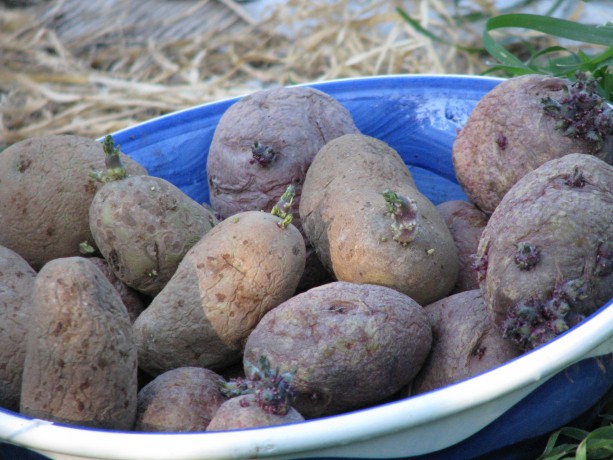
Organic chitted potatoes. ‘Seed’ potatoes aren’t potato seeds. They are small tubers that are ready to plant. Always buy organic seeds. Period. You can buy seed potatoes online or in nurserys available in Southern California just after Christmas, and sometimes in the late Fall. They usually purchase the seed from other states which have snow and don’t ship during the winter. Buying online or from organic catalogs allows you to shop among a wide variety of potatoes differing in size, color and purpose. However since we can plant potatoes in the Fall and don’t want to wait for shipping times, we can buy a bag of organic potatoes locally and sprout them ourselves. Non-organic potatoes have been treated so that they don’t sprout in the store, and are genetically modified (GMO) to last on the shelf. Sprouting potatoes is called ‘chitting’ and is very easy. Mine usually sprout in a bowl on my kitchen counter. Keep them in a light, cool area out of direct sunlight and they’ll grow. When the potatoes have chitted and ‘greened’ (have sprouts), you can either plant them whole or slice them so that each piece has at least one eye. Allow them to harden off and plant them. Give the extras to your neighbor!
Potatoes can be grown in the ground, or in a raised bed, and then you hill up around the plant to produce more tubers. The reason for growing trashcan potatoes is that you can grow vertically, save garden space, and in particular save your back from trenching, hilling and then digging. The harvest is more productive, too, because you won’t be accidentally cutting through or spearing potatoes in the ground. Potatoes can grow this way because the tubers are actually specialized underground stems called stolons. Potatoes will produce tubers underground, but anywhere along their stems they also can grow a potato under the right conditions. Once you plant a potato ‘eye’, the eyes being the growth buds, it will send out stolons. The plant will produce potatoes below ground, and if you hill up around the stems they will also begin to swell and produce tubers.
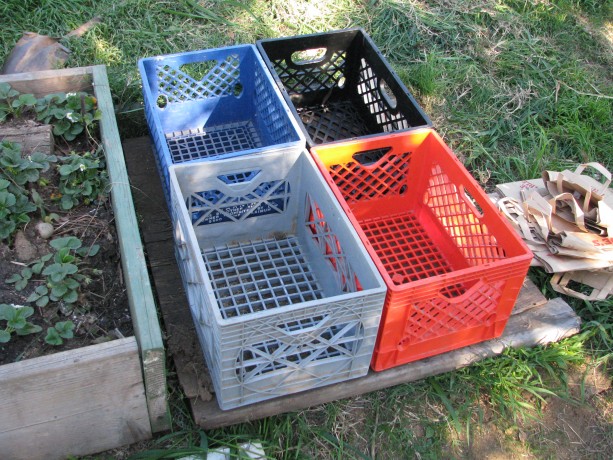
I have extra milk crates, and a source for more, so why not use them? When you plant in a trash can (with drainage holes!), as the greens shoot up you keep layering compost or straw or woodshavings or potting soil or whatever around the stems keeping a little green showing until you can’t fill the trashcan anymore.

I lined the bottoms and the outside edges with extra paper bags and watered them. When the plant is done growing the plant will bloom and sometimes even produce seeds. When the stems die back, you knock over your trashcan and harvest. Save some of the smaller ‘taters for seed for planting in the Fall.
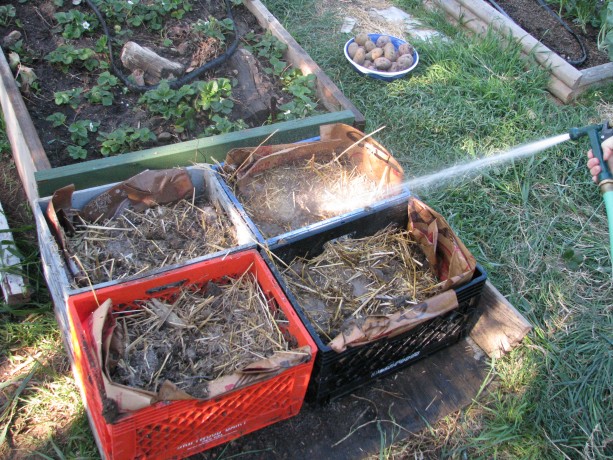
I filled the crates 2/3s full with compost mixed with chicken straw and watered well. You don’t want heavy soil or the potatoes will rot. You also want to insulate the potatoes from outside warmth. You can also root around in there earlier and pick new potatoes, or you can delay your harvest, keep water out of the trashcan and keep it in a cool spot, and harvest when you want them. The beauty of trashcan gardening is that you don’t need a trashcan. Very zen! You can drill holes in a plastic carrier, use burlap sacks, stack old tires, nursery containers, large plant pots or whatever you have. If you have a bottomless or rusted out trashcan, use it! Place it over good garden soil and allow the potatoes to grow down, too. You’ll have a little digging to harvest after you knock over your trashcan full of potatoes, but not much. To make holes in a plastic or aluminum trash can, borrow a digging bar (a long metal pry bar), place your trashcan right-side up on a dirt area, hold the bar high vertically over your trash can pointy side down and let it go. It should make a hole. Or turn the can over and use a hammer and something sharp like an awl or screwdriver (be careful you don’t shatter the top of the screwdriver! You don’t have to pound too hard. Be wise and wear safety glasses just in case). Do this multiple times to make as many holes as you can without making the bottom unstable.
Also be sure to keep the trashcan or crate potatoes in a cool place, especially if you are planting in the early spring here in Southern California. Warmth will keep the potato stems from swelling into tubers. Insulate the potatoes well and keep them cool while still allowing them enough sunlight. Fall and winter are the best times for planting potatoes here, as long as they have adequate drainage.
There is concern about leaching chemicals from plastic, or tires, or aluminum. Do the research and make yourself happy. I don’t think there is that much leaching to be worried about because the plants aren’t in there for a long time. You can always make a barrier between the soil and the sides of the containers with undyed paper or newspapers using soy ink. So save your garden space for other crops, and pop your ‘tatties in a can. Or crate. Or whatever.
Update: here is a very comprehensive article about planting potatoes. Rather than use commercial fertilizer, of course, we recommend rich compost, which will provide what your potatoes need. Also use dead garden debris such as old pea stalks (cut rather than pull them up to allow the nitrogen nodules on the roots to remain in the soil) in your planting bed or container.
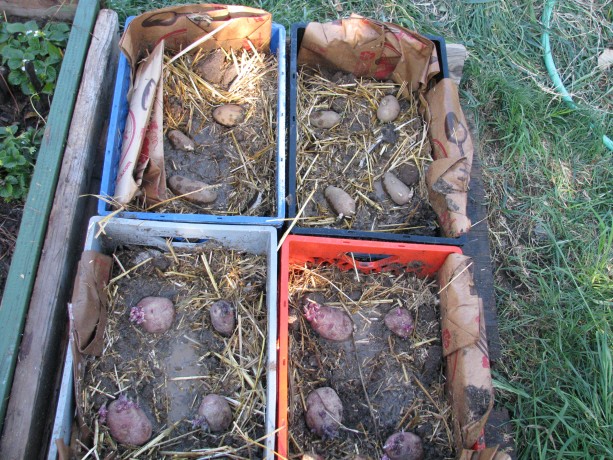
I planted whole potatoes just because I didn’t have room for lots of cut ones and these needed planting or tossing. I then covered them with about an inch of light compost and now I’m waiting! - Animals, Chickens, Compost, Gardening adventures, Hugelkultur, Permaculture and Edible Forest Gardening Adventures, Soil, Worms
Strawberry-flavored Hugelkultur, Please
A few months ago my daughter and I thinned out the raised strawberry bed.

Way too many plants. I planted the extra strawberries under the passionvine arch,
Under the passionvine trellis. using well pooed and pecked and rained-upon straw from the Fowl Fortress as mulch.
Good yucky straw. However the soil level in the raised bed has become lower, and the Bermuda grass has grown higher. Time for a re-do.
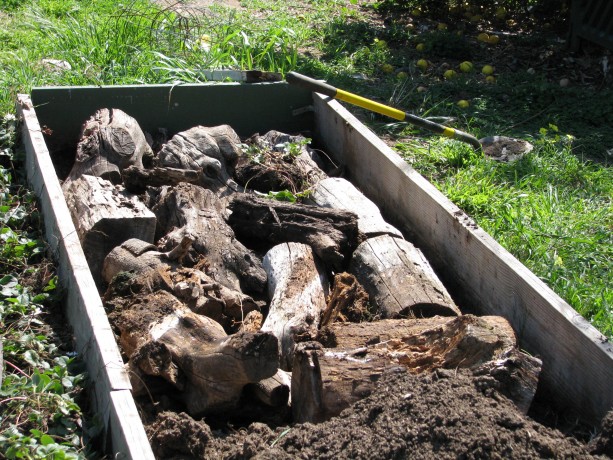
When I’d originally planted the bed a few years ago, I’d heard about burying wood to hold moisture and improve the soil. Some little thing we call… hugelkultur. I laid old lime tree logs along one side. They began to break down and some really cool mushrooms came up.
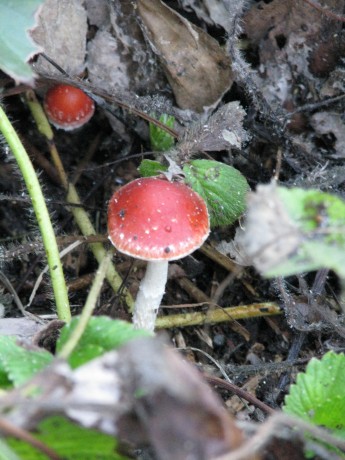
Cool mushrooms. Strawberries sent runners out and they rooted right in the wood. A great success.
Strawberries rooted right in the wood! Since I don’t have ready compost to fill such a large bed right now, I decided to do the hugel-thing in the entire bed. I spent several hours digging out the strawberries and the Bermuda grass.

Making the bed: everyone out! Then I pulled the soil back and was simply amazed.
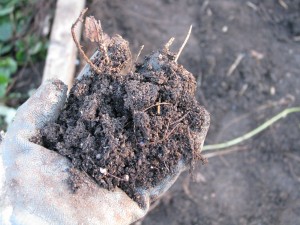
Beautiful soil It was crumbly like prime worm castings. I lined the bottom of the raised bed with the logs on top of the wire I’d laid across the bottom to deter gophers and mice.
Old lime logs. Then I shoveled heavy clay out of the new bog area and threw that in and around the logs; the wood would decompose and turn the clay to great soil, and the clay already had a lot of interesting microscopic creatures in it from being at the edge of the pond.

Heavy clay. And I do mean heavy. On top of that I sprinkled some pigeon guano I recently received from some wonderful new friends who rescue pigeons. (They are wonderful even if they hadn’t given me the guano. I have many friends who, in fact, are guano-less. Just to clarify.) There were a lot of pigeon peas in the guano, but if they sprout its all good because they are nitrogen fixers and will only help things along. Some sugar was added to help stir up the bacteria in the clay.All along I watered everything in, including hosing down Lark the fat, barren Barred Rock hen who just wouldn’t take no for an answer and kept jumping into the bed to steal the worms!
Get away from my worms, hens! My hens are such prima-donnas that they refuse to eat sowbugs and just go for worms. Geez! Lark got back at me later by making me come after her when it was time to shut them in for the night.
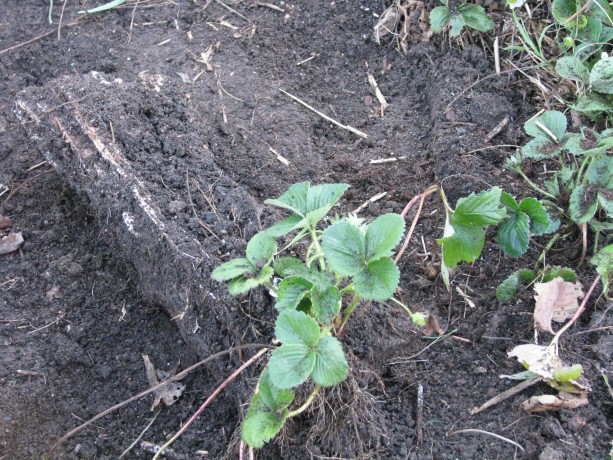
The last layer on the bed (and I don’t mean a chicken) was the good soil into which I replanted the strawberries. I did this process in thirds and ended up with a lot of extra strawberries.
A third section done. As it was nearing sunset and I was becoming chilly in my shorts and sleeveless shirt, I hurriedly planted the extras up under the passionfruit trellis, in with the others from the previous planting. Most of them had happily survived.
Finished! The leftover soil I sprinkled on top, laid the soaker hose back on top, and voila! A somewhat shocked but hopefully soon-to-be-happier strawberry bed.
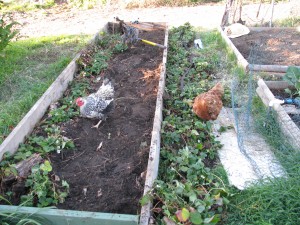
There are a couple of wild mallards that come to the pond and have grown trusting of me up to a point. I throw game bird food by the pond for them. I don’t want to tame them, but I like it that they don’t fly off in a fright every time I come near. Its better for their health not to be so stressed. Makes me feel good, too.
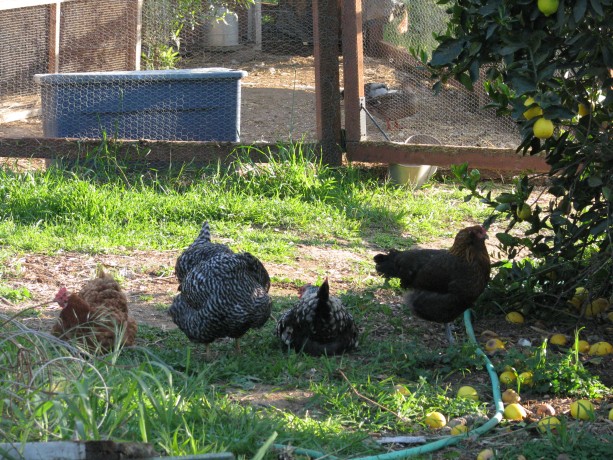
Hen line-up. But what is in the coop behind them? While I was digging I looked up to find my hens all in a row watching me, and beyond them inside the Fowl Fortress (the door of which I’d propped open) were the two mallards! They were perfectly content to be eating what the hens hadn’t eaten, and were even sitting in there enjoying… I don’t know… forbidden territory?
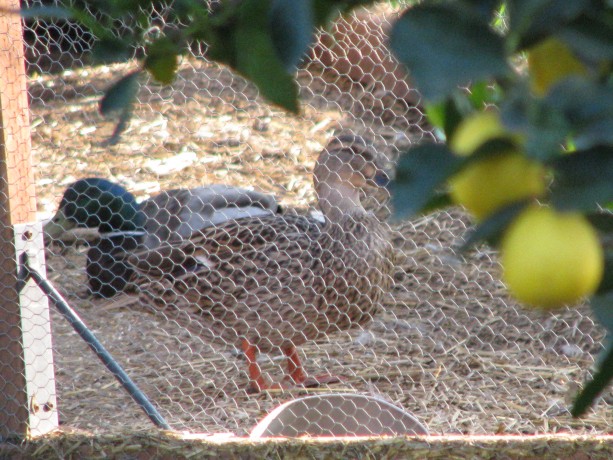
Just make yourself at home! The alluring and romantic smell of chicken poop? After awhile Miss Amelia wandered in there and the mallards wandered out. They’re welcome in there, but if they want me to build them a castle of their own, forget it. They already have the floating duck house, after all!
You May Also Like
Native Insects and IPM
- Compost, Composting toilet, Gardening adventures, Hugelkultur, Permaculture and Edible Forest Gardening Adventures, Ponds, Rain Catching, Soil
Rain Catchment Awesomeness (and some BSP)

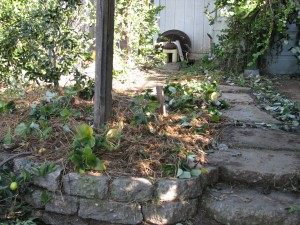
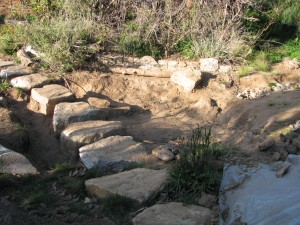
Water flowed over the stone steps First, a little BSP (blatant self-promotion). There is a wonderful ezine called San Diego Loves Green featuring topical local articles and snippets that reflect on the growing green community here in, you guessed it, San Diego. The San Diego Permaculture Group has an ongoing column, and yesterday I was the guest writer. My article is on the importance of planting natives , with some information that you might find surprising, or that you may have already read in my blog about the same subject. Also (more BSP) if any of you attended the Southern California Permaculture Convergence this weekend, and still yet, if any of you listened to my talk on soil, first of all I’d like to thank you for your attention and attendance, and I hope I answered your questions and solved some problems for you. You can search on my blog for many posts concerning nitrogen -fixing, or 50 Ways to Leave Your Compost , and see my composting toilet (I went to a Garden Potty).
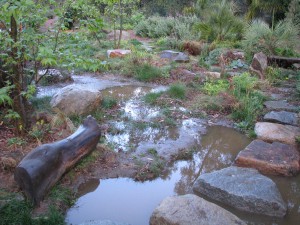
We had almost two inches of rain on Thursday night. In San Diego we rarely receive the long soaking rains that we really need. Instead we must be ready for flash floods. If you are familiar with Finch Frolic and the labors we’ve been undertaking in the last two years to hold the rainwater, then you may be curious to find out how the property survived this last middle-of-the-night flooding and hailstorms. If you remember, not only is there the water flowing off the roof and falling onto the watershed property, but also an unmeasurable amount that is purposely channelled runoff from all the neighbor’s properties that runs through mine.
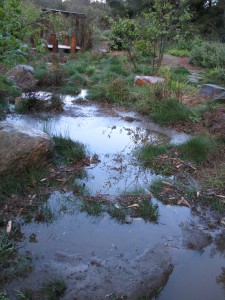
All basins full! Since the permaculture project was installed I haven’t had any of the erosion that plagued the site. As of last year I’m pretty sure that every drop that falls on my property is caught, in rain catchment basins, the ponds, and in the loam and compost in the guilds. The challenge was to also keep all the neighbor’s water on my property as well! I’m thrilled to say that we almost did it!
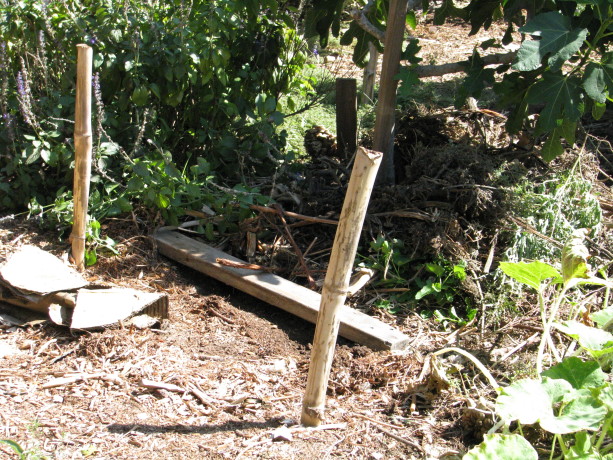
There is a new bog area being designed by Jacob Hatch just above the big pond.
The new bog area This area had been designed to channel overflow water from the rain catchment streams around the pond and down a black tube to the stream bed below. Greedy me wants all that water! With the creation of another silt basin, and now that there is vegetation in the stream to hold onto the silt, I’ve made the water now flow directly into the big pond. There are planned overflows from the big pond, and water did overflow where it was supposed to.
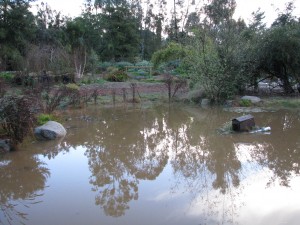
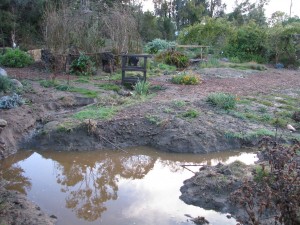
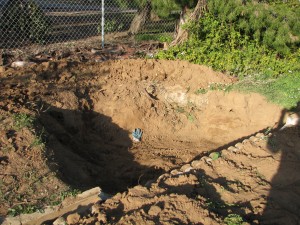
The big pond was filled to capacity, making the duck house do a sinking ship impression because of the length of the rope attached to the anchor wasn’t long enough. The first rain catchement basin was enlarged a lot so as to catch water higher on the property.
The first catchment basin was deepened There is decomposed gravel in that one so the water perculates quickly, thank goodness, as most of the other basins hold water due to the clay composition of the soil.
Water following the basins. Also, a rain catchement basin was created along the top of the cement channel that normally funnels water off the property.
New basin, empty A series of these will be created all along the channel, allowing water to slow, gather and perculate along the length of the property, with no outlet at the end.
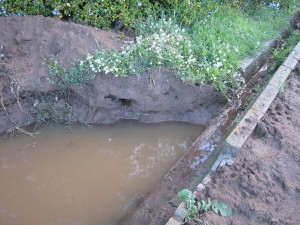
Full! This will take some of the flow pressure off of the water diverted down into the main series of basins.
The only area breached was actually due to a gopher hole whose origin must be in the stream. I could tell by the swirls in the mulch where the erosion happened.
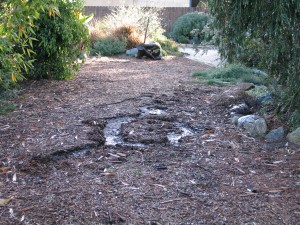
Swirls tell of a breach. There is also the slight problem of water flowing down my own driveway and then down the trail.
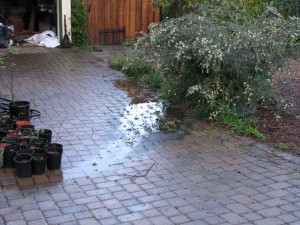
Water funneled down my driveway. I think a small hugelkultur bed might slove that problem.
The verdict? Almost all the water was retained on the property,even that of the neighbor’s! A few tweaks and we are well on our way to total rainwater dominance! Mwwahahahahahahaha!

Mwwahahahahahahaha!