- Animals, Chickens, Compost, Gardening adventures, Hugelkultur, Other Insects, Permaculture and Edible Forest Gardening Adventures, Seeds, Soil, Vegetables, Water Saving, Worms
Using Smuck, or Using Food Waste
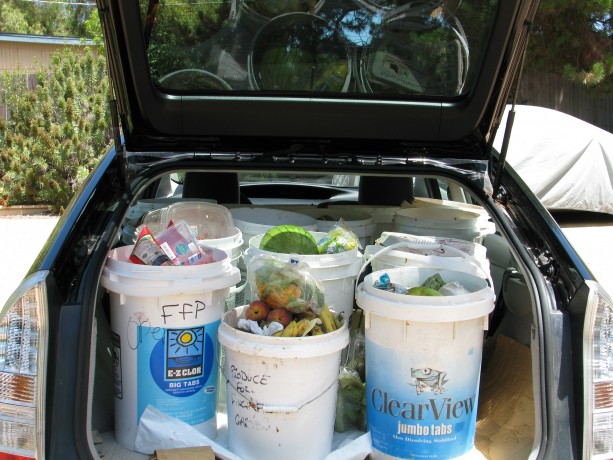
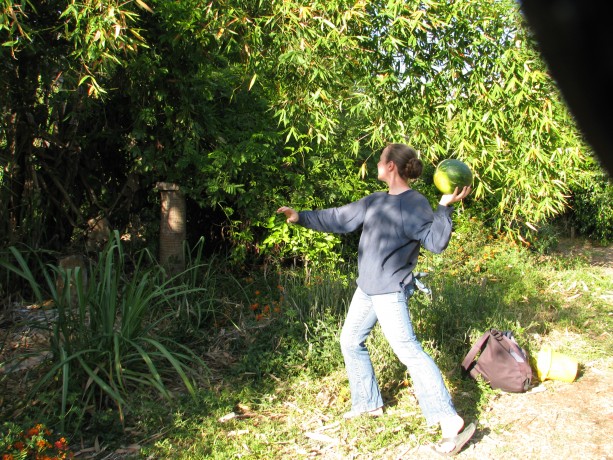
One afternoon’s haul of smuck. Just when I was mourning the fact that our household didn’t create enough food waste to generate lots of compost, I received an email from a former visitor to Finch Frolic Garden. She volunteers at the Fallbrook Food Pantry, where they distribute balanced food supplements to over 800 families a week who earn less than the US poverty limit. They receive raw, outdated fruit and vegetables from grocery stores and other sources, sort through it and have to discard what isn’t safe to hand out. The volunteer knew that I composted and wondered if I’d like to pick up the residue so that they wouldn’t have to throw it out. She and the director had been taking it home, but it was too much for them. Four times a week I’ve been picking up buckets of smuck, or what I call the rotting fruit and vegetables, and often its too much for me as well.
Boxes of mixed smuck were difficult to pick up and very, very juicy. Buckets are better. There has been a grace period where my daughter and I nearly broke our backs picking up cardboard boxes sodden with fruit juice that stained our clothes and our car, and spent lots of time cutting produce out of plastic bags and containers, but the Food Pantry staff have been wonderful about usually opening the packages and using only old pool buckets.
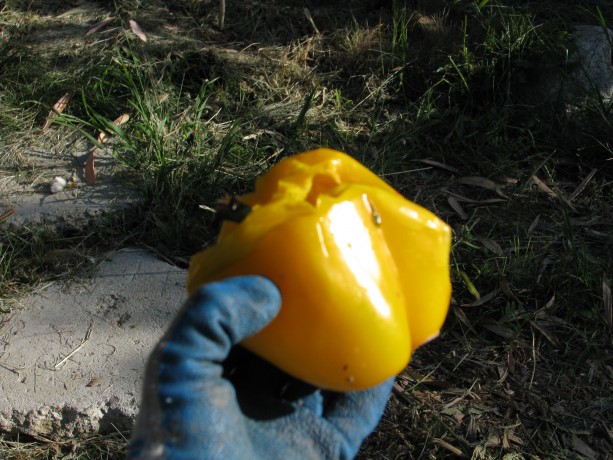
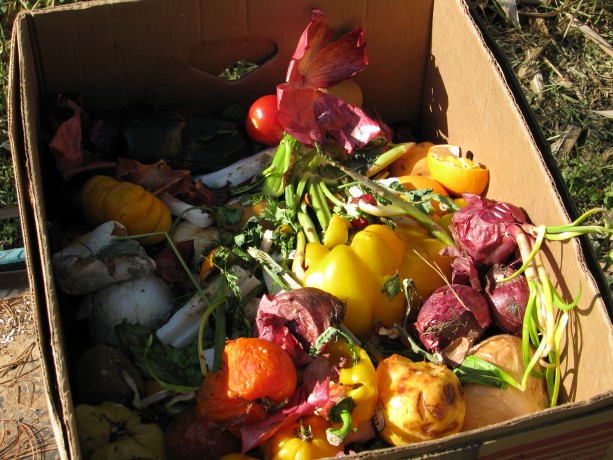
One drawback is that very little of the smuck is organic. We are constantly amazed at how fruit and vegetables remain hard on the outside while rot on the inside. These peppers were hybridized to be solid enough to ship without bruising, at the expense of flavor and nutrition. My back, my clothes and my car thank them. Fortunately others have been picking some smuck up. The man in my life happily takes lots of it to feed to his compost worms. We’re a great match.
My daughter and I empty the buckets into the chicken coop.
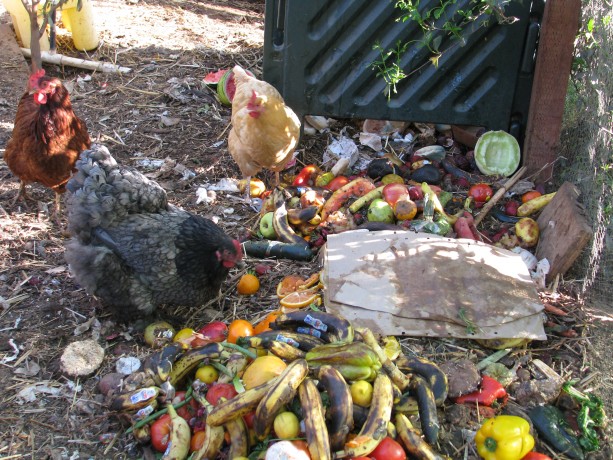
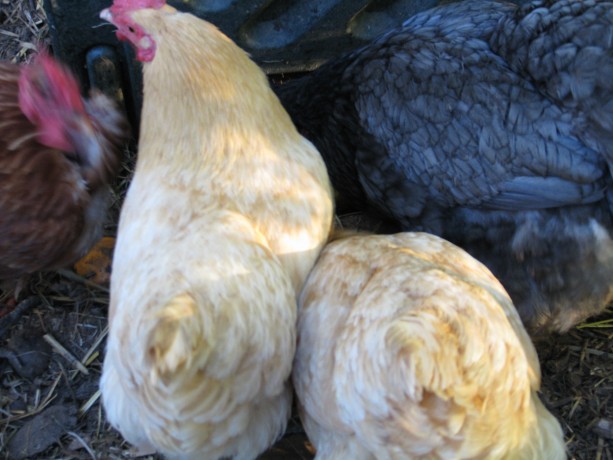
Charlotte, Bodicea and Esther/Myrtle with a new batch of smuck, heavy on the bananas. The girls love it. I make sure they eat lay crumble and calcium as well to keep laying, but with the smuck they’ve reduced their intake of crumble and hence have lowered my expense.
The girls going after the smuck. I pitchfork straw and weeds over the top and within a few days most of it except some citrus and a coconut or two is pretty much gone. There is a fly problem, but with the flies there have come more flycatchers and lizards, and the hens eat the insect larvae that emerges in the compost.
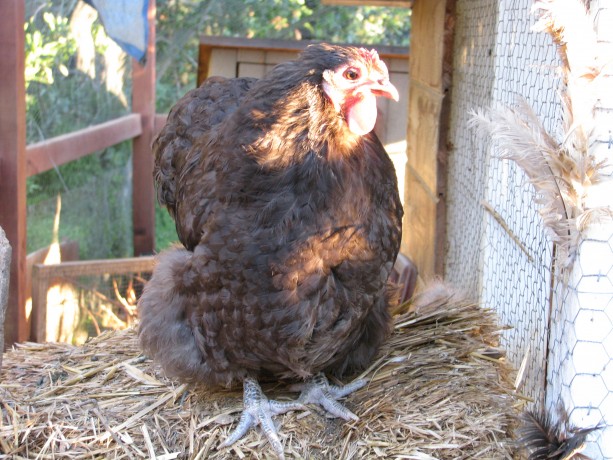
This is Agatha, named after a favorite mystery writer. She’s here just because she’s so lovely. The picking up of smuck, hauling it down the hill and into the coop, de-packaging, cleaning buckets and fighting flies and ants, three – to -four times a week has been a time-consuming and very, very icky job, but the thought of all that free waste going into the dumpster keeps me at it. This is bacteria-heavy compost material, which is excellent for growing non-woody herbaceous plants such as our own vegetables and herbs.
I’ve also layered the smuck with cardboard, paper waste from the house (tissues, paper towels, cotton balls, Q-tips, junk mail, shredded paper, etc.) under the bananas.

A pile of fruit, veggies and cardboard, partially covered with clippings, at the food of our big banana. A citrus to the side likes it, too. Bananas love lots of food in the form of moist compost around their roots; in fact, they are commonly planted in banana circles with understory plants and the center of the circle is a place for waste products to deteriorate. In our dry San Diego climate we don’t have that kind of tropical moisture to help it rot, but the compost does become a sheet mulch and really helps create soil.
Miranda adds a melon to the banana circle smuck. One inch of compost reduces watering needs by ten percent, so a pile of wet smuck layered with carbon items such as dry cuttings and cardboard is excellent. I throw cuttings and pine needles over the top to keep down the rotty fruit smell, which doesn’t last long anyway.
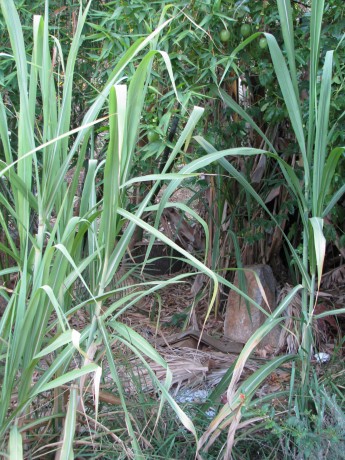
Sugar cane and passionfruit enjoy the smuck layers under the banana – kind of a banana semi-circle. When creating new impromptu trellises for melons and squash in unimproved soil, Miranda and I dug trenches, threw in wet wood and dumped buckets of smuck right on top then covered the trench with dirt. We planted seeds in handfuls of good compost and away they went. We also used some of the mostly composted soil from the Fowl Fortress directly into the kitchen garden .

We augmented the kitchen garden soil with nearly-composted smuck dirt. Due to the wide variety of fruit and vegetables in the smuck buckets we’ve had some interesting volunteer plants. Tiny tear-shaped tomatoes that had been sold in plastic containers for natural snacks, a sweet potato, other tomatoes, and melons. At least we thought they were melons.
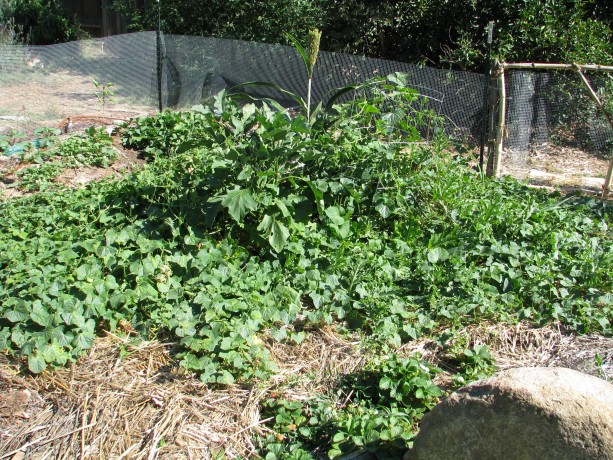
Melon vines taking over the kitchen garden… but not the melons we expected! Miranda was wondering about pulling them out of the kitchen garden because they were taking over without apparently producing a flower. A couple of days ago she investigated further and found a real surprise. We have about thirty kiwanos growing under the foliage!
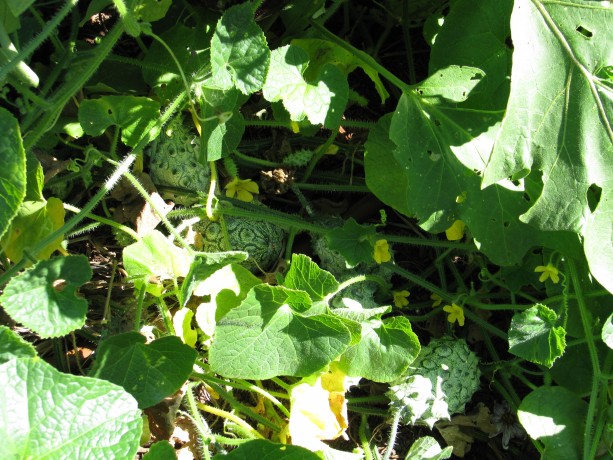
Kiwanos with lots of blooms lurking beneath the foliage. I’ve never eaten a kiwano. Wikipedia says: Cucumis metuliferus, horned melon or kiwano, also African horned cucumber or melon, jelly melon, hedged gourd, melano, in the southeastern United States, blowfish fruit, is an annual vine in the cucumber and melon family, Cucurbitaceae. I’ve seen them in the smuck buckets, and it just figures that of all the green melons and orange melons that we’ve thrown in there, something like these would grow! None have ripened to the light orange color as yet, which is good because it gives us time to figure out what to do with them.
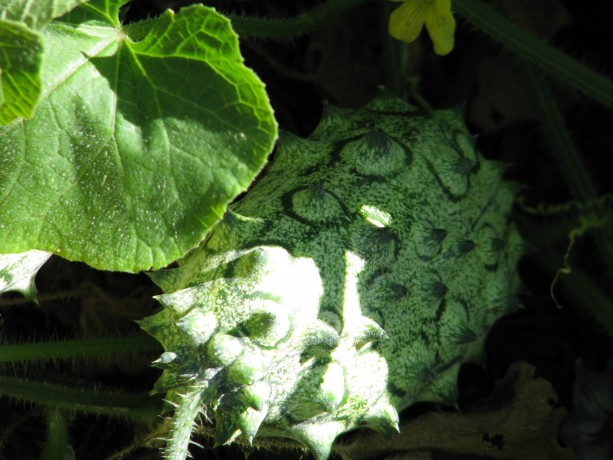
When they turn orange they’ll really look like blowfish fruit! You May Also Like

Native Insects and IPM
- Animals, Bees, Birding, Gardening adventures, Natives, Other Insects, Permaculture and Edible Forest Gardening Adventures, Ponds, Rain Catching, Soil
Summer At Finch Frolic Garden
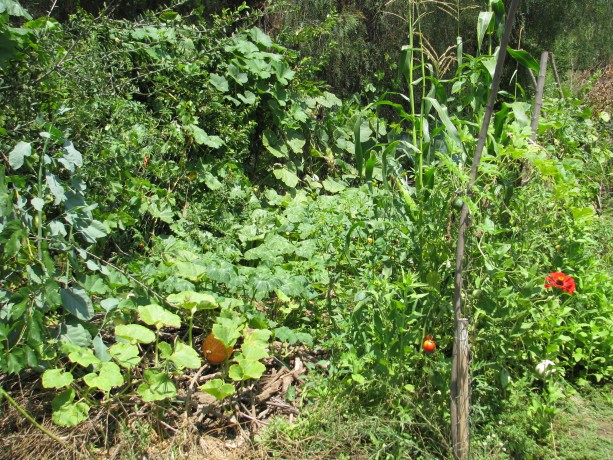
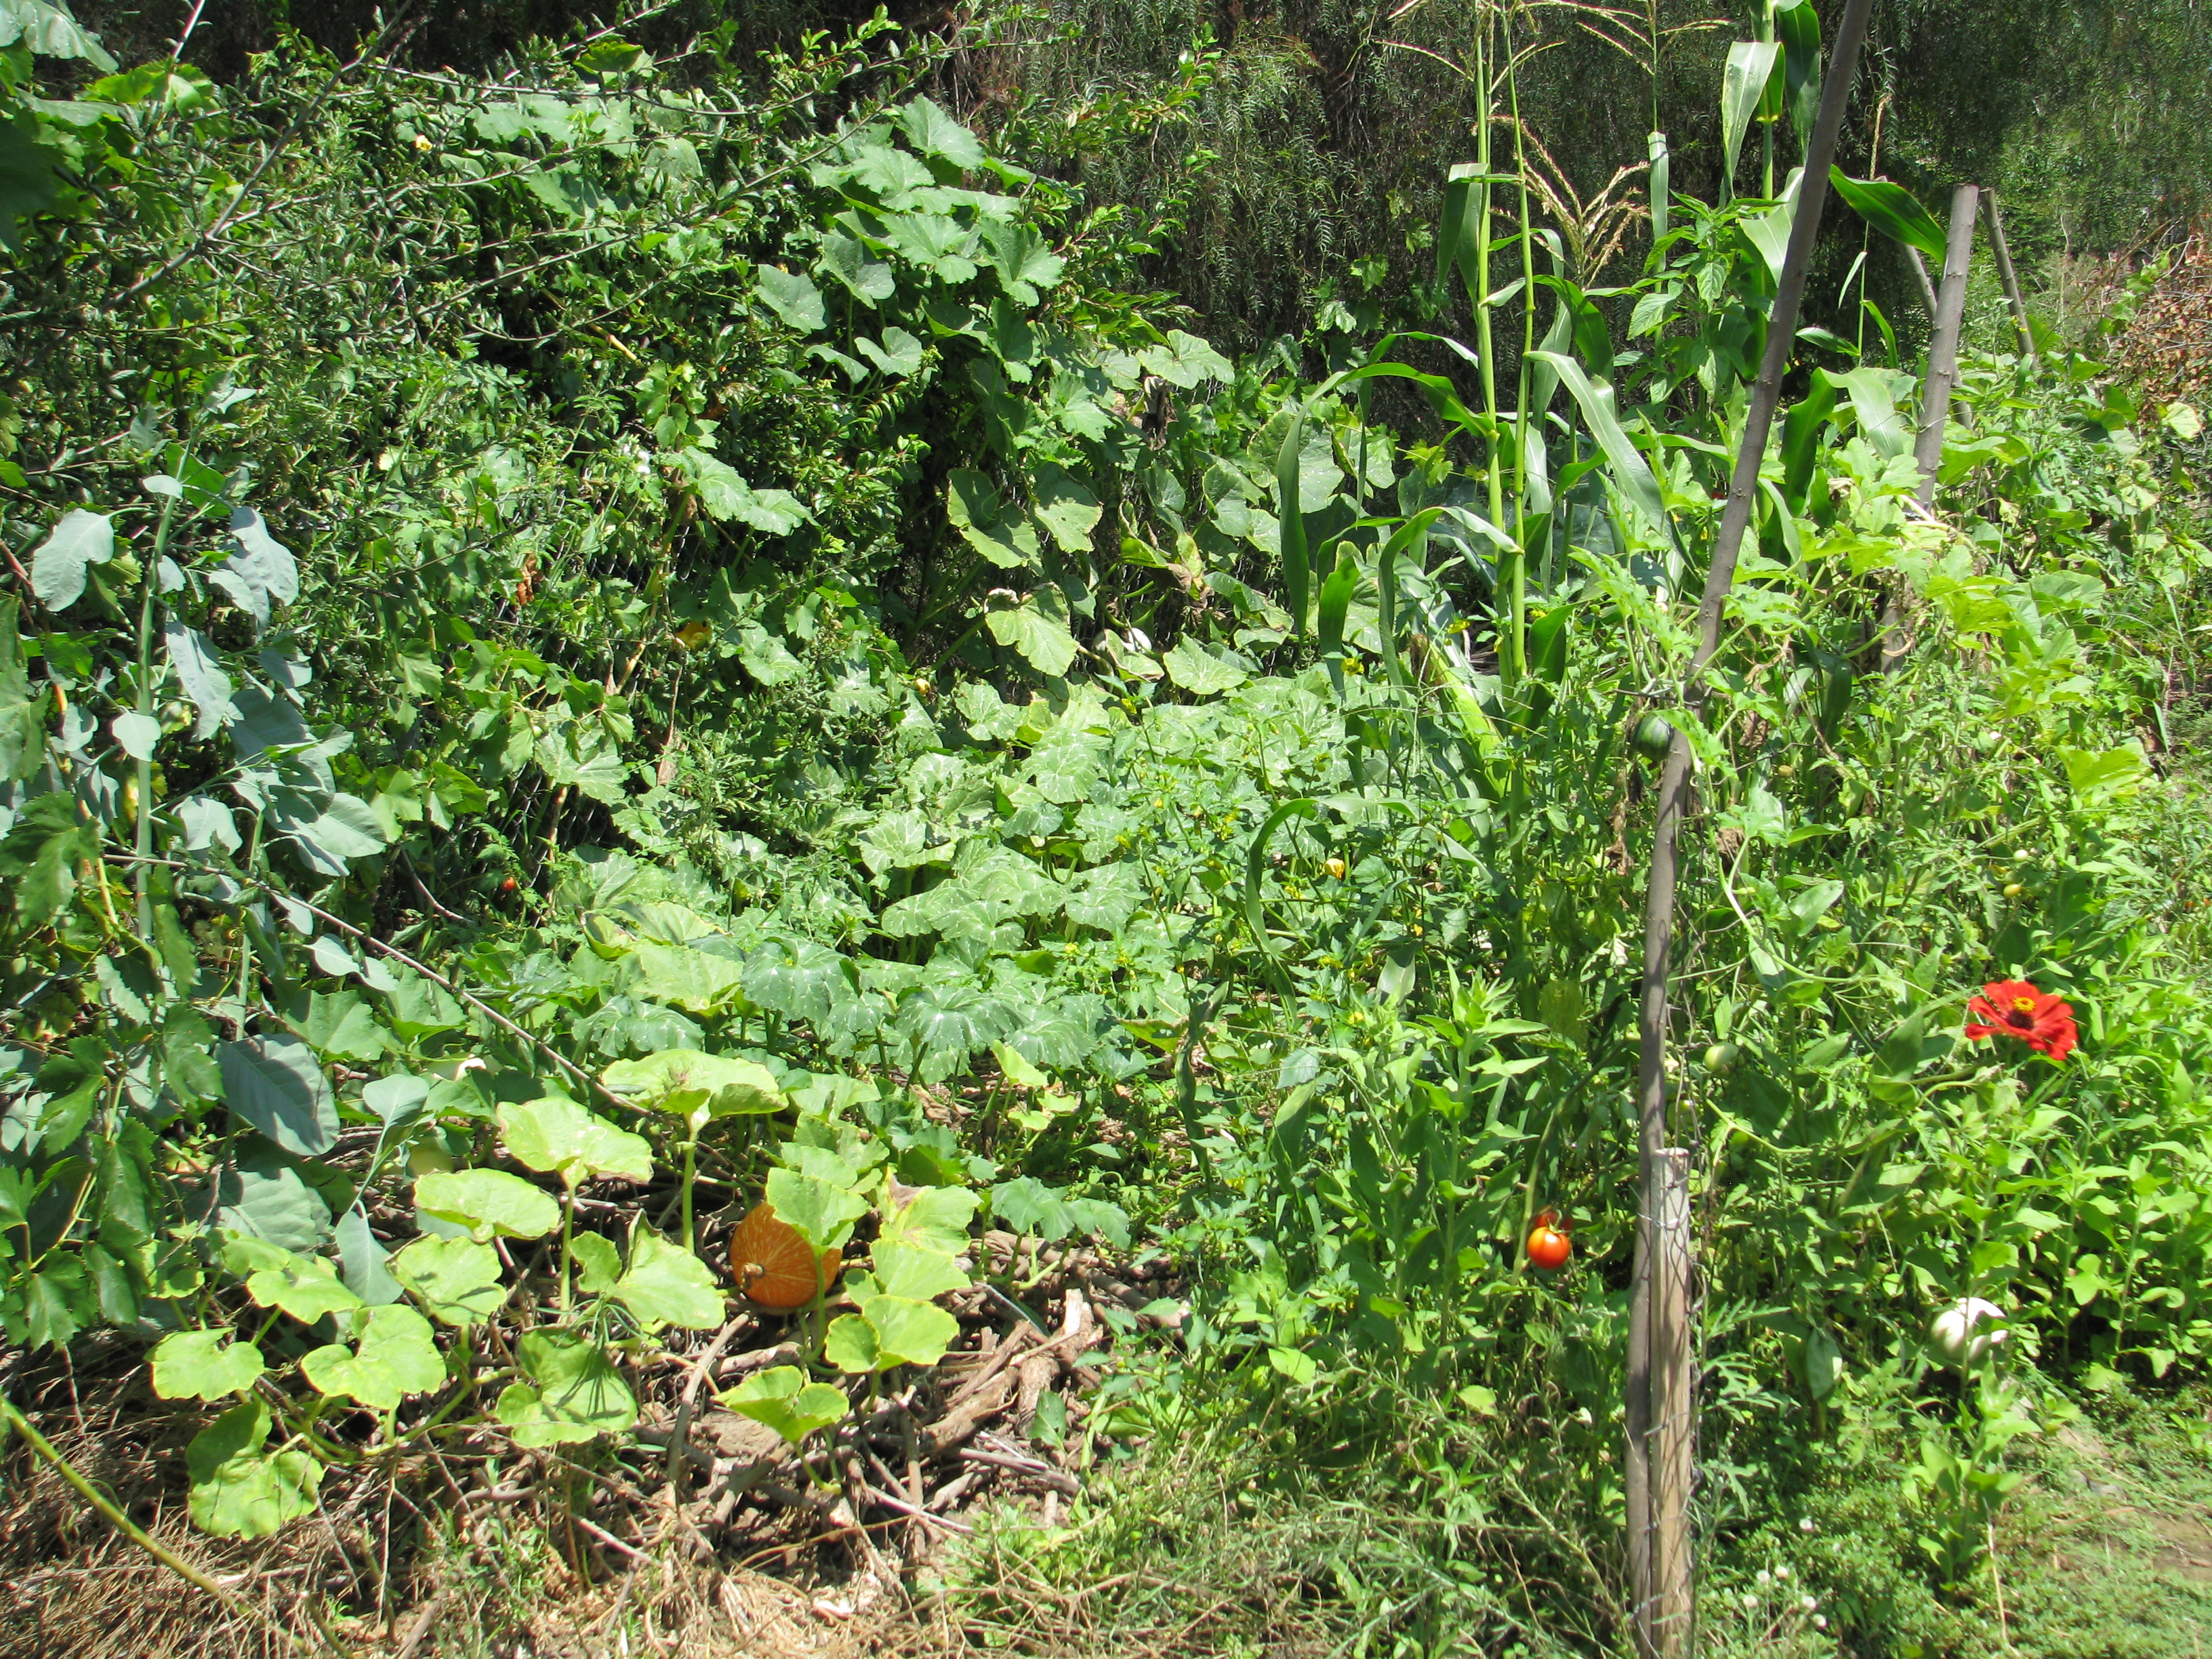
Squash, melons, tomatoes, flowers, tomatillos, sweet potatoes and more flourish along a chain link fence and on a wire-and-post trellis we set up over buried wood. Vertical space is perfect for vines; the vines provide shade and protection for other plants, and mulch plus a harvest when they die down. They are exciting and fun to watch grow as well. I’ve wanted to show you more of the garden, using video as well as photos. The summer garden is beautiful and full of life. Life in the ground, in the water, in the air and on every plant. Last year the pond had an overgrowth of pond weed and algae. Since our pond is natural – meaning that it has no liner, just compressed clay, and is cleaned only by plants and fish with no other aeration or filtration – the idea of adding algaecide is unthinkable. In great pond water there are as many if not more microbes as in good soil. Algaecide may advertise that it doesn’t harm fish or frogs, but it will kill the small pond life that is keeping your pond and its animals healthy. Seven small koi were added (rescued from a golf course pond where they had been dumped) in the hopes that they would eat the emergent pond weed as it grew out of dormancy. We hadn’t seen the koi and thought that they were dead. A couple of months ago they were sighted: all seven, each about a foot long and magnificent. We have no pond weed nor algae overgrowth thanks to these beauties.
In the following short video you’ll see some of the koi and possibly some of the bluegill and mosquito fish that also inhabit the pond. Notice a small blue dragonfly alighting on the bamboo pole. Birds call out all around. You’ll also hear my work shoes squeaking! The size and vigor of the water lilies is due to the healthy, microbially balanced water. We keep the pond topped up from the well. Well water here in San Diego County is notoriously salty and mineral-laden. Plants and microbes remediate that water, as is obvious in this video. The last part is of the native marsh fleabane which was sown by wild birds and flourishes around the pond. The small groups of flowers are perfect for our tiny native insects to land upon and feed. A honeybee uses it here. Enjoy with me a moment by the pond; the following link will send you to a Youtube video:
You May Also Like
Native Insects and IPM
- Animals, Bees, Birding, Building and Landscaping, Chickens, Cob, Compost, Composting toilet, Fungus and Mushrooms, Gardening adventures, Giving, Health, Heirloom Plants, Hiking, Houses, Hugelkultur, Humor, Living structures, Natives, Natural cleaners, Other Insects, Permaculture and Edible Forest Gardening Adventures, Pets, Photos, Predators, Quail, Rain Catching, Recycling and Repurposing, Reptiles and Amphibians, Seeds, Soil, Vegetables, Water Saving, Worms
Special Tours for Aug. and Sept., 2014
Come take a tour of a food forest! Normally tours of Finch Frolic Garden are held by appointment for groups of 5 – 15 people, Thursdays – Mondays. Cost is $10 per person and the tour lasts about two hours. By popular demand, for those who don’t have a group of five or more, we will be hosting Open Tour days for the first 15 people to sign up in August and September. They will be Sunday, August 10 and 24, Sept. 7 and 21, and Thursdays August 7 and 28, and Sept. 11 and 25. Tours begin promptly at 10 am. The tours last about two hours and are classes on basic permaculture while we tour the food forest. I ask $10 per person. Please reserve and receive directions through dianeckennedy@prodigy.net. Children under 10 are free; please, no pets. Photos but no video are allowed. Thank you for coming to visit! Diane and Miranda
You May Also Like
Native Insects and IPM
- Breads, Breakfast, Cake, Condiments, Dessert, Frosting, Permaculture and Edible Forest Gardening Adventures, Recipes, Sauces, Vegan, Vegetables, Vegetarian
Making Ethical Butter

Vegan butter! I’ve labeled myself an ‘ethical vegetarian’ for nearly two decades. I stopped eating animals when I became horrified at the dichotomy of having glue traps under the house to catch wild rats and mice (and any poor, poor animal that happened upon it, such as lizards. Glue traps are horrendously cruel. I hadn’t put them there.) and a cage with an exercise wheel and specialty food for ‘pet’ mice in the bathroom. Justice is a man-made effort, and by not eating animals I was no longer approving of mass torture by buying into it. Although I no longer ate animals, I have still indulged in animal products, namely dairy products. Slowly it has sunk in how badly animals are treated for those, too. As someone who loves cooking, it has been difficult for me to wean away from dairy products. Butter is especially difficult. Unlike hens who have been bred to continuously lay without needing the services of a rooster, dairy cows must be lactating to produce milk. Cows are usually artificially inseminated, then after giving birth their calves are replaced by milking machines. The calves are most often slaughtered for veal. This process is repeated until the cow is used up from the constant pregnancies and lactating, and then she is slaughtered. This horrible practice is disguised by advertisements showing happy cows grazing in fields. That is a fantasy. ‘Grass fed’ and ‘pasture raised’ are sly terms that give you an image that is nowhere near to the truth. Please read Michael Pollen’s Omnivore’s Dilemma to understand where your food comes from and why.
To find an acceptable butter substitute has been an expensive and frustrating endeavor. For awhile I used a dairy substitute from Trader Joe’s, who I swear keeps tabs on what I buy the most and then discontinues it. All other butter substitutes either taste horrible, can only be used for spreading, or more commonly contain palm oil. The sudden fad for palm oil has created extreme clearance for the growing of palm in the areas which are habitat for the orangutan; indeed, if we don’t curtail our consumption of palm oil quickly the orangutan will go extinct within our lifetimes.
I finally found a recipe for a butter substitute that works pretty well for both spreading and baking. It is made mostly of refined coconut oil. At this point coconut oil is sustainably produced – please make sure that you support companies that do so. Refined organic coconut oil has no flavor or scent; unrefined has a mild coconut flavor and a toasted coconut scent. If you are using a batch of this butter for baking where coconut flavor is desired, then use the unrefined.
This recipe is by no means my own. I found it and a detailed description of the science behind it at VeganBaking.net . There are several options listed and a lot of cooking science behind the butter.
The mouth-feel is amazingly creamy and satisfying. I used the basic recipe, Regular Vegan Butter, Coconut Oil Base. The recipe calls for curdling the soy milk, which will drive the butter flavor. I tried the full teaspoon of cider vinegar, then half cider vinegar and half coconut vinegar, then just half a teaspoon of coconut vinegar, and finally no vinegar, and thus no curdling, at all. I found for my taste that the vinegar flavor carried through and was much too dominant. Even at just half a teaspoon it was so noticeable to me that I didn’t like it on toast. It was good, however, when my daughter used it on sourdough and topped it with fresh avocado. The slight vinegar flavor enhanced the avocado deliciously.
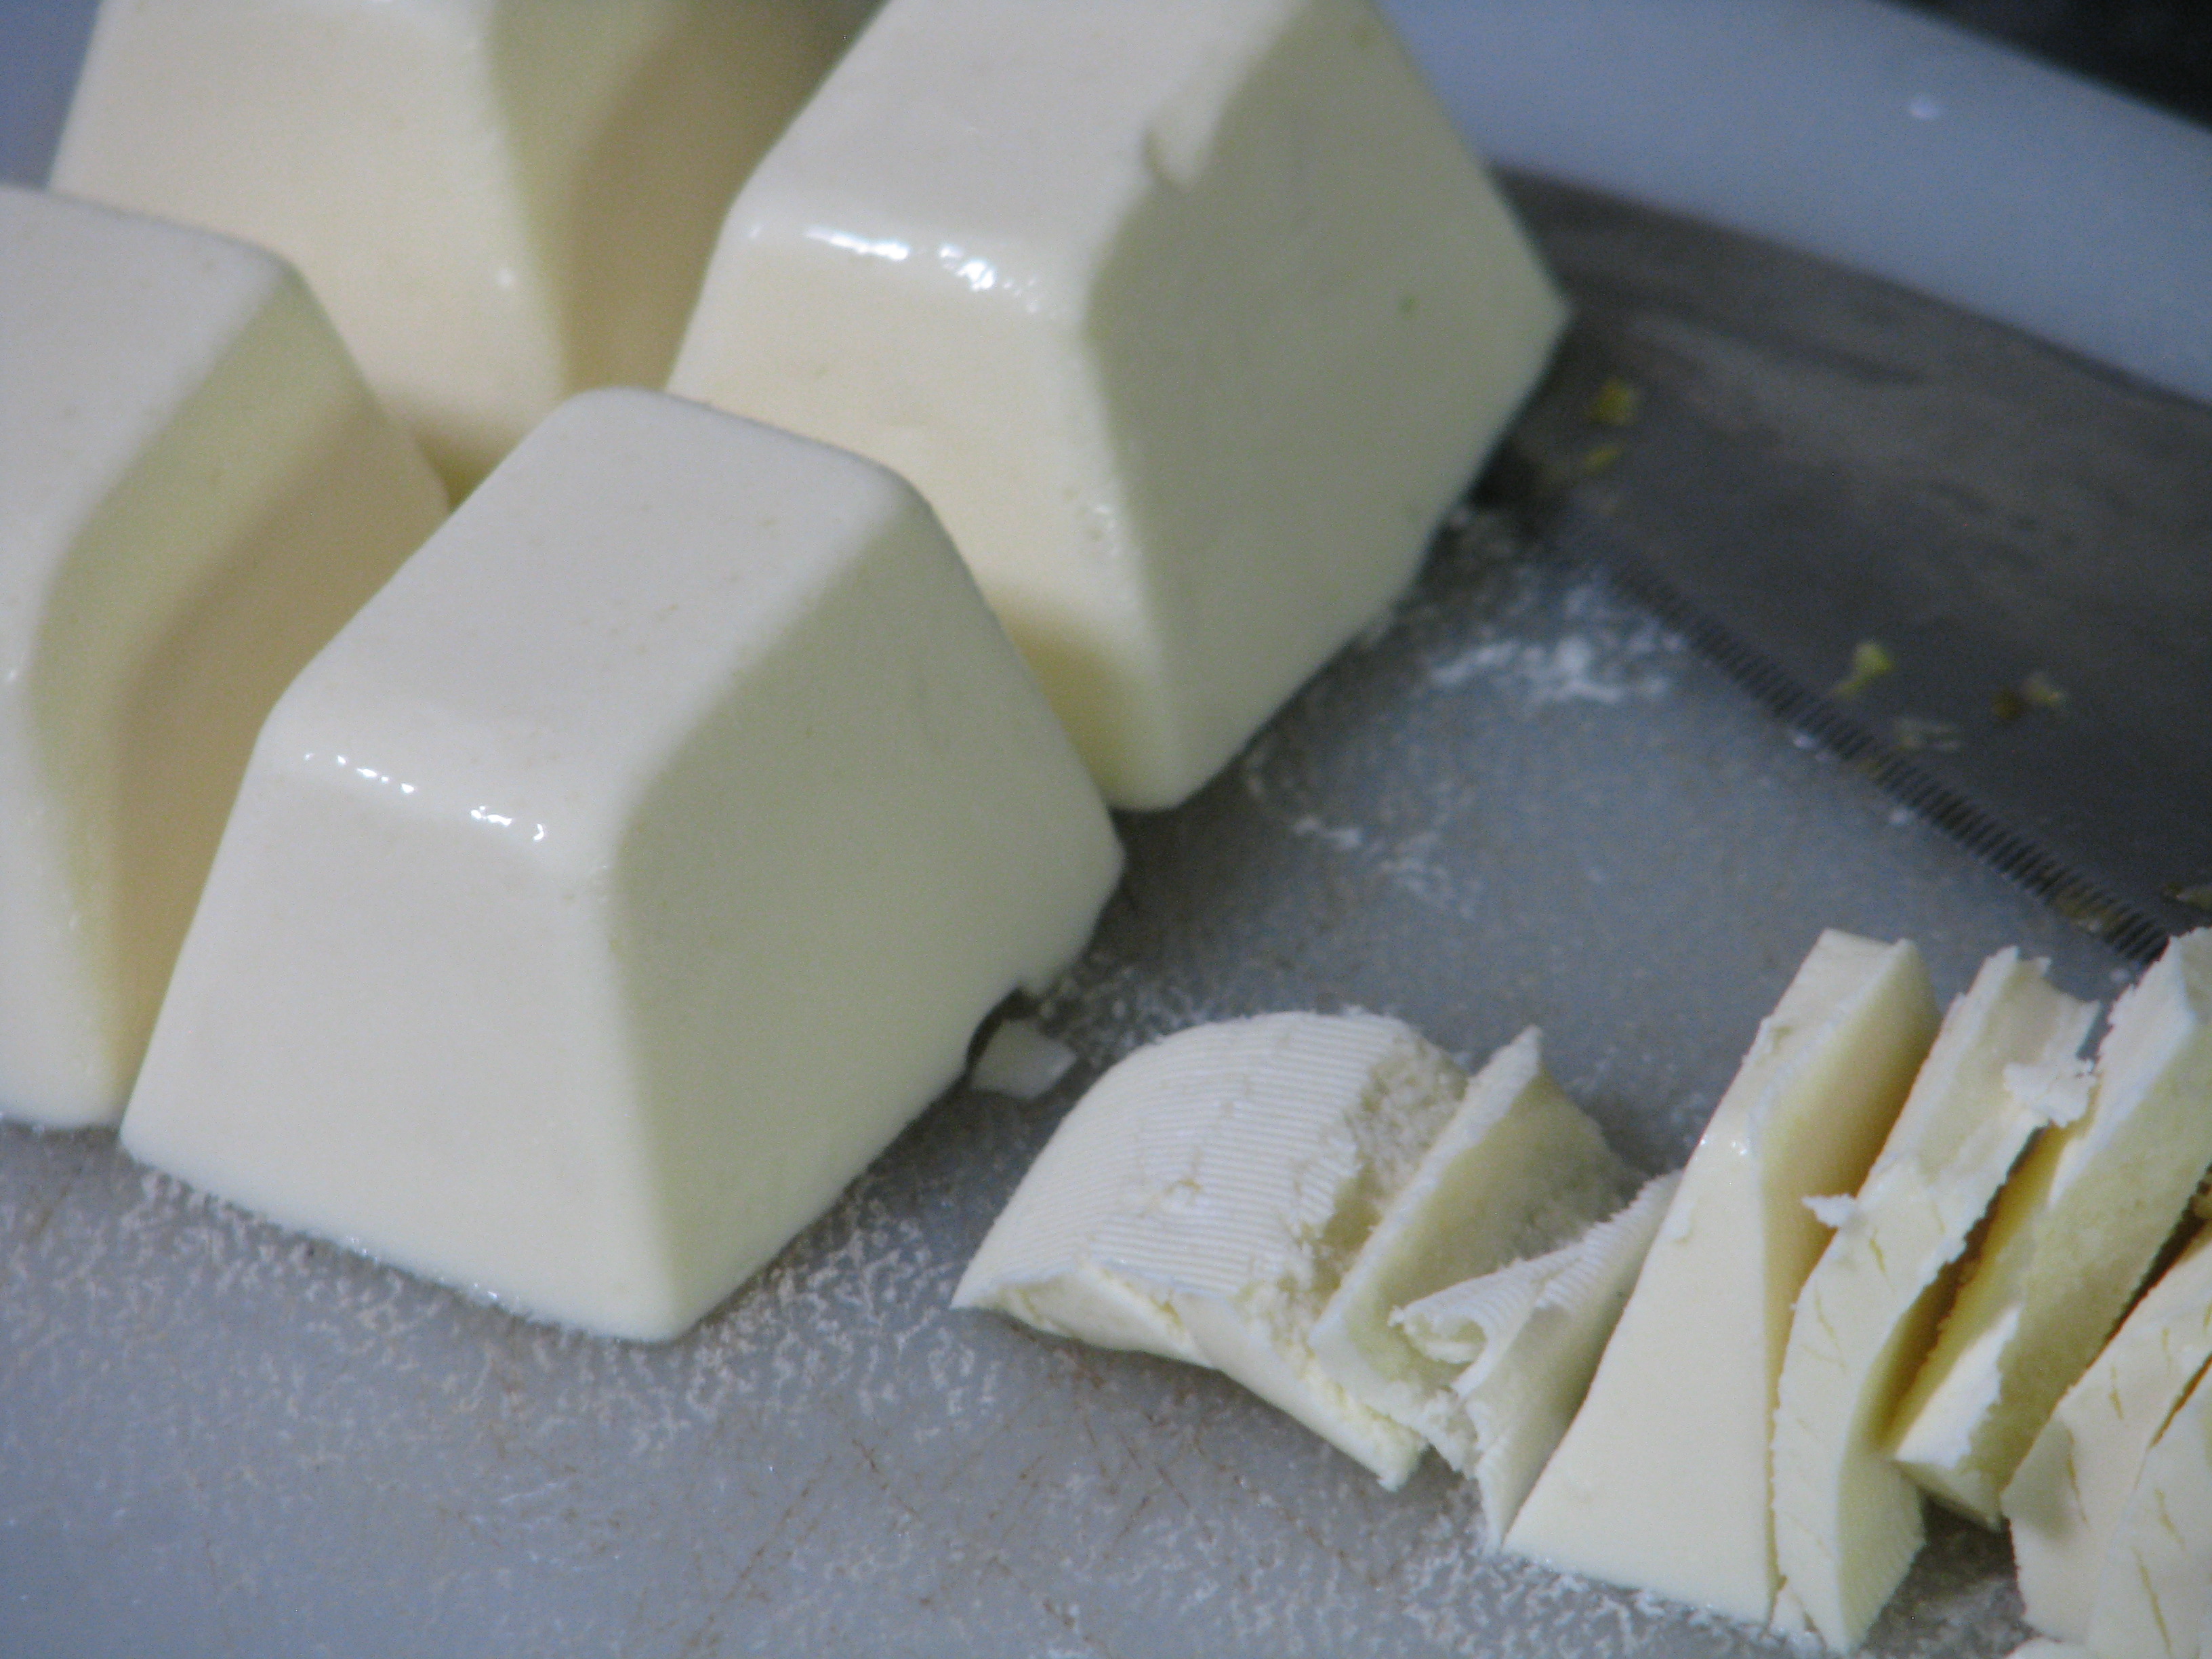
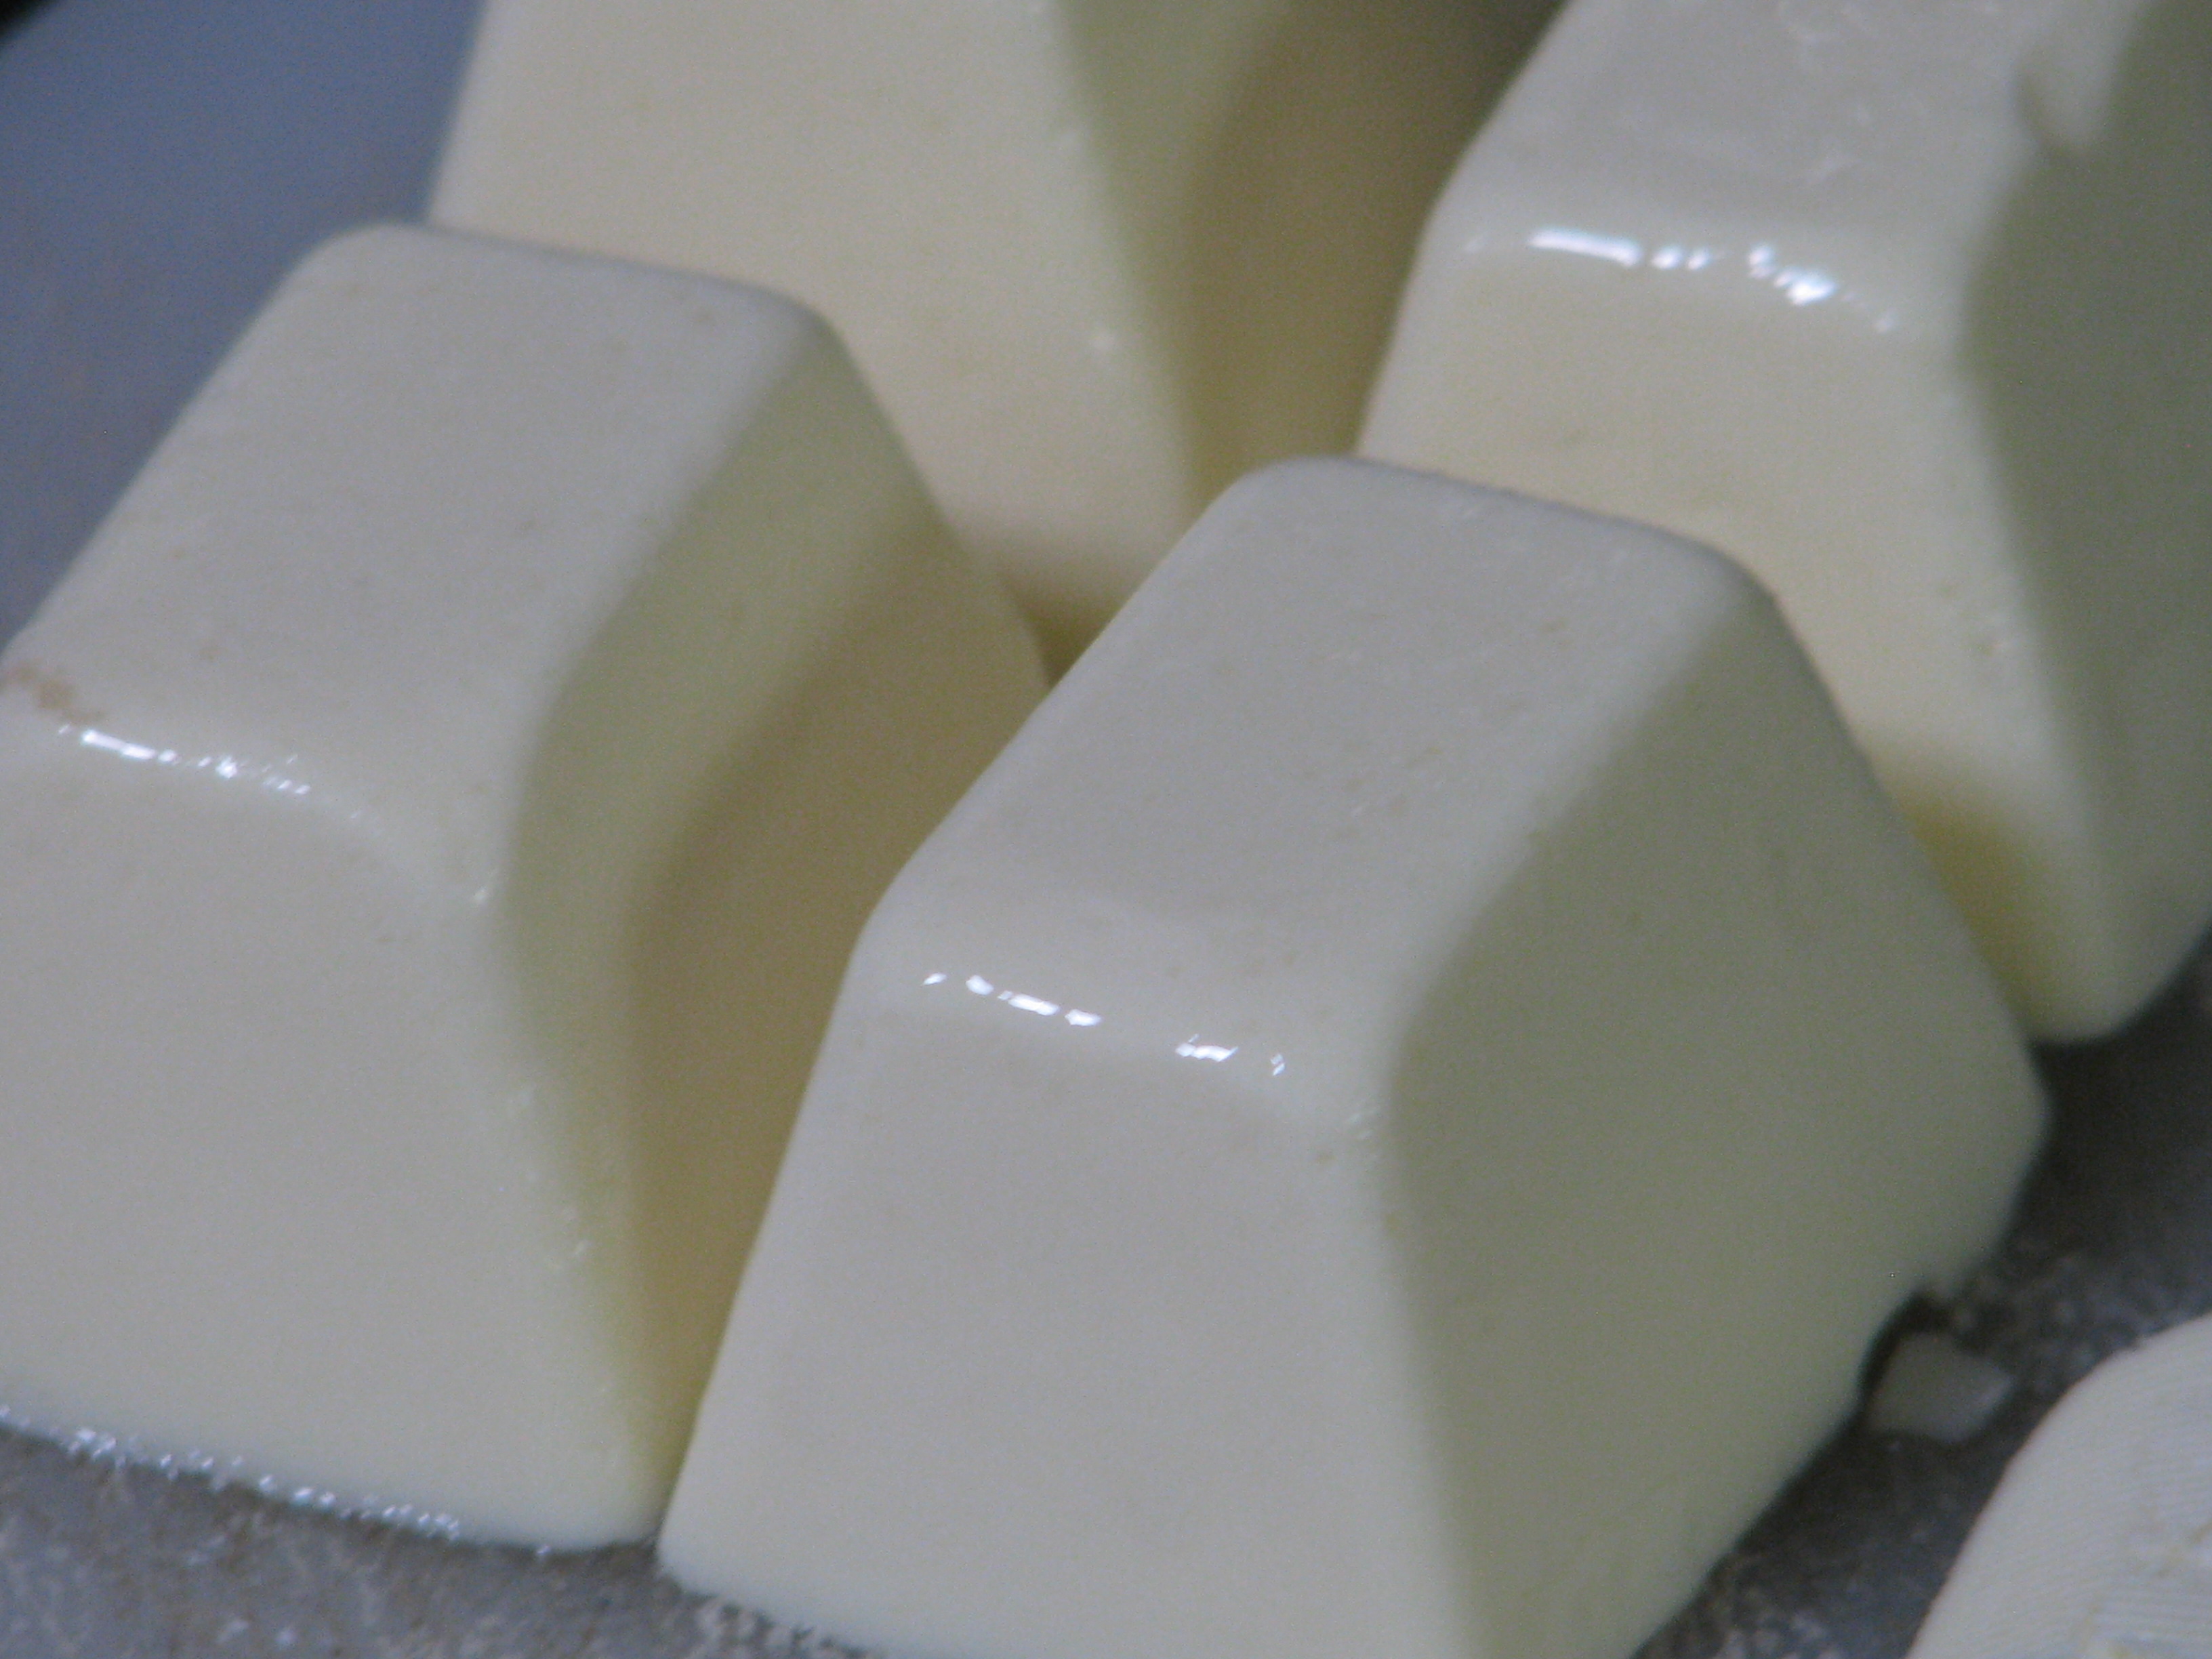
The batch I made without vinegar seemed perfect. The mouth-feel of this butter with or without the vinegar is creamy and all that a high-fat butter should be. It looks, cuts and spreads like butter. The flavor is creamy and very mild, almost like a slightly salted sweet butter. This was a winner for me. For the soy milk I used Trader Joe’s Organic Plain, which does have some sweetener in it. I’ll try with an unsweetened plain organic soy milk another time.
I keep my butter on the counter. I know that organic butter holds its shape better in the heat than processed butter, but both stay stable unless the temperature is in the 80’s. Coconut oil melts at 76F, and in my summertime Southern Californian kitchen, this vegan butter must be kept in the refrigerator. The butter is hard when needed, so the next batch I will take the author’s advice and swap out a tablespoon of coconut oil with regular oil to make it more spreadable.
I wanted to test the butter in cooking and baking. I melted it in a pan and cooked eggs and other breakfast items in it successfully. I used it on toast and on mashed potatoes with great success. The experiment with shortbread cookies went wrong, however, but I don’t think that that was the butter’s fault. These were lemon rosemary shortbread cookies, and contrary to my baking sense I followed the author’s (another blog) directions and didn’t sift the powdered sugar before adding it. There were lumps, therefore, in the batter and I mixed it extra to try and beat them out, which I believe was responsible for making the cookies tough. They were flavorful, but not crumbly. Oh well, I’ll just have to try again! The cookies rolled out, cut, and baked well, retaining their shape and performing as well as with cow’s butter.
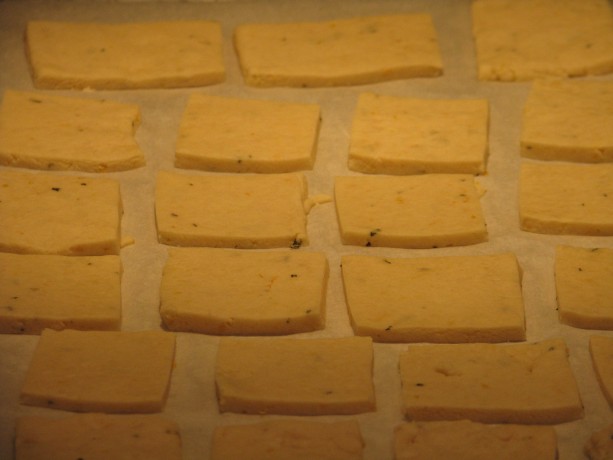
Shortbread didn’t spread using this butter, which was great. I don’t have a finished photo of the lemon-rosemary cookies because, well, they were eaten. As with all substitutions, there is always a difference and vegetarians and vegans have to embrace it. Of course fake bacon and ground ‘meat’ is not quite the same: the great part is that it is far more healthy for your body (lower fat, few preservatives if any, often organic, and not the pesticide-drenched and drugged animals that people eat) and doesn’t perpetuate the extreme cruelty to animals about which humans have become nonchalant. Yes, other animals aren’t kind when feeding off of other animals (those which aren’t vegetarians). Yet we as humans have the option the others don’t, to make eating choices.
Here is the basic revised recipe; please see the original blogpost on VeganBaking.net and give the options a try. I found xanthan gum from Bob’s Red Mill at my local grocery store, and liquid lecithin and coconut vinegar online through Amazon.com.
You can double or triple the recipe with no problem! Enjoy.
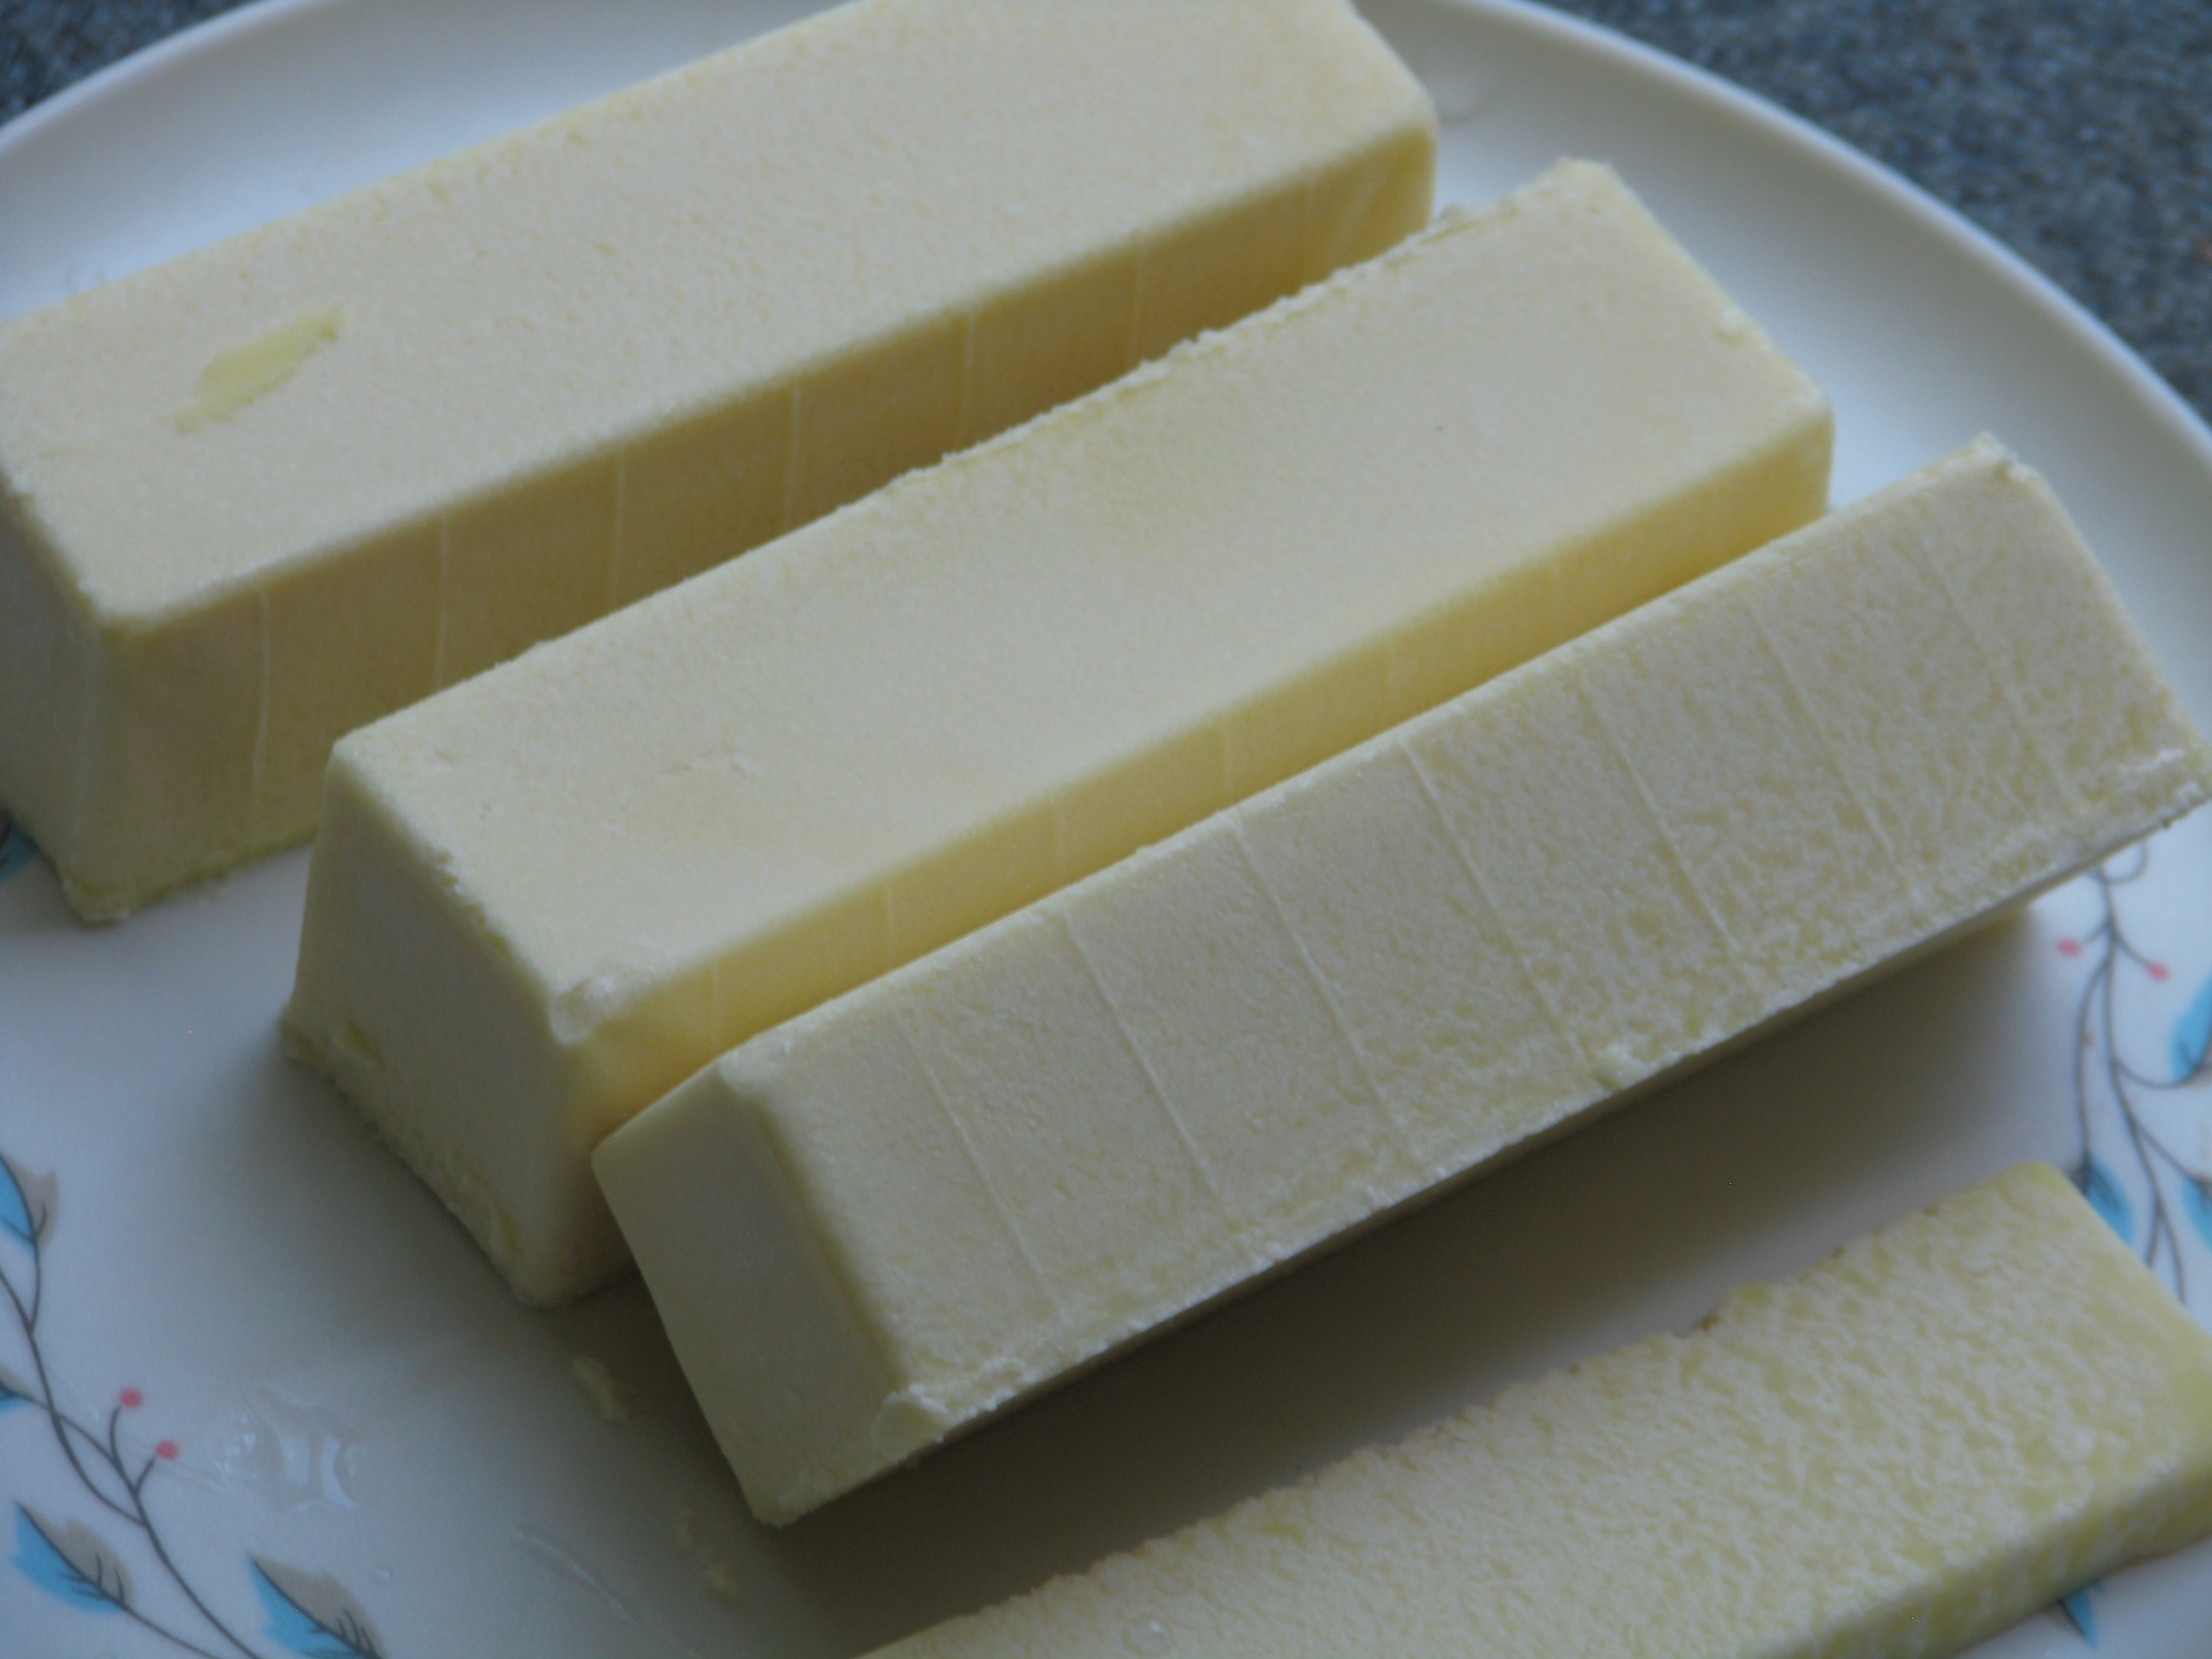
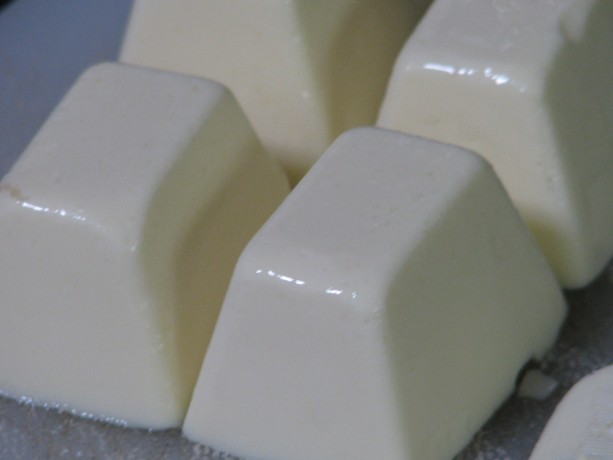
Recipe update: I’ve since made some changes to the recipe, exchanging some vegetable oil for some coconut oil for more spreadability, and adding a little more salt for a more satisfying (to me) taste when spread on toast. I’ve been using this butter for a month now, and have noted that: when melting in a hot pan it will brown faster than regular butter, so keep the temperature down, that it will melt and separate at room temperature (its summer now, so the kitchen is usually in the 70’s – in the winter it will be different) so I keep it in the refrigerator. I found butter stick molds that have the teaspoon markings along the side, so I’ve made 8x the original recipe and poured it into the butter molds, then wrapped each unmolded stick in wax paper and frozen them.
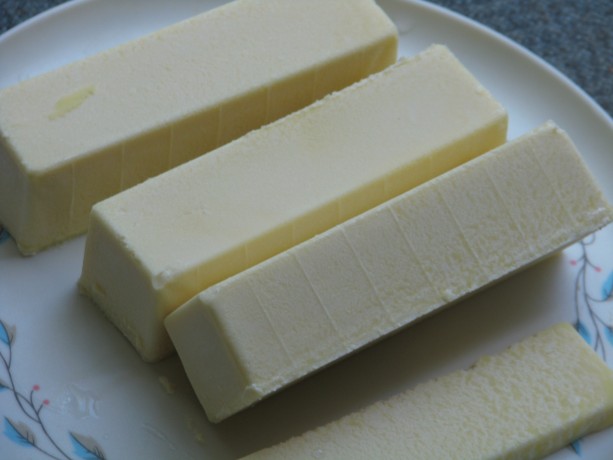
Vegan butter sticks with teaspoon markings along the side for ease in baking. I’ve also poured it back into the cleaned coconut oil jars and frozen them, keeping one in the refrigerator for unmeasured use. I’ve used it along with a non-dairy creamer in the Chocolate Ganache recipe and it is very chocolaty, but not as rich as the original. Part of that is due to the creamer; heavier creamer will produce creamier results, but in no way was it disappointing. It was very tasty, but not as heavy. When refrigerated it didn’t solidify as much as the other, so more chocolate might need to be added depending upon the type of creamer used but it was still spreadable and yummy.
Another Recipe Update:
I’ve been making the butter with unsweetened organic rice milk and it turns out well. At first it tasted too light to be satisfying, but when I had dairy butter at a restaurant it tasted greasy and heavy – my taste buds wanted the vegan butter! I found out that even when the kitchen is colder than the melting point of the coconut oil, it isn’t a good idea to leave the butter refrigerated because unlike dairy butter it will grow mold. The rice milk butter with the increased vegetable oil makes it perfectly usable from the refrigerator. I make sticks and freeze them in a freezer bag for baking and pour the rest into glass jars with screw-on caps for spreading. The jars are kept in the freezer until needed, then switched to the refrigerator. I’ve made biscuits, cookies, cakes, scones and breads with this butter, and with proper handling they all come out just fine. We offered both dairy and vegan butter to our holiday guests and they didn’t detect much of a difference. Since vegan butter is so much lower in calories, and coconut oil is so good for you, I don’t have to hesitate to use it. It is actually part of my weight maintenance program!
Ethical ButterAuthor: Mattie, at VeganBaking.netRecipe type: CondimentCuisine: VeganPrep time:Cook time:Total time:A wonderful vegan butter with no palm oil, but lots of options. My version is without curdling the soy milk. Please see the original excellent post for more explanations and options.Ingredients- ¼ cup + 2 teaspoons organic plain soy milk
- ¼ + ⅛ teaspoon salt (I increased the total salt to ½ t. for spreading butter)
- ½ cup + 2 Tablespoons + 1 teaspoon (130 grams) refined coconut oil, melted to room temp. (For more spreadability, I used ½ cup coconut oil and changed the 2T and 1 t to vegetable oil, along with the following 1 T for a total of 2 Tablespoons and 1 teaspoon vegetable oil.)
- 1 Tablespoon vegetable oil or light olive oil
- 1 teaspoon liquid soy lecithin or liquid sunflower lecithin or 2 ¼ teaspoons soy lecithin granules
- ¼ teaspoon xanthan gum or ½ + ⅛ teaspoon psyllium husk powder (I used xanthan gum)
Instructions- Combine soy milk and salt in a food processor or blender.
- Melt the coconut oil until it is just room temperature and barely melted.
- Add the coconut oil and the rest of the ingredients to the soy milk.
- Blend or process for about 2 minutes on low.
- Pour into ice cube trays, or into butter molds or trays.
- Freeze until firm, about an hour.
- Serve.
- Keep wrapped in refrigerator for a month, or frozen for a year.
- Makes one cup.
- Gardening adventures, Heirloom Plants, Permaculture and Edible Forest Gardening Adventures, Seeds, Vegan, Vegetables, Vegetarian
Watermelon Radish
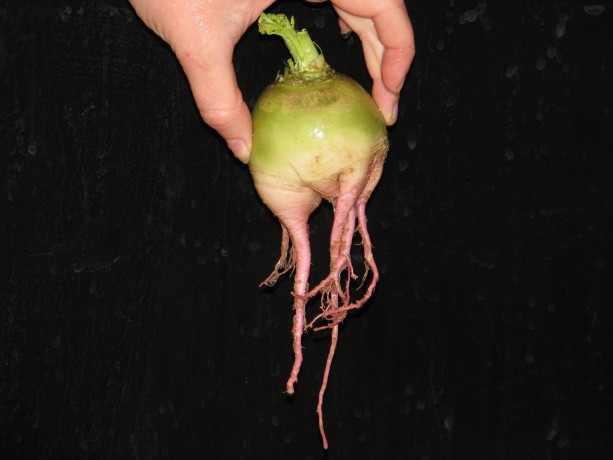
It looks a little like an alien species! We’ve planted a lot of new varieties this year. Still there are seed packages left unopened! So much fun, though. One veggie that we bought from Baker Creek Heirloom Seeds is a beautiful radish called Chinese Red Meat Radish, or Watermelon Radish.
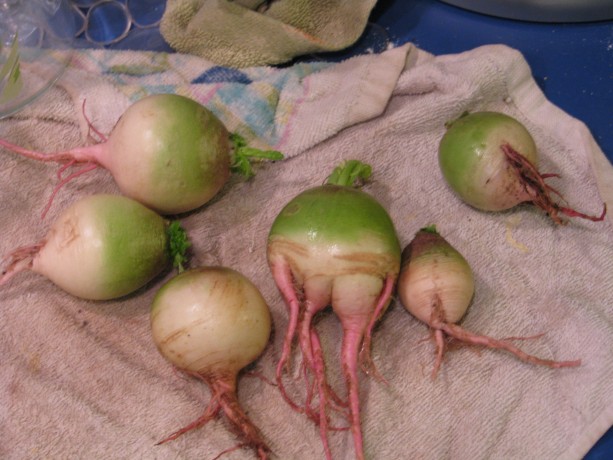
The green/white/pink outer color on the swollen roots is a little disconcerting. I’m not a huge fan of radishes. They grow quickly, help identify rows of slower-growing seeds, and are great for kids to plant. Still neither me nor my tummy really likes the strong radish flavor.

Slicing into them is a little creepy. The Watermelon Radish, however, are large, crisp and sweet on the inside. My daughter cut them into small triangles and stir-fried them. They had a little of the bitter radish flavor, but if you expect that you will be delighted at the taste and color.
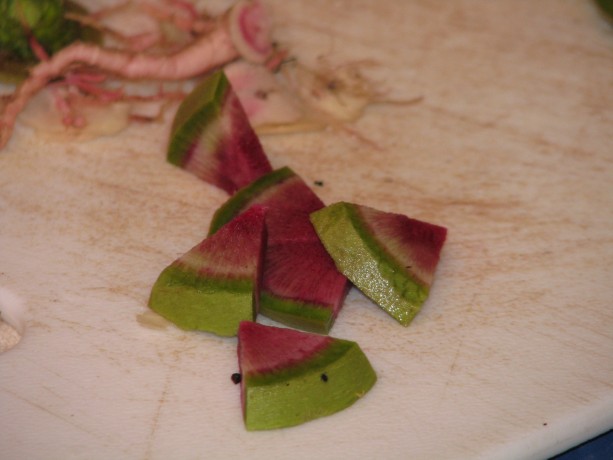
These brilliant little wedges don’t hold much heat and are great raw, in stir-fries, or lightly cooked on their own. Younger ones have more of a starburst of red in the center. Older ones grow brilliantly red, set against the green outer skin, as dramatic as a dragonfruit.
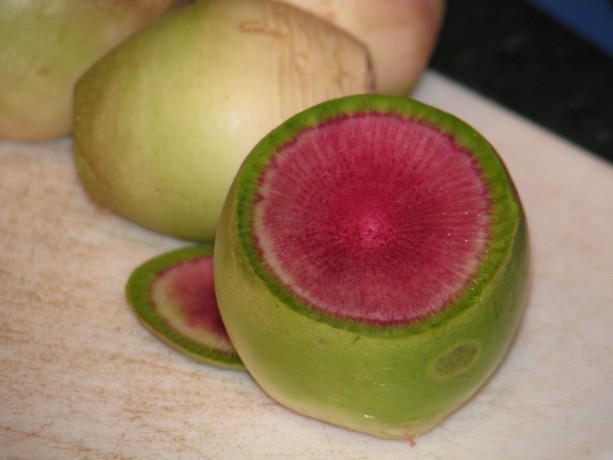
The brilliant center color is fantastic. Radishes are cool-weather plants; these I planted late but were shaded by vigorous volunteer currant tomatoes that are taking over the bed!
When planting annuals, plant your favorites but don’t forget to play. There are so many varieties of veggies, herbs and flowers available now, especially heirloom and organic (non-GMO!). Why not try some and share the seed with friends?
-
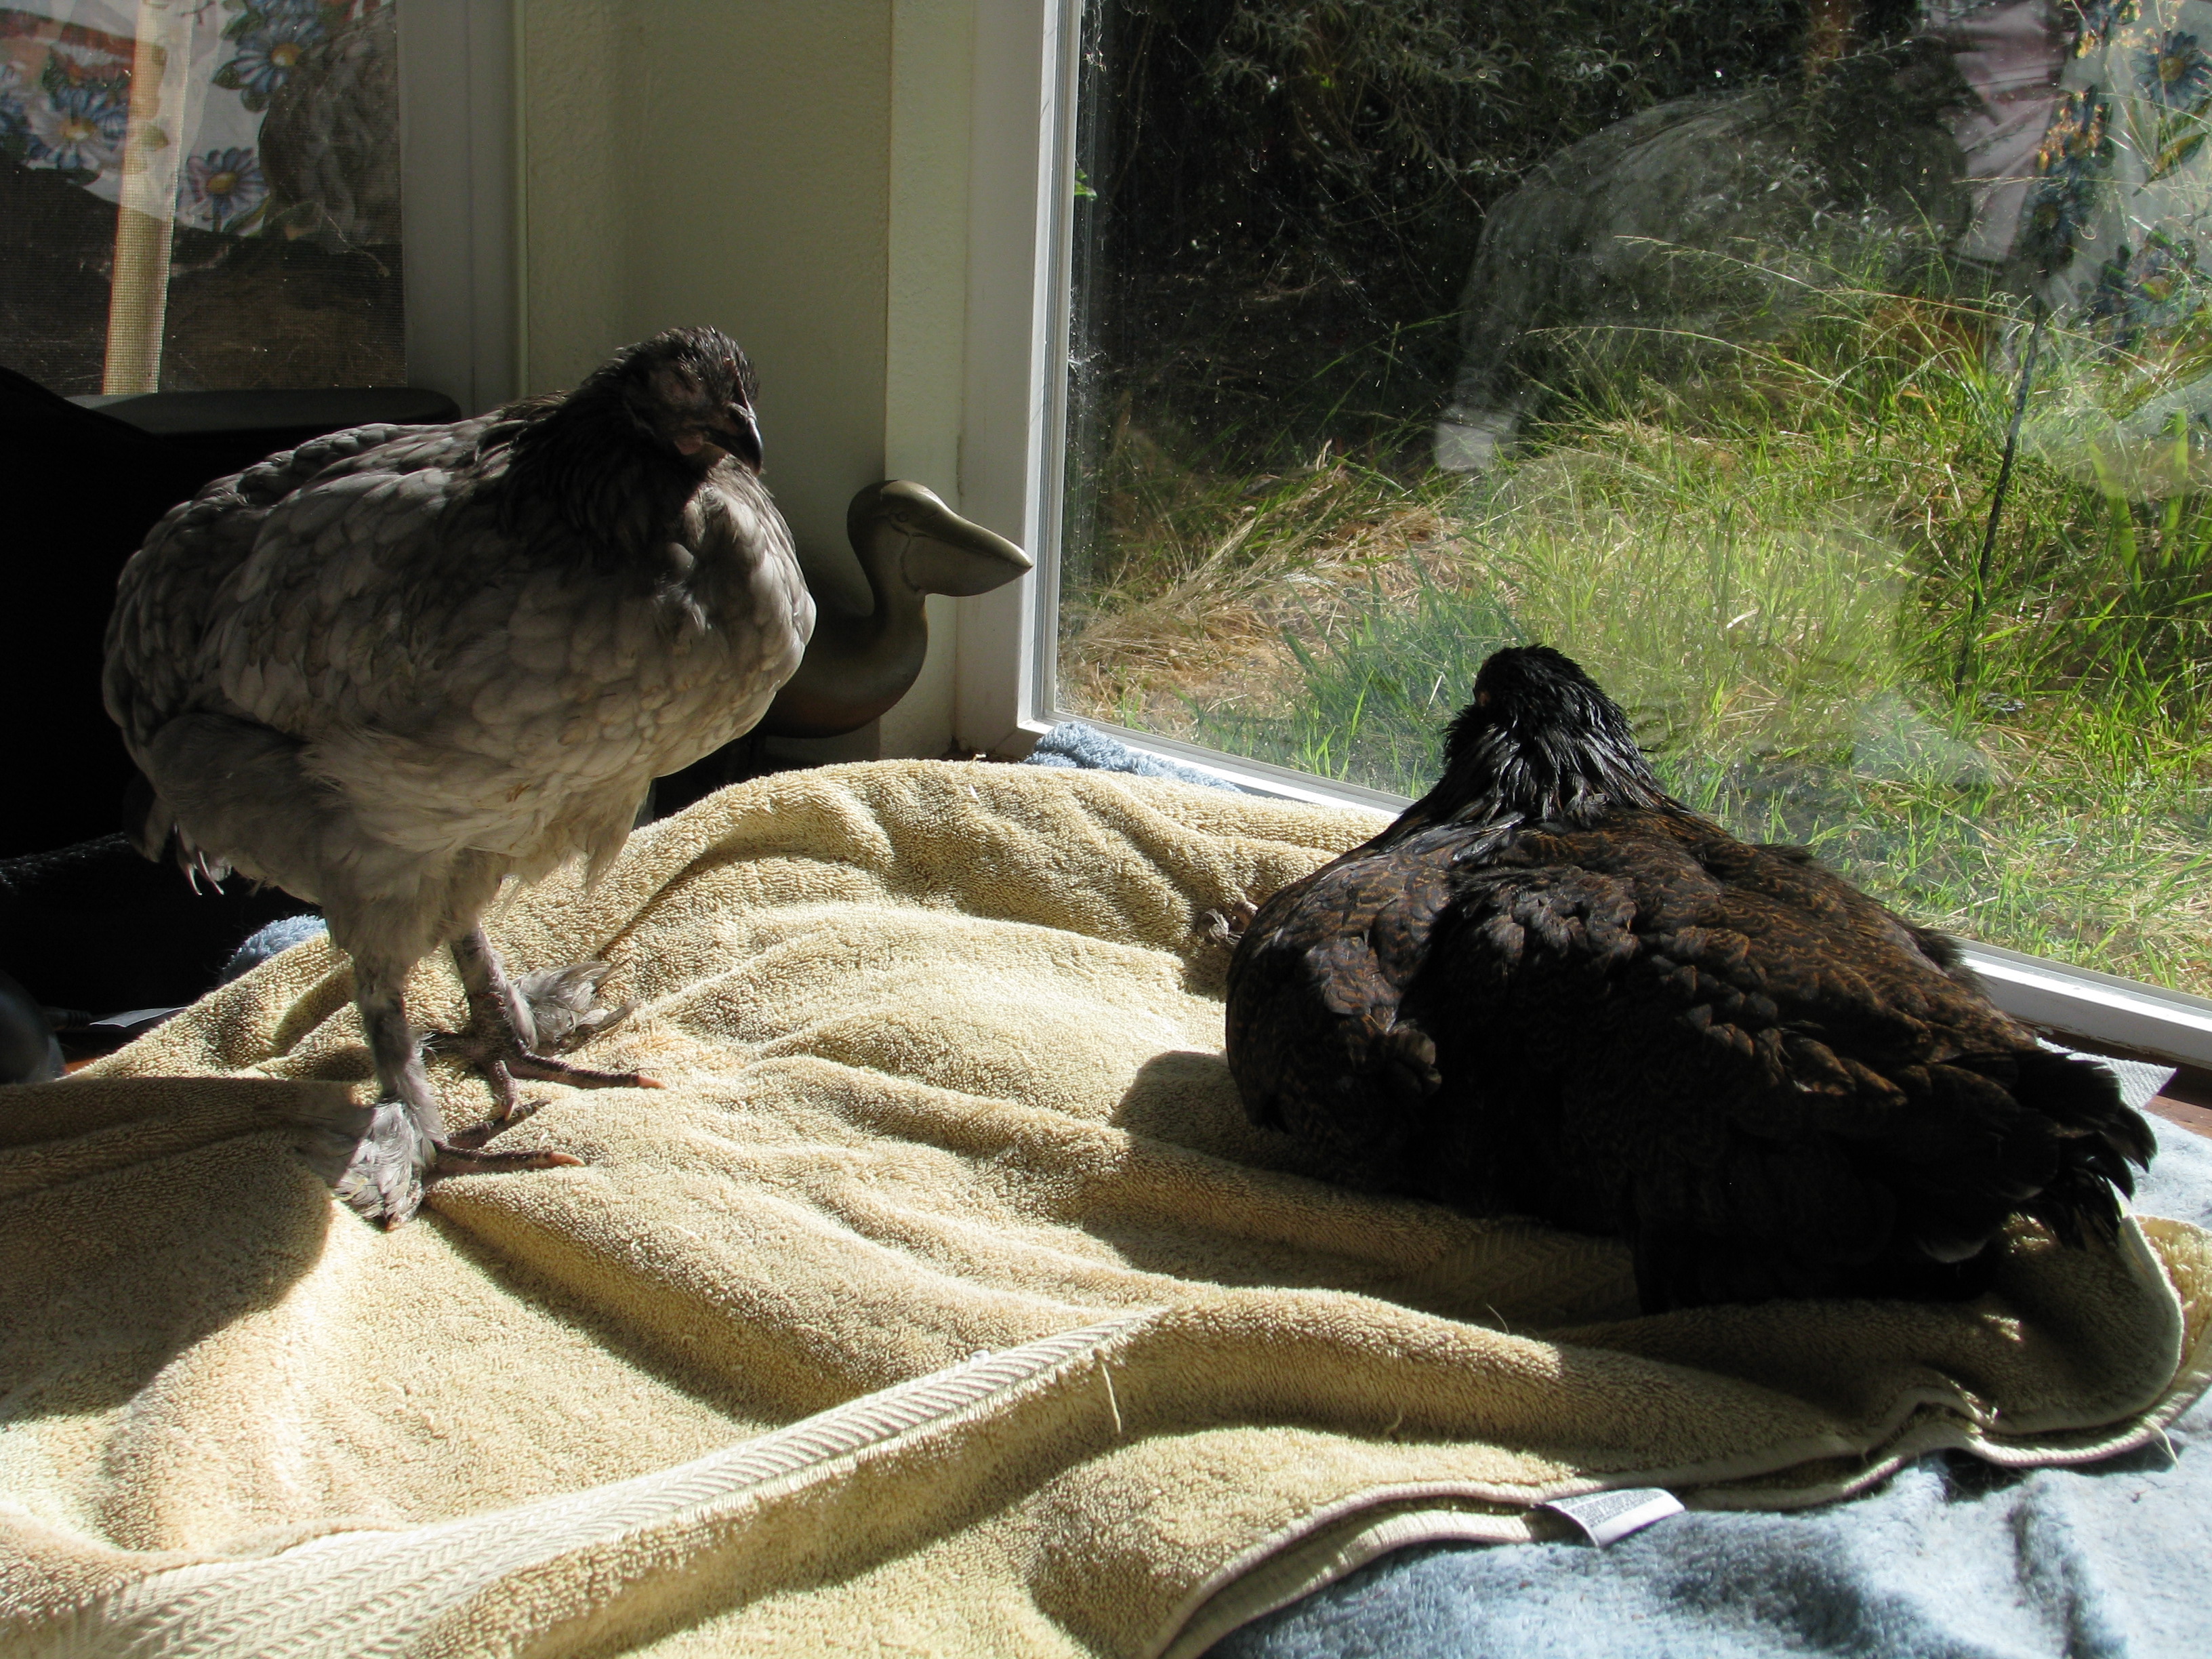
Striving for Healthier Hens

Nora and Branwyn enjoying the sun on our windowseat. The last six months have been very difficult chicken-wise. We lost Chickpea to a coyote, who snatched her a few yards from us, we lost Miss Amelia and Madge from unknown ailments, and we’ve nursed chickens back to health as well. Mulan had a prolapsed uterus, which we cleaned, stuffed back in coated with honey from our own bees and bandaged. She recovered and is laying happily, thank goodness. Viola and a couple of others had impacted crop, which means that they swallowed something like long pieces of grass which have blocked up the exit from their crop to their stomach. There have been many mornings I’ve spent making a chicken throw up, without breaking her neck or suffocating her. We’ve been frazzled with the health of our hens, all purchased through feed stores. Our past chicken experiences had no egg binding, no septic peritonitis, no crossbill (which should have been bred out of the hens) and no infected eyes.
I’ve purchased mostly organic feed for them, and given them greens in their large Fowl Fortress or brought them into the fenced yard for grazing. Organic feed is amazingly expensive. Since we don’t eat the hens and we use their eggs as one of our main protein sources, they need to be in good productive health. Chickens can live ten years or more, and lay that long, too. Ours seem to top off at three.
I tried fermenting their food. Fermented food is all the rage and I read many articles about the health benefits of fermenting chicken food. In a 5-gallon bucket I’d mix water and their lay crumbles along with some cracked corn and wait a couple of days until it smelled yeasty. Then I’d give them some and replenish the bucket. It took awhile for the hens to come to like the food, but it didn’t seem to do anything for their health. In our warm San Diego weather it was tricky to not have the fermented food spoil. Eventually I gave that up.
One of the hen’s purposes in the garden is to create compost. They excel at pooing. When the opportunity arose to be able to pick up discarded fruit and vegetables from the Fallbrook Food Pantry four times a week, I jumped at it. Much of the produce is still edible for the hens; when mixed with pooey straw and dirt the chickens could grub out, well, grubs and fly larvae and eat more naturally. Although we’re still picking it up, we are devoting hours a week lugging stinky veggies around. It is hard and heavy work, and the fly population has exploded. However we have seen more flycatchers hanging around the yard recently and the phoebe is truly fat. I shovel and rake the produce mixed with carbon sources (paper goods from the house mostly) and then the hens kick it all over. It is good exercise for them, they eat far less lay crumble, and they are producing some very good quality compost for the veggie garden. Their health has been better.
One of the reasons that the hens came down with just about every known illness was because they were purchased from hatcheries. Hatchery birds live in hell from the second they are born. Since few people want roosters, the male chicks are swept into trash bags and thrown away, live. The female chicks are inoculated and packaged up for shipment through the mail. There are always extra chicks packed in because the heat of the ones on the outside keep the ones on the inside warm enough to possibly survive the stressful, hungry, thirsty and brutal trip. Therefore the ones on the outside of the bundle are sacrificial. I didn’t want to support this animal cruelty any longer.
I decided to find a local breeder who cared for her hens. I found someone who seemed reputable; her mother owns a feed store and the woman breeds horses, dogs and hens. On conversation with her I learned that she had imported chickens from good stock and bred them at her place. The hens weren’t inoculated, but that wouldn’t matter to us since we have a small isolated flock. With glee I ordered four pullets, from several weeks old to a couple of months. They were different breeds and were to lay different egg colors. We sectioned out the back of the Fowl Fortress and happily put the girls in. Not long after we found out they were crawling with lice. None of our other girls had lice, thank goodness. Upon contacting the woman she said that she’d put Frontline on the hens per advice from her vet. We smeared Vaseline around the eggs that encrusted their necks and powdered diatomaceous earth on their bodies. We’ve repeated the treatment, but we haven’t won the war yet. I noticed when we picked the girls up that the blue maran, Nora, had a watery eye. That eye became infected, and we learned that it was probably a small eyeball, and now she’s blind in that eye. Just a few days ago her other eye was bothering her so we are treating it. She is underweight, and Miranda noticed that her beak was overgrown so it was hard for her to peck food. Miranda trimmed it, having had lots of experience with our poor late crossbill, Belle. So Nora lives for the time being in the house as we hope that she doesn’t go completely blind, and as we try to feed her up so that if the time comes when we can reintroduce her, the flock won’t attack her.
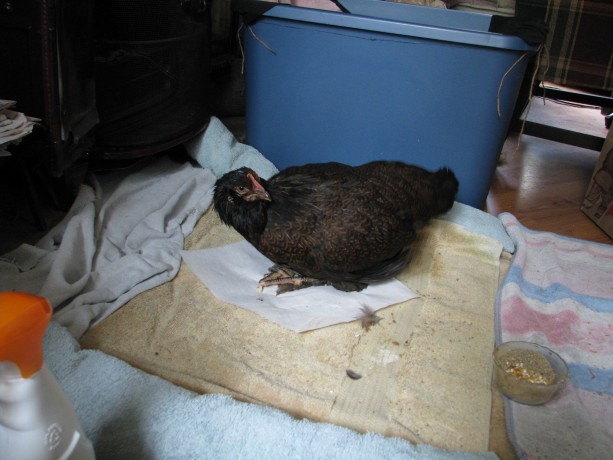
Branwyn balancing herself on her weak forelegs. Then there is Branwyn. She’s a feisty olive-egger. A few weeks ago Miranda noticed that Branwyn’s legs were bowing out as she walked. By the time she brought the bird up to the house she was paralyzed in both legs. Our immediate fear was Merek’s disease, which is highly communicable and would have meant death for all our birds, sterilization of the coop and no hens for six months or more. Within days Branwyn showed signs of moving her left leg. Miranda configured a Rubbermaid container as a bouncy chair, tying a t-shirt across it and cutting leg holes through it so Branwyn could rest with legs down and feet touching the bottom. Later, Miranda cut the legs from an old pair of tights and stuck Branwyn through to bounce her across the floor, giving her physical therapy. Sounds nutso, I know, but its working. Branwyn’s left leg is much stronger and she’s beginning to force her right leg to work. She can’t stand, but she can now get her feet under her. We still don’t know what was wrong with her; some kind of neurological disorder or possibly vitamin deficiency. We were giving her Vitamin E and B complex with selenium heavily for a week and saw her initial improvement. Vitamin deficiency can be inherited; common chicken feed should have enough in it, especially when combined with vitamins in their water.

Miranda walking Branwyn in her sling made of old tights (to the tune of Surrey With The Fringe On Top). Lark, who was huge with sterile peritonitis, was drained by the vet and is several pounds lighter and much happier. She’s with the rest of the flock. Since we have no idea what caused the condition (she’s barren), it might happen again but for now she’s back kicking fruit around with the rest.
I still don’t want to participate in the hatchery butchery and torture. Anything mass-produced, be it animals, food, plants or products, are rooted in cruelty: sweat shops in other countries, underpaid workers, poor root stock, diseased, malnourished and maltreated animals, unhealthy chemical-laden food. I’m holding off on purchasing any new hens, even though I wanted a lavender Americauna. I still think that buying local, while more expensive, is better. For whatever reasons this batch have all been ill. In fact, the only hens we’re treating right now are all four of the new girls!
Chickens have wonderful personalities and make great pets, and they are pets; having a few hens for eggs and meat sounds easy but just like any living thing they require work. Especially OUR hens, who must know we won’t cull them and have decided that we are an early retirement home with personal nursing care. I wish I could look forward to such a deal!
You May Also Like
Native Insects and IPM
- Animals, Bees, Birding, Books, Building and Landscaping, Chickens, Cob, Compost, Composting toilet, Fungus and Mushrooms, Gardening adventures, Heirloom Plants, Hugelkultur, Humor, Living structures, Natives, Natural cleaners, Other Insects, Permaculture and Edible Forest Gardening Adventures, Ponds, Predators, Quail, Rain Catching, Recycling and Repurposing, Reptiles and Amphibians, Seeds, Soil, Water Saving, Worms
Permaculture Lectures At Finch Frolic Garden, June 2014
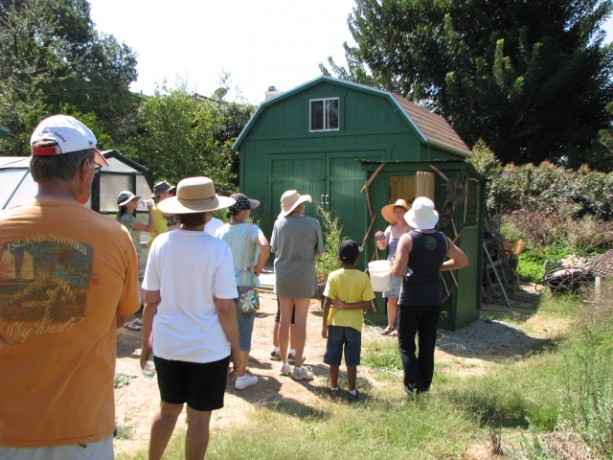
Tour Finch Frolic Garden! Permaculture Lectures in the Garden!
Learn how to work with nature and save money too
Finch Frolic Garden and Hatch Aquatics will present four fantastic, information-filled lectures in June. Join us at beautiful Finch Frolic Garden in Fallbrook, 4 pm to 6 pm, for refreshments and talks on…
Saturday, June 7: Introduction to Permaculture and Finch Frolic Tour: We’ll take you through the main precepts of permaculture and how it can be applied not only to your garden, but to yourself and your community. Then we’ll tour Finch Frolic Garden and show rain catchments, swales, plant guilds, polyculture, living buildings and so much more.
Saturday, June 14: Your Workers in the Soil and Earthworks: Learn the best methods for storing water in the soil and how to replace all your chemicals with actively aerated compost tea and compost.
Saturday, June 21: Aquaculture: You can have a natural pond – even in a tub! How natural ponds work, which plants clean water and which are good to eat. Even if you don’t want a pond, you’ll learn exciting information about bioremediation and riparian habitat.
Saturday, June 28: Wildlife in your Garden: What are all those bugs and critters and what they are doing in your yard? We’ll discuss how to live with wildlife and the best ways to attract beneficial species.
Your hosts and lecturers will be
Jacob Hatch Owner of Hatch Aquatics. With years of installing and maintaining natural ponds and waterways, and a Permaculture Design Course graduate, Jacob has installed earthworks with some of the biggest names in permaculture.
Miranda Kennedy OSU graduate of Wildlife Conservation and wildlife consultant, Miranda photographs and identifies flora and fauna and maps their roles in backyard ecosystems.
Diane Kennedy Owner of Finch Frolic Garden, lecturer, consultant, Permaculture Design Course graduate, former SDC Senior Park Ranger, Diane educates homeowners on how to save money and the environment while building their dream gardens.
Each class limit is 50 attendees, so please make pre-paid reservations soon before they fill up. Fee for set of four lectures and tour is $45 per person. Single session fee is $20 per person. Contact Diane Kennedy at dianeckennedy@prodigy.net for reservations and directions.
You will not want to miss this fascinating and useful information!
You May Also Like
Native Insects and IPM
- Building and Landscaping, Compost, Fungus and Mushrooms, Gardening adventures, Heirloom Plants, Hugelkultur, Natives, Permaculture and Edible Forest Gardening Adventures, Rain Catching, Seeds, Soil, Water Saving
The Albedo Effect: How Bare Earth Causes Wild Weather
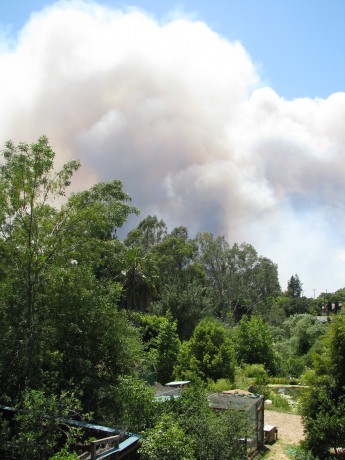
This week’s 100F+ temperatures and high Santa Ana winds have fueled three fires close to us. It is May, not October. Albedo is a reflection coefficient. In layman’s terms it is the effect that happens when sunlight is reflected off of white areas. There is the high albedo of bare earth, snow and ice, and clouds, and the low albedo of water and vegetation. There is less reflection from dark areas such as off of water and green areas, and darker areas, just like dark clothing, absorbs more heat rather than reflects it like white clothing does. There are arguments that we should cut down all the trees to increase white space to stop global warming. NO! The plant life that occupies the green spaces transpire water and excess heat into the air, causing cloud cover. Clouds, of course, insulate the earth from the sun and their albedo effect is cooling to the earth, not to mention that clouds amass moisture and – bingo – you get rain. It is the loss of green areas and the desertification of large masses of Africa, and the in-progress desertification of the already drier areas of the world (such as California) that makes the albedo effect one that is helping warm our climate. Great tracks of land now reflect light into cloudless skies; water sources dry up and plants die so transpiration disappears. The loss of air-borne water (evapotranspiration) allows areas around the desert area to also dry out. The rapid change of climate due to desertification, loss of topsoil and the resulting erosion and the melting of our ice caps (creating larger oceans and thus larger thermal masses to reflect heat) causes severe weather patterns – weather patterns that balance out huge dry desert areas with destructive rain and wind storms in other areas. Drying areas ignite… here in San Diego North County there are five fires burning as I sit, and heavy smoke and ash rain down on everything between them. My house is not threatened at this time, but we may be evacuated. So many people are evacuated right now and the highways are packed. There is another fire near San Diego, and two between here and Los Angeles. It is May – usually we have these temperatures, wild winds from the desert called Santa Ana winds, and fire threat in October. Our lack of rain doesn’t bode well for California.
My point is that to help balance nature out again, we need to hurriedly lessen the amount of reflected light in areas where we were traditionally covered by plants. We need to plant. We need to plant native plants. We need to re-green our landscapes, in each backyard and vacant lot, as quickly as we can. Allow the plants to keep moisture in the soil, to slow flooding, to transpire moisture into our atmosphere so that rain comes back to the desert areas. We need to hold what rain that falls in our soil by burying wood (hugelkultur), by creating level swales and mulching, mulching, mulching. Yet on trash day I see bags and bags of leaves set on the street ready to go to the dump. We need to stop erosion areas by using whatever means we can to keep the topsoil back. We need native trees with long roots that will hold the soil, build topsoil and transpirate.
Of course you probably can’t afford lots of plants, so plant natives that will quickly grow large. Between the slower-growing oaks, plant sages, mallows, ceanothus, quail bush and other bushes that cover 10 -15 feet of dry earth. Under them will be moisture, protected soil with mulch from their leaves, and habitat for lizards, frogs, small birds and hundreds of insects. These bushes will help shade young oaks, sycamores, and other trees and keep their trunks from scorching.
Throw down seeds of California fescue (Festuca californica var. parishii) to hold soil and cover the dry, reflective areas. This native grass is tough and doesn’t cause trouble like non-native grasses. You can seed it with California poppies, lupine and other native flowers. Aggressively weed out non-native species.
Since I was little, in the 60’s, I heard the mantra ‘plant a tree’. Obviously we haven’t been doing that. I think it should be changed to ‘plant a tree and don’t cut down any more because the earth can’t afford it’!
Please plant! And all my hope goes to you and yours who are threatened or have had losses from our severe weather.
-
Fruit Flies – How To Be Rid of them Naturally

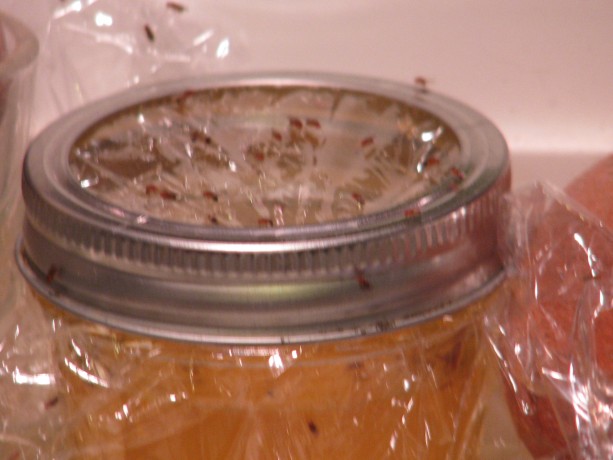
A jar, plastic and ACV. Works like a charm. It is fruit season and citrus and stonefruit are becoming ripe in the garden. When the fruit comes to the kitchen, and particularly when the peels and pits go into my open compost bucket, fruit flies appear as if by magic. It is amazing how quickly they show up and how quickly they reproduce. Fruit flies are busy laying eggs in any spot on any fruit or juice vegetable such as tomato. Gross. Here is a quick and inexpensive method of trapping and -unfortunately- killing the little things. I don’t like to kill anything, but I don’t know of a way to get around this, even when I drape towels over the fruit.
Take a small canning jar or baby food jar – something like that. Use the rim of the lid of a canning jar, or just a strong rubberband. You’ll also need a small piece of plastic to cover top of the jar; you can reuse some cellophane or part of an old plastic bag.
Fill the jar only about halfway with apple cider vinegar – not white distilled vinegar. Place the plastic over the top and secure with the lid rim or a rubber band.

A fruit fly finding a way in. Take a toothpick and prick tiny holes in the plastic. Set the jar near where the fruit flies accumulate and forget about it. Be sure to remove other lures such as old kitchen scraps or fruit, or cover it with dishtowels. That’s that. The flies swarm to the jar and eventually disappear into it and can’t get out.
A kind of blurry photo of lots and lots of fruit flies queuing up to get inside. You May Also Like
Native Insects and IPM
- Arts and Crafts, Building and Landscaping, Gardening adventures, Permaculture and Edible Forest Gardening Adventures, Recycling and Repurposing
Urbanite, the New Name for Chunks of Cement
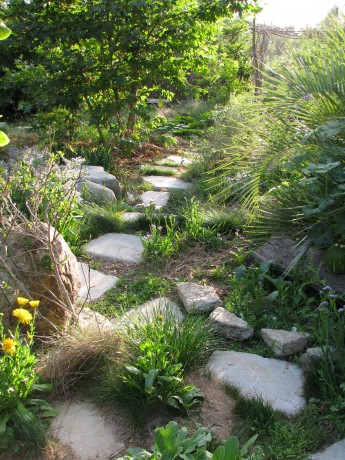
Urbanite stepping stones work beautifully in the garden allowing plants to grow in between. Just as old LPs or records are now called vinyls, so are chunks of a neighbor’s patio called urbanite. I like the term because it makes the mental transition from a waste product – cement chunks – to building material. Put an ‘ite’ at the end, and you can use it. The name urbanite also makes me envision pieces of nature-less cities being used for more natural landscapes. There are spaces around chunks of cement for plants to grow.
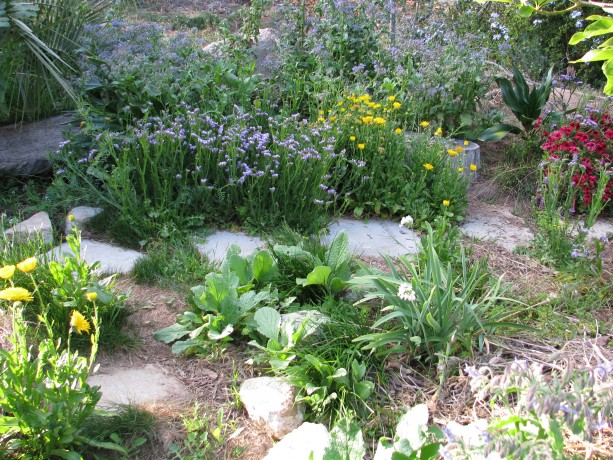
Urbanite lasts a long time, too, and it is free. The idea of working with cement chunks doesn’t sound aesthetically pleasing, but done well it always has visitors to Finch Frolic Garden enthusiastic. A pathway and two retaining walls were made of urbanite, and they are all wonderful.
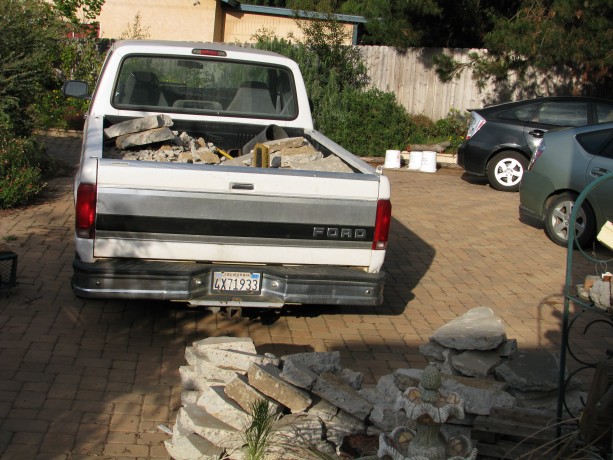
A friend and former co-worker called me a few weeks ago to offer urbanite from a piece of her patio that had to be repoured. It took awhile but I found some help to go pick it up. With a small pickup truck we managed two loads; the pieces were stacked on the patio, but the only way to access them was to drive the pickup below the patio wall. Unfortunately, the ground was at an unnerving angle, and quite sandy so there was little traction. I handed pieces of urbanite over the wall and down to Jacob, who loaded them into the tilted truck. It was quite warm that day so we were well cooked. There was a lot left.
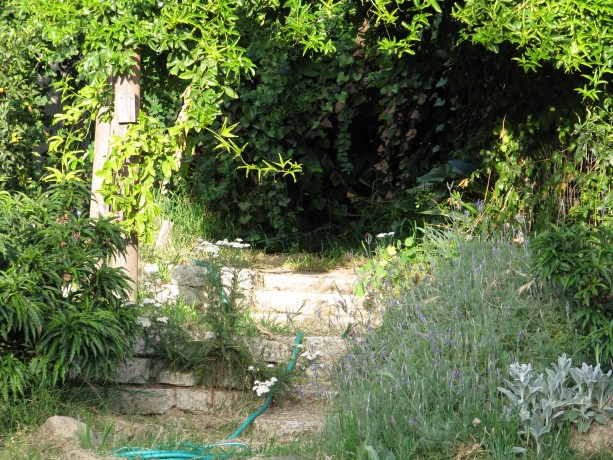
You can see the retaining wall and stairs made from urbanite peeking out from under the plants. Then Jacob arranged for me to borrow an old 2-ton pickup with 4-wheel drive. My daughter and I headed over two days ago during a cloudy morning intending to get the truck very close to the wall. No way. The truck tilted dangerously and began to slide, so I had to park it out on the driveway. Of course the sun came out. We spent three hours taking turns tossing huge chunks of cement over the patio wall, shot-putting the pieces so that they wouldn’t hurt the plants at the base of the wall, and then picking them up (finding some of them that had rolled downhill) and carrying them across the shifty dirt to hoist the pieces up and into the bed of the large truck. We swept rubble into nursery containers and dumped them into the truck as well.
Well cooked and completely exhausted, we made it home with the whole load, the truck tires just a little squished. Now we have urbanite to replace some of the stairs made from palms that are beginning to soften or which have been eaten by bunnies.
Ugh! Unfortunately, we still have to unload the truck.