- Fruit, Gardening adventures, Permaculture and Edible Forest Gardening Adventures, Recipes, Seeds, Vegan, Vegetarian
Jackfruit: The Largest Fruit in the World
 I’d heard a lot about vegetarians using unripe jackfruit in the place of pulled pork because it can have the same texture. I had looked for canned jackfruit to no avail until a friend on Facebook (that most reliable of news sources) wrote that they had seen fresh jackfruit at 88 Ranch market in Temecula, a neighboring town.
Off Miranda and I went. Not only did we find amazing and wonderful produce and mushrooms there, but we found the jackfruit.
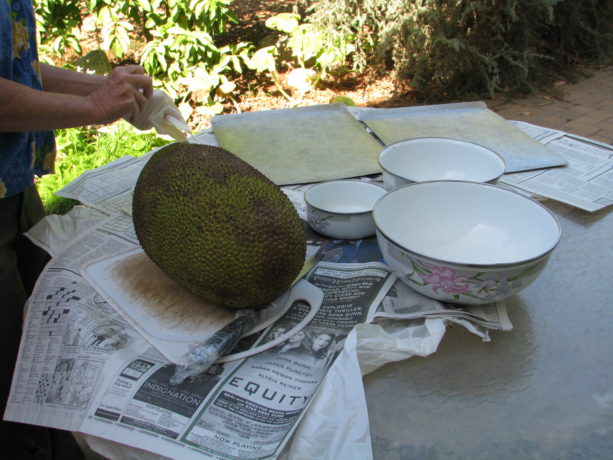 Jackfruit are the largest fruit in the world and are produced on the largest fruit-bearing tree in the world. The fruit can weigh 80 or more pounds. The more manageable one we purchased was a mere fifteen pounds.
 Jackfruit has latex in its core and stem, so butchering one (does one simply slice something that large?) requires some planning. We did it outside.
  Following Internet advice (which is always true and sound) (at least in this case it was) we spread out plastic with newspaper on top, covered our knife handles with plastic wrap, and used nitrile gloves. What I forgot to do was coat the knife blades with oil, but it all worked out okay.
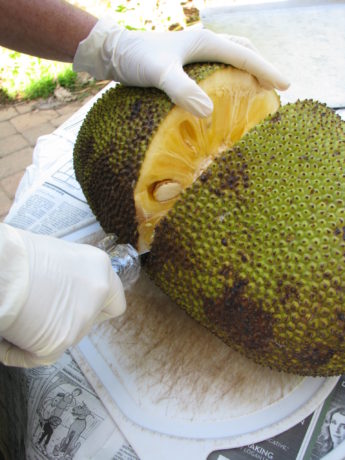 Indeed, the inside was amazing. The core in the center of the fruit did weep white latex which we wiped away. This fruit was ripe, although the bumpy outside had been green.
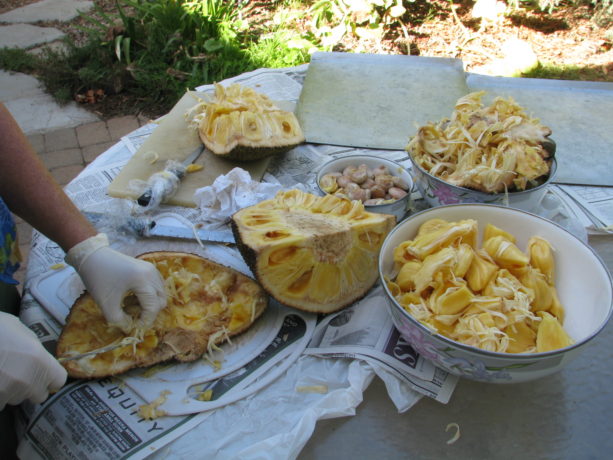 The scent was tropical and enticing. The fruit is actually the fleshy sections that surround the large seeds. This we tore out with our fingers.
 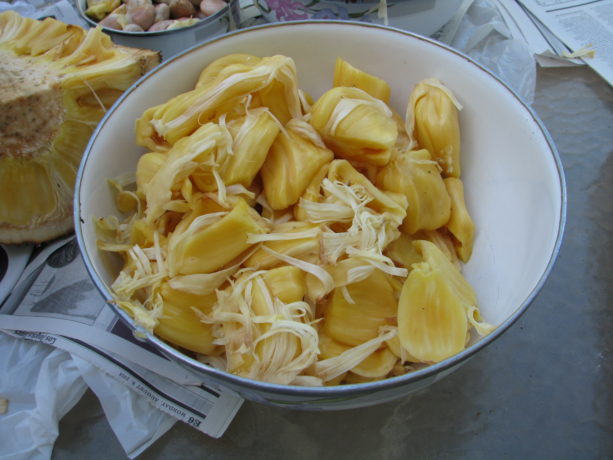 It was firm and yet soft, not mushy, and a light apricot color. The seeds are edible too.
 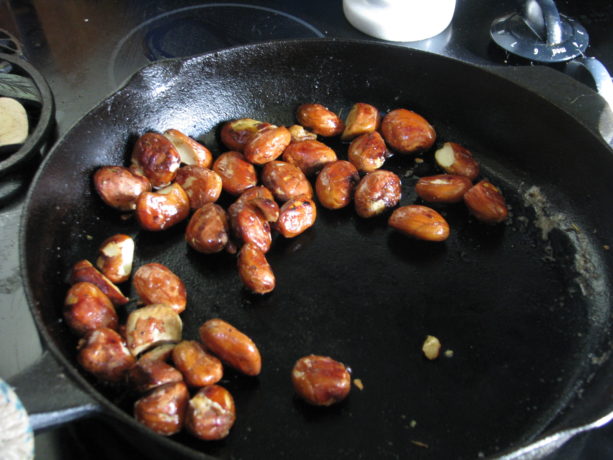 We boiled a batch, then had to slip off their protective coating then pan-roasted them, and they tasted like baked potatoes with the skin still on.
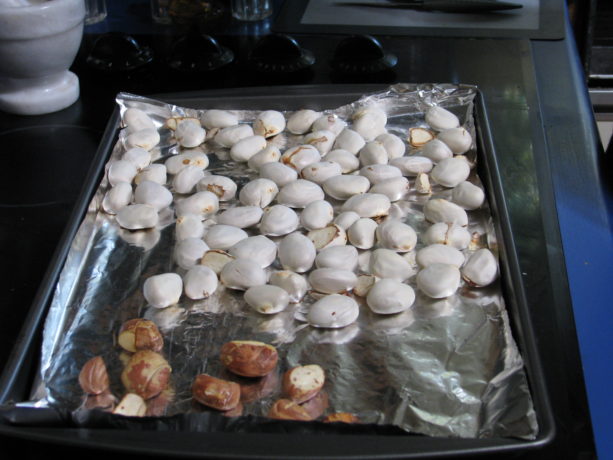
 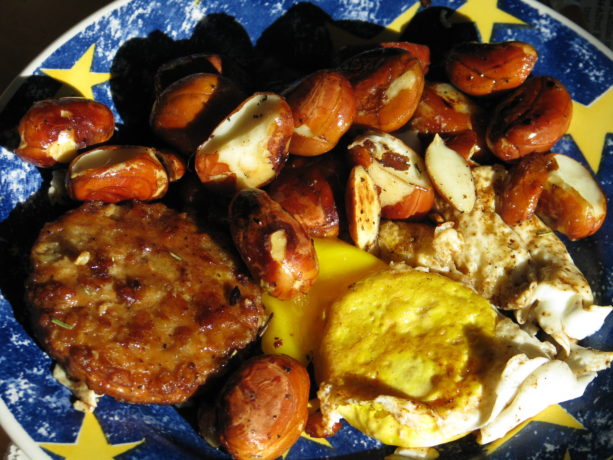 We roasted more in the oven and they didn’t taste so great, but I think that was my fault not theirs.
 I planted several, and one sprouted and is now in the greenhouse about two inches tall and wondering how far he fell from the tree.
 The ripe fruit has a flavor that is both mango and pineapple. It is SO GOOD. As it wasn’t goopy or full of juice, the fruit was easy to deal with. We lay most of it on cookie sheets, froze them and them put them in freezer bags. The frozen pieces taste like mango popsicles, and the fruit thaws without much change in texture; I brought some along for snacks on a trip.
The part that is used for pulled pork is the fleshy parts that weren’t pollinated and didn’t develop a seed. They can be cut out and marinated. As this fruit had ripened, these parts had a bit of a fruity flavor to them, but we used it anyway.
Clean up wasn’t as bad as we had thought. Throughout the process we had to switch gloves because the latex would make the fruit stick to them. The knife blades cleaned up after soaking in boiling hot water.
We also bought the canned fresh and unripe fruit, but haven’t tried them yet.
Jackfruit is mostly grown in Asia, but also has popped up in South America and even Southern California and Florida.
When jackfruit come back to the store, and the weather is warm, it will be a fine day for another butchering. Or I can wait for a decade for my little jackfruit sprout to grow up and shade out part of the Finch Frolic food forest and produce monster fruit. Until then we have really superb jackfruit pieces frozen on which to nibble.
- Arts and Crafts, Breads, Cake, Condiments, Dessert, Fruit, Gardening adventures, Herbs, Vegan, Vegetables, Vegetarian
2016 Marketplace and Last Tours of the Year
Our Marketplace is extended to Sunday, Nov. 20th, 9 – 2!
 At Finch Frolic we’ve come to celebrate the end of our season with a Marketplace. This year our Marketplace will happen one day only, this Sat. Nov. 19th from 8-3. Finch Frolic is located at 390 Vista del Indio, Fallbrook, CA. We’ll be selling our abundance. Here’s some of the goodies you’ll find:
Tiny Cocktail Mouse Melons (cucumbers… so cute!)
Amazing, milk-free Passionfruit Curd
Incredible tropical Guava Jam
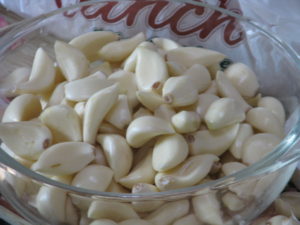
Pickled Garlic
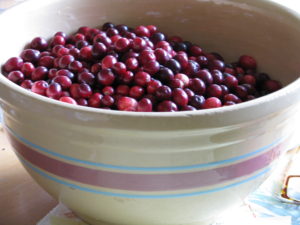
Whiskey Cranberry Relish
Nectarine Amaretto Jam
Tangy Plum Jam
Our very best dill Pickles

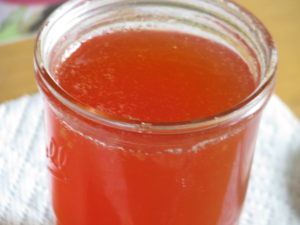
Jelly Palm Jelly
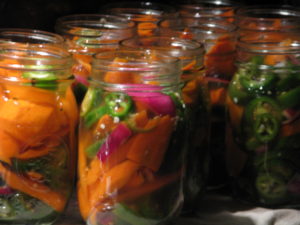
Spicy Jalapeno Carrots
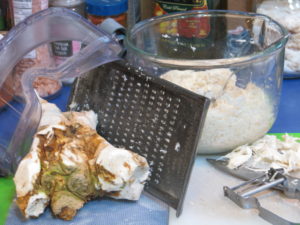
Hand-grated, homegrown organic Horseradish Sauce
Guava Halves in Simple Syrup
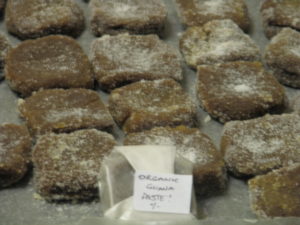
Guava Paste squares – eat as is or put them in baked goods, or pair with slices of cheese. Ummm!
Frozen Passionfruit Juice cubes
Our famous Pomegranate Gelato
Frozen Pomegranate Arils, all ready to sprinkle on your baked goods or mix in a salad or stuffing.
Clear, amazing Guava Jelly
Frozen Plum, Guava and Peach slices
Frozen strained cooked organic home-grown pumpkin, all ready for a pie or bread!
Our best-selling Cranberry Biscotti
Gingerbread Houses. Pair them with our Passionfruit Curd for a memorable dessert!
Lilikoi (Passionfruit) Poundcakes. Small amazing tropical bundles of yum.
Guava Sauce, like applesauce but guava. Very low sugar!
Fresh Jerusalem Artichoke (Sunchoke) roots. Cook them or plant them!
Layered Curry Mix – a sensual trip to the Middle East, either layered in cute little jars for a gift or in bags for use at home. Make a curry with these organic spices!
Lime Juice Cubes
Candied Orange Peels. From our organic oranges. A much better stocking stuffer than hard candy. Or top your baked goods with a twist.
Fresh, fragrant guavas, both white and pink

Fresh kiwanos, those thorny African fruit that sell for a fortune at the stores.
And more!
Plus, we’ll be selling some knick-knacks, and a few garage sale items . A punching bag anyone?
PLUS, we’ll have a selection of native plants lovingly grown locally.
And we’ll have amazing succulents from our neighbor Rosa of Roja’s Succulents. You’ll pass by her business on the way in, so please stop by on the way out and see her incredible inventory of plants, all organically hand-grown by Rosa. I never loved succulents until I saw her collection, and her very low prices!
Except for the gelato, we’re dairy (milk) free this year. We use organic eggs from cage-free hens, and otherwise use vegan butter that I make at home which is coconut-oil and rice milk based.
Our last two tours of the year (the garden closes from Thanksgiving until March 1. We will still be available for consultations and appearances) will be this weekend, Nov. 19th and 20th, both at 10. [UPDATE: THE SATURDAY TOUR IS FULL. THERE IS STILL ROOM FOR THE SUNDAY TOUR]. The tours are our usual 2-hour concentrated Intro to Permaculture walks through the garden. The tours cost $15/adult and you will come away with so many ideas and so much information that you’ll spend the next week working in your garden! Please RSVP for the tours to dianeckennedy@prodigy.net.
Your continued support helps Miranda and I keep our consultation and tour prices low, and enables us to keep teaching and spreading the word on permaculture. So thank you!
-
Adventures with Fruit: Pindo (Jelly) Palms
 Evaluating the usefulness of the plants in your yard is a big part of permaculture; once you understand what each plant does, you will know if it is useful either to you, to wildlife or to the environment, or if it is causing harm. There are many food-producing plants that we think of as weeds or as ornamentals. Always, always, always be sure before you pop something in your mouth. So by identifying your plants you can add to your diet, and if something is already successfully growing in your yard and you can use it, fantastic!
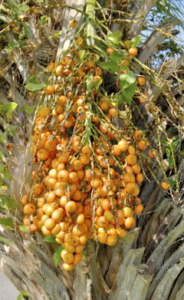
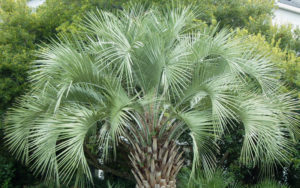 You’ve probably walked past them, or even looked askance at the dropped fruit without realizing. Also called Jelly Palms, the pindo palm is a common landscape tree for drought-tolerant hot areas. The fronds look very pokey, but are rather soft. That is a relief because once you’ve tasted the ripe fruit you’ll be thrashing through the fronds trying to pick more of them.
Pindo palms (Butia capitata) are called Jelly Palms because the fruit has a lot of pectin in them. The trees are also called Wine Palms because you can make a cloudy wine from the fruit. But then, mankind has proven that you can make alcoholic beverages from just about anything.
The fruit is small and fiberous with a big seed, and falls to the ground when very ripe. They taste amazing. The burst of flavor is as if a pineapple and an apricot had a little yellowish baby. The best way to eat them is to gently chew the whole thing and swallow the juice, then spit out the fiber and seed.
We have two jelly palms at Finch Frolic Garden, only because they didn’t have identification we didn’t really know what they were. At the beginning of this year Miranda and I were evaluating the garden plants using the Three Positives rule (where everything in the garden has to give you three positive things. If it doesn’t, then it should be turned into hugelkultur or mulch). Several trees were repurposed and we were eyeing the palms. These palms are squat and short, not slim and tall like the very similar Queen palms. Fortunately for them, and as it turned out, for us, the trunks were too thick for my small chainsaw so we didn’t remove them with the others. This threat seemed to work because they set fruit on long stalks. We hesitantly tried one… and then just about ran each other over trying to get more!
Queen palms also produce an edible fruit that is sweeter, but is only edible when very ripe.
The fallen ripe fruit can attract bees and wasps because, well, everyone wants some. We waited until the stalks were just about completely ripe then cut them off and left them in a paper bag. The fruit then ripened and dropped off in the house where we could have them all.
Most of what I know about the Pindo Palm comes from the website Eat the Weeds by Greene Deane.
We cleaned them and froze them. Now we’re making Pindo Palm Jelly. Or maybe Jelly Palm Jelly, which sounds better.
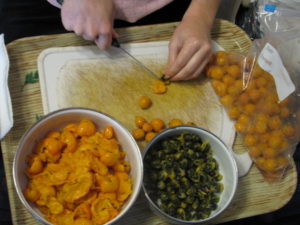 Freezing and thawing the fruit actually helps break down some of the fiber and release juices, and makes them much easier to pit. The pits are high in oil, so advice for cooking the fruit whole says the jelly can pick up bitter flavor from the seeds. We sat with trays laden with cutting boards, a knife and bowls and pitted them. Yes, this is how we spend our evenings when I’m not out dancing, processing fruit and watching a movie or reruns of the Bob Newhart show or something. Yep.
The thawed fruit was easy to push away from the seed, so the process went very quickly although our fingers were pretty cold from the fruit.
We covered the pitted fruit with water and cooked it for about an hour, then strained out the fruit. There isn’t a lot of pulp because of all the fiber.
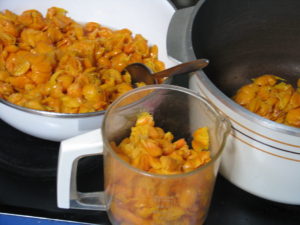 We used the National Center for Home Food Preservation’s recipe which used a lot of sugar, but the juice is so tart that it needed it.
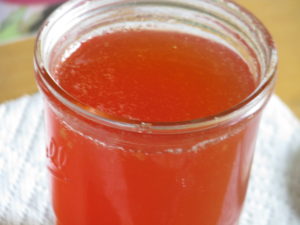
What we got was a beautiful jelly that,despite the natural and added pectin was fairly loose. The benefit was that it can be used as a syrup as well. While the flavor of the jelly isn’t quite as astonishing as the fresh fruit, the tart tropical flavor is very good.
So walk around your weeds and trees and identify them, read up on them, and perhaps you can find a treasure in your yard as we have!
(We’ll be selling Jelly Palm Jelly at our annual Marketplace here at Finch Frolic Garden on Sat. Nov. 19th, 2016)
-
Ghostly Spring Rolls
 Vegetariat began as mostly a food blog. Now I talk more about growing food than cooking but if you go through the archives you’ll find a lot of recipes. This one I thought was so cute that I had to pass it on.
My daughter and I wanted something savory, vegan and spooky to bring to a Halloween potluck. We saw lots of Pintrest tags for apple slices with teeth, green pepper faces oozing spaghetti and all kinds of cheese or egg eyeballs.
Miranda had made some Thai spring rolls for my birthday last week, which are a big favorite of mine. I liked how you could see the veggies through the rice paper. Then I thought what if something spooky was peering through the rice paper wrapper? A ghostly figure. Then I thought of these wonderfully large King Oyster mushrooms we bought at 88Ranch Market and I knew what I wanted.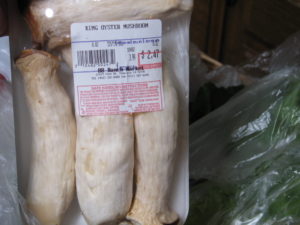
I sliced the mushrooms very thinly.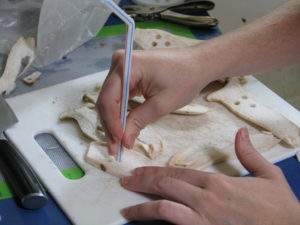 To cut out the eyes and mouth at first I used a knife, then tried a hole punch, and finally used the end of a plastic straw which worked beautifully.
 I simmered the mushrooms until tender in vegetable broth, sesame oil and Bragg’s Amino Acids.
  Then they were set on paper towels to dry and to cool. We also prepared the other ingredients: cilantro, Thai basil, strips of chive, soaked rice noodles, lettuce, bean sprouts, grated carrot and crumbled tofu cooked in sesame seed oil and lite Soy Sauce.
Spring rolls are not cooked. They are a bunch of flavorful and aromatic herbs and veggies wrapped in a clear rice paper wrapper. These wrappers come in hard, brittle sheets. You carefully dip them one at a time into hot water and they quickly become translucent and soft.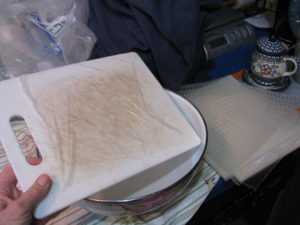 This is the tricky part, getting them on a surface to fill and fold without allowing it to stick onto itself. If one hangs up too much, dip it back into the water and you can gently pull creases out then.
We put a mushroom ghost 2/3rds of the way up, and the rest of the filling just below that.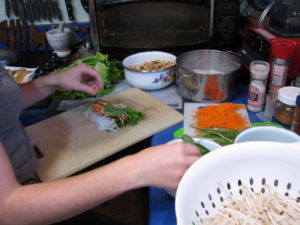 Don’t overfill, and keep a margin on either side for folding. Beware of stems that might poke holes into the wrapper. To fold, you fold in either side first. Then fold the bottom up until it covers 2/3s of the rest, then roll up. The filling should be neatly tucked away and the ghost peering out. You can arrange the filling behind the ghost so that there are different backgrounds, such as a lettuce forest, creepy bean sprout tendrils or a haze of red carrot.
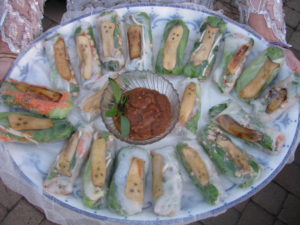
Serve the rolls with a peanut dipping sauce. We brought these to a potluck Halloween party and they all disappeared in a not-so-spooky manner!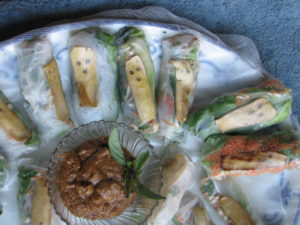
If you don’t have big mushrooms available, then you can also do this with carrots very thinly sliced and handled the same way.
Here’s a quick recipe for the peanut dipping sauce, but there are many variations out there so try others:
Peanut Dipping SauceRecipe type: SauceCuisine: ThaiPrep time:Total time:Serves: ½ cupFor use with Thai spring rolls.Ingredients- 2 tbsp water
- ½ cup chunky peanut butter (you can use smooth, but I like the chunks for more flavor)
- 1 tbsp sugar
- 4 tbsp vegetarian hoisin sauce
- 1 tbsp lite soy sauce (or Bragg's Amino Acid)
- 2 small garlic cloves (or 1 large), minced
- 1 birds eye chilli, finely chopped (optional. We left them out)
- 1 tbsp sesame oil
- 2 tbsp lime juice
Instructions- Mix all ingredients until the consistancy is like honey; you want it to stick but not clump.
- Garnish with crushed peanuts and sprigs of herbs or a piece of lime.
Just wanted to share our spooky treats that also were very healthy and so very tasty!
- Animals, Bees, Compost, Gardening adventures, Irrigation and Watering, Microbes and Fungi, Natives, Other Insects, Permaculture and Edible Forest Gardening Adventures, Rain Catching, Reptiles and Amphibians, Soil, Water, Water Saving, Worms
Creating Rain with Canopy
Even if we don’t receive a lot of rain in drylands, we might have fog, sprinkles and other degrees of ambient moisture. This moisture can burn off with reflected heat from hard-packed earth, from gravel and hardscape, and from buildings. It is too irregular and thin to make the use of mist nets feasible. However, a much better way to collect that moisture and turn it into rain is the method nature uses: trees. The layers of a plant guild are designed to capture, soften and sink rainwater, so why not just let them do it? Many trees are dying due to heat, low water table, lack of rainfall and dry air. Replacing them with native and drought-tolerant trees is essential to help put the brakes on desertification.
Please take five minutes, follow this link and listen and have a walk with me into Finch Frolic Garden as this 5-year-old canopy collects moisture and turns it into rain:
Plant a tree!
-
Happy Autumn!
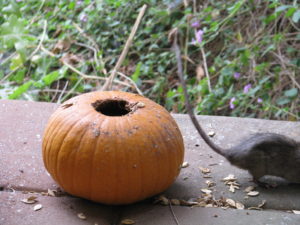
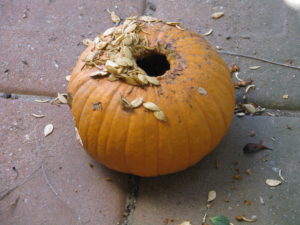 Some night creature has been enjoying our pumpkins… if I see a Jack O’Lantern face being chewed into the side of it, then I’ll be setting up the night camera!
Update: I suspected that this was the culprit! Bon appetite, Madam Rat.




- Building and Landscaping, Gardening adventures, Natives, Perennial vegetables, Permaculture and Edible Forest Gardening Adventures, Water, Water Saving
Irrigation For Drylands: Conclusion
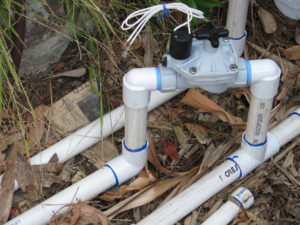
One-inch PVC runs from the valve. This is the last of the series of posts on irrigation, and I’d like to briefly address the issues of water pressure and valves. As I’ve said in a past post, if you don’t know about these things then hire someone who is an irrigation specialist (not just someone who says he’s put together irrigation before… they are guessing!). That specialist will obtain for you the right sized valves, the right irrigation timer, and monitor the water pressure so that your sprinkler heads won’t blow off and pipes break.

The one-inch pipe is then reduced to 3/4″ pipe at the first T, close to the first sprayer. For pipe, don’t use small 1/2″ pipe for large jobs. Bigger – to a point- is better. Smaller pipe doesn’t mean higher pressure. It reduces the volume of water going to the sprinklers. The smaller pipe creates more pressure loss due to friction and turbulence as the water flows through it. We took the advice of our irrigation specialist and ran 1″ pipe from the valves to the first sprinkler, and reduced it to 3/4″ pipe, then reduced for the 1/2″ risers.
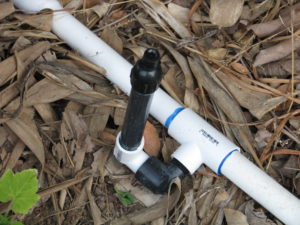
Further reducing 3/4″ to the 1/2″ sprinkler configuration. Most sprinkler systems need a water pressure of between 30 – 50 psi. Drip systems need less, around 20 psi. Too high or too low a water pressure will adversely affect your system. If you attach a water pressure gauge to a spigot you can see what your pressure is. If it is very high, you will want to check the indoor pressure as well because too high a pressure can mean pipe damage and leaks, and no one wants wet walls. You can use a pressure regulator on your line to reduce the water pressure for your irrigation.
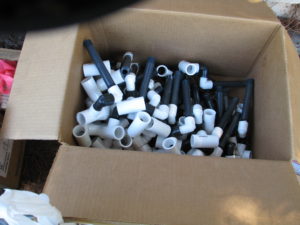 How many sprinklers you can put on a valve depends upon several factors, but mainly the flow rate, or how much water is flowing through the pipes at one time. Sprinklers have an output rate so you can do the calculations on how many you can put on a line. Flow rates are measured either in gallons per hour or gallons per minute, with gpm the most common for householders. Drip systems are less concerned with flow rate. We ended up adding valves to our system because we had so many sprinklers.
When installing your system, be sure to add a ball valve (rather than a cheap gate valve) close to your water source so that if you have to work on your system you can shut it off; otherwise you’ll have to shut off the main to your outside water. If you have a large system, installing ball valves along the line to isolate different areas will help down the road if you need to troubleshoot. Having hose bibs along the line are very nice, too.
There is a lot to learn about irrigation valves – using globe valves with an expensive back-flow preventer or using anti-siphon valves that must be above ground and above the closest sprinkler head. I’m not an expert, but there is expert advice on valves here.
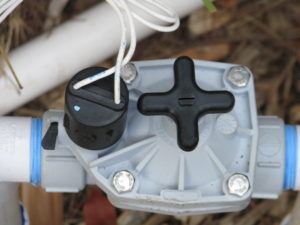
Another thing to consider is your electrical line. If you have valves, you must run electrical line to them (at this writing, solar valves are not that dependable for the long run). Electrical line must also run from your irrigation clock to your electrical source at your house. Usually electrical line is buried. Please spend the little extra money and have the electrical pulled through conduit first, rather than direct burial! Having loose wires buried in your yard is a recipe for disaster. I know this. I asked for conduit with the original system, and the wire was directly buried before I could protest. Sure enough, two years in and a valve wouldn’t turn on. The problem was with the wire… but where? How to dig it all up without nicking any of the lines? Impossible. So until this project two of my valves had to be tied together and both stations running simultaneously, which really stunted the water pressure and was a real headache. This time the conduit is run above ground along with the PVC pipe, which will be covered with mulch, and also along the top of my chain-link fence up to my house. If there are any problems, the conduit comes apart every ten feet and wires can be checked or replaced. Pulling electrical wire through conduit is not for the fainthearted; I developed new muscles and callouses working on that, but it was worth it.
Skipping ahead, your irrigation project is finished and your landscape planted. Be sure to take the time to update your plan so that it is an ‘as-built’, reflecting any changes you’ve made. This is an invaluable document not only for your own use, but for any future owners of your property or workers who might need that information. Use a rough plan of your yard and identify each valve and the area the valve covers in different colors. If you want to draw in every sprinkler head, that is fine. On large projects that isn’t practical, so just use zones. Take a waterproof marker and write the valve numbers on the valves themselves, so that you won’t become confused in the field.
Be sure to run each valve during the daytime while you inspect the sprinklers for clogging or broken heads. A lot can go wrong during the night when most systems run, and you won’t know it until you get the water bill or your plants start to die.
You may want to put in the wire for additional valves that may be added in the future. Making double valve stub-outs and only using one is far easier than pulling new electrical if you find that you need to add a valve.
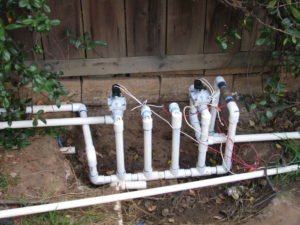
So don’t think that irrigation is a simple endeavor, and begin to glue miles of 1/2″ pipe together with 2 – 3′ risers that shoot water up embankments. This is a waste of money, plastic, water and plants. Put as much thought into your system as you put into the design of plants, and your system will give you little trouble in years to come.
Oh, and remember to shut your system off when it rains!
 You can read Options, Part 1 of this series here, Part 2 Evaluating Your System here, and Designing Your System Part 3 here .
 - Building and Landscaping, Gardening adventures, Hugelkultur, Irrigation and Watering, Permaculture and Edible Forest Gardening Adventures, Water, Water Saving
Irrigation for Drylands, Part 3: Designing Your System

Google Maps view of property lines. Before you start buying pipe, make your design. If you are new to the property, evaluate the plants and features that exist and decide if you really want them or not. Use the ‘three positives’ rule in permaculture: everything in your yard should give you at least three positive things. For instance, you have a eucalyptus tree. It gives great shade, it is a great roost for larger birds which keep down your mice and rats, it drops lots of leaves for mulch, etc. On the ‘negative’ side, they are really thirsty and they send their roots out in search of water. They will go to the nearest irrigation and drink from there, robbing water from the tree you are trying to water. They are also allelopathic, meaning that they produce a substance that discourages many other plants from growing, or growing successfully, under or near them. Their root mass is so thick close to the surface that very few plants can survive. If planted in the wrong spot they will block views, hang over the house, drop those leaves, peels of bark and depending upon the species, heavy branches, where you don’t want them, get into overhead wires or underground leach lines, etc. They don’t make good firewood or building material, and are highly flammable. How does the tree weigh in? Usually eucalyptus are all negatives in my book. Only if they are providing the only shade and bird perches for a property are they useful. Even then I recommend pollarding them (reducing their height) and trying to ‘nursery in’ other better trees to take their place. Cut trees then should be buried, as in hugelkultur. So evaluate what you have using the three positives rule and don’t be too sentimental if you don’t like something. Do you like them? If not, cut them and bury them to fertilize plants that will serve you, and yes, aesthetics is very much a plus. If you love a particular plant, then if its possible, plant it.
If you have a property that is a blank slate, your irrigation diagram will follow your plant design. If you have an existing landscape, as I had, you need to map out where all the trees and groupings of plants are, what their water needs are and keep in mind the way water runs past these plants when you do. Use Google Maps. Type in your address, find your home and zero in on it until you can clearly see the boundries of your property.

At the bottom right hand corner of the screen is the key that show how many feet are in a measurement. This line may not always equal an inch, so measure it! At the lower right Google shows you a key for distance. There is a line with a number above it. This shows you how many feet are represented by that length. Don’t assume that the line is one inch! The line will adjust, so put a ruler up to the screen and measure it. I zoom out until the line is an inch long, and take that number; its just easier to compute distances using an inch rather than a fraction. You can print that diagram of your property line, which will show you which way your house sits on the property.
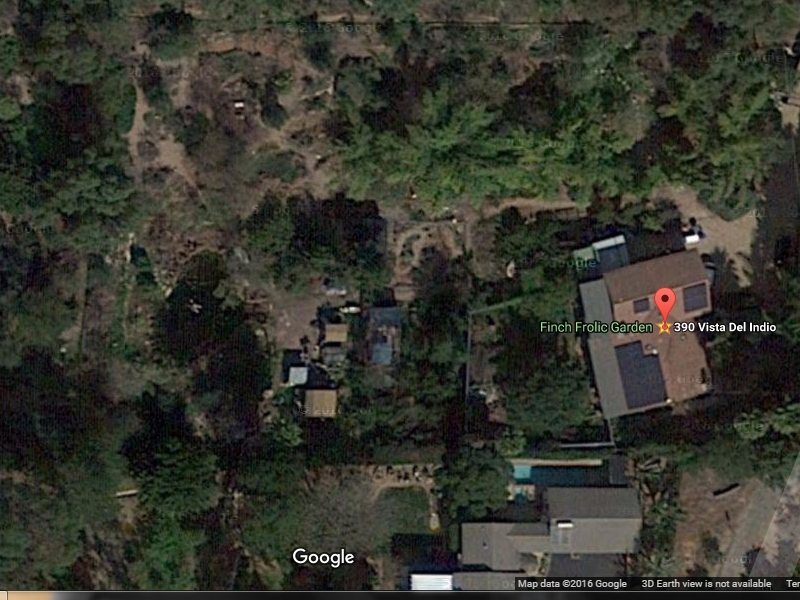
Satellite view of Finch Frolic Garden. This helps to map groupings of vegetation. I have a PC, so I press the PrntScr (print screen) key, paste it onto a paint.net screen, crop off the extra bits and print that. Now you have something to work with. I double or triple the size of the drawing onto a larger sheet; this can be done easily with a ruler, using the printed sheet to guide your angles.
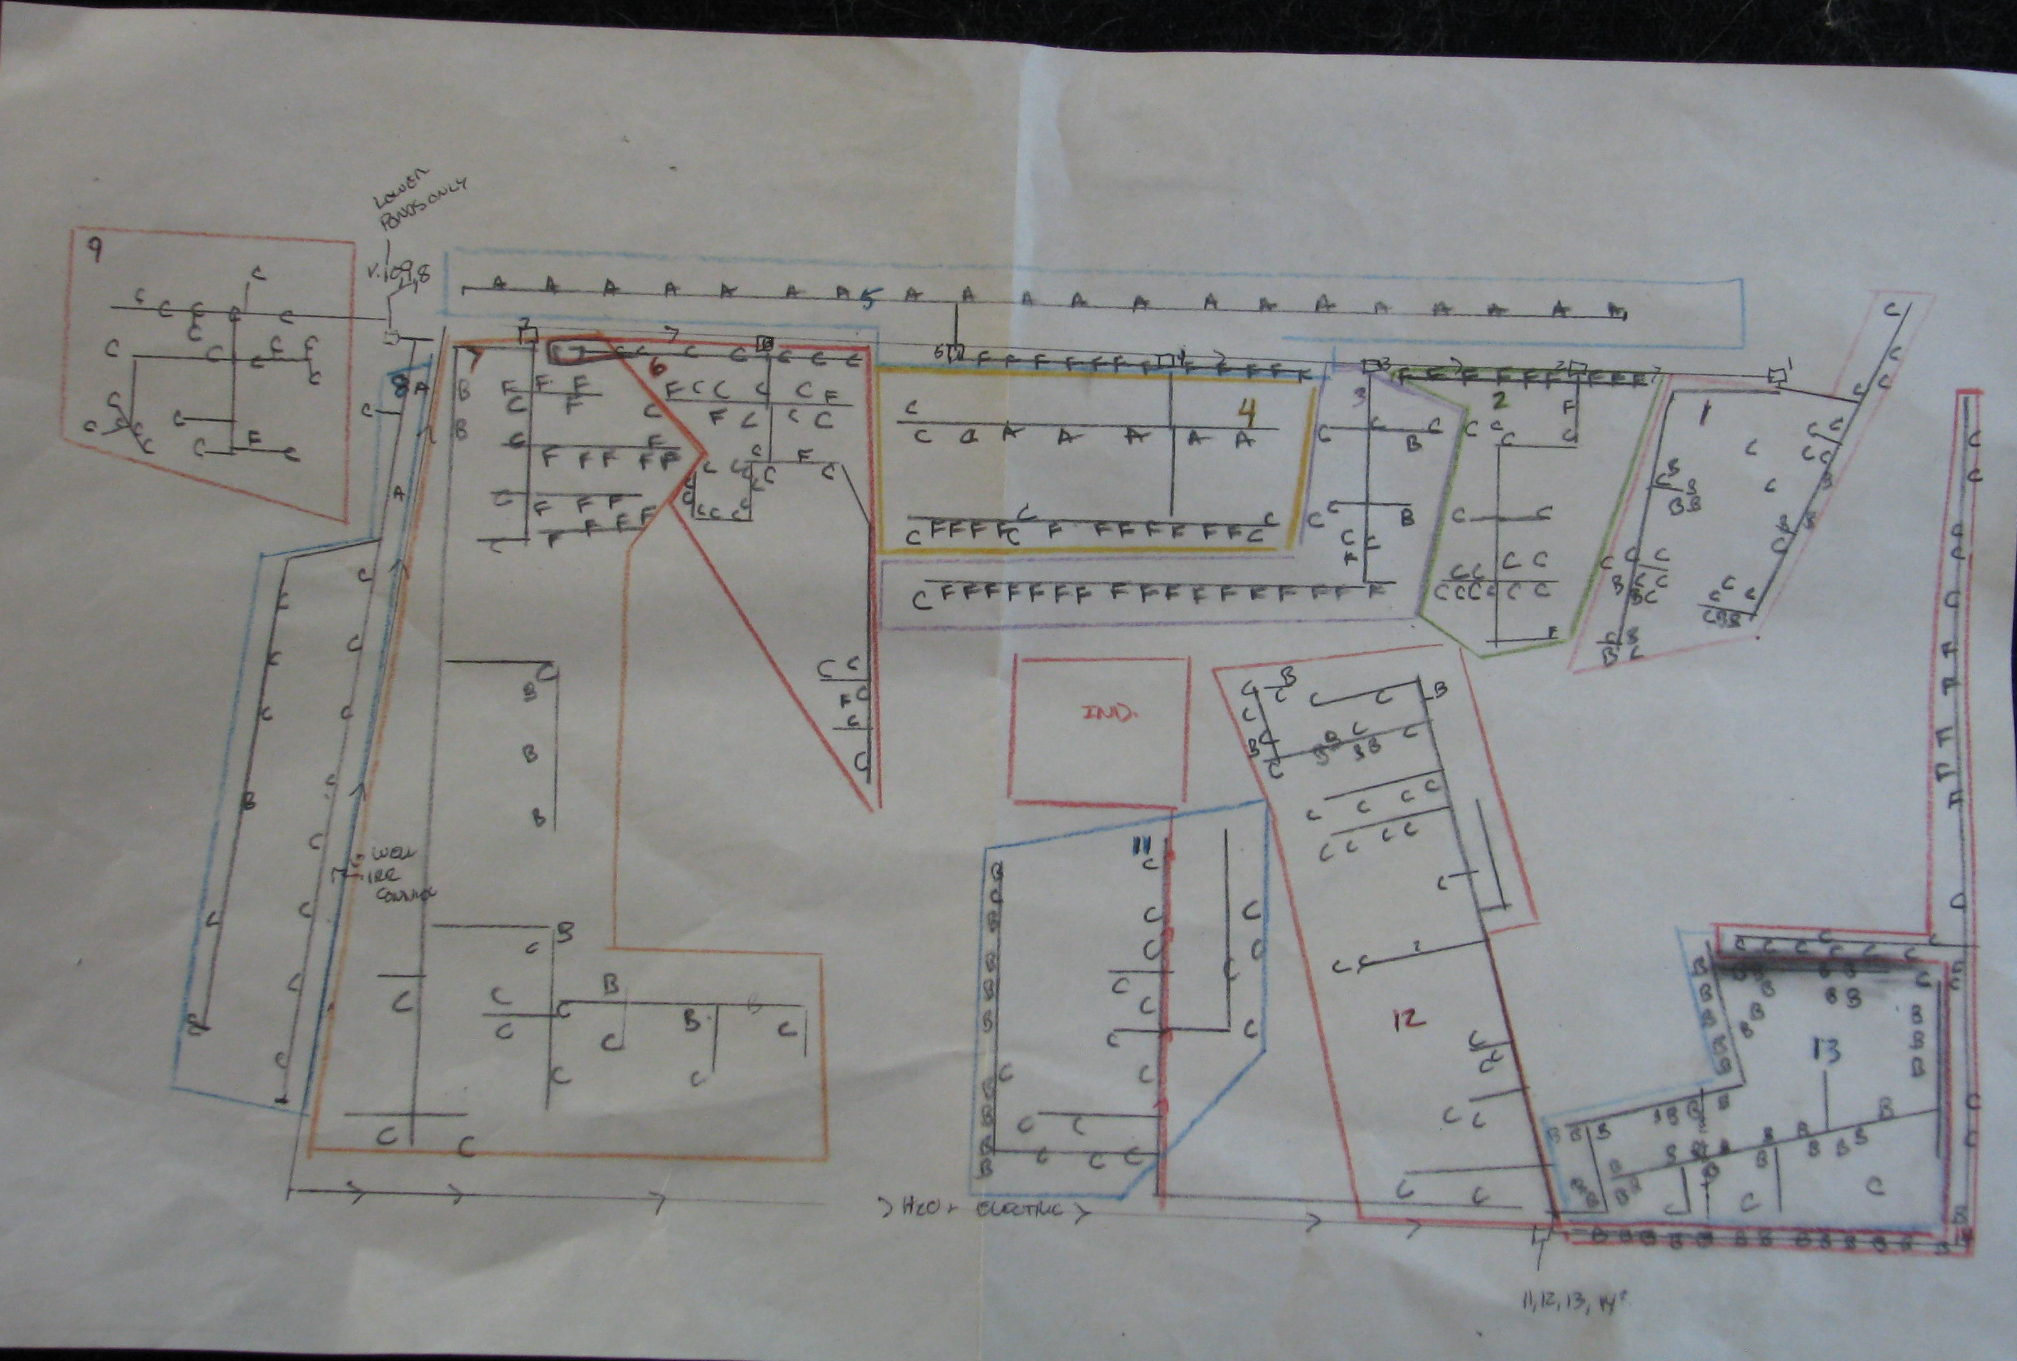
A projected irrigation plan for Finch Frolic Garden. What you actually put in may differ. Make a couple of copies of this template, and then use one to start drawing.
When you have the plants down on paper, then start with the irrigation. Determine where your water main is, and where any valves and hose bibs are around your house. If you only have domestic water to choose from, you’ll be coming from a domestic line.
Fifteen to twenty sprayers are good per valve. I’m not talking about high-pressure nozzles that shoot water all over the place; these you want to eliminate. Most of that water is evaporated.
The sprinklers that we installed have a spray of up to 4 feet, and can be reduced down to a drizzle.
These are what we installed here:


The 3/4″ T was glued in facing sideways rather than straight up. A black Street 90 and a white Street 90 were screwed into the T, firmly but with enough leeway to turn if pushed. Black ones don’t need pipe tape because they are soft and self-seal. The risers (nipples) are 6″, and were taped at both ends before screwing into the Street 90. (You don’t put the heads on yet because you’ll want to ‘blow’ out your system with water to clean the pipes beforehand. )

These risers can bend! With this configuration the risers are resistant to damage from being kicked, from having 100-lb. tortoises crawling over them, etc.

Gamera enjoying the movable sprinklers. They can be moved in all directions so that you can deliver water closer to small rooted new plants, then move them away as the root ball grows. If you have the assembly ready when you glue in the T, then you won’t have to struggle to screw it on. Ends will have a slip/thread elbow glued sideways with the same assembly.
There are lots of sprinkler heads out there. These sprayers have threaded ends rather than barbed, so that they stay in place rather than be blown off. These are 360 degree sprayers; you can obtain threaded sprayers for 180 and 90 degree, and probably other configurations as well.

A 180 degree head. Notice all the white? That is mineral deposit, and the sprinkler has run only about 10 -15 times. Don’t forget the filter. A filter in every head saves you a lot of grief with plugged heads and poor irrigation down the line. They are easy to clean.
Next post: Concluding the project.
You can read Part 1 Options here, Part 2 Evaluating Your System here, and Part 4 Conclusion here.
- Building and Landscaping, Gardening adventures, Heirloom Plants, Natives, Perennial vegetables, Permaculture and Edible Forest Gardening Adventures, Rain Catching, Soil, Water
Irrigation for Drylands, Part 2: Evaluating your System
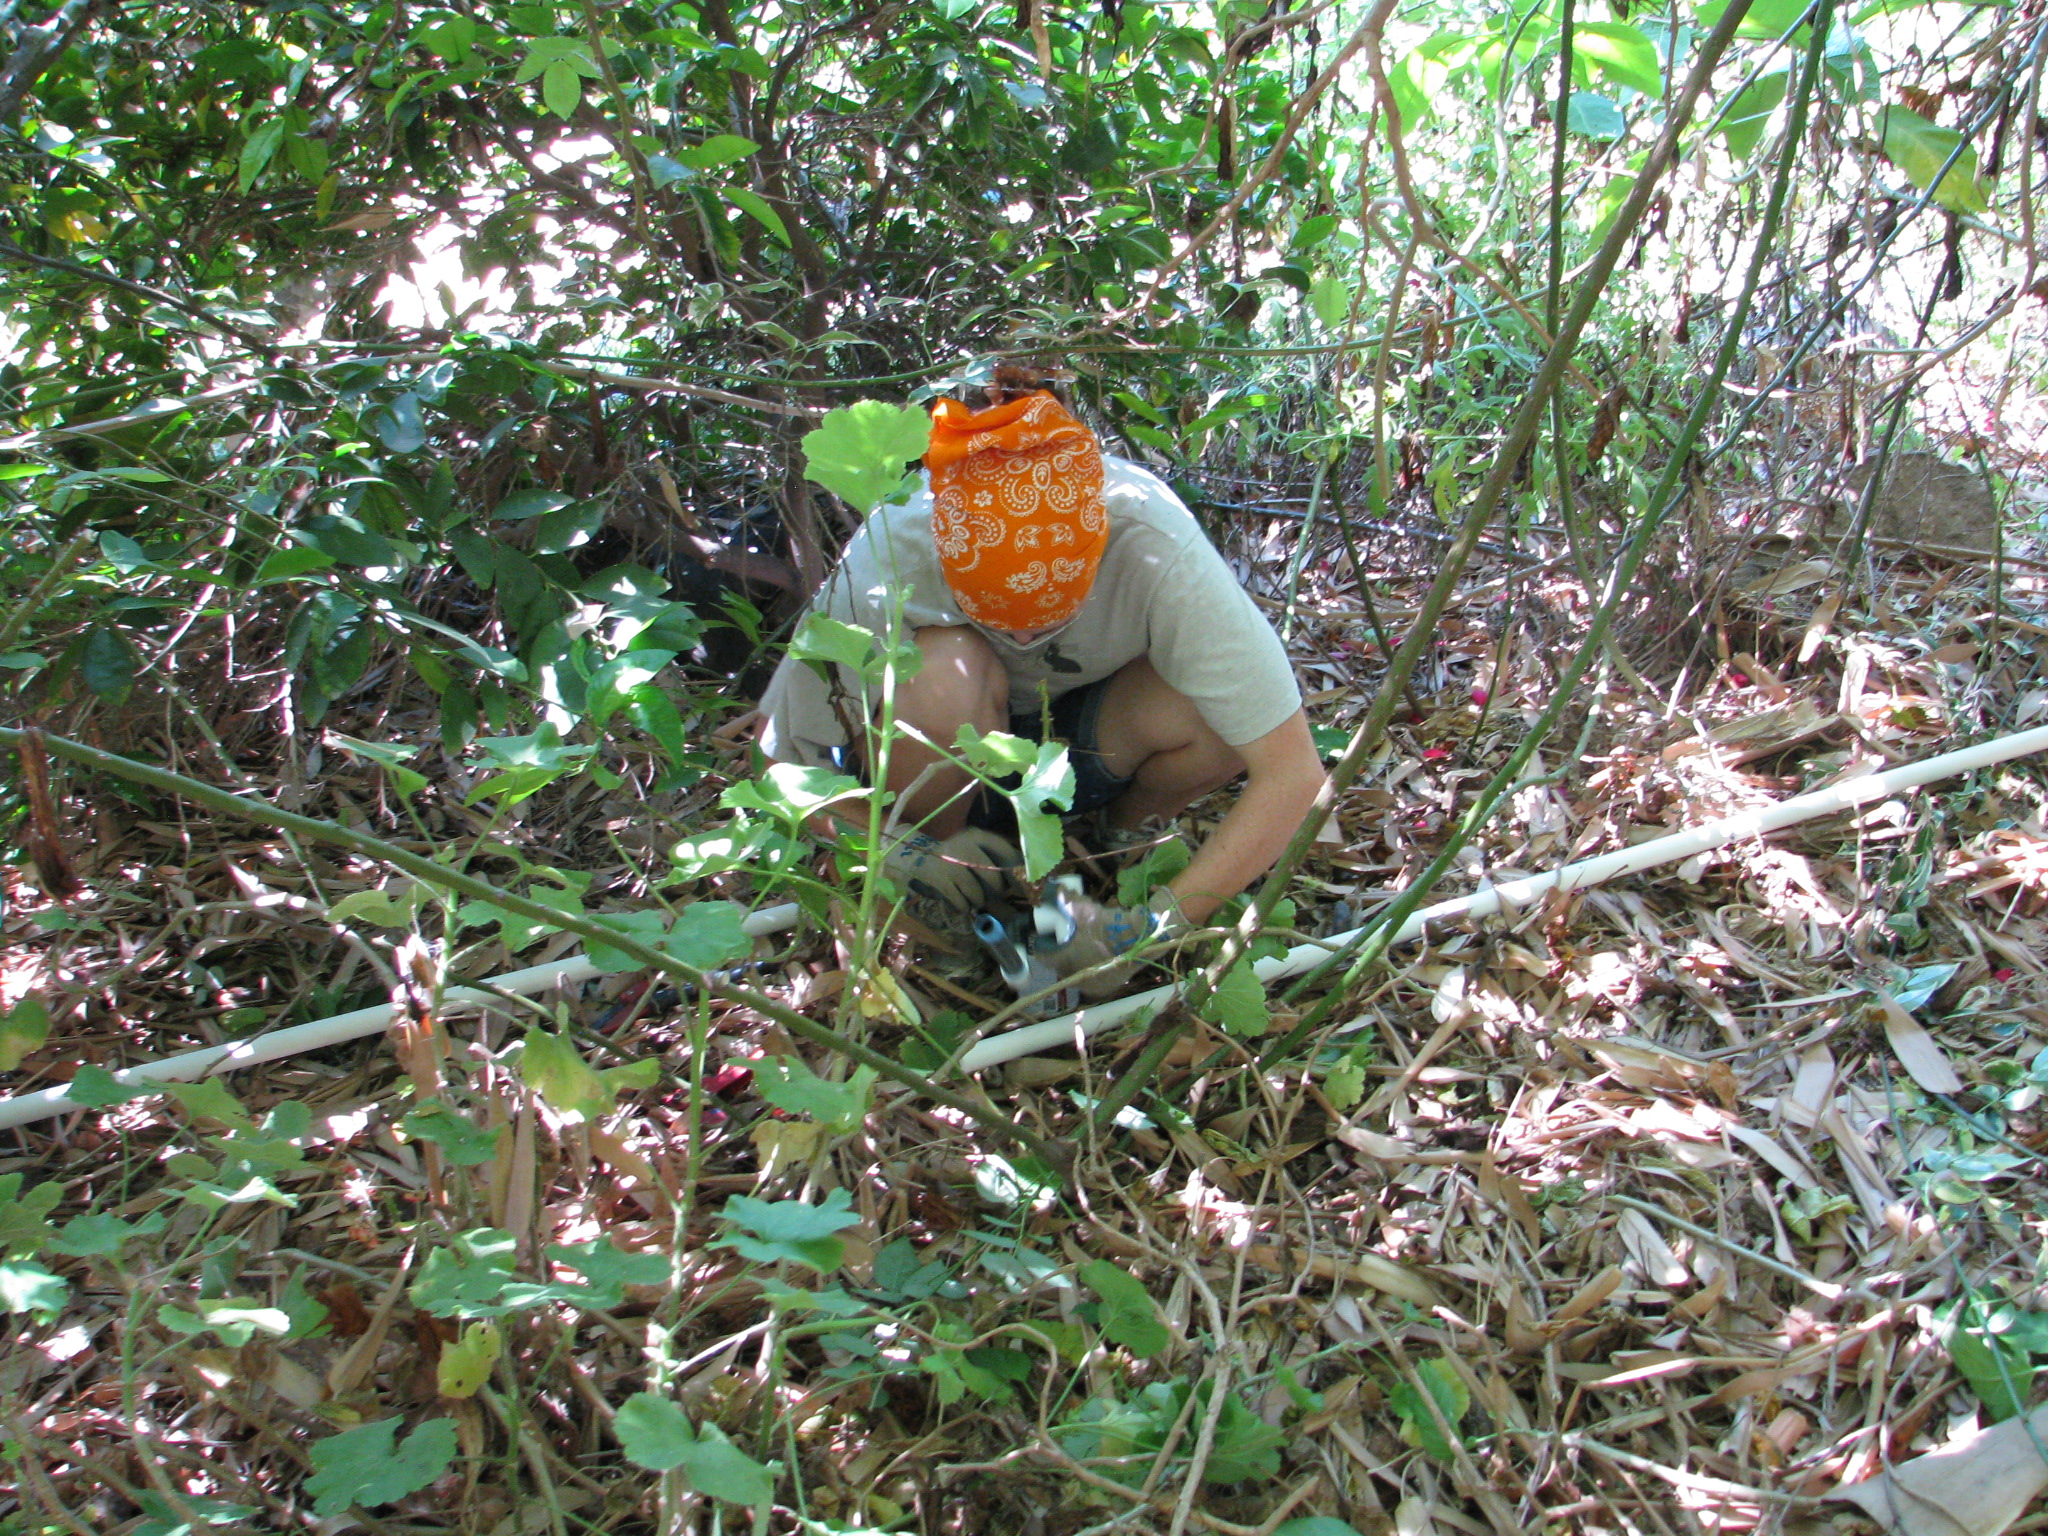
Miranda in the roses gluing pipe. If you have an existing irrigation system that works, you may easily convert it by adapting the heads for whatever you want to plant. Many lawn conversions I’ve designed utilize the existing spray system, particularly for natives, but with a different watering schedule. Don’t spend money when you don’t have to.
If you have an old grove that is to be converted and downsized, you’ll usually have far more pressure in your system than you need for smaller heads which may cause them to blow. Working with an irrigation specialist for the valves and pressure is advisable. For this re-irrigation project of Finch Frolic Garden, I found Vista-based John Taylor of Taylor-Made Irrigation and Landscape, 760-945-0118. He’s the first person to listen to and consider what I have to say, based on my experience with the old system, and he adapts to different situations. I’ve learned some cool new things that I will pass on to you, and he’s enjoying learning permaculture techniques, which will help both him and his landscape clients.
Here’s a little world-weary advice from someone who trusts too easily: Many professionals no matter what their field have one set way of doing things that they apply to every situation, be it irrigation, plant selection, tree trimming, construction, etc. (My neighbor has his poor coral tree topped every year. Topping trees is a bad practice. When I asked him about it, he said that his tree trimmer has been topping trees for years and recommends it, so he’s talking his expert advice! Do you see the problem here?) You, I’m sure, have dealt with these people too. Every situation needs a different solution, so look for someone who is flexible, listens to you, can offer several solutions with various price ranges, and who will give you a detailed estimate up front. Jobs will always run over, but they shouldn’t run too much over and the professional should be determined to keep on budget, and honest with you when there is an overrun. If you ask a professional to do extra things, the new tasks will need to be added on to the original contract because it will take up part of the time allocated towards the original project, so the project completion date will be moved ahead, and will add on to the total cost. On the other side, if your professional adds on projects that he thinks you’ll like, and you give him the verbal okay, realize that he’ll be working on those projects in addition to the original tasks, so it will take longer and cost more than the original contract. Look for people who don’t consider telling you their life story part of the time for which you are paying. If you tell them your life story, remember that they are on the clock and you are paying for that time. (I’d rather deal with a quiet, focused professional than a chatterbox who will talk more than work. If he’s not talking to you, he’s probably on his phone a lot while on the job.) Look for neat vehicles with organization, letterhead for estimates and invoices, someone who shows up on time when they say they will, and stays until they are done. They should schedule in their lunch; if they work through it they are not going to work well for you later in the day, and its unprofessional. Its okay for professionals to handle several clients at one time, but only if they are well organized and are eager to finish your project on your timeline. Contractors are infamous for tearing something apart the first day, then disappearing for days or longer holding you hostage while they work on other projects. Its okay to ask about all of this, and really important to read reviews. Don’t always rely on people your friends have recommended; I’ve had both really bad and really good referrals, so make up your own mind.

Extreme mineral buildup in a PVC pipe. Photo from http://www.marinechandlery.com/. Back to irrigation. Most irrigation is PVC, the white plastic pipe. If you have old buried metal pipes they should be examined for leaks. Mostly they will fail to function due to mineral buildup due to our hard water. The inner diameter of the pipe closes; if you’ve ever cleaned your shower head or seen house drains with the thick white inner coating, that’s what I’m talking about. It will slowly dissolve in vinegar, but the vinegar must remain in the pipe to soak it for awhile, then blown out an open riser to get rid of the chunks. All sprinkler heads must be decalcified as well. Often the buildup is so old that the pipes are deteriorating and just need to be replaced, usually with PVC. The galvanized pipe can either be left in the soil to gradually rot, which is fine, or else be dug up and sold for scrap. The labor cost involved with digging it up will probably be more than what you’ll get for scrap.
Here’s some understanding of water. The reason why domestic (potable) water is chlorinated is not to purify the water. That has already been done before it gets into the delivery pipes. It is to keep biomass from forming inside the water pipes. Biomass is any type of growth that forms, usually in wet conditions. Think of algae inside a fish tank or on the inside of a pool. Biomass is nature’s way of filtering and softening hard surfaces, and in nature is essential. In man-made pipes, the biomass can not only harbor things that can make humans sick, but also slows the flow of water. Garden hoses have some biomass inside of them, and any rough part will slow the water pressure. Lengths of any kind of pipe are the same. The longer the pipe, the slightly less pressure you’ll have. Pressure is important because you want your sprinkler heads to spray, not just dribble (unless you set them for dribbling). Pressure regulators are set in sprinkler heads, Netafim, and valves to keep lines from blowing out under normal pressure. If you don’t have an irrigation system set up for a large grove or large grasslands for animals, which require enough pressure to shoot water great distances, then you shouldn’t worry about the lines blowing out. But understanding about pressure and the effects of biomass and distance will determine what size pipe you lay.
Most people use domestic water for irrigation. Some rural areas have agricultural water available for commercial growers. Some people have well water, which is what I have. Well water has not been treated, so whatever has leached into that water is what you are delivering to the topsoil. Have your well water tested for contaminants and salts. You should have a filter after the pump on your well. However, our heavy-mineralized water will form a oozy barrier around the diaphragms in valves. If debris or too much of this slick mineral buildup accumulates, the valve won’t ‘seat’, or seal, and will allow some water to seep through the pipes even when the valve is off. This has been a huge problem here at FFG, and one which several irrigation ‘specialists’ have completely denied. They deal with treated water rather than well water, and just don’t understand. Some valves have diaphragms that can be very carefully cleaned and replaced, but not frequently before they are damaged. If you have a well, check with an irrigation specialist who has real-time experience with well water and valves to recommend the appropriate valves and filter system for you. I’ll talk more about the ones John recommended for FFG in a later post.
Large-diameter pipes will carry lots more water more slowly. Small-diameter pipes carry less water more quickly. If you lay out large diameter pipes from your valves, let’s say 1″ pipe like we’re using at FFG, then you can reduce the size of your pipe gradually to your sprinkler heads and that will be the best of both worlds. You will have volume of water and increased pressure. So John has recommended that we use 1″ PVC from our valves, which are connected to the well with 1″ PVC already.
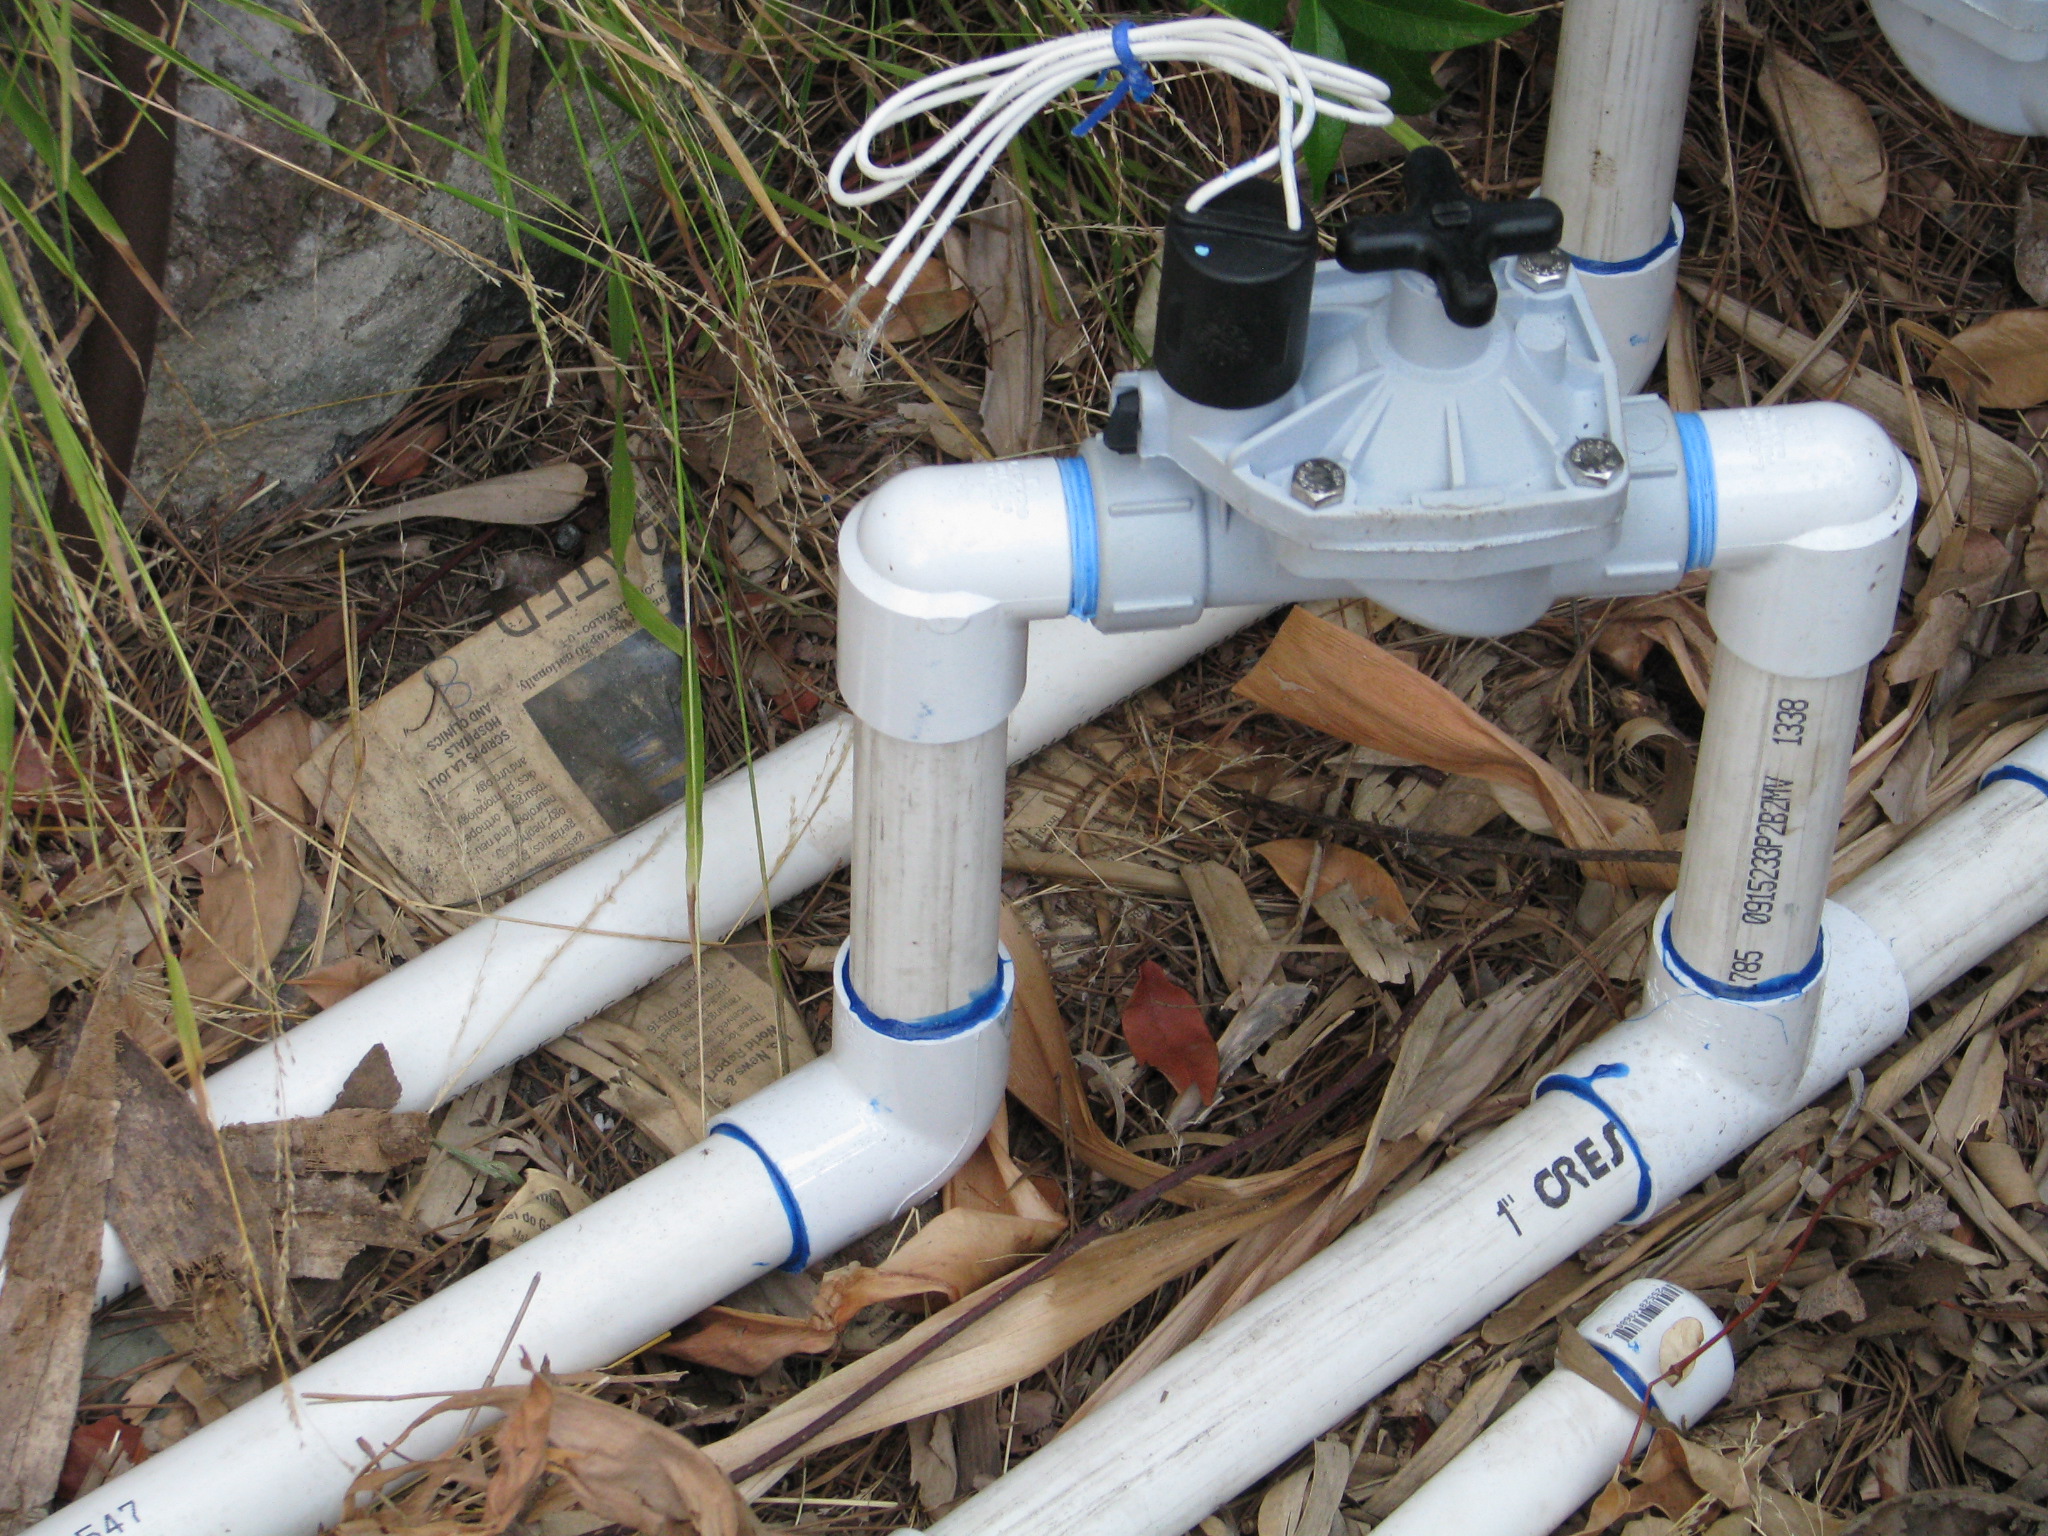
One-inch PVC runs from the valve. Then we reduce the pipe to 3/4″ at the nearest T, or closest to the first sprinkler head.
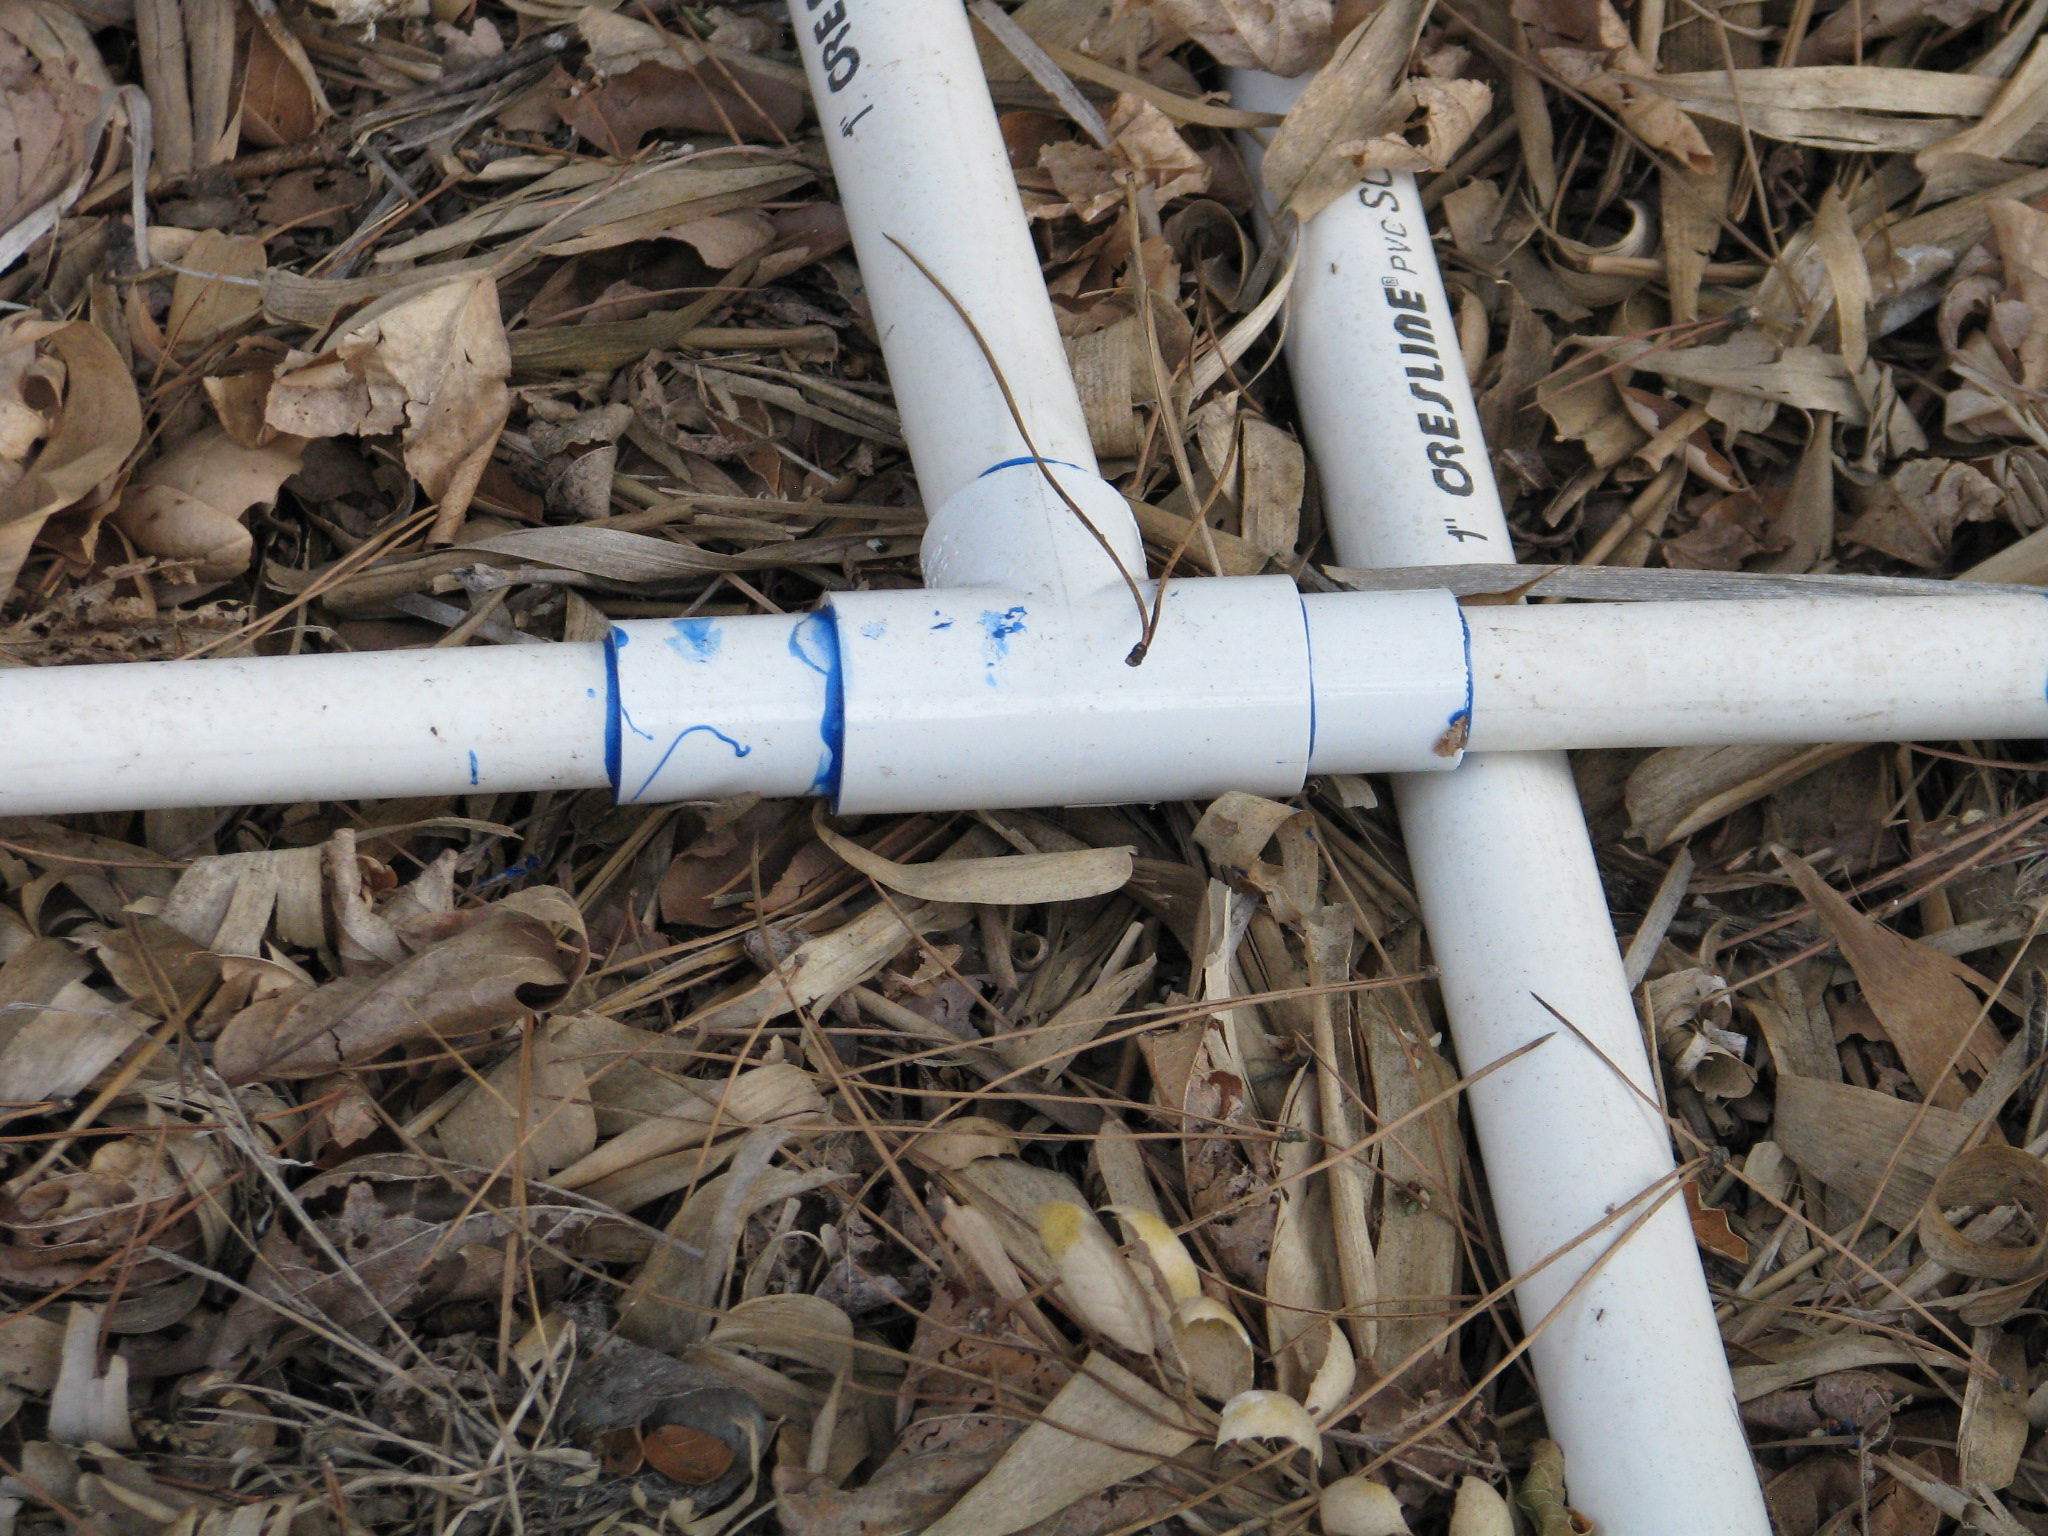
The one-inch pipe is then reduced to 3/4″ pipe at the first T, close to the first sprayer. Then the sprinklers are reduced down to 1/2″. Since our well is at the bottom of our slope and water needs to be pumped back to the top, this design really helps keep the topmost systems pressurized.
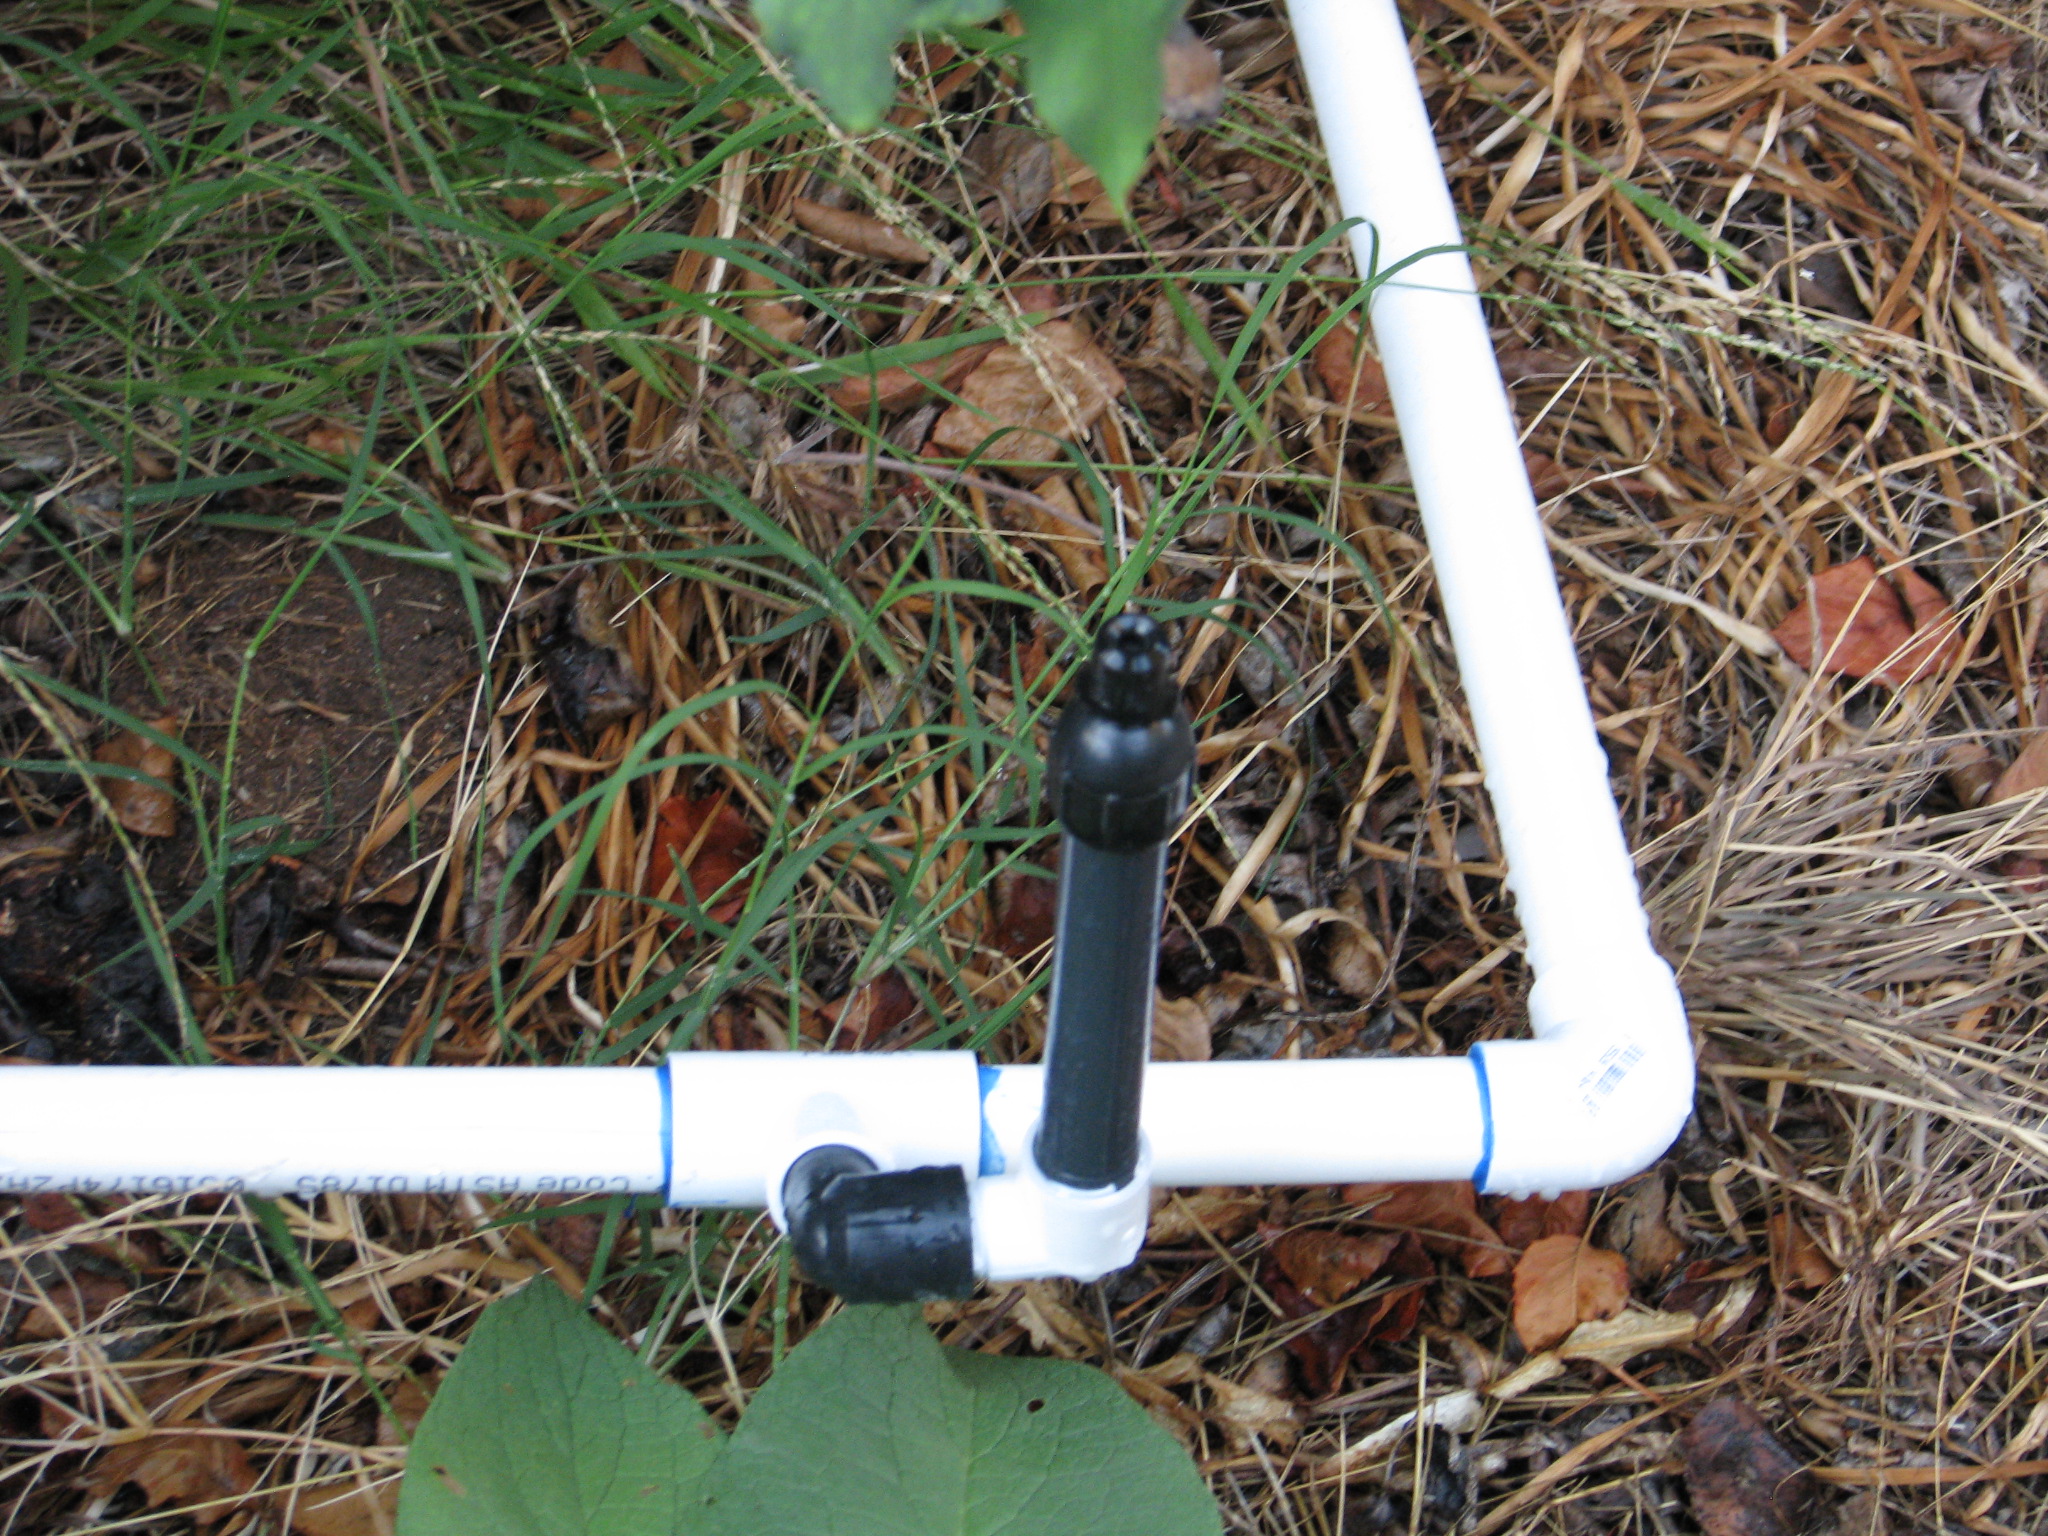
This sprayer is reduced from 3/4″ to 1/2″. So as you are laying out your garden and irrigation system, understand about slope, water pressure, volume of water and your water source. These factors all have large parts to play in the long-term success of your irrigation.
Next time I’ll discuss drawing up an irrigation plan.
You can read Part 1 Options here, Designing Your System Part 3 here , and Part 4 Conclusion here.
- Building and Landscaping, Gardening adventures, Hugelkultur, Permaculture and Edible Forest Gardening Adventures, Rain Catching, Recycling and Repurposing, Soil, Water, Water Saving
Irrigation for Drylands, Part 1: Options
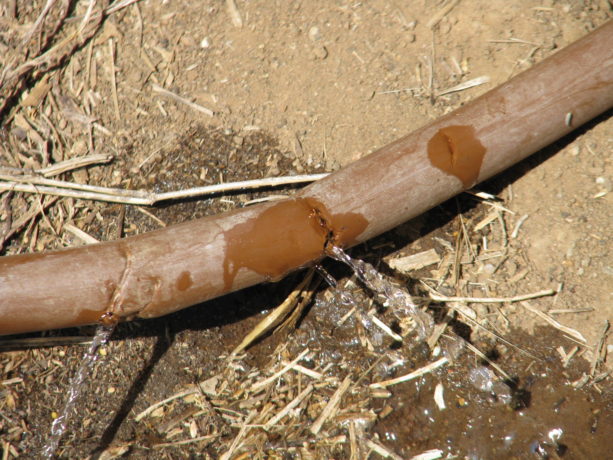
This tubing is so easily nicked that weeding around it often results in a bad leak that isn’t detected for awhile. Leaks cause flooding with dry areas past them on the line. A previous draft of this post was about 2,000 words of mostly rant against Netafim, so I’m starting over trying to be more helpful. You’re welcome.
In Southern California, and many dryland areas, if you are to grow food crops you have to irrigate. I have met several people who believe that they can ‘dry farm’ crops such as grapes here, and that is problematic. Even in Central California where they receive many inches more rain than we do, farmers struggle in the long hot, dry summers.
There are many ways to water, and I’ll address as many as I can.
The first and most important step for irrigating your property is installing the earthworks that will harvest what rain we do receive and allow it to percolate into the soil. Paring that with burying wood and other organic material to hold that water, planting in shallow depressions rather than on raised mounds and sheet mulching will greatly increase the health of your plants and decrease your water bill.
For delivering captured or purchased water you’ll need some kind of tubing and a force to deliver the water. We’ll discuss the natural methods first:

Ollas (oy-ahs) should have a lid or stone or something to block the top, to keep creatures from falling in and drowning. Photo from link page. For small yards, or for orchards with lots of labor, burying ollas (porous clay pots) in the center of a planting area is a wonderful idea. There is a really good article with diagrams and suggestions here. You can manually fill the ollas by carrying water to them (the best would be from rain barrels), or dragging a hose around to fill them. Or they can be combined with a water delivery system of pipes as discussed below. Water is then drawn through the porous pots by the dry soil around them, and thus to plant roots. There is a tutorial about making inexpensive ollas from small clay pots, and interesting comments, here. There are problems, but then, there are problems with everything. Clay pots can break, especially if you have soil that freezes or foot traffic. A larger pot doesn’t mean that water will be delivered farther underground; absorption is based on soil density. This is a system that you need to monitor and replace periodically. On the plus side, clay is natural and will decompose in the soil. Many years ago, long before I ‘discovered’ permaculture, I buried gallon milk jugs in which I punched small holes by some trees beyond any irrigation pipes. I didn’t know about ollas then; I just thought it was a good idea to get water close to the roots of the plants. This really worked and those trees are mature and still exist almost thirty years later, and still don’t have irrigation to them. However, I found that the plastic milk jugs become brittle and break apart, as will plastic soda bottles, and you really don’t want to bury plastic. Clay is much better.

Clay pipe photo from Permanomades. Please follow link to website. These look very large, but are not. Next would be delivering water via some kind of pipe. Clay pipes are the most natural, but unless you have the clay, the labor and the time to create lots of long, hollow clay pipes, this is a pricey option. Clay pipes break easily, too.

Split bamboo delivers water downhill. Photo from link page. If you have lots of bamboo you can season it, split it, remove the nodes (partitions) and then mount it to deliver water to individual plants, to ollas, or to swales. Again, you need time, bamboo, labor and some expertise. There is a good article about it here.
Plastic:
There are a lot of plastic pipes out there, and although I hate to invest in more plastic, it is often a necessary evil. Drip irrigation comes in many forms. There are bendable tubes that ooze, tubes that have holes spaced usually 12″ or 24″, tubes that can be punctured and into which spray heads are inserted, and tubes which can support spaghetti strands that are staked out next to individual plants. The popularity of drip irrigation has been huge in water-saving communities. Unfortunately they have lots of problems. Here I’ll indulge in just a little rant, but only as an illustration.
One of the big problems with flexible tubing in arid areas is the high mineral content of the water and what it does to these tubes. Any holes -including those in small spray heads- will become clogged with minerals.
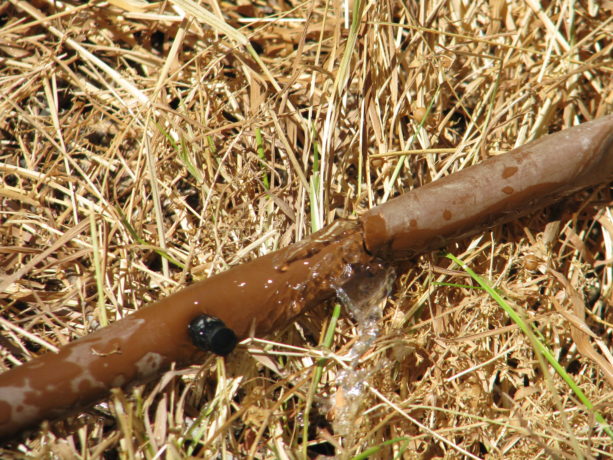
A nozzle that is clogged next to a hole that is not. Flushing the system with vinegar works for a short time, but eventually the minerals win. If the tubing is buried, then it is virtually impossible to discover the blocked holes until plants begin to die. Tubing above ground becomes scorched in the sun and breaks down.
Also, flexible tubing is extremely chewy and fun with a little drink treat as a reward.
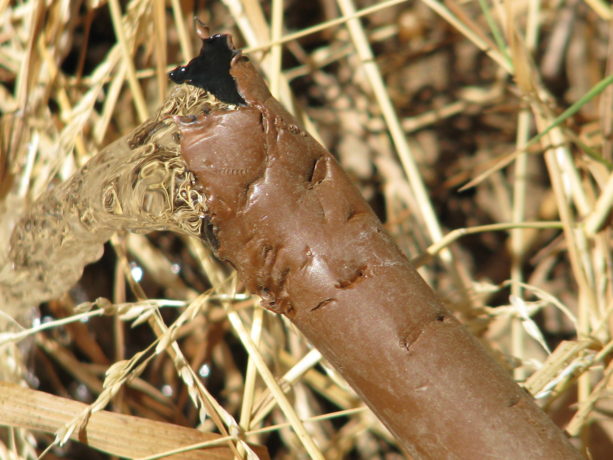
Coyotes and many other animals find flexible pipe so fun to chew. This is the opinion of gophers (who will chew them up below ground and you won’t know unless you find a flood or… you guessed it… dying plants), coyotes (who will dig the lines up even if there is an easier water source, because tubing is fun in the mouth), rats (because they are rats), and many other creatures. Eventually a buried flexible system will be overgrown by plant roots, will kink, will clog, will nick (and some products such as Netafim seem to nick if you even wave a trowel near it), and will be chewed. Some plants will be flooded; others will dry up. You will have an unending treasure hunt of finding buried tubing and trying to fix it, or sticking a knife point into the emitter holes to open them up and then having too much water spray out.
Plus, drip irrigation is not good for most landscape plants. Most woody perennials love a good deep drink down by their roots, and then let go dry for a varying time depending upon the species, weather and soil type. Most native California plants hate drip irrigation. According to Greg Rubin, co-author along with Lucy Warren of The California Native Landscape (Timber Press; March 5, 2013) and a San Diego native landscaper, native plants here enjoy an overhead spray such as what a rain storm would deliver. Some natives such as Flannel Bush (Fremontia) die with summer irrigation and are especially intolerant of drip. Drip is most appropriate with annuals or perennials that have very small root bases and that require regular watering. Small root balls are closer to the hot surface and will dry up more quickly. Vegetables, most herbs and bedding plants can use drip. Plants that have fuzzy leaves that can easily catch an air-born fungal disease such as powdery mildew are better watered close to the ground rather than with an overhead spray of chlorinated water.
Then there is PVC, the hard, barely flexible pipe that is ubiquitous in landscaping for decades. PVC is hard to chew, can be buried or left on the surface if covered with mulch (to protect from UV rays), is available in a UV protected version if you want to spend the extra money and still give it some sun protection, utilizes risers with larger diameter water deliver systems such as spray heads, bubblers, and even drip conversion emitters that have multiple black spaghetti strands emerging from them like some odd spider.
At Finch Frolic Garden I had taken advice to install Netafim, a brown flexible tubing with perforations set 12″ apart, which was buried across the property from each valve box. It has been a living nightmare for most of that time. Besides all the reasons that it could fail (it did all of them) listed above, it also at its best delivered the same amount of water to all of the plants no matter what their water needs. It was looped around most trees so that the trees would receive more water, but since then roots have engulfed the tubing, cutting off the water flow. There are areas with mysterious flooding where we can’t trace the source without killing many mature plants.
Over the past year we’ve lost about 1/4 of our plants including most of our vegetables, because we plant where there should be water, and then mysteriously, there isn’t any. Flushing with vinegar helped a little, but whatever holes are still functioning are closing up with mineral deposits. Okay, I’m ranting too much here. But this was an expensive investment, and an investment in plastic, that has stressed me and my garden. So upon weighing all my alternatives I’ve decided to install above-ground PVC with heads on risers that either spray or dribble, and the dribblers will go into fishscale swales above plants.
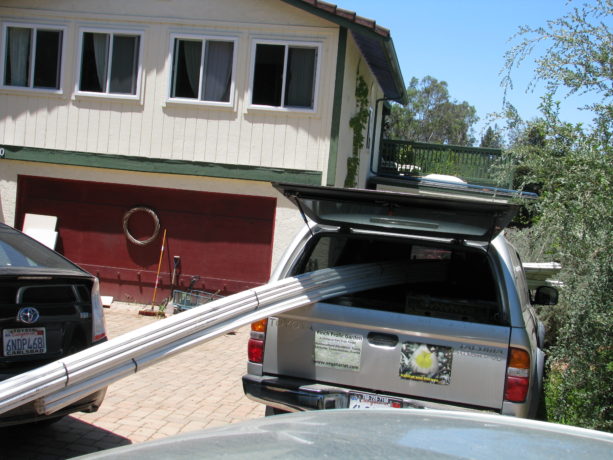
Twenty-foot lengths of PVC can fit in the Frolicmobile, and sure beats carrying it down the property. In the next few posts in this series I will talk about how to draw up an irrigation plan, installation, valves and other watering options, as Miranda and I spend our very hot summer days crawling through rose bushes and around trees gluing, cutting, blowing out and adjusting irrigation. Thanks for letting me vent.
You can read Part 2 Evaluating Your System here, Designing Your System Part 3 here , and Part 4 Conclusion here.
