-
Pagent of the Masters
Last night my daughter and I attended the Laguna Festival of the Arts Pagent of the Masters (http://www.foapom.com/). This is the show where masterpieces are reproduced to human scale and people are ‘painted’ right into the pictures. The other time I attended was with my parents about 35 years ago now (the Festival has been around for 75 years). I remember sawdust on the floor of the Sawdust Festival, where A-frame stands held works of art and there were too many people mulling around. I also remember sitting in the middle section to the left near one of the rotating stages and having a close-up view of a statue where the humans on it were painted a metallic silver. I was awestruck at how still they were. This is where I learned about the skin being the body’s largest organ, and if it is completely covered in paint then a person could die. Fascinating stuff.
Now the Festival has hundreds of pieces of art on display and for sale, with artists in attendance trying not to look at the expressions on the faces of the people examining their ‘babies’. There is also ongoing entertainment from a central stage, multiple food booths selling the usual fast food, and hawkers peddling rentals on binoculars and seat cushions. The entertainment was a band playing soft rock, interspersed with people reciting bits of Shakespeare. I’m not sure why they were, for the theme of the festival was Only Make Believe and focused on myths, legends and fairytales. The first bit of the Bard we heard while strolling the zig-zag around the walls of art was from Much Ado About Nothing (we recognized it from the Kenneth Branagh and Emma Thompson film version that I must have watched twenty times), and definitely not a piece from Oberon or any other fairy from A Midsommer Night’s Dream which would have made more sense. Anyway, it didn’t go over very well unfortunately but the audience were sitting at tables eating or waiting until the Pagent began, so it didn’t really matter if they had Shakespeare soliloquies thrust upon them.
The Pagent takes place in an outdoor ampitheatre with the usual drop-seat plastic chairs and a decent view from anywhere. I didn’t even think to bring binoculars; it wasn’t mentioned in anything I read in the website, probably because they rent them there. They would have helped. Our tickets were given me by a friend, and were up in the third section. I could see well enough but without detail. Either I could tell there was a person in the painting, or I couldn’t and just appreciated the care with which they reproduced the artwork, and without binoculars to examine the makeup and staging it wasn’t as thrilling as I had remembered from my pre-teen self. Just before intermission they had dragons flanking the audience and breathing soap bubbles while an enormous inflated one appeared clawed foot by clawed foot over the roof of the stage. This bit of theatrics was very fun and possibly the highlight of the show, but had nothing to do with paintings or painted people. The orchestra in the pit below the stage had the most arduous task and performed beautifully.
I believe that the most impressive thing for me was that the entire show is made up of volunteers. Having run a volunteer group before, I know how even the best-intentioned group can go astray because volunteers are just that… unpaid help. The level of professionalism and talent with the staging, make-up, costumes, orchestra, planning and execution is phenomenal.
So I wasn’t as excited as I had hoped, but perhaps binoculars would have made some difference. But what have I to complain of? A beautiful evening outdoors in Southern California listening to good music, looking at art, talking with artists, and seeing a unique show that is quite brilliant and fun, isn’t something to sneeze at. I’m glad that my daughter had a chance to see it; having artistic talent herself made her particularly interested in many of the displays, and she identified all the birds represented in various artwork as well.
If you haven’t seen the Festival and you like art, you really should experience it. Avoid the toll road though, and prepare to pay for parking and take a windowless shuttle (it blows your breath away). The program is available for download from their site (above), and don’t even think of bringing a camera because they have you check it in at the door. It really is a good time.
-
Segregating the Rooster, or Building a Bachelor’s Quarters out of PVC

Bachelor Pad If you’ve read my earlier chicken posts, you’ll know that we bought seven hen chicks, and one of them turned into a rooster. Since we are vegetarians and animal activists (and just plain softies), I opted to try and keep him. I don’t want fertile eggs or chicks. So far the neighbors haven’t complained about the crowing and I kind of like it. The store from whence he came said that they’d give a refund, but Emerson (the rooster) would end up as an employee’s dinner or in the dumpster. Squawk! I contacted my very amenable and patient vet Dr. Pyne about ‘fixing’ him, which I found out is what capons are (which was common practice up until fairly recently, and capons were often used to sit on eggs because they were calmer than the hens. Hmmm.), but since the rooster’s, um, or-gans, are internal, this would be an involved surgery and we left it at that (he’s fixed feral cats for me, helped my tortoise, many dogs… I wish he could be my personal doctor because I’d get better treatment there!).
Since E-Day (Egg Day) is coming up in August, when the six hens will be old enough to start laying, and since Emerson has become more aggressive with them, and since the chicken tractor is too small for that many chickens anyway, I decided to add on. I am terrible at measuring things. I do just as good a job eyeballing a length or walking a thing off and counting my foot lengths as I do with yardsticks or measuring tape. I have an interesting set of curtains as proof of this. No matter how I try, and how clear-headed I am with the numbers, I get it wrong. If I am to build a thing, I have to start with pre-measured lengths and not cut them. About fifteen years ago I built a very respectable movable chicken coop that way, using 2x4x8’s, a lot of chicken wire, screws and piano casters. I didn’t cut any wood. However that had to be dismantled when we moved and I used the wood for other projects.

Facinated Audience If something bends or stretches, now, hoo-boy that’s a whole ‘nother story! I’m all over it! So today my ever-patient and forgiving daughter and I stood out in the blazing sun for a good eight hours and glued together a chicken coop extension made of leftover 3/4 inch PVC water pipe! My sketch, of course, was on the back of some unopened junk mail, but I only had to run to the hardware store once in the middle of the day for some extra fittings. Much as I don’t want to contribute any more to the manufacturing of plastic, I had all this pipe leftover so I’m recycling. The coop is a rectangle divided in half lengthwise with chicken wire, so half of it becomes a bachelor quarters for Emerson, and the other half an extended run for the hens. They will access it through a hole cut into the wire on the side of their coop, and they can keep company with Emerson on two sides of the coop without being, um, disturbed. Emerson isn’t going to be very happy about it, but we certainly didn’t ask him to be a rooster, either! In fact, he was the smallest and least-aggressive looking chick in the bunch.

The door was made of 1/2 inch PVC PVC is fun to glue; it bends and is forgiving, and if it is a little off, on a project like this, it’s okay! If anyone ever asked me what kind of fingernail polish I use, I’d have to say Red Hot Blue Glue. Working with wire is another story. I believe that all discontented former employees, people with grudges who believe that the world is either out to get them or owes them more than what they have, all work at poultry wire companies. Rolls of wire are treacherous and evil. When you uncoil the thin wire that binds each roll of tightly wound chicken wire (or any other, for that matter), the roll slips and tries to nip off your fingers. The outer edge is raggedly folded under, and the cut ends poke out at angles so as to scratch you and draw blood no matter how careful you are. As you reach the end of the roll it requires almost superhuman strength to unroll, and if you are working alone it will recoil with a snap that can take you up with it. Any work with poultry wire, no matter how innocent, ends in several copiously bleeding scratches and possible loss of limb.

Framed! By seven o’clock tonight, we’d finished his side enough to move him in. My daughter went to catch him and boy did he put up a fuss, making all the girls panic. You’d think we’d tortured him every day since his second day on earth instead of treating him as a pet. Perhaps I should put a photo of a dumpster or a stewpot up in his quarters just to make him reconsider his behavior.

Wire around all sides So tonight Emerson is separated. The girls were very concerned and he looked confused, but they share a wall at night and can plainly see each other. He has a roost near theirs, too. We didn’t get the girl’s side attached yet, and we need more chicken wire for their roof (we wired a tarp over it temporarily). I’ve also decided that I will put wire on the bottom as well. The PVC is lightweight and I’m afraid of raccoons getting under it. I could always put it on small wheels and make a chicken tractor out of it, or fill the entire thing with water to make it heavier! Or not.
I point out to my daughter constantly that other people are at the beach, or doing some typical summer activity, while we glue a coop, cob an oven, trim nails on our cat… all of which draw blood, come to think of it. The chickens are laughing.
-
Candying Kumquats
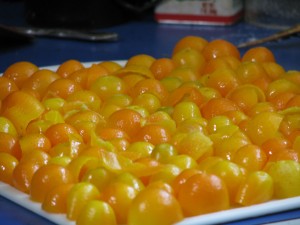
An army of kumquat halves We have two small but prolific kumquat trees. Kumquats are very small citrus that are tart and sweet at the same time, and you eat the skin and all whole. Kind of scary. Not wanting to waste food, my daughter picked a whole batch of them and was determined to juice them. And she did, one tiny half at a time! There was about half a cup of juice in all, which she froze in plastic butter molds for future use in drinks, etc.
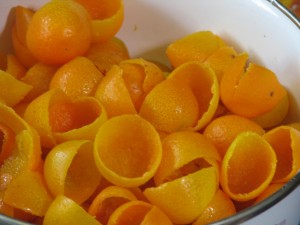
De-pithed kumquat shells Then we had all these little half shells, so she carefully scraped the pith out of all of them and candied them. The idea was to make little candied shells in which we’d put little scoops of vanilla ice cream, lemon sherbet, or something yum. We tried a couple with homemade vanilla ice cream, and it was worth all the work.
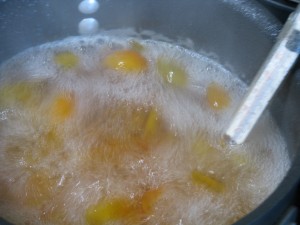
Cooking kumquats in simple syrup The kumquats needed to dry round, like little bowls, so I picked some more kumquats (yes, there are still more!), halved them and used them as molds for the shells, which were put onto the halves like little hats.

Using kumquat halves as molds for shells All the split ones were set aside, and then everything was sugared and dried. Several years ago we candied orange and lemon peel and I pulled some out of the bags now and then for use in baked goods. Now we have candied kumquat peels and shells.

Sugaring the peels and letting them dry But we still had all those kumquat halves that we’d used as molds. We also had half a saucepan of simple syrup in which the kumquats had been cooked. So, not wanting to waste, we put the kumquat halves into the syrup and boiled it again until the halves were candied and then I put them in jars and sealed them. I’m not sure what I’m going to do with them, but they can be used to decorate desserts.
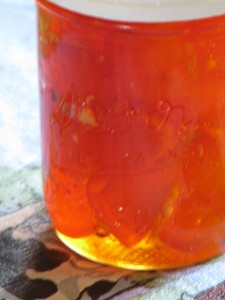
Candied kumquat preserves in syrup I also had another ginger beer recipe that called for slicing the ginger, cooking the slices in a sugar and water mixture until reduced, then using the liquid as a base for a ginger drink. The slices could then be sugared and dried and eaten. I keep candied ginger from Trader Joe’s in the car to snack on, because ginger helps with car sickness or an upset stomach. These homemade ginger slices were quite hot, so I think I’ll save them to use in cakes and pies instead.
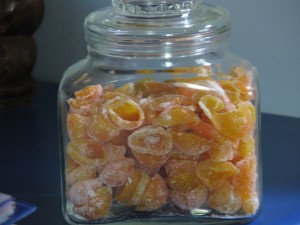
Stored candied kumquat shells and peels So it was a day of sugaring, preserving and messing about in the kitchen. We now have seven quarts of pickles, a couple of bags of dried kale that is not only good to munch on, but great to crumble over rice or noodles, jars of candied kumquats, a jar of sugared kumquat peel, a bag of candied ginger slices, some miscellaneous jam, and lots of zucchini with more to come!
-
Hiking Santa Ysabel Open Space Preserve

Ancient god face in wood Today my daughter and my hiking buddy Alex spent almost five hours hiking a seven-mile trail in the stunning Santa Ysabel Preserve. Alex and I hiked the Kanaka Loop trail before, taking less time, but today we stopped often for photographs of the abundant birds, insects, plants and incredible views.

A small pine in the shadow of a fallen giant Managed by the County of San Diego Parks Dept., this open space preserve has two entrances. The West Loop Trail, which is short and mostly easy, is off of Highway 79, and the main entrance and staging area is off of Farmer Road past Julian (http://www.sdcounty.ca.gov/parks/openspace/Santa_Ysabel.html ) . Each entrance offers loop trails, and are connected by a portion of the Coast to Crest Trail.
This preserve is the home of ancient oak riparian woodlands,

Out of a storybook 200-year-old sycamore groves,
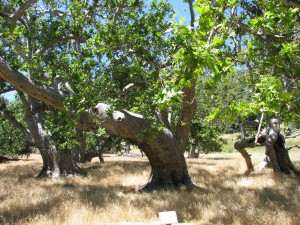
Two-hundred year-old sycamores stunning views of the mountains and hills west, with a glimpse of Palomar Observatory in the far distance

The View towards Palomar Observatory and equally serene pastoral landscapes of mountain homes, apple orchards and rolling hills in the southeast.
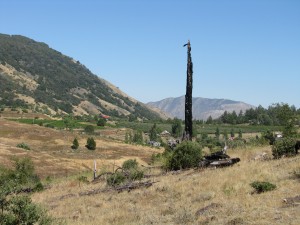
A beautiful valley of apple groves At this time of year the grasslands are pale gold, and ripples travel for acres in the very welcome warm breeze that kept this July day from being overwhelmingly hot.
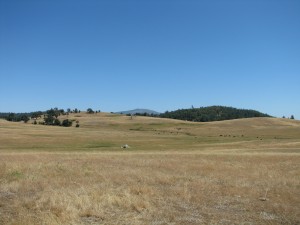
Rolling grasslands A new experience for us was to walk miles of trail while disturbing thousands of grasshoppers that flung themselves out of the way or took wing to avoid us. It was like setting popcorn off as we walked, trying to not tread on any but also being hit by some misdirected fellows. One took a ride on my pants for awhile until he began to investigate my pants pocket and I had to give him a boost to freedom.
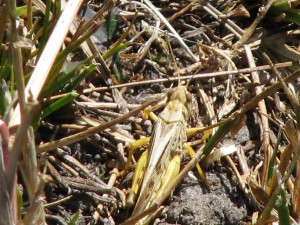
Grasshoppers It was a glorious day for birding; some of the birds we saw were flocks of Western bluebirds, kingbirds, a lark sparrow, a Lazuli bunting, ravens, chipping sparrows, goldfinches, bushtits, both spotted and California towhees, acorn and Nuttall’s woodpeckers, a Northern flicker, a Cooper’s hawk, an American kestrel, Western meadowlarks, brown-headed cowbirds, cliff swallows, Steller and scrub jays, Mountain chickadees, and many turkey families, their brood half-grown and comically awkward. We saw bright red Large Milkweed Beetles on blooming Indian milkweed, a late blooming Summer lupine, and did I mention grasshoppers? Thousands of grasshoppers. Almost the entire hike. A pair of ravens sat in the tall grass to the side of the trail with their beaks open, catching them as they leaped, as did Western bluebirds and others.
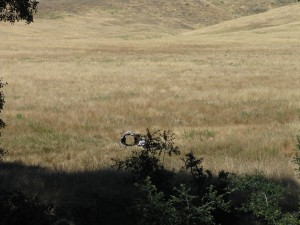
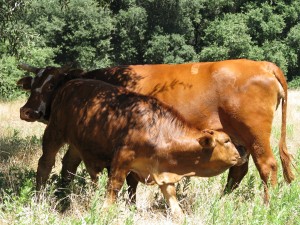
A hollow stump that looks like a TV set The Preserve is also home to cattle, and groups of the little ladies and their offspring dotted the landscape. Many bad cow jokes ensued (they’re in a bad MOOd; you can’t HIDE from them, they are UTTERLY charming, we’ve got to HOOF it past them, let’s MOOve it along… well, you get the picture), and although they watched us warily, they gave us no problem and we spoke to them soothingly as we passed by.
Lunch The Kanaka Loop Trail is easy up to the streambed crossing,

Good run-off for July then it goes uphill in areas which are bare due to elevation and past fires, so there is little cover. Many pines have sprouted up and their fragrance in the heat is intoxicating. However twice during the trail up through the trees we smelled greasy french-fries, and have no idea what plant or combination of flowers created that scent. It is an exceptionally beautiful trail and not difficult for the average hiker, but be sure to take a hat and lots of water, and a good attitude towards cows!
-
Dutchman’s Pipe

Vigorous Vines There are a few very peculiar specimens in my garden, thanks to Roger Boddaert. They have nothing to do with edible forest gardens, drought tolerant plants or permaculture. They simply are fun. One of which is the Dutchman’s Pipe (Aristolochia), named that because it’s very odd buds look something like… well… the pipe a Dutchman might smoke, I’m guessing. I’m thinking that the Dutchman was either blind or drinking heavily to put something that looked like this in his mouth! Another less imaginative name for this variety is Calico Flower. They look like hanging squash when they are immature.

Many buds waiting to open There are many varieties of this vigorous vine, each having different sized flowers. Mine has flowers in Summer and Fall, and they are sizable.

Flower Opening The vines can grow 30 feet high, and the plant can easily cover the side of a house. They originate in the Southern United States, preferring moist soil.

Flower opening more This is the larval host plant for the blue and black pipevine swallowtail butterfly, which don’t migrate this far west. Perhaps something else will find it useful.

Opened flower is flat The flower develops as a miniature version of its large self, and then continues to grow into these sack-like buds. When ready, they fold open to become flat, with the seed pod in the back. The flowers catch the wind and twist on their stems like decorations. Or like those things in the original Star Trek that flew across the cave and attached themselves to Spock’s back. So another fun and kind of creepy plant, which will provide shade, food for butterflies, and a lot of conversation starting. Gotta love it!

The one on the right is laughing! -
Zucchini
I have four vigorous zucchini plants. Why four? Because in winter with a lap full of comforter and gardening catalogs, the January eye peers back at July’s garden and the plants are smaller, the harvest never enough. What if something happens to one spindly seedling? Then there would be no zucchini, and summer without it just wouldn’t be the same. So four tiny sprouts went into the ground and four large plants are what I have. The zucchini harvest began several weeks ago. My daughter and I have happily eaten sauteed zucchini, seared zucchini, broiled zucchini and have even made sun-dried zucchini chips. It has been too hot to make Rosemary Zucchini Soup (see my recipe section). Zucchini bread uses far too little zucchini for the amount of calories it contains. The problem with zucchini recipes is that they use far too little zucchini! Zucchini has many health benefits, and is low-calorie, versitile, and is the butt of many summer-harvest jokes. I say this while considering who I know that I might unload some of the harvest upon.

Zucchini Chips ready to sun-dry on the roof We’ve both been harvesting under the enormous leaves this year’s zucchini plants have produced, and have kept up with it with few surprises. Until today.
In summer the days can run into each other with a speed that is breathtaking. We’d gone two days without checking. Then this morning after a second morning of trying to teach our old dog General the new trick of not hunting the chickens, which we were allowing out of their coop, we were on our way back to the house. It was hot already, the morning mist having burned off as if with an acetyline torch. My daughter carried strawberries in her hat and I was headed up to water stressed plants stranded without irrigation. Then I caught a glimpse of something along the edge of the raised bed. It was green. It was wedged against the corner and pressing against the edge of the wooden end. It was trying to break free. Trembling and exchanging fearsome glances with my daughter, I lifted a spiny leaf: There lay a six-pound zucchini.
This might not impress you. Perhaps you’ve recklessly gone on a summer vacation and forgot to mention to your neighbors that they should keep a cool eye on the big plant in the veg bed, and returned to find a green Moby Dick sucking up all the water in the garden. Perhaps you know already that the world’s record zucchini weighed 65 pounds. The world’s longest was 69.5 inches long, which is 6 and a half inches taller than I. Yet to find a six pounder trying to break down my much-cherished raised bed was something of a shock, especially when there was only a two-day gap between checking. This zucchini is only slightly less weight than my daughter at birth. Yet, I feel strangely deprived of maternal instincts toward it.
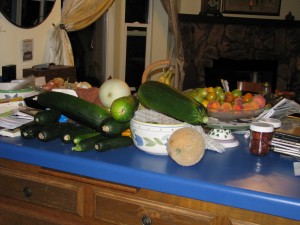
Big Zucchini How luxurious it is to complain about too much food. I’ll make steaks out of this big one, and perhaps donate the smaller ones to the Fallbrook Food Pantry. And begin to harvest the squash blossoms more vigorously!
-
The Importance of Leaving a Mess

Animal tunnels through a brush pile A clean yard is usually a pleasing sight. Picking up loose boards, plywood, sticks and logs keeps people from tripping, is encouraged by the fire department to reduce fuel for fires, and makes for more room to walk. Also, things live under debris and we’ve always been told to not poke our fingers into dark places (excellent advice! If a giant stuck his huge finger into our bedroom window we’d try to hurt it to make it go away, too!), and by eliminating so-called debris we reduce the chance of bites by snakes, spiders, or whatever bitey things may be living in your part of the world.
However, by reducing the debris, we also reduce habitat. Those bitey creatures need a place to live, as do the non-bitey creatures we are also displacing by removing wood. All these creatures are part of the intensely woven food web that keeps our planet populated and working. I cannot disagree about making your yard safe for children and pets, but if you have a space, make an area for habitat, too. Rope off a corner of your yard and tell your children and pets not to go into there, and leave bundles of sticks, pieces of plywood, old logs, piles of leaves, etc. in that corner. This is a home for the wild things, and your children can understand, observe and respect the fact that the world should not be made clean for them. Teach your children not to hunt and catch wild things, not to tear apart nests and destroy habitat. Observe and wonder instead.
In my yard, especially since I’ve had some sheds removed (in which racoons, wasps and possums raised families… I’m hoping to make a new place for them), I have stacks of plywood and old buidling materials which are good for recycling back into projects around my house. A junkheap, yes; a goldmine, yep. Under these stacks I have found such wonderful creatures that I didn’t even know came into my yard (perhaps they didn’t until the wood was left out).
The most exciting creature was a female Western pond turtle.

Female Western Pond Turtle In Washington, the Western pond turtles are endangered, and they are considered threatened in Oregon and are becoming rare in California and Baja California. Besides loss of habitat and an increase in pollution, one of the major factors in our native turtle’s slow demise is the release of non-native aggressive species such as the red-eared slider turtles. Red-eared sliders are America’s favorite pet turtle although they are native to the Southern United States. Due to releases they are everywhere. DO NOT RELEASE YOUR PET INTO THE WILD! As much harm has been done by and to domestic animals and wild animals by the releasing of pets as by habitat loss. A number of years ago there was a salmonella scare allegedly traced to pet turtles. The public’s response was to dump their children’s turtles in any waterway close by. Red-eared sliders have a distinctive red line by their eyes, and are named sliders because that family of semi-aquatic turtle can slide into the water quickly. They are omnivorous, aggressive, adaptable and become large. They eat anything that they can fit into their mouths, including the less aggressive smaller Western pond turtles.

Females have flat plasterons; notice her left stumpy leg. Finding a female Western pond turtle in the yard was fantastic, and I can only surmise that she had made her way up from the shallow streambed below the property to hopefully lay eggs. I haven’t found signs of a disturbed area yet where she may have layed, but am keeping the whole area protected just in case.

Long tails She is missing one front foot, probably bitten off while a youngster when something was trying to eat her. Before we knew she was a she, we thought of giving him a piratey name due to the missing foot and her semi-aquatic nature. Captain Blood was too fierce, but the author of that and other swashbuckling tales which had been made into movies is Raphael Sabatini. Now that is a terrific name. Go ahead and say it to yourself. See? So he became Raphael Sabatini until we checked her plasteron (the underside of her shell) and realized that it was flat not concave, which meant that she was a female. Males need concave plasterons so that when they are, um, amorous, they don’t fall off so easily. So she became Mrs. Sabatini. Long story… sorry. Nothing simple in my life. Anyway, we checked out Mrs. Sabatini’s health, and then released her into our small upper pond, which has an excess of mosquito fish and bugs, so that she wouldn’t be hurt with all the work that is being done down where she was found. We haven’t seen her since, so hopefully she is healthy and happy.

Good-bye Mrs. Sabatini! Under another piece of plywood I’ve found blue-tailed skinks (I couldn’t take a photo because they move too quickly), California Slender Salamanders,

California Slender Salamander gopher snakes, king snakes,

California Kingsnake and Pacific chorus frogs.
In a brush pile there are many birds hopping through, especially California towhees, Western fence lizards, alligator lizards, tree rats, mice and many other creatures.
In the ground are insects that you’d never expect. For instance while weeding one of my heirloom bulb beds I disturbed this huge caterpiller that had a horn tail.

White-lined Sphinx Moth Caterpiller The only horn tails that I’m familiar with are the tomato hornworms, but this guy was far away from my veggie patch, and instead of stripes had spots. We looked him up, and he is the caterpiller form of the White-Lined Sphinx Moth, also known as the hummingbird moth because of the way it hovers in front of night-blooming flowers to drink nectar. It is one of the important nighttime pollinators which few ever see. We put him back and left some weeds in for him.
Of course mason bees, among other pollinators, use holes in wood in which to nest. Some bumblebees nest in abandoned gopher holes, and they are the natural pollinators of many native North American plants such as blueberries (honeybees were imported from Europe with white settlers; until then native plants developed their flowers to attract and accomidate bumblebees, wasps, and hundreds of other native insects.)
All around my property there are logs and brush piles, and plywood layed down to choke out weeds in my veggie garden. Underneath there is a world of habitat. Isolated refuges for animals and insects who desperately need places to feel safe. So go ahead, throw down some mulch, some logs, a pile of sticks or some plywood. Know that you are doing the Earth a favor.
-
Freestyle Peach and Apricot Tart
Freestyle Peach and Apricot TartAuthor: Diane C. KennedyRecipe type: DessertPrep time:Cook time:Total time:Serves: 8A handsome, rustic dessert that is easier to make than a regular pie or tart, and delicious, too!Ingredients- For Pastry:
- ½ cup cold unsalted butter
- 1¼ cups all-purpose flour
- ½ teaspoon cinnamon
- 1 beaten egg yolk
- 2-3 tablespoons ice water
- For Filling:
- ¼ cup granulated sugar
- 4 teaspoons all-purpose flour
- ¼ teaspoon freshly ground nutmeg
- 3 cups total sliced, peeled peaches and apricots
- 1 tablespoon lemon juice
- 1 beaten egg
- Powdered sugar
Instructions- For Pastry:
- In a mixing bowl cut butter into flour with a pastry blender until pieces are small pea-sized.
- Stir together egg yolk and 1 tablespoon of the ice water
- Graually fold egg yolk mixture into flour mixture.
- Using a fork, gently toss rest of ice water one tablespoon at a time into flour mixture, till all the dough is moistened.
- Gently press together dough until you can form a ball.
- If necessary, cover dough with plastic wrap and refrigerate for ½ an hour or more until the dough is easy to handle.
- Line a baking sheet with aluminum foil and sprinkle it lightly with flour.
- Place the dough in the middle and roll to a 13-inch circle; a chilled rolling pin will help with this, or lightly dusting the top of the dough with flour (don't overdo!).
- For Filling:
- Mix together granulated sugar, flour and nutmeg, then stir in fruit and lemon juice.
- Mound fruit mixture in the center of the crust, leaving a 2-inch border.
- Fold border up over fruit in an artsy, farmhouse sort of way, leaving the middle exposed.
- Combine the egg and 1 tablespoon water and use it to brush onto the top and sides of crust for browning.
- Bake in a 375F oven for 40-45 minutes until crust is golden and fruit is bubbling.
- To prevent overbrowning, you can cover the edge with foil for the last 10 minutes of baking.
- Cool 30 minutes on the baking sheet.
- Dust edges with powdered sugar, if desired.
- Serve as is, or with vanilla ice cream or whipped cream.
-
Cob Oven 3

The bottom layer stayed damp This is the third installment of the cob oven building story. In our last episode, we saw permaculturalists mounding and shaping sand, then beginning to build the first insulation layer on the sand form. The lack of straw made the mixture of sand and clay a little challenging to work with (straw would burn off so it isn’t used for this layer). When my intrepid daughter and I ventured out this morning in the July heat, we found that the wet burlap and newspaper had worked well for keeping the insulation moist. The mixture still on the tarps was a little drier, and a batch that had been put into a 5 gallon black nursery container so it was easy to grab, and then forgotten, had turned into a cylindrical brick. That was good news, for it showed that the mixture was a good one.

The mud was still good on the tarps Although hot today, it wasn’t nearly as searing as yesterday. Intermittent clouds blew over and created some humidity, but sheltered us from the direct sun and the breeze stayed pleasant. I’d already baked a layer cake and a peach/apricot tart after blanching and peeling the fruit, to make sure the oven was used during the cool part of the morning. We also sliced extra fruit and put them out on cookie trays on our roof to dry (look at my post about drying fruit, if you would like to know more). I made sliced polenta with cheese and egg for breakfast, and cleaned up a mountain of dirty dishes from the cooking and baking by 10:30 am; a good start to the day.
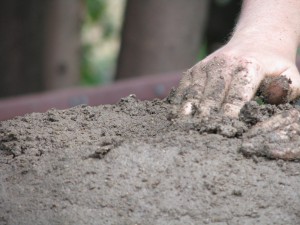
So we began layering the 2/1 sand and clay mixture, digging it into the layer below and being careful not to press inwards on the sand dome. We used our fists as guides to measure the same width all the way around, guiding with our other hand. If you don’t like having dirty fingers, or you value your fingernails, this isn’t the hobby for you. I think ninja masters must toughen up their hands by building cob ovens. Certainly no physical therapy I might have to do for my months-old sprained wrist could equal this kind of exercise!
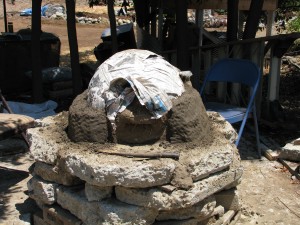
Slowly working up the sides While we worked we’d periodically hear chirps from a palm tree where a hooded oriole family was being fed by diligent parents. We were also watched most closely by our chickens; Emerson (who was supposed to have been a hen) practiced crowing.
Despite our drier mud, the sides liked to succumb to gravity. We used 2×4’s to press mud up from the bottom, similar to rolling out pastry dough. To make the front even, I took a mortar spatula and sliced off extra mud, then patted it even.
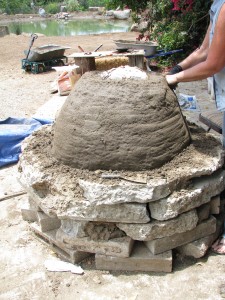
A bald pate The most valuable tools we used were a spray bottle of water, the pieces of 2×4’s and folding chairs. A good arguement for making the oven stands higher is to save your back when mudding!
Finally the top was attained!
Closing up the top! The next part was to use the board to smooth out all the sides and make a beautifully rounded shape. An area in the back was a little slumpy due to extra wet mud, but it wasn’t a big problem. After it was smooth, we took the board and gave the dome gentle whacks to compress the insulation.

Using a board to shape the dome After about 3 1/2 hours today, and 45 minutes yesterday, the first layer is finished. All during the process it felt as if we were creating an entity. I was trying to puzzle it out as we worked, and I think working with soil from our own property, mixing with hands and feet, and the rounded soft shape of the earthen dome all created that illusion. Also, the handle of the door that we made of cob looks like a big nose. My daughter dubbed the oven Harry Mud (and all you Star Trek Classic fans will love that name even more).
The next phase will be to mix straw with the sand and clay and create another layer over the insulation layer. That process will be in the near future, but definitely after our hands heal up from the sanding they received today. Hot and humid as it was, we had a real sense of accomplishment and pride when we finished the bones of Harry Mud.
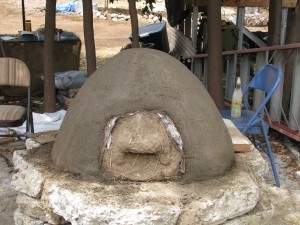
Harry Mud -
Cob Oven Part Deux (and still not done)
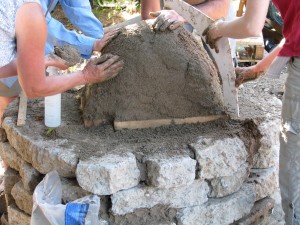
Mounding sand within a template Today three members of the San Diego Permiculture Guild joined my daughter and I in another go at finishing the cob oven. We had only two hours in which to work on a warm morning which was rapidly turning into a hot day. With the base already built, we now needed to build a sand dome which would serve as the inside mold for the oven. Mixing sand with water until it clumped wasn’t as easy as it looked in the books, and it never really clumped. However, after a long effort the group did a fantastic job making a sand mound of correct dimensions.
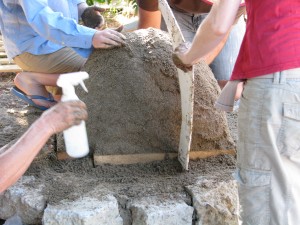
Measuring and spraying the sand with water My daughter and I had made a template to show how high and round the sand should go, and eventually the sand dome became something of which Sir Christopher Wren himself would of been proud. It is a shame that after the cob is added the sand will be scooped out, but the hollow that is left will be perfect for the roiling flames of the fire, with no cold spots.
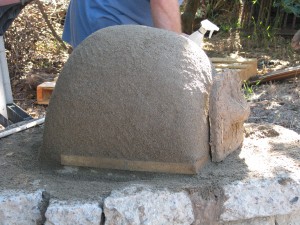
A beautiful mound, with a door Our choices for a door was to make one out of wood with insulation on the inside, cut one out of the cob and then create one, or make one out of cob ahead of time and build around it. My daughter and I made one the day before, and albeit topheavy one, and propped it up so cob could be built around it.
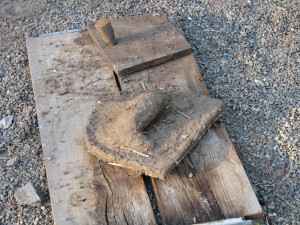
Mud door The sand dome was then covered with wet newspaper for protection from the cob.

The door looks like a big-nosed creature! Next came the insulation layer, which was two parts sand to one part clay. No straw was added because it would catch fire. The mud we used was a batch in a wheelbarrow that had been worked (all the hard pieces either discarded or squished) by the group during the first oven building session. We kept it wet and covered so that the clay would soften. This became a problem, though, because the clay was already saturated when we worked in the sand. As the sides were beginning to be built, the cob was soft enough to bulge out at the sides. Thinking quickly, the group put pieces of wood around to use as a frame while I began mixing another batch from the rest of the mud in the wheelbarrow and sand, using my feet. Others leant their feet to the project.
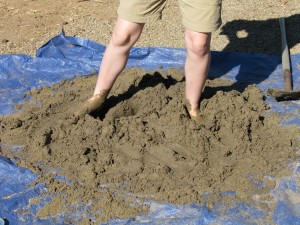
The cob dance This batch was wet as well, but not as wet as the first batch.
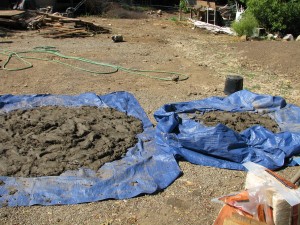
Two sand and mud mixes, the left one too wet The theory was that since the clay was in water, the heavier particles sunk to the bottom displacing the water, and so the first batch of mud from the top of the wheelbarrow held more water than the second, lower batch. This made perfect sense.
When building the insulation layer, care must be taken not to press into the sand mound. The first layer of insulation should be 3-4 inches wide. Each layer must be pressed into the one beneath so that the cob is uniform and doesn’t dry in layers. At first it is built straight up, then gradually around the curve of the dome.
With only 45 minutes to go, and the sides bulging enough to prevent any more building, we opted to take out what was already built and start in again with the drier mud mixture. This, too, needed some wooden support, but it was by far easier to use than the first batch. The wetter mud was spread out on a tarp to dry out more in the sun.
With the time coming to a close we stopped, covered the mound with wet burlap and the mud with tarps. Perhaps the next time will bring about the finale of the oven, and the long-hoped for pizza!

Covered with wet burlap until next time
