-
Fruit Tree Guild, Revisited
In June I blogged about how to plant a fruit tree guild, and gave the example of one I was planting by the Fowl Fortress. I thought I’d show you how it matured.

Apple tree in trouble: heavy clay thoroughly shot through with Bermuda grass. Yuck! This was the area four months ago. Heavy, sticky clay taken over with Bermuda grass. A struggling apple tree begs for my help. A star jasmine climbs the side of the Fowl Fortress. A portion of the brown subterranean irrigation system lies aboveground.
Using permaculture design, I created a plant guild with herbs and vegetables that would build the soil and help the apple tree.

A guild is planted. Strawberries went around the trunk of the tree for groundcover and grass competition. Comfrey, a valuable nutrient accumulator in there, too, for slash and drop fertilization. There is also a perennial basil, marjoram, gourds, golden runner bean (a nitrogen fixer), garlic chives, a prostrate rosemary and a tomato, along with other flower seeds. This is how it looks now from the same vantage point:
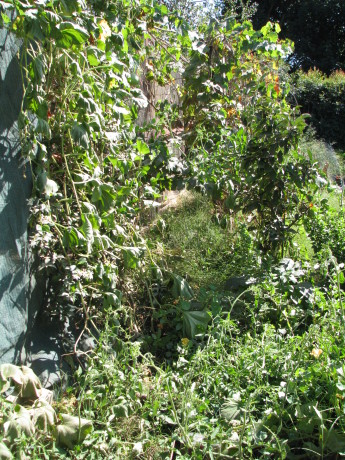
The guild in September. 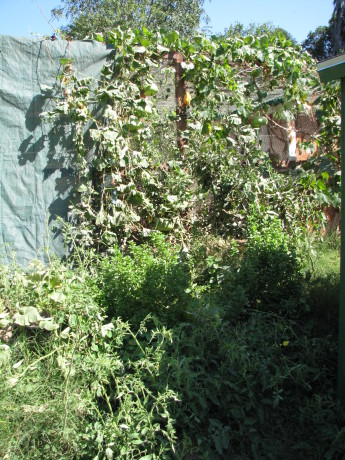
Layers of plants protect the ground and produce food. 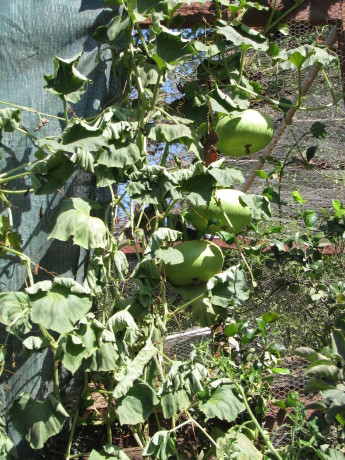
These gourds can be dried and made into bowls. 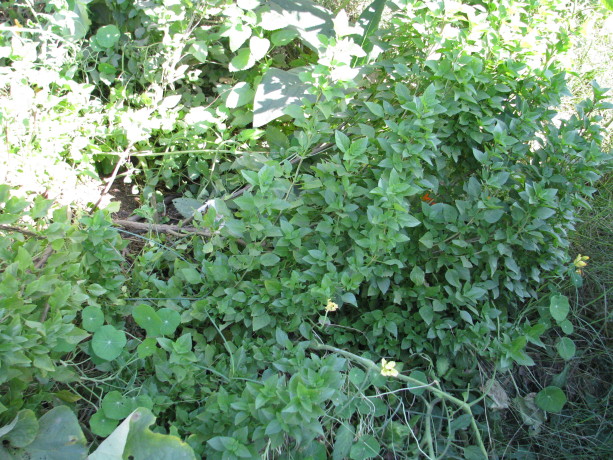
Perennial basil, Amish paste tomatoes smother the weeds and enrich the soil. 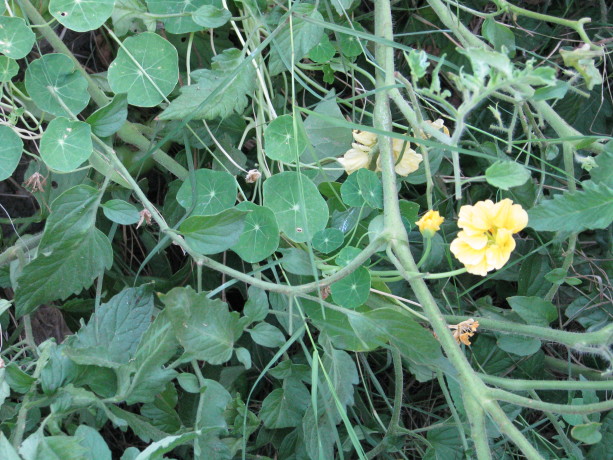
Nasturtiums reseed and fill in as the other vegetables die off. Polyculture beds produce abundant, insect-confusing food guilds which help fertilize and water each other and improve the soil quality. Meanwhile the apple tree has a few apples on it and looks healthier than it has been. Next year’s growth should be drastically improved, and the amount of invasive grasses should be nil. If I don’t grow consecutive annual crops here around the perennial plants, I will sheet mulch the bed.
- Compost, Gardening adventures, Health, Hugelkultur, Other Insects, Permaculture and Edible Forest Gardening Adventures, Soil, Vegetables, Worms
Don’t Clean Up, Dig It In!

Use old vegetables to grow new ones! Tomatoes, eggplant, peppers, fennel, carrots, string beans, three kinds of basil, and probably other things I’ve forgotten about! In January of this year I wrote about Lazy Composting. Frost had killed off sweet potato and tomato vines,
and the soil in the raised garden beds were becoming very low.

- Soil level is very low on the raised beds.
Instead of hauling all the vines to the compost heap or bin, I thought I’d create soil in place. The raised beds are lined with chicken wire to protect veggies from gophers. Although I didn’t want to disturb the microbes and fungus in the soil, I dug out half the beds down to the wire.
Then I layed all those vines right on the soil and covered them up.
Then I did the other half…
- Spent tomato vines, with some green ‘maters still attached.
… and then did the other bed. Any thick stalks in other beds which didn’t need extra soil I simply cut close to the ground so that their roots can decay in place and feed the wormies.
I sprinkled the whole thing with a little Epsom salts for the magnesium sulfate, and a little sugar to start the disturbed microbes feeding and reproducing heavily, which would cause them to decompose the vines more quickly.
In one bed I planted cold weather crops right away; peas, brassicas, garlic, onions and more. I am a firm practicioner of polyculture, or integrated gardening , which means that I plant an assortment of seeds of plants which will help each other in small areas instead of planting all one thing to a bed. I can still plant a row of peas so that I can string them up easily, but I’ll plant all kinds of other plants around them. Usually I don’t plant in a line at all anymore, but rather stake the plants as they need them. Often they’ll use taller plants as support. This is why planting peas and sweet peas next to trees and bushes is a great idea (they fix nitrogen in the soil which helps the tree).
In the other bed I waited to plant until March when the weather warmed up, because I was planting early summer crops. Here it is the beginning of September, and here are the beds, still producing. Even the winter veg one.
In the bed to the right there is a yellow current tomato blocking the view, and growing into the tree. You can see a Japanese eggplant, and behind it the red is a pepper. Under the tomato and along the bed are three kinds of basil, many string bean plants, some of the sweetest carrots we’ve grown, fennel (one of which we allowed to be the host plant for the Anise Swallowtail, which ate the tops. The bottom of the fennel, which is the part we eat, will still be harvestable). In the bed to the right is the January plants still alive and kicking. Collards, kale, garlic, celery, onions, brussels sprouts, kohlrahbi and more. We’ve harvested most of the garlic and onions. We’ve harvested kale, collards and celery by cutting leaves and allowing the plant to continue to grow. The stalks are now so thick that it is hard to cut them. Out of season, these plants have had attack by cabbage moths and other bugs, but because of the integration of plants and the health of the soil, they’ve bounced right back. I’m harvesting the plants now to feed to the chickens so that I can use the bed for something else soon.
So what happened? A teaspoon of great soil has a billion microbes in it, a million fungi, tens of thousands of amebas, bacteria and all kinds of things we don’t even know about yet. This is a good thing. This is the secret to continued life on this planet. Healthy soil doesn’t wash away, doesn’t erode, feeds the underground waterways, grows excellent food for healthy wildlife and healthy humans. If we feed the soil, we save the planet. That simple. That means no Roundup, no GMOs, no chemical (even organic) fertilizer. Just compost. Very cheap and easy.
Vegetables tend to like a soil that is heavier in bacteria than in fungus, although both should be present. Woody plants such as bushes and trees tend to like a more fungal soil. The vines that I buried had both dry (stems) and wet (green leaves and tomatoes) on them. The stems made the fungus flourish in the soil, and the green bits made the bacteria active. There wasn’t enough matter to become anaerobic, or to rob nitrogen from the soil. The vines weren’t compacted so lots of soil surrounded all the parts, aiding in quick composting and keeping the soil aerated. Water could be absorbed better as well.
If you are starting a garden and want to buy compost, be careful of what stores sell you. In August I was asked to look at a few raised beds that hadn’t succeeded. The soil was low in the beds, there were a few straggly pepper plants, a poorly tomato and some brassicas of some sort which were so stunted that they were just green balls of leaves. When I pulled one up there was white stuff on the roots. A couple of strawberry plants looked very healthy but unproductive. I tried the soil and couldn’t get my finger into it because the roots from those poor peppers had made a thick mat just under the surface of the dirt well beyond their dripline. Two major things were wrong. One was the dirt in the beds. Splinters of shredded wood made up the bulk of it. The woman who had asked me to look at the beds said that she had described her project at Home Depot and they’d recommended two kinds of bagged stuff. I say stuff, because it isn’t soil. What they recommended would be appropriate for hardwoods such as bushes and trees, or acid-loving plants. That is why the strawberries were healthy, only they were in the full sun in a searing hot place and would have done much better under the shade of other plants. I showed the white stuff on the brassicas to her; it was fungal net, which showed the high fungal activity in the soil. Perfect for trees, not perfect for vegetables. Also the brassicas are cold-weather plants and just won’t develop in our summer heat here in San Diego County. They should be planted from October through the beginning of March. The spongy soil… honestly, I’ve never before felt root mat so thick that I couldn’t wiggle my finger into the soil… was the result of desperate plants and poor watering. A custodian would occasionally hose water the beds, which meant that he’d shoot some water on them for a few minutes every day or so. This topical water didn’t sink into the bark-heavy soil. It was only enough to water the top, so the plant roots couldn’t go deep. It was often enough that the plants didn’t die entirely, but survived stunted and striving for water and nutrition that the fungal soil wasn’t providing. Vegetables (and roses!); indeed, most plants except grasses and seedlings, need deep watering less frequently. This allows the roots to go where they want to go, deep into the ground where they can mine nutrients and stabilize the plant. My advice for her was to dig in the few plants that were there, use the compost in the compost bin next to the beds, even if it wasn’t decomposed and add some vegetable-friendly soil to the beds to bring up the heighth. I recommended mixing seeds and scattering them, making sure she planted winter crops, not corn or tomatoes. I also recommended a long watering twice a week; none when it starts raining. If it ever does.
Recommending permaculture techniques to people makes me want to work in the garden! That is because there is so much life, so much success, so many happy surprises and such great feelings that come out of naturally planted gardens. Rows of veggies look so neat and peaceful, but beds chock full of veggies are more fun, better tasting and far more productive.
I just wanted to follow up on the old post about digging in the vines and show you how well the plants did. I have never fertilized these beds after burying the vines and sprinkling on the Epsom salts and sugar. All this growth is due to the happy microbes making nutrients available to the vegetable roots. If you think about it, plants in the wild shed their seeds and then either completely die off or drop leaves. The seeds naturally grow up through the debris of the last generation. Makes sense, doesn’t it?
When these beds are done (if they ever are! They keep producing!) I will practice no-dig gardening on them and simply cut all the plants at the soil surface and drop the tops. I’ll plant seeds for winter crops right in among the debris of the summer crops. They’ll use the nutrients, shade and support of the old crops to grow. October is a good planting time for winter crops because the weather finally changes and the daylight hours are shorter which these plants need. What to plant? Potatoes, garlic, onions, Brussels sprouts, cabbage, peas, broccoli, cauliflower, rhubarb, kohlrabi, celery and much more. Cover crops when it frosts and allow good drainage for the potatoes when it rains. Be sure if you buy starter sets that they are guaranteed organic! Best of all plant organic seeds… they do the best of all and are the best value.
Have a happy, easy Fall garden!
-
Plum Clafoutis!

Plum clafouti. Yum. OMG! How could I not have told you about clafoutis yet? If you have ripe plums, peaches, apricots… any stonefruit… and you need something to do with them, this is it! Clafoutis (clow-FOO-tee) is a baked dessert (or breakfast!) that is simple to make and absolutely yummy. Ripe fruit, especially those that are a little too ripe to eat fresh because of the texture, is topped with a flour and custard batter and baked.

Serve plum clafouti warm or at room temperature. So yum. The result is firm enough to not gross out those who don’t like the texture of custard (like my daughter), not too sweet, and makes the flavor of the fruit bloom in your mouth. This is different than Plummy Skillet Cake, which is also wonderful. Of course clafoutis

Because of its simple ingredients and low sugar, clafouti is wonderful for breakfast. Peach clafouti is shown here along with asparagus and soy sausage. is good with ice cream, but just powdered sugar on top for decoration or plain is fine. You can make it with liquid egg substitute and non-dairy milk substitutes; I used our hen’s eggs and organic soy milk. Plums are absolutely delicious in a clafoutis, but we’ve used peaches and apricots as well with great results.
Plum ClafoutisAuthor: Diane KennedyRecipe type: Dessert or BreakfastCuisine: FrenchPrep time:Cook time:Total time:Serves: 6A simple and delicious baked fruit dessert.Ingredients- (You can halve the ingredients and bake in a square pan instead)
- ¼ cup butter (or veg oil or coconut butter)
- Pitted plums cut into thin wedges (think what size you like to bite into) (five cups)(you can use a mixture of stonefruit, too)
- ½ cup granulated sugar, divided (you can eliminate or reduce this amount if you like a tart dessert, if your fruit is very sweet, or use a sugar substitute)
- 4 eggs or equivalent liquid egg substitute
- ½ cup unbleached all-purpose flour (or a mix of other flours)
- ½ teaspoon salt (opt)
- 1 cup milk or milk substitute
- 1 tablespoon vanilla extract
- ½ teaspoon almond extract
- Confectioner's sugar for dusting
Instructions- Move oven rack to the middle and heat to 400F.
- Place butter in a 9 x 13 inch baking dish and put in oven to melt butter.
- In a medium bowl, toss the plums with ¼ cup sugar.
- With oven mitts, remove hot dish from oven and swirl melted butter to coat bottom and partially up the sides.
- Spread plums evenly on bottom of baking dish.
- In a medium bowl, whisk the eggs until blended.
- In a separate bowl, whisk the remaining ¼ cup sugar with the flour and salt.
- Whisk the sugar and flour mixture into the eggs.
- Whisk in the milk, vanilla and almond extracts.
- Pour the batter evenly over the plums.
- Bake 40 - 45 minutes until the clafoutis is lightly browned and the center has puffed up.
- Cool on a wire rack.
- Dust with confectioner's sugar and serve warm, plain or with ice cream. Or hard sauce. Or whatever you like. Use a French accent when announcing dessert.
- Eat within a couple of days or it becomes soggy.
- Store covered at room temperature.
- Animals, Bees, Birding, Gardening adventures, Heirloom Plants, Other Insects, Permaculture and Edible Forest Gardening Adventures, Quail, Seeds
Growing Birdseed: Love Lies Bleeding Amaranth
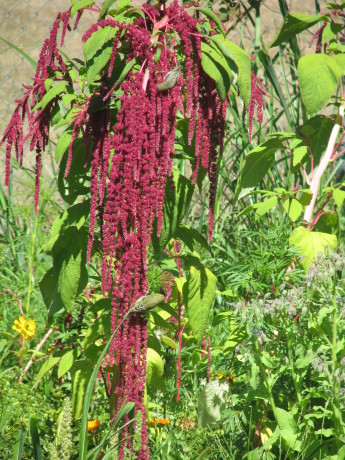
Love-Lies-Bleeding amaranth is a dramatic addition to your garden… ask a bird! We’ve participated in Cornell University’s winter Project Feederwatch for about six years. It is a volunteer amateur scientist-type program where, from November through March, you fill bird feeders and two days a week count how many birds come. Then you report your results on an online form. This helps trace changes in migration patterns and in habitats in wild birds, as well as sitings of diseased birds.
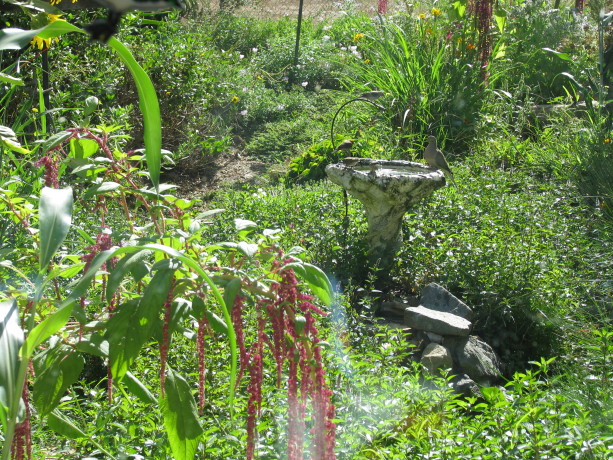
The sound of dripping water attracts birds more than food does… from long distances, too. This year I found out that most birdseed is contaminated by insecticide; some brands are reported to have illegal levels of pesticides in them. Geez! How am I going to get around that problem? I’m not sure about this winter, but I’m going to grow more of my own birdseed. In the past we’ve rolled pine cones in peanut butter and hung them out for woodpeckers and many other birds. I’ve also grown sunflowers, for both their seeds and for their leaves, which lesser goldfinches just love to eat! This year I planted heirloom Love Lies Bleeding Amaranth (Amaranthus caudatus) to some pretty spectacular results. Yes, this is one of the types of amaranth that produces an edible seed for humans; the leaves are edible as well. It can grow 3 -6 feet, with long ruby-red falls of seed heads that the birds just love.
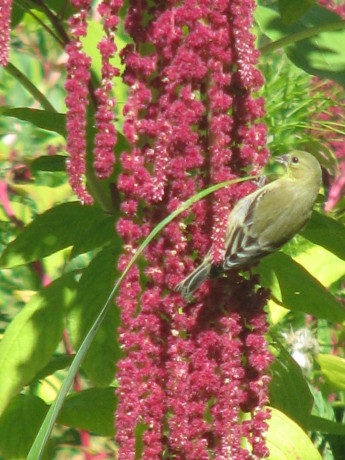
One of our Finch Frolic Finches feeding! There are many other amaranths to grow for both your own consumption as well as for the birds. Sometimes you grow it for yourself and end up feeding the birds! Of course there are many plants which attract hummingbirds all year, especially those with tubular flowers. Why do you want to attract birds? Besides their right to habitat, and their appeal to our better selves, all native animals play important roles in the preditor/prey relationship in a healthy garden. The birds may eat some of your produce, but they are also eating large amounts of bugs. They are also pooping, and you know how valuable poop is to any garden! If you plant a bird garden away from your vegetable crops, then plant your veg crops using the polyculture method, you will have birds and food for yourself as well. Please, please don’t put up those dangerous tree nets! They tear apart your trees when you try to remove them, they don’t really work, and birds can be stuck in them. When they are on the ground snakes are trapped in them! No plastic netting. Ever. Please!
Try planting some amaranth – especially this one with the dramatic name and dramatic fall of color – next spring when you plant a bird garden. Or in your edible forest garden and plant guilds. Or between your fruit trees, or along the back of your flower beds. Take a nibble for yourself if the birds will let you!
-
Melon Pie!?!

Melon. Pie. Nom. It is melon time in the garden. Fresh green melons served with a little lime juice, or fresh orange melons served with a little lemon juice, are just heaven. When you have too many melons, it is time to look for things to do with them.
Last year we froze melon slices in a mild sugar syrup. This worked well when using the melons in something; the texture was too goopy for eating fresh with any pleasure.
This year I found a recipe in my Baker Creek Heirloom Seed catalog for melon pie. Melon pie? I did a little Googling on the subject and found a lot of melon pie, cake and bread recipes. Who knew? Well, not me anyway.
This recipe works for any melon, the more fragrant the better. It was written for Mother Mary’s Pie Melon, an heirloom that we grew this year. It is small and fragrant, and just makes the right amount of melon the recipe. The version of the recipe in the catalog – which is also in their book The Baker Creek Vegan Cookbook – is vegan. I’ve changed it to vegetarian and you can do what you want with it. The cookie-like crust paired with the creamy yet firm filling is wonderful. Top it with a little whipped cream! They suggest topping with toasted coconut, but I’m not that much of a coconut fan. However I could really see this topped with merangue, like a lemon merangue pie. Yep.
Melon PieAuthor: Originally from Baker Creek Vegan CookbookRecipe type: DessertCuisine: AmericanPrep time:Cook time:Total time:Serves: 8A fragrant, yummy pie with a perfumy melon flavor and crisp cookie crust.Ingredients- Crust:
- ½ cup butter or vegan alternative
- ¼ cup packed brown sugar (or white)
- 1¼ cups unbleached flour (organic if possible)
- Filling:
- ½ cup sugar
- 3 Tablespoons cornstarch (organic if possible)
- 1 egg, beaten
- 1½ cups cubed melon, liquified in blender (makes 1½ cups)
- ¼ cup water
- 3 Tablespoons butter or vegan alternative
- 1 teaspoon fresh squeezed lemon juice
Instructions- Prepare crust: beat butter and sugar in mixer until fluffy.
- Add flour and mix thoroughly.
- Press into bottom and sides of a 9" pie pan.
- Bake crust at 375F for 10 - 12 minutes until lightly browned.
- Meanwhile, stir sugar and cornstarch together in medium saucepan and set aside.
- Blend egg, melon and water together until smooth.
- Over medium heat, gradually stir melon mixture into cornstarch mixture, stirring constantly until mixture thickens and begins to boil, about ten minutes. Don't rush!
- Reduce heat and cook 1 minute more.
- Remove from heat and stir in 3 T butter and lemon juice.
- Pour into pie shell, cool and then refrigerate at least an hour before serving.
- Serve with whipped cream... or not.
- Animals, Bees, Chickens, Health, Natural cleaners, Other Insects, Permaculture and Edible Forest Gardening Adventures, Pets, Quail, Worms
DE for Birds, and More About Chickens
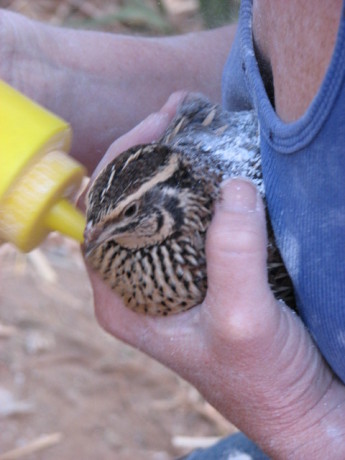
A little mustard with your quail? Cleopatra being treated. I’ve written about using Food Grade Diatomaceous Earth around plants to keep down ants and other sectioned insects. It is also used around the feet of my bee hives; as long as it isn’t where bees and other beneficials go it won’t hurt them because it has to be on the bug to work. I’ve also used FGDE around my cat’s bedding to kill hatching flea eggs, and have rubbed it into their fur. It is scentless, edible (will help kill interior parasites when eaten), tasteless, and the food grade is so fine that it won’t hurt your lungs if you breathe it in, although if you have lung conditions you should wear a mask. More about FGDE in a minute.
Some of our laying hens have difficulty laying eggs recently. Chickpea we found panting on the ground in a wet spot, with ants on her. She had a soft-shelled egg break inside of her.

Madge in the house cage, recooperating. Madge, our partially blind RIR passed a soft shelled egg, then was ill for a day when she passed a broken shell. Warm Epsom salts baths and time spent in the house cage with a heating pad helped both of them. Because of the threat of infection I used some of the Cephalexin left over from our dog (divided into small doses) on both of them and they recovered. My daughter finally deduced that in the mornings when the pullets and hens were released the big girls ran over to eat the chick mash. It probably tastes better than the lay pellets, and more importantly in their little brains it kept the pullets from eating it. Even with the supplemental oyster shell the big girls were probably not getting the calcium and other nutrition their bodies needed to make good eggs. It was time to switch the small girls to lay mash anyway, so I did and yesterday we had all four of our laying hens lay eggs… first time in a long time!
While we were bathing Madge in the sink for her illness, my daughter noticed mites on her. Now a few mites are usual on everyone and everything. When you can see several on the skin when you blow on the feathers, then you have a problem. She wasn’t having a problem, but at that time we still didn’t know what was wrong with her. After she was better we instituted FGDE Day in the Fowl Fortress.
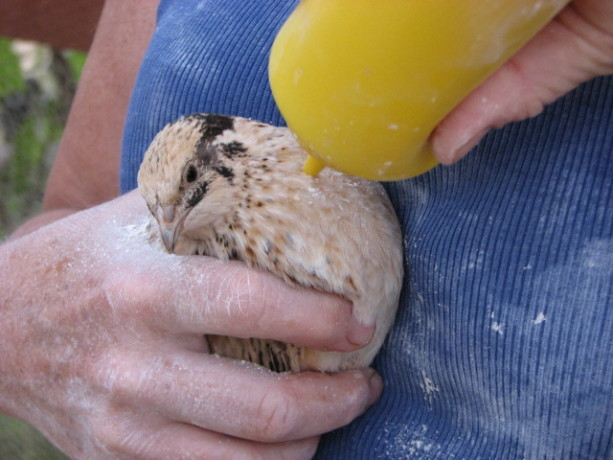
Miss Lemon, one of three coturnix hens, is treated with FGDE. You can buy pricey powder dispensers, which usually clog. I bought a set of mustard and ketchup dispensers for less than two dollars and they work just fine. We caught all the hens and our three quail and puffed FGDE into their feathers and, of course, all over ourselves.
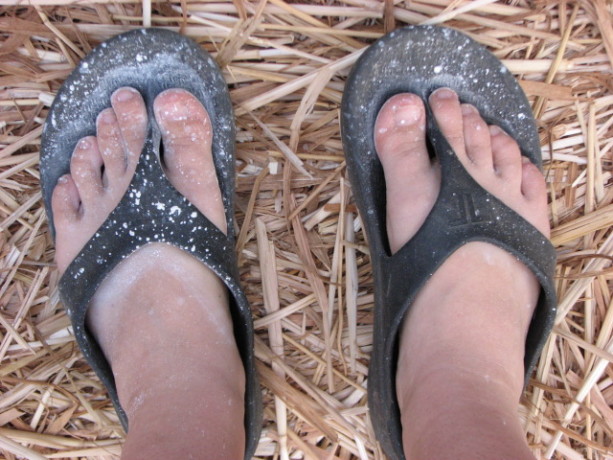
We treat ourselves, too. I puffed it into the nesting boxes, and into the ‘attic’ of the pullet house where they roost, and into the straw in the coops. Since we don’t have a problem we don’t need to treat often, just every few months or so. Any that they eat helps with any internal parasites as well. We also had some wood ash left over from making pizzas in Harry Mud the cob oven and sprinkled them where the birds take dust baths. That fine ash helps to keep their feathers clean and keep away mites too.
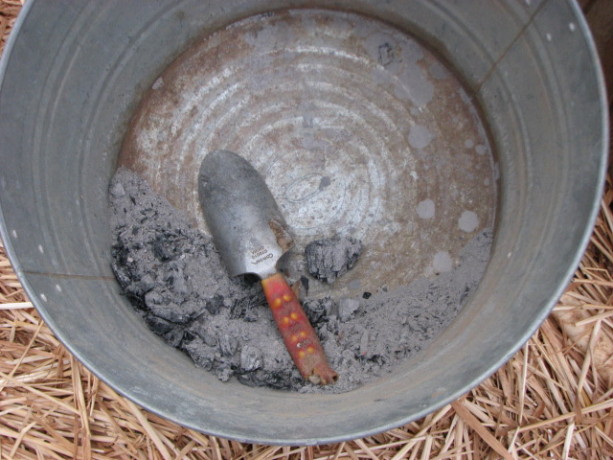
Wood ashes are good for dust baths. Very little went a long way, so even after treating all the hens and the Fowl Fortress, the cat bedding repeatedly, several cats, the feet of the bee hives, a variety of plants, and the feet of the food tables I’d set up for a garden party to protect from ants, along my window sills and around the privy where ants were getting in, I’m still working on the first bag that I bought on Amazon.com.
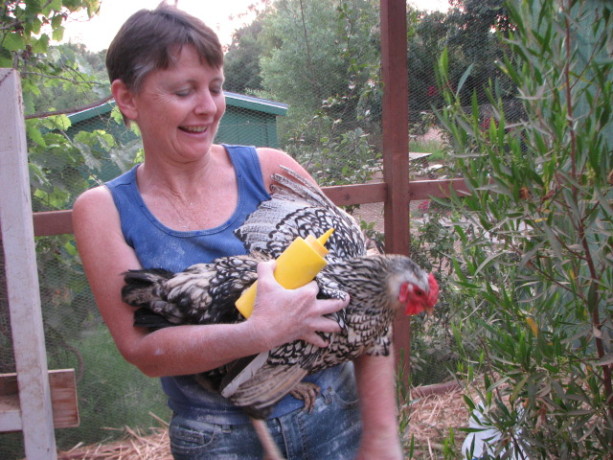
Amelia objecting to her dusting. When you compare with buying expensive different poisons for all of these problems, the health hazards and impact on non-target species including ourselves, and the negative impact on the Earth, one bag of FGDE is such a deal that you really can’t not try it.
-
The Mock Pavilion

The ground is covered with straw now, and the passionvines have grown about a foot in two weeks since this photo was taken. It was clear that if I wanted to have any group of people over in the summer and have them survive, that I’d have to have a shade structure. I have an EZ-Up, which is anything but easy especially when going down, but the shade it provides is minimal and only appropriate at high noon. I had a look at the line of Eugenia trees right behind Harry Mudd, the cob oven. The trees had been planted by the previous owner to block the view of the horrendous piecemeal sheds he’d nailed together (most of which have now become walkways and structures). They had been trimmed up during the removal of the sheds to giant lollypops with floppy arms. Floppy arms that often broke under the weight of the fruit the trees bore. I thought that some of these trees could make a good gazebo. Click here to learn about the benefits of tree trimming
I talked to Steve about it. Steve works on my ponds and irrigation, and now just about anything else I need to have done since he is skilled in carpentry and other talents which I am not. Steve cut down some of the trees and for some he used professional services – check this link right here now, brushed them and we discovered that they weren’t very tall at all.
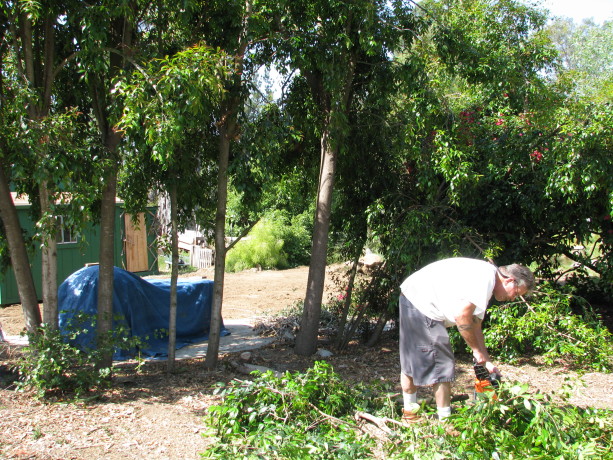
Steve cutting down some of the Eugenia. Harry Mudd is covered with the blue tarp. At the time I was touring a new friend through the garden who offered some very long cedar logs. Here began a fiasco having to do with hauling a trailer, misunderstandings, and a lot of very heavy long logs which weren’t used and now need to be returned, but I will not explore that here.
I had a garden party planned; the first large party I’ve ever had. I thought that the end of June would be a perfect time before the hot weather hit. Life laughed at me and began a series of intensely hot days more associated with the end of July. So I told Steve to just buy the wood and build the thing. He did, and I covered it with some very expensive shade cloth. By two of the pillars have been planted red passionfruit vines. When they grow to the top, I’ll replace the shadecloth with wire so that the passionvines can become a living shady roof with fruit dangling down.
This structure, along with some borrowed EZ-Ups, saved the day for the party, which had temperatures in the low 90’s (lower than anticipated, thank goodness!). The structure is similiar in look to the Fowl Fortress, so it doesn’t seem so out of place, and it is very comfortable to be under during this intense summer.

Nice and cool, with easier access to Harry Mudd. Why the Mock Pavilion? Perhaps because it isn’t really a pavilion, just a large shade structure with a piece of plywood over a couple of wooden pallets as a stage. Really it is because Steve’s last name is Mock, and I couldn’t resist.
-
Why Is July So Busy?
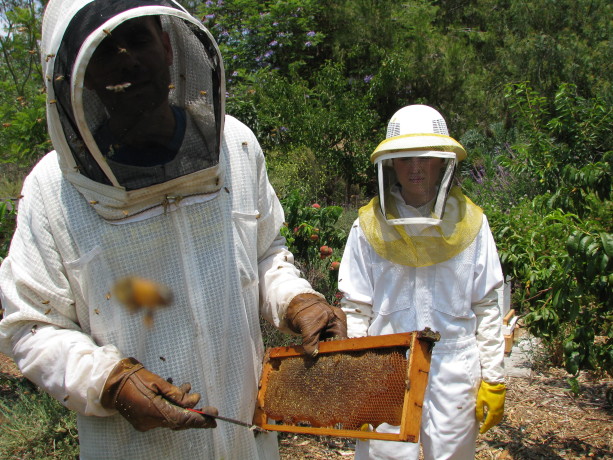
Quentin holds a frame full of wax-capped honey cells while Miranda looks on. Whew! What an early hot spell, and what a lot of things to do! The daylight is longer but animals, plants and people have a way of filling it all up. It is almost 9 pm again and still no dinner for humans this night. It is cooking. We’ve had a sick kitty, Maow, who we had to put to sleep due to kidney failure yesterday, and our ancient dog Sophie keeps us busy nursing her. She refuses dog food and only will eat veggie sausage and eggs, but none of our hens are laying in this hot weather. One of our chickens, Chickpea, had an egg break inside of her and had to have an Epsom salts warm sink bath which worked its chicken magic and pulled her through. Tonight our partially blind Rhode Island Red, Madge, has been acting funny so into the sink she went. The hens all like the warm bath so much that we don’t have to hold them down.
The garden produce has been good and keeping up with ripening fruit while beating the birds to it has been my newly graduated collegiate daughter’s role. Irrigation difficulties have created large problems, however, and lots of seeds never germinated, and several crops have shrivelled due to irregular or not enough water, while some others were drowning because of holes in the lines. Minerals from our hard water have clogged up holes in the lines, and running vinegar through the system seems to dissolve the calcium pretty well. If only it repelled the gophers who occasionally nip the underground lines, or the weeding tools that unerringly nick them.

Quentin and Miranda with one of the new hives of Italian bees put up two months ago. We have two co-op bee hives, set in place by Quentin Alexander of BeehiveSavers.com. He performs humane bee removal, and also has the co-op program where he sets up hives in your yard with calm Italian bees. You pay for the equipment, and he monitors the hive for a year to study the bees and see what is affecting the disappearance of European honeybees. He harvests the honey and gives you half of it, too. This is a perfect set-up for me since I just don’t have the time to deal with the bees anymore, and because I swell up when stung now. We had a swarm in a stack of empty bee boxes next to our trashcans for a couple of years and they never gave us any trouble, but I wanted to move them to the Bee Garden.

Quentin beginning to move a two-year hive that had settled in my stack of supers. The bees objected. When Quentin moved them a few months ago, he found out that they were an enormous ‘hot’ hive… pretty aggressive.
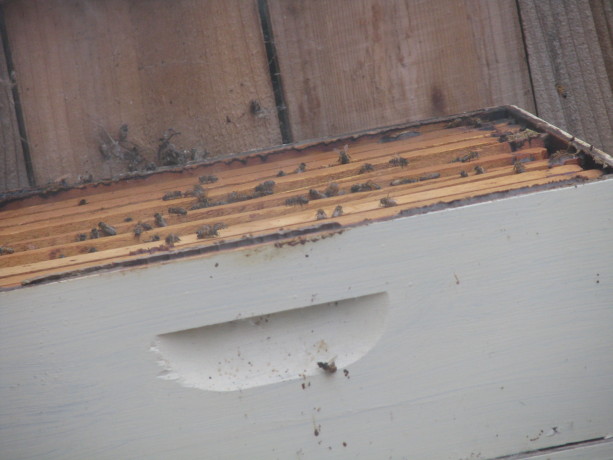
Bees complaining about having their home ripped apart… I can’t blame them. Yesterday he came with two ‘nuc’s, or ‘nucleuses’. A ‘nuc’ is a new queen bee and about a pound of workers devoted to her. With my daughter’s help, and with me hanging back with the camera, he opened the moved hive. It was breezy, humid, mid-day and in the 90’s, all bad conditions for opening a hive.
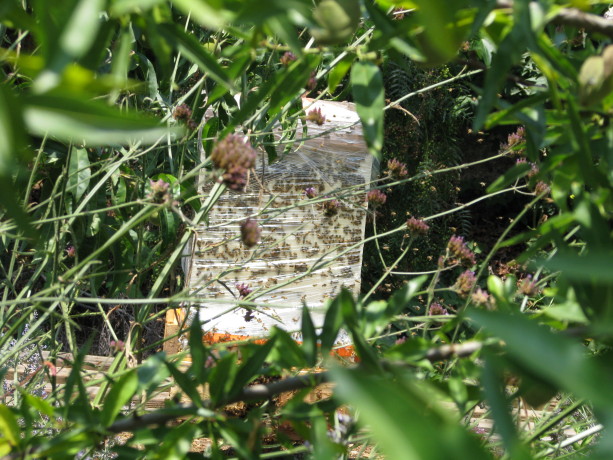
The wild hive wrapped with the ‘hot’ queen isolated in one of the supers by queen excluders. She will be replaced by a gentle queen. He looked for the old queen and couldn’t find her, so trapped her in one of the three boxes he thought she was in, moved honey and larvae over to two new boxes and set up the new queens. The idea is that the new kinder and gentler queens will breed more docile bees, and in a few weeks the whole swarm will not only have been divided into two but will have produced calm bees.
Explaining this to bees who were stressed from drought, heat, direct sunlight and humidity while tearing apart their hive, taking out brood and honey and looking to kill their queen, was a different story. A normal hive can have 60,000 bees or more in it at its peak. This was a larger hive. The bees decided that Quentin – and anyone else in the area – were going down with them. I don’t blame them. Attack my family and I’d come after you, too. Quentin’s gloves were studded brown with a forest of stingers. The neighbor called asking about bees because his gardeners were stung.
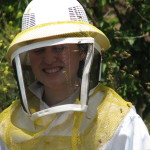
Miranda surrounded by very angry bees. No stings penetrated her bee suit, but on a humid day in the mid-90’s that suit sure was hot. We had to walk the property, roll in some jasmine to mask the ‘anger’ pheramone with which our bee suits were covered, and dash into the house. Quentin drove off in his suit with bees in his car – not an unusual sight for a beekeeper, but with the BeeHiveSavers logo on the side it looked very appropriate. We had to stay in the house until dusk when the bees went to bed (they don’t fly at night). Today the rest of the property was back to normal, but we did stay away from the Bee Garden for several more days. There are peaches to harvest in there, too, but we’ll have to donate some to the birds.
-
Black Plum and Basil Granita
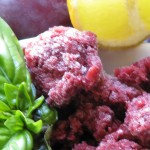 This is an interesting and delicious way to use some of those plums that ripen overnight. Basil is also in season, and combining it with the heavenly, winey flavor of ripe black plums is amazing. If you grow other types of basil such as lime basil or cinnamon basil, use those instead, reducing the lime juice to 1 tablespoon.
Granita is juice that is partially frozen, forked around a little, then refrozen. You don’t need an ice cream maker. Easy, quick and nutritious, too!
Black Plum and Basil GranitaAuthor: Diane C. KennedyRecipe type: DesertCuisine: AmericanPrep time:Cook time:Total time:Serves: 8½ cup servingsBasil and allspice give a wonderful depth of flavor to winey black plums in this frozen treat.Ingredients- 1 cup water
- ⅔ cup granulated sugar
- ¼ teaspoon vanilla extract
- ⅛ teaspoon salt
- 6 whole allspice (if you don't have allspice berries, use a small piece of cinnamon stick)
- 1½ pounds black plums, pitted and quartered
- 2 tablespoons fresh lime juice
- ¾ cup basil leaves (not packed)
Instructions- In a large saucepan combine water, sugar, vanilla, salt, allspice and prepared plums and bring to a boil.
- Reduce heat and simmer for 15 minutes or so, stirring occasionally, until the plums begin to fall apart.
- Pour into a small bowl set in ice water in a larger bowl and cool completely.
- Fish out and discard the six allspice.
- In a blender or VitaMix process plum mixture, basil and lime juice until well blended.
- Press the plum mixture through a fine sieve over a bowl and discard solids. If you have a VitaMix you may not have any residual solids; the granita will be cloudier but will be more nutritious. Don't worry about it.
- Pour the mixture into an 8-inch square glass or ceramic baking dish.
- Cover and freeze until partially frozen, about 2 hours.
- Scrape with a fork, crushing any lumps, and smooth down again.
- Freeze for 3 more hours, scraping with a fork every hour so that it doesn't freeze as a cube, until completely frozen.
- Serve in small scoops; really nice paired with little vanilla cookies.
- Bees, Gardening adventures, Other Insects, Permaculture and Edible Forest Gardening Adventures, Seeds, Soil
Hairy Vetch
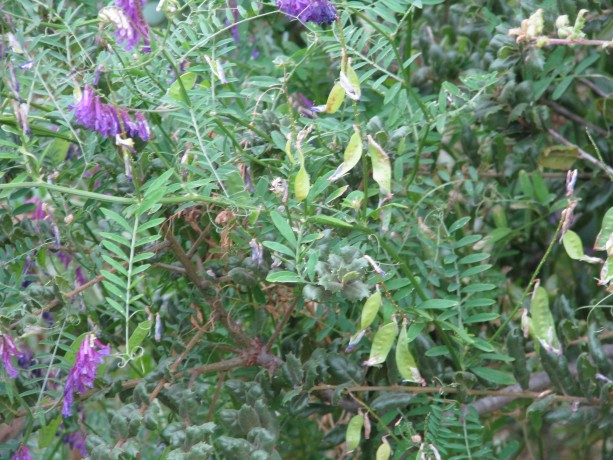
Attractive flowers and seeds. Hairy vetch (Vicia villosa), also known as winter vetch is a nitrogen-fixing plant that is used mostly for cover-cropping in monoculture fields. Native to Europe and Asia, it is a winter plant sown in the Fall and, in places where it snows, is killed off with the cold or tilled into fields. When a nitrogen-fixing plant dies or is cut back, roots die and release the nitrogen nodules into the soil. Here is sunny San Diego the vetch thrived since I sowed it in Spring of last year. It is a pretty, vining plant, with lovely dark purple blooms that bees and other pollinators love. It produces pea pods like its edible relative the fava bean, but I wouldn’t eat them. The seeds may be bad browse for livestock as well. The roots help hold soil during winter rains, too.
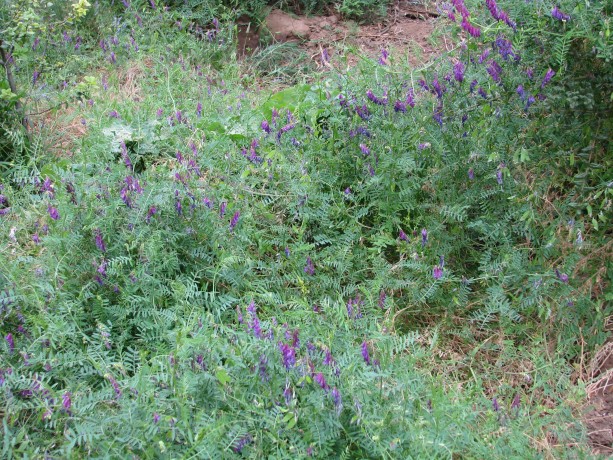
Hairy vetch clamboring all over the place Vetch can be hard to get rid of because it reseeds easily. It will also climb up bushes, competing with the bush for sunlight. If I didn’t know about the nitrogen-fixing properties and if the bees didn’t like it so much, I’d suspect it of being an invasive.
To control it I take my trusty hand scythe and cut the vetch out of bushes and close to the ground. I leave the vines to decompose and protect seedlings that I plant to take advantage of the newly-enriched soil.
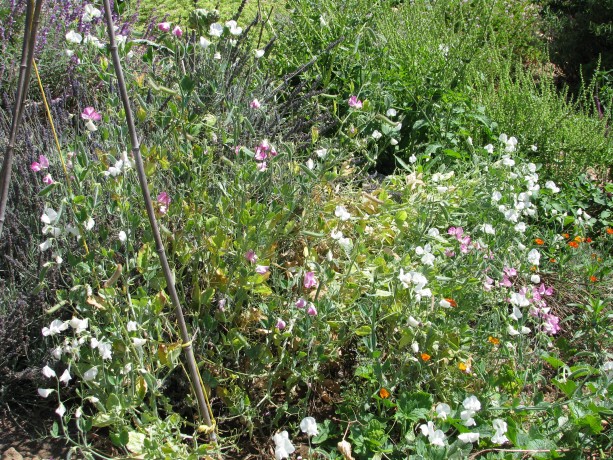
A mass of sweet peas climbing a lavendar. If you don’t want a cover crop that is so aggressive I suggest sowing a mixture of lupine, sweet peas, edible peas and fava beans in the Fall here in Southern California, and again in early Spring. In cold areas check with your farm advisor on when to plant.


