How To Preserve Squash and Pumpkin

You have this wonderful pumpkin sitting around, waiting to be eaten. The holidays pass and… there it sits. You don’t want to let it go bad, but you don’t have a use for it right away. What to do?
Here’s how to make your own pumpkin or squash puree and preserve it by freezing. I haven’t seen reliable methods of canning puree so I opt for the freezer method in plastic bags. I know, I too want to eliminate plastic bags from my life. However I own freezer bags and I will use them.

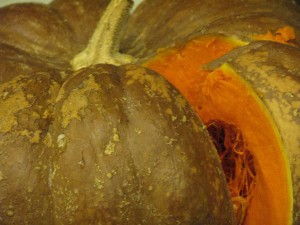
First of all, choose a pumpkin bred for taste, such as Sugar Baby; Jack o’lantern pumpkins aren’t that tasty and are usually very fibrous. Wash your pumpkin or winter squash (not summer squash, like zucchini or crookneck) without soap. There are two good options for cooking the squash (pumpkin is a type of squash, so I’ll just say squash from now on): steaming or baking. Baking is the best method in my opinion. First of all, you can stick the whole squash into the oven and bake it, whereas if steaming you must cut up the squash and with some of these hard-skinned beauties that task can be difficult and dangerous (it is easy for the knife to slip). Secondly, steaming adds a lot of moisture to the squash, and it must be drained after pureeing before you freeze it, or else it will be too watery to use in pies and other baked goods. I steam squash when I want to serve it for dinner because it is quick and it preserves nutrients. Baking removes a lot of the moisture and increases the flavor of the squash. Some people recommend boiling it, but the squash would have to be whole, and dealing with a huge pot of boiling water is just not necessary.
If you are going to be obstinate and want to steam the squash, then cut it up, scoop out the seeds (save for replanting or making pepitas, recipe: Pepitas 1/15/12), steam until fork-tender, scoop out the flesh, puree it in batches, and leave it sit in a bowl, covered, in the refrigerator overnight. Water will seep out. Or tie into cheesecloth suspended over a bowl and allow to drain.

If you are going to bake it, heat the oven to 400 degrees F. Lightly oil the outside of the washed squash. Line a baking dish with foil. If you have a whopper, just pop in the pumpkin (remove the stem if there is one).

If you have a thinner skinned pumpkin, you can carefully cut it into quarters, scoop out the seeds, and place on a piece of foil on a cookie sheet. I bake them face-up to improve flavor and remove moisture.

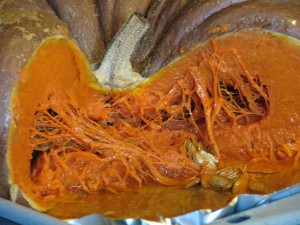
Bake a large squash for about 60 minutes, until you can slide a knife easily into it. If you have a large, thick-skinned squash, you may need to leave it in up to another half an hour. If you have a thinner skinned pumpkin such as Sugar Baby, you may test it for doneness after 45 minutes. Allow the squash to cool, then slice it into chunks. Scoop out the seeds (no good for planting now, but still good for making pepitas) and then scoop out the flesh from the skin. Puree flesh in batches until there is no fiber left. If the puree looks thin (think of the consistency of canned pumpkin), then either leave it covered in a bowl in the ‘fridge overnight and pour off excess water the next day, or strain through a cheesecloth.

Once your puree is ready to go, then I suggest you measure it by 3/4 cupfuls into plastic freezer bags. That’s how much puree is in a 15 -oz can of pumpkin, and what pie recipes call for. Or if you have other recipes in mind with other measurements, freeze in those increments.

After filling the freezer bags (and I guarantee that you’ll get pumpkin everywhere!), flatten the bags and place on a cookie sheet that will fit into your freezer. Stack the bags (make sure to label with type of squash and date!) and freeze. They will be flat and much easier to deal with. Freeze for about six months.
Of course, before you freeze it all, save 1/2 a cup and make my Spiced Pumpkin Scones (posted on January 10, 2012).